
The official integration instructions of Eagle Eye + Map Baidu are very detailed, but there are still several pits that do not know the series. I'm using the Eagle Eye V3.0.3 version here. List a few pits I stepped into in the integration process.
Eagle Eye Trajectory itself is only responsible for collecting and displaying the user's motion trajectory point information, while SDK can complete the functions of thinning, denoising and binding, but the processed information is still a scattered information point, you need to combine with Baidu Map SDK to present it as an intuitive and comprehensible form - the better use is to draw a straight line map on the map.
So you have to integrate Baidu Map's base, map and location sub-packages at least in order to fully use all the functions. The integration process follows Baidu's official guidance. Here we do not mention using cocoapod import method, which will not be a problem but will import a lot of unnecessary parts, manual integration can use only three subpackages, compress the size of APP.
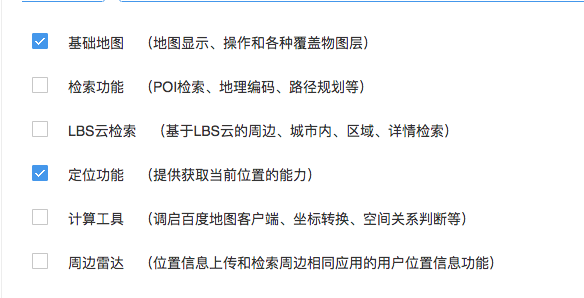
When integrating, you need to drag three subpackages into the project: BaiduMap API_base. framework, BaiduMap API_Location. framework, BaiduMap API_Map. framework. base subpackage is the dependency basis of all functional packages and must be introduced.
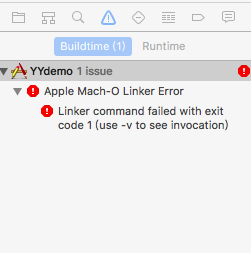
Point A: In the official integration instructions, if you just change A. m file to A. mm file instead of choosing "or specify a compilation method in the project properties, that is, find Compile Sources As in Xcode Projects - > Edit Active Target - > Build Setting and set it to"Objective-C++", you will report the error along the way:
Half a day later, maybe you will try to change the compilation mode to Objective-C++, as I did. It seems that there are no red compilation errors, but once you try to run it, you will find that:
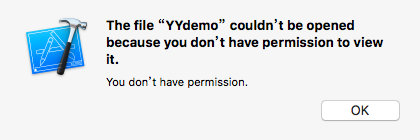
I guess your heart should break down. Later, I consulted a lot of places, and finally in Here See some slightly reliable explanations, simple summary is: automatic compilation mode (that is, compile Source As set to Automatic) will automatically select compilation mode according to the language type of resource files. If the compilation mode is forcibly specified as C++, some third-party files can not be compiled successfully.
Later, I had no choice but to retry step by step, and found that the Linker command failed with exit code error occurred in the step of adding static libraries in. a, at which time the compilation mode was Automatic.
The practical solution here is:
Copy the. a file to the project folder and add it again!
Copy the. a file to the project folder and add it again!
Copy the. a file to the project folder and add it again!
If only according to the operation method of the official guidance document, the. a static library has not been copied into the project, only has a logical address to point to. In the compilation process, the project can not smoothly execute the identification language and compile the files other than the project package!
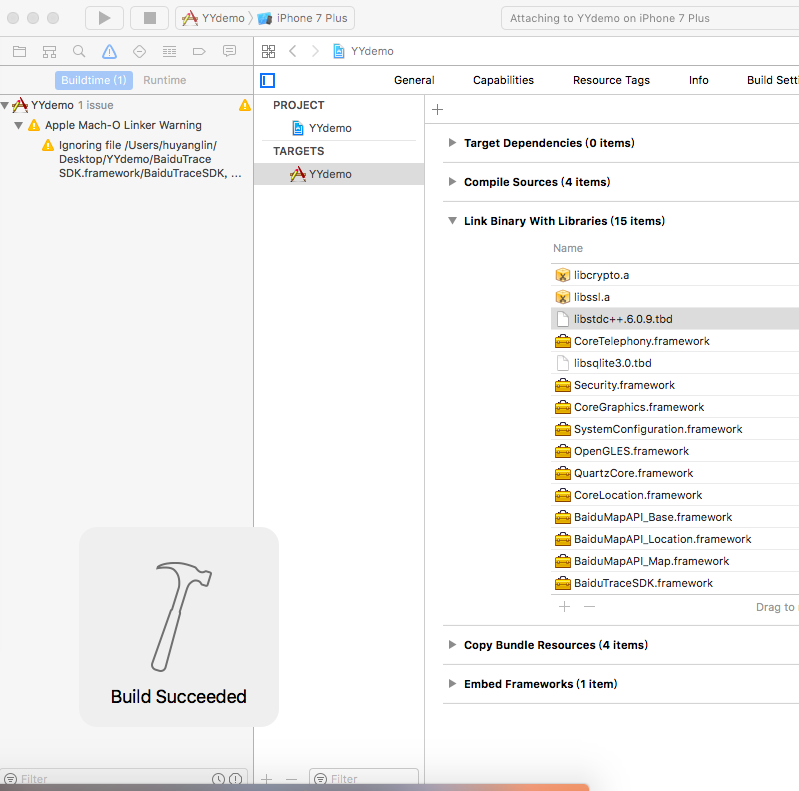
After copying the. a static library into the project folder and adding it to Link Binary With Libraries, the introduction of Baidu Map was successfully completed.
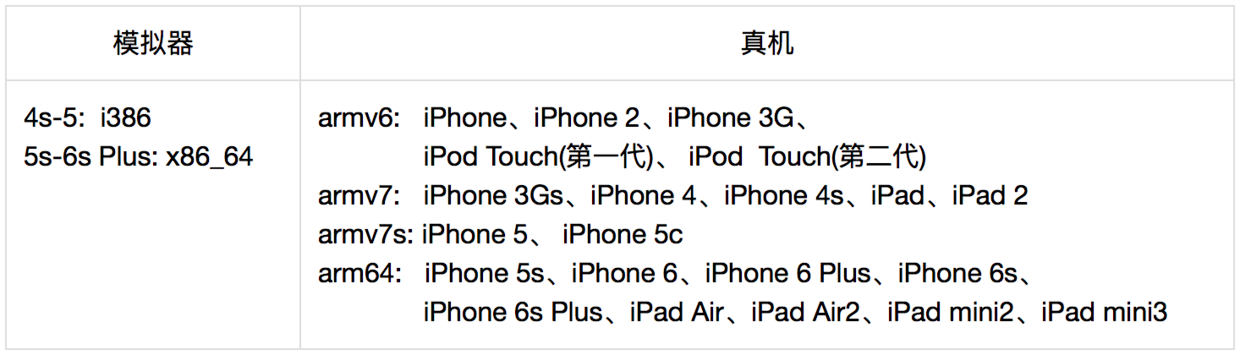
Contrary to the complexity of Baidu Map, the introduction of Eagle Eye SDK is very simple and friendly, just turn off bitcode and drag the framework into the project. But one problem I encountered was that the official Eagle Eye demo could run on the simulator, while the official SDK could not run on the simulator. After comparing the SDK packages on both sides, we found that the sizes of the packages were not the same. Then we used the lipo-info. / BaiduTrace SDK. framework / BaiduTrace SDK instructions to consult the SDK-supported architecture. It reminded me that the SDK I downloaded had removed the support part of the simulator according to the official synthetic CPU architecture steps, so the SDK could not run on the simulator for the following reasons:
Reference: On the CPU Architecture of iOS Development
The xcode simulator is actually on the computer, so the iOS simulator does not use arm instruction set. It compiles and runs using x86 instruction sets (or i386). What is used on the real machine is the arm type instruction set.

The integration work has come to an end and coding is now under way.
First, set the didFinishLaunchingWithOptions method in Appdelegate.m:
#import "AppDelegate.h"
#import <BaiduMapAPI_Base/BMKBaseComponent.h>
#import <BaiduTraceSDK/BaiduTraceSDK.h>

@interface AppDelegate () <BMKGeneralDelegate>

- (BOOL)application:(UIApplication *)application didFinishLaunchingWithOptions:(NSDictionary *)launchOptions {
    // Override point for customization after application launch.
    //Basic Information for Setting up Eagle Eye SDK
    BTKServiceOption *basicInfoOption = [[BTKServiceOption alloc]initWithAK:@"Your Hawk Eye AK" mcode:@"Your Hawk Eye mcode" serviceID:100000 keepAlive:YES];
    [[BTKAction sharedInstance] initInfo:basicInfoOption];
    //Initialize map SDK
    BMKMapManager *mapManager = [[BMKMapManager alloc]init];
    if ([mapManager start:@"Your Baidu Map key" generalDelegate:self]) {
        NSLog(@"manager Startup success");
    }
    return YES;
}


-(void)onGetNetworkState:(int)iError {
    if (0 == iError) {
        NSLog(@"Networking success");
    } else{
        NSLog(@"onGetNetworkState %d",iError);
    }
}

- (void)onGetPermissionState:(int)iError {
    if (0 == iError) {
        NSLog(@"Authorized success");
    } else {
        NSLog(@"onGetPermissionState %d",iError);
    }
}
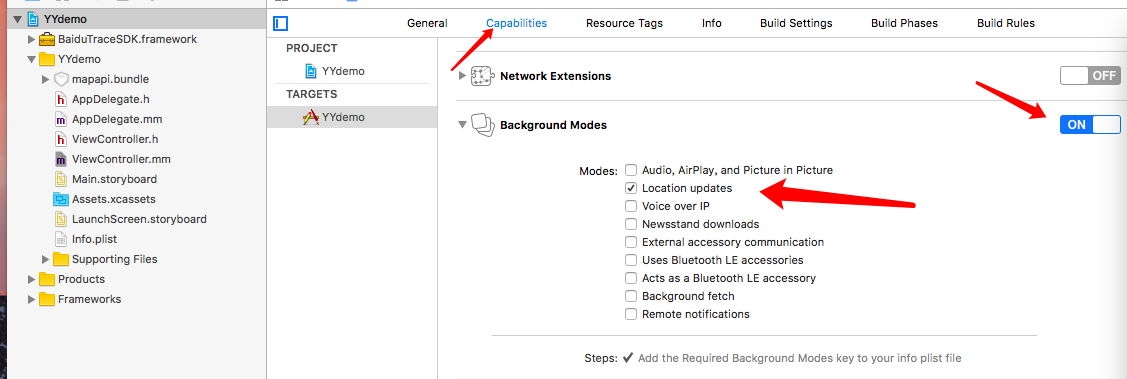
Next, the background positioning authority should be opened, otherwise the EAGLE-EYE will collapse:
Then go to ViewController and call the related functions:
- (void)viewDidLoad {
    [super viewDidLoad];
    if (self.mapview == nil) {
        self.mapview = [[BMKMapView alloc]initWithFrame:CGRectMake(0, 0, 414, 414)];
    }
    [self.view addSubview:self.mapview];
    _mapview.showsUserLocation = YES;
    _mapview.userTrackingMode = BMKUserTrackingModeFollow;
    if (self.locationService == nil) {
        self.locationService = [[BMKLocationService alloc]init];
        self.locationService.delegate = self;
    }
    [_locationService startUserLocationService];

    BTKStartServiceOption *option = [[BTKStartServiceOption alloc]initWithEntityName:@"YYDemo"];
    [[BTKAction sharedInstance] startService:option delegate:self];
    [[BTKAction sharedInstance] startGather:self];

}
-(void)viewWillAppear:(BOOL)animated{
    [super viewWillAppear:animated];
    self.mapview.delegate = self;
    self.mapview.zoomLevel = 18.5;
}
-(void)viewWillDisappear:(BOOL)animated{
    [super viewWillDisappear:animated];
    _mapview.delegate = nil;
    [[BTKAction sharedInstance] stopGather:self];
    [[BTKAction sharedInstance] stopService:self];
}
Finally, don't forget to add two entries in Info.plist, which allow access to location permissions and bundle display name, so that the basic integration should be completed smoothly.
The default mode of Hawk Eye Trajectory is to collect locations every five seconds and upload them every 30 seconds. You can customize these parameters according to your needs. Paying attention to the improvement of location frequency and accuracy will greatly increase power consumption.
Talk about the way to query historical trajectories:
-(void)touchesBegan:(NSSet<UITouch *> *)touches withEvent:(UIEvent *)event{
    // Constructing Request Objects
    BTKQueryTrackProcessOption *options = [[BTKQueryTrackProcessOption alloc]init];
    options.denoise = true;  //Noise reduction
    options.vacuate = true; //Is it rare?
    options.mapMatch = true;  //Is the road tied?
    options.transportMode = BTK_TRACK_PROCESS_OPTION_TRANSPORT_MODE_WALKING;  //Motion mode setting


    NSUInteger endTime = [[NSDate date] timeIntervalSince1970];  //Query the track of the past 24 hours
    BTKQueryHistoryTrackRequest *request = [[BTKQueryHistoryTrackRequest alloc] initWithEntityName:@"YYDemo" startTime:endTime - 86400 endTime:endTime  isProcessed:TRUE processOption:options supplementMode:BTK_TRACK_PROCESS_OPTION_SUPPLEMENT_MODE_RIDING outputCoordType:BTK_COORDTYPE_BD09LL sortType:BTK_TRACK_SORT_TYPE_DESC pageIndex:1 pageSize:50 serviceID:147404 tag:0];
    // Initiate a query request
    [[BTKTrackAction sharedInstance] queryHistoryTrackWith:request delegate:self];

}
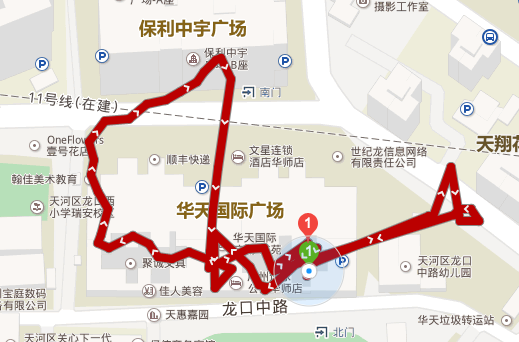
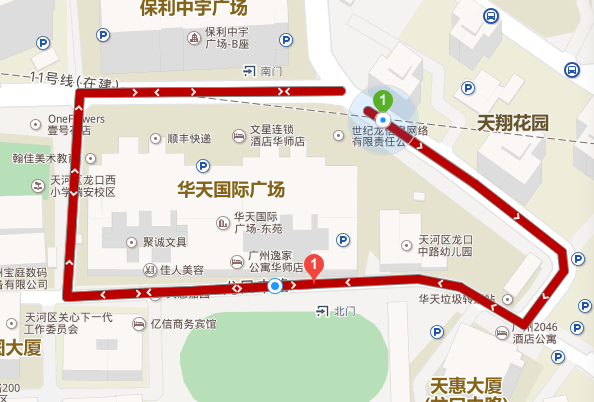
Then here is the callback method of the query results. I use the information of the historical track points queried, combined with the method of drawing polygons on Baidu map, so as to draw the historical track map on the map view.
-(void)onQueryHistoryTrack:(NSData *)response{

    NSDictionary *dict = [NSJSONSerialization JSONObjectWithData:response options:NSJSONReadingAllowFragments error:nil];
    NSLog(@"track history response: %@", dict);
    NSArray *arr = dict[@"points"];
    CLLocationCoordinate2D paths[arr.count];
    NSMutableArray *colors = [[NSMutableArray alloc]init];
    for (NSInteger i = 0; i < arr.count; i++) {
        NSDictionary *point = arr[i];
        paths[i] = CLLocationCoordinate2DMake([point[@"latitude"] doubleValue], [point[@"longitude"] doubleValue]);
        UIColor *color = [UIColor redColor];
        [colors addObject:color];
    }
    BMKPolyline *colorfulPloyLine = [BMKPolyline polylineWithCoordinates:paths count:arr.count];
    [_mapview addOverlay:colorfulPloyLine];

}
//Generate the corresponding View according to overlay
- (BMKOverlayView *)mapView:(BMKMapView *)mapView viewForOverlay:(id <BMKOverlay>)overlay
{
    if ([overlay isKindOfClass:[BMKPolyline class]]) {
        BMKPolylineView* polylineView = [[BMKPolylineView alloc] initWithOverlay:overlay];
        polylineView.lineWidth = 3;
        /// When drawing with segmented colors, you must set (the content must be UIColor)
        polylineView.strokeColor = [UIColor redColor];
        return polylineView;
    }
    return nil;
}
The effect is as follows:
Hawk Eye SDK Integration has come to an end. Thank you for reading.