Author: Arthur Knopper, Links to the original text Original date: 2017-04-04
Translator: Crystal Sun Proofreading:way Finalization: shanks
Translator's Note: This is an updated version of the previous article. Old Text Links The Swift version used in the old version is not 3.0. This article updates the code and upgrades to Swift 3.0.
Attributed Strings can assign a variety of attributes to text and multiple attributes to (part) text at a time. In this tutorial, you will learn to set different styles for each word in the label text. This section uses Xcode 8 and iOS 10.
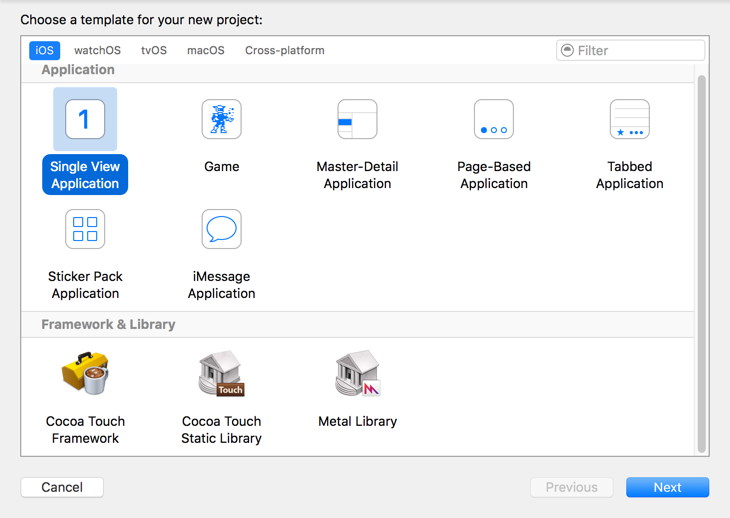
Open Xcode and create a Single View Application.
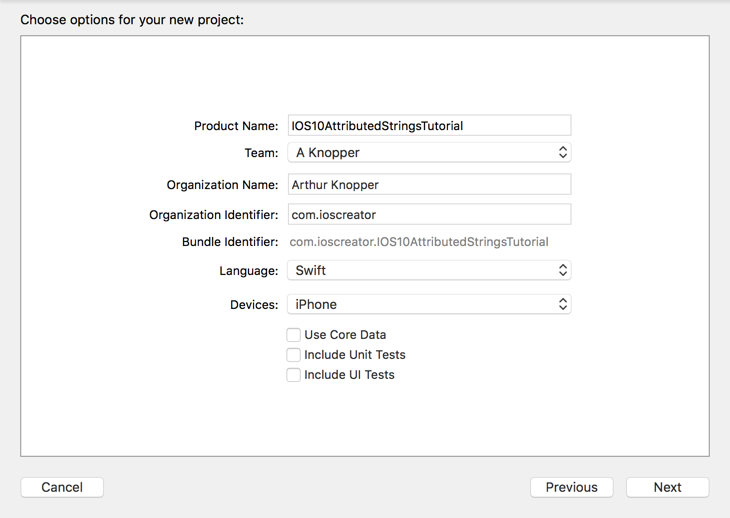
Product Name uses IOS10Attributed Strings Tutorial, fills in its Organization Name and Organization Identifier, Language chooses Swift, Devices chooses the iPhone.
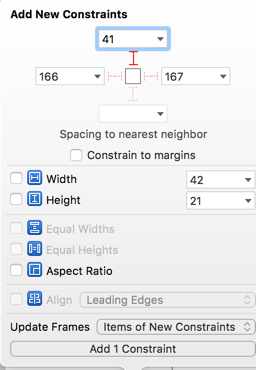
Open Storyboard, drag a Label control from Object-Library to the main interface, click the Align ment button of Auto Layout in the lower right corner of Storyboard, add the constraints shown below, and click Add 1 Constraint.

Click on the Pun button of Auto Layout, add the constraints shown below, and click "Add 1 Constraint".
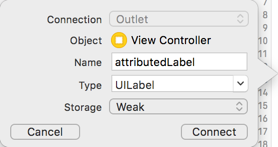
Click Assistant Editor to ensure that the ViewController.swift file is visible. Hold down the Control key and drag the Label control under the ViewController class to create the following Outlet connection.
Open the ViewController.swift file and modify the viewDidLoad method as shown below.
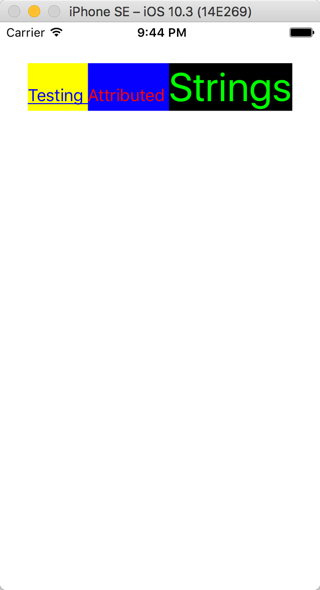
override func viewDidLoad() {
    super.viewDidLoad()

    // 1
    let string = "Testing Attributed Strings"
    let attributedString = NSMutableAttributedString(string: string)

    // 2
    let firstAttributes:[String:Any] = [NSForegroundColorAttributeName: UIColor.blue, NSBackgroundColorAttributeName: UIColor.yellow, NSUnderlineStyleAttributeName: 1]
    let secondAttributes:[String:Any] = [NSForegroundColorAttributeName: UIColor.red, NSBackgroundColorAttributeName: UIColor.blue, NSStrikethroughStyleAttributeName: 1]
    let thirdAttributes:[String:Any] = [NSForegroundColorAttributeName: UIColor.green, NSBackgroundColorAttributeName: UIColor.black, NSFontAttributeName: UIFont.systemFont(ofSize: 40)]

    // 3
    attributedString.addAttributes(firstAttributes, range: NSRange(location: 0, length: 8))
    attributedString.addAttributes(secondAttributes, range: NSRange(location: 8, length: 11))
    attributedString.addAttributes(thirdAttributes, range: NSRange(location: 19, length: 7))

    // 4
    attributedLabel.attributedText = attributedString
}
Creating a common string will translate into multiple attribute strings.
Create 3 dictionaries to store the keys and values of attributes.
Add attributes to the attributedString object.
Finally, the attribute string is assigned to Label.
Running the program, the implementation effect of the attribute string is as follows.
From github Download the source code of the IOS10Attributed Strings Tutorial tutorial.
This article has been translated by SwiftGG Translation Group and authorized by the author. Please visit the latest article. http://swift.gg.