Video player
Before iOS 9, MPMoviePlayerController was used. With the continuous iteration of iOS, AVPlayer has become the mainstream.
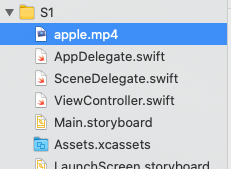
To add a resource file to a project:
import UIKit
import AVFoundation

class ViewController: UIViewController{
    var avPlayer : AVPlayer?

    override func viewDidLoad() {
        super.viewDidLoad()

        let mp4url = Bundle.main.path(forResource: "apple", ofType: "mp4")
        let movieURL = URL(fileURLWithPath: mp4url!)
        avPlayer = AVPlayer(url: movieURL)

        let avPlayerLayer = AVPlayerLayer(player: avPlayer)
        avPlayerLayer.frame = self.view.frame
        avPlayerLayer.videoGravity = AVLayerVideoGravity.resizeAspectFill
        self.view.layer.addSublayer(avPlayerLayer)

        avPlayer?.play()
    }
}
videoGravity property type:
- AVLayerVideoGravity.resizeAspectFill preserves the aspect ratio and fills the screen
- AVLayerVideoGravity. Resize aspect zooms the video size within the display range and maintains the aspect ratio
- AVLayerVideoGravity.resize stretches the video to match the display area
AVPlayerViewController
To use AVPlayerViewController, you need to import AVKit again
import UIKit
import AVFoundation
import AVKit

class ViewController: UIViewController{

    override func viewDidLoad() {
        super.viewDidLoad()

        let mp4url = Bundle.main.path(forResource: "apple", ofType: "mp4")
        let movieURL = URL(fileURLWithPath: mp4url!)

        let avPlayer = AVPlayer(url: movieURL)
        let avPlayerVC = AVPlayerViewController()
        avPlayerVC.player = avPlayer
        avPlayerVC.videoGravity = AVLayerVideoGravity.resizeAspect
        avPlayerVC.allowsPictureInPicturePlayback = true
        avPlayerVC.showsPlaybackControls = true
        avPlayerVC.view.frame = self.view.bounds

        avPlayerVC.player!.play()
        self.view.addSubview(avPlayerVC.view)
    }
}
Configure picture in picture
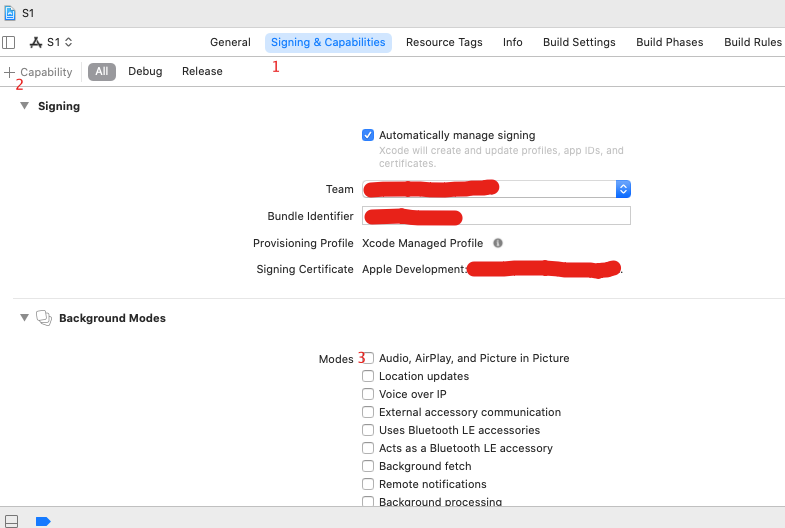
- First, click Capabilities
- Step 2: click Add Capabilities - Background Modes
- Step 3 click Audio AirPlay and Picture in Picture
Network request
HTTP defines different methods of interacting with the server, among which there are four basic methods: GET, POST, PUT and DELETE.
GET and POST
Each GET and POST consists of a series of HTTP request headers that define what data the client wants to request from the server. Similarly, the response consists of a series of response headers and response data.
GET uses the urlencoded text format of MIME type application/x-www-form-urlencoded to pass parameters. Urlencoding is a character encoding that ensures that the parameters passed follow the specification.
The POST parameter is also encoded by the URL, but the variable name / value is not transmitted as part of the URL, but is transmitted inside the actual HTTP request message.
GET is to GET data from the server, and POST is to send data to the server. GET submits data through the URL, and the data can be seen in the URL. POST is submitted by putting the request data in the request header HTML HEADER. The data submitted by GET can only have 1024 bytes at most, while POST does not have this limit. When using GET, the parameters will be exposed and POST will not. Therefore, GET is often used to submit non sensitive data.
In iOS development, the delegation protocol of URLSession is often used to call back different object methods in different stages.
URLSession
Network request using URLSession
URLSession is a group of interdependent classes, and most of its components are the same as those in NSURLConnection. For example, URLRequest, URLCache, and so on.
The difference of URLSession is that it replaces URLConnection with URLSession and URLSessionConfiguration, and subclasses of three urlsessiontasks: URLSessionDataTask, urlsessionuplodatask, and URLSessionDownloadTask.
Using URLSession, you can:
- Download data to memory via URL
- Download data to file system through URL
- Upload data to the specified URL
- Upload and download in the background
- The downloaded file has the function of continuous transmission at breakpoint
- Background upload or download has the function of task progress tracking
class ViewController: UIViewController{

    var label : UILabel!

    override func viewDidLoad() {
        super.viewDidLoad()

        label = UILabel(frame: CGRect(x: 0, y: 0, width: 480, height: 568))
        label.text = "loading..."
        label.font = UIFont(name: "Arial", size: 14)
        label.numberOfLines = 0
        label.lineBreakMode = NSLineBreakMode.byWordWrapping
        self.view.addSubview(label)

        let urlString:String = "https://www.baidu.com"
        let url:URL!=URL(string: urlString)

        let request:URLRequest = URLRequest(url: url)
        let session = URLSession.shared

        let dataTask = session.dataTask(with: request) { (data, response, error) in
            print("There's a result")
            if error != nil {
                print(error?.localizedDescription)
            }else{
                //Because URLSession requests are made asynchronously,
                //Therefore, you need to return to the main thread to update the UI
                DispatchQueue.main.async {
                    let str = NSString(data: data!, encoding: String.Encoding.utf8.rawValue)
                    self.label.text = str as! String
                }
            }
        }

        dataTask.resume()
    }
}
Operation results:
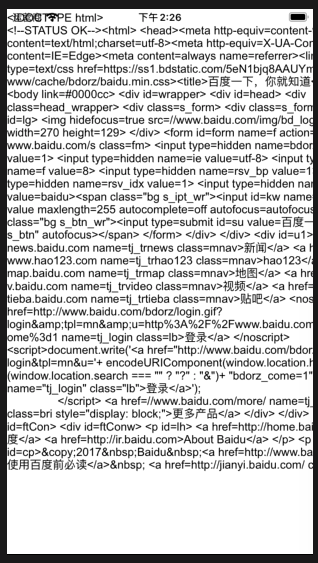
let dataTask = session. DataTask (with: request) {(data, response, error) is only a process in which session single object declaration handles url executed and invokes tail closure processing after completion. However, in fact, no network request has been started, and the request task has been started after calling resume().
In addition to requesting remote data, URLSession also has upload and download functions. To use this function, you need to follow the URLSessionDownloadDelegate protocol to monitor the download progress.
class ViewController: UIViewController, URLSessionDownloadDelegate{
var backgroundView:UIView!
var foregroundView:UIView!
var progressLabel:UILabel!
//Initialize the URLSession object and set the agent as the current controller. The controller implements the agent method to monitor the picture download
func getSession() -> Foundation.URLSession {
var session:URLSession? = nil
let config = URLSessionConfiguration.default
session = URLSession(configuration: config, delegate: self, delegateQueue: nil)
return session!
}
//Agent method for monitoring picture download completion
func urlSession(_ session: URLSession, downloadTask: URLSessionDownloadTask, didFinishDownloadingTo location: URL) {
print("Download complete!")
}
override func viewDidLoad() {
super.viewDidLoad()
backgroundView = UIView(frame: CGRect(x: 50, y: 50, width: 200, height: 40))
backgroundView.backgroundColor = UIColor.lightGray
foregroundView = UIView(frame: CGRect(x: 54, y: 54, width: 0, height: 32))
foregroundView.backgroundColor = UIColor.green
progressLabel = UILabel(frame: CGRect(x: 54, y: 100, width: 200, height: 32))
progressLabel.textAlignment = NSTextAlignment.center
self.view.addSubview(backgroundView)
self.view.addSubview(foregroundView)
self.view.addSubview(progressLabel)
let urlString:String = "https://p8.itc.cn/images01/20210416/0f44703fd5754c24af70ea031fe135b4.png"
let url:URL!=URL(string: urlString)
let request:URLRequest = URLRequest(url: url)
let session = self.getSession() as Foundation.URLSession
let downloadTask = session.downloadTask(with: request)
downloadTask.resume()
}
//Agent method for monitoring download progress
func urlSession(_ session: URLSession, downloadTask: URLSessionDownloadTask, didWriteData bytesWritten: Int64, totalBytesWritten: Int64, totalBytesExpectedToWrite: Int64) {
let rate:CGFloat = CGFloat(totalBytesWritten)/CGFloat(totalBytesExpectedToWrite)
DispatchQueue.main.async {
self.foregroundView.frame.size.width = rate * 192
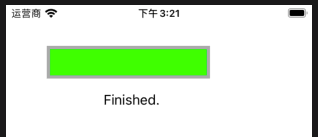
if rate == 1.0 {
self.progressLabel.text = "Finished."
}
}
}
}
Operation results:
Alamofire
In the OC era, Alamofire's name was AFNetworking.
GET request using Alamofire
You need to import the alamofire framework before using it.
The use of Alamofire is quite different from that of version 4.0. For example, in the period of 4.0, Alamofire was used to call class methods, and now AF is used in 5.0.
Moreover, obvious changes have been made in the return value. Read for yourself. Here is an example of a request
import UIKit
import Alamofire

class ViewController: UIViewController{

    override func viewDidLoad() {
        super.viewDidLoad()
        getInfo()
    }

    func getInfo() -> () {
        let url : String = "https://www.baidu.com/get"
        AF.request(url).responseString { (afDataResponseString) in
            print(afDataResponseString)
        }
    }
}
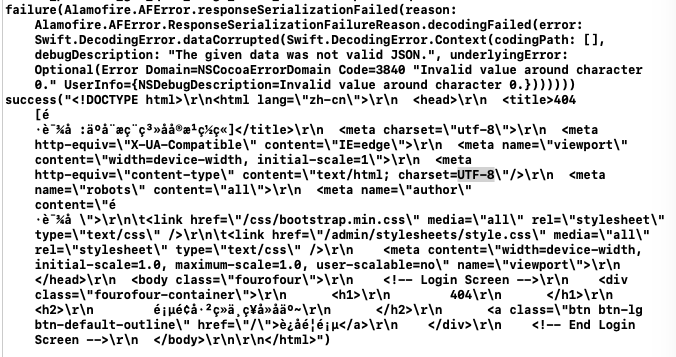
Operation results:
success("<!DOCTYPE HTML PUBLIC \"-//IETF//DTD HTML 2.0//EN\">\n<html><head>\n<title>404 Not Found</title>\n</head><body>\n<h1>Not Found</h1>\n<p>The requested URL /get was not found on this server.</p>\n</body></html>\n")
Alamofire makes GET requests by default. The biggest feature of alamofire is the use of chain request / response for network interaction. As shown in the above code, the request and return body response are written on one line. The amount of code is very small and concise.
POST request using Alamofire
import UIKit
import Alamofire

class ViewController: UIViewController{

    override func viewDidLoad() {
        super.viewDidLoad()
        postInfo()
    }

    func postInfo() -> () {
        //Declare that the parameter type of post is the dictionary type of String for key value pairs
        var parameters : Dictionary<String,String> = Dictionary()
        parameters["email"] = "fzhlee@coolketang.com"
        parameters["password"] = "123456"
        let url : String = "https://www.coolketang.com/post"

        struct DecodableType: Decodable { let url: String }
        AF.request(url, method: HTTPMethod.post, parameters: parameters, encoding: URLEncoding.default, headers: nil, interceptor: nil, requestModifier: nil).responseDecodable(of: DecodableType.self) { (dataResponse) in
            print("\(dataResponse)")
        }

        AF.request(url, method: HTTPMethod.post, parameters: parameters, encoding: URLEncoding.default, headers: nil, interceptor: nil, requestModifier: nil).responseString { (dataResponse) in
            print("\(dataResponse)")
        }
    }
}
Operation results:
Since the server supported by this textbook has not provided corresponding response, it cannot be confirmed. Please update other website examples in the future.
Upload pictures using Alamofire
When using JSON or URL encoding parameters to send less data to the server, Alamofire's request method is sufficient, but Alamofire's upload method is needed when uploading pictures or other large files.
First, import the sample resource file wind png
import UIKit
import Alamofire

class ViewController: UIViewController{

    override func viewDidLoad() {
        super.viewDidLoad()
        uploadImage()
    }

    func uploadImage() -> () {
        let imageURL = Bundle.main.url(forResource: "wind", withExtension: "png")

        struct DecodableType: Decodable { let url: String }
        AF.upload(imageURL!, to: "https://httpbin.org/post").uploadProgress { (progress) in
            print("--speed of progress:\(progress.fractionCompleted)")
            print("--complete:\(progress.completedUnitCount)")
            print("--total:\(progress.totalUnitCount)")
        }.responseDecodable { (dataResponse:DataResponse<DecodableType, AFError>) in
            let message = "Result:\(dataResponse.result)"
            print(message)
        }
    }
}
In the upload method, the first parameter can also be the Data type, so that the Data in memory can be uploaded to the server.
In addition, in the process of Alamofire requesting data, the time consumption of each step will be collected and a timeline object will be generated
Operation results:
--speed of progress:0.11106045996139592
--complete:65536
--total:590093
--speed of progress:1.0
--complete:590093
--total:590093
Result:success(S1.ViewController.(unknown context at $106e70ce8).(unknown context at $106e70d3c).DecodableType(url: "https://httpbin.org/post"))
In the dataResponse of the return body, view the member properties one by one through the breakpoints, as well as some time-consuming statistics on request, loading, parsing, etc.
AlamofireImage
Caching pictures using AlamofireImage
Alamofire also has some extensions. AlamofireImage is one of them, which can handle the expansion of image processing and caching.
When using AlamofireImage to load pictures, it has the following characteristics:
- Easy to use, automatically cache pictures in memory, and the loaded pictures can be displayed when there is no network.
- It contains some common extensions, such as compression, scaling, fillet, filter and so on.
Before using, import the framework in the way of CocoaPods:
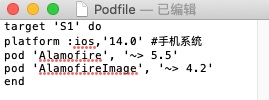
import UIKit
import Alamofire
import AlamofireImage

class ViewController: UIViewController{
    var imageView : UIImageView?

    override func viewDidLoad() {
        super.viewDidLoad()
        getImageByAlamofireImage()
    }

    func getImageByAlamofireImage() -> () {
        let image = UIImage(named: "wind.png")!
        let imageSize = CGSize(width: 100, height: 100)

        //Processing images using AlamofireImage
        let scaleImage = image.af.imageScaled(to: imageSize)

        //Initialize the ImageView with the image, so that the size of the ImageView will be the size of the image
        imageView = UIImageView(image: scaleImage)
        imageView?.center = self.view.center
        self.view.addSubview(imageView!)
    }
}
Operation results:
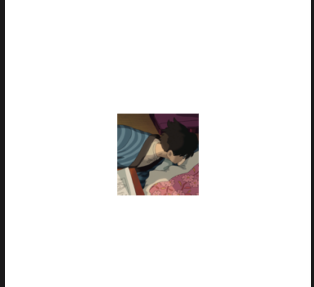
Add a filter to a picture using AlamofireImage
//Processing images using AlamofireImage
let blurImage = image.af.imageFiltered(withCoreImageFilter: "CIMotionBlur", parameters: ["inputRadius":5,"inputAngle":45])
imageView = UIImageView(image: blurImage)
imageView?.frame = CGRect(x: 0, y: 0, width: 200, height: 200)
imageView?.center = self.view.center
Operation results;