With the increase of induction time and the deepening of work, it is essential to open dozens of browser Tab pages while processing multiple tasks at the same time. Almost all of my work is to switch back and forth between various browser Tab pages, such as writing documents, learning new knowledge, handling Bug sheet flow, going online and so on, Therefore, I need to finely manage the Tab page of the browser to achieve the purpose of finely managing the workflow. Therefore, my use of the browser has become the following stages:
Chrome - disorganized phase

Chrome - organize appropriately

Edge - vertical sidebar

However, no matter how much assistance is provided at the browser level, after all, the responsibility of the browser is mainly to help you browse the web better, faster and more efficiently, not to help you manage knowledge and workflow. Therefore, if you need personalized customization, you have to develop it yourself! After all, as a programmer, do it yourself and have plenty of food and clothing 😋.
requirement analysis
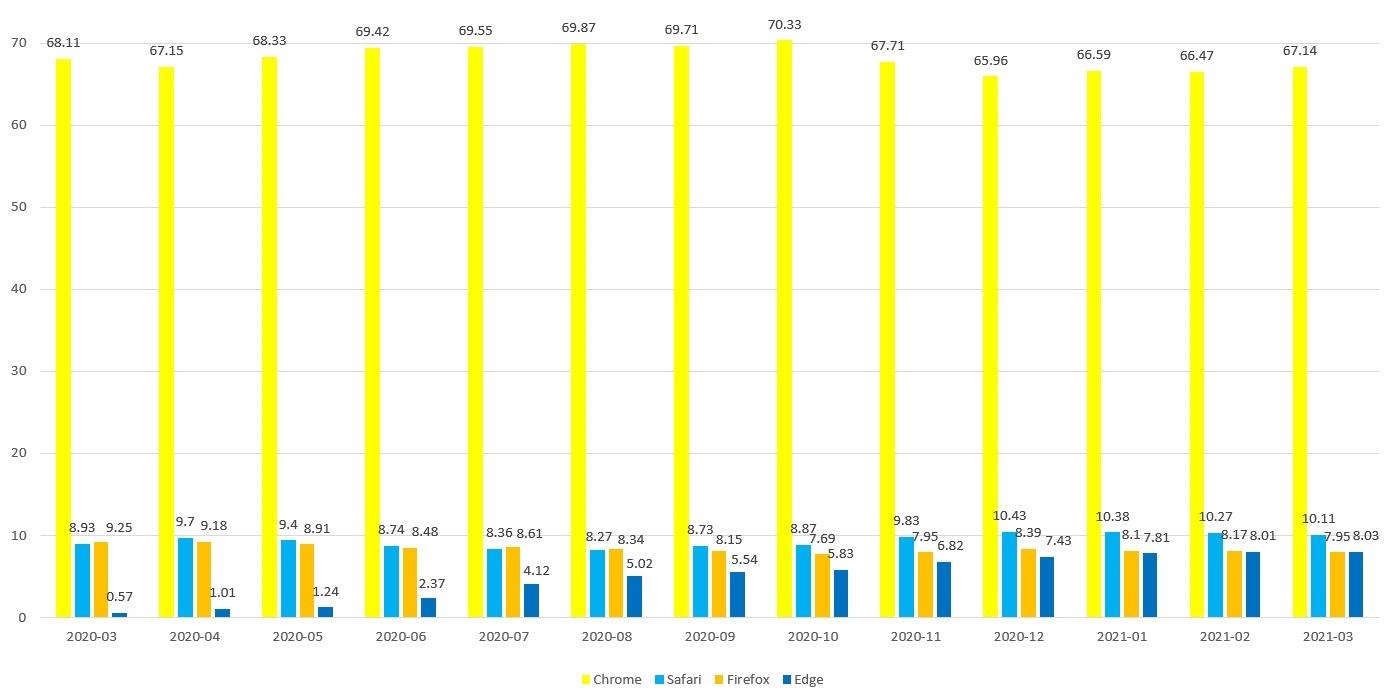
I hope to develop a Chrome browser plug-in. At present, other browsers such as Edge, Firefox, Brave and all other browsers developed with Chromum support chrome plug-in format, and these major browsers account for nearly 83% of the desktop browser market, so this chrome plug-in can run on my favorite browser.
The following is the proportion of desktop browsers from 2020.3 to 2021.3
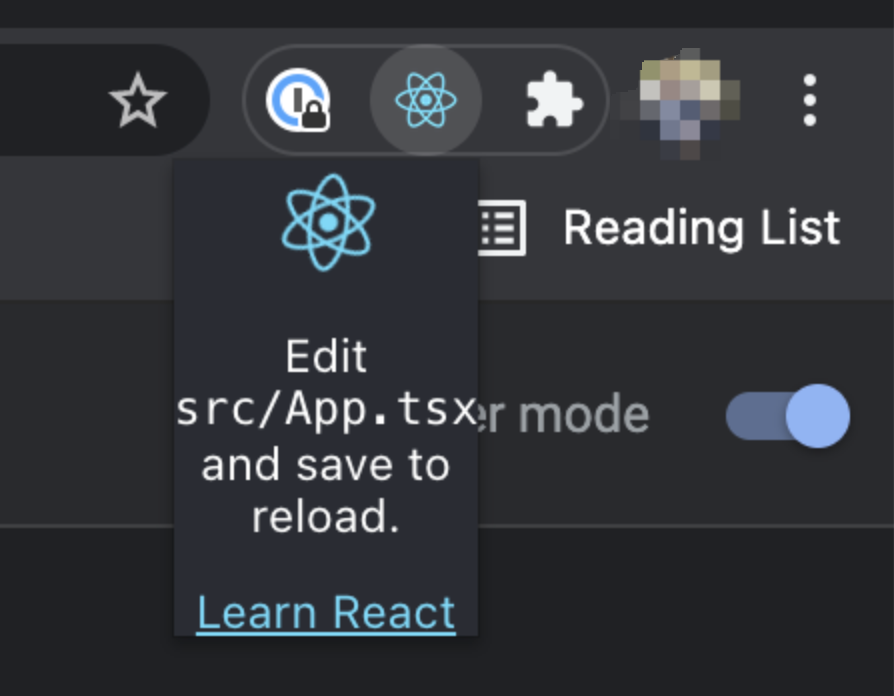
This browser supports traditional plug-ins, click the pop-up bar, and display my application every time a new Tab is opened, which can help me know my current work at any time. The general form is as follows:
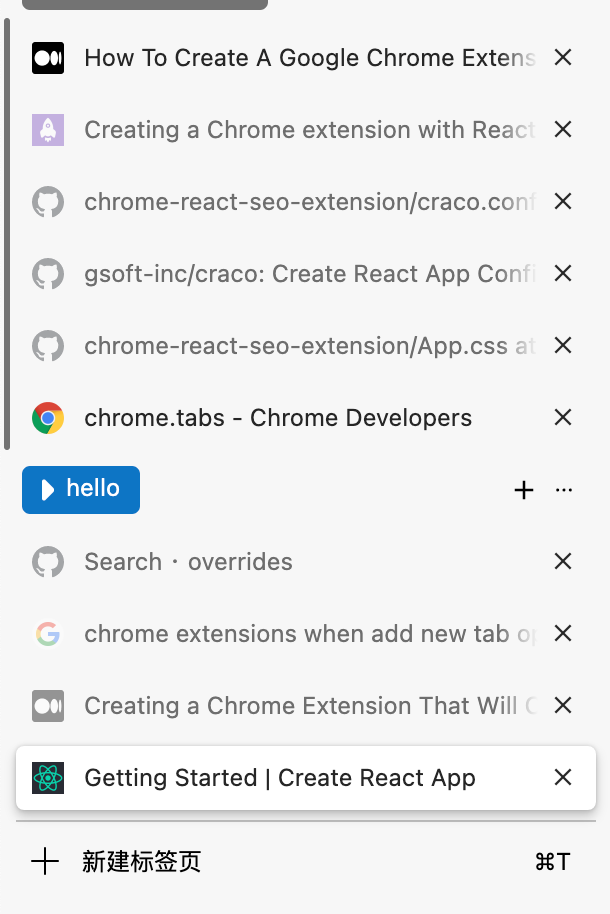
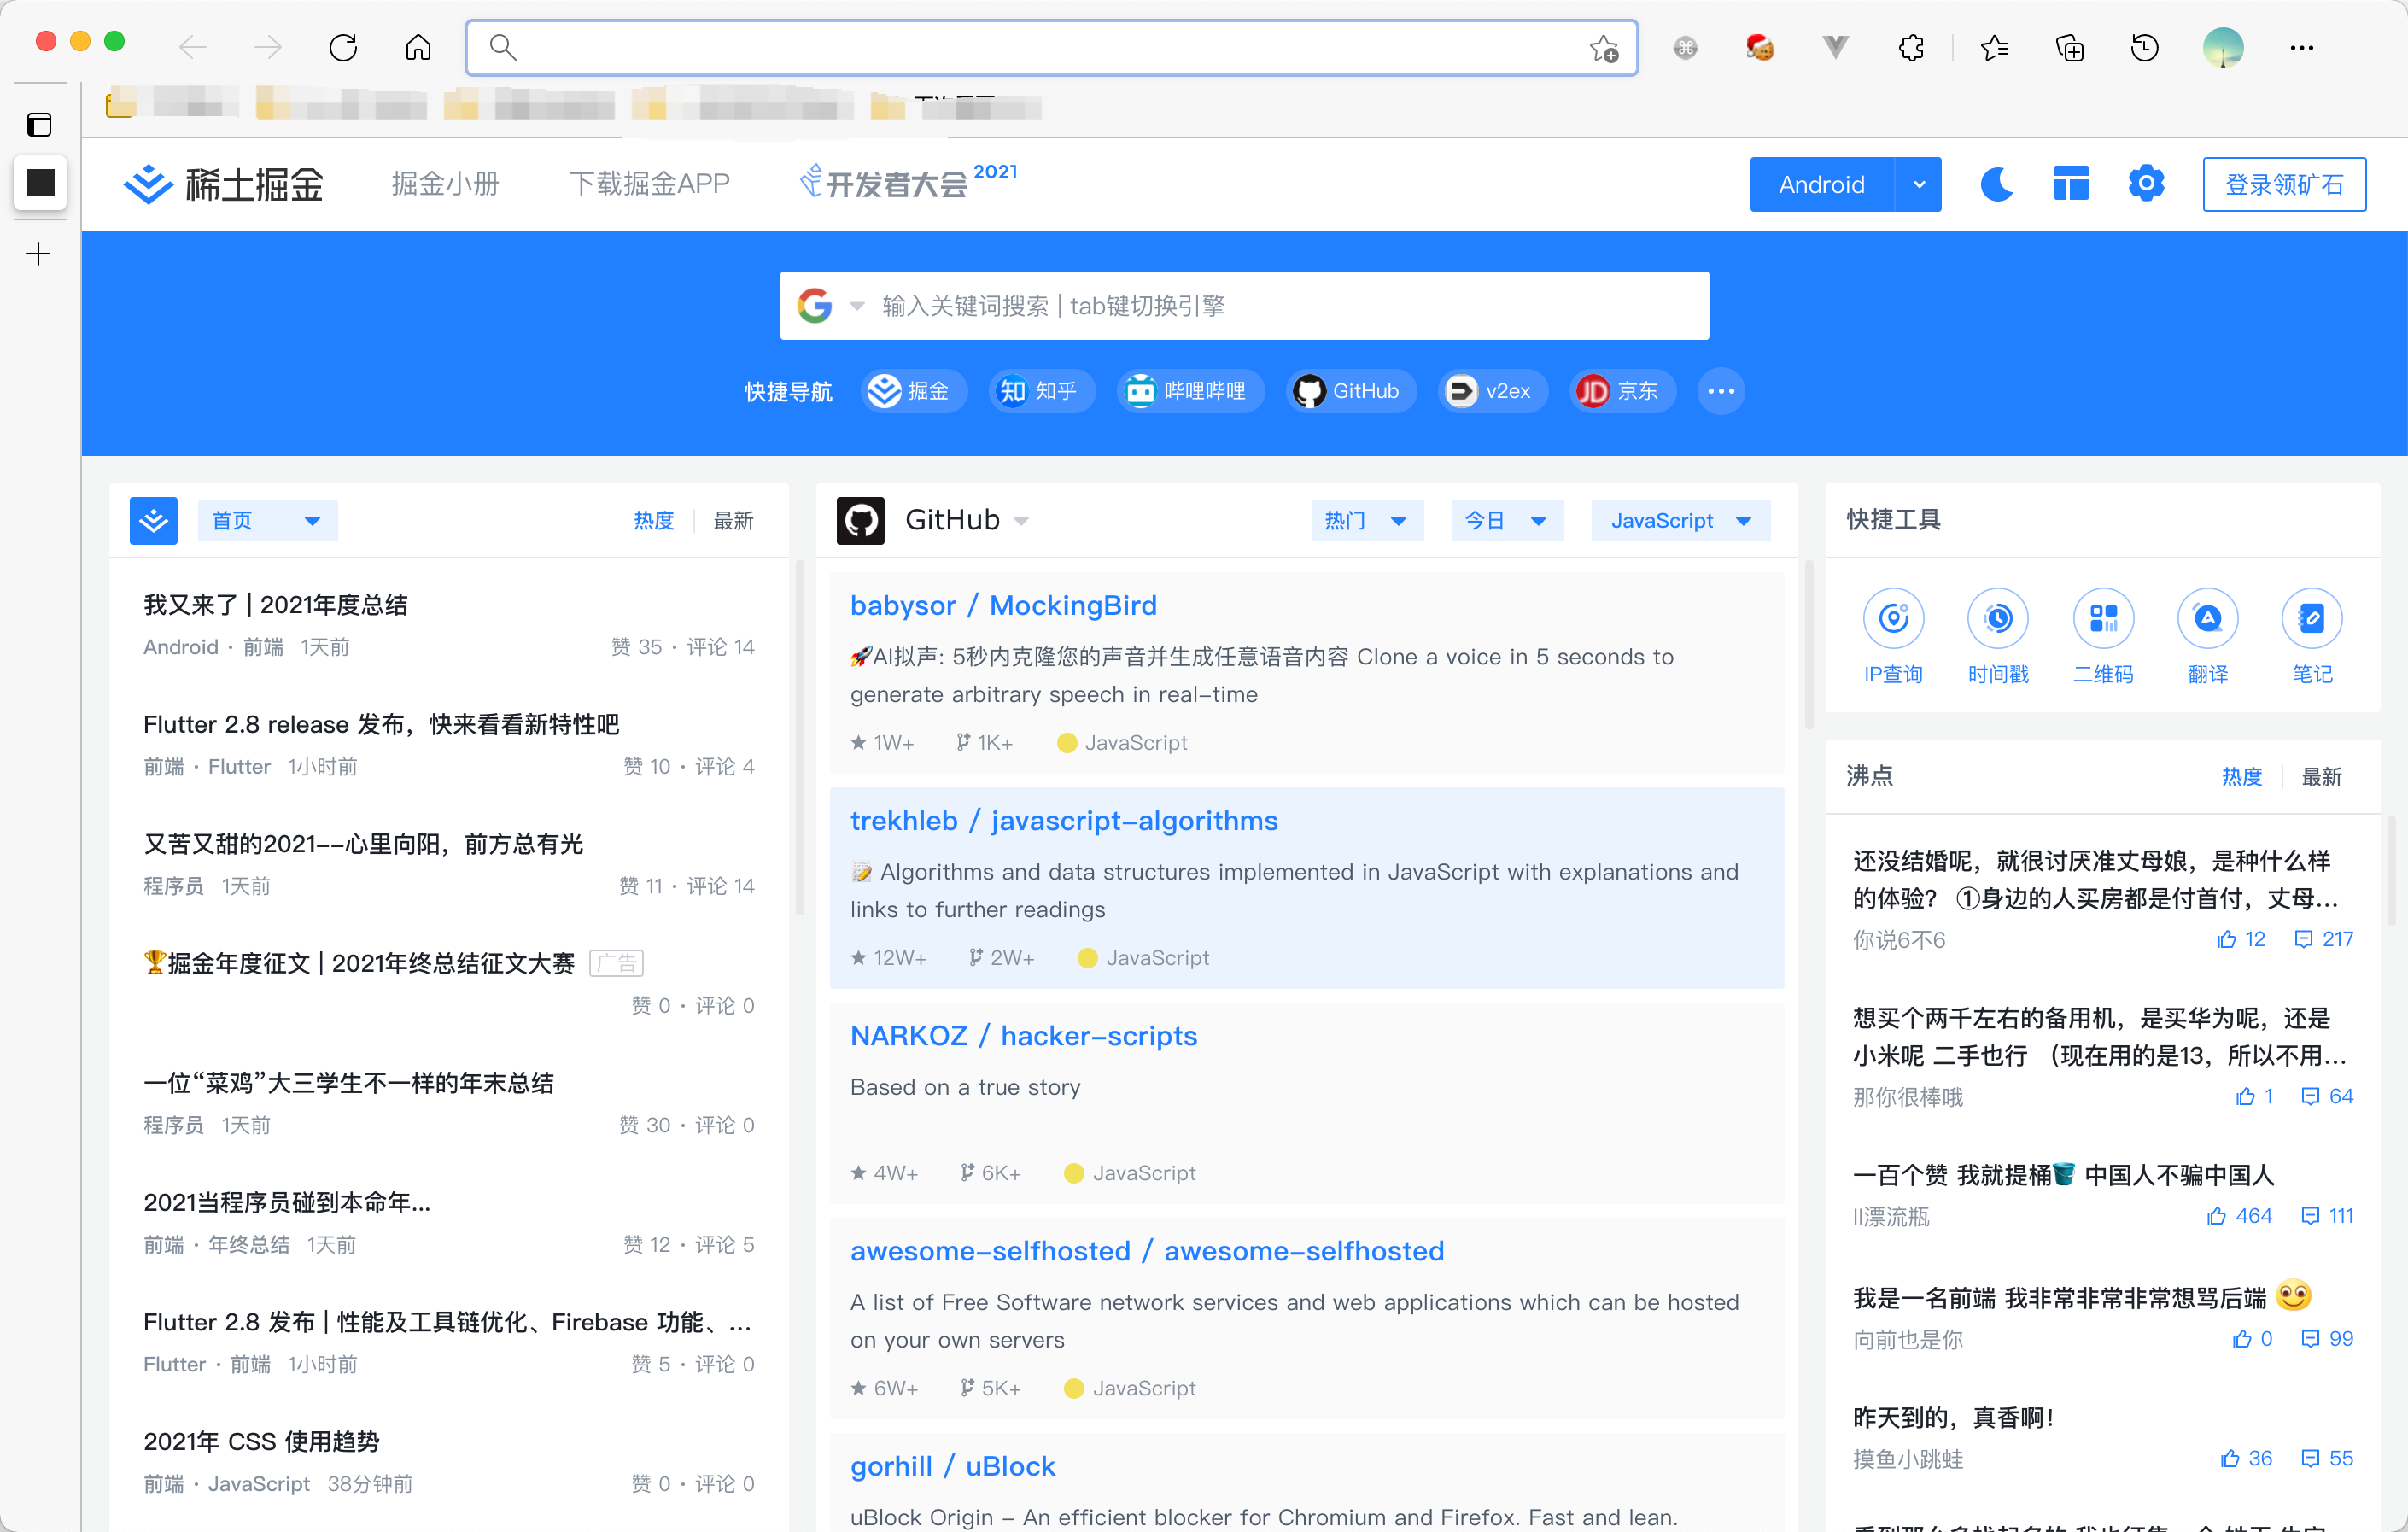
Pop up bar:
New Tab:
I wonder if you are familiar with the form of the above requirements? Yes, the framework of this plug-in is similar to that of nuggets. Let's take a look at the Chrome plug-in of Nuggets:
Pop up box:

New Tab:
In other words, after reading this article, you basically have the ability to develop a Nuggets plug-in 🐴?

Incidentally, the technical stack of our plug-in development is as follows:
- React + TypeScript, based on create react app scaffolding
Write Chrome plug-ins through advanced technology stack 🚀.
Pre knowledge
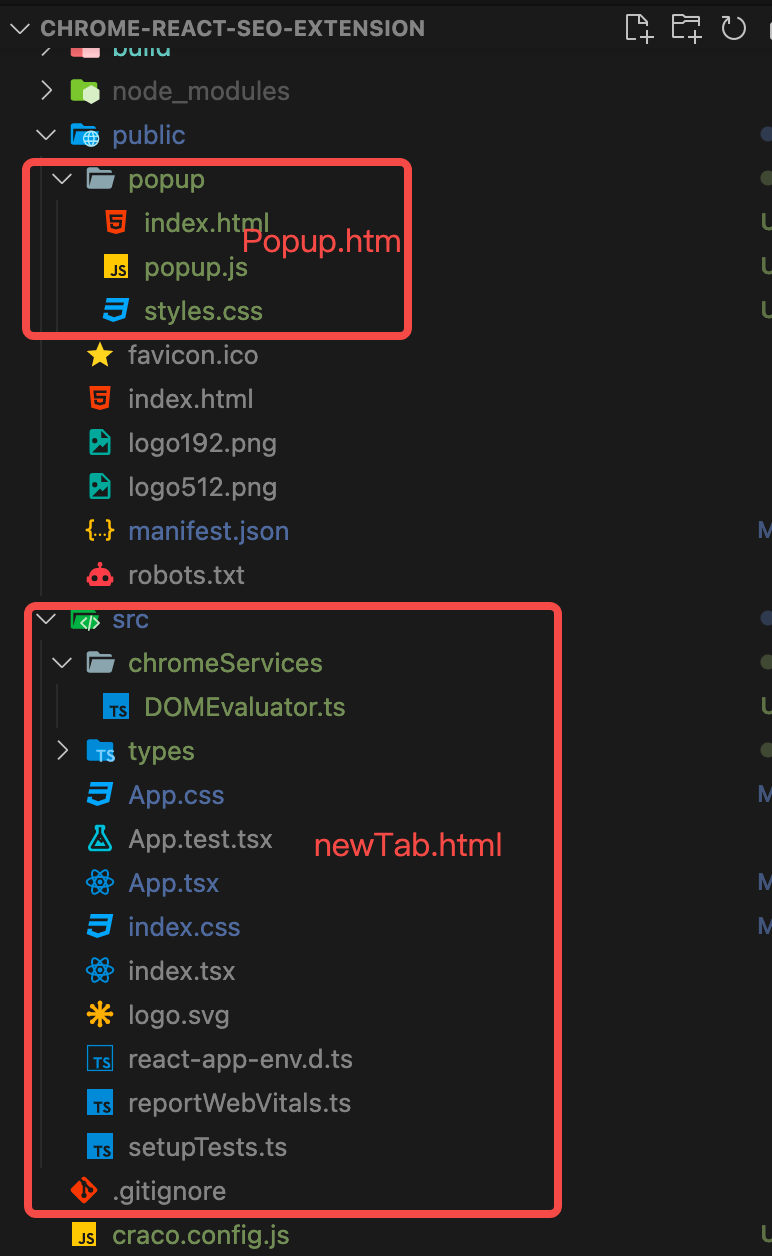
The Chrome plug-in actually contains several parts:
- manifest.json file is equivalent to the entry of the whole project. It records the icon display, pop-up box style file, new Tab logic, option logic, content script logic, etc. of the plug-in
- background.js. This script is a script file that will run after the entire browser is started or the plug-in is loaded. It runs in ServiceWorker. It is usually used for some pre data storage operations and can operate all chrome APIs
- popup.html, the template content displayed by the pop-up box of the plug-in can control the style through CSS and the logic through JavaScript
- options.html. When you right-click the plug-in icon, the menu page pops up. Click the options in the menu page to open the page
- content.js, this script is a script file injected by Chrome browser into a new web page when you open it. It is used to assist the web page to communicate with your plug-in. Because the running environment of the plug-in is isolated by sandbox and cannot directly operate on the DOM, you need to operate the DOM through the content script and send it to the processing logic of the plug-in
The above five files constitute the necessary elements for a Chrome plug-in. The logical relationship is as follows:
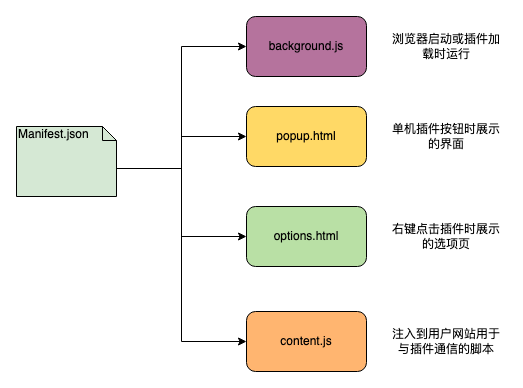
It can be seen that in fact, the development of a Chrome plug-in also uses the knowledge of HTML/JavaScript/CSS, but in the use scenario, the permissions of each JavaScript are different from the API s of functions and operations. Since it uses the basic Web technology, We can upgrade the development of Chrome plug-ins to a modern level with the help of higher-level Web development frameworks such as React.

Most simplified plug-in
Make sure you have the latest version of node installed JS, and then run the following command on the command line:
npx create-react-app chrome-react-extension --template typescript
After initializing the project and installing the dependencies, we can see the template code generated by CRA, including the public / manifest JSON file:
Of course, the content is not as rich as the above figure. We need to make some modifications and change the content to the following:
{
   "name": "Chrome React Extension",
   "description": "use React TypeScript structure Chrome extend",
   "version": "1.0",
   "manifest_version": 3,
   "action": {
       "default_popup": "index.html",
       "default_title": "Open the popup"
   },
   "icons": {
       "16": "logo192.png",
       "48": "logo192.png",
       "128": "logo192.png"
   }
}
The above fields are described as follows:
- Name: the name of the plug-in, which is displayed in the Chrome plug-in icon and the plug-in market
- description: what did you do when introducing the plug-in
- Version: the current version of the plug-in
- manifest_version: the version of the currently used manifest file. The minimum manifest version of the Chrome plug-in is V3
- Action: controls the action to be responded when clicking the plug-in icon. Here, we set the text displayed when hover as default_title, click to open, and the displayed content is index html
- Icons: icons displayed in Chrome plug-ins
In fact, the Chrome plug-in can only understand native JavaScript, CSS, HTML, etc., so we need to build after using React, and package the built products to the browser plug-in for loading and use. During construction, another thing to note is that in order to ensure optimal performance, the CRA script will use some small JS files during construction, Inline to HTML files instead of packaged into independent JS files. This form of HTML is not supported in the running environment of Chrome plug-in, which will trigger the CSP (content security policy) error of the plug-in.
So in order to test the current effect of our plug-in, we modify the build script in package JSON:
"scripts": {
    "start": "react-scripts start",
    "build": "INLINE_RUNTIME_CHUNK=false react-scripts build",
    "test": "react-scripts test",
    "eject": "react-scripts eject"
  },
By setting INLINE_RUNTIME_CHUNK=false ensure that all JS will be built into independent files and then imported into HTML for loading and use.
When everything is ready, it's time to build our React application ~ run the following command on the command line:
npm run build
You will find that the output of the content build is under build/xxx, including manifest json,index.html, corresponding JS/CSS files, pictures, etc. index. Is indexed in manifest Html is used as the pop-up display page when clicking the plug-in. At this time, we can use Chrome to load the files we have built to view the operation effect of the plug-in:
We open the extension panel, set the developer mode, click load file, and select our build file address to load:

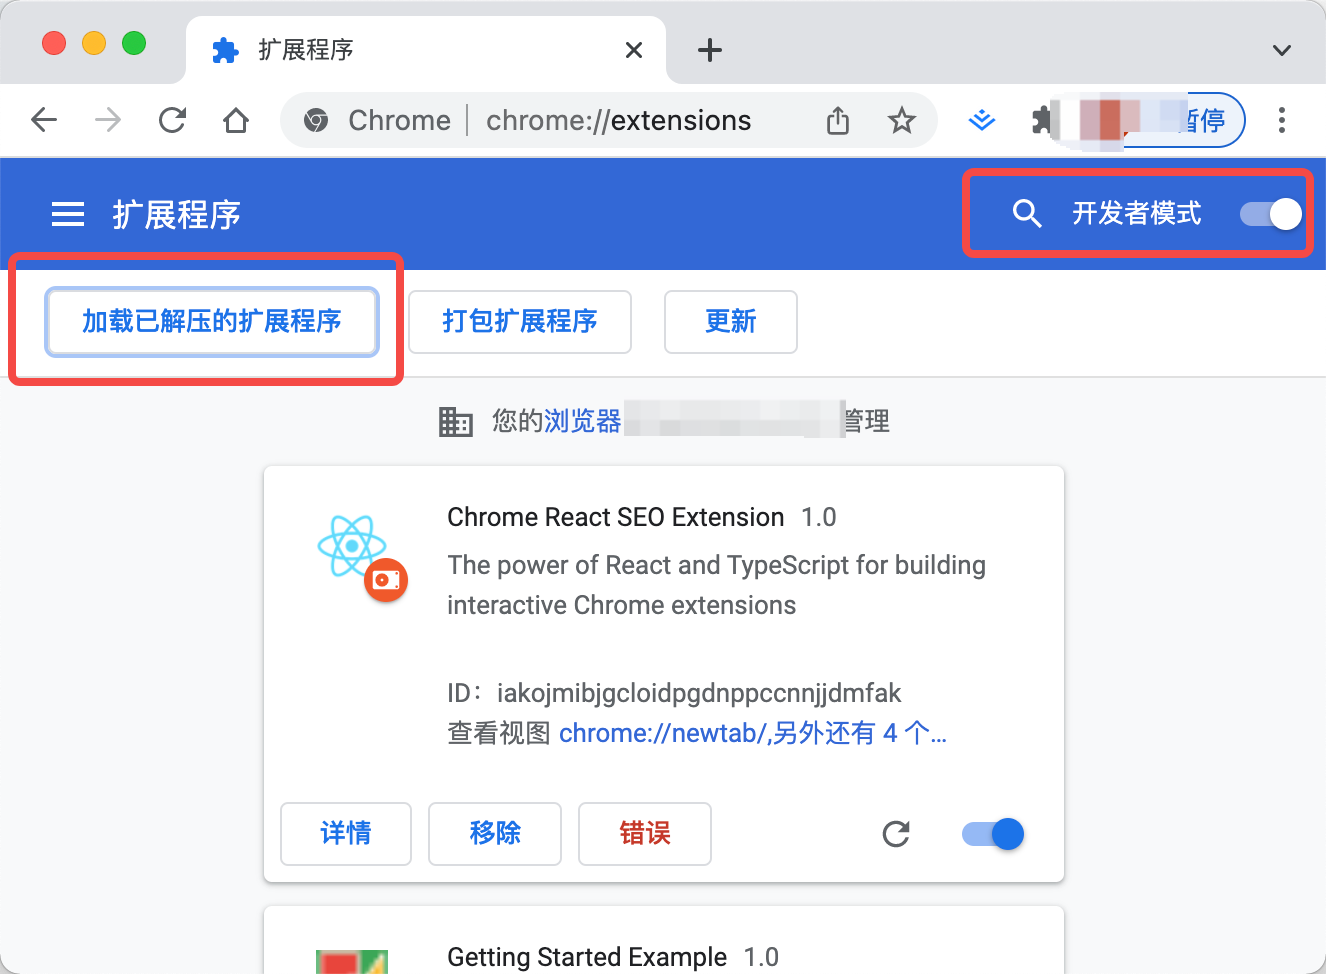
Magic ! We can see our plug-in in the browser and use it. A most simplified plug-in is completed! 🥳
Of course, although we can use React/TypeScript and all modern Web development technologies to write plug-ins here, there is no good way to develop in real time - to view the effect, that is, our common HMR and Live Reload technologies do not yet support the development of Chrome plug-ins, So every time we need to view the effect of writing, we need to click the plug-in after building to view it.
Of course, if it is purely for UI or logic unrelated to Chrome API, you can rest assured to develop directly on the Web and build Chrome plug-in preview after development.

Customize new Tab logic
Our previous logic is that as long as we open a new Tab, we will access the page we provide, which is similar to the Nuggets plug-in. Moreover, we mainly realize that the Popup page is only a few buttons, and the highlights are displayed in the new Tab page interface, that is, we really need a multi page application here? Because the final page is generated, one is displayed on the Popup page and the other is displayed on the new Tab page.
However, we know that the template generated by CRA scaffold is mainly used for single page applications. If it is necessary to switch to multi page applications, there is a certain cost, but our Popup page actually has only a few buttons, so we can simplify it here, that is, the Popup page directly writes the original HTML/JS/CSS manually, and then the main play Complex new Tab page logic is developed with modern Web technologies such as React TypeScript.
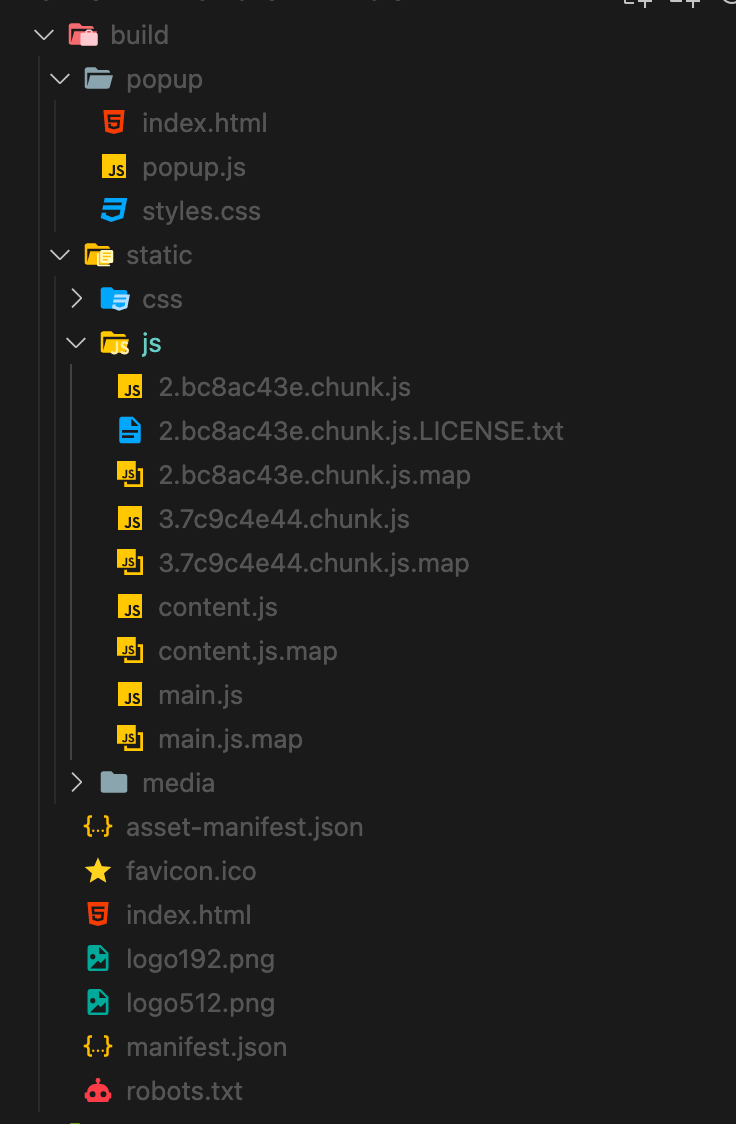
After this design, our directory structure becomes as follows:
Including manifest The JSON logic becomes as follows:
{
  "name": "Chrome React SEO Extension",
  "description": "The power of React and TypeScript for building interactive Chrome extensions",
  "version": "1.0",
  "manifest_version": 3,
  "action": {
    "default_popup": "./popup/index.html",
    "default_title": "Open the popup"
  },
  "chrome_url_overrides": {
    "newtab": "index.html"
  },
  "icons": {
    "16": "logo192.png",
    "48": "logo192.png",
    "128": "logo192.png"
  }
}
As we can see, click the pop-up page of Chrome plug-in and replace it with/ popup/index.html, and we added a new Chrome_ url_ In the overrides field, in the newtab, we open the built index HTML file.
Through the above operations, each time we open a new Tab, the following page will be displayed:
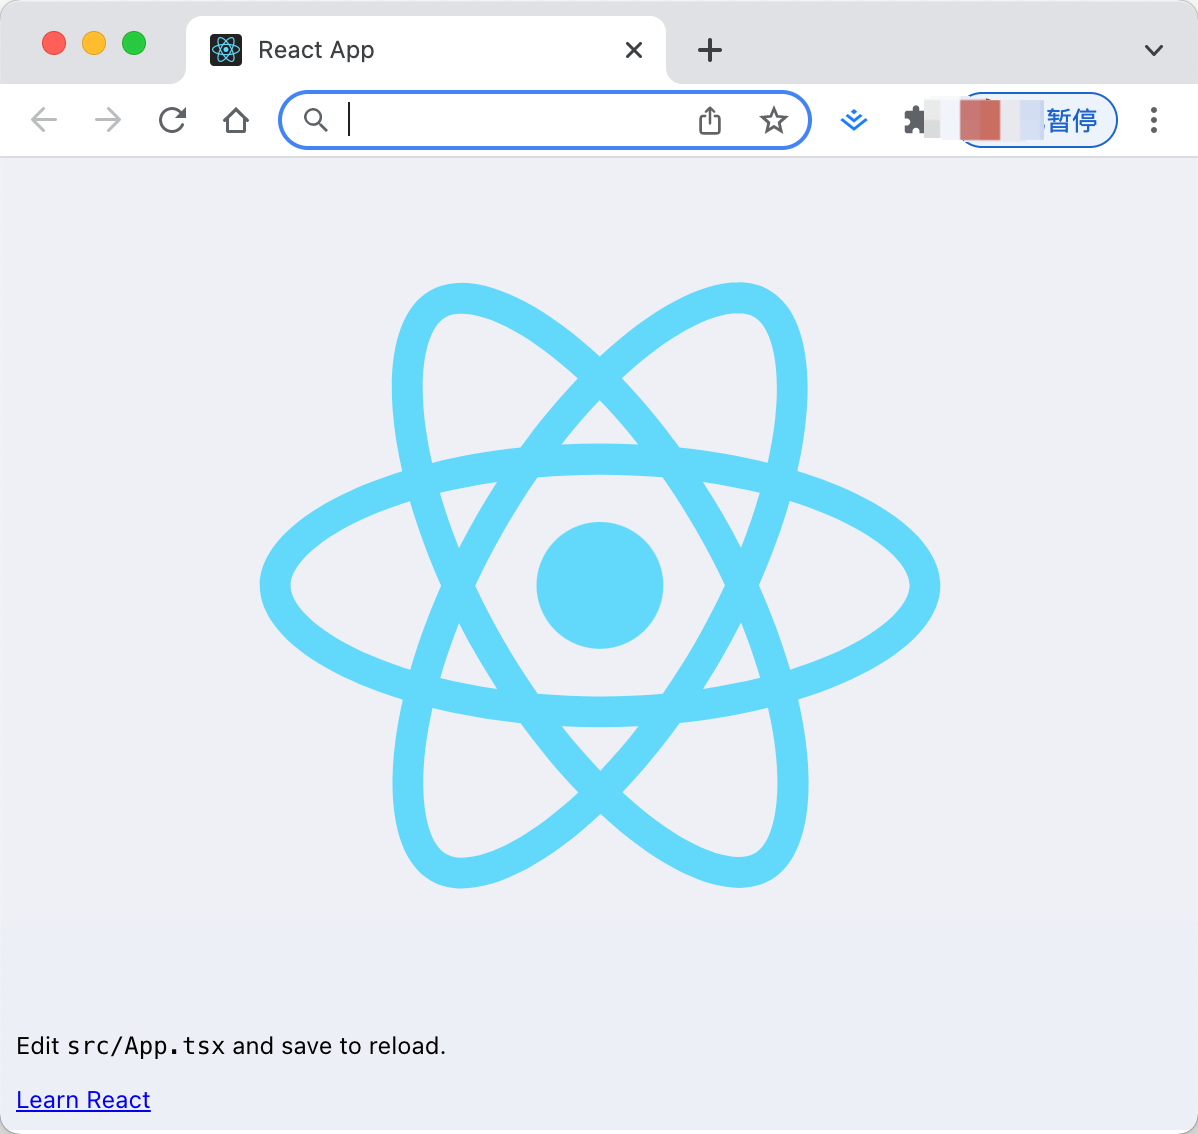
Perfect! We have realized the core idea of the Nuggets plug-in: convenient access to technical knowledge every time you open the Tab.
Develop Popup page
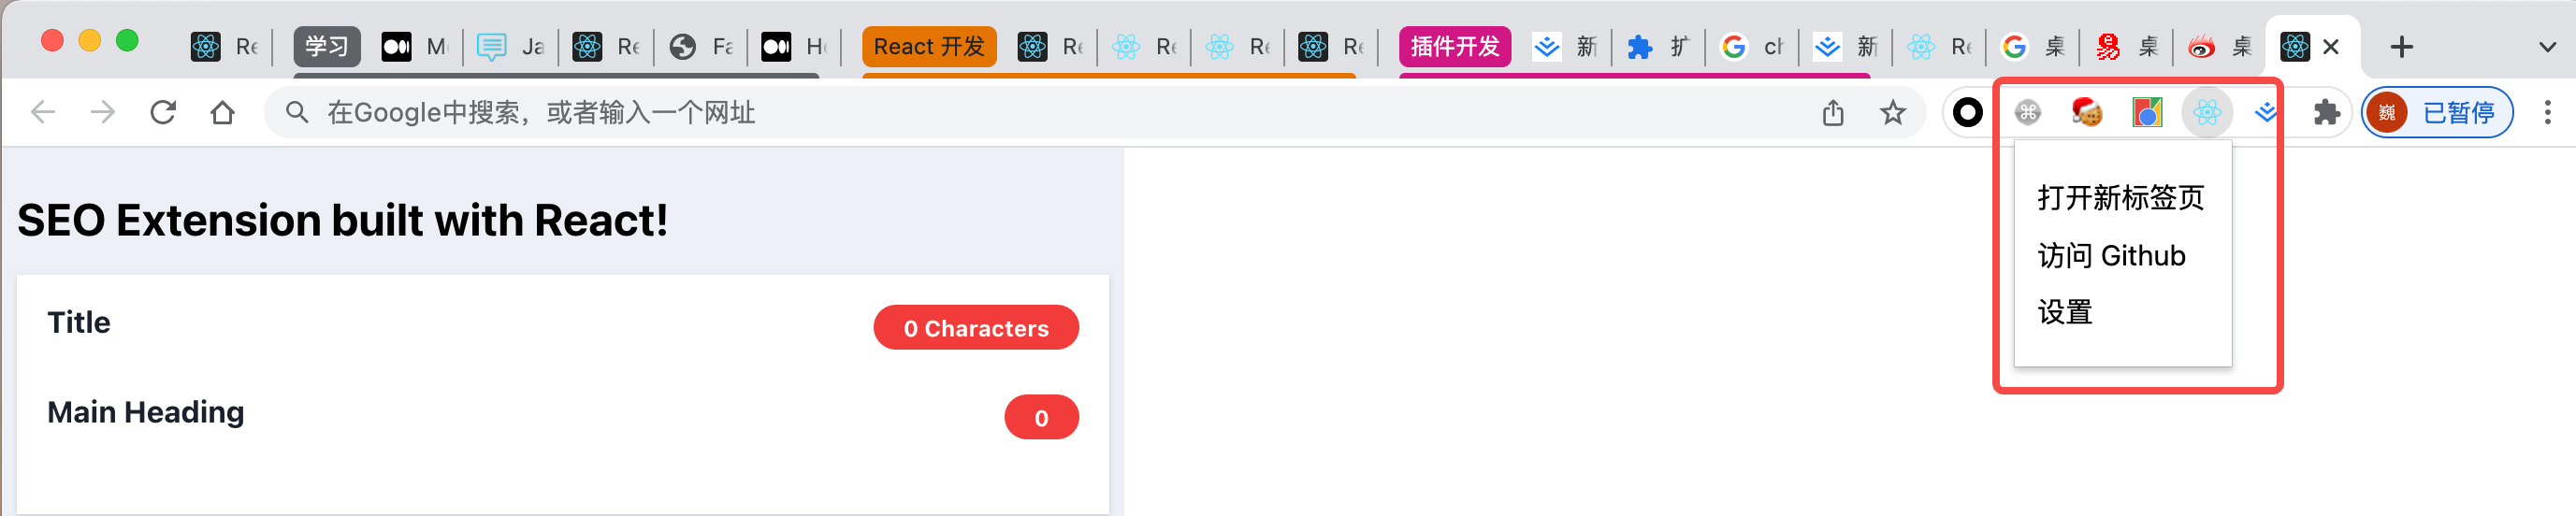
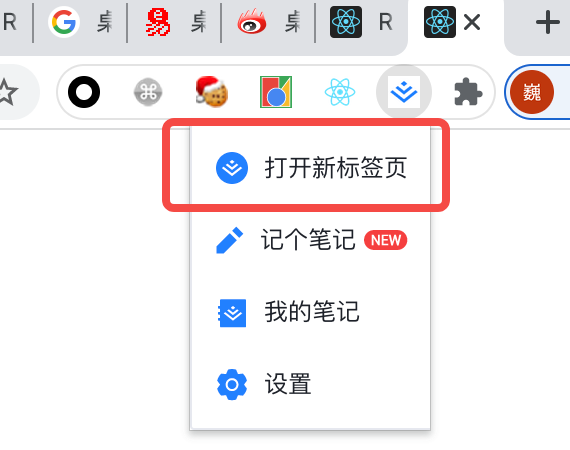
Next, we try to transform our Popup page, which is also a benchmark for nuggets. We know that Nuggets' Popup page is a relatively simple menu bar, which is mainly used to jump to a new Tab or setting page:
We now need to implement a similar method. Click a button to jump to our new Tab page and open the Tab logic customized in the previous part.
In this part, we need to modify pop / index HTML, add relevant JS logic as follows:
<!DOCTYPE html>
<html lang="en">
  <head>
    <meta charset="UTF-8" />
    <meta http-equiv="X-UA-Compatible" content="IE=edge" />
    <meta name="viewport" content="width=device-width, initial-scale=1.0" />
    <title>Fake Juejin Extensions</title>
    <link rel="stylesheet" href="./styles.css" />
  </head>
  <body>
    <ul>
      <li class="open_new_tab">Open new tab</li>
      <li class="go_to_github">visit Github</li>
      <li class="go_to_settings">set up</li>
    </ul>
    <script src="popup.js"></script>
  </body>
</html>
This time, we only need to open a new tab and access Github. We don't need to do this, but leave it to the readers to expand.
You can see that we have imported pop JS file. In this JS file, we need to complete the logical configuration of opening a new tab and accessing Github:
document.querySelector(".open_new_tab").addEventListener("click", (e) => {
  chrome.tabs.create({}, () => {});
});

document.querySelector(".go_to_github").addEventListener("click", (e) => {
  window.open("https://github.com");
});
You can see, because pop JS runs in the sandbox environment of the chrome plug-in, so it can use the chrome API for page, browser and other related operations.
After we have written the above logic, we can click the corresponding to open a new tab, access the new tab and display the contents mentioned in the previous section. If we visit Github, we will jump to the Github page.

Using Content scripts
We have developed a new Tab page and Popup logic. Next, we can try to communicate between the user page and the plug-in script through the content script to indirectly operate the DOM.
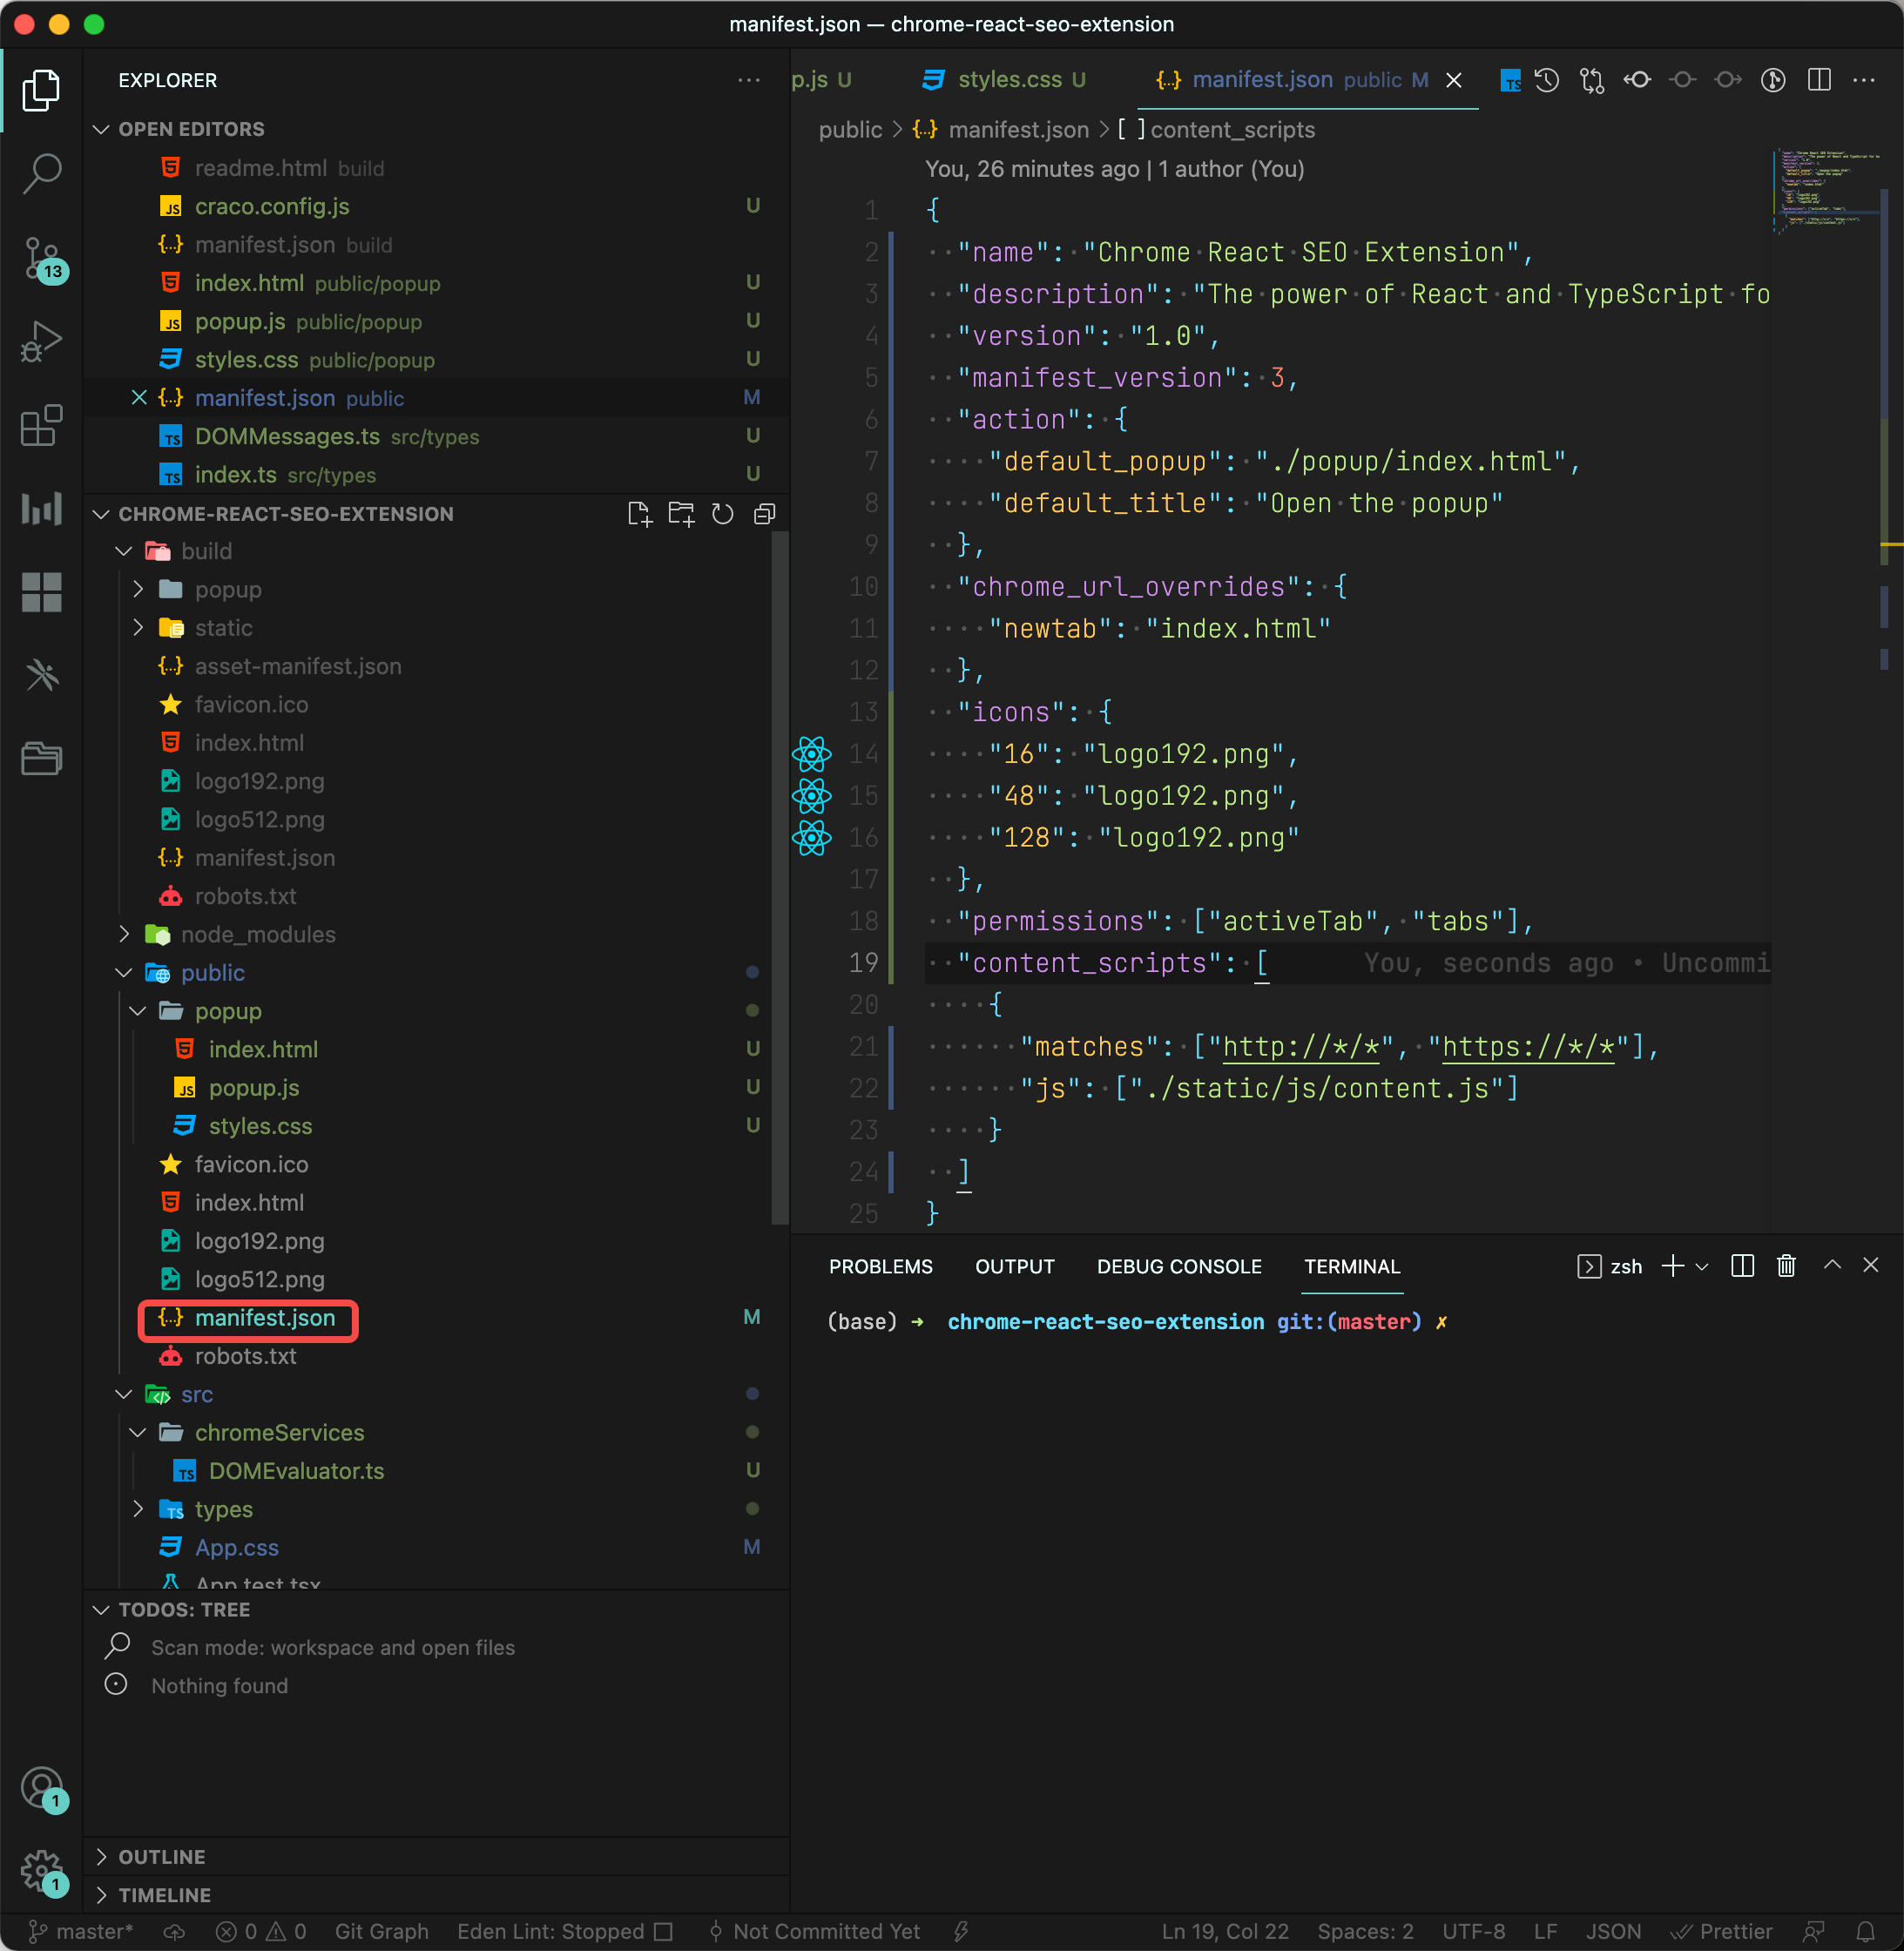
First, we need to be in manifest Script related to registering content in JSON:
{
  "name": "Chrome React Extension",
  // ...
  "permissions": ["activeTab", "tabs"],
  "content_scripts": [
    {
      "matches": ["http://*/*", "https://*/*"],
      "js": ["./static/js/content.js"]
    }
  ]
}
The above script passes through content_scripts specifies the content script. matches specifies that the logic of the injection script is executed only when the domain names are matched. JS represents the location of the script to be injected. Here we fill in/ static/js/content.js, that is, the JS content address generated after construction.
Next, we establish communication with the content script in the React project on the Tab page:
import React from "react";
import "./App.css";
import { DOMMessage, DOMMessageResponse } from "./types";

function App() {
  // Pre logic

  React.useEffect(() => {
    /**
     * We can't use "chrome.runtime.sendMessage" for sending messages from React.
     * For sending messages from React we need to specify which tab to send it to. */     chrome.tabs &&
      chrome.tabs.query(
        {
          active: true,
          currentWindow: true,
        },
        (tabs) => {
          /**
           * Sends a single message to the content script(s) in the specified tab,
           * with an optional callback to run when a response is sent back.
           *
           * The runtime.onMessage event is fired in each content script running
           * in the specified tab for the current extension. */           chrome.tabs.sendMessage(
            tabs[0].id || 0,
            { type: "GET_DOM" } as DOMMessage,
            (response: DOMMessageResponse) => {
              setTitle(response.title);
              setHeadlines(response.headlines);
            }
          );
        }
      );
  });

  return (
    // ...  Template
  );
}

export default App;
You can see that we query the currently active Tab page through the chome API, and then give the content script of the Tab page through chrome tabs. SendMessage sent a message with {type: "GET_DOM"}.
Then we create the script of the corresponding content and create domevaluator.xml under src/chromeServices ts:
import { DOMMessage, DOMMessageResponse } from "../types";

// Function called when a new message is received const messagesFromReactAppListener = (
  msg: DOMMessage,
  sender: chrome.runtime.MessageSender,
  sendResponse: (response: DOMMessageResponse) => void
) => {
  console.log("[content.js]. Message received", msg);

  const headlines = Array.from(document.getElementsByTagName<"h1">("h1")).map(
    (h1) => h1.innerText
  );

  // Prepare the response object with information about the site   const response: DOMMessageResponse = {
    title: document.title,
    headlines,
  };

  sendResponse(response);
};

/**
 * Fired when a message is sent from either an extension process or a content script. */ chrome.runtime.onMessage.addListener(messagesFromReactAppListener);
The script is loaded through onmessage AddListener listens, and then calls back messagesFromReactAppListener. In the function, you can directly obtain the DOM, query the title and all H1 tags in the page, and then return.
import React from "react";
import "./App.css";
import { DOMMessage, DOMMessageResponse } from "./types";
function App() {
const [title, setTitle] = React.useState("");
const [headlines, setHeadlines] = React.useState<string[]>([]);
// ... Message communication logic
return (
// ... Template
<div className="App">
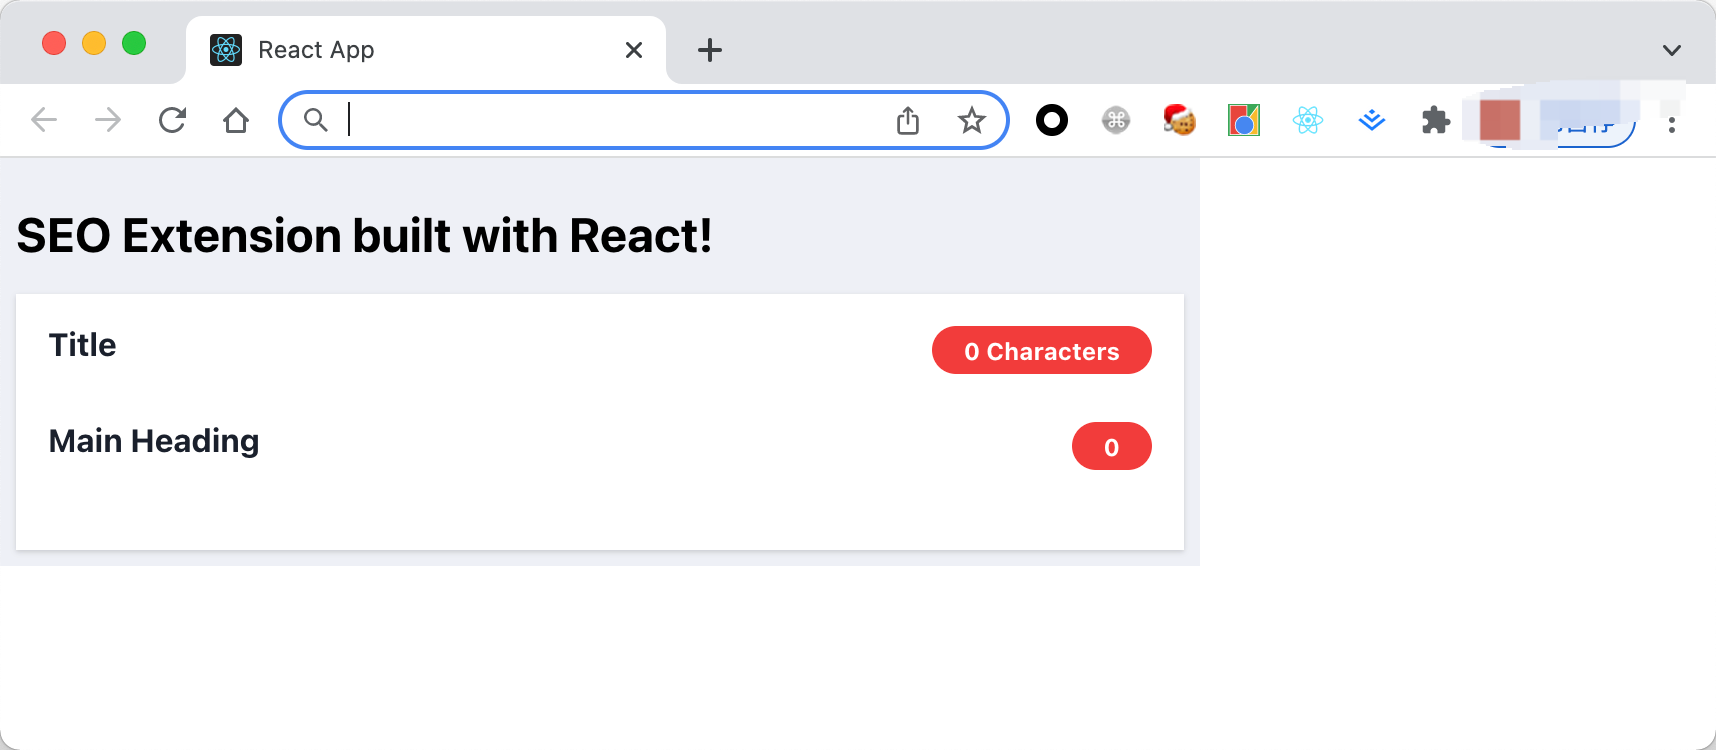
<h1>SEO Extension built with React!</h1>
<ul className="SEOForm">
<li className="SEOValidation">
<div className="SEOValidationField">
<span className="SEOValidationFieldTitle">Title</span>
<span
className={`SEOValidationFieldStatus ${
title.length < 30 || title.length > 65 ? "Error" : "Ok"
}`}
>
{title.length} Characters
</span>
</div>
<div className="SEOVAlidationFieldValue">{title}</div>
</li>
<li className="SEOValidation">
<div className="SEOValidationField">
<span className="SEOValidationFieldTitle">Main Heading</span>
<span
className={`SEOValidationFieldStatus ${
headlines.length !== 1 ? "Error" : "Ok"
}`}
>
{headlines.length}
</span>
</div>
<div className="SEOVAlidationFieldValue">
<ul>
{headlines.map((headline, index) => (
<li key={index}>{headline}</li>
))}
</ul>
</div>
</li>
</ul>
</div>
);
}
export default App;
Then extend the CSS code:
.App {
  background: #edf0f6;
  padding: 0.5rem;
}

.SEOForm {
  list-style: none;
  margin: 0;
  box-shadow: 0 1px 3px 0 rgb(0 0 0 / 10%), 0 1px 2px 0 rgb(0 0 0 / 6%);
  background: #fff;
  padding: 1rem;
}

.SEOValidation {
  margin-bottom: 1.5rem;
}

.SEOValidationField {
  width: 100%;
  display: flex;
  justify-content: space-between;
}

.SEOValidationFieldTitle {
  font-size: 1rem;
  color: #1a202c;
  font-weight: bold;
}

.SEOValidationFieldStatus {
  color: #fff;
  padding: 0 1rem;
  height: 1.5rem;
  font-weight: bold;
  align-items: center;
  display: flex;
  border-radius: 9999px;
}

.SEOValidationFieldStatus.Error {
  background-color: #f23b3b;
}

.SEOValidationFieldStatus.Ok {
  background-color: #48d660;
}

.SEOVAlidationFieldValue {
  overflow-wrap: break-word;
  width: 100%;
  font-size: 1rem;
  margin-top: 0.5rem;
  color: #4a5568;
}
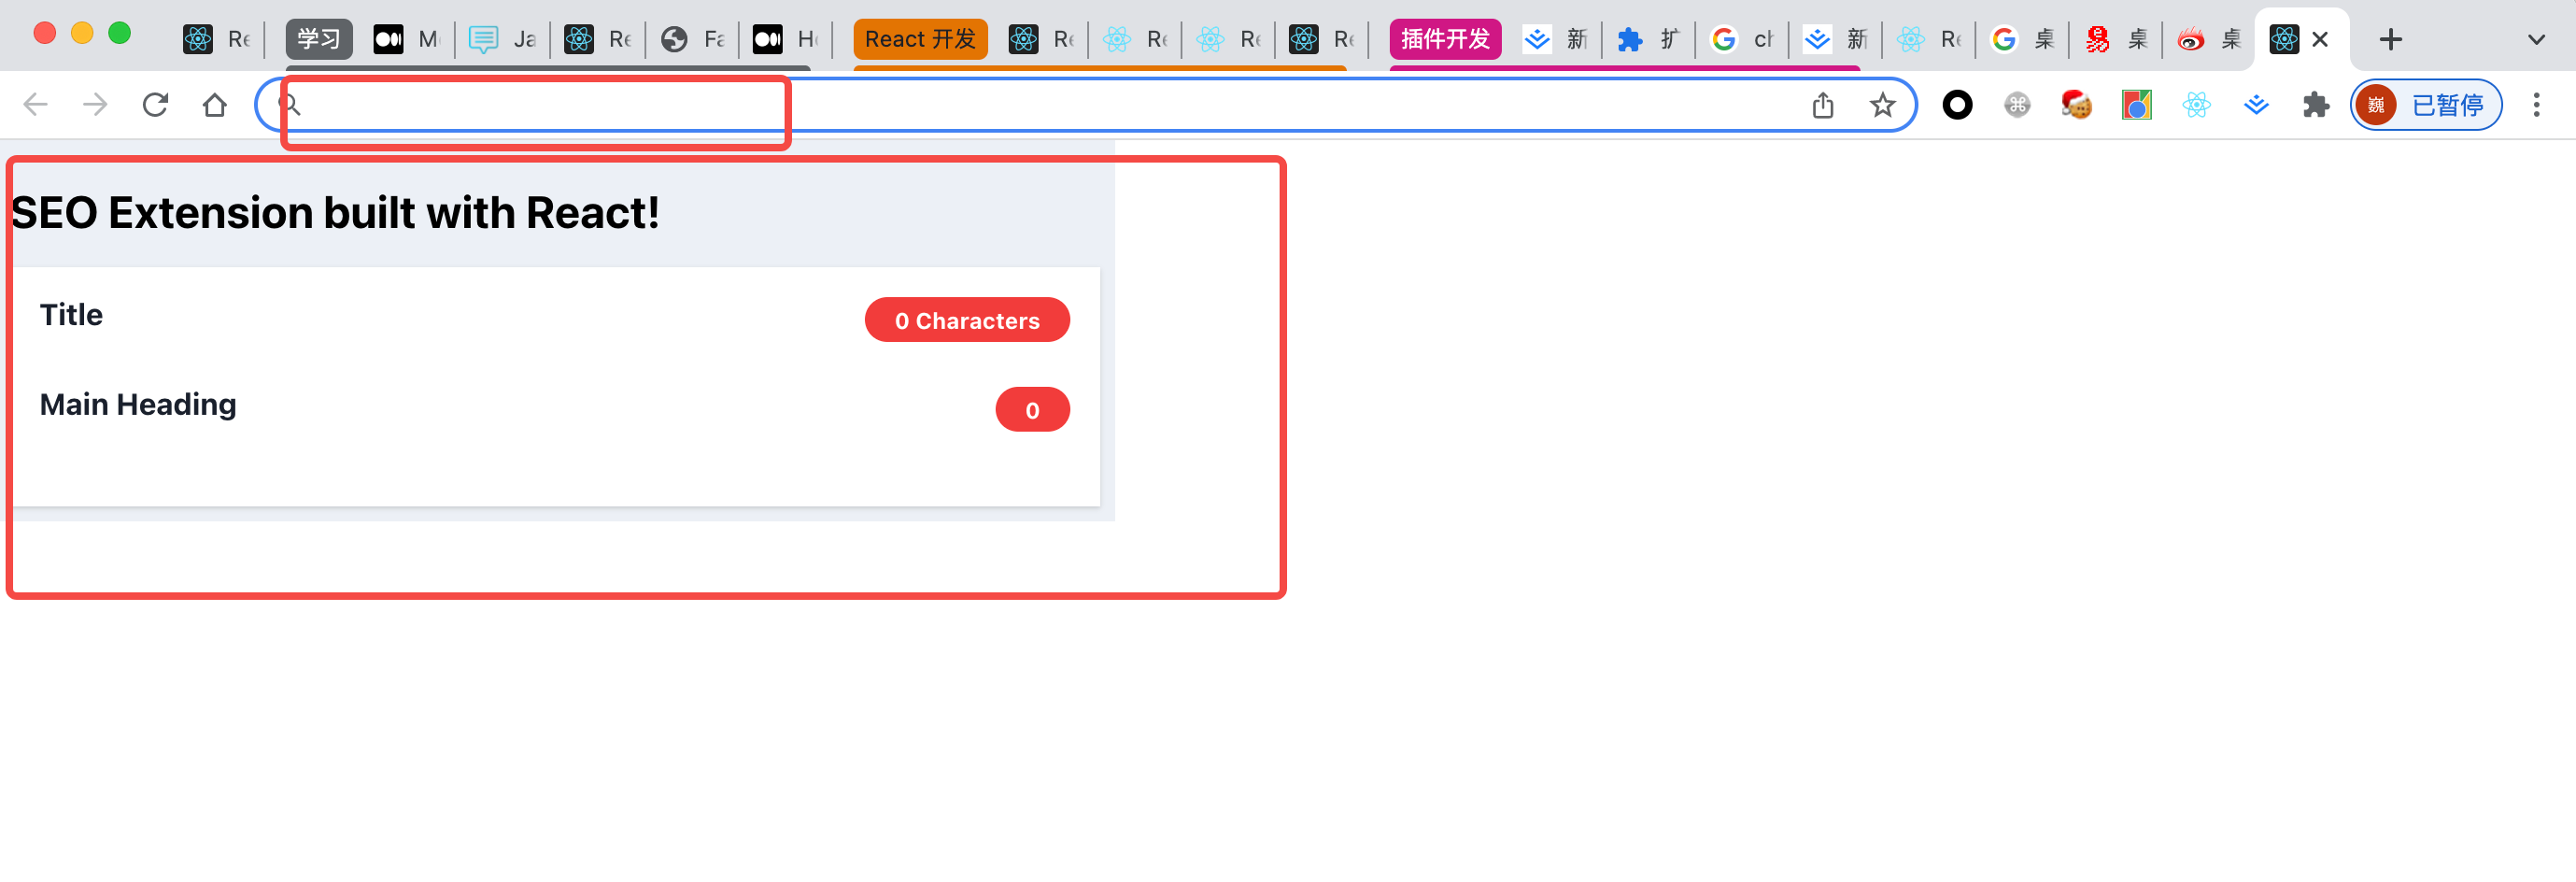
Nice! We have successfully written a new Tab page template, logic and style, and created Content script logic. Finally, our presentation effect is as follows:
Then we need to build the code, because we use TypeScript syntax to write the content, build the logic of the content into a separate JS output, install the craco dependency, and then modify the corresponding script:
yarn add -D craco
// package.json
"scripts": {
    "start": "react-scripts start",
    "build": "INLINE_RUNTIME_CHUNK=false craco build",
    "test": "react-scripts test",
    "eject": "react-scripts eject"
  },
Change react scripts to craco.
Then create a new craco config. JS, add the following:
module.exports = {
  webpack: {
    configure: (webpackConfig, { env, paths }) => {
      return {
        ...webpackConfig,
        entry: {
          main: [
            env === "development" &&
              require.resolve("react-dev-utils/webpackHotDevClient"),
            paths.appIndexJs,
          ].filter(Boolean),
          content: "./src/chromeServices/DOMEvaluator.ts",
        },
        output: {
          ...webpackConfig.output,
          filename: "static/js/[name].js",
        },
        optimization: {
          ...webpackConfig.optimization,
          runtimeChunk: false,
        },
      };
    },
  },
};
When you are ready, start building: yarn`` build. We will find that the output of the build directory is as follows:
Write at the end
In this article, we fully experienced the use of React+TypeScript to develop a new Tab content display page and content communication script, and then built a sub file for craco by configuring react scripts, and directly developed the native pop page. Through this fusion technology, we successfully developed a Chrome plug-in similar to the Nuggets framework.
What this article does not introduce is the background script, and the overall plug-in content is not perfect. I hope interested readers can continue to explore and improve it.

❤️/ Thank you for your support/
The above is all the content of this sharing. I hope it will help you_
If you like, don't forget to share, like and collect~
Welcome to official account occupation bus, the three brothers from bytes, shrimp skins and silver merchants, sharing programming experience, technical dry cargo and career planning, helping you to walk in the big factory without any detours.