JavaFX dialog boxes are mainly divided into prompt dialog boxes and file dialog boxes. The prompt dialog boxes are divided into message dialog boxes, warning dialog boxes, error dialog boxes and confirmation dialog boxes. These four dialog boxes are expressed by Alert control and distinguished by dialog box types, such as AlertType.INFORMATION for message dialog box, AlertType.WARNIN for warning dialog box, AlertType.ERROR for error dialog box, AlertType.CONFIRMATION for confirmation dialog box. In addition, the Alert tool provides the following methods to manipulate the dialog box:
setTitle: Set the title of the dialog box.
setHeaderText: Set the header text of the dialog box.
setContentText: Set the content text of the dialog box.
show: Display the dialog box.
Show AndWait: Display the dialog box and wait for the button to return. The return type of this method is Optional < ButtonType >, which describes whether the confirmation dialog box selects the confirm button or the cancel button.
Next, several examples of the implementation of prompt dialog boxes are listed. First, message dialog boxes. Its calling code examples are as follows:
		Button btn1 = new Button("MsgBox"); // Create a button
		btn1.setOnAction(new EventHandler<ActionEvent>() { // Setting the Click Event of the Button
			@Override
			public void handle(ActionEvent arg0) { // Handling click events
				Alert alert = new Alert(Alert.AlertType.INFORMATION); // Create a message dialog box
				alert.setHeaderText("Today's weather"); // Set the header text of the dialog box
				// Set the content text of the dialog box
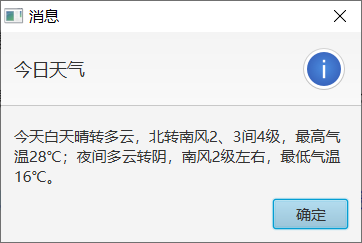
				alert.setContentText("Today, the day is clear and cloudy, and the north wind turns to the south wind with 4 grades. The highest temperature is 28.℃;Cloudy night turns cloudy, south wind level 2 or so, minimum temperature 16℃. ");
				alert.show(); // display a dialog box
			}
		});
		flowPane.getChildren().add(btn1); // Add a button to the streaming pane
Running the test program that contains the above code, the dialog box pops up after clicking the button as shown in the figure below. You can see that the prompt icon of the message dialog box is a circle with an exclamation mark embedded in it.
Next is the warning dialog box, whose call code example is as follows:
		Button btn2 = new Button("alert"); // Create a button
		btn2.setOnAction(new EventHandler<ActionEvent>() { // Setting the Click Event of the Button
			@Override
			public void handle(ActionEvent arg0) { // Handling click events
				Alert alert = new Alert(Alert.AlertType.WARNING); // Create a warning dialog box
				alert.setHeaderText("Compile warnings"); // Set the header text of the dialog box
				// Set the content text of the dialog box
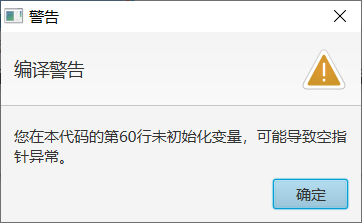
				alert.setContentText("You do not initialize variables in line 60 of this code, which may cause null pointer exceptions.");
				alert.show(); // display a dialog box
			}
		});
		flowPane.getChildren().add(btn2); // Add a button to the streaming pane
Run the test program that contains the above code. The dialog box that pops up after clicking the button is shown in the following figure. It can be seen that the prompt icon of the warning dialog box is a triangle box with an exclamation mark embedded in it.
Again, the error dialog box, whose call code example is as follows:
		Button btn3 = new Button("Error dialog box"); // Create a button
		btn3.setOnAction(new EventHandler<ActionEvent>() { // Setting the Click Event of the Button
			@Override
			public void handle(ActionEvent arg0) { // Handling click events
				Alert alert = new Alert(Alert.AlertType.ERROR); // Create an error dialog box
				alert.setHeaderText("Fatal error"); // Set the header text of the dialog box
				// Set the content text of the dialog box
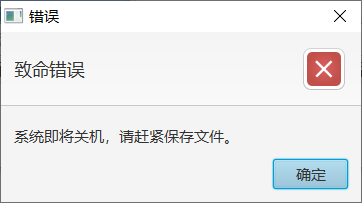
				alert.setContentText("The system is about to shut down. Please save the file as soon as possible.");
				alert.show(); // display a dialog box
			}
		});
		flowPane.getChildren().add(btn3); // Add a button to the streaming pane
Run the test program that contains the above code. The dialog box that pops up after clicking the button is shown in the following figure. You can see that the prompt icon of the error dialog box is a rounded box with an embedded crossmark.
Finally, the confirmation dialog box replaces the show method with the show AndWait method. The specific invocation code example is as follows:
		Button btn4 = new Button("ConfirmDialog"); // Create a button
		btn4.setOnAction(new EventHandler<ActionEvent>() { // Setting the Click Event of the Button
			@Override
			public void handle(ActionEvent arg0) { // Handling click events
				Alert alert = new Alert(Alert.AlertType.CONFIRMATION); // Create a confirmation dialog
				alert.setHeaderText("Reminder"); // Set the header text of the dialog box
				// Set the content text of the dialog box
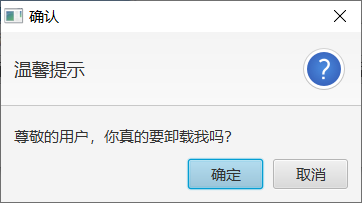
				alert.setContentText("Dear users, do you really want to uninstall me?");
				// Display the dialog box and wait for the button to return
				Optional<ButtonType> buttonType = alert.showAndWait();
				// Determine whether the type of button returned is determined or cancelled, and then proceed separately accordingly.
				if (buttonType.get().getButtonData().equals(ButtonBar.ButtonData.OK_DONE)) { // Click the OK_DONE button
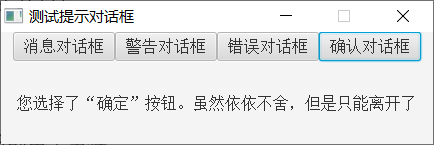
					label.setText("You selected the OK button. Although reluctant to give up, but can only leave");
				} else { // Click the Cancel button CANCEL_CLOSE
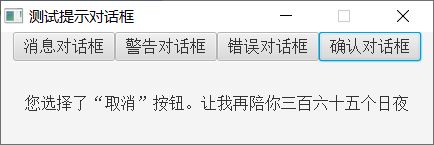
					label.setText("You selected the Cancel button. Let me accompany you three hundred and sixty-five more days and nights");
				}
			}
		});
		flowPane.getChildren().add(btn4); // Add a button to the streaming pane
Run the test program that contains the above code. The dialog box that pops up after clicking the button is shown in the following figure. You can see that the prompt icon of the confirmation dialog box is a circle with embedded question marks.
Click the confirmation button and cancel button on the confirmation dialog box respectively. The window interface after the disappearance of the dialog box is shown in the following two figures.
In addition to prompt dialog box, there are file dialog box FileChooser, which is subdivided into file opening dialog box and file saving dialog box. The common methods of FileChooser are as follows:
setTitle: Set the title of the file dialog box.
SetInitial Directory: Set the initial directory of the file dialog box.
GetExtension Filters: Get an extension filter for the file dialog box. Calling the filter's add method or addAll method can add a new file type filter.
Show OpenDialog: Display the file to open the dialog box. This method returns a selected file object.
Show Open MultipleDialog: Displays the file open dialog box, and the dialog box supports the simultaneous selection of multiple files. This method returns a list of selected files.
Show Save Dialog: Displays the file save dialog box. This method returns a file object to be saved, which may or may not exist.
Then look at the application scenario of a file dialog box. Now I'm ready to open a picture for processing. Since the image file contains jpg, gif, bmp, png and other formats, several main image extensions have to be added when creating the file type filter. Here is an example of calling code to open the picture dialog box:
		Button btn1 = new Button("File Open Dialog Box"); // Create a button
		btn1.setOnAction(new EventHandler<ActionEvent>() { // Setting the Click Event of the Button
			@Override
			public void handle(ActionEvent arg0) { // Handling click events
				FileChooser chooser = new FileChooser(); // Create a file dialog box
				chooser.setTitle("Open the file"); // Set the title of the file dialog box
				chooser.setInitialDirectory(new File("E:\\")); // Set the initial directory of the file dialog box
				// Add filters of multiple file types to the file dialog box
				chooser.getExtensionFilters().addAll(
						new FileChooser.ExtensionFilter("All documents", "*.*"),
						new FileChooser.ExtensionFilter("All pictures", "*.jpg", "*.gif", "*.bmp", "*.png"));
				// Display file opens dialog box, and this dialog box supports simultaneous selection of multiple files
				File file = chooser.showOpenDialog(stage); // Display File Open Dialog Box
				if (file == null) { // File object is empty, indicating that no files have been selected
					label.setText("No files were selected");
				} else { // File object is not empty, indicating that a file has been selected
					label.setText("The file path to open is:"+file.getAbsolutePath());
				}
			}
		});
		flowPane.getChildren().add(btn1); // Add a button to the streaming pane
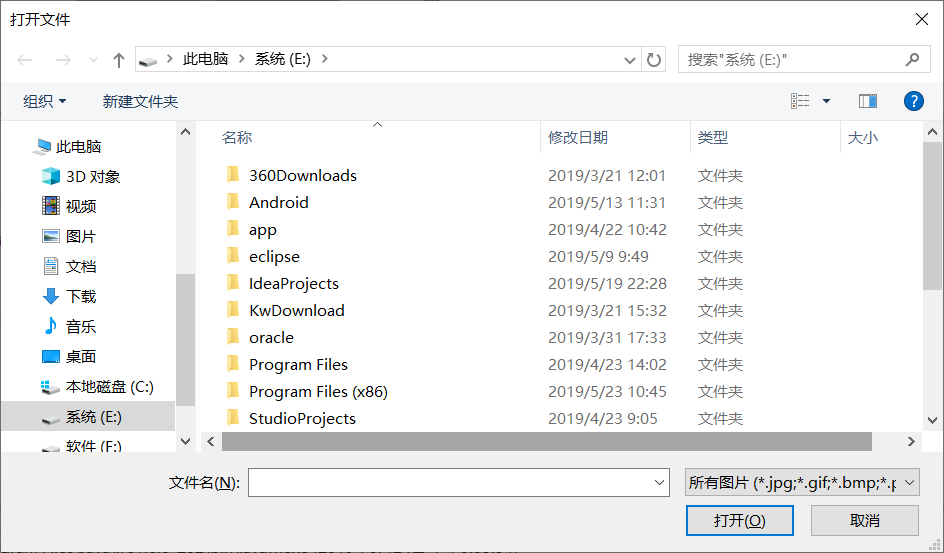
Run the test program that contains the above code. The dialog box pops up after clicking the button as shown in the following figure.
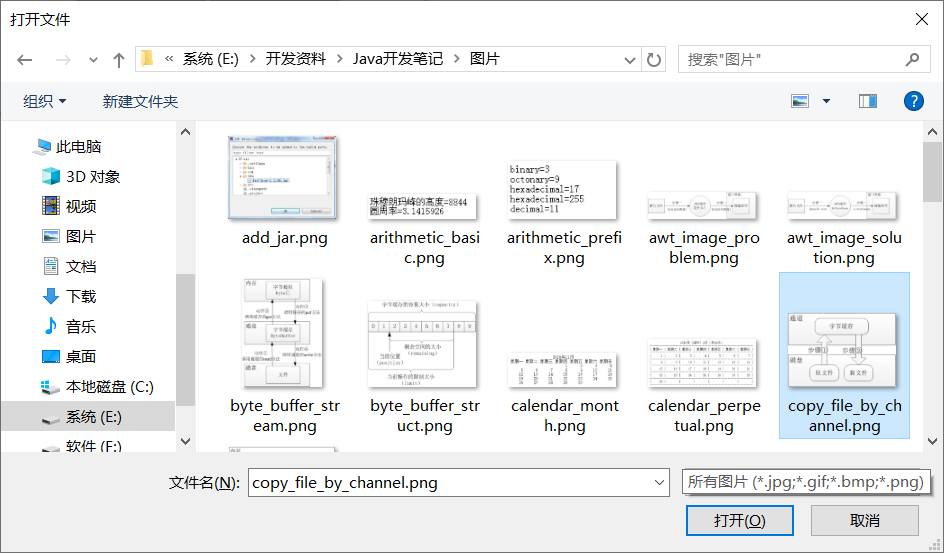
Select a picture file in a directory in the file dialog box, and the dialog interface is shown in the following figure.
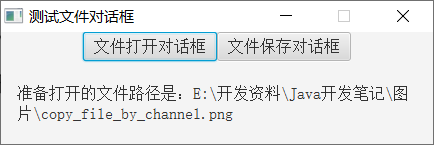
Then click the OK button and go back to the window interface of the main program as shown in the figure below. It can be seen that the main program has successfully obtained the full path of the file.
Then verify the process of using the file save dialog box. This time, we expect to save a paragraph of text to the text file. Then the code of the dialog box is as follows:
		Button btn2 = new Button("File Save dialog"); // Create a button
		btn2.setOnAction(new EventHandler<ActionEvent>() { // Setting the Click Event of the Button
			@Override
			public void handle(ActionEvent arg0) { // Handling click events
				FileChooser chooser = new FileChooser(); // Create a file dialog box
				chooser.setTitle("Save files"); // Set the title of the file dialog box
				chooser.setInitialDirectory(new File("E:\\")); // Set the initial directory of the file dialog box
				// Create a File Type Filter
				FileChooser.ExtensionFilter filter = new FileChooser.ExtensionFilter("text file(*.txt)", "*.txt");
				// Add File Type Filter to File Dialog Box
				chooser.getExtensionFilters().add(filter);
				File file = chooser.showSaveDialog(stage); // Display File Save Dialog Box
				if (file == null) { // File object is empty, indicating that no files have been selected
					label.setText("No files were selected");
				} else { // File object is not empty, indicating that a file has been selected
					label.setText("The file path to be saved is:"+file.getAbsolutePath());
				}
			}
		});
		flowPane.getChildren().add(btn2); // Add a button to the streaming pane
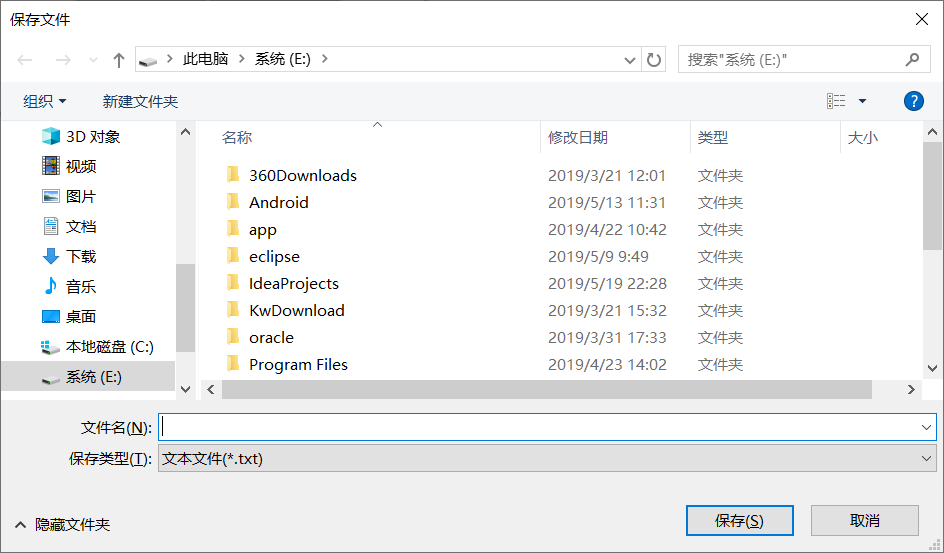
Run the test program that contains the above code. The dialog box pops up after clicking the button as shown in the following figure.
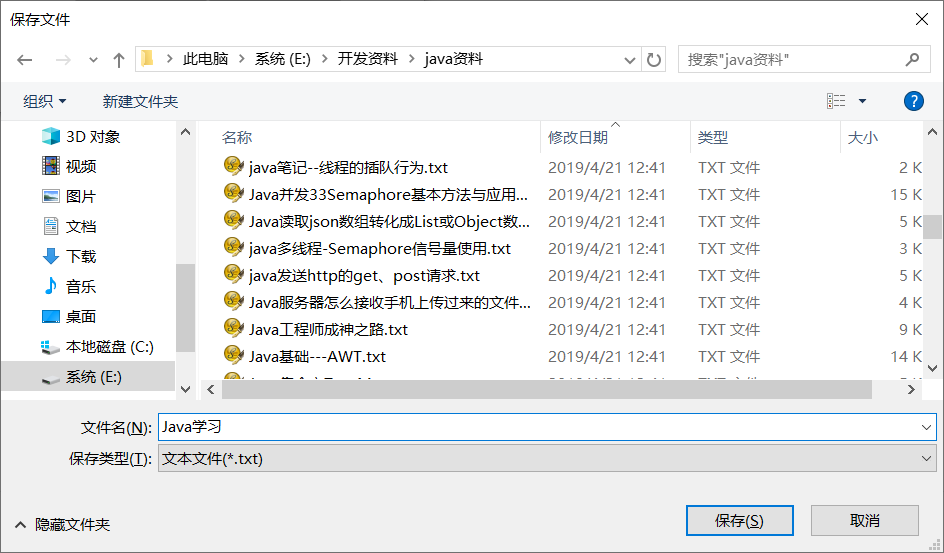
Enter the specified directory in the file dialog box and fill in the file name to be saved in the file name column below the dialog box. The dialog interface is shown in the following figure.
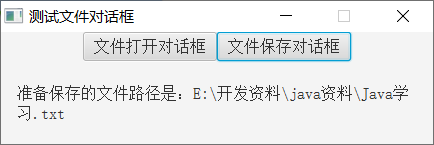
Then click the OK button and go back to the window interface of the main program as shown in the figure below. You can see that the main program has also obtained the full path of the file.
See more Java technology articles< Java Development Notes (Preface) Chapter Program Directory>