java Transformation Road - database (I)
Those who discipline themselves are enough to convince others, and small steps can reach thousands of miles.
As mobile developers, although they are familiar with java syntax, they are only the tip of the iceberg for back-end development. Self discipline is not a temporary brain fever. Ideas need to be put into action. Here, I record my learning achievements and provide a learning route for Taoists who want to enter the back end of the pit but don't know where to start (dig out a bottomless abyss).
development environment
The installation and configuration of some software for windows and macOs are also different. For my macOs system, future environment installation will follow the steps of mac. Windows is relatively simple, so I won't introduce it more.
Mysql
MySQL is the most popular relational database management system. As the basis of back-end development, start with MySQL!
1. Mysql installation
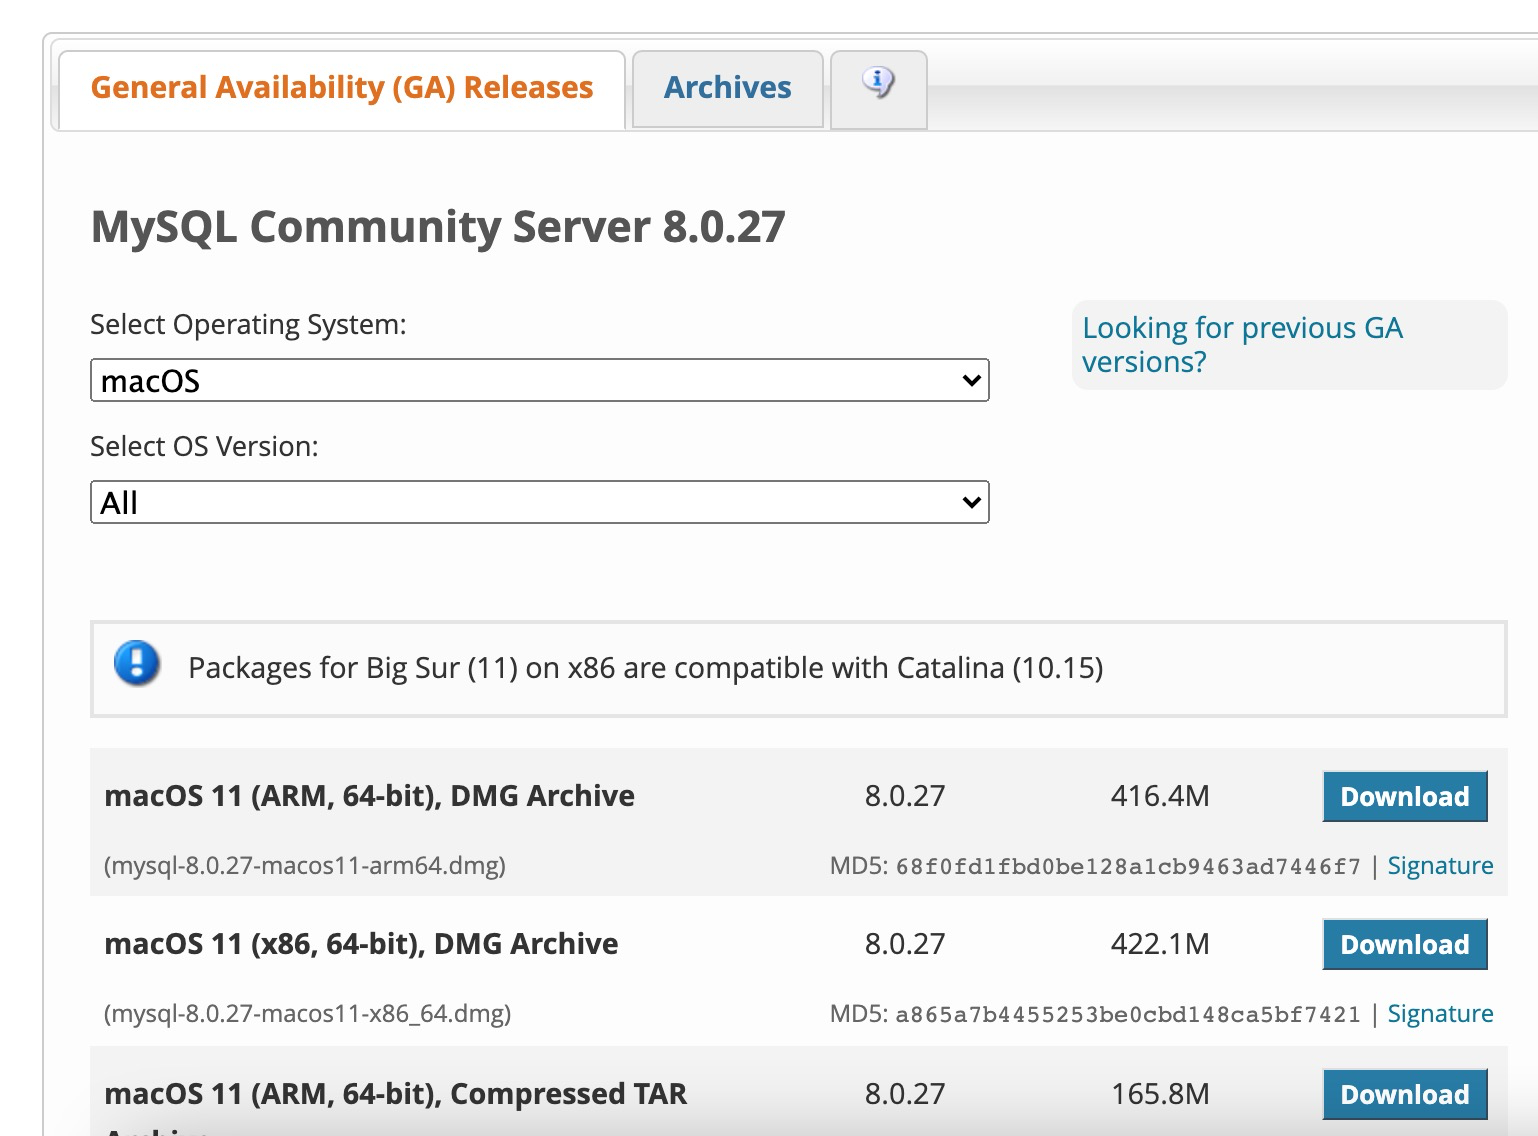
First go Mysql official website , download the installation package corresponding to your own system and install all the way next. Note that you must download the corresponding version of the system, otherwise an error will be reported when running in the future, and you have to uninstall and reinstall. My system architecture is MacOS 11 (x86, 64 bit) and DMG archive. Don't ask me why I know...
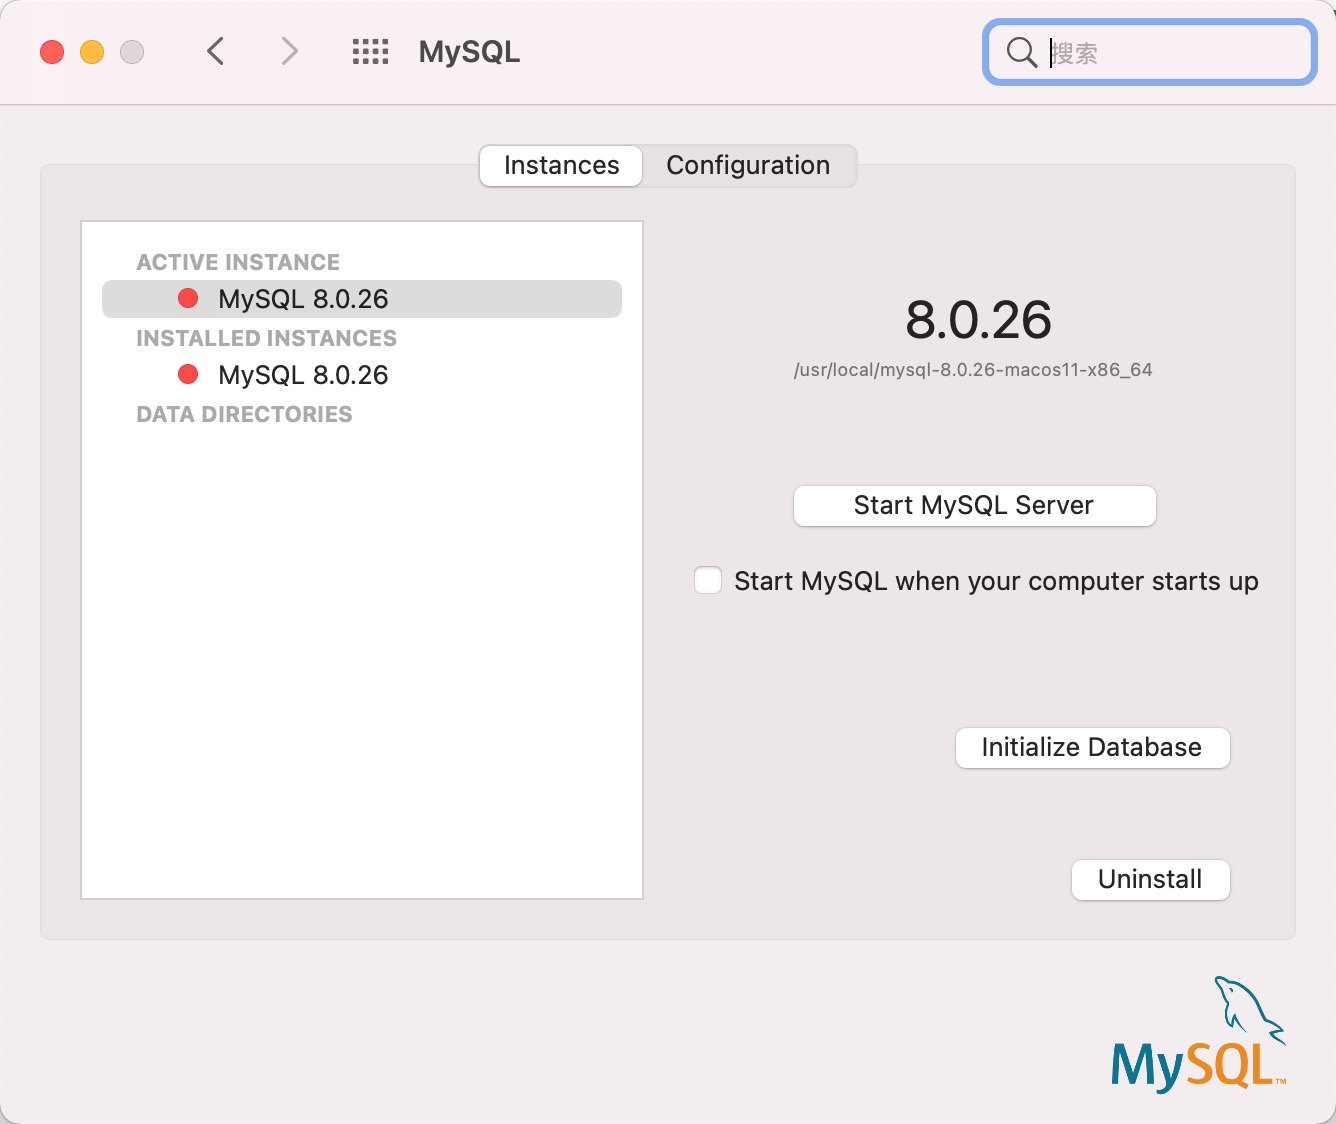
After installation, a MySql icon will appear in the system preferences

Click Start MySQL Server to start the mysql service.
2. Environmental variables
Next, we need to use sql statements on the command line. First, we need to configure environment variables and enter VIM ~ /. In the terminal base_ Profile open the configuration file and append mysql environment variable after path:
export MYSQL=/usr/local/mysql/bin
export PATH=$MYSQL:$PATH;
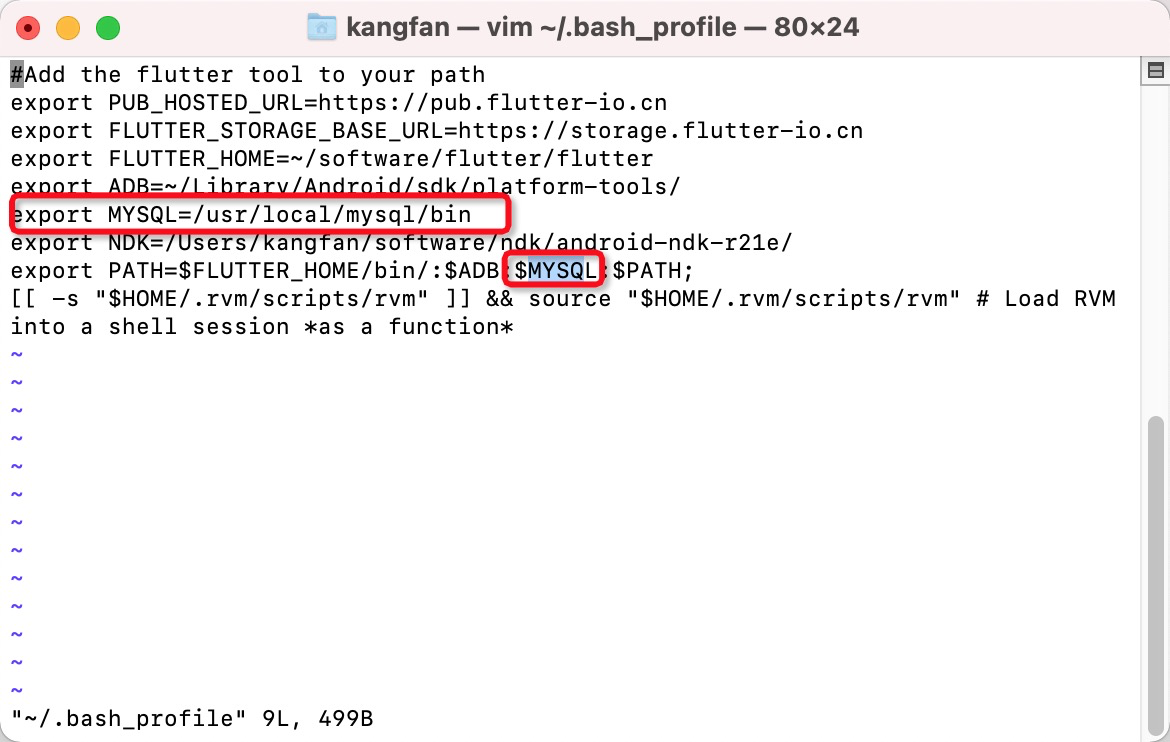
Type i to edit, press esc to exit the editing mode, and use: wq to save. After the configuration is completed, enter the command source ~ / base_ Profile refresh resource.
Check whether the environment variables are configured successfully:
Enter the command mysql - version on the terminal, and the version number of mysql will be printed.

Mysql syntax
Note that each command must be followed by a semicolon to represent the completion of command input.
Mysql connection
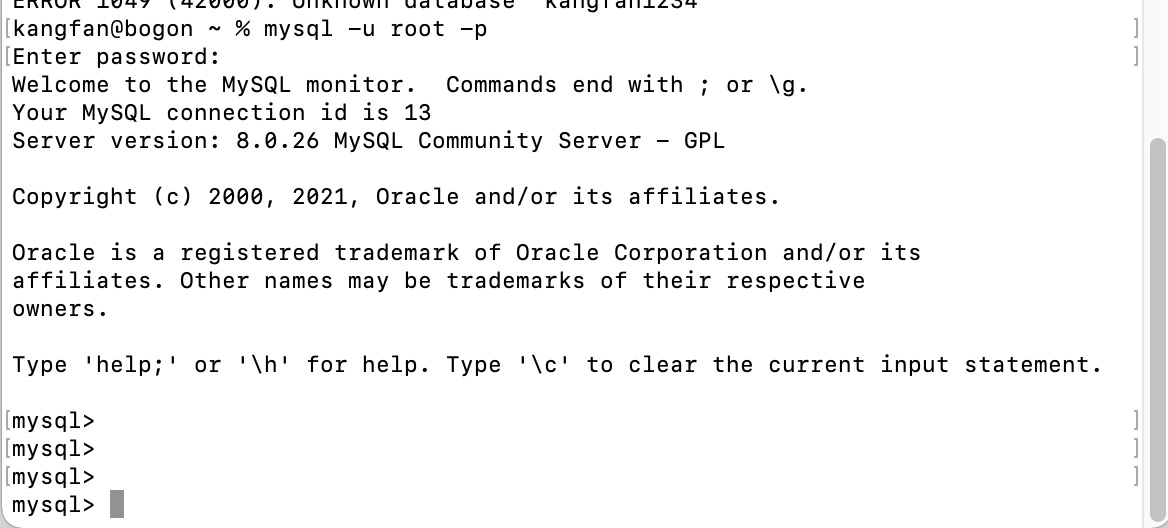
Type the command at the terminal
kangfan@bogon ~ % mysql -u root -p
Enter password:
The first installation password is empty. Just press enter. Log in successfully and enter mysql command mode:
Mysql exit
Use the exit or quit command to exit mysql mode
mysql> exit;
Bye

mysql> quit;
Bye
Mysql password modification
In mysql command mode, use set password for root@localhost = password(123456);
You can change the password, where root is your own database user name, and 123456 is replaced with the password you want.
Create database
Create a database using the create database database database name
mysql> create database empdb;
Query OK, 1 row affected (0.00 sec)
Successfully created as described above
View all databases
Use show databases; Command to view all databases in the current server
mysql> show databases;
+--------------------+
| Database           |
+--------------------+
| empdb              |
| information_schema |
| mysql              |
| performance_schema |
| sys                |
| test1              |
+--------------------+
6 rows in set (0.01 sec)
Select the database to operate on
If you want to add, delete, modify and query a database, you need to specify the corresponding database
mysql> use empdb
Reading table information for completion of table and column names
You can turn off this feature to get a quicker startup with -A

Database changed
Database changed appears, indicating that the selection was successful
Create table
A table consists of columns
Column rules:
- (1) Column: column name data type (length) non NULL constraint
Column name, table name, database name: in English letters, Numbers, try not to use special characters. If spaces are needed, use double quotation marks to introduce the field: "zz bb" - (2) mysql data type:
Character:
char(n): fixed length, cannot exceed or shrink
varchar(n): it becomes longer and cannot exceed. It shrinks when the data does not meet the length
Number:
int: Auto increment column
float
numeric(38,2): the total number of digits is 38, with 2 decimal places
Date:
date: mm / DD / yy
time: hour, minute and second
timestamp: month, day, hour, minute and second - (3) Non null: whether the data column is allowed to be null
Primary key constraint: non empty
unique: can be null (only one is null)
(4) Restraint
Primary key constraint: primary key
The data that can identify us is unique (very important). The query speed is very fast and does not repeat
- Unique constraint: unique
You can make a column of data not duplicate - Default constraint: default
When the user does not give a value in this column, it will be filled with the default value - Check constraint: check:mysql is invalid
Check the validity of the data
eg. check(sex = 'male' or sex = 'female') - Foreign key constraint: foreign key
When the data in one table must use the data in one column of another table, they can be related by using foreign keys
It is required that the foreign key of one table must be the primary key of another table
To create a table, use the following command:
create table table name (column name column rule constraint)
mysql> create table product
    -> (
    ->   id  int auto_increment primary key,
    ->   productName varchar(50) unique not null,
    ->   price float  not null DEFAULT 0,
    ->   unitsInStock int  not null,
    ->   discontinued int  not null
    ->
    -> );
Query OK, 0 rows affected (0.01 sec)
After successful creation, use the following command to view the table
View all tables in the database
Use show tables; Command to view all tables in the current database. This command needs to select the database to operate first, otherwise an error will be reported. We found the product table we just created
show tables;
+-----------------+
| Tables_in_empdb |
+-----------------+
| dept            |
| emp             |
| product         |
+-----------------+
3 rows in set (0.00 sec)
insert
insert into table name values (field 1, field 2, field 3... Field n); Used to insert a piece of data into a table
mysql> insert into product values(0,'abcd',28.99,20,1);
Query OK, 1 row affected (0.00 sec)
The log is printed successfully. Let's make a simple query to see if there is this data
Query all information in a table
Use select * from table name; Query all information in a table
mysql> select * from product;
+----+-------------+-------+--------------+--------------+
| id | productName | price | unitsInStock | discontinued |
+----+-------------+-------+--------------+--------------+
|  1 | abcd        | 28.99 |           20 |            1 |
|  3 | qwer        |  8.99 |            0 |           12 |
+----+-------------+-------+--------------+--------------+
2 rows in set (0.00 sec)
It proves that the above has been inserted successfully.
Modify data
Using the update table name set column = new value where condition, modify the price value of the data with id 1 to 22.2:
mysql> update product set price=22.2 where id=1;
Query OK, 1 row affected (0.00 sec)
Rows matched: 1  Changed: 1  Warnings: 0

mysql> select * from product;
+----+-------------+-------+--------------+--------------+
| id | productName | price | unitsInStock | discontinued |
+----+-------------+-------+--------------+--------------+
|  1 | abcd        |  22.2 |           20 |            1 |
|  3 | qwer        |  8.99 |            0 |           12 |
+----+-------------+-------+--------------+--------------+
2 rows in set (0.00 sec)
Query again after modification. It can be seen that the modification has been successful
Delete data
Use the delete from table name where condition to delete the data with id 3:
mysql> delete from product where id=3;
Query OK, 1 row affected (0.00 sec)

mysql> select * from product;
+----+-------------+-------+--------------+--------------+
| id | productName | price | unitsInStock | discontinued |
+----+-------------+-------+--------------+--------------+
|  1 | abcd        |  22.2 |           20 |            1 |
+----+-------------+-------+--------------+--------------+
1 row in set (0.00 sec)
Visible has been deleted successfully.
Navicat
The above is just a simple addition, deletion, modification and query. Although the sql operation on the command line is very difficult, it is extremely inconvenient. Therefore, we usually download a visualization software Navicat for database management,
1. After installation, click connection → mysql in the upper left corner to connect to the database

2. Enter the connection name casually, enter the user name and password, and click the Test Connection button to test whether the connection is successful, as shown below. After the connection is successful, click save
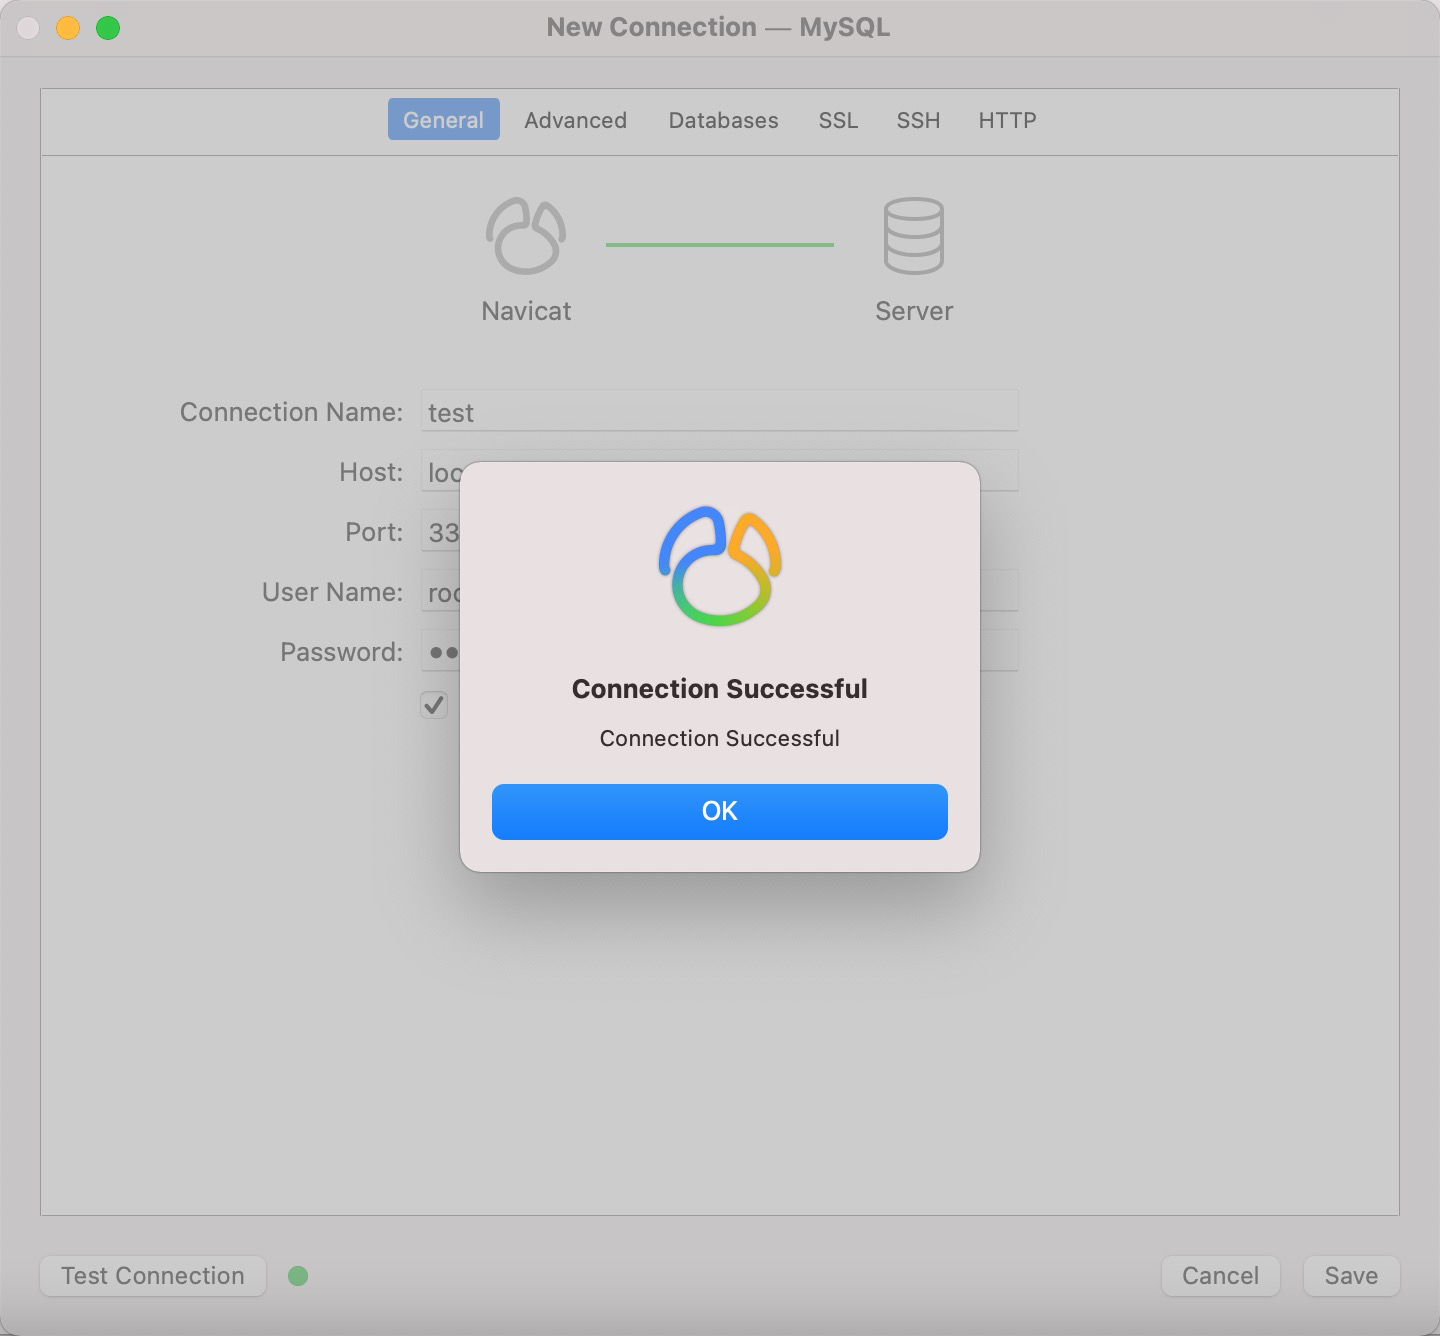
3. After the connection is successful, open the database you just operated, and you can see the table and table data:

summary
The above is the creation of databases and tables, as well as simple addition, deletion, modification and query statements. The next note focuses on the advanced query of mysql, which is also relatively difficult sql statements.