Learning objectives
- Master the key points of using JavaScript conditional structure statements
- Master the simple method of JavaScript to get and modify HTML elements
- Master the usage of common events in JavaScript
- Master the key and difficult points of using JavaScript circular structure statements
- Master the use of break and continue keywords in JavaScript
JavaScript conditional statement
In JavaScript, we can use the following conditional statements:
- If statement - use this statement to execute code only if the specified condition is true
- if... else statement - executes code when the condition is true and other code when the condition is false
- If... else if... else statement - use this statement to select one of multiple code blocks to execute
- switch statement - use this statement to select one of multiple code blocks to execute
1. if statement
The statement executes code only if the specified condition is true.
Syntax:
if ( /*condition*/ ) {
	/*Code executed when the condition is true*/
}
Case 01
<!DOCTYPE html>
<html>
<head>
<meta charset="UTF-8">
<title></title>
<script src="/js.js" type="text/javascript" charset="utf-8"></script>
</head>
<script type="text/javascript">
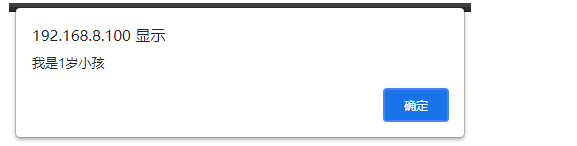
var age = 1;
if (age > 3) {//false
//The following sentence will pop up a warning box with the content "I'm not a 3-year-old child"
alert('I'm not a 3-year-old');
}else{
//Code block
alert('I'm a 3-year-old');
}
</script>
<body>
</body>
</html>
Effect display
3. if... else statement
The supplement to if... Else can have any number of branches. The if branch must be in the front, the else if statement must be in the middle, the else statement must be in the back, and the else statement can not be written. At most one option can be executed for multiple branches.
grammar
if ( /*Condition 1*/ ) {
	/*Code executed when condition 1 is true*/
}
else if ( /*Condition 2*/ ) {
	/*Code executed when condition 2 is true*/
}
...
else{
	/*Code executed when neither condition 1 nor condition 2 is true*/
}
Case 03
<!DOCTYPE html>
<html>
<head>
<meta charset="UTF-8">
<title></title>
</head>
<script type="text/javascript">
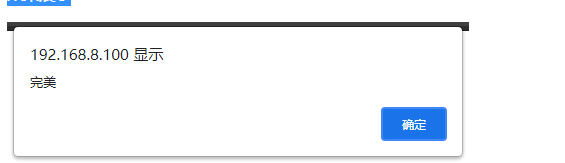
var mark = 90;
if (mark < 60) {
//The following sentence will pop up a warning box with the content "poor"
alert('difference');
}else if(mark >= 60 && mark < 70){
//The following sentence will pop up a warning box with the content "pass"
alert('pass');
}else if(mark >= 70 && mark < 80){
//The following sentence will pop up a warning box with the content "good"
alert('good');
}else if(mark >= 80 && mark < 90){
//The following sentence will pop up a warning box with the content "excellent"
alert('excellent');
}else{
//The following sentence will pop up a warning box with the content "perfect"
alert('perfect');
}
</script>
<body>
</body>
</html>
Effect display
4. JavaScript switch statement
The difference between switch statement and if is:
- The switch statement can only judge whether a variable is equal to a value, and the if statement can judge any condition
- switch statements can have multiple branches executed at the same time, and if statements can only have one branch executed at most
- Switch statements can use break statements, but if statements cannot use switch statements
Syntax:
var n=1;
switch(n) {
	case 1: //If n=1, execute the code here
		alert('n=1'); //Pop up prompt
		break; //The execution will stop here and the following code will no longer be executed
	case 2: //If n=2, execute the code here
		alert('n=2'); //Pop up prompt
		break; //The execution will stop here and the following code will no longer be executed
	default: //If n is not equal to 1 or 2, execute the code here
}
Case 04
<!DOCTYPE html>
<html>
<head>
<meta charset="UTF-8">
<title></title>
</head>
<body>
</body>
<script type="text/javascript">
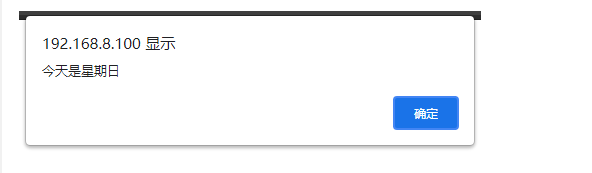
var d = 0;
switch(d) {
case 0:
alert("Today is Sunday");
break;
case 1:
alert("Today is Monday");
break;
case 2:
alert("Today is Tuesday");
break;
case 3:
alert("Today is Wednesday");
break;
case 4:
alert("Today is Thursday");
break;
case 5:
alert("Today is Friday");
break;
case 6:
alert("Today is Saturday");
break;
}
</script>
</html>
Effect display
JavaScript gets and sets HTML elements
1. Only the first HTML element can be obtained through ID attribute
var name = document.getElementById('name')
2. Get multiple HTML elements through the CLASS attribute, and use item(n) to get the nth
var text = document.getElementsByClassName('text'); // Get all elements of class=text
var first = text.item(0); // Get 1st
var first = text.item(1); // Get 2nd
3. You can get multiple HTML elements through the tag name, and use item(n) to get the nth
var button = document.getElementsByTagName('button'); // Gets all elements with the label name button
var button = text.item(0); // Get 1st
var button = text.item(1); // Get 2nd
4. Use ". Value" to set or get the value of HTML input box element
// Gets the value of the input box
var name = document.getElementById('name'); // Get the input box of id=name
var value = name.value; // Gets the value of the input box
// perhaps
var value = document.getElementById('name').value; // Gets the value of the input box with id=name

// Set and modify the value of the input box
var name = document.getElementById('name'); // Get the input box of id=name
name.value = "JavaScript Modified content"; // Change the value of the input box to "JavaScript modified content"
// perhaps
document.getElementById('name').value = "JavaScript Modified content"; // Change the value of the input box to "JavaScript modified content"
5. Use ". innerHTML" to set or get all child elements and text inside HTML bilateral elements
// Gets the content of a double label element
var value = document.getElementsByClassName('text').item(0).innerHTML;
// Set and modify the contents of double label elements
document.getElementsByClassName('text').item(0).innerHTML = "<h1>Hello</h1>";
6. Use ". innerText" to set or get all text inside HTML bilateral elements
// Gets the content of a double label element
var value = document.getElementsByTagName('button').item(0).innerText;
// Set and modify the contents of double label elements
document.getElementsByTagName('button').item(0).innerText = 'search';
Case 05
<!DOCTYPE html>
<html>
<head>
<meta charset="UTF-8">
<title></title>
</head>
<body>
<div class="text">
HTML Text content of
</div>
<input type="text" id="name" />
<button>Button</button>
</body>
<script type="text/javascript">
//Get HTML element through ID attribute
//Set and get the value of HTML input box through value
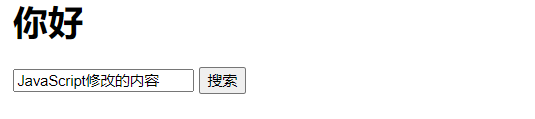
document.getElementById('name').value = "JavaScript Modified content";
//Get HTML elements through the CLASS attribute
//Set and obtain the internal elements and text of HTML ordinary tags through innerHTML
document.getElementsByClassName('text').item(0).innerHTML = "<h1>Hello</h1>";
//Get HTML element through tag name attribute
//Set and get the text of HTML ordinary tag through innerText
document.getElementsByTagName('button').item(0).innerText = 'search';
</script>
</html>
Effect display
JavaScript common events
Document loading event
window.onload = function(){
    /*Write code inside*/
}
Element click event
document.getElementById('name').onclick = function(){
    /*Write code inside*/
}
Element double click event
document.getElementById('name').ondblclick = function(){
    /*Write code inside*/
}
Event when the form input element gets focus
document.getElementById('name').onfocus = function(){
    /*Write code inside*/
}
Event when a form input element loses focus
document.getElementById('name').onblur = function(){
    /*Write code inside*/
}
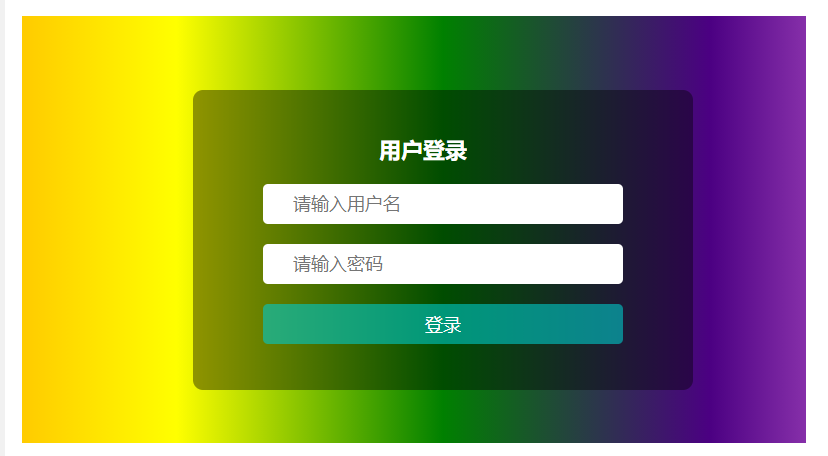
Case 06: Login
<!DOCTYPE html>
<html>
	<head>
		<meta charset="UTF-8">
		<title></title>
		<link rel="stylesheet" type="text/css" href="css/style.css"/>
		<script src="js/js.js" type="text/javascript" charset="utf-8"></script>
	</head>
	<body>
		<div id="content">
			<form>
				<div id="title">User login</div>
				<input type="text" id="name" placeholder="enter one user name" />
				<input type="text" id="pswd" placeholder="Please input a password" />
				<button type="button" id="buttom">Sign in</button>
			</form>
		</div>
	</body>
</html>
Example: CSS
body {
	background: -webkit-linear-gradient(left, red, orange, yellow, green, indigo, violet, blue);
	background: -moz-linear-gradient(left, red, orange, yellow, green, indigo, violet, blue);
	background: -o-linear-gradient(left, red, orange, yellow, green, indigo, violet, blue);
	background: linear-gradient(left, red, orange, yellow, green, indigo, violet, blue);
}

#content {
	position: absolute;
	left: 0;
	right: 0;
	top: 0;
	bottom: 0;
	margin: auto;
	width: 400px;
	height: 200px;
	border-radius: 10px;
	padding: 50px;
	background-color: rgba(0, 0, 0, 0.4);
}

#content:hover {
	background-color: rgba(0, 0, 0, 0.7);
}

form {
	height: 100%;
	display: flex;
	flex-wrap: wrap;
	align-content: center;
}

#title {
	width: 360px;
	font-size: 22px;
	text-align: center;
	margin-bottom: 20px;
	color: white;
	font-weight: bold;
}

input {
	position: relative;
	display: block;
	width: 360px;
	height: 40px;
	margin: auto;
	border-radius: 5px;
	font-size: 18px;
	outline: 0;
	border: 0;
}

input:not([type=button]) {
	width: 300px;
	margin-bottom: 20px;
	padding: 0 30px;
}
input[type=text]:focus{
	font-size: 20px;
}
button[type=button]{
	width: 360px;
	height: 40px;
	margin: auto;
	border-radius: 5px;
	font-size: 18px;
	outline: 0;
	border: 0;
	background-color: rgba(0,200,200,0.6);
	color: white;
}
button[type=button]:hover{
	background-color: rgba(0,200,200,0.8);
	color: white;
}
button[type=button]:active{
	background-color: rgba(20,200,200,0.4);
	color: white;
}
Example: JS
window.onload = function(){
	//Event when the user name input box loses focus
	document.getElementById('name').onblur = function(){
		var name = document.getElementById('name').value;
		if (!name) {
			document.getElementById('name').style.backgroundColor = 'rgba(255,100,100,0.8)';
		}
	}

	//Event when the user name input box gets focus
	document.getElementById('name').onfocus = function(){
		this.style.backgroundColor = 'white';
	}

	//Event when the password input box loses focus
	document.getElementById('pswd').onblur = function(){
		var pswd = document.getElementById('pswd').value;
		if (!pswd) {
			document.getElementById('pswd').style.backgroundColor = 'rgba(255,100,100,0.8)';
		}
	}

	//Event when the password input box gets focus
	document.getElementById('pswd').onfocus = function(){
		this.style.backgroundColor = 'white';
	}
}
Effect display
JavaScript loop statement
1.while loop
Judge the condition first. As long as the specified condition is true, the loop can always execute the code block.
Syntax:
while ( /*condition*/ ) {
	/*Code to execute*/
}
Case 07
<!DOCTYPE html>
<html>
	<head>
		<meta charset="UTF-8">
		<title></title>
	</head>
	<body>
		<div id="test"></div>
	</body>
	<script type="text/javascript">
		var i = 1;
		while (i <= 6){
			document.getElementById('test').innerHTML+='<h'+i+'>'+'The first'+i+'Level title';
			i++;
		}
	</script>
</html>
Effect display

2.do/while loop
Variant of do/while loop. It will be executed at least once regardless of whether the conditions are true or not.
Execute the code once before judging the condition. If the condition is true, the loop will be repeated.
Syntax:
do{
	/*Code to execute*/
}while ( /*condition*/ );
Case 08
<!DOCTYPE html>
<html>
	<head>
		<meta charset="UTF-8">
		<title></title>
	</head>
	<body>
		<div id="test"></div>
	</body>
	<script type="text/javascript">
		var i = 1;
		do{
			document.getElementById('test').innerHTML+='<h'+i+'>'+'The first'+i+'Level title';
			i++;
		}while (i >= 6)
	</script>
</html>
Although the condition of the loop does not hold, it is also executed once.
Effect display

3.for loop
The for loop is often used when the number of cycles is known.
Syntax:
for ( Statement 1 ; Statement 2 ; Statement 3 ) {
	/*Executed code block*/
}
explain:
- Statement 1: an operation done before the execution of the loop begins
- Statement 2: conditions of the loop, judge whether the loop conditions are met, true: execute the loop; Flash: do not execute
- Statement 3: the operation to be performed after the end of each cycle and before the start of the next cycle
Case 09
<!DOCTYPE html>
<html>
	<head>
		<meta charset="UTF-8">
		<title></title>
	</head>
	<body>
		<div id="test"></div>
	</body>
	<script type="text/javascript">
		for(var i = 0; i < 5; i++) {
			document.write("The first" + i + "loop<br>");
		}
	</script>
</html>
Effect display

break and continue statements
Both break and continue statements can control the number of cycles of a circular statement.
- The break statement is used to jump out of the entire loop.
- continue is used to skip one time in the loop.
Case 10
<!DOCTYPE html>
<html>
	<head>
		<meta charset="UTF-8">
		<title></title>
	</head>
	<body>
		<div id="test"></div>
	</body>
	<script type="text/javascript">
		for(i = 0; i < 10; i++) {
			if(i == 3) {
				break;
			}
			document.write("Article:" + i + "Secondary cycle<br>");
		}
	</script>
</html>
Effect display

Case 11
<!DOCTYPE html>
<html>
	<head>
		<meta charset="UTF-8">
		<title></title>
	</head>
	<body>
		<div id="test"></div>
	</body>
	<script type="text/javascript">
		for(i = 0; i <= 10; i++) {
			if(i == 3) continue;
			document.write("The first" + i + "loop<br>");
		}
	</script>
</html>
Effect display