reference resources:
http://www.jeecg.com/
JeecgBoot development documentation
https://github.com/jeecgboot/jeecg-boot
Recently, the project wanted to use jeecg code scaffolding for development, so I learned about it.
- JeecgBoot is a low code platform based on BPM!
- Front and back end separation architecture springboot 2 x. SpringCloud, Ant Design & Vue, mybatis plus, Shiro and JWT support microservices.
- Powerful code generator allows one click generation of front and rear code to realize low code development!
- JeecgBoot leads the new low code development mode onlinecoding - > code generator - > manual MERGE
- A series of low code capabilities: Online form, Online report, Online chart, form design, process design, report design, large screen design, etc
Source code directory structure
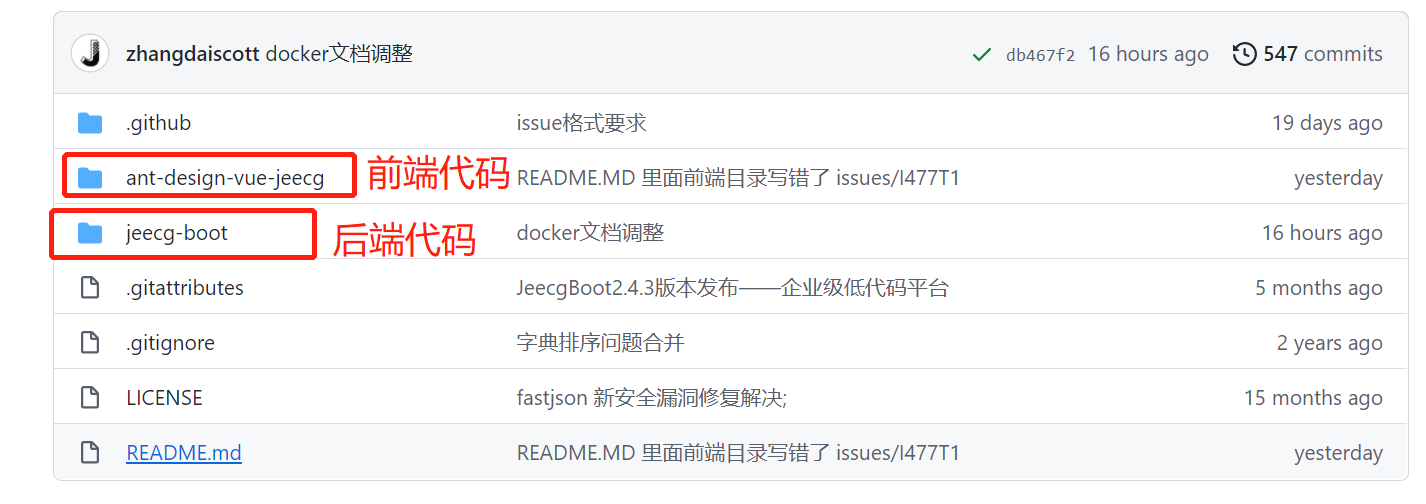
Can pass https://github.com/jeecgboot/jeecg-boot Download the relevant source code of JeecgBoot. The source code structure is as follows:
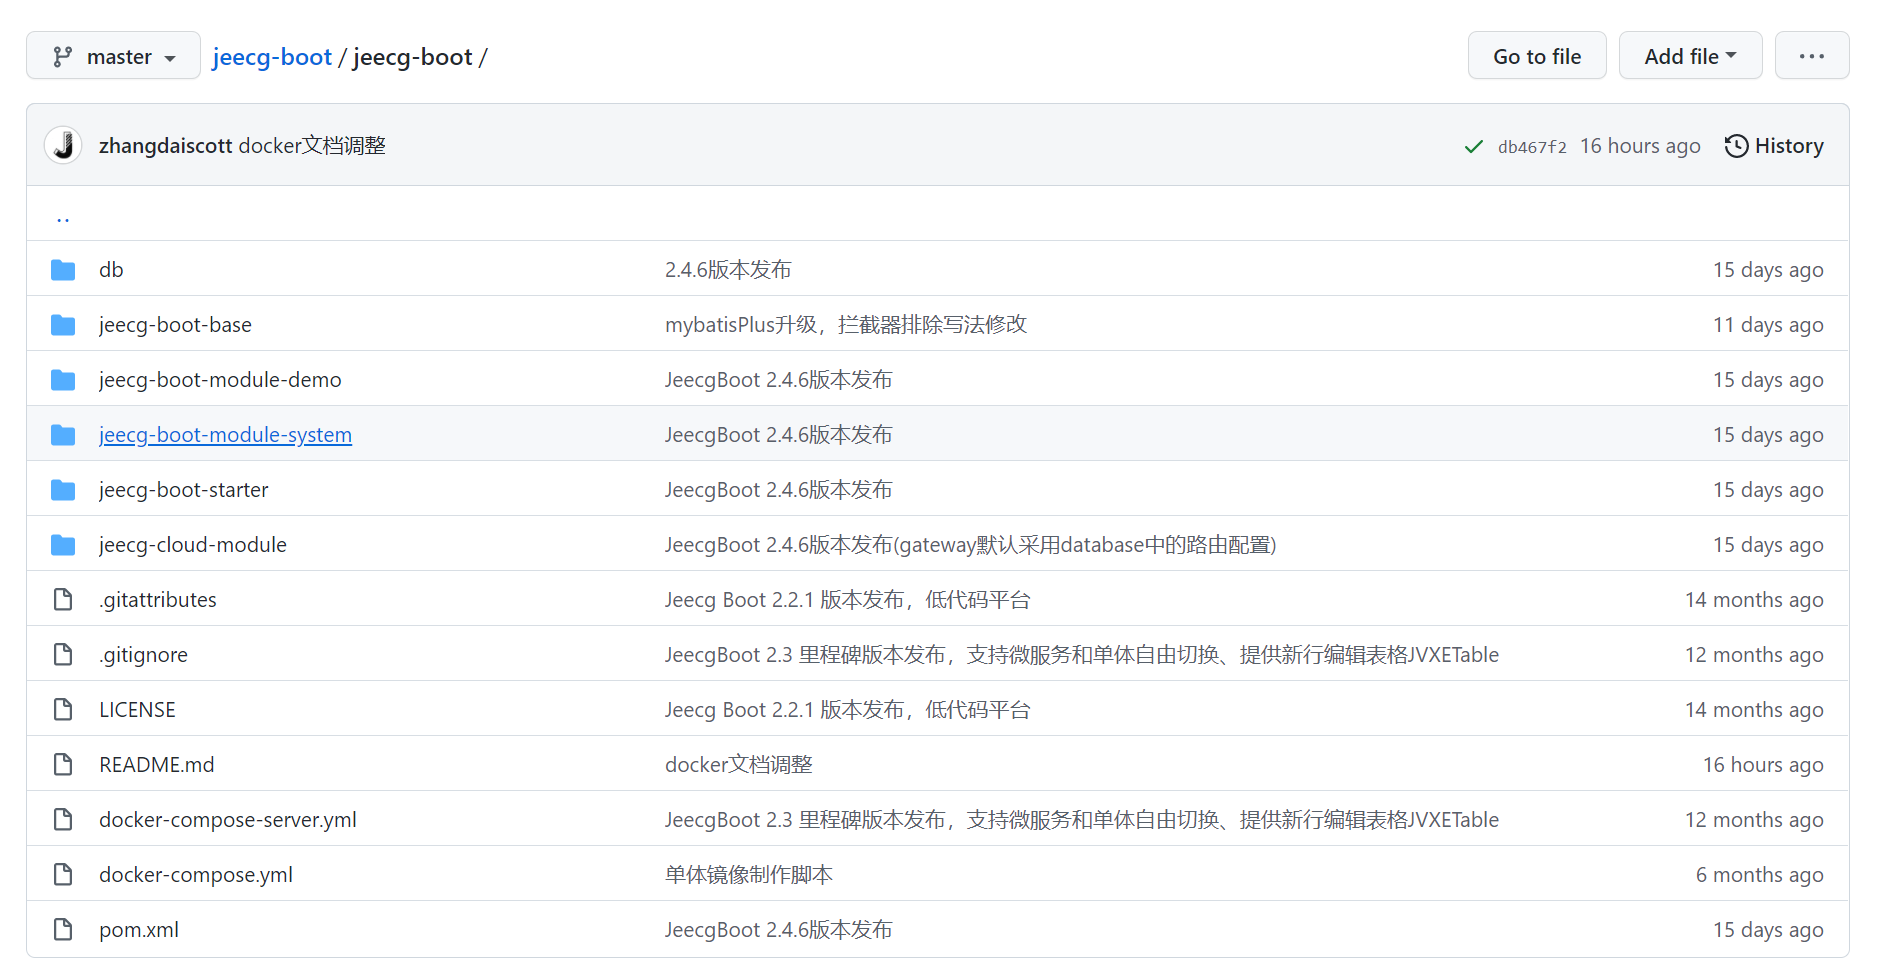
The back-end code directory structure is as follows
Project structure
├─ jeecg-boot-parent(father POM:  Project dependency modules Organization)
│  ├─ jeecg-boot-base(Common modules: tools config,Permissions, query filters, annotations, interfaces, etc.)
│  ├─ jeecg-boot-module-demo    Sample code
│  ├─ jeecg-boot-module-system (System management authority and other functions) -- Default as startup project
│  ├─ jeecg-boot-starter(Microservices starter Module, which can be deleted without microservice)
│  │  ├── jeecg-boot-starter-cloud       -- Microservice startup starter
│  │  ├── jeecg-boot-starter-job         -- xxl-job Timed task starter
│  │  ├── jeecg-boot-starter-lock        -- Distributed lock starter
│  │  ├── jeecg-boot-starter-rabbitmq    -- Message Oriented Middleware starter
│  │  ├── jeecg-boot-starter-redis       -- redis cache starter
│  ├─ jeecg-cloud-module(Micro service ecological module (can be deleted without micro service)
│  │  ├── jeecg-cloud-nacos         --Nacos Service module(8848)
│  │  ├── jeecg-cloud-gateway       --Microservice gateway module(9999)
│  │  ├── jeecg-cloud-monitor       --Microservice monitoring module (9111)
│  │  ├── jeecg-cloud-system-start  --System Microservice startup project(7001)(Start with this project system It becomes a micro service)
│  │  ├── jeecg-cloud-xxljob        --Microservices xxljob Scheduled task server (9080)
Monomer startup
The first task before using JeecgBoot for development is to start the JeecgBoot scaffold. The startup mode is divided into monomer and micro service modes,
To get started quickly, you can start in monomer mode first, and then enable the micro service mode when you go to the production environment.
back-end
(1) Initial import into jeecg system DB
Execute jeecg boot / db / jeecgboot mysql-5.7 SQL, you can select local or other environment MySQL database,
After that, you need to ensure that the subsequent mysql connection configuration is consistent with the selected DB.
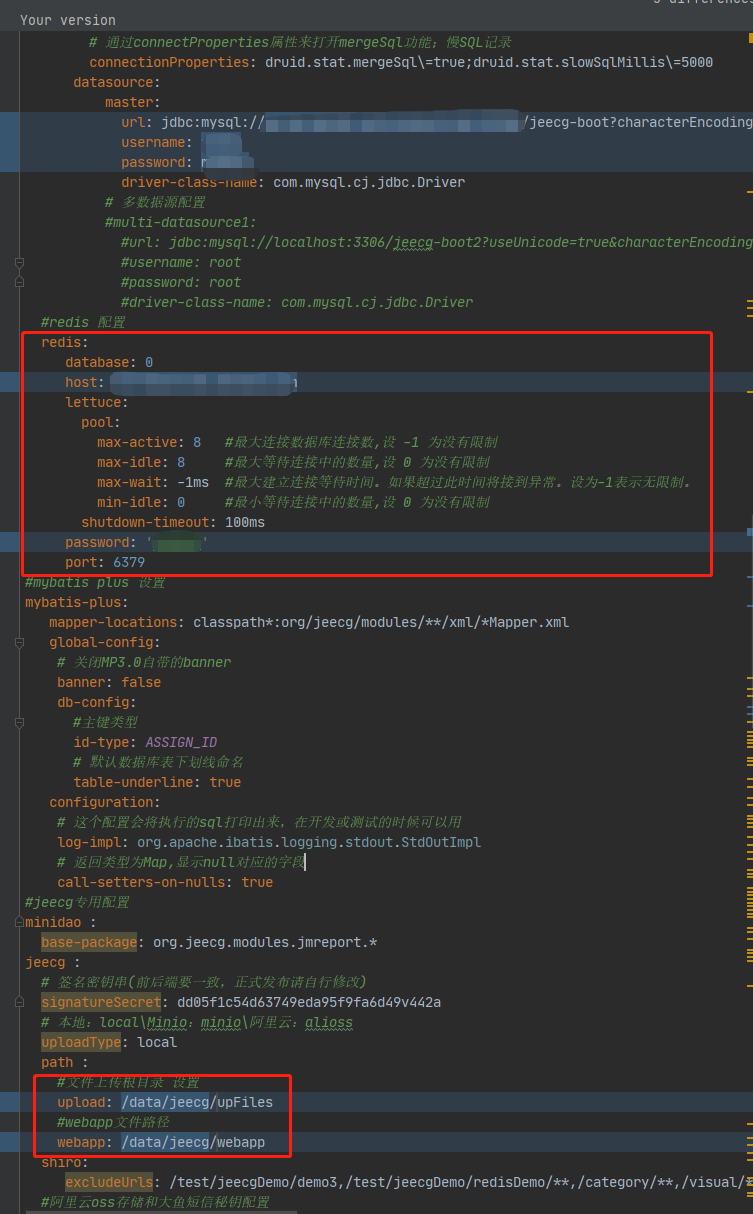
(2) Modify the application dev|test|prod.yml in the startup configuration jeecg boot module system
Modify mysql (that is, the DB initialized in step (1)), redis connection (self built or other available redis), and file upload location configuration
(3) Execute maven install -P
You need to replace Maven settings The mirrors in the XML file are as follows
<mirrors>
       <mirror>
            <id>nexus-aliyun</id>
            <mirrorOf>*,!jeecg,!jeecg-snapshots,!getui-nexus</mirrorOf>
            <name>Nexus aliyun</name>
            <url>http://maven.aliyun.com/nexus/content/groups/public</url>
        </mirror>
 </mirrors>
Build with the following naming
# Default build dev
maven install -Dmaven.test.skip=true -P dev
# It can be switched by - P
maven install -Dmaven.test.skip=true -P test
maven install -Dmaven.test.skip=true -P prod
Note:
-The profile specified by P corresponds to application-{profile}.yml in step (2),
That is, - P specifies to build the profile, then modify the corresponding application - {profile} YML file,
For example, Maven install - dmaven test. Skip = true - P test, you need to modify application test in jeecg boot module system YML profile

(4) Right click to start jeecg boot module system / SRC / main / Java / org / jeecg / jeecgsystemapplication.java
After successful startup, you can access:
Druid monitoring
http://localhost:8080/jeecg-boot/druid
Account password: admin / 123456
Online interface documentation swagger
http://localhost:8080/jeecg-boot/doc.html
Account and password: jeecg / jeecg1314
front end
(1) Installing nodejs
You can download the installation package from the official website and install it yourself. After the installation is completed, set the nodejs image library
# npm image
npm config set registry https://registry.npm.taobao.org --global
npm config set disturl https://npm.taobao.org/dist --global
(2) Install yarn
npm i yarn -g
Set yarn image library
# yarn mirror
yarn config set registry https://registry.npm.taobao.org --global
yarn config set disturl https://npm.taobao.org/dist --global
(3) Front end download depends on yarn install
Execute the following command in the front-end project root directory Ant Design Vue jeecg
yarn install
Local startup
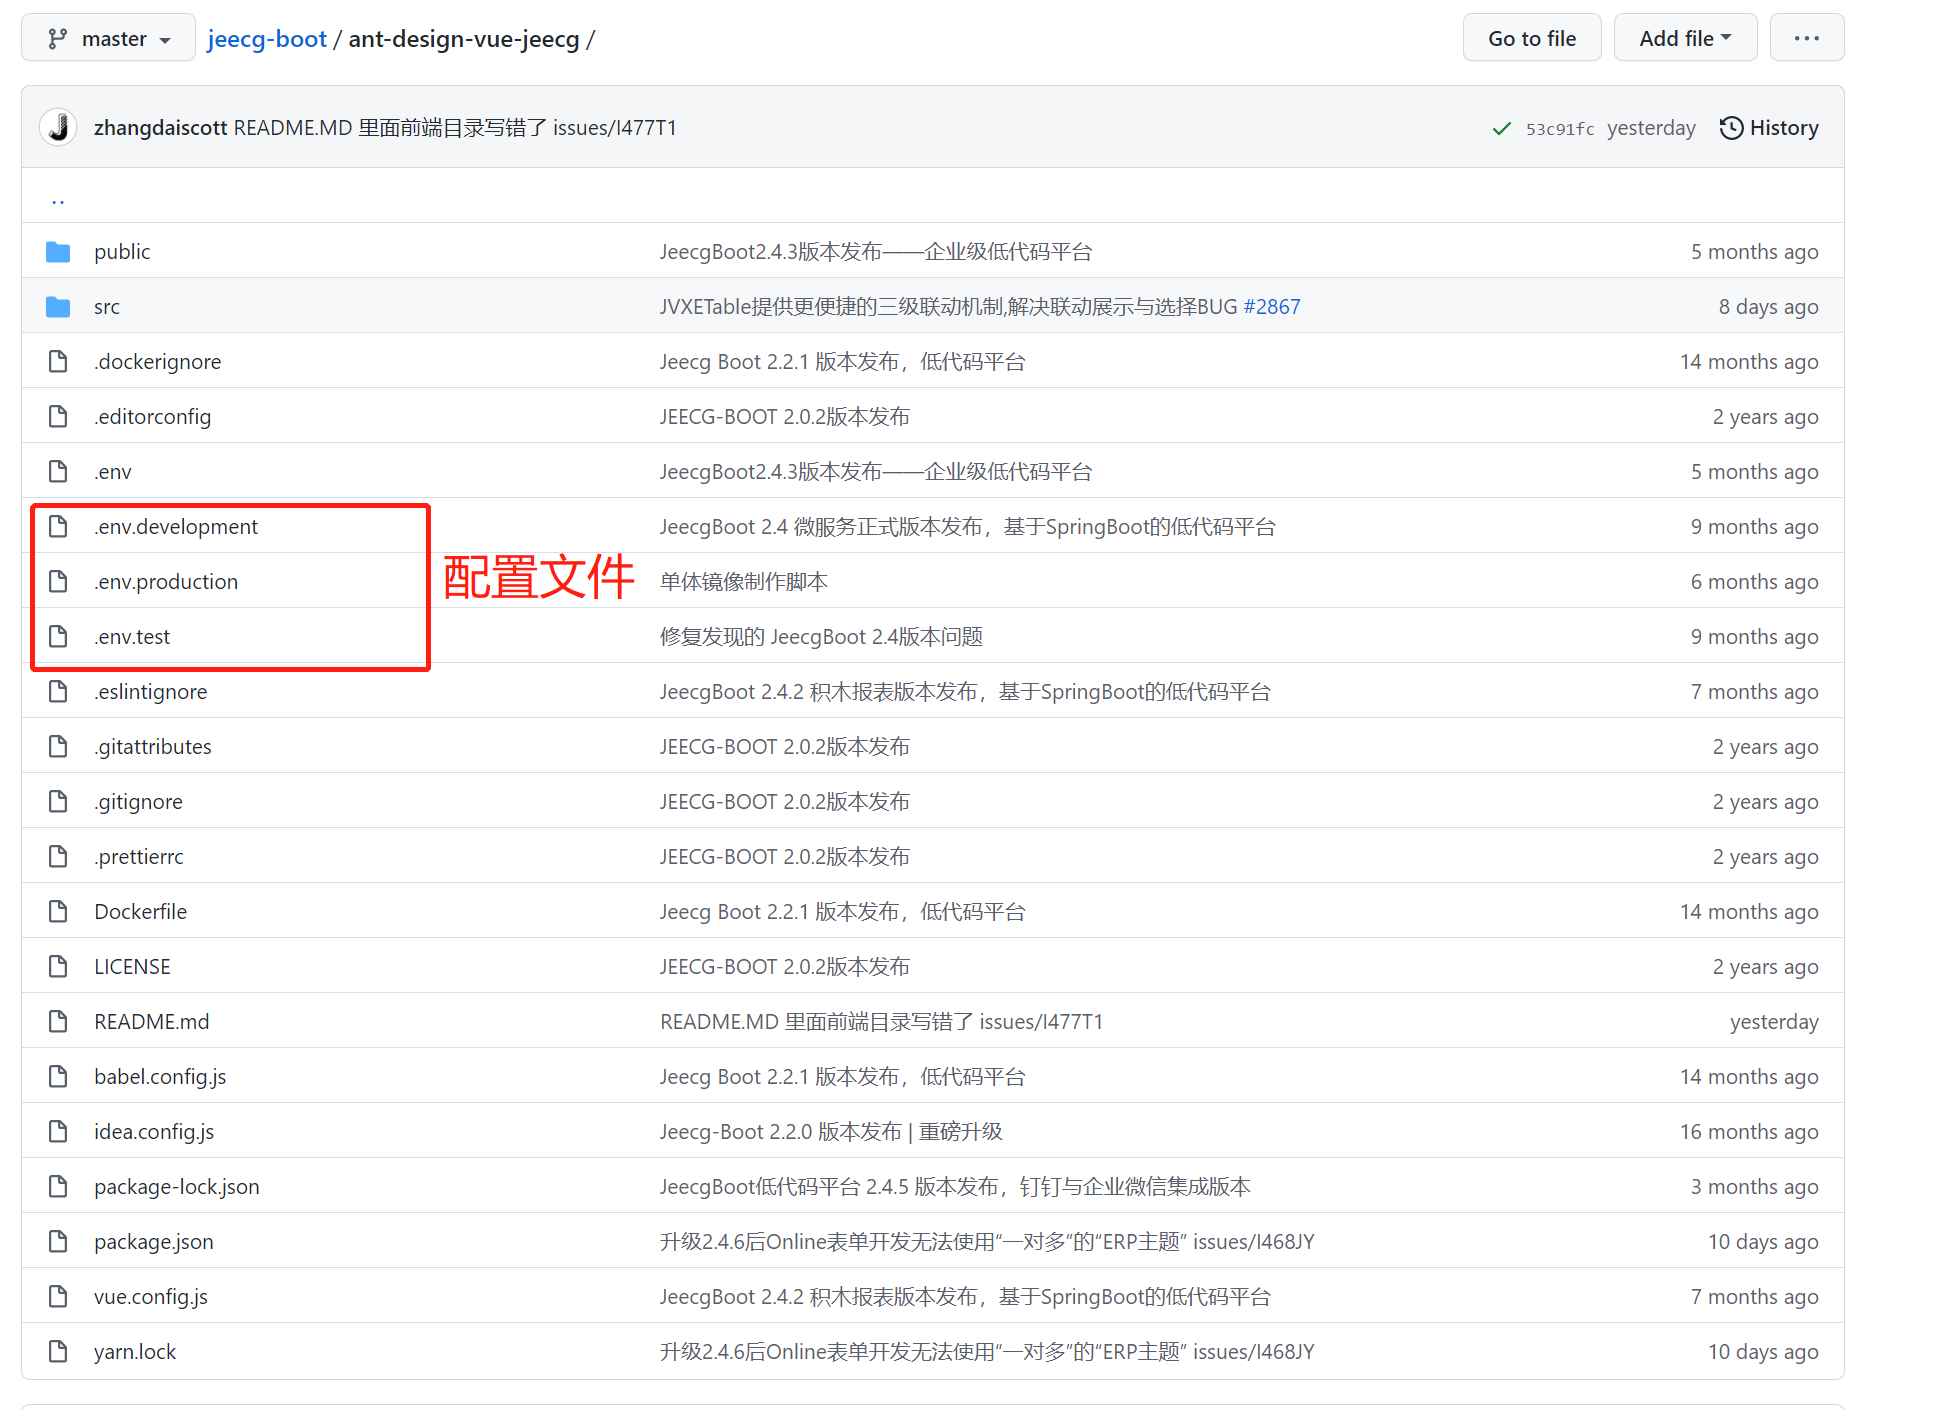
(4) Modify the configuration file env.development
Modify env The connection in development is a back-end connection, as shown in Vue below_ APP_ API_ BASE_ The URL corresponds to the back-end service we started earlier. Other configurations do not need to be modified for the time being
NODE_ENV=development
VUE_APP_API_BASE_URL=http://localhost:8080/jeecg-boot
VUE_APP_CAS_BASE_URL=http://cas.example.org:8443/cas
VUE_APP_ONLINE_BASE_URL=http://fileview.jeecg.com/onlinePreviewyarn install
(5) Click the command serve to start the front end
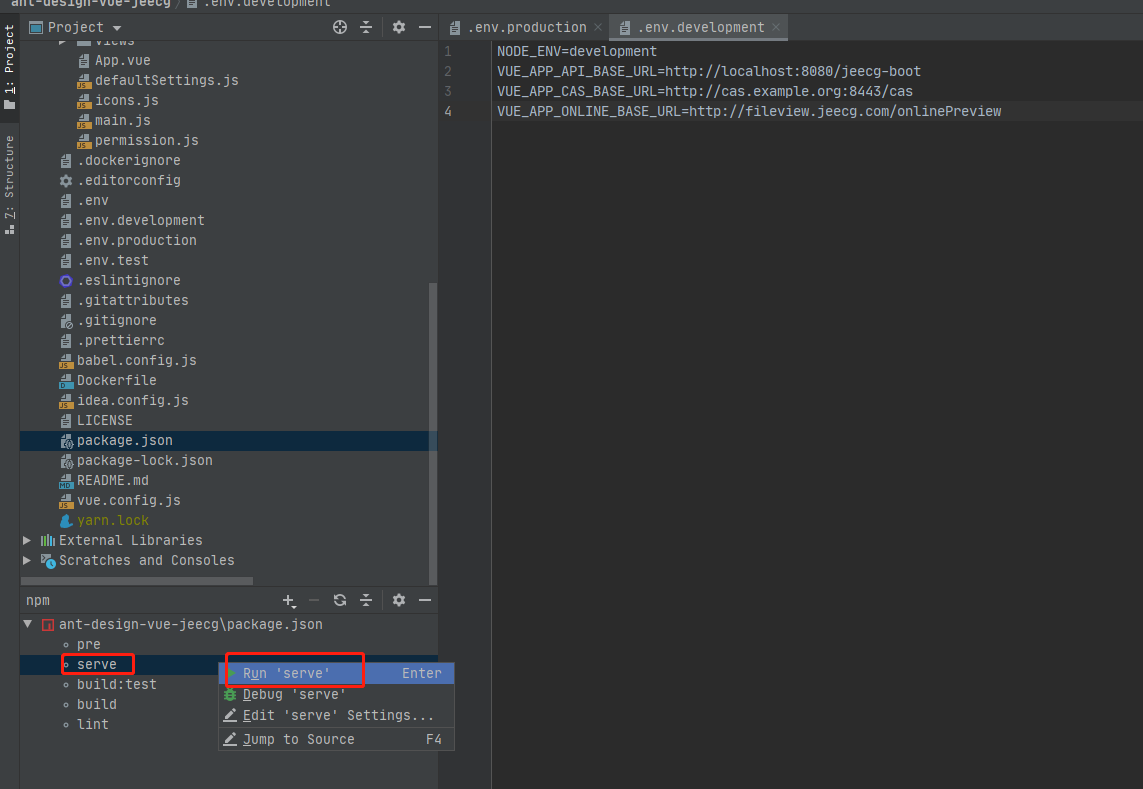
The following is the successful startup
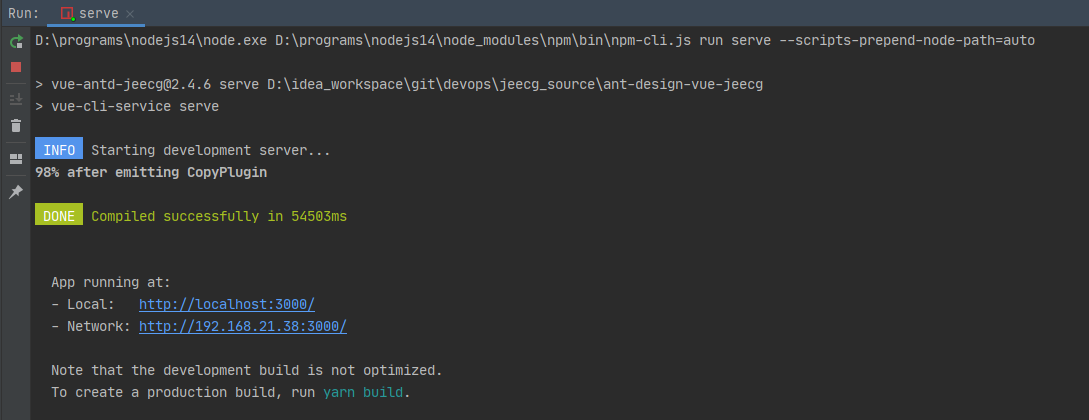
After successful startup, you can access:
Front end management interface
http://localhost:3000
Account password: admin / 123456
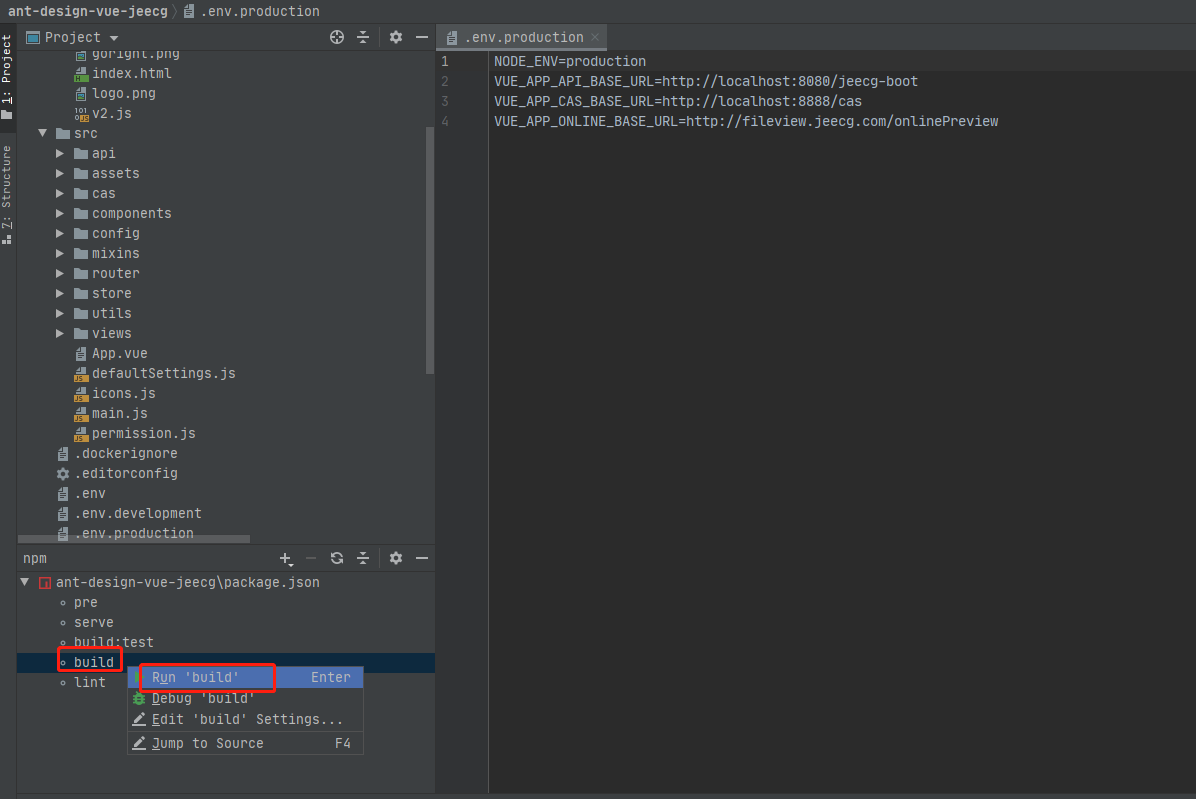
Front end packaging and publishing build
(4) Modify the configuration file env.production
Modify env The connection in production is a back-end connection, as shown in Vue below_ APP_ API_ BASE_ The URL corresponds to the back-end service started by our online environment. Other configurations do not need to be modified for the time being
NODE_ENV=production
VUE_APP_API_BASE_URL=http://localhost:8080/jeecg-boot
VUE_APP_CAS_BASE_URL=http://cas.example.org:8443/cas
VUE_APP_ONLINE_BASE_URL=http://fileview.jeecg.com/onlinePreviewyarn install
(5) Execute npm run build
After the build is completed, a dist directory will be generated in the background, which is the file after the build.
(3) Deploy nginx server
For example, copy the dist directory to the server / nodejs/dist directory, and the corresponding nginx configuration is as follows:
server {
		listen       80;
		server_name  localhost;

		#Background service configuration. After this location is configured, you can access it through http: / / domain name / jeecg boot / XXXX
		location ^~ /jeecg-boot {
			proxy_pass              http://127.0.0.1:8080/jeecg-boot/;
			proxy_set_header        Host 127.0.0.1;
			proxy_set_header        X-Real-IP $remote_addr;
			proxy_set_header        X-Forwarded-For $proxy_add_x_forwarded_for;
		}
		#Solve the problem that the page cannot be found when refreshing the routing address in the Router(mode: 'history') mode
		location / {
			# The html directory given by the official example, that is, copy the dist file to the / etc/nginx/html directory (the html folder under the nginx installation directory)
			# root   html;
			# The actual root storage location and the dist storage directory after the completion of the corresponding project build, as well as the / nodejs/dist directory mentioned earlier
			root /nodejs/dist;
			index  index.html index.htm;
			if (!-e $request_filename) {
				rewrite ^(.*)$ /index.html?s=$1 last;
				break;
			}
		}
	}
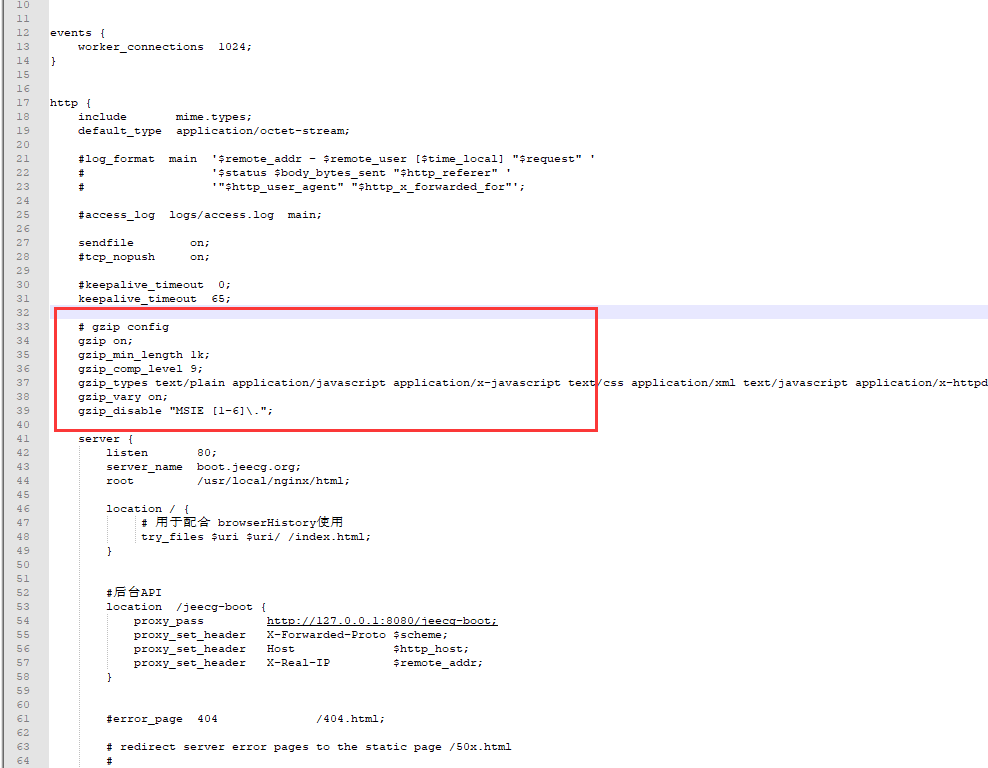
It can also enable nginx to enable compression and improve the efficiency of home page access Add the following fragment to the http of conf
# gzip config
gzip on;
gzip_min_length 1k;
gzip_comp_level 9;
gzip_types text/plain application/javascript application/x-javascript text/css application/xml text/javascript application/x-httpd-php image/jpeg image/gif image/png;
gzip_vary on;
gzip_disable "MSIE [1-6]\.";
Online deployment of single JeecgBoot based on K8S
After successful local startup, it is only applicable to local development and debugging,
In order to provide a unified Jeecgboot platform for learning and testing for the company's small partners, the jeecg single application needs to be deployed to the online K8s environment.
With the previous front-end and back-end startup experience, the next steps are:
Modify the code configuration to online environment related configuration
- Initial import online environment jeecg system DB
- Modify the application test in the backend jeecg boot module system mysql and redis connection configurations in YML correspond to the online environment
- Modify the front-end configuration file env Production, which is configured to point to the back-end service URL after online deployment
Create backend docker image
- Build backend: Maven install - dmaven test. skip=true -P test
- Get jeecg-boot-module-system-2.4 6.jar
- Use the existing or self-made Java docker image, and then jeecg-boot-module-system-2.4 6. Copy jar to the image and start it with the java -jar command
- Submit and push the newly created backend docker image to the image warehouse
Create front-end docker image
- Execute npm run build
- Use the existing or self-made nginx docker image, and then copy the / dist directory to the image to modify the corresponding configuration of nginx
- Submit and push the newly created front-end docker image to the image warehouse
k8s deployment front and rear
- The backend is arranged based on deployment + nodeport service
- The front end is arranged based on deployment + nodeport service
Visit JeecgBoot
Through the K8s NodePort Service, the NodePort port of the corresponding service can be exposed to any node of the K8s cluster,
For example, the NodePort of the back-end service is 20505, the NodePort of the front-end service is 20404, and there are 192.168 nodes in the K8s cluster 1.16, then:
Back end service URL: http://192.168.1.16:20505/jeecg-boot/druid, http://192.168.1.16:20505/jeecg-boot/doc.html
Front end service URL: http://192.168.1.16:20404
Default account password
Backend Druid monitoring
http://localhost:8080/jeecg-boot/druid
Account password: admin / 123456
Backend online interface document swagger
http://localhost:8080/jeecg-boot/doc.html
Account and password: jeecg / jeecg1314
Front end management interface
http://localhost:3000
Account password: admin / 123456
Problem summary
reference resources:
CSDN - Jeecg official blog - JeecgBoot FAQ Q & A