Article directory
Preparation
Clone private warehouse to local:
[root@linux01 ~]# git clone git@github.com:AsnFy/test_java.git
[root@linux01 ~]# ls test_java/
README.md
Download the source code of zrlog for testing:
[root@linux01 ~]# wget https://codeload.github.com/94fzb/zrlog/zip/master
Decompression:
[root@linux01 ~]# unzip master
To move files to the local git Repository:
[root@linux01 ~]# mv zrlog-master/* test_java/
Push to private warehouse:
[root@linux01 test_java]# git add .
[root@linux01 test_java]# git commit -m "add zrlog"
[root@linux01 test_java]# git push
In GitHub private warehouse: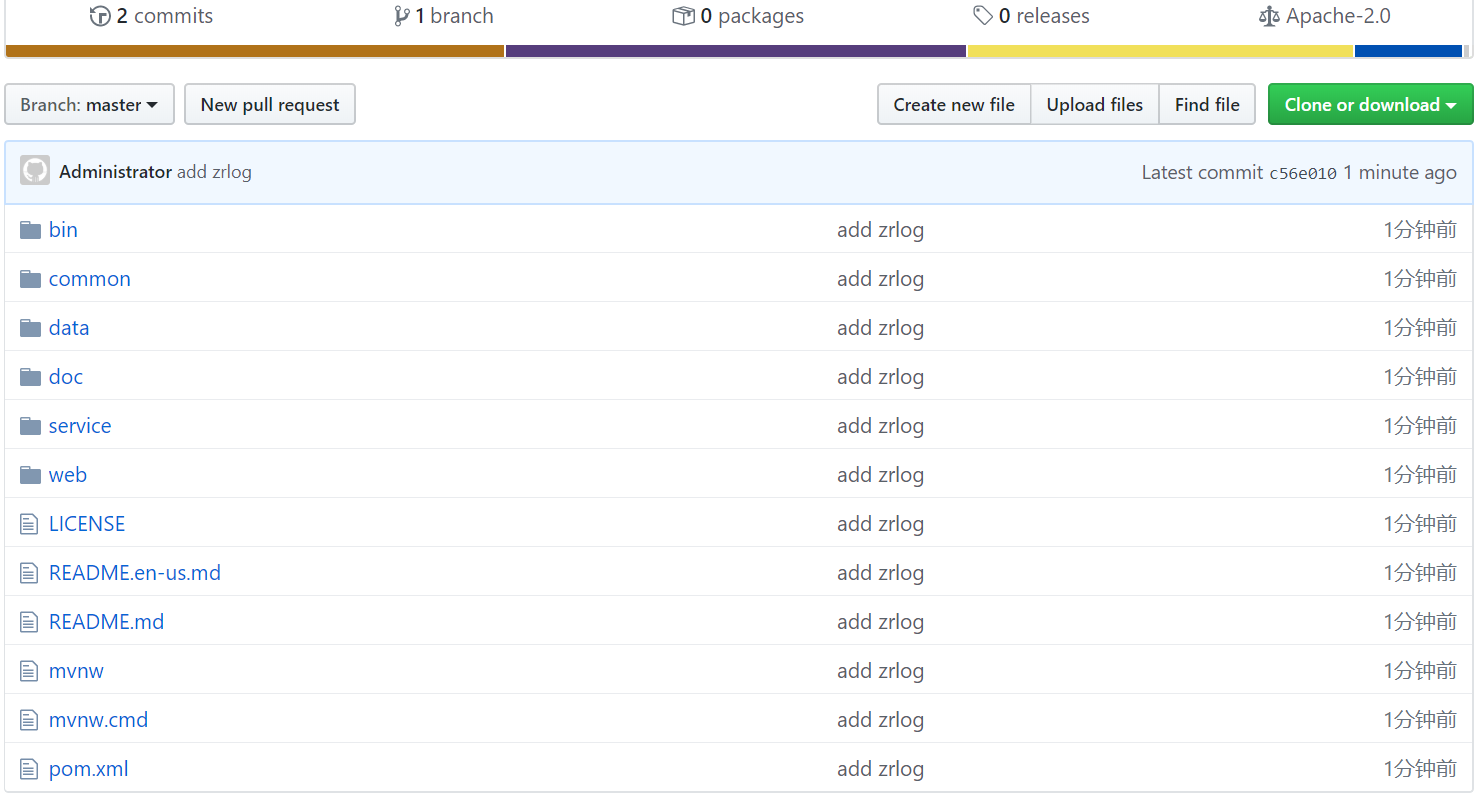
Install jdk and tomcat on another machine to publish Java projects:
[root@linux02 ~]# yum -y install java-1.8.0-openjdk
[root@linux02 ~]# wget https://mirrors.tuna.tsinghua.edu.cn/apache/tomcat/tomcat-9/v9.0.30/bin/apache-tomcat-9.0.30.tar.gz
[root@linux02 ~]# tar zxvf apache-tomcat-9.0.30.tar.gz
[root@linux02 ~]# mv apache-tomcat-9.0.30 /usr/local/tomcat
Edit profile:
[root@linux02 ~]# vim /usr/local/tomcat/conf/tomcat-users.xml
Add the following:
<role rolename="admin"/>
<role rolename="admin-gui"/>
<role rolename="admin-script"/>
<role rolename="manager"/>
<role rolename="manager-gui"/>
<role rolename="manager-script"/>
<role rolename="manager-jmx"/>
<role rolename="manager-status"/>
<user name="admin" password="admin" roles="admin,manager,admin-gui,admin-script,manager-gui,manager-script,manager-jmx,manager-status" />
Edit profile:
[root@linux02 ~]# vim /usr/local/tomcat/webapps/manager/META-INF/context.xml
Add the ip or network segment that is allowed to access:
Start tomcat:
[root@linux02 ~]# cd /usr/local/tomcat/bin/
[root@linux02 bin]# ./startup.sh
Visit the tomcat page, click manager webapp and enter the user and password defined in the above configuration file in the authentication box: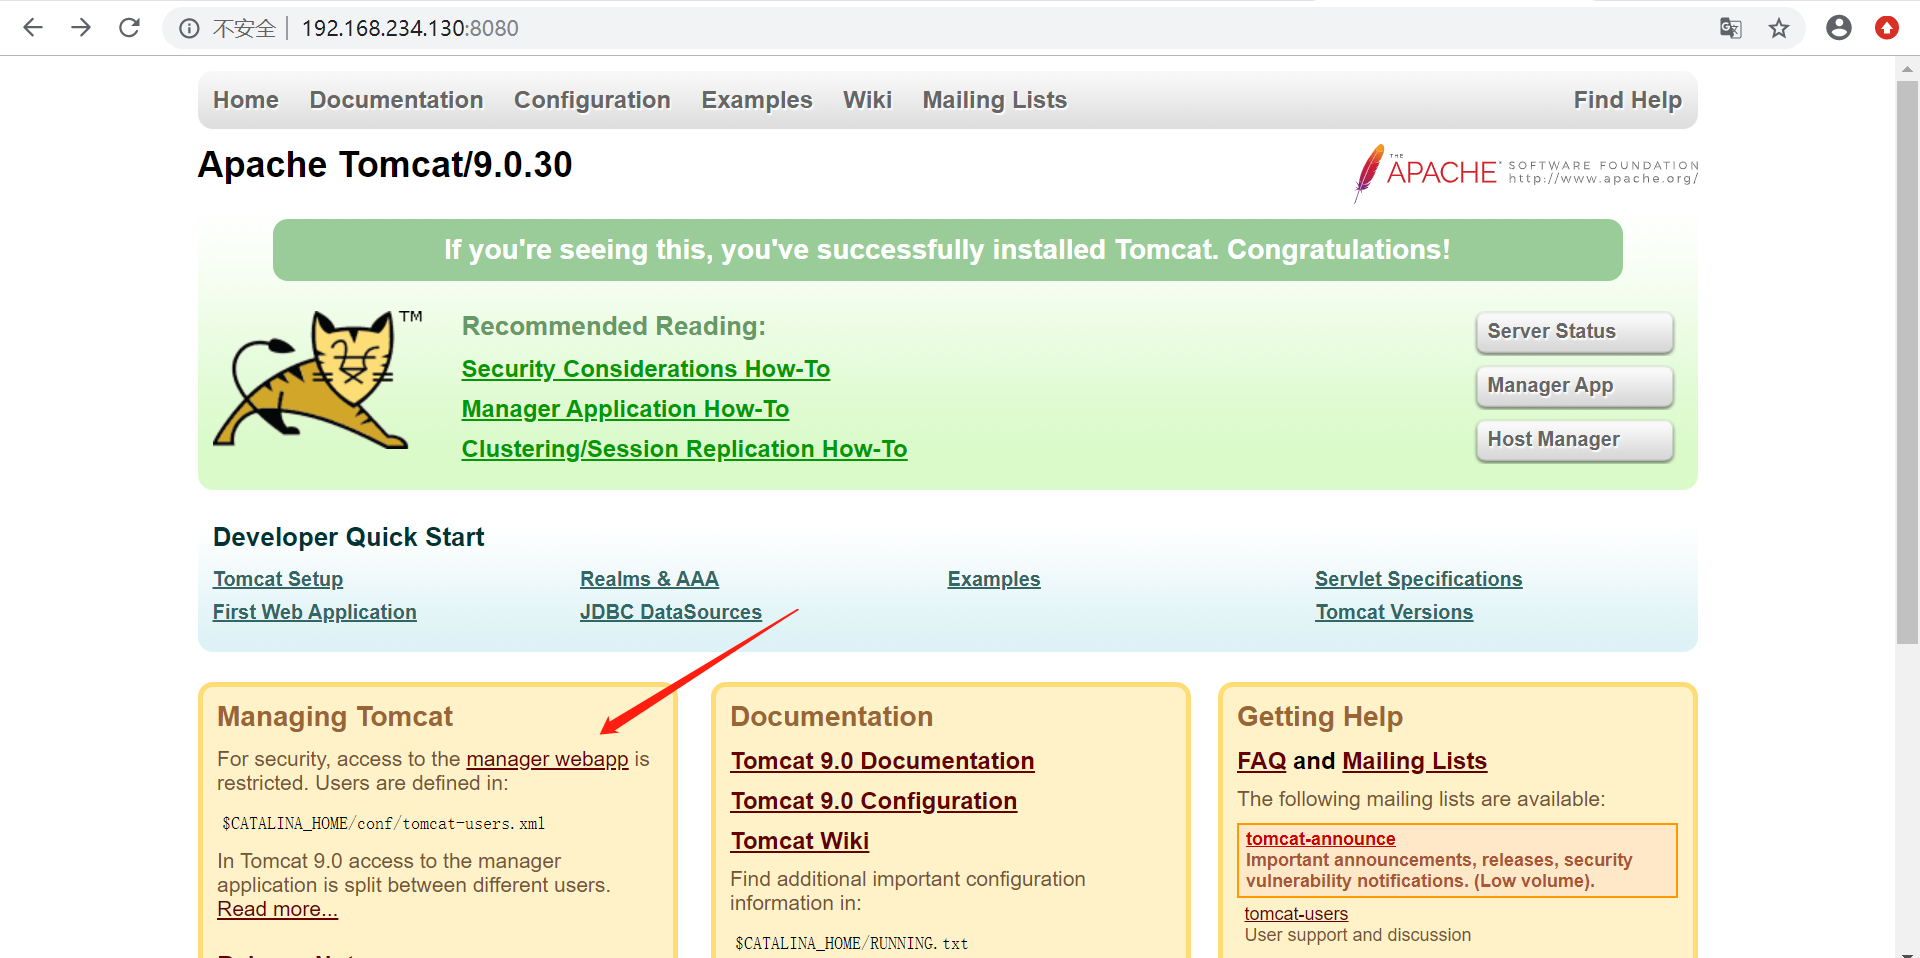
You can enter the following page, through which Jenkins will publish java projects: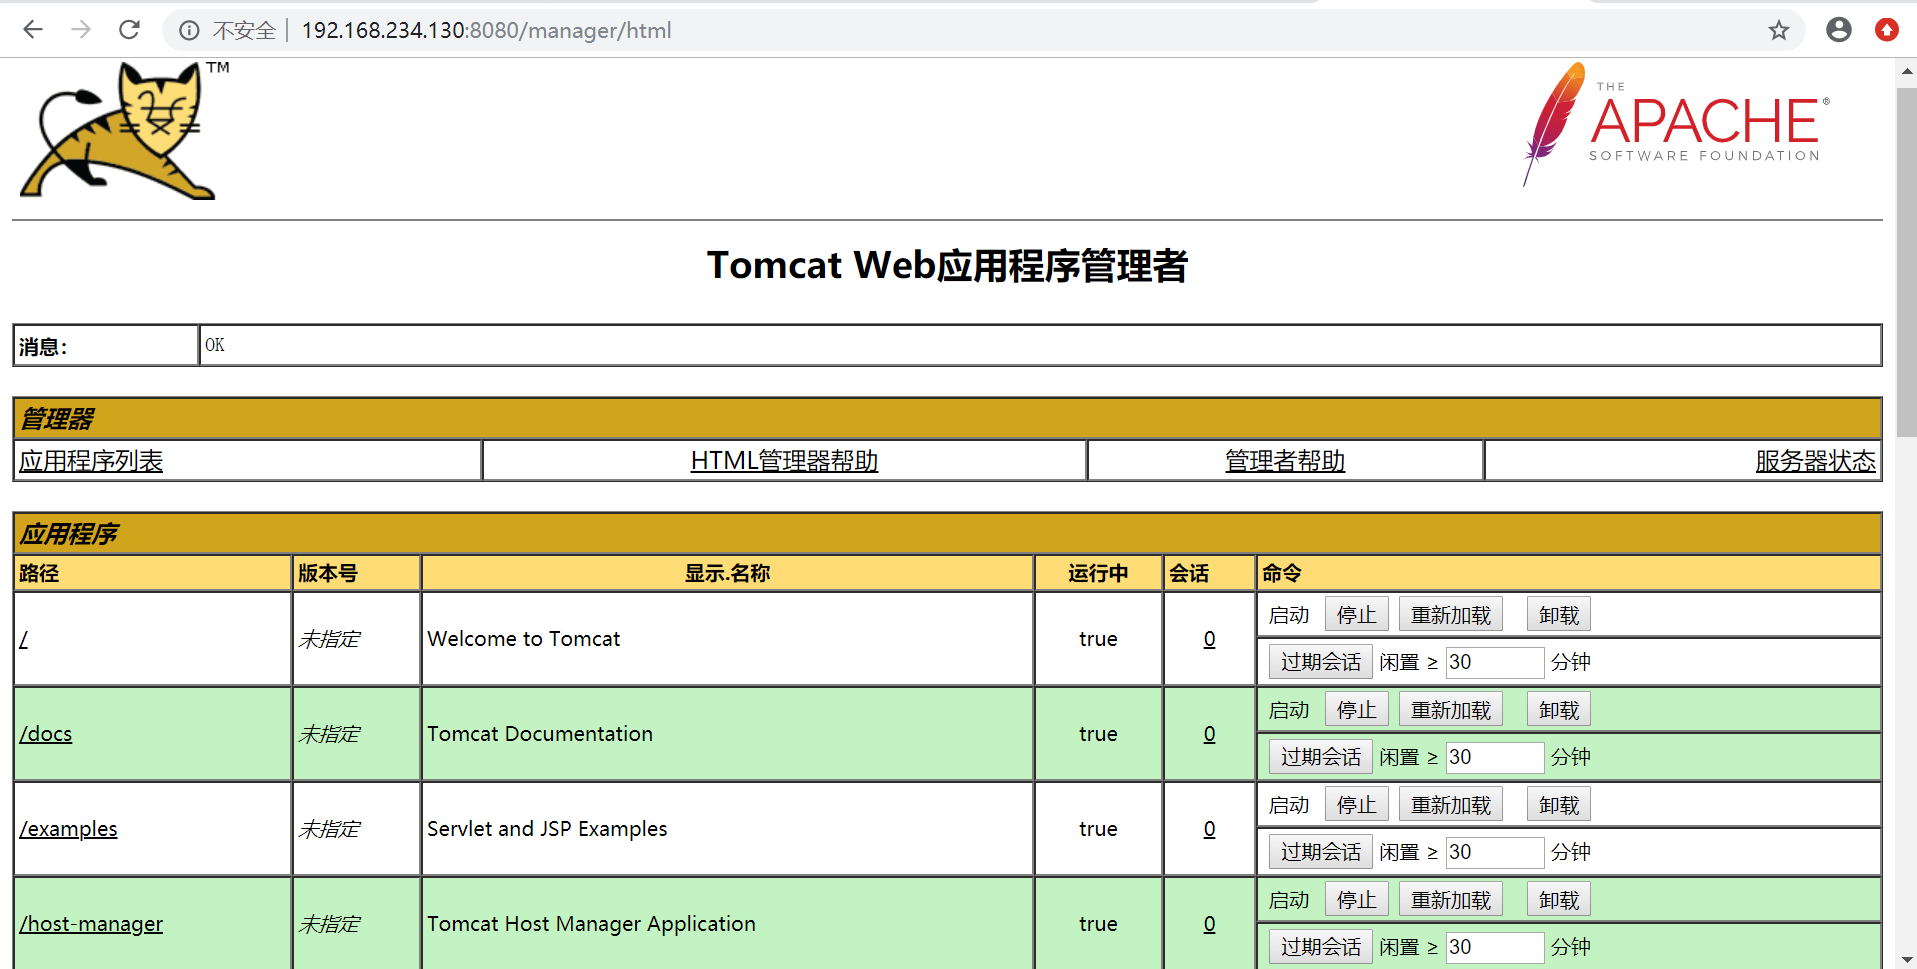
Install maven
Install Maven on the Jenkins server at https://maven.apache.org/download.cgi
To install maven:
[root@linux01 ~]# wget http://mirrors.tuna.tsinghua.edu.cn/apache/maven/maven-3/3.6.3/binaries/apache-maven-3.6.3-bin.tar.gz
[root@linux01 ~]# tar zxvf apache-maven-3.6.3-bin.tar.gz
[root@linux01 ~]# mv apache-maven-3.6.3 /usr/local/
To install jdk1.8:
[root@linux01 ~]# wget https://download.oracle.com/otn/java/jdk/8u241-b07/1f5b5a70bf22433b84d0e960903adac8/jdk-8u241-linux-x64.tar.gz
The jdk download on the official website is very slow, and an Oracle account needs to be created. The online disk download: https://pan.baidu.com/s/1 kzwmfzkohmfw zgtxv6rg
Decompression:
[root@linux01 ~]# tar zxvf jdk-8u161-linux-x64.tar.gz
[root@linux01 ~]# mv jdk1.8.0_161/ /usr/local/
Edit profile:
[root@linux01 ~]# vim /etc/profile
Add the following:
export JAVA_HOME=/usr/local/jdk1.8.0_161
export CLASSPATH=$:CLASSPATH:$JAVA_HOME/lib/
export PATH=$PATH:$JAVA_HOME/bin
Make profile effective:
[root@linux01 ~]# source /etc/profile
View version:
[root@linux01 bin]# java -version
java version "1.8.0_161"
Java(TM) SE Runtime Environment (build 1.8.0_161-b12)
Java HotSpot(TM) 64-Bit Server VM (build 25.161-b12, mixed mode)
If openjdk has been installed, you need to perform the following to switch after installing Oracle jdk:
[root@linux01 ~]# cd /usr/bin/
[root@linux01 bin]# ln -s -f /usr/local/jdk1.8.0_161/bin/javac
[root@linux01 bin]# ln -s -f /usr/local/jdk1.8.0_161/jre/bin/java
On the Jenkins home page, click Manage > global configuration tool, and specify the configuration file path:
Click add in the jdk column, cancel the √ of automatic installation, and fill in the user-defined name and jdk installation path:
Pull down and click add in maven column, cancel the √ of automatic installation, fill in the user-defined name and maven installation path:
System management - > management plug-in, check whether Maven integration plug-in and deploy to container plug-in have been installed. If not, install: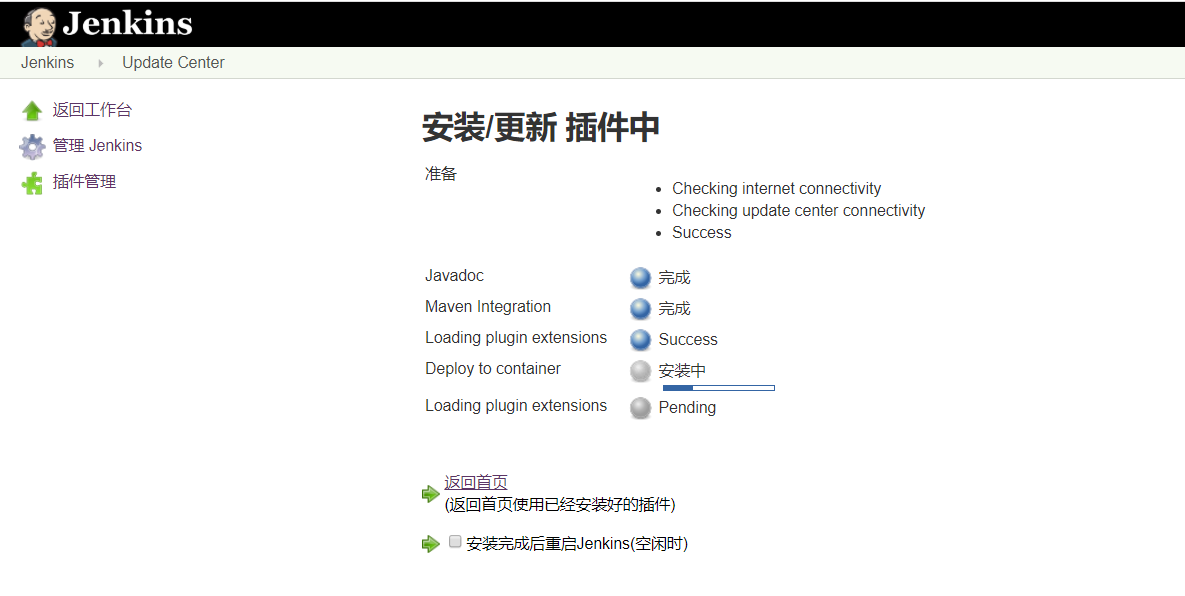
Restart Jenkins:
[root@linux01 ~]# systemctl restart jenkins
When you create a new project, you can choose to build a maven project: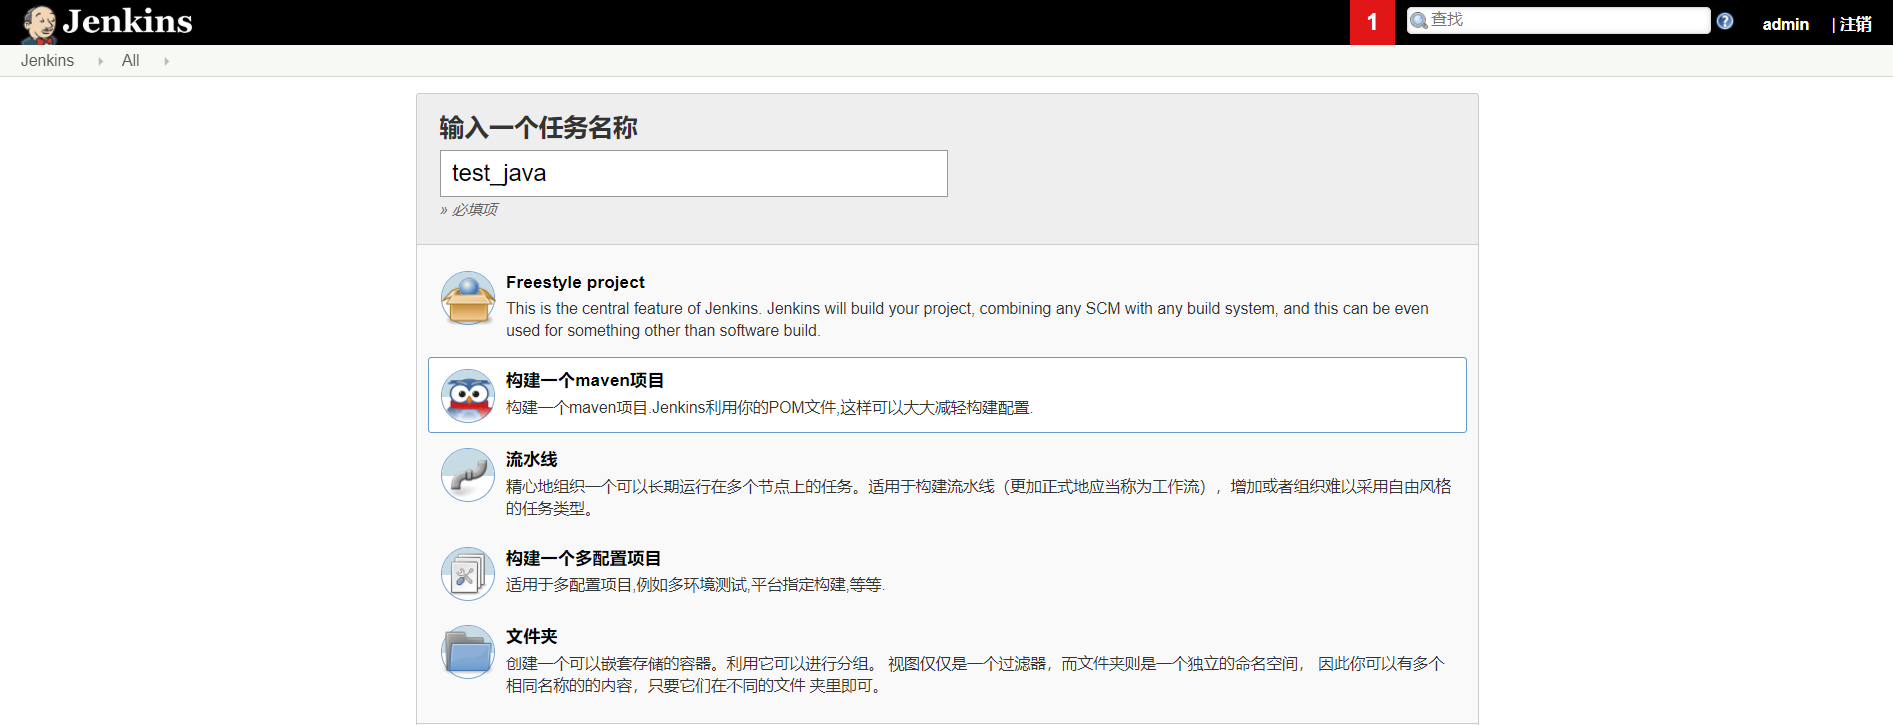
Building job
After creating the maven project, you will enter the detailed configuration page and fill in the warehouse address in source management: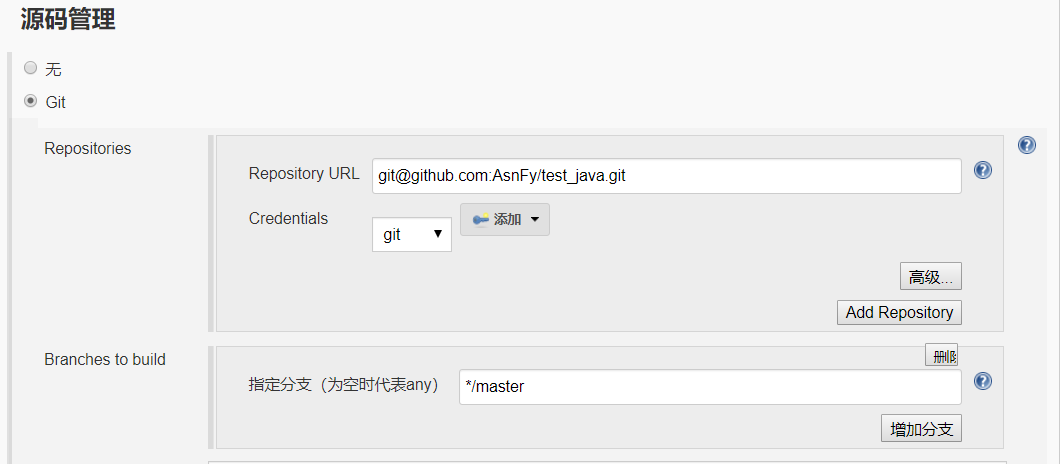
After entering the warehouse address, the private warehouse needs to click the Add button, select ssh secret key verification, and enter username and private key: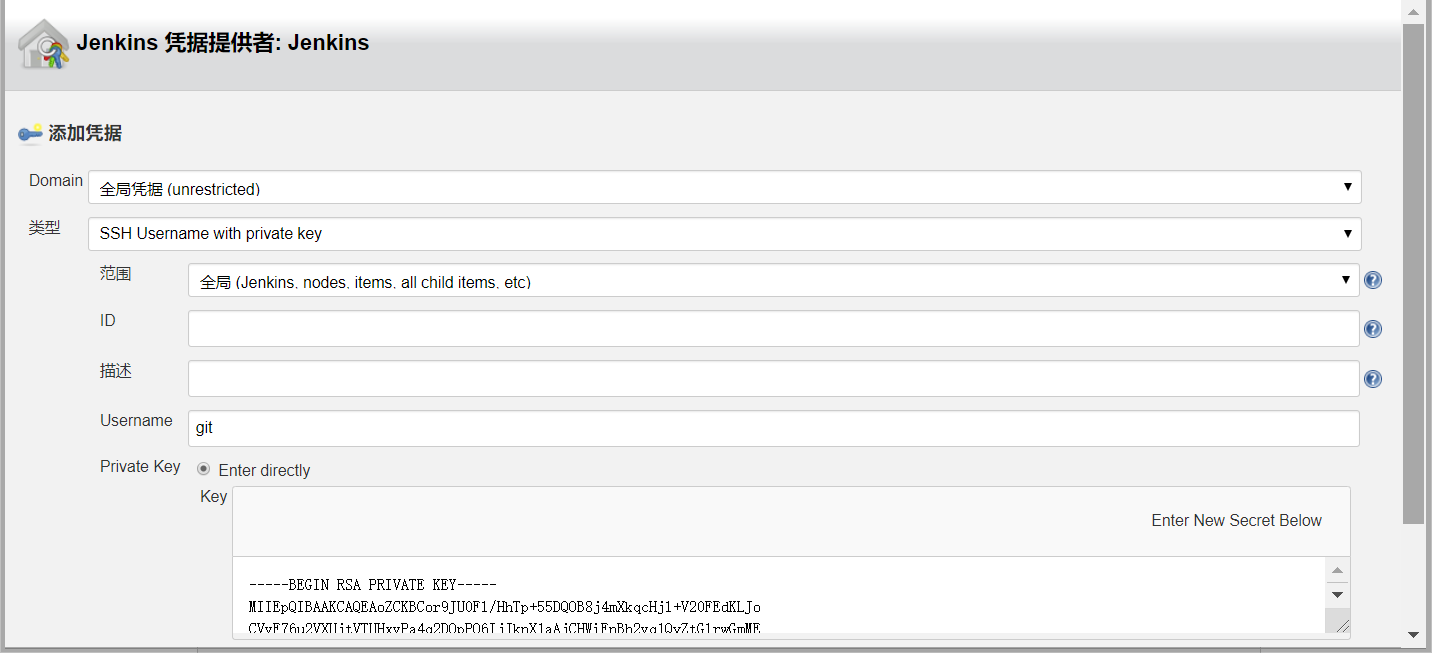
#After adding, select git in the drop-down box. It will take a little time to verify. If the error message in red font disappears, it means the configuration is successful
Add clean install -D maven.test.skip=true at build:
Select Edit email notification after construction: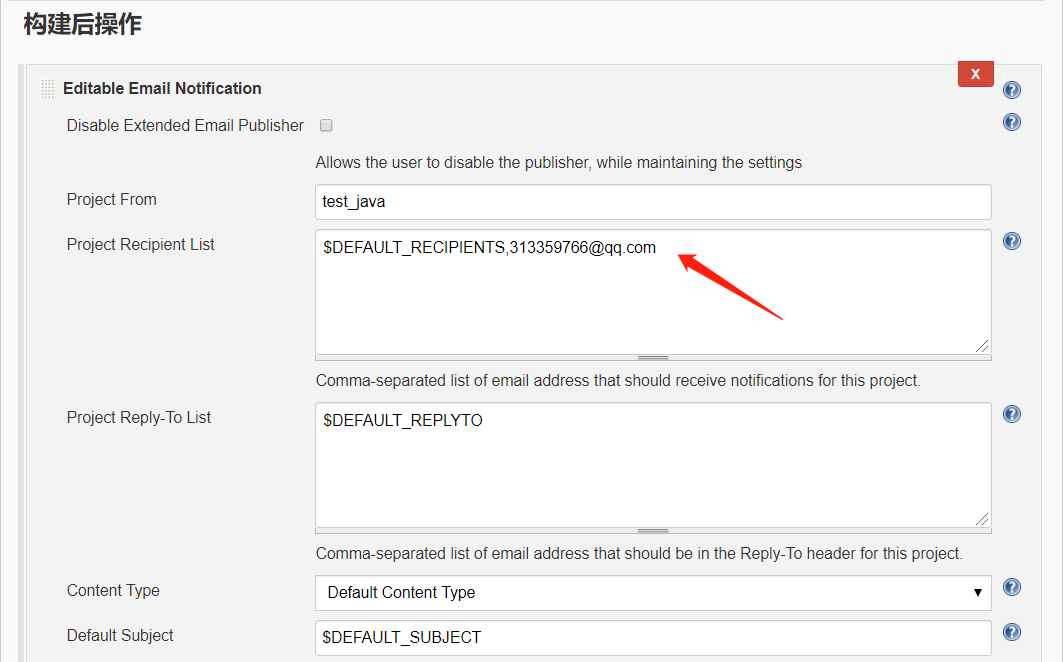
#Add mailbox to receive mail
Select add trigger - > always at triggers:
After clicking save, enter the project interface and click now build to view the console output. Success means success: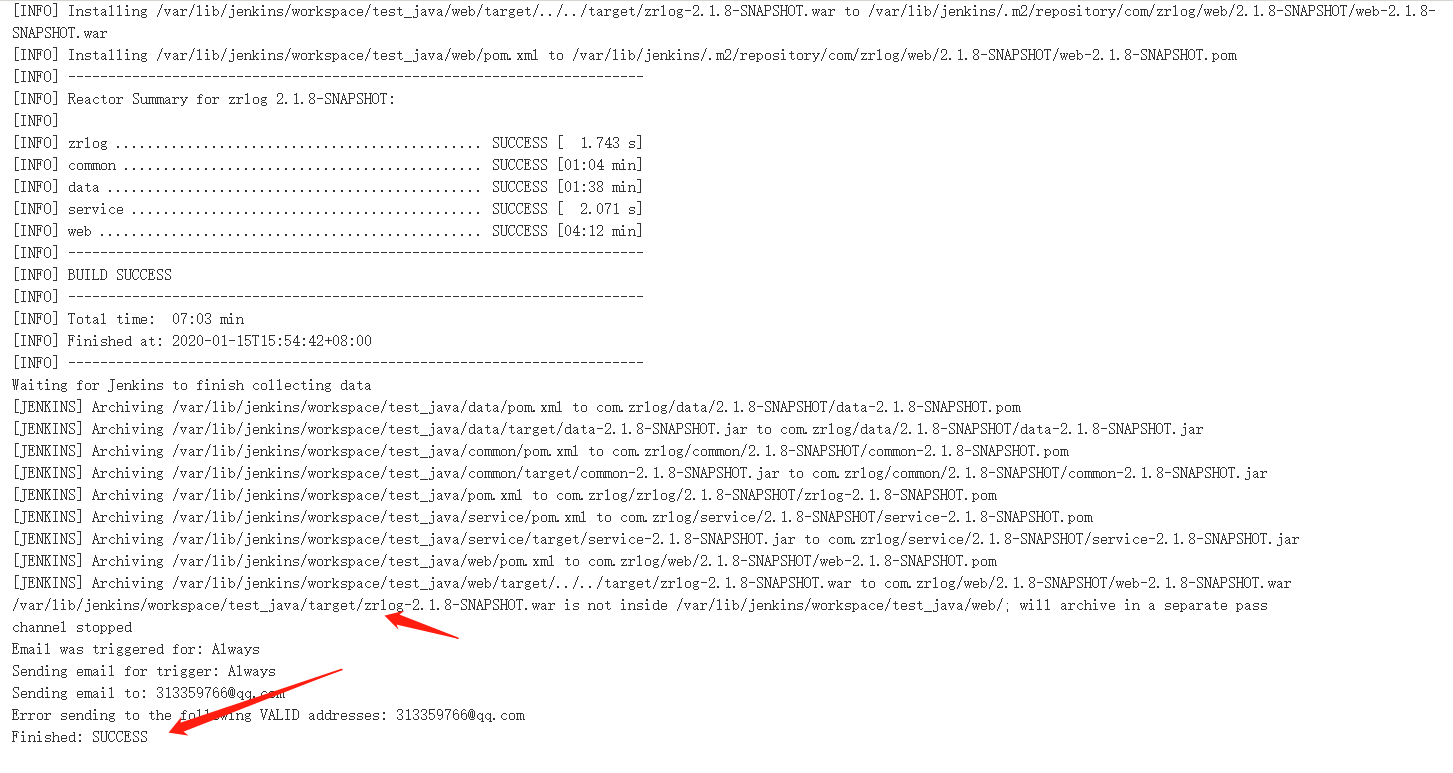
#The source code should be compiled and packed. The path is / var/lib/jenkins/workspace/test_java/target/zrlog-2.1.8-SNAPSHOT.war
To view the war package:
[root@linux01 ~]# ls /var/lib/jenkins/workspace/test_java/target/
zrlog-2.1.8-SNAPSHOT.war
Publish war package
Click configuration in the project: add deploy war/ear to a container after construction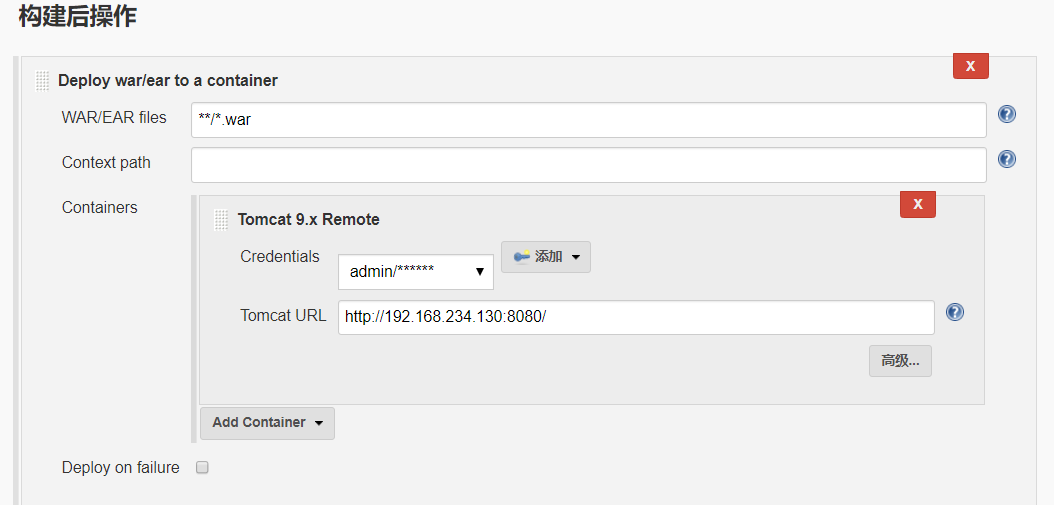
Enter * * / *. war in the file, select the corresponding tomcat version, click add, and enter the user name and password of the manage ment page of the previous tomcat configuration: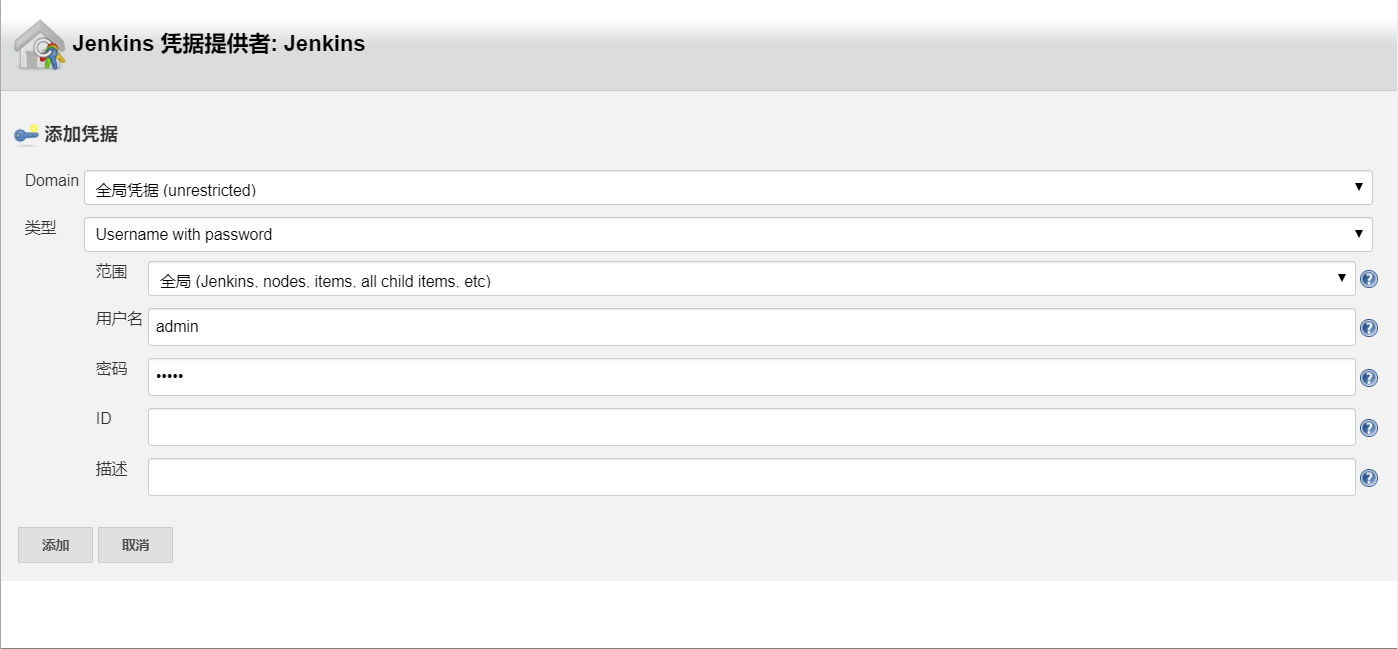
#Enter the access address of tomcat and click Save to start building the project, which will be automatically published to the tomcat server after successful construction
Add: the version of jdk used by Jenkins server and tomcat server should be the same, otherwise an error will be reported

