What is continuous integration
Continuous Integration (CI for short) refers to the frequent (multiple times a day) integration of code into the backbone.
The purpose of continuous integration is to enable products to iterate quickly while maintaining high quality.. Its core measure is that the code must pass automated testing before being integrated into the backbone. As long as one test case fails, it cannot be integrated.
Through continuous integration, teams can quickly move from one function to another. In short, a large part of agile software development is due to continuous integration.
Continuous integration deployment to process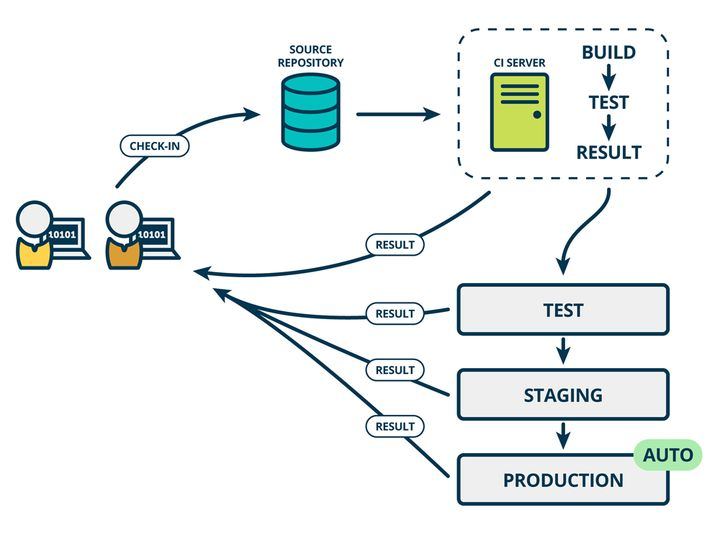
According to the design of continuous integration, from code submission to production, zeng ti includes the following processes:
- Submit
In the first step, the developer submits the code to the code warehouse. All subsequent steps begin with a commit of the local code.
- Test (first round)
The code warehouse sets hook s for the commit operation. As long as the code is submitted or merged into the trunk, the automated test will be started.
Run at least the unit test in the first round.
- structure
After the first round of testing, the code is merged into the trunk and can be delivered.
After delivery, build and then enter the second round of testing. Build refers to converting the source code into actual code that can be run, such as installing dependencies, configuring various resources (style sheets, js scripts, pictures, etc.).
Common construction tools include Jenkins, Travis, Codeship, etc.
- Test (second round)
After the construction is completed, the second round of testing will be conducted. The second round is comprehensive testing, including unit testing and integration testing, mainly automated testing. Every update point of the new version will be tested.
- deploy
Through the second round of testing, the code is a directly deployable version. Package and archive all files (jar s, wer s, etc.) of this version and send them to the production server. The production server unpacks them into a local directory, points the symbolic link of the running path to this directory, and then restart the application.
- RollBACK
Once there is a problem with the previous version, it is necessary to roll back to the build result of the previous version. The simplest way is to modify the symbolic link to point to the directory of the previous version.
Continuous integration into composition
- An automatic build process, including checking out code, compiling and building, running tests, result records and test statistics, is completed automatically without manual intervention.
- A code memory requires version control software to ensure the maintainability of the code, and half uses git or svn
- A continuous integration server, Jenkins is a continuous integration server with simple configuration and convenient use.
Benefits of continuous integration
- Reduce risk and repeated operation
- Reduce problems caused by release risk
- Reduce repetitive work
- Continuous deployment provides deployable unit packages
- Continuously deliver available versions
- Enhance team information
Jenkins

As a leading open source automation server, Jenkins provides hundreds of plug-ins to support the construction, deployment and automation of any project.
Jenkins features:
- As a scalable automation server, Jenkins can be used as a simple CI server or become a continuous delivery center for any project.
- Jenkins is an independent Java based program that can be used out of the box with software packages for Windows, Linux, macOS and other Unix like operating systems.
- Jenkins can be easily set up and configured through its Web interface, including immediate error checking and built-in help.
- By updating hundreds of plug-ins in the center, Jenkins can integrate with almost all tools in the continuous integration and continuous delivery tool chain.
- Jenkins can be extended through its plug-in architecture, providing nearly unlimited possibilities for Jenkins functions.
- Jenkins can easily distribute work across multiple machines, helping to drive faster build, test, and deployment across multiple platforms.

Jenkins installation and continuous integration environment configuration
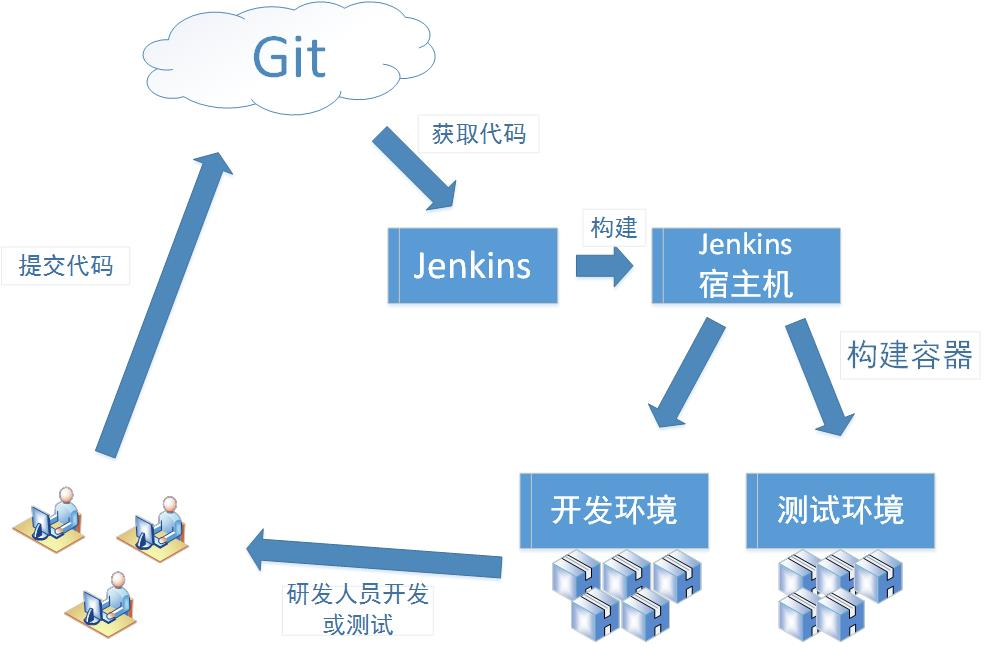
Description of continuous integration process
- First, developers submit code to git repository every day
- Then Jenkins, as a continuous integration tool, private git tools go to the GIT warehouse to pull the code to the integration server, and then cooperate with jdk, maven and other software to complete code compilation, code testing and audit, testing, packaging and other work. If there is an error in each step of the process, the whole process will be executed again.
- Finally Jenkins put 7
- The generated jar or war package is distributed to the test server or production server, and testers or users can access the application.
Server list
| name | ip | Install to software |
|---|---|---|
| Code hosting server | Gitlab-12.4.2 | |
| Continuous integration server | Jenkins-2.190.3,jdk1.8,Maven3.6.2,git,SonarQube | |
| Application test server | jdk1.8,tomcat8. 5 |
Gitlab code managed server installation
GitLab
GitLab is an open source application developed by Ruby on Rails. It implements a self managed Git project warehouse, which is deployed on its own server and can access public or private projects through the Web interface.
It has similar functions to Github, which can browse the source code and manage defects and comments. It can manage the team's access to the warehouse. It is very easy to browse the submitted versions and provides a file history library. It also provides a code fragment collection function, which can easily realize code reuse and facilitate searching when necessary in the future.
GitLab general installation
- Install dependent packages
sudo yum install -y curl policycoreutils-python openssh-server perl
- Start the ssh service and set it to on
sudo systemctl enable sshd
sudo systemctl start sshd
- Download postfix and set postfix to enable self startup. Postfix supports gitlab sending function
sudo yum install postfix
sudo systemctl enable postfix
sudo systemctl start postfix
- Open ssh and http services, and then reload the firewall list
sudo firewall-cmd --permanent --add-service=http
sudo firewall-cmd --permanent --add-service=https
sudo systemctl reload firewalld
-
Download gitlab package and install
Download address: https://mirrors.tuna.tsinghua.edu.cn/gitlab-ce/yum/el7/gitlab-ce-12.4.2-ce.0.el7.x86_64.rpm
Installation: RPM -ivh gitlab-ce-12.4 2-ce. 0.el7. x86_ 64.rpm -
Modify gitlab configuration
vi	/etc/gitlab/gitlab.rb
## Modify the gitlab access address and port. The default is 80. We modify it to 82
external_url 'http://192.168.66.100:82'
nginx['listen_port'] = 82
- Overload configuration and start gitlab
gitlab-ctl reconfigure
gitlab-ctl restart
- Add ports to the firewall (do not use if the firewall is turned off)
firewall-cmd --zone=public --add-port=82/tcp --permanent
firewall-cmd --reload
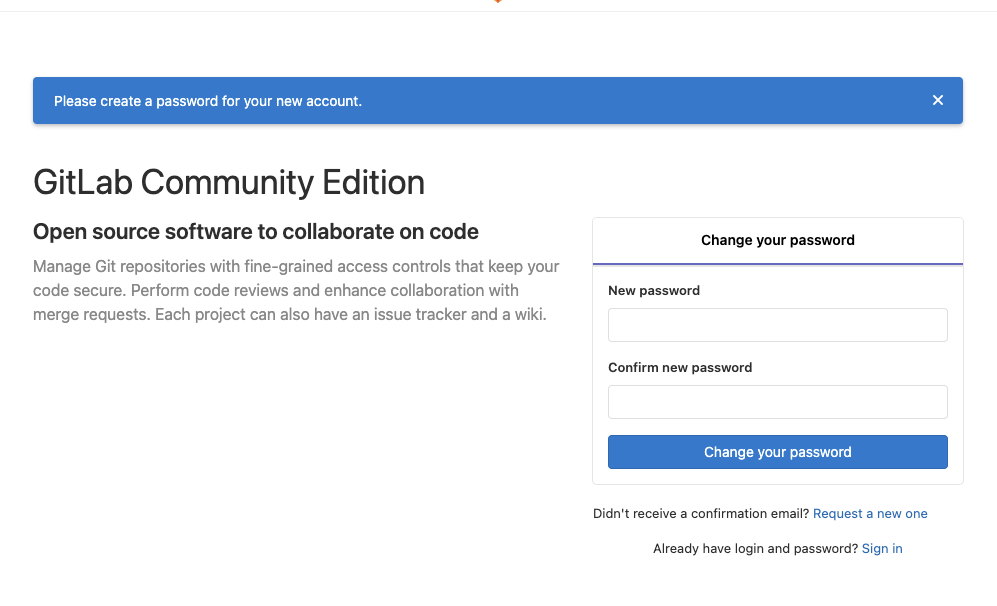
After successful startup, you can see the page of modifying the administrator root password, modify the password, and then log in!
GitLab Docker installation
Gitlab add groups, create users, create projects
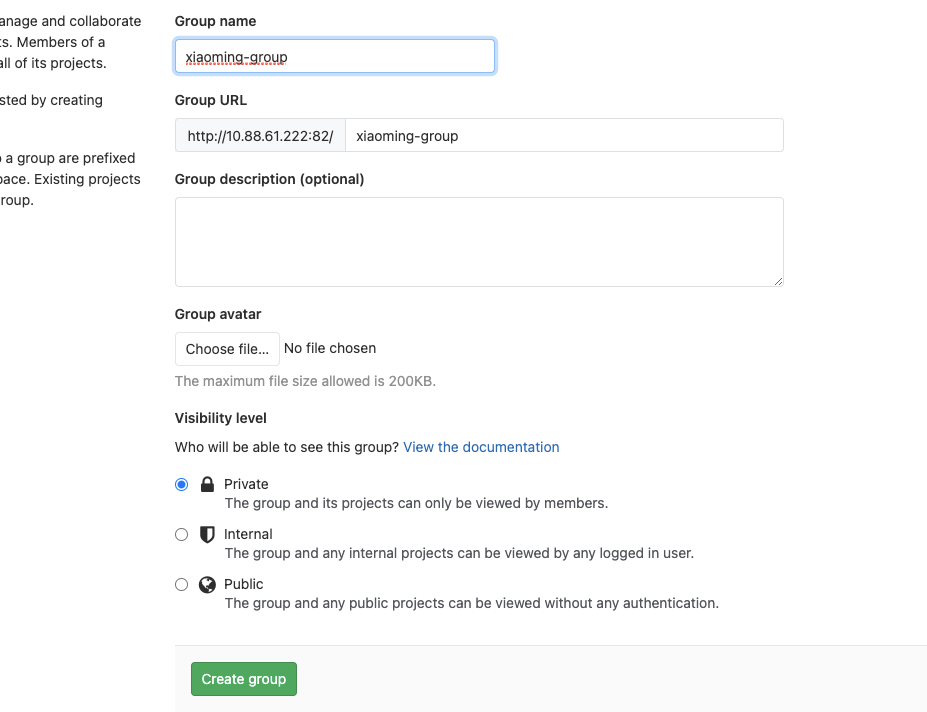
1) Create group
Use administrator root to create a group. There can be multiple project branches in a group. You can add development to the group to set permissions. Different groups are different development projects or service modules of the company. Different groups can be added to the development to realize the management of development setting permissions.
- Create group
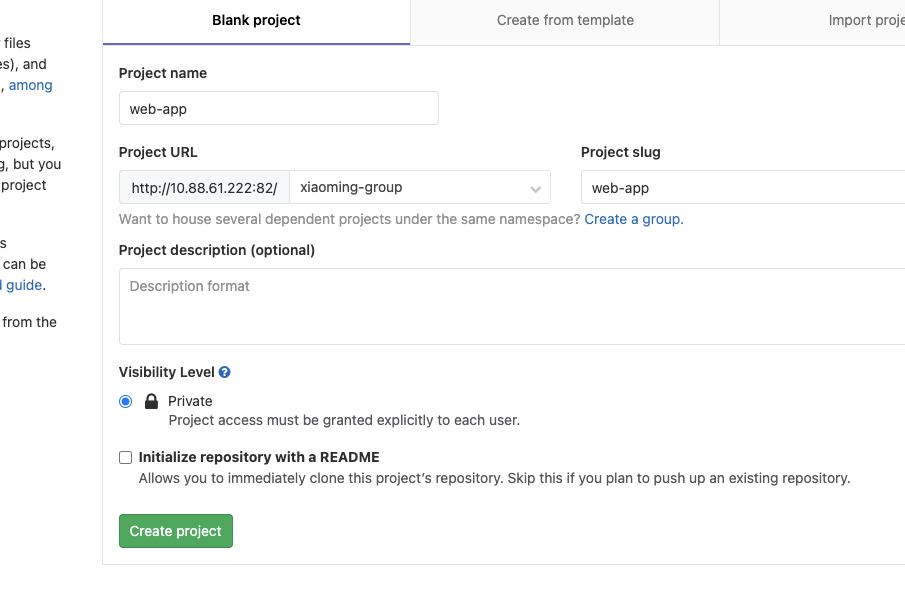
- Create project
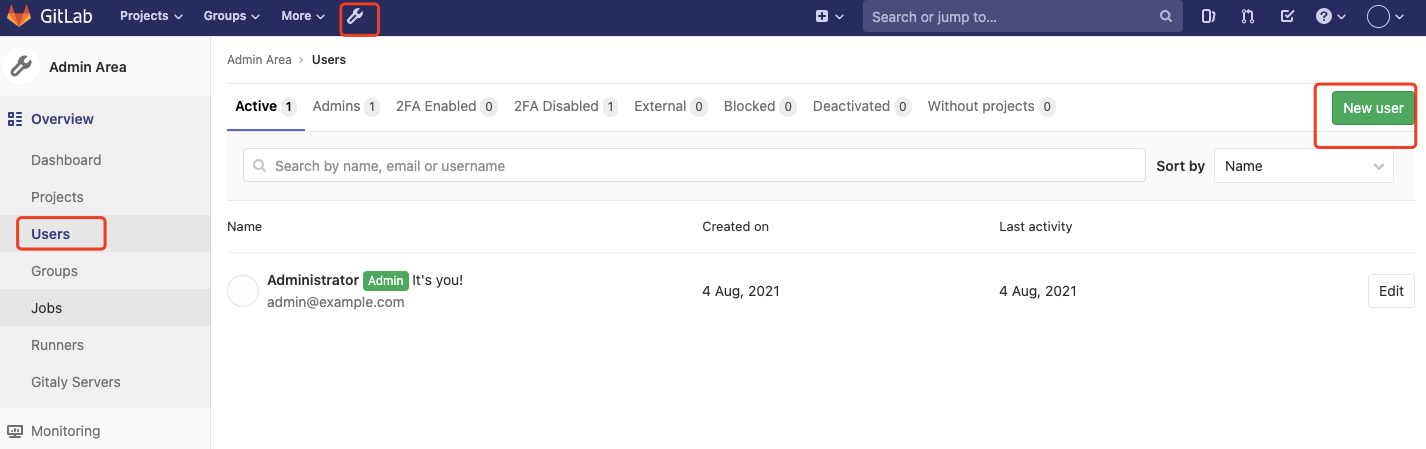
2) Create user
- Create information filled in by ordinary users

Regular: ordinary users can access their groups and projects
Admin: administrators can access all groups, projects, and users and manage all features in this installation
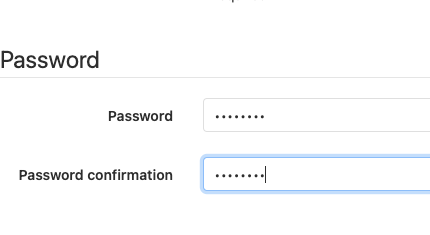
2. Set user password

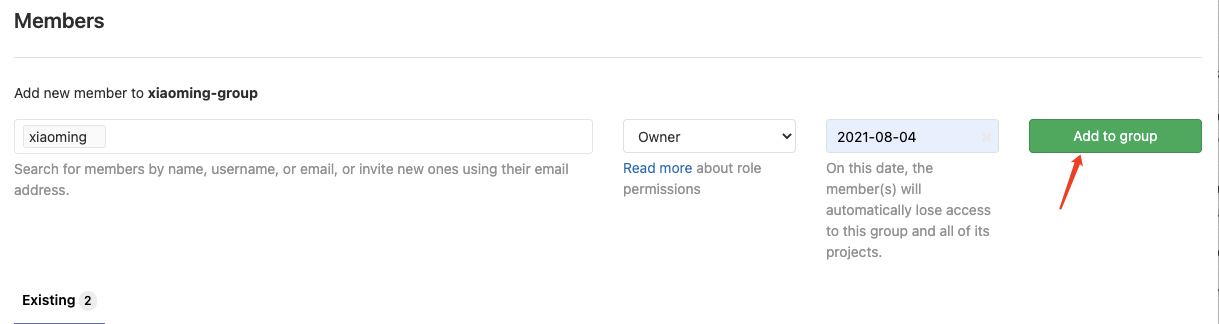
3) Set project group permissions for users
Guest: you can create issue, post comments, and can't read or write version libraries
Reporter: code can be cloned but not submitted. QA and PM can grant this permission
Developer: you can clone code, develop, submit, and push. Ordinary developers can grant this q permission
Maintainer: you can create projects, add tag s, protect branches, add project members, edit projects, and grant this permission to core development
Owner: you can set project access permission - Visbility Level, delete projects, migrate projects, manage project team members and development team leader.
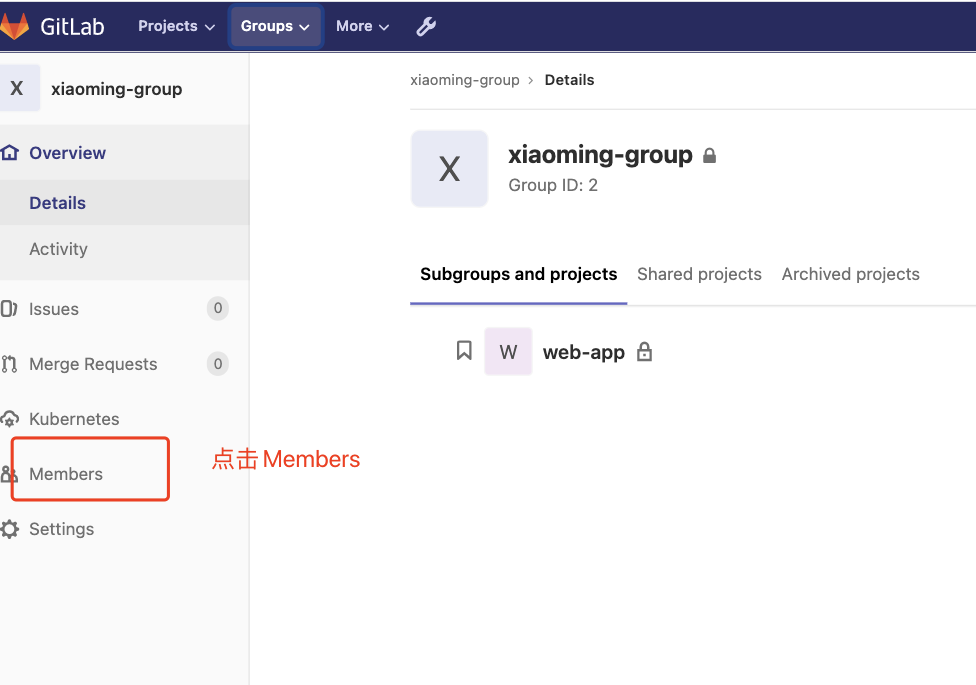
Log in using ordinary users
You can see our group directly
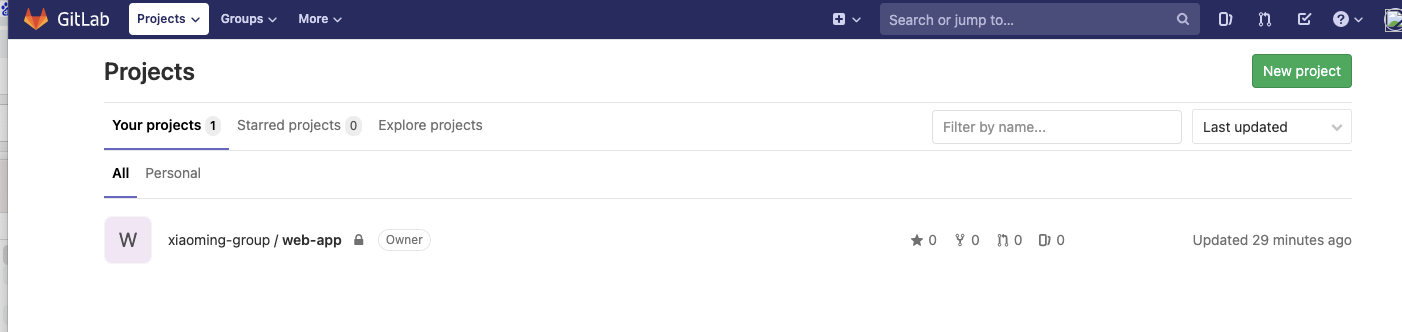
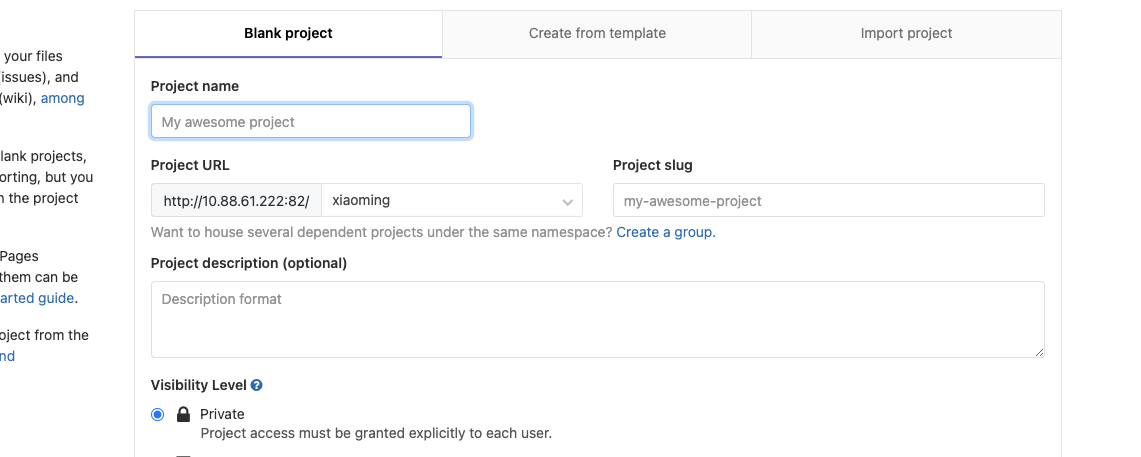
4) Create an item in a user group
The user who just logged in can create a project
Upload Idea code to gitlab
First, create the project in idea and start the test successfully
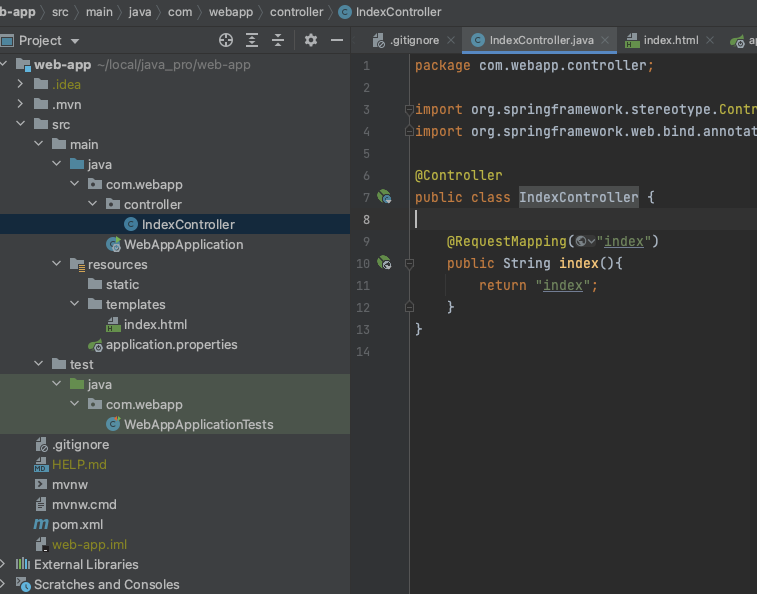
Then add git to the project
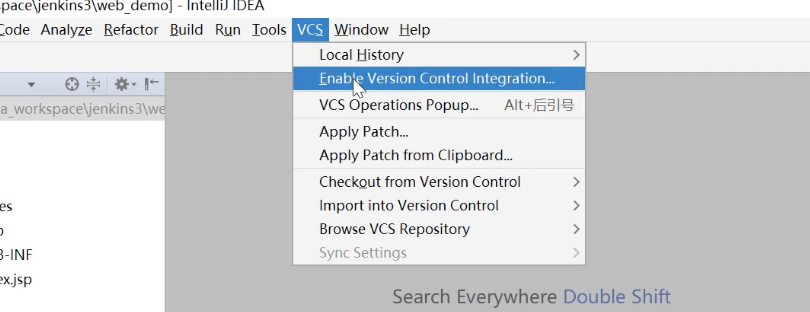
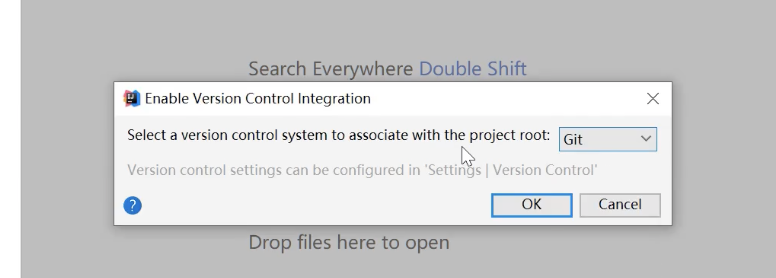
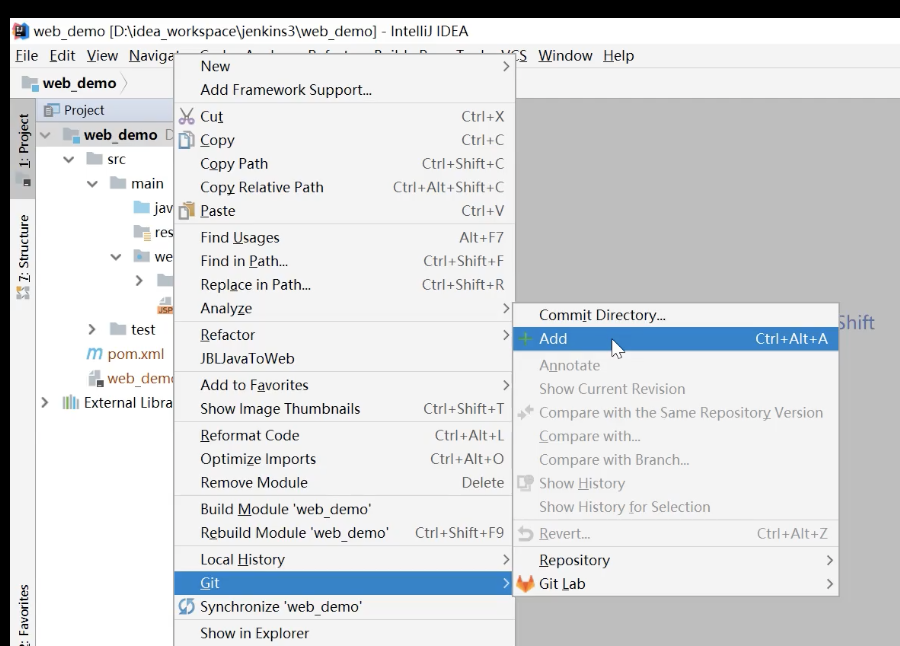
Add the project to the local git repository and submit it
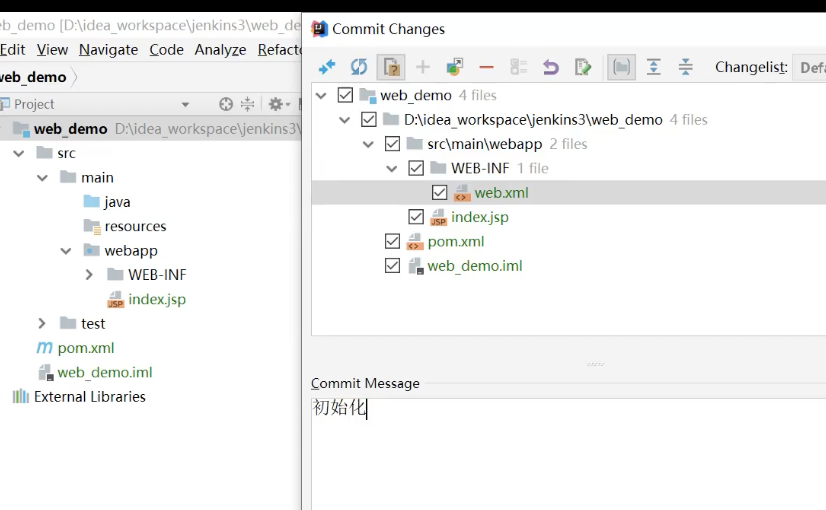
Finally, push to the remote gitlab warehouse
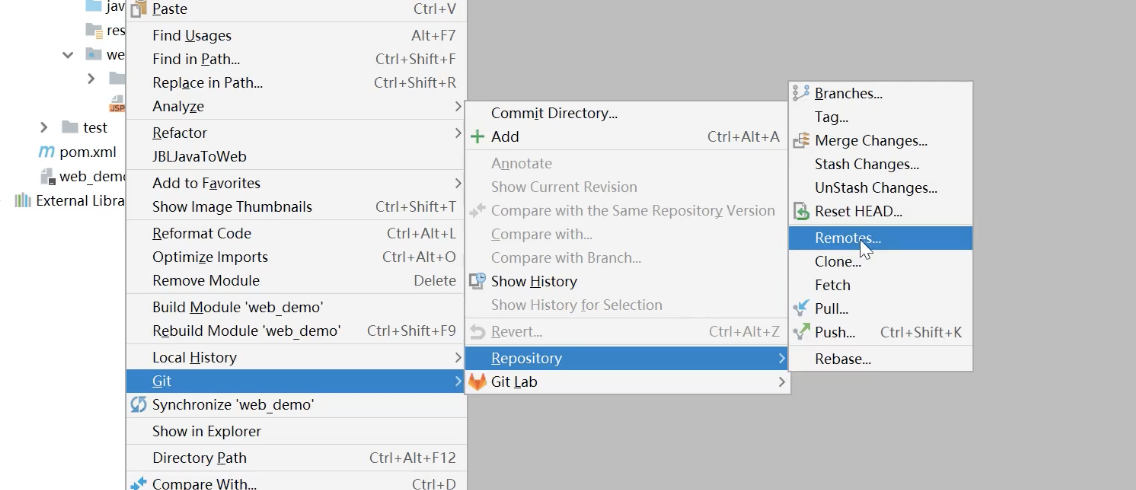
The address used here is ssh, and then the password will be entered
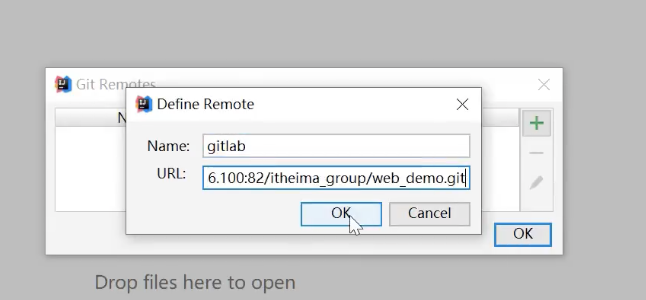
Then push
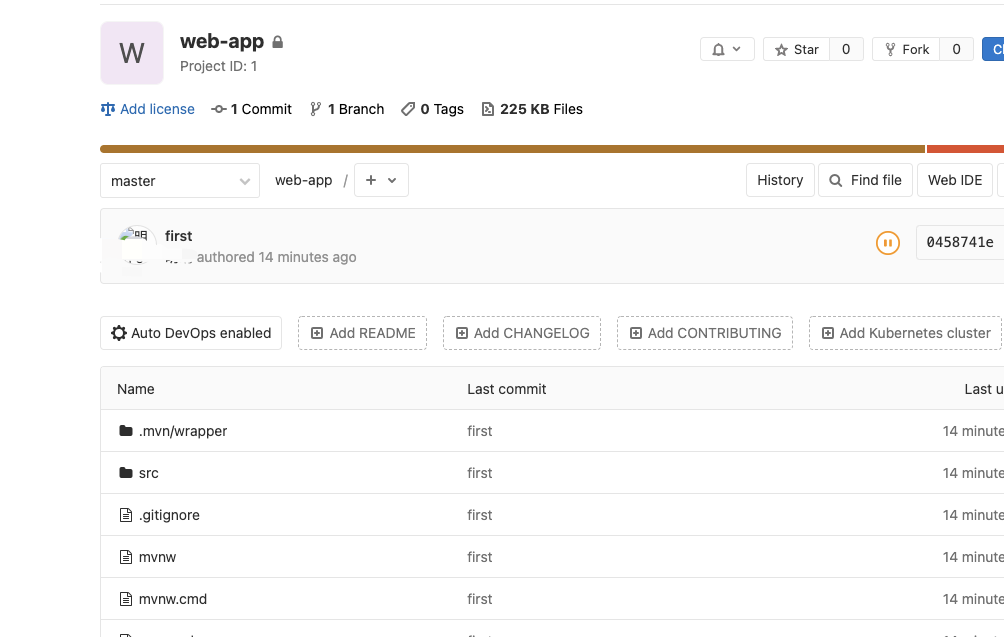
Upload succeeded!!!
How Jenkins software installs Docker
- docker pull image
docker pull jenkins/jenkins
- Create directory and grant permissions
mkdir -p /var/jenkins_mount
chmod 777 /var/jenkins_mount - docker creates and starts the container
docker run -d -p 10240:8080 -p 10241:50000 /
-v /var/jenkins_mount:/var/jenkins_home	/
-v /etc/localtime:/etc/localtime /
--name myjenkins jenkins/jenkins
Port mapping
-p 10240:8080 -p 10241:50000

The mount directory is a container jenkins Working directory, we mount a directory on the hard disk to this location:
-v /var/jenkins_mount:/var/jenkins_home

Let the container use the same time settings as the server.
-v /etc/localtime:/etc/localtime
4. Configure image acceleration
The default Jenkins uses a foreign address, so it is very slow.
cd /var/jenkins_mount/updates
Then execute
sudo sed -i 's#http://updates.jenkins-ci.org/download#https://mirrors.tuna.tsinghua.edu.cn/jenkins#g' default.json && sed -i 's#http://www.google.com#https://www.baidu.com#g' default.json
This blog is very detailed
5. Restart the container
docker restart myjenkins
Start successful
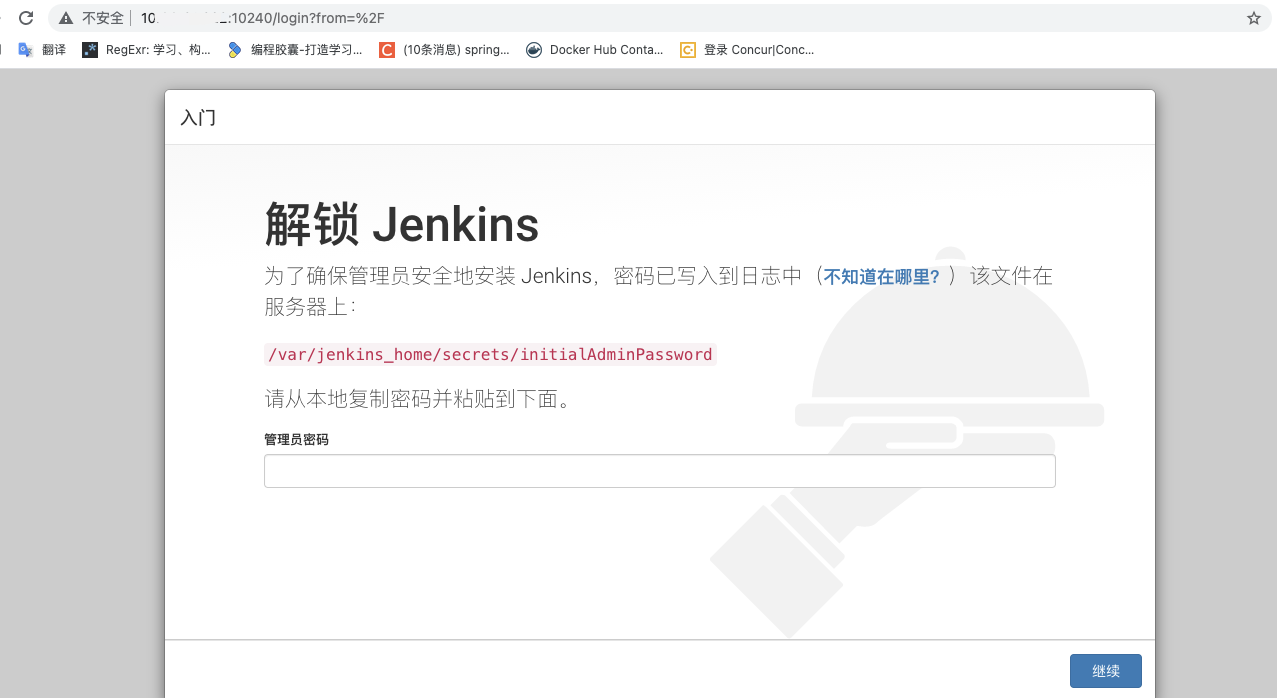
6. View administrator password
[root@localhost jenkins_mount]# cat /var/jenkins_mount/secrets/initialAdminPassword
46f87f2955484e489f82262aaf58ed83
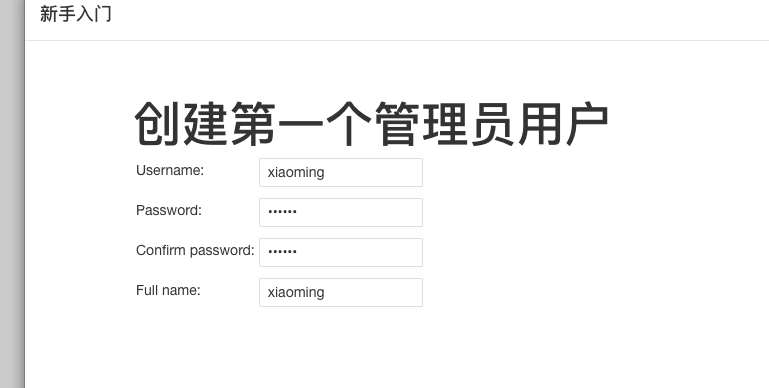
Login succeeded!!
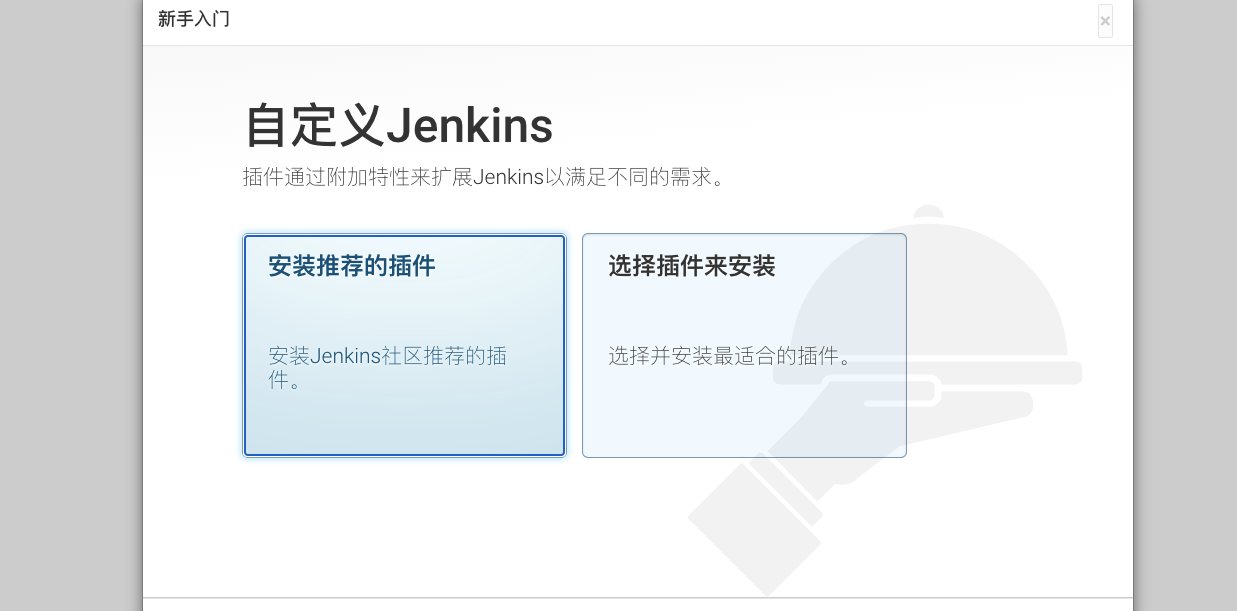
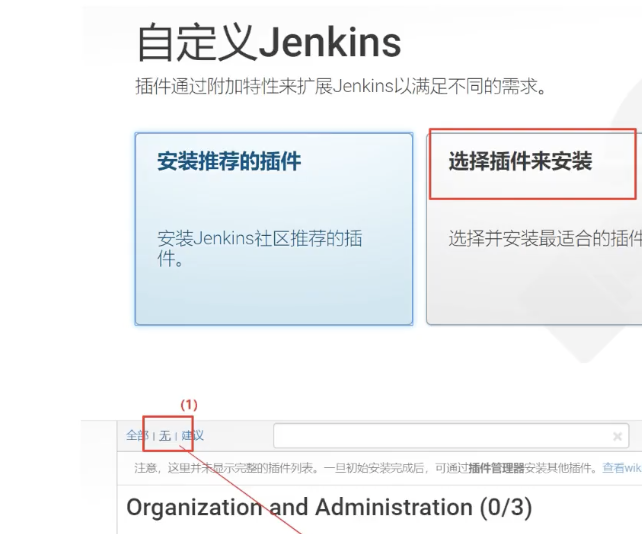
Here we click to select plug-in installation, and then select none. We don't install plug-ins here. We will install them later
The installation is completed after confirmation!
Jenkins plug-in management
Install Chinese package
First, enter our plug-in management

Search for chinese, and then select chinese package download
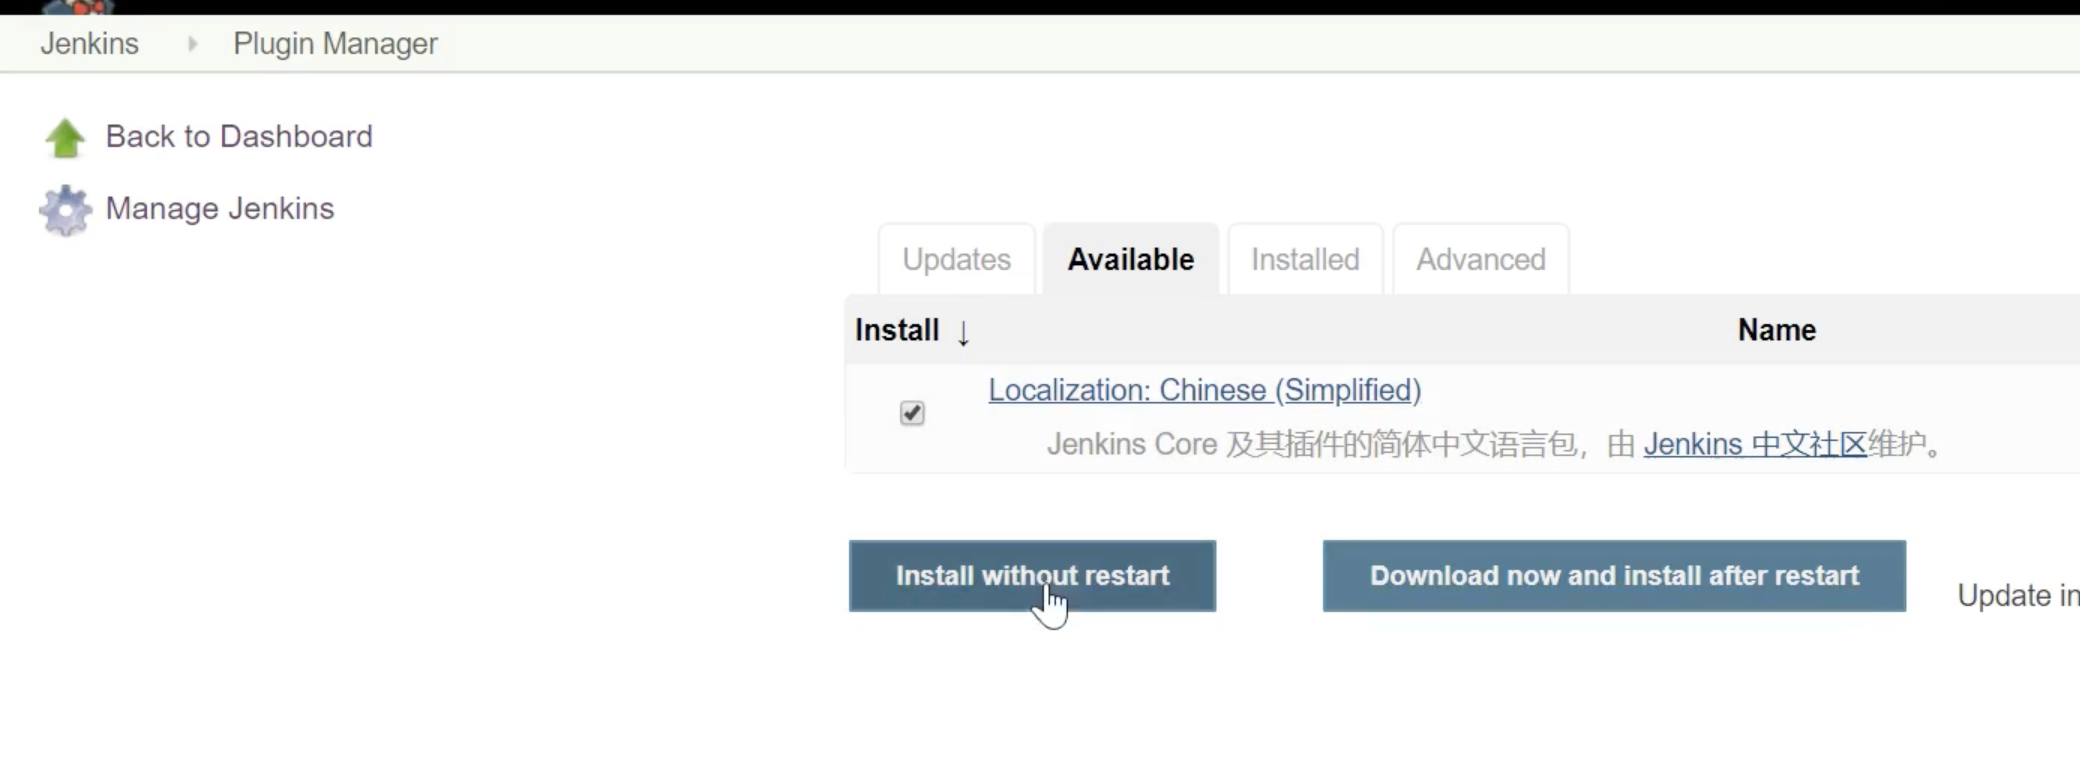
Click Go back to the...
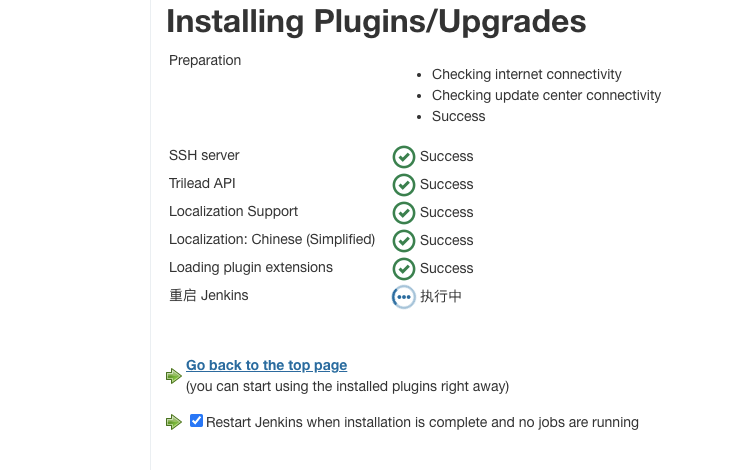
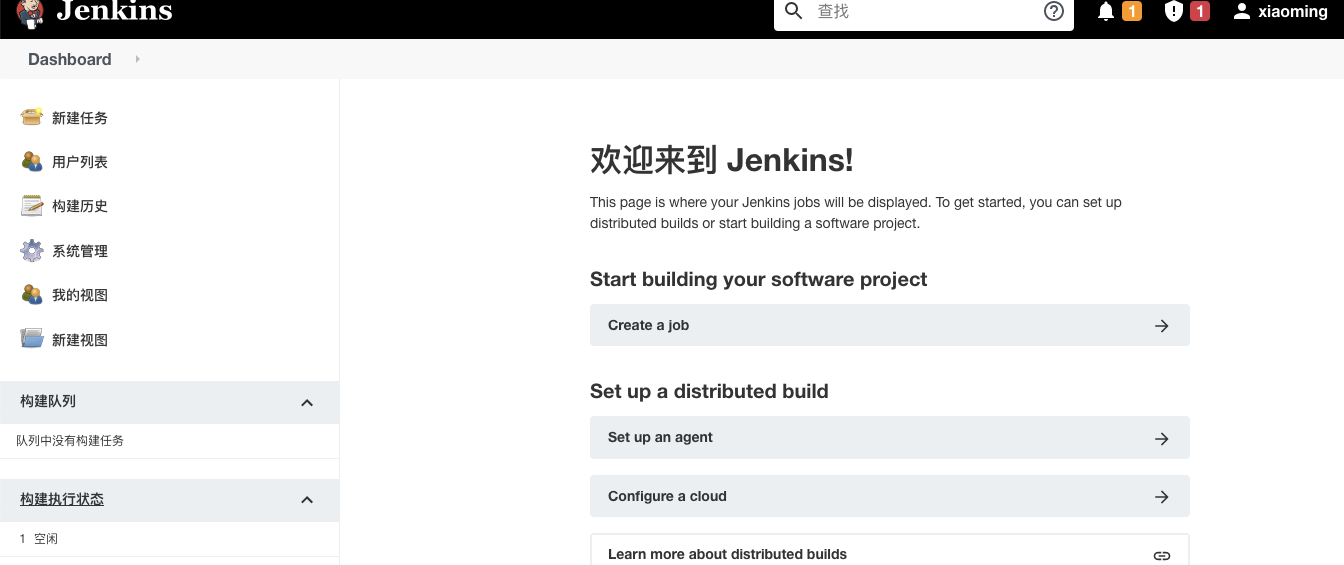
After reopening
Jenkins user rights management
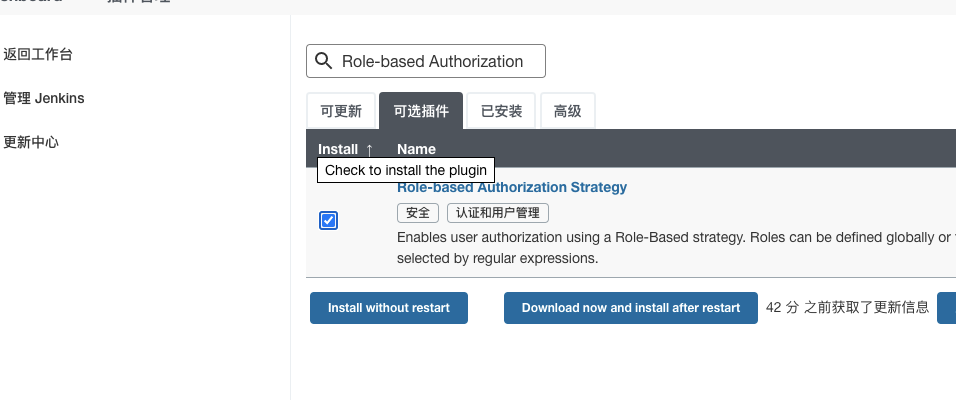
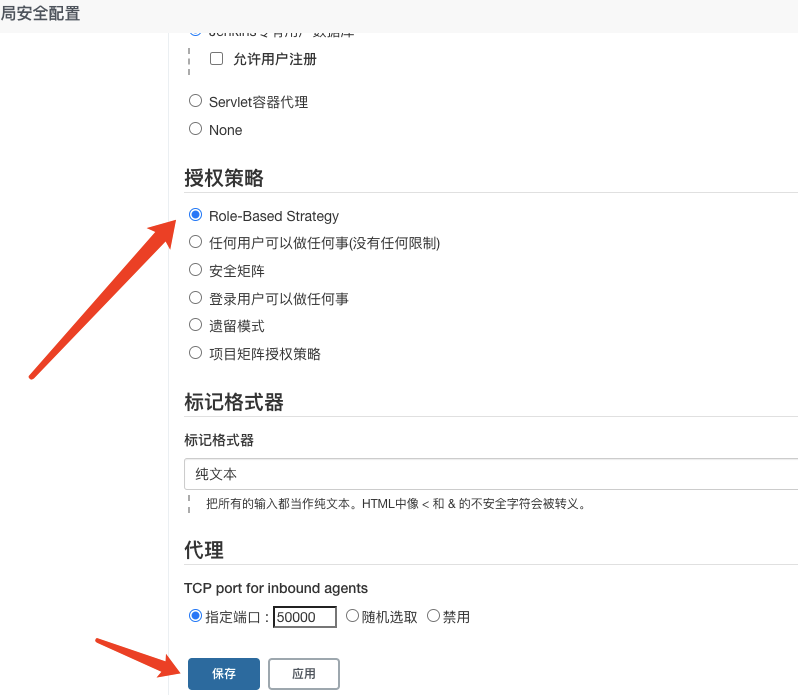
We use the Role-based Authorization Strategy plug-in to manage Jenkins user permissions
Install the role based authorization strategy plug-in
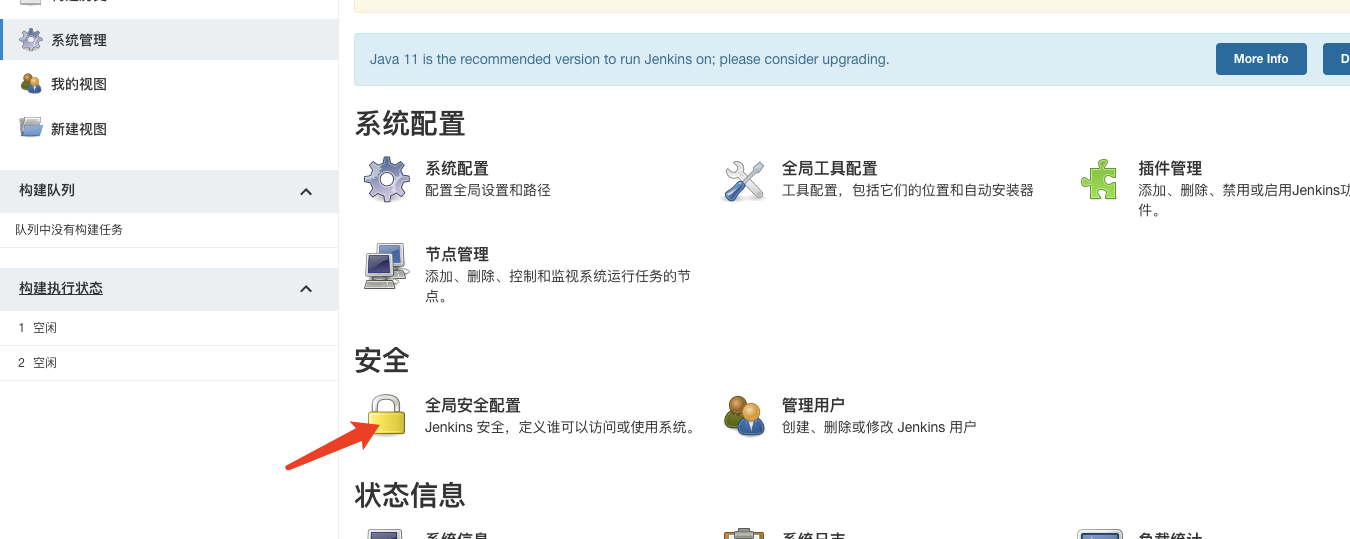
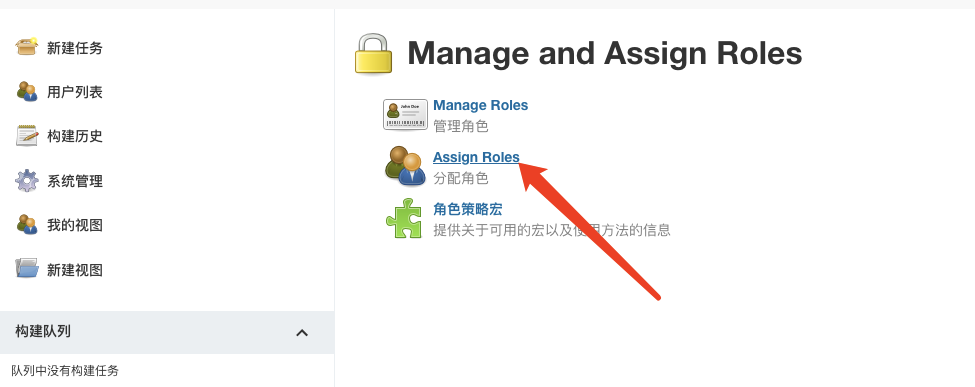
Then configure the global security permissions
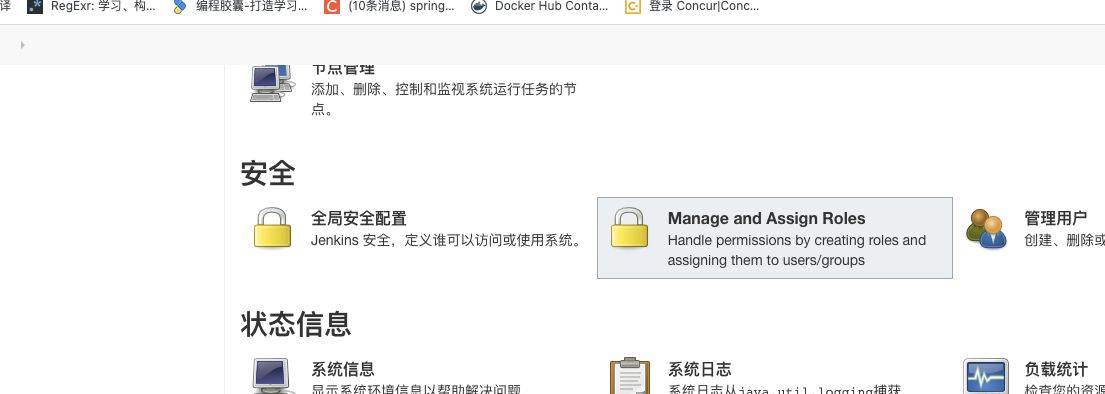
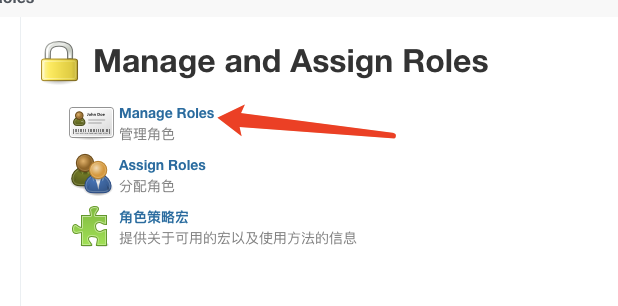
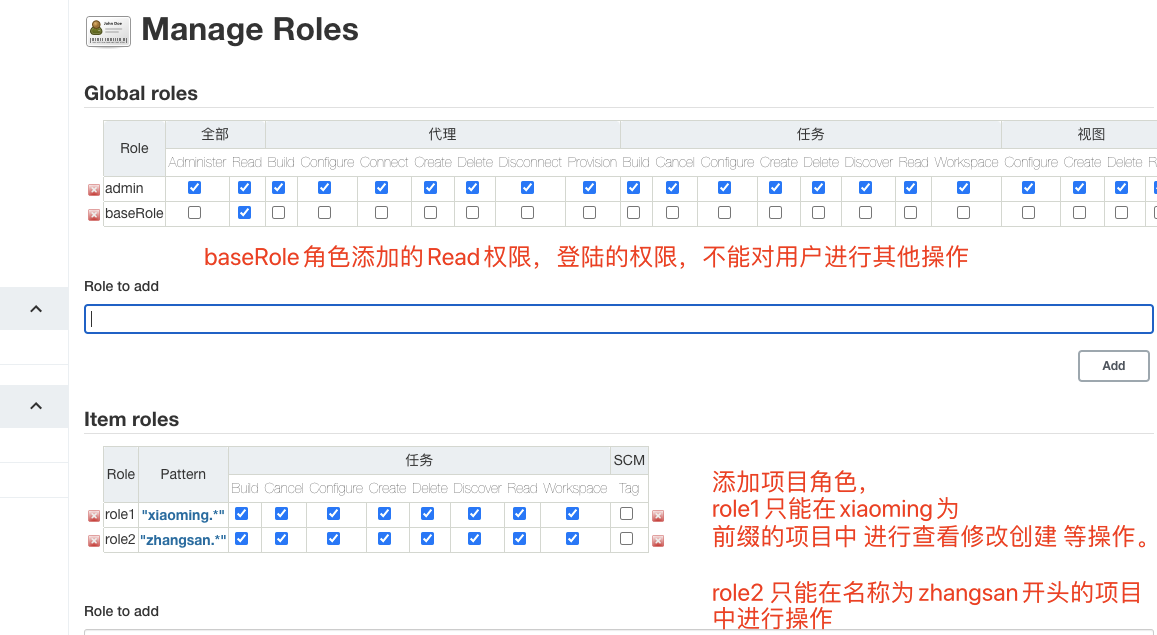
- Create our role rights management
- Add two users to authorize their roles
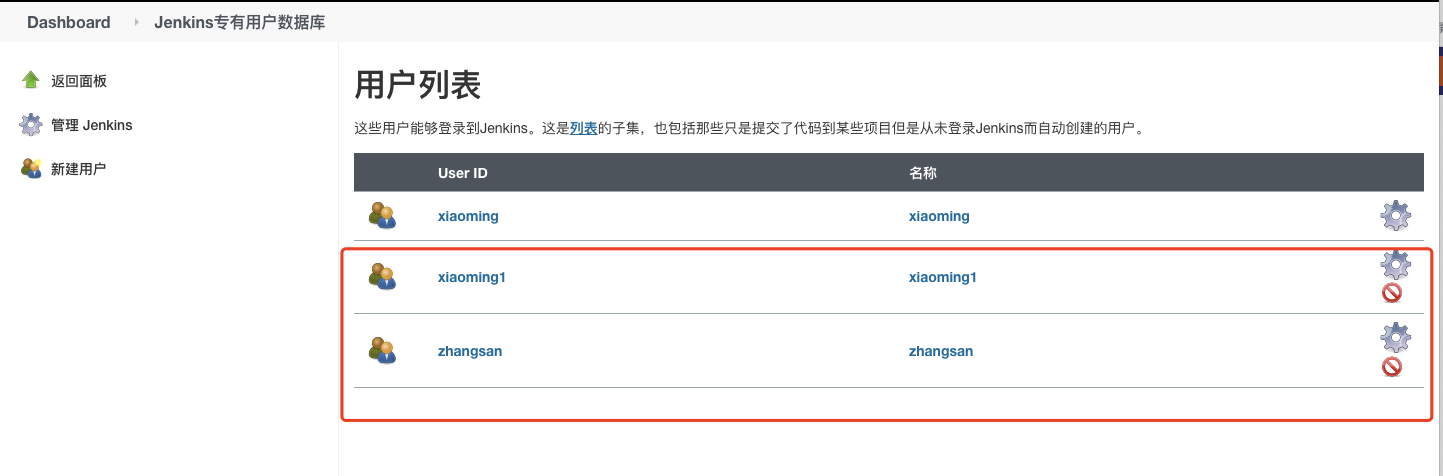
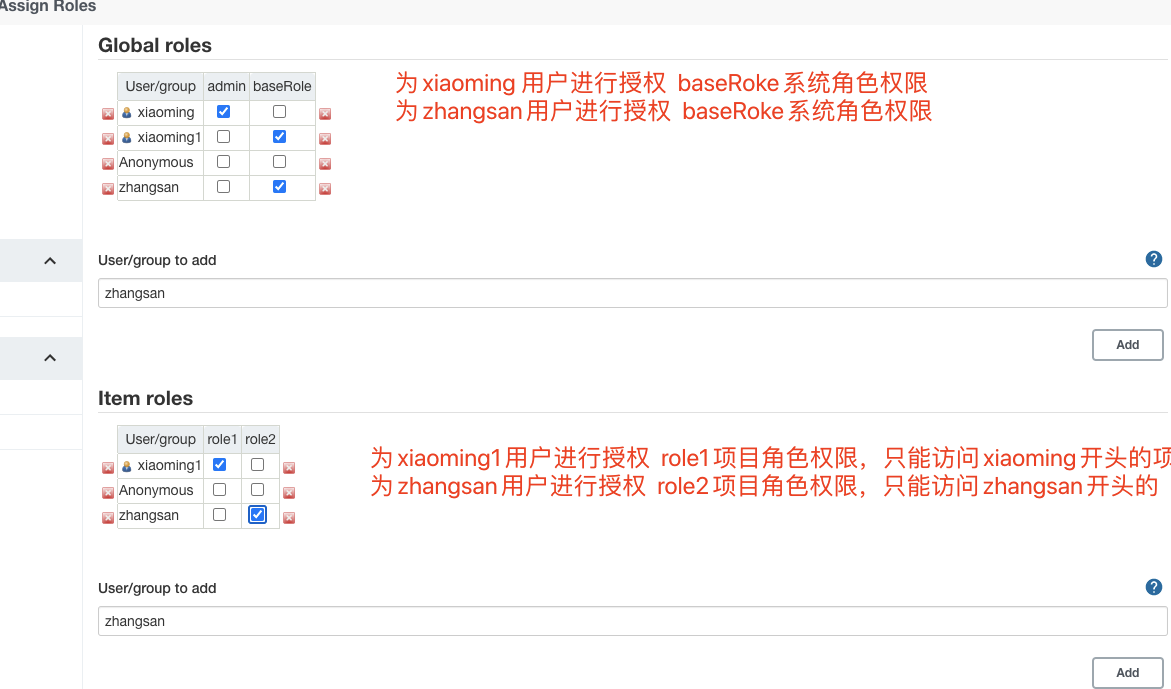
- Test our role permissions
Create several new projects
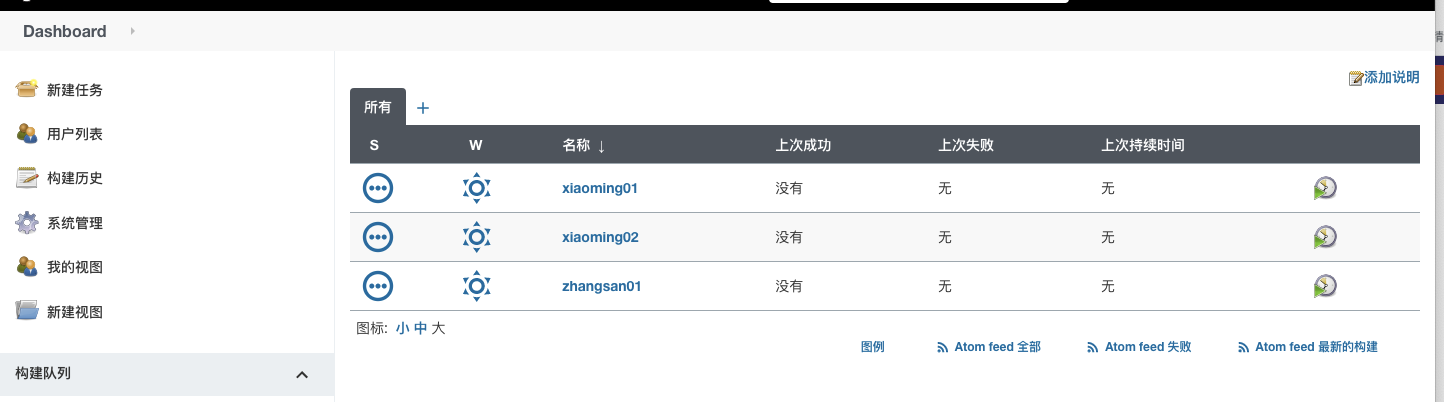
Then log in to xiaoming1 and the user finds it. Only project tasks starting with xiaoming can be viewed
t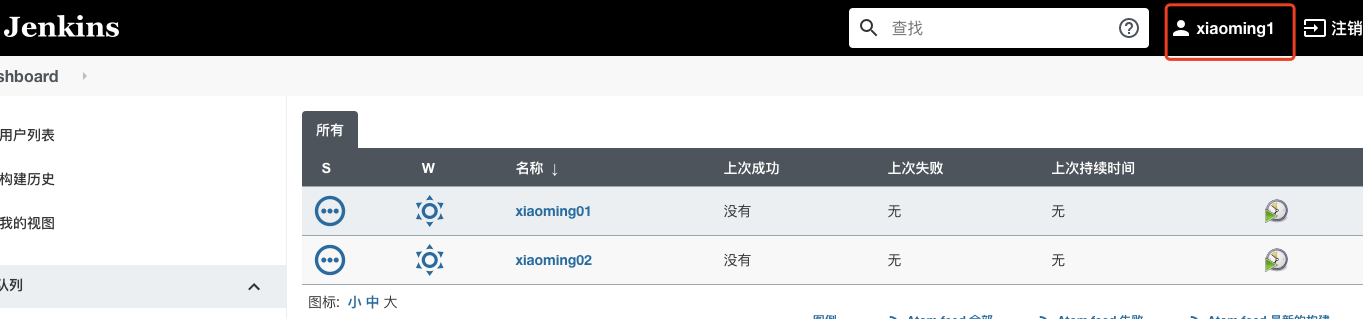
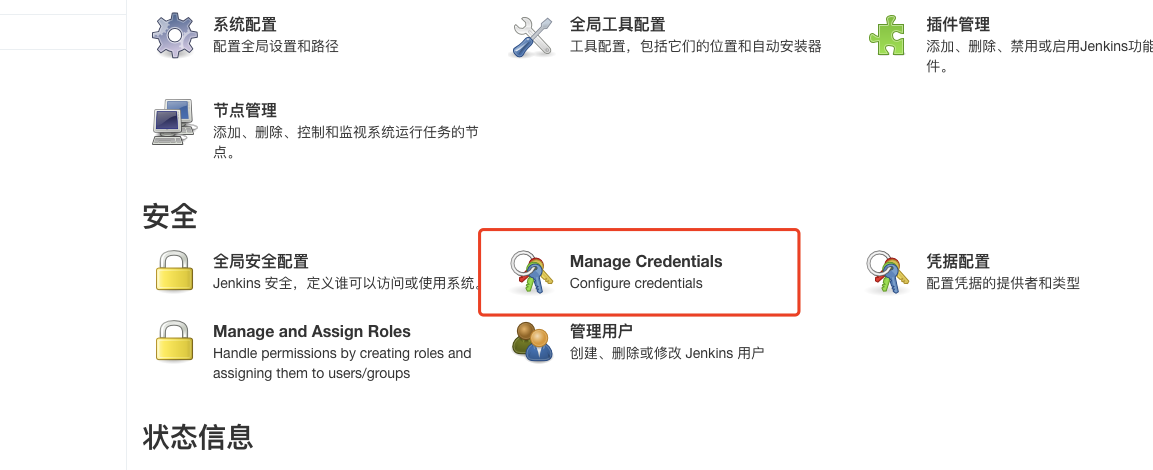
Jenkins voucher management
Credentials can be used to store database passwords, Gitlab password information and Docker private warehouse passwords that need ciphertext protection, so that Jenkins can interact with these third-party applications.
Install the Credentials Binding plug-in
To use the credential management feature in Jenkins, you need to install the Credentials Binding plug-in

next step
next step
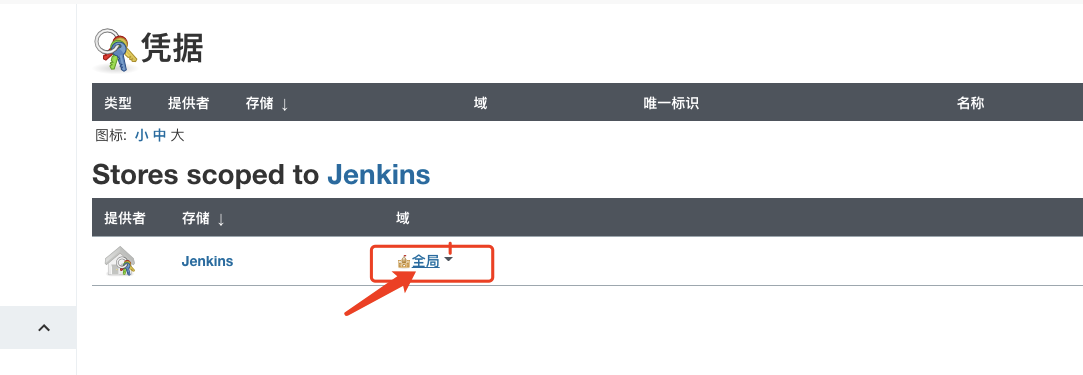
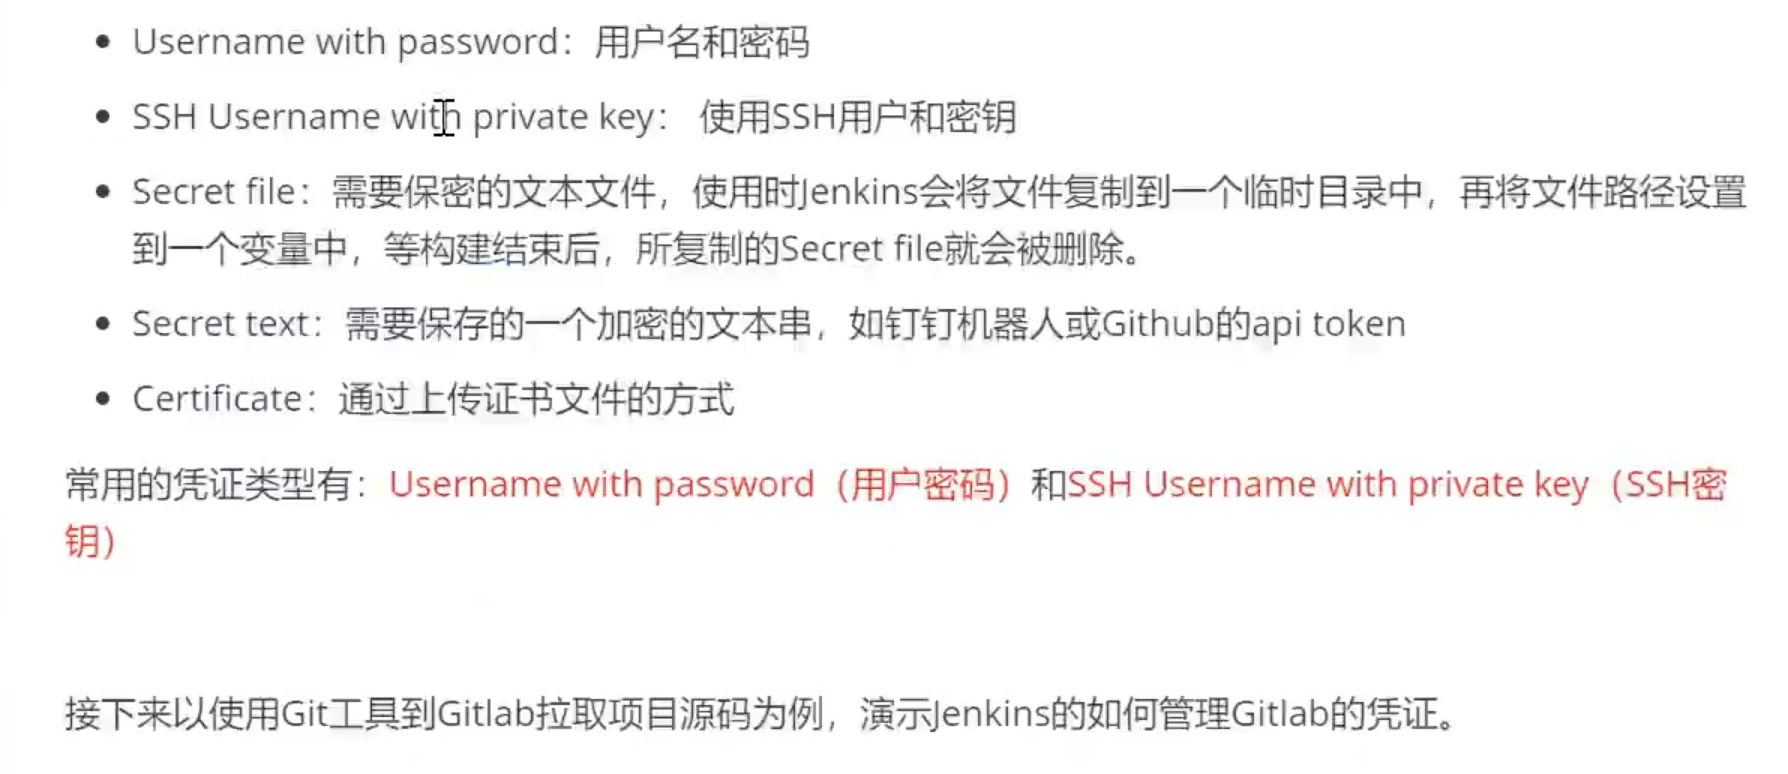
Select voucher type
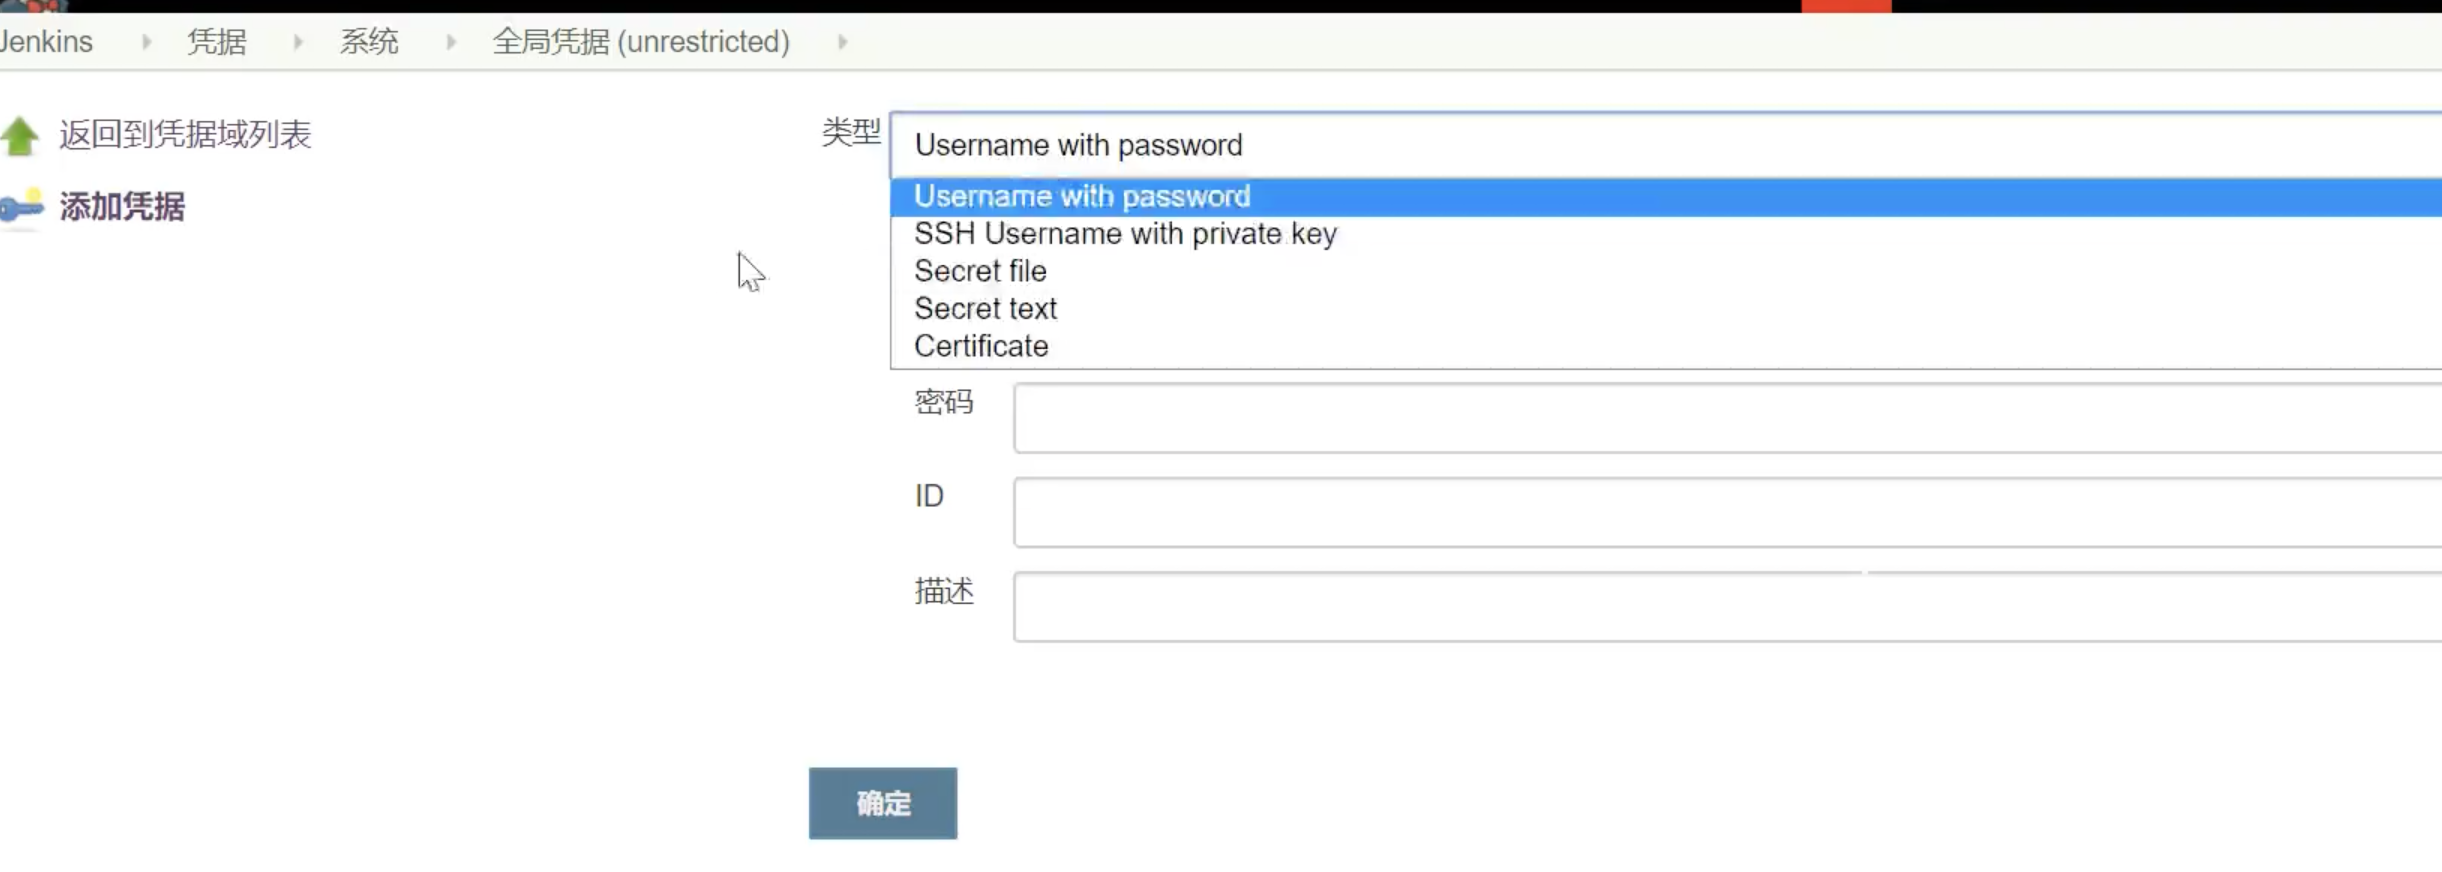
There are five kinds of vouchers
Install git plug-ins and git tools
In order for Jenkins to support pulling source code from gitlab, you need to install git plug-in and git tool on CentOS
git plug-in installation: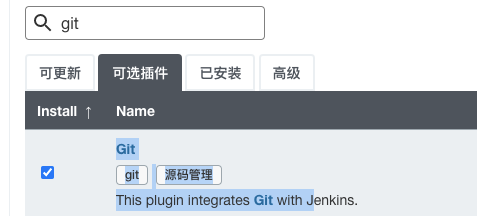
Installing GIT tools on CentOS
yum install git -y
git --version view version after installation
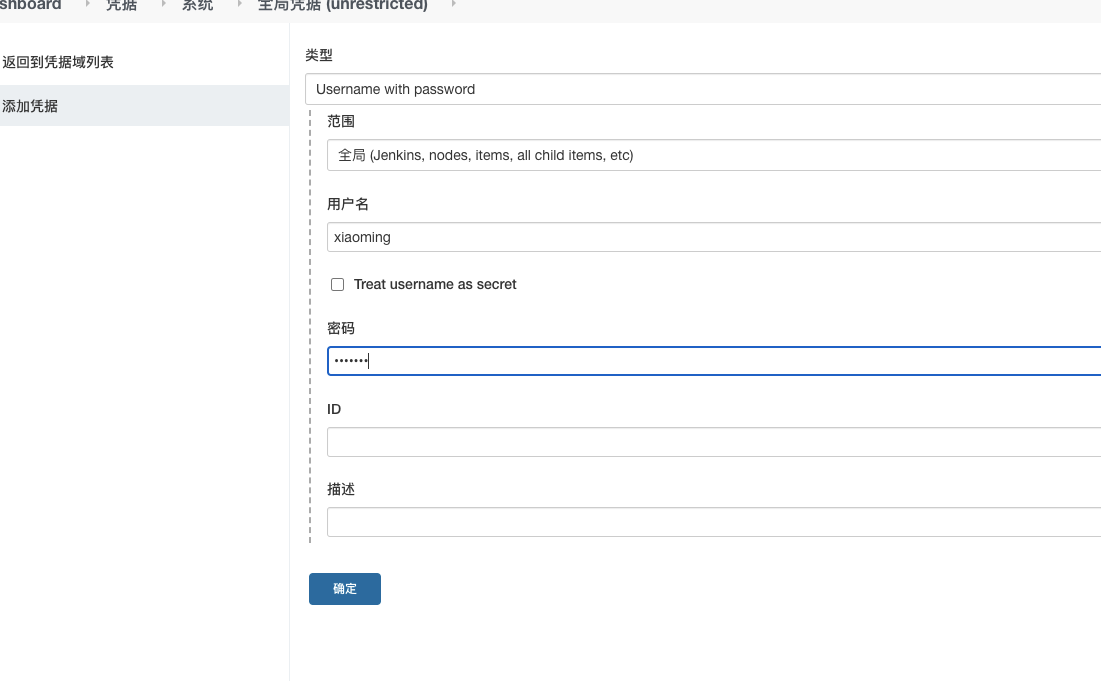
User password type
Add a voucher and use the account password of gitlab

Create a project add git user password credentials to the project
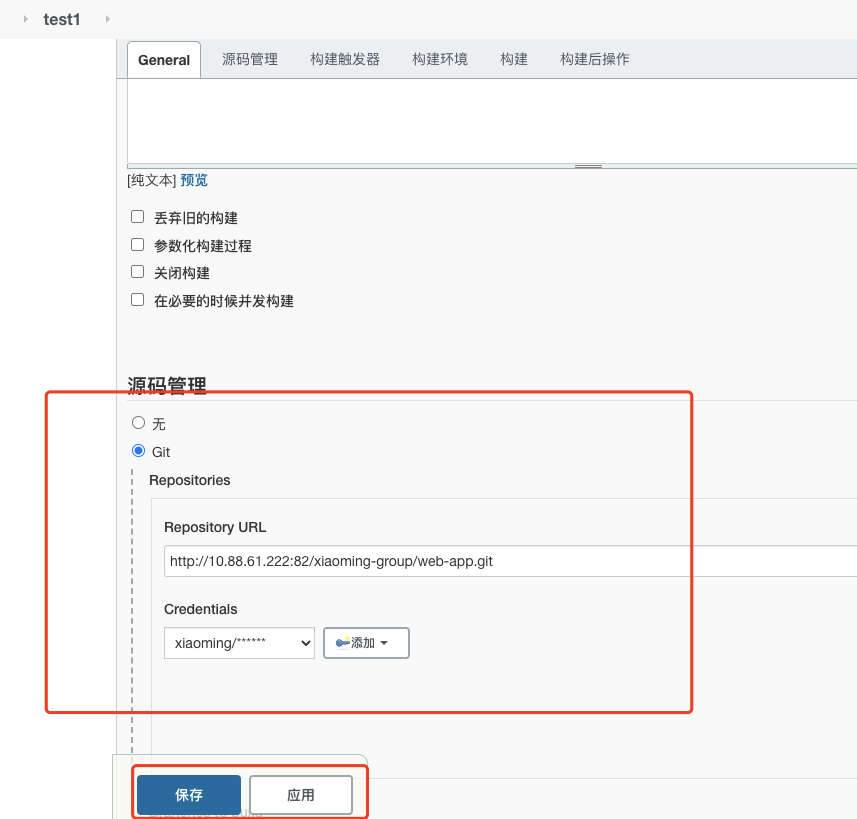
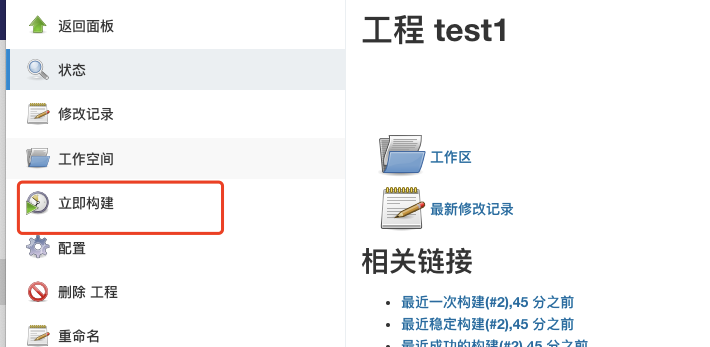
Build project
SSH key type
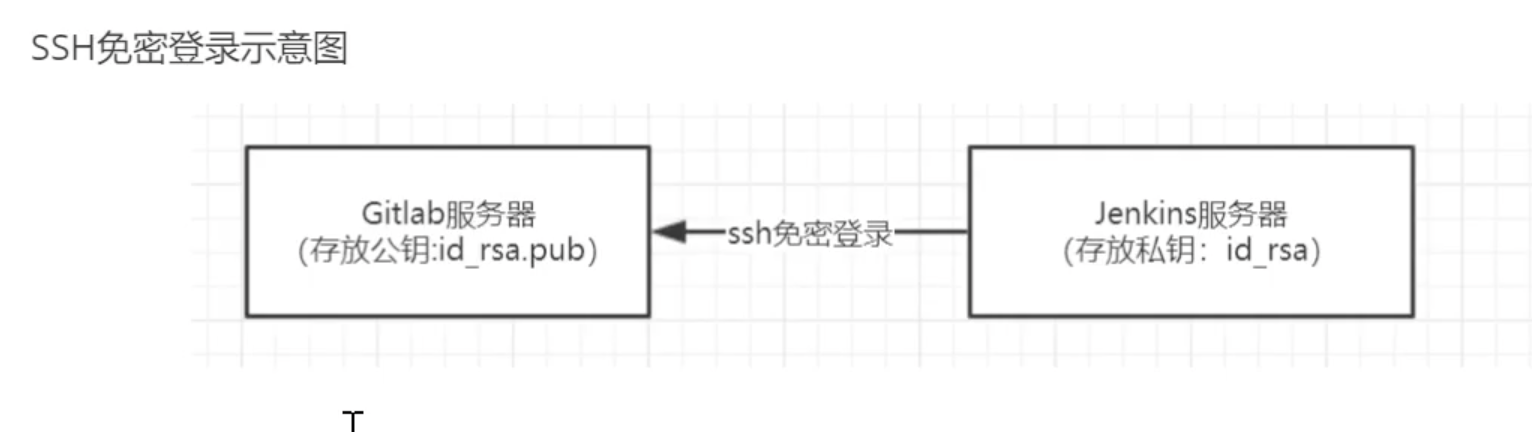
1) Generate public and private keys using root
ssh-keygen -t rsa
At / root / The SSH / directory holds the public and private keys
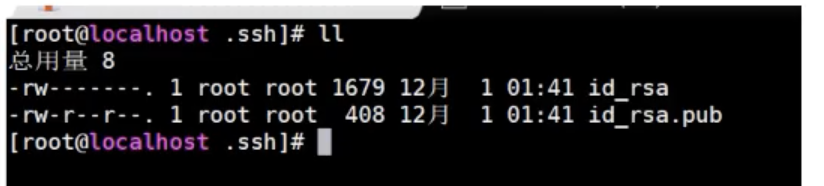
id_rsa: private key
id_rsa.pub: public key
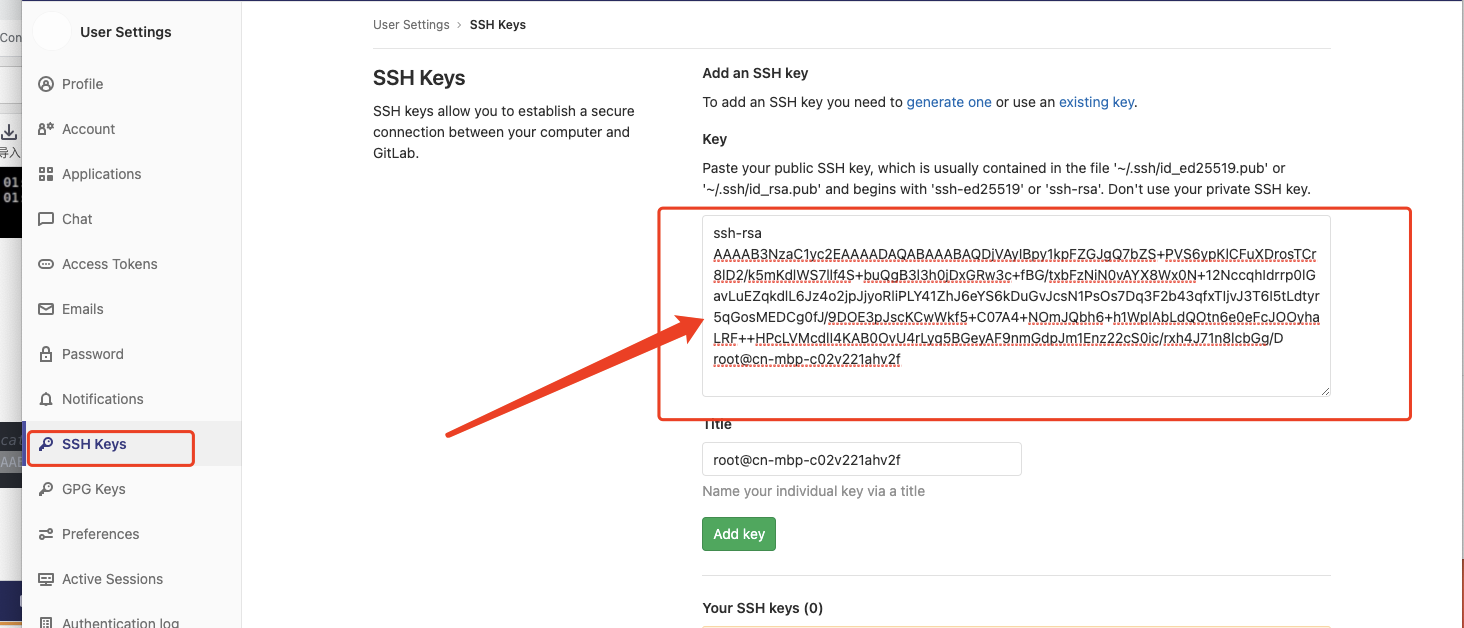
2) Put the generated public key in gitlab
- Check the public key on the Jenkins machine
[root@cn-mbp-c02v221ahv2f .ssh]# cat id_rsa.pub
ssh-rsa AAAAB3NzaC1yc2EAAAADAQABAAABAQDjVAyIBpy1kpFZGJgQ7bZS+PVS6ypKlCFuXDrosTCr8lD2/k5mKdlWS7llf4S+buQgB3l3h0jDxGRw3c+fBG/txbFzNiN0vAYX8Wx0N+12NccqhIdrrp0lGavLuEZqkdlL6Jz4o2jpJjyoRliPLY41ZhJ6eYS6kDuGvJcsN1PsOs7Dq3F2b43qfxTIjvJ3T6I5tLdtyr5qGosMEDCg0fJ/9DOE3pJscKCwWkf5+C07A4+NOmJQbh6+h1WplAbLdQOtn6e0eFcJOOyhaLRF++HPcLVMcdlI4KAB0OvU4rLyq5BGeyAF9nmGdpJm1Enz22cS0ic/rxh4J71n8lcbGg/D root@cn-mbp-c02v221ahv2f
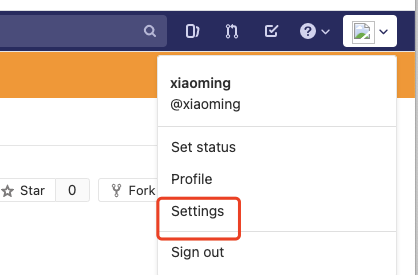
- Add public ssh key to gitlab
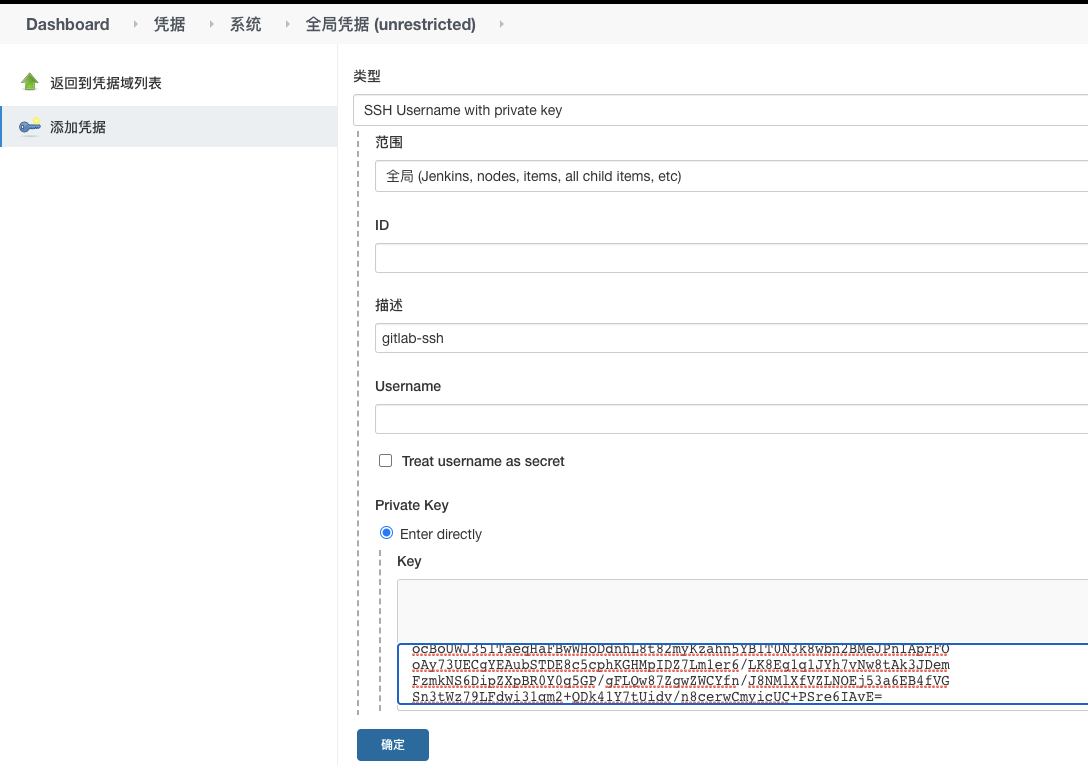
3) Add the generated private key to the Jenkins certificate

Final test
Create a project and use ssh
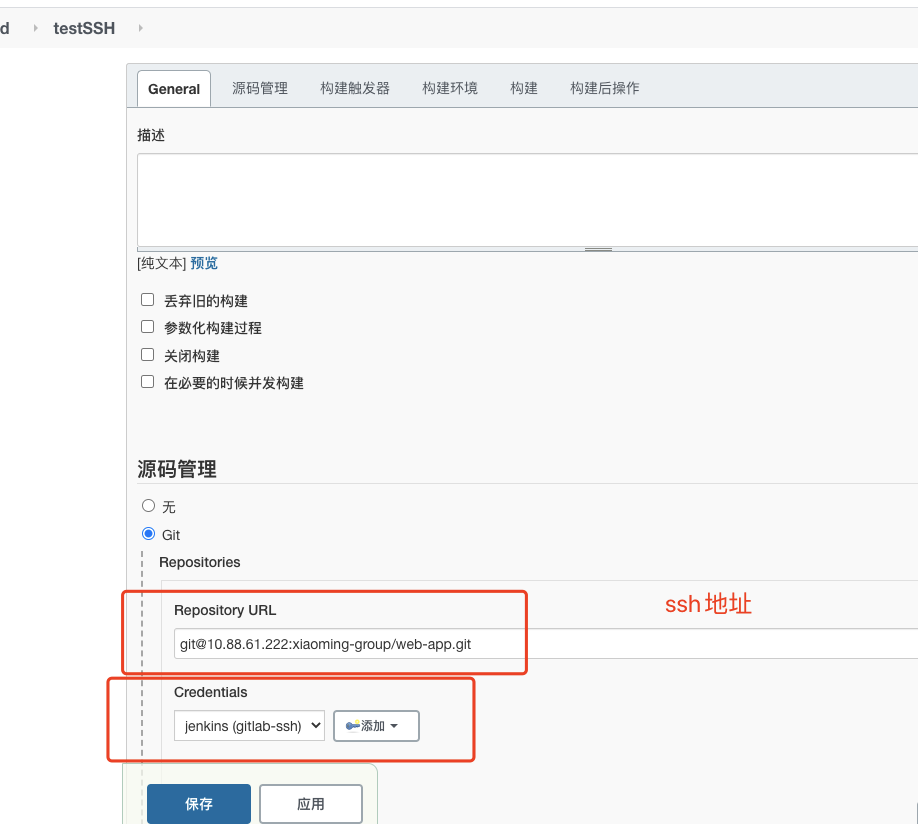
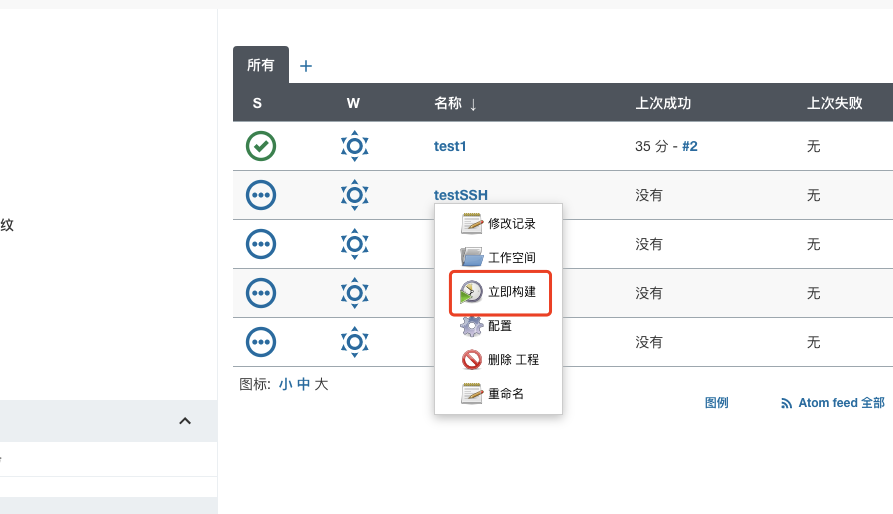
Complete ssh type pull code!!
Installing Maven and configuring
Install maven and java
First, maven relies on the java environment
 tar -zvxf jdk-8u301-linux-i586.tar.gz
 tar -zvxf apache-maven-3.8.1-bin.tar.gz
Configure the environment of jdk and maven
# java
export JAVA_HOME=/home/java/jdk1.8.0_301
export JRE_HOME=/home/java/jdk1.8.0_301/jre
export CLASSPATH=.:$JAVA_HOME/lib:$JRE_HOME/lib:$CLASSPATH
export PATH=$JAVA_HOME/bin:$JRE_HOME/bin:$JAVA_HOME:$PATH

# maven
export MAVEN_HOME=/home/maven/apache-maven-3.8.1
export PATH=$MAVEN_HOME/bin:$PATH
Execute source /etc/profile to refresh the file
## View version
java -- version
mvn -v
Modify maven's configuration file and download it using Ali's
 <!-- Download from alicloud image jar package -->
  <mirrors>
	<mirror>
      <id>alimaven</id>
      <name>aliyun maven</name>
      <url>http://maven.aliyun.com/nexus/content/groups/public/</url>
      <mirrorOf>central</mirrorOf>
    </mirror>
  </mirrors>
Start Jenkins to mount java and maven
The previous container was deleted.
docker run -d -p 10240:8080 -p 10241:50000 \
-v /var/jenkins_mount:/var/jenkins_home \
-v /home/maven/apache-maven-3.8.1:/usr/local/maven \
-v /home/java/jdk1.8.0_301:/usr/local/java \
--name myjenkins jenkins/jenkins
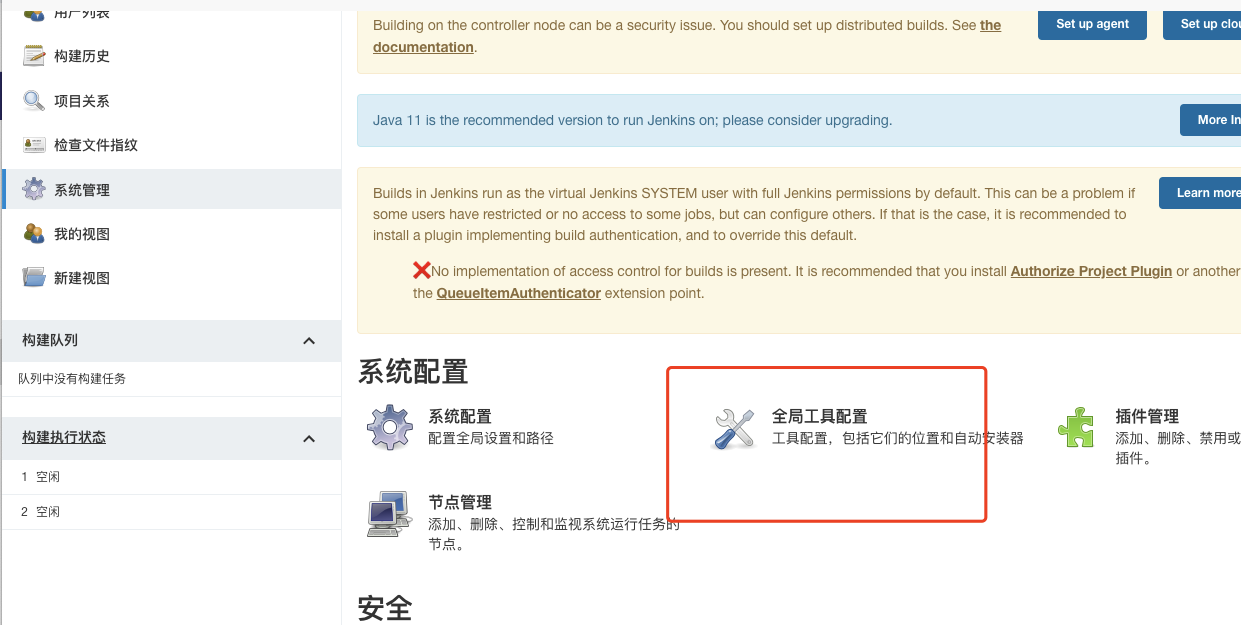
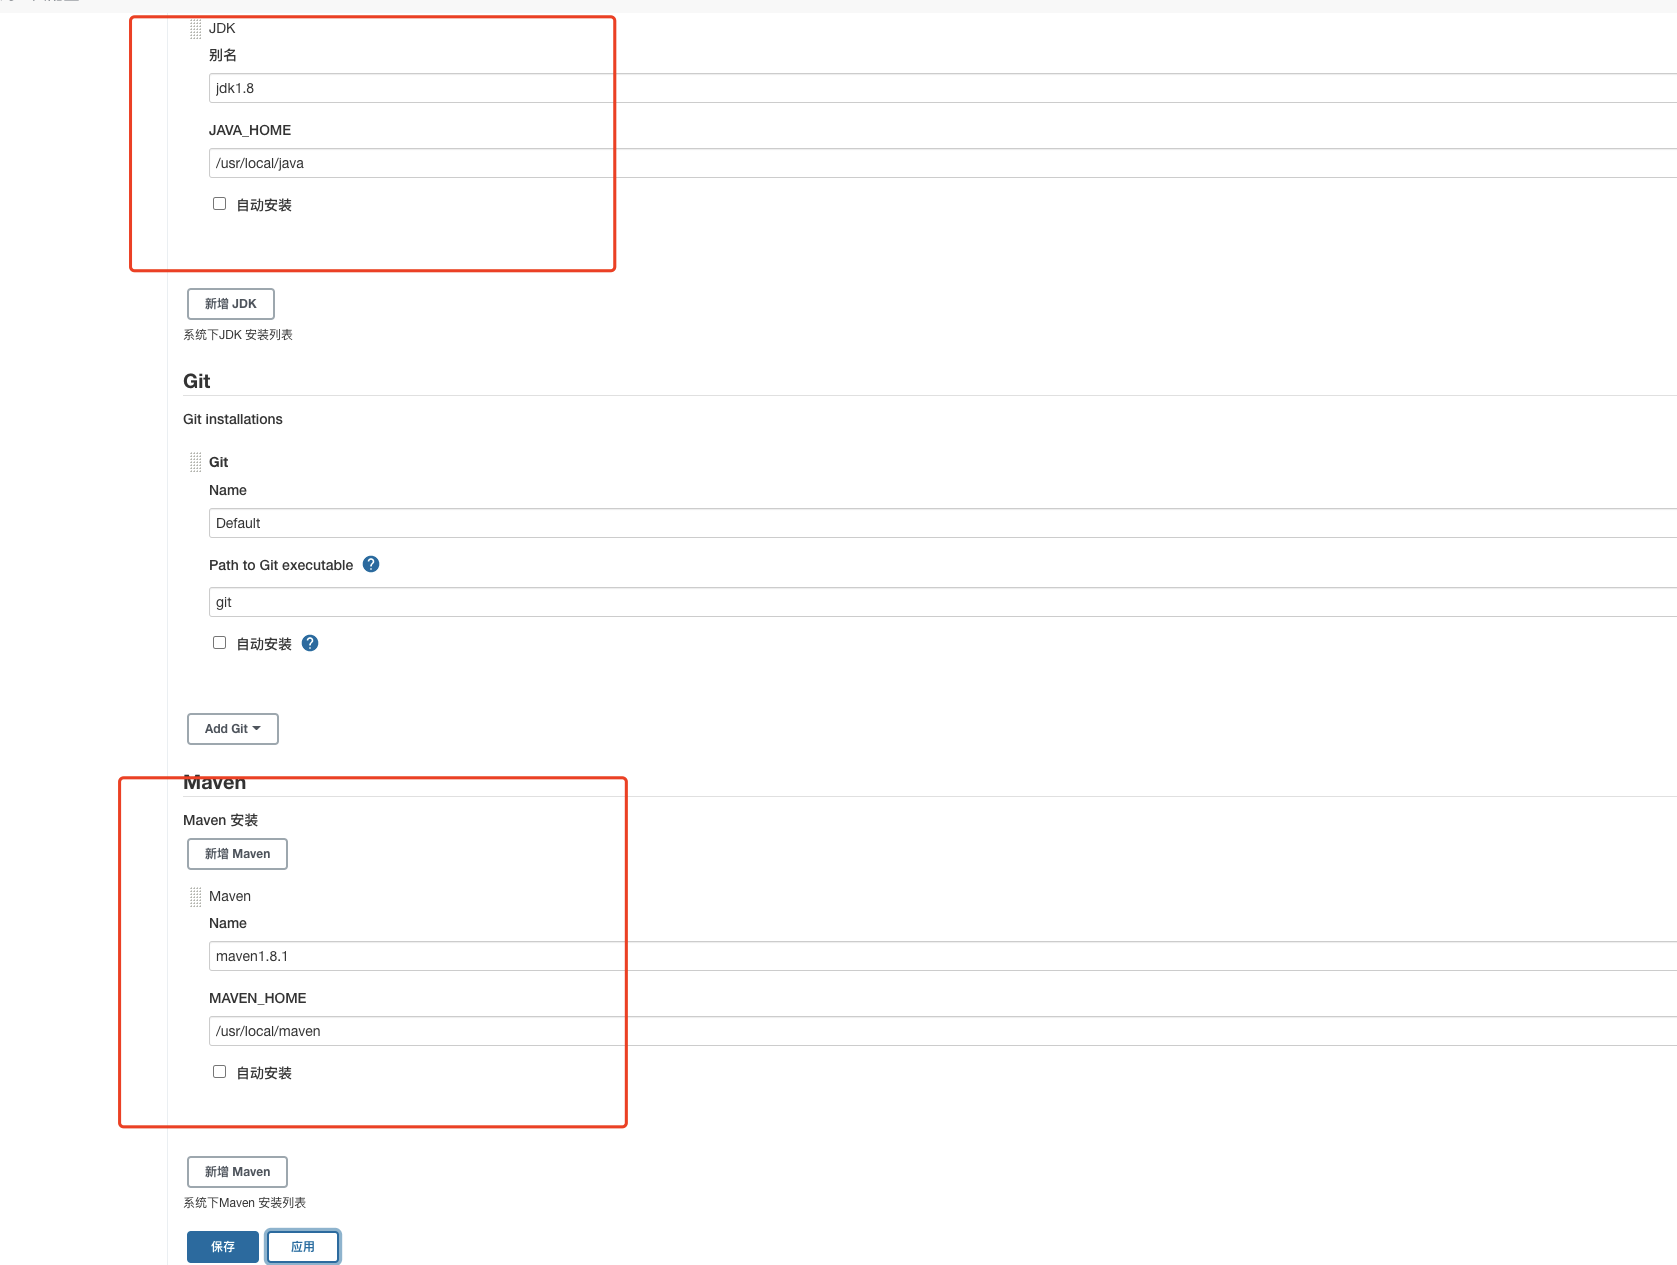
The global tool configures jenkins to associate JDK and Maven
Then configure the Jenkins environment
Modify jdk and maven configuration
Java here_ Home and make
Installing the maven plug-in
Maven Integration plugin

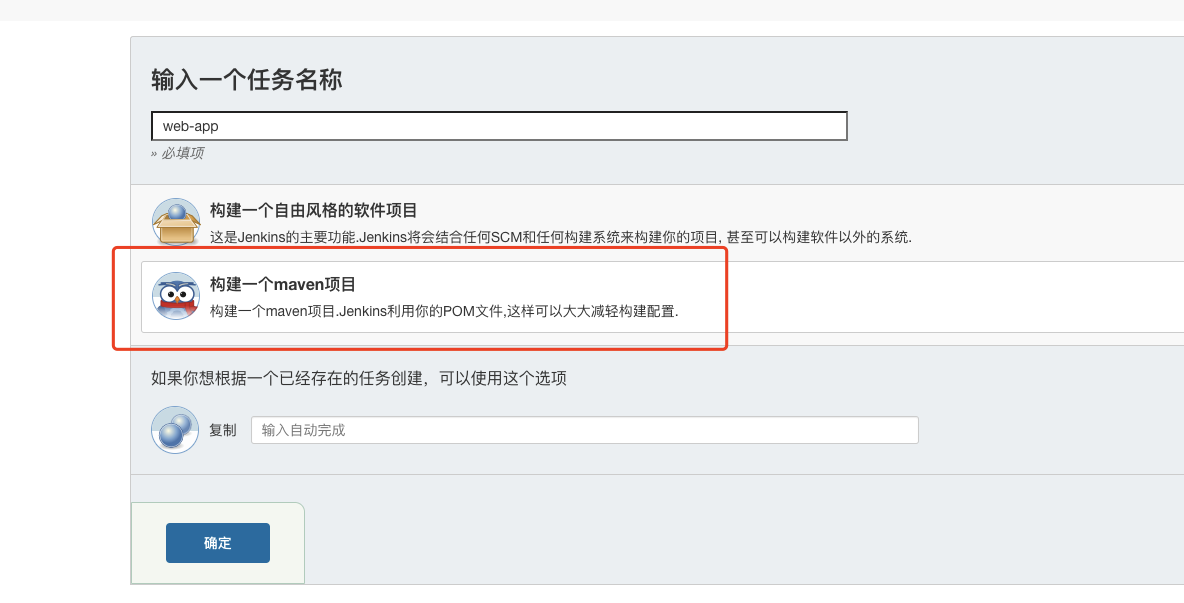
Create project and build package
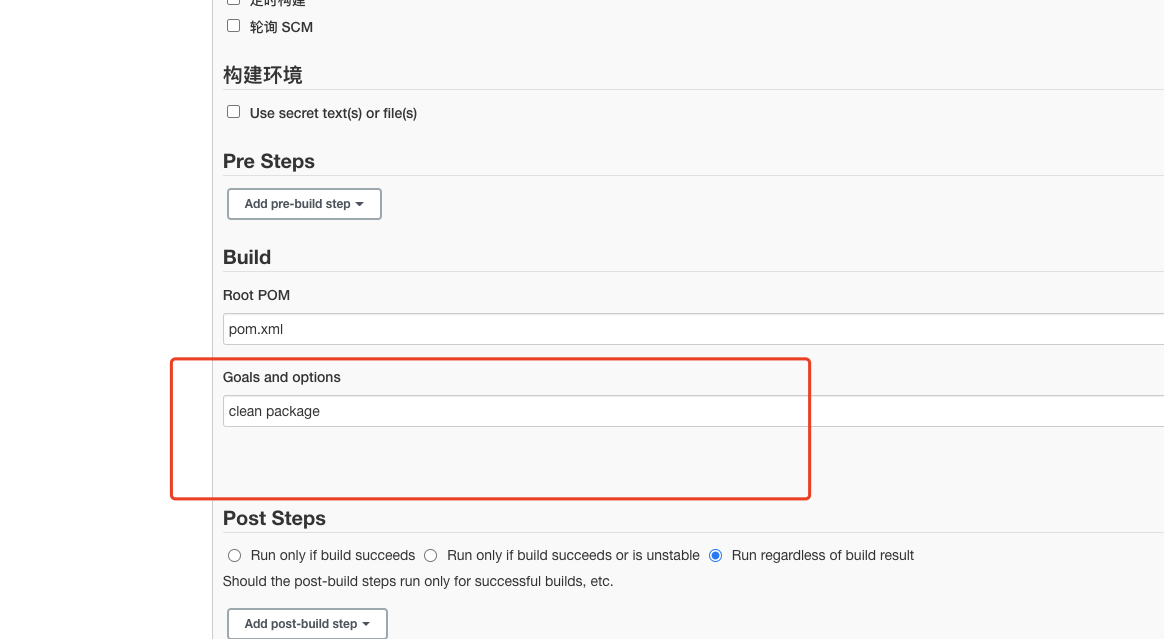
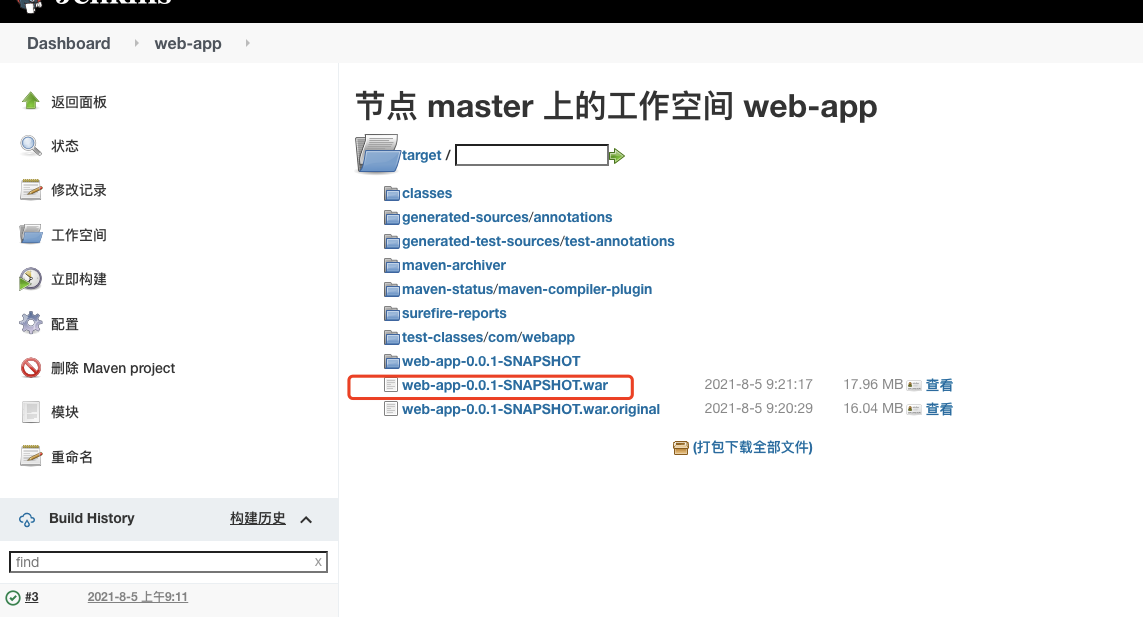
Package succeeded!!
Use Docker to install tomcat and package the deployment
install
Start a basic tomcat
docker run -d -p 8081:8080 mysql:8.5
cp tomcat file to local
 docker cp b5c948b981ec:/usr/local/tomcat/webapps.dist /home/tomcat/webapps/
 docker cp b5c948b981ec:/usr/local/tomcat/conf /home/tomcat/conf/
  docker cp b5c948b981ec:/usr/local/tomcat/logs /home/tomcat/logs/
Stop and delete the underlying tomcat image
docker stop tomcat
docker rm tomcat
Start the tomcat container and mount it
docker run -d -p 8088:8080 --name tomcat1 \
-v /home/tomcat/conf:/usr/local/tomcat/conf \
-v /home/tomcat/logs:/usr/local/tomcat/logs \
-v /home/tomcat/webapps:/usr/local/tomcat/webapps tomcat:8.5
Configuring tomcat users
Enter the conf directory and find Tomcat users XML file, and then configure some user names, that is, permissions
<role rolename="tomcat"/>
<role rolename="role1"/>
<role rolename="manager-script"/>
<role rolename="manager-gui"/>
<role rolename="manager-status"/>
<role rolename="admin-gui"/>
<role rolename="admin-script"/>
<user username="tomcat" password="tomcat" roles="manager-gui,manager-script,tomcat,admin-gui,admin-script"/>

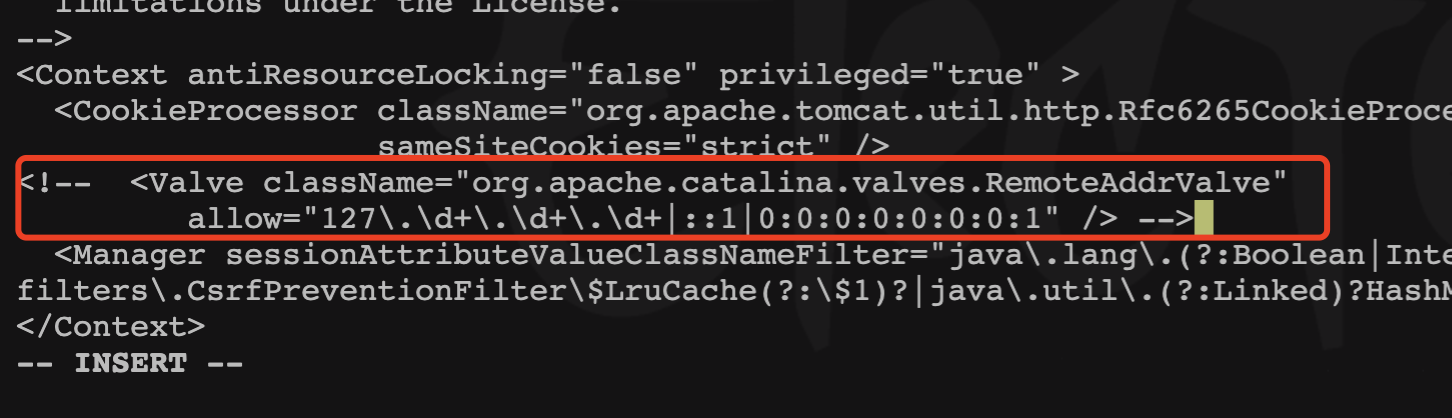
Next, go to the webapp directory and modify a context file. By default, the web ui interface is invisible. You need to comment out the following configuration
cd /home/tomcat/webapps/manager/META-INF

vi context.xml
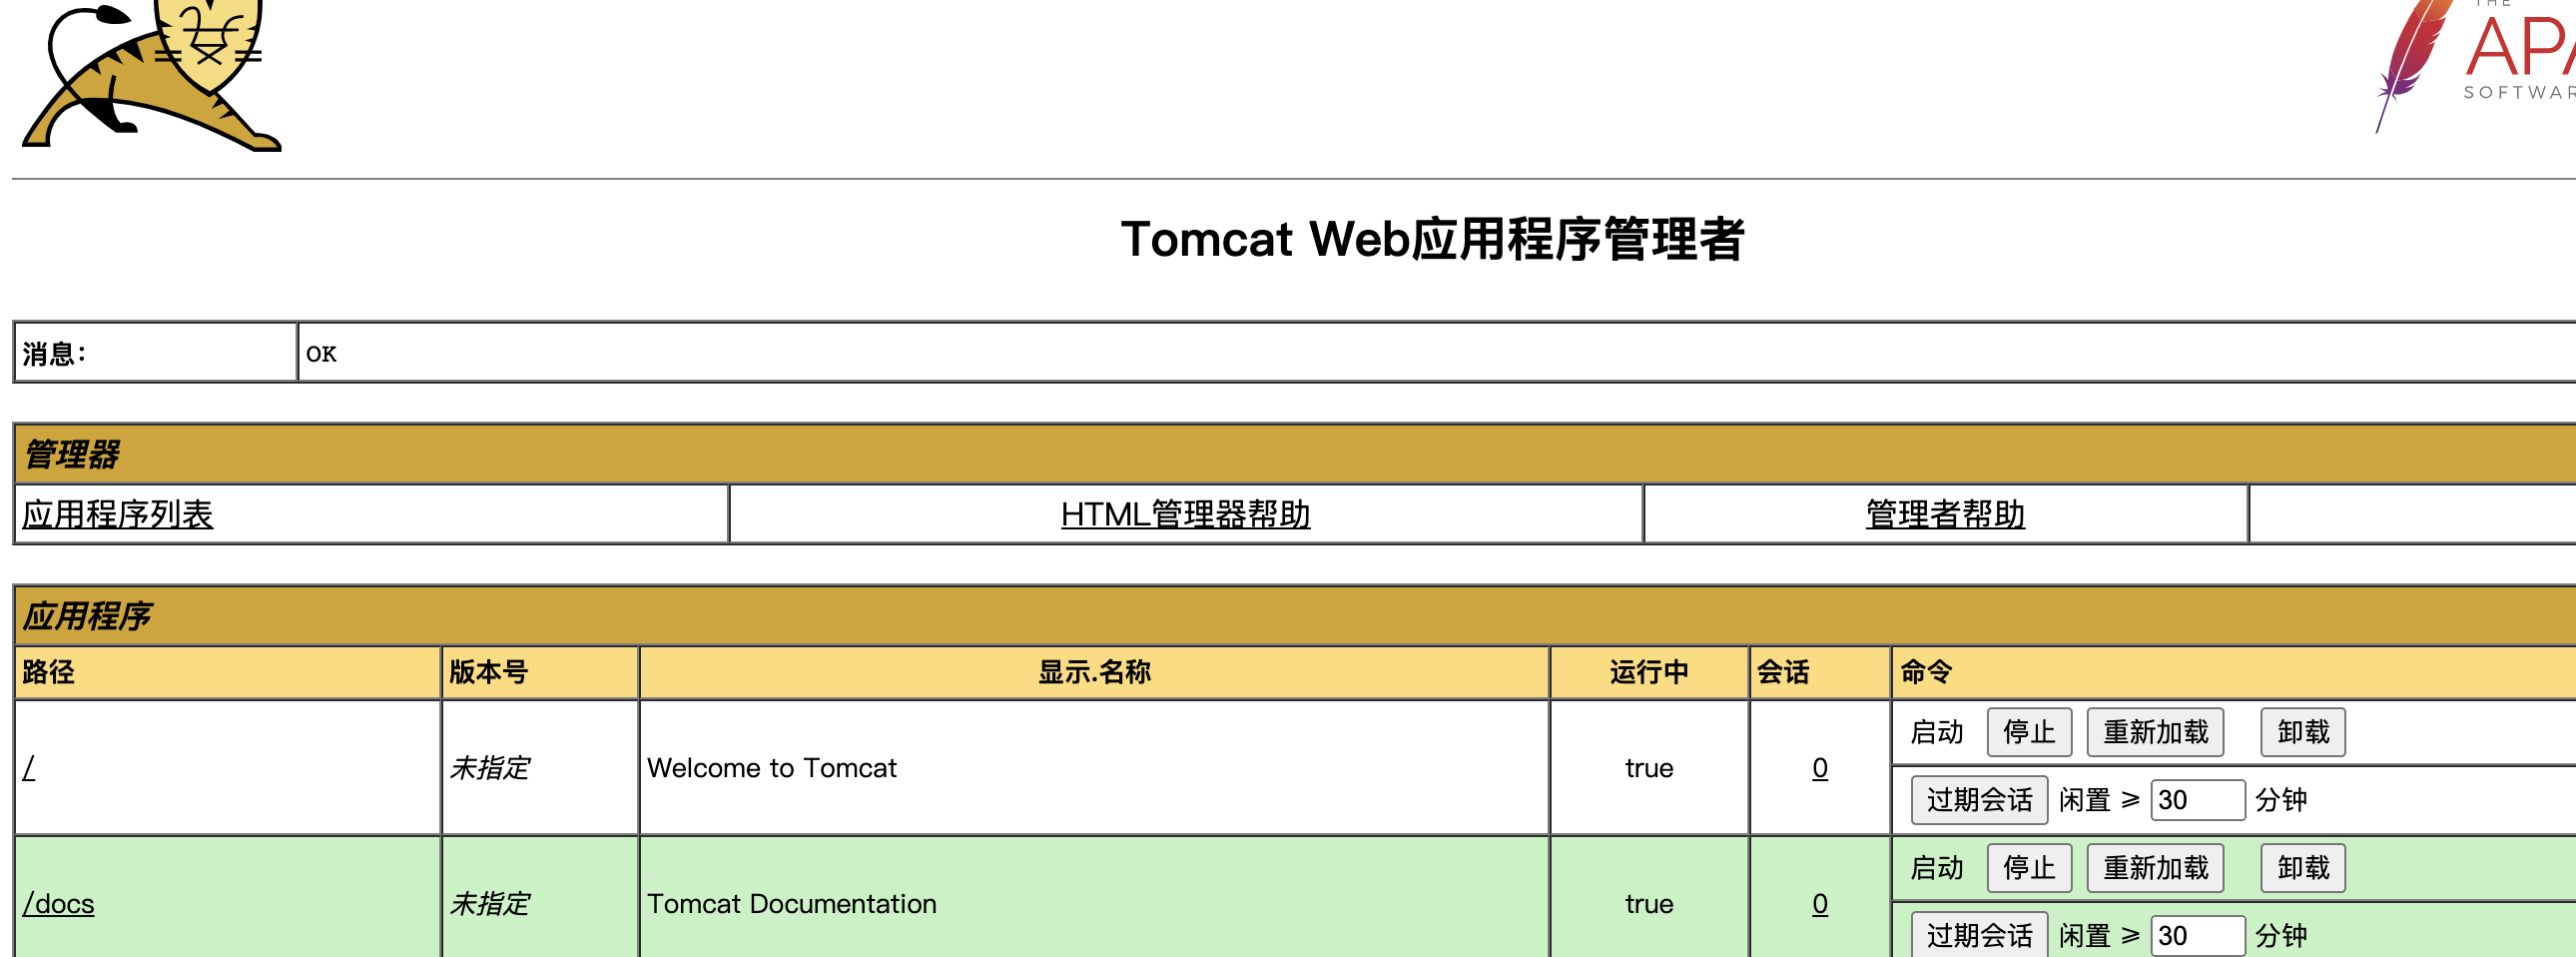
After starting tomcat again, we click manage webapp again to pop up the interface to verify the user name
jenkins installs the Deploy to container plug-in
Imagine how jenkins can push the jar package or war package to the specified tomcat container to start running? You must configure the remote tomcat container address somewhere. For example, the war package is placed in the webapp directory. Is this OK? Let's look at the specific operation
Search for Deploy to container and install
Configure items after installation

Add key
The account number is tomcat and the password is tomcat
Save after configuration
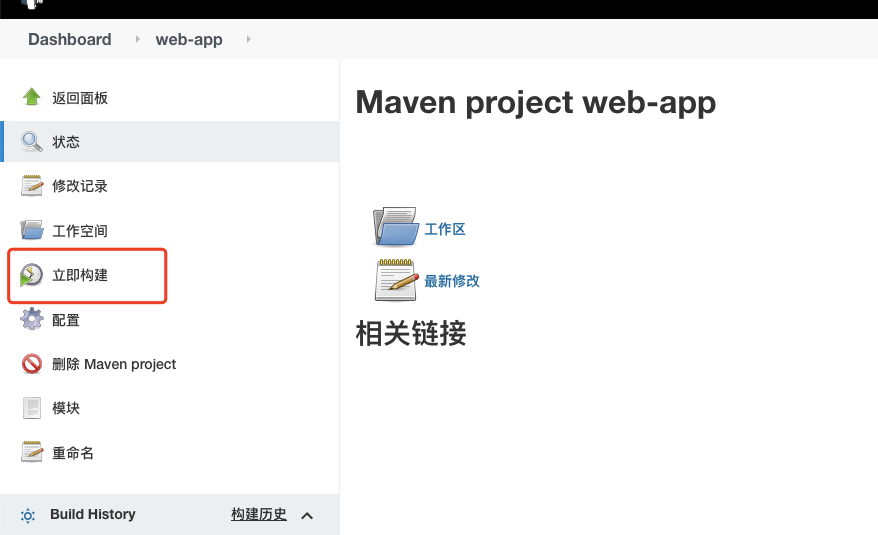
Click build
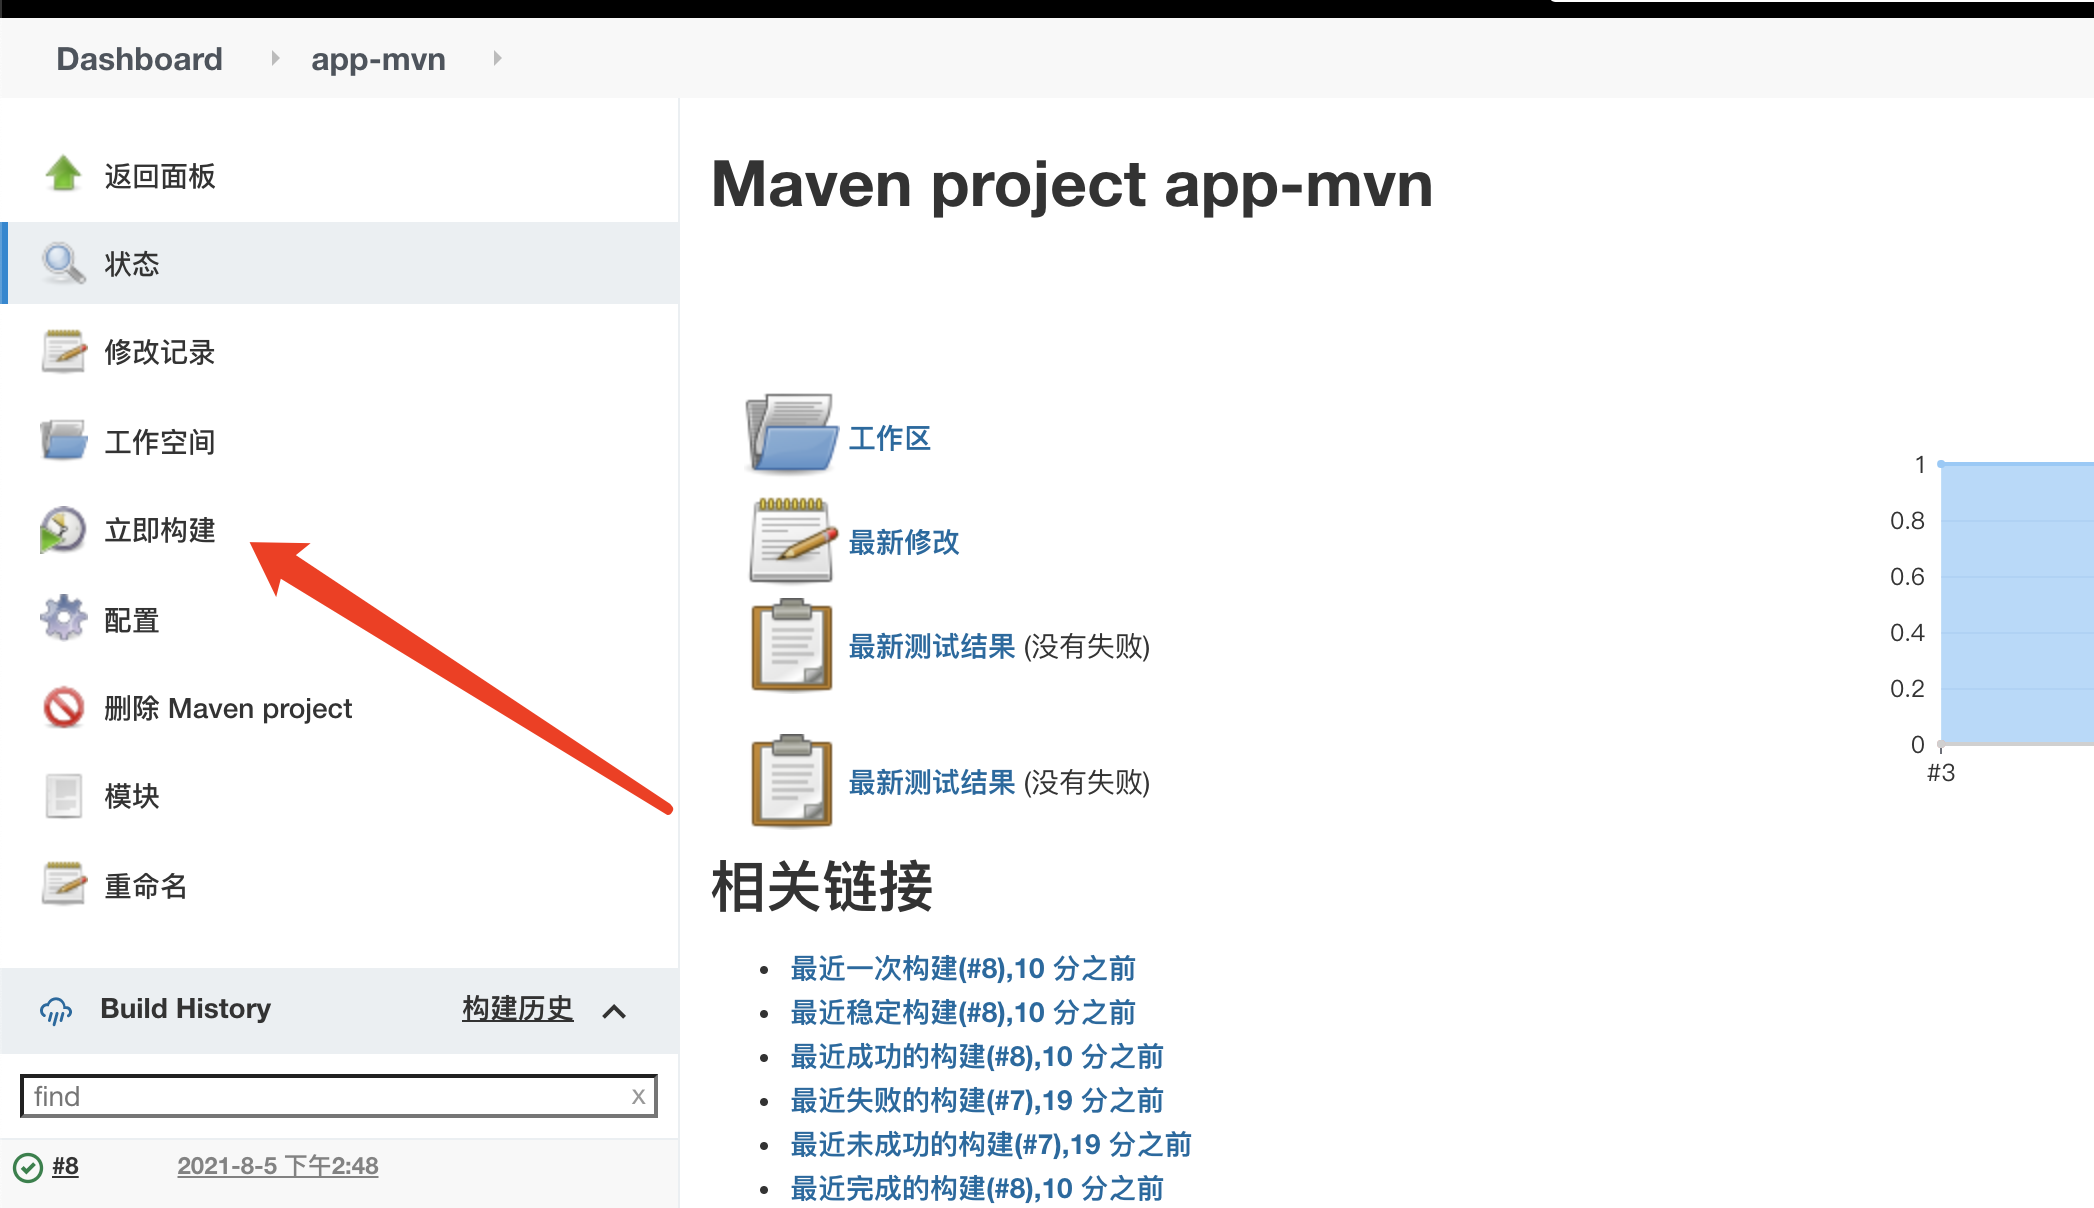
Finally, you can access our web project!