(Note: the installation and configuration of jdk and jmeter are not described here)
Ant Download https://dlcdn.apache.org//ant/binaries/apache-ant-1.10.12-bin.zip
1. You need to configure environment variables first:
ANT_HOME D:\apache-ant
CLASSHOME %ANT_HOME%\lib
Path %ANT_HOME%\bin
After configuring the ant environment variable, verify whether the environment variable is effective under dos:
ant -version

2. Copy ant-jmeter-1.1.1.jar under extras under JMeter directory to lib directory under ant directory.
3. Modify the bin\jmeter.properties configuration file of JMeter and find the configuration item:
jmeter.save.saveservice.output_format=csv ,
Replace with:
jmeter.save.saveservice.output_format=xml

4. Configure the script that ant calls jmeter to run and convert the generated jtl format report to html format. Create a new build.xml in the path where the script is stored.
The configuration information is as follows:
<?xml version="1.0" encoding="UTF-8"?>
<project name="ant-jmeter-test" default="run" basedir=".">
<tstamp>
<format property="time" pattern="_yyyy_MMdd_HHmmss"/>
</tstamp>
<!-- Configure local jmeter route -->
<property name="jmeter.home" value="D:\apache-jmeter-5.4.1" />
<!-- to configure jmeter Execute script path -->
<property name="jmeter.script.dir" value="D:\apache-jmeter-5.4.1\testScript" />
<!-- Configure report name -->
<property name="report.title" value="Interface automation test" />
<!-- to configure jmeter Generated after running jtl Path of format report -->
<property name="jmeter.result.jtl.dir" value="D:\apache-jmeter-5.4.1\testScript" />
<!-- to configure jmeter generate html Path to format report -->
<property name="jmeter.result.html.dir" value="D:\apache-jmeter-5.4.1\testScript" />
<!--Description of the configuration Report-->
<property name="detail" value="_detail" />
<!--Configure the file name for generating the report-->
<property name="ReportName" value="ApiTestreport" />
<property name="ReportNameDetail" value="ApiTestreportDetail" />
<!--to configure jmeter Generated after execution jtl Path of report storage-->
<property name="jmeter.result.jtlName" value="${jmeter.result.jtl.dir}/${ReportName}${time}.jtl" />
<!--to configure jtl Report format converted to html After that, there are two different report names because I have configured two template reports -->
<property name="jmeter.result.htmlName" value="${jmeter.result.html.dir}/${ReportName}${time}.html" />
<property name="jmeter.result.detail_htmlName" value="${jmeter.result.html.dir}/${ReportNameDetail}${time}.html" />
<target name="run">
<antcall target="test" />
<antcall target="report" />
</target>
<target name="test">
<taskdef name="jmeter" classname="org.programmerplanet.ant.taskdefs.jmeter.JMeterTask" />
<jmeter jmeterhome="${jmeter.home}" resultlog="${jmeter.result.jtlName}" >
<!-- Declare the script to run:*.jmx ,Refers to all in this directory jmx script-->
<testplans dir="${jmeter.script.dir}" includes="*.jmx" />
<property name="jmeter.save.saveservice.output_format" value="xml" />
</jmeter>
</target>
<path id="xslt.classpath">
<fileset dir="${jmeter.home}/lib" includes="xalan*.jar" />
<fileset dir="${jmeter.home}/lib" includes="serializer*.jar" />
</path>
<target name="report">
<tstamp>
<format property="report.datestemp" pattern="yyyy/MM/dd HH:mm" />
</tstamp>
<!-- call jmeter The built-in generation template is displayed in the extras You can find it next time -->
<xslt classpathref="xslt.classpath"
force="true"
in="${jmeter.result.jtlName}"
out="${jmeter.result.htmlName}"
style="${jmeter.home}\extras\jmeter-results-detail-report_21.xsl">
<param name="titleReport" expression="${report.title}" />
<param name="dateReport" expression="${report.datestemp}" />
</xslt>
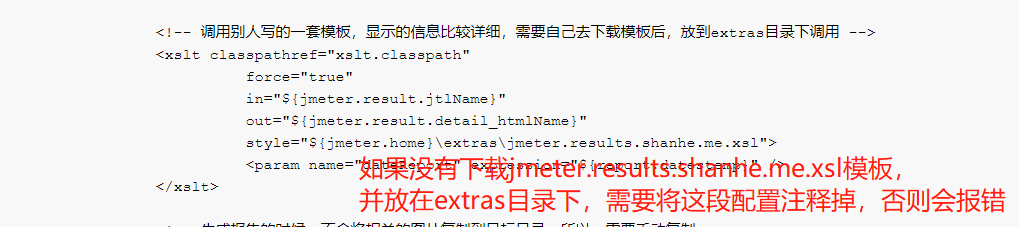
<!-- Call a set of templates written by others. The information displayed is more detailed. You need to download the template yourself and put it in the extras Call under directory -->
<xslt classpathref="xslt.classpath"
force="true"
in="${jmeter.result.jtlName}"
out="${jmeter.result.detail_htmlName}"
style="${jmeter.home}\extras\jmeter.results.shanhe.me.xsl">
<param name="dateReport" expression="${report.datestemp}" />
</xslt>
<!-- When generating the report, the relevant pictures will not be copied to the target directory, so they need to be copied manually -->
<copy todir="${jmeter.result.html.dir}">
<fileset dir="${jmeter.home}/extras">
<include name="collapse.png" />
<include name="expand.png" />
</fileset>
</copy>
</target>
</project>
Note: if the jmeter.results.shanhe.me.xsl file is not downloaded and stored in extras, you need to comment out the following configuration:
If jmeter.results.shahe.me.xsl has been downloaded and placed in the extras directory, you need to configure jmeter.properties in the / bin directory to see the effect.
You need to change all the following configurations to: true
jmeter.save.saveservice.assertion_results_failure_message=true
jmeter.save.saveservice.data_type=true
jmeter.save.saveservice.label=true
jmeter.save.saveservice.response_code=true
jmeter.save.saveservice.response_data=true
jmeter.save.saveservice.response_data.on_error=false
jmeter.save.saveservice.response_message=true
jmeter.save.saveservice.successful=true
jmeter.save.saveservice.thread_name=true
jmeter.save.saveservice.time=true
jmeter.save.saveservice.subresults=true
jmeter.save.saveservice.assertions=true
jmeter.save.saveservice.latency=true
jmeter.save.saveservice.connect_time
jmeter.save.saveservice.samplerData=true
jmeter.save.saveservice.responseHeaders=true
jmeter.save.saveservice.requestHeaders=true
jmeter.save.saveservice.encoding=true
jmeter.save.saveservice.bytes=true
jmeter.save.saveservice.sent_bytes=true
jmeter.save.saveservice.url=true
jmeter.save.saveservice.filename=true
jmeter.save.saveservice.hostname=true
jmeter.save.saveservice.thread_counts=true
jmeter.save.saveservice.sample_count=true
jmeter.save.saveservice.idle_time=true
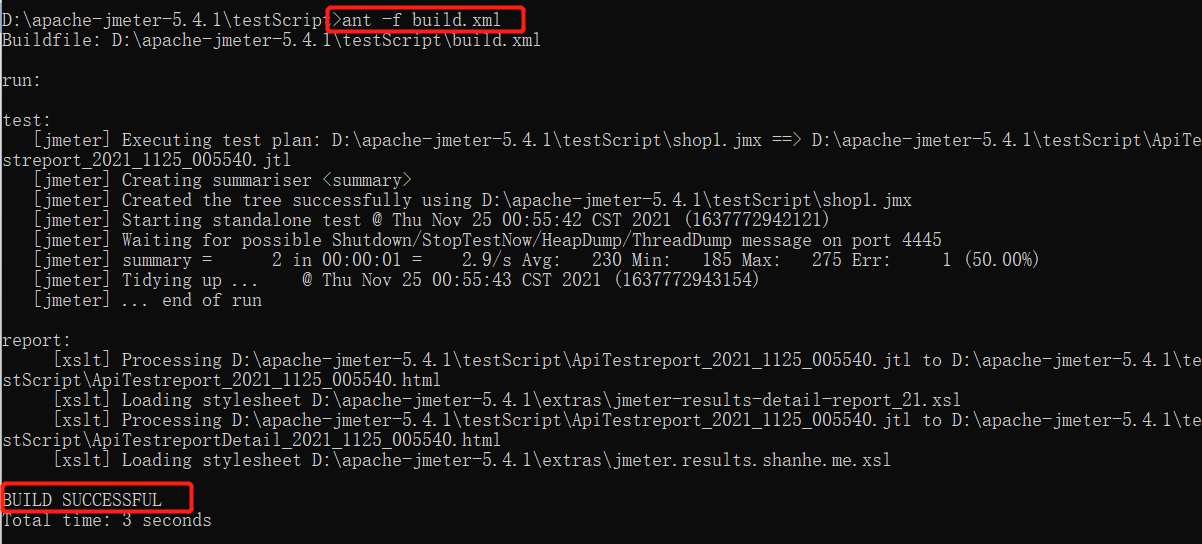
After all the above are configured, switch to the newly created build.xml directory under the dos command and execute:
ant -f build.xml
If you see BUILD SUCCESSFUL, it indicates successful execution and correct configuration
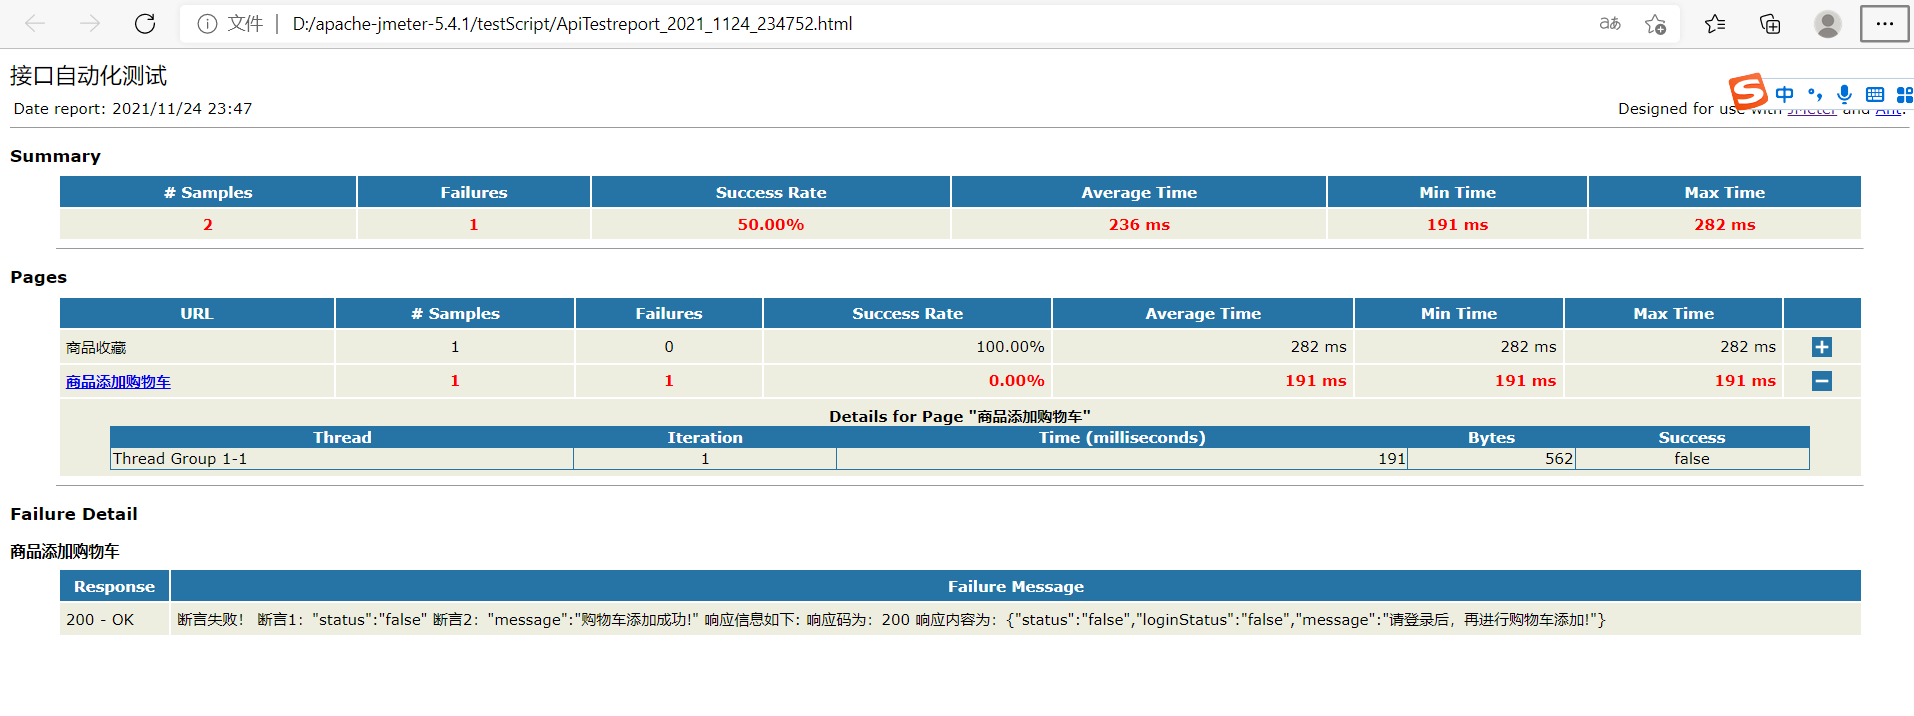
After execution, the generated html format report of jmeter is as follows
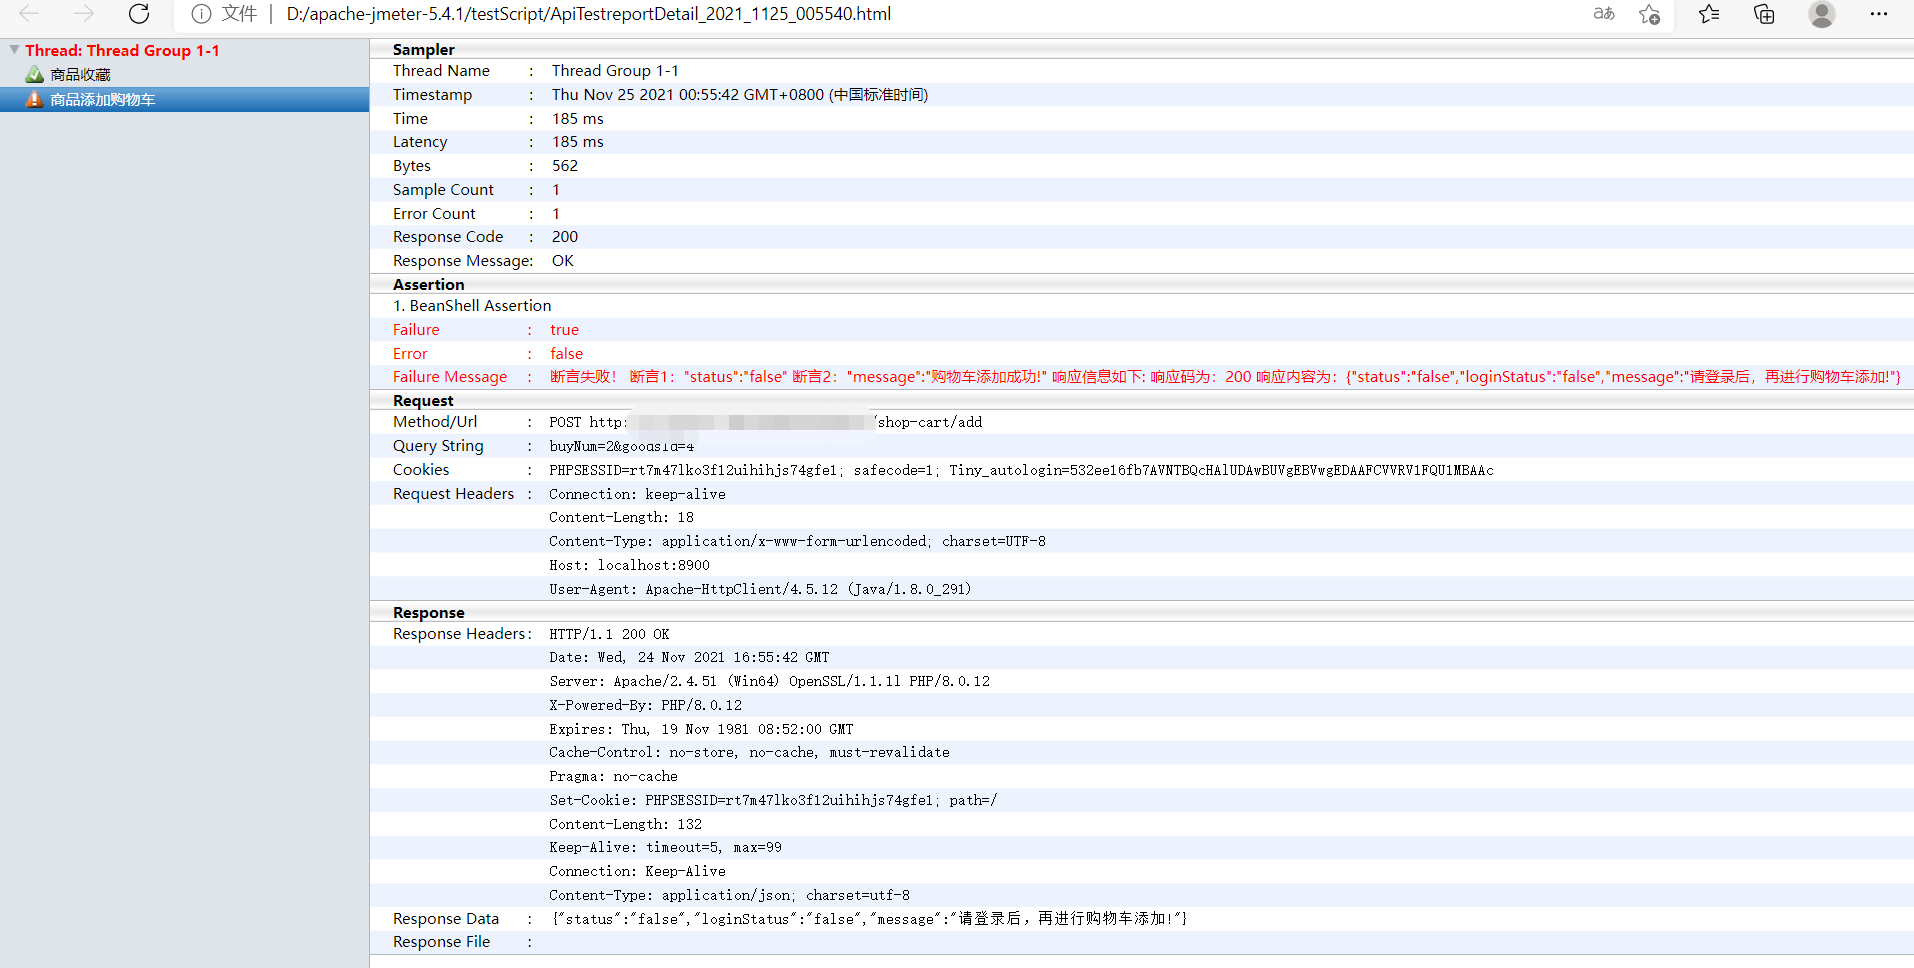
After execution, another report template written by others is generated, as follows:
Problems encountered: during configuration, the paths of some directories are written incorrectly or the ant command is not executed in the build.xml directory, resulting in the following problems:
Ant: the 'ant' entry cannot be recognized as the name of a cmdlet, function, script file, or runnable program. Check the spelling of the name. If you include a path, make sure the path is correct,
Then try again.
Location line: 1 character: 1
+ ant -f build.xml
+ ~~~
+ CategoryInfo : ObjectNotFound: (ant:String) [], CommandNotFoundException
+ FullyQualifiedErrorId : CommandNotFoundException

Solution:
1. Check whether the path in the configuration is correct. You can copy the path of the configuration item and paste it directly in the address bar in windows Resource Management to see whether it enters the corresponding directory.
2. Check whether the configured parameters are written correctly, especially the xml has strong hierarchical verification. Note whether the parent and child labels are closed correctly
3. In dos environment, switch to the path where build.xml is located, and then execute ant -f build.xml, or execute the specified file path, such as ant -f d:\testScript\build.xml