jmeter itself can output html test reports, but the built-in test reports are very simple, as shown in the figure below. Generally, we don't look at them.
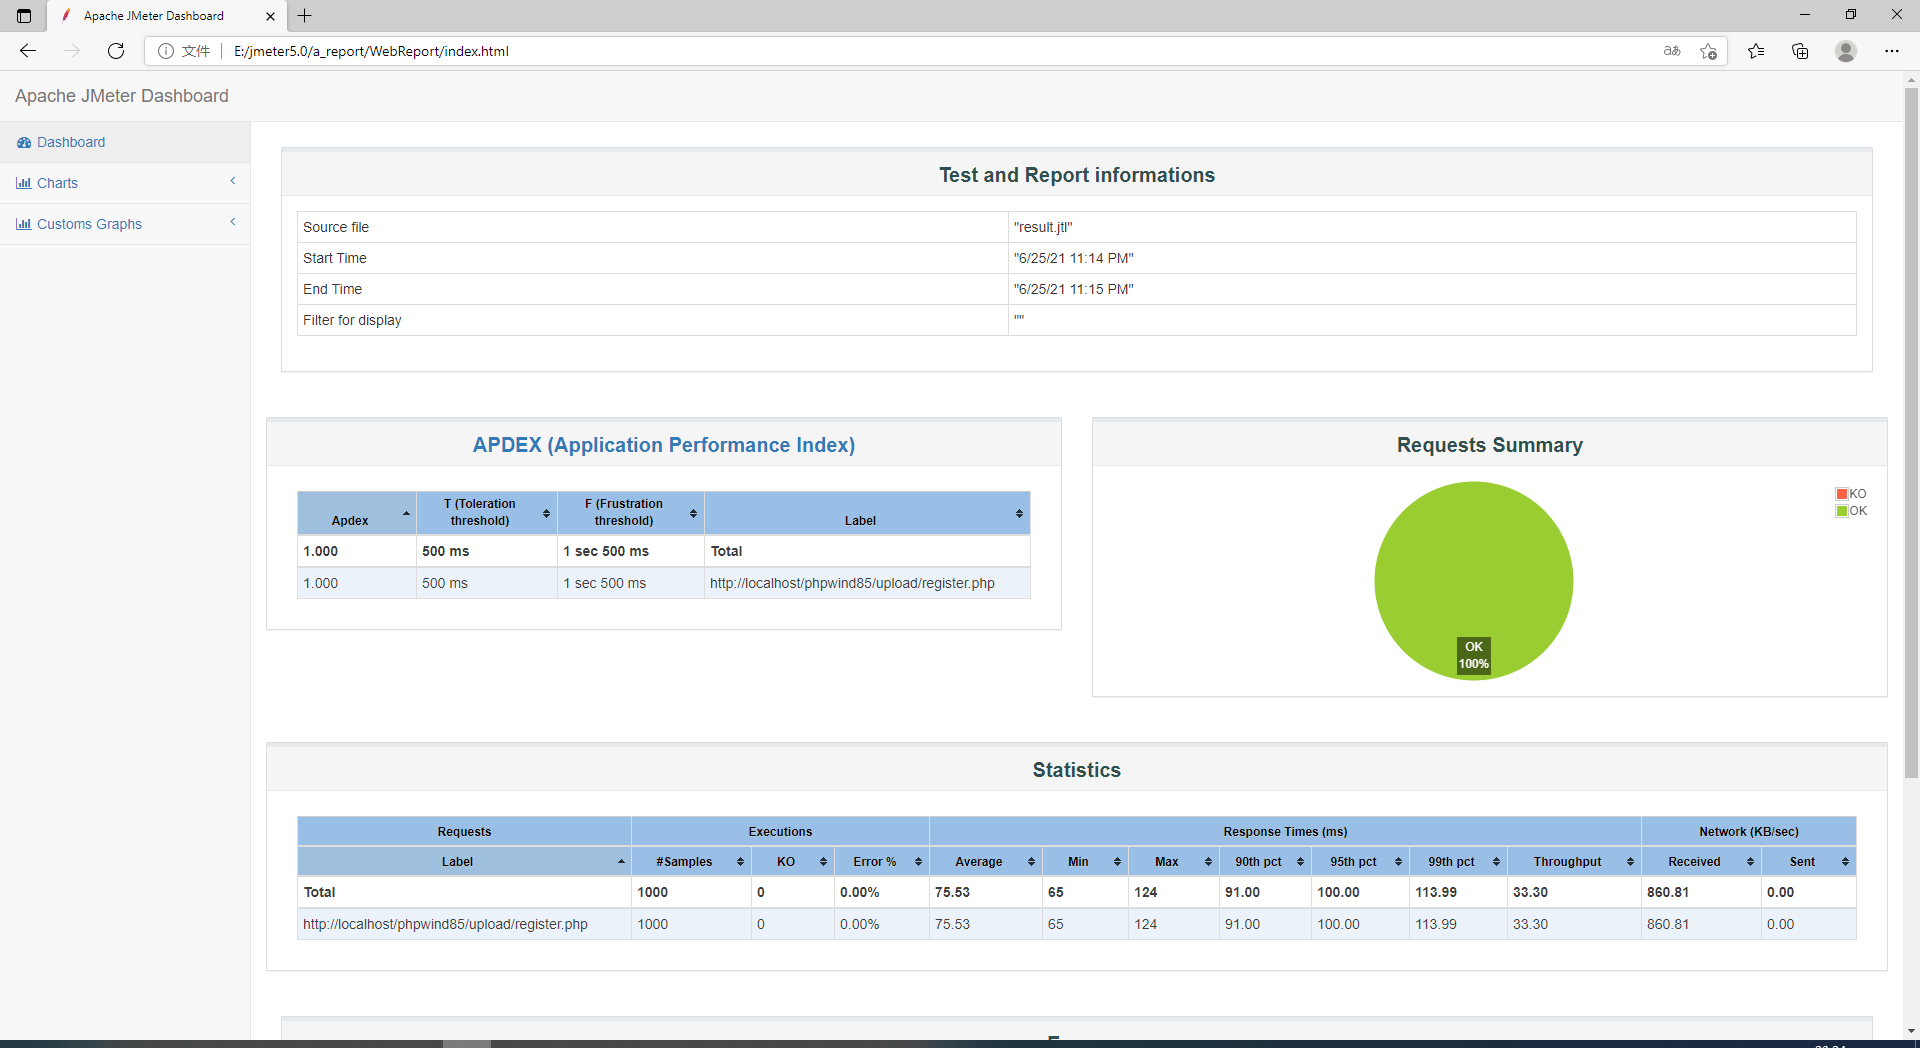
We can use ant to output more efficient and intuitive test reports.
First download and install ant,
I use apache-ant-1.9.7. You can also search the official website or the Internet and download it.
Unzip the downloaded ant package, which is installation free, so just put the whole package in the directory you want to put. For convenience, the author simply puts it in the F:\lsg\jmeter+jenkins+ant directory.
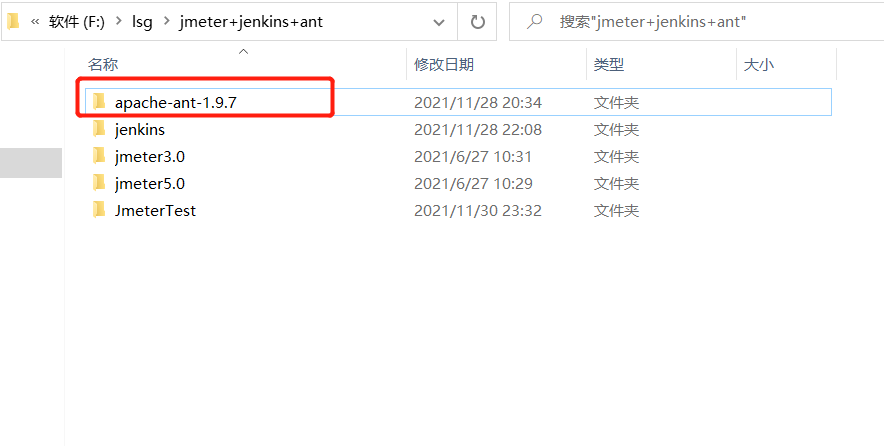
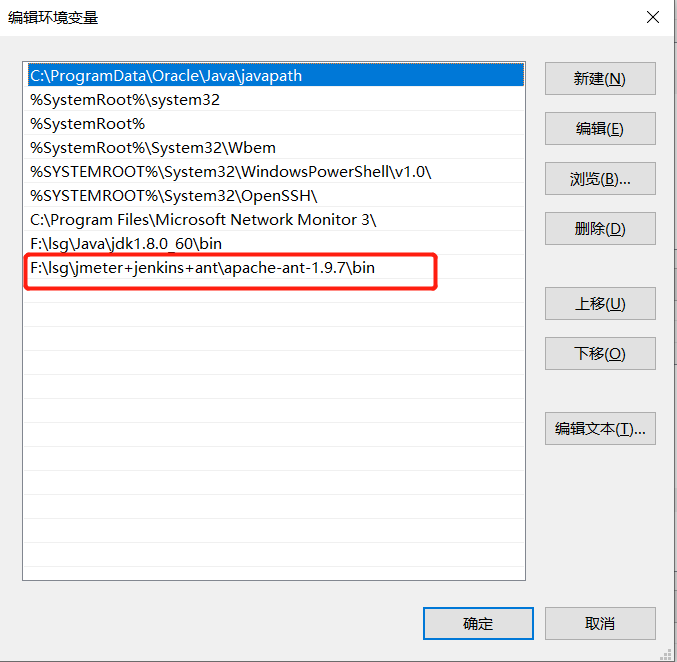
Then configure the environment variable: put the bin directory of ant into the environment variable. For example, mine is F:\lsg\jmeter+jenkins+ant\apache-ant-1.9.7\bin
Then put this directory into the path of the environment variable and confirm it.
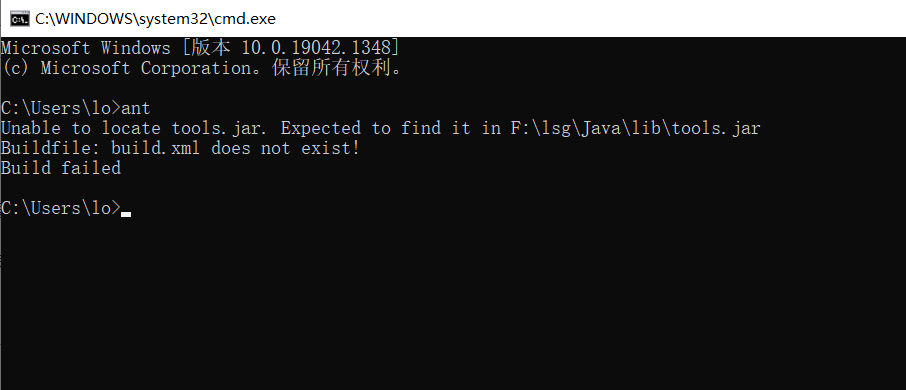
Then directly win+R, enter cmd, enter ant on the command line, and press enter. If the following figure appears, ant configuration is successful!
Then, go to the extras directory of JMeter and copy ant-jmeter-1.1.1.jar to the lib directory of ant
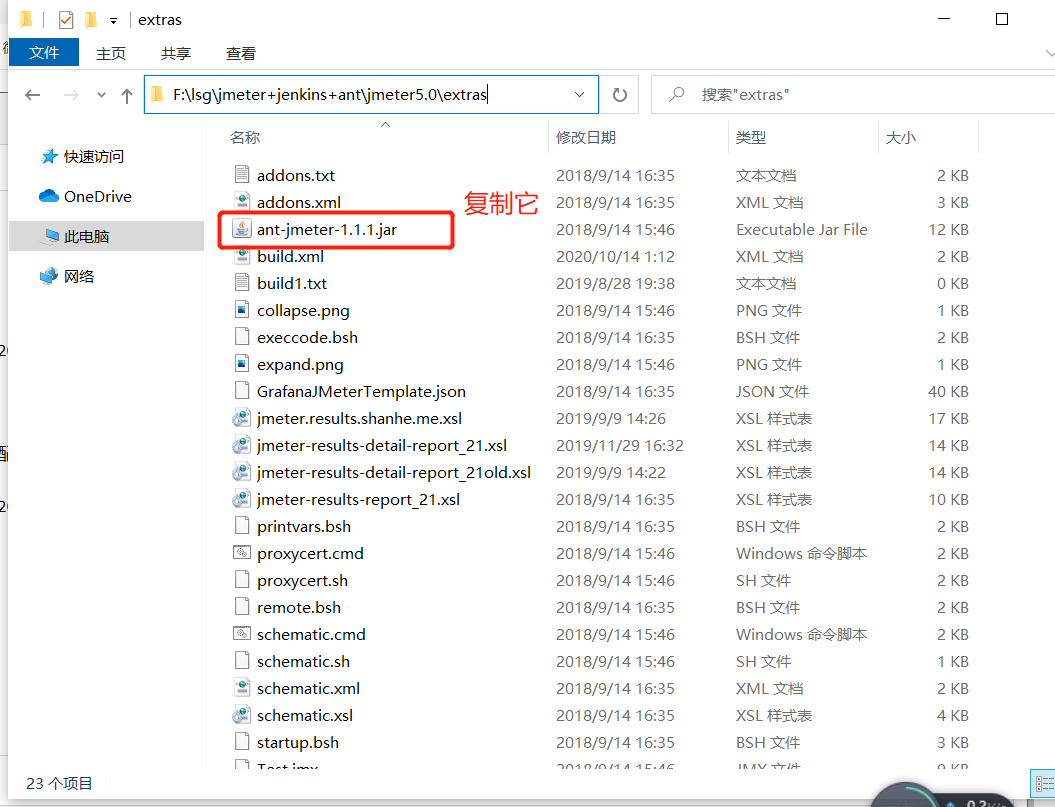
Configuration ant compilation file build.xml
Create a new text file and change the file suffix to. xml
Then copy this code in (please note to copy and modify it in English input method):
Let me put out the xml code directly. This construction code is very important. If it is written incorrectly, it will not run later.
Click to view the code<?xml version="1.0" encoding="UTF-8"?>
<project name="ant-jmeter-test" default="run" basedir=".">
<tstamp>
<format property="time" pattern="yyyyMMddhhmm" />
</tstamp>
<property name="basedirectory" value="F:\lsg\jmeter+jenkins+ant\jmeter5.0\extras" />
<!-- Need to change to your own local Jmeter catalogue-->
<property name="jmeter.home" value="F:\lsg\jmeter+jenkins+ant\jmeter5.0" />
<!-- jmeter generate jtl Path to the result report in format-->
<property name="jmeter.result.jtl.dir" value="F:\lsg\jmeter+jenkins+ant\JmeterTest\resultLog\jtl" />
<!-- jmeter generate html Path to the result report in format-->
<property name="jmeter.result.html.dir" value="F:\lsg\jmeter+jenkins+ant\JmeterTest\resultLog\html" />
<!-- Name of test (without .jmx) -->
<property name="test" value="Test"/>
<!-- Prefix of the generated report-->
<property name="ReportName" value="TestReport" />
<property name="jmeter.result.jtlName" value="${jmeter.result.jtl.dir}/${time}.jtl" />
<property name="jmeter.result.htmlName" value="${jmeter.result.html.dir}/${time}.html" />
<path id="xslt.classpath">
<fileset dir="${jmeter.home}/lib" includes="xalan*.jar"/>
<fileset dir="${jmeter.home}/lib" includes="serializer*.jar"/>
</path>
<target name="run">
<antcall target="test" />
<antcall target="report" />
</target>
<target name="test">
<taskdef name="jmeter" classname="org.programmerplanet.ant.taskdefs.jmeter.JMeterTask" />
<jmeter jmeterhome="${jmeter.home}" resultlog="${jmeter.result.jtlName}">
<!-- Declare the script to run."*.jmx"It refers to all the files in this directory jmeter script-->
<testplans dir="F:\lsg\jmeter+jenkins+ant\JmeterTest" includes="*.jmx" />
</jmeter>
</target>
<target name="report">
<tstamp> <format property="report.datestamp" pattern="yyyy/MM/dd HH:mm" /></tstamp>
<xslt classpathref="xslt.classpath"
force="true"
in="${jmeter.result.jtlName}"
out="${jmeter.result.htmlName}"
style="${jmeter.home}/extras/jmeter.results.shanhe.me.xsl">
<param name="dateReport" expression="${report.datestamp}"/>
</xslt>
<copy todir="${jmeter.result.html.dir}">
<fileset dir="${jmeter.home}/extras">
<include name="collapse.png" />
<include name="expand.png" />
</fileset>
</copy>
</target>
</project>
There are several points to note:
As like as two peas, I need to change your own path to the place I want to play.
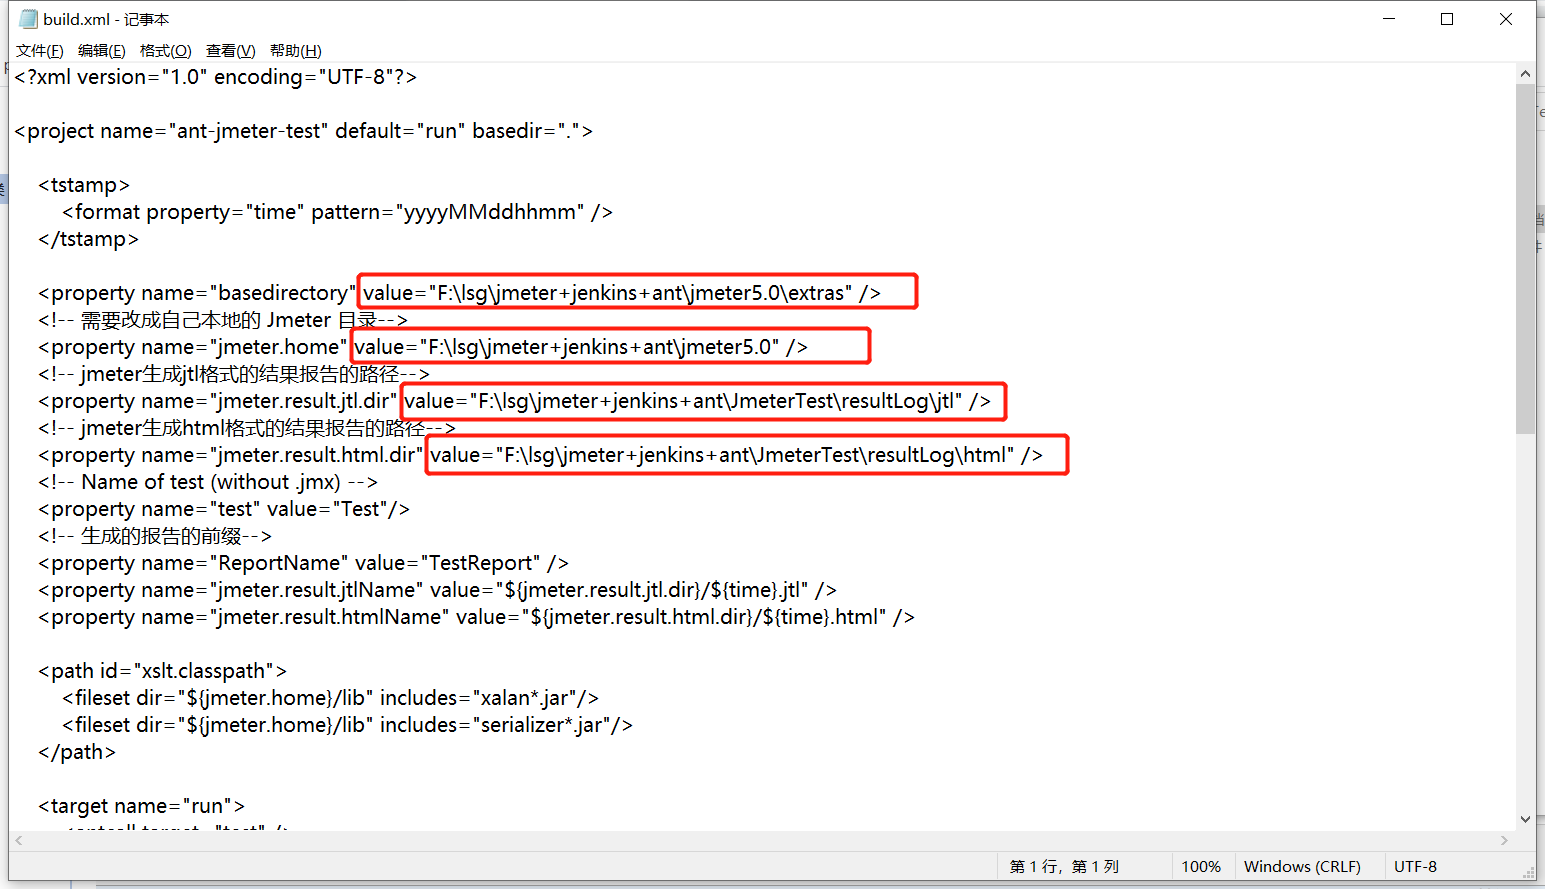

Remember to save after configuration.
Then go to the bin directory of JMeter, find the file jmeter.properties, and open it in text mode,
Modify jmeter.save.saveservice.output_format=csv is
jmeter.save.saveservice.output_format=xml
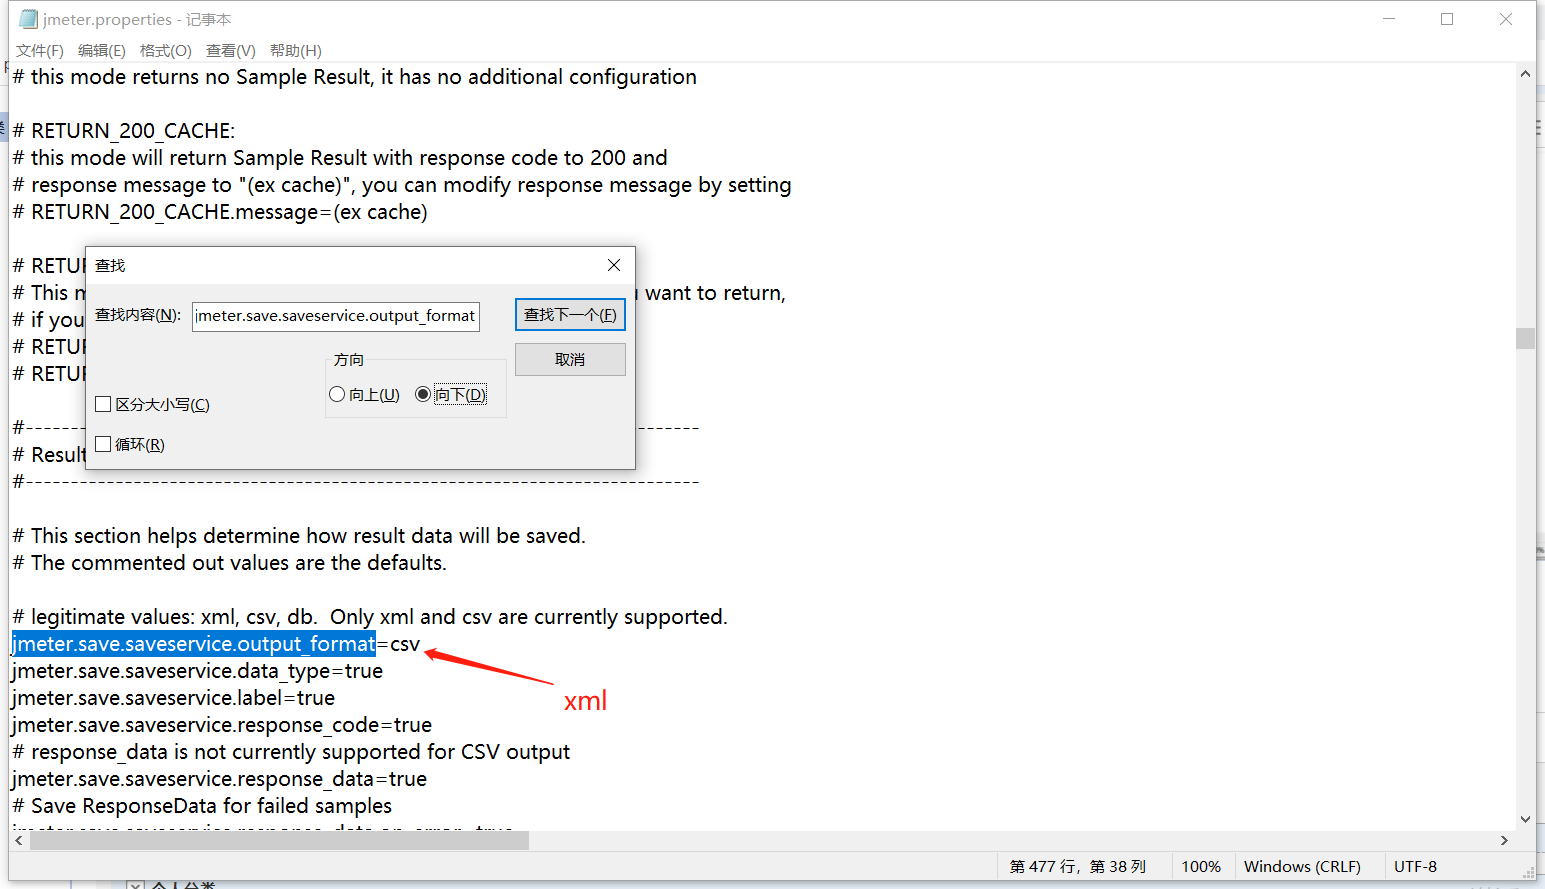
preservation,
Then let's set the content of the test report to be output, optimize the test report, or just the file jmeter.properties,
Find this place:
Change all these contents to true and remove the # symbols in front
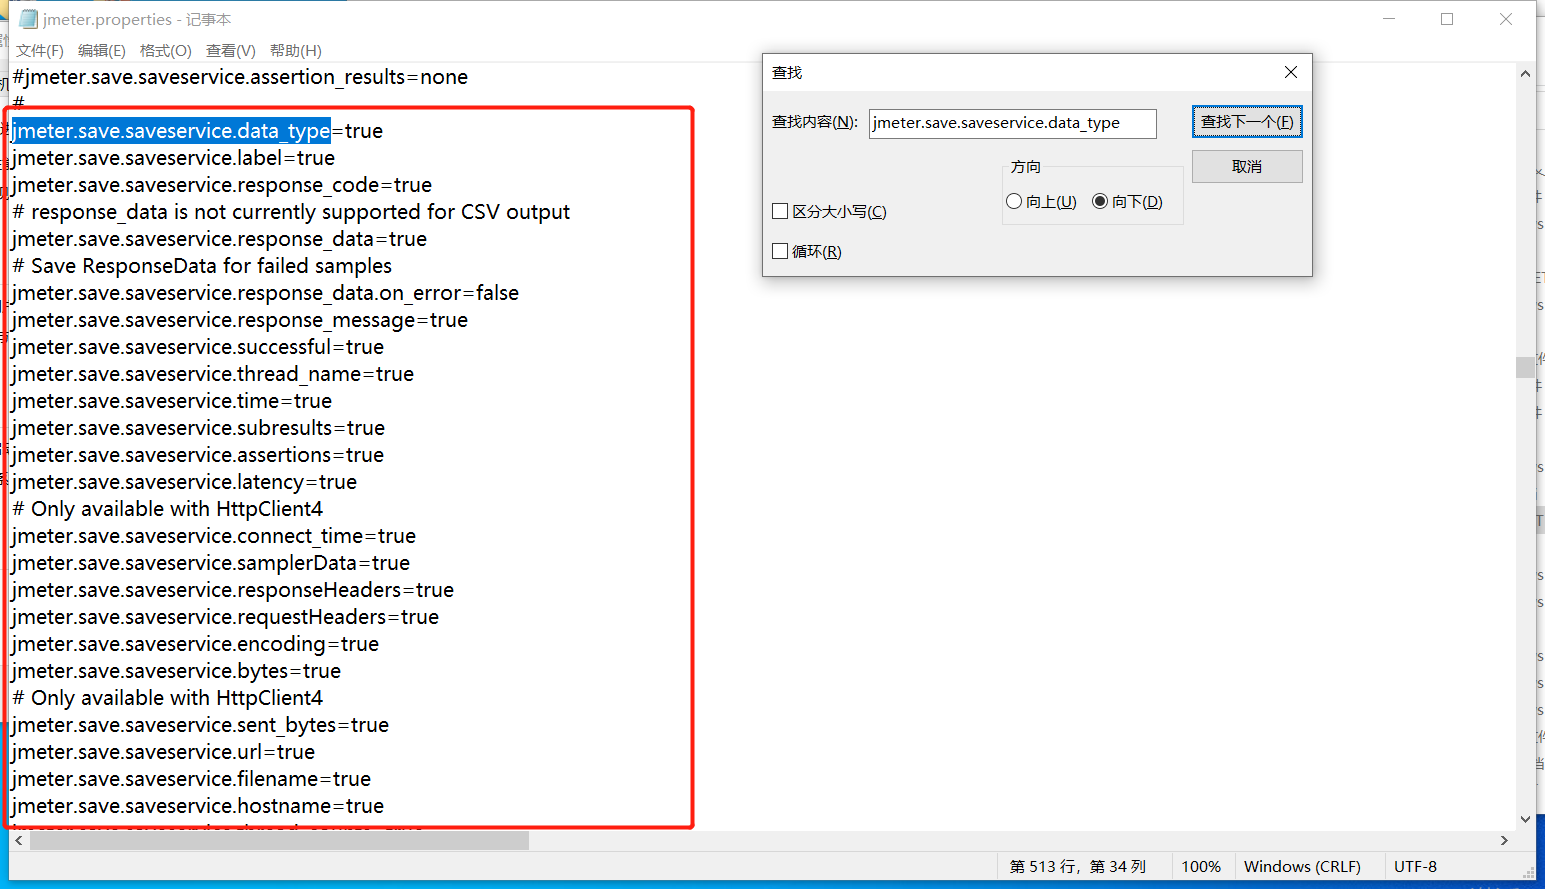
After setting, save.
At this point, our ant configuration is complete.
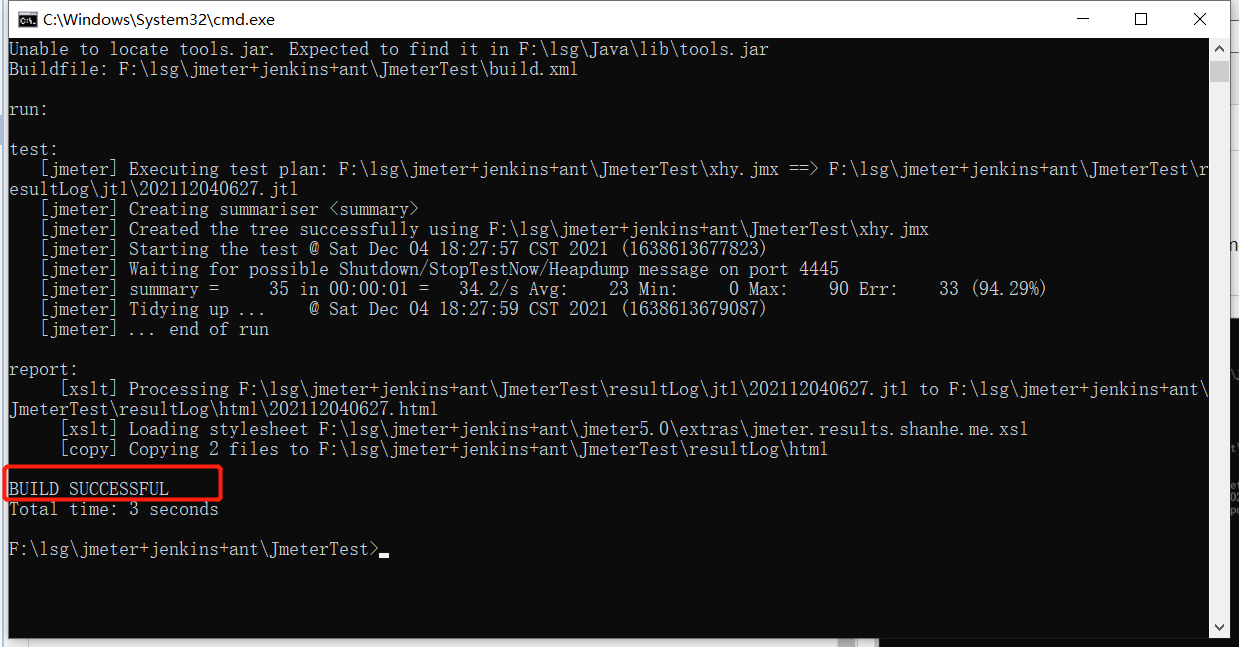
Open the directory where the build.xml file is located, enter cmd in the address bar, press enter, enter the command line, enter ant run, press enter, and execute the test. The interface is as follows:
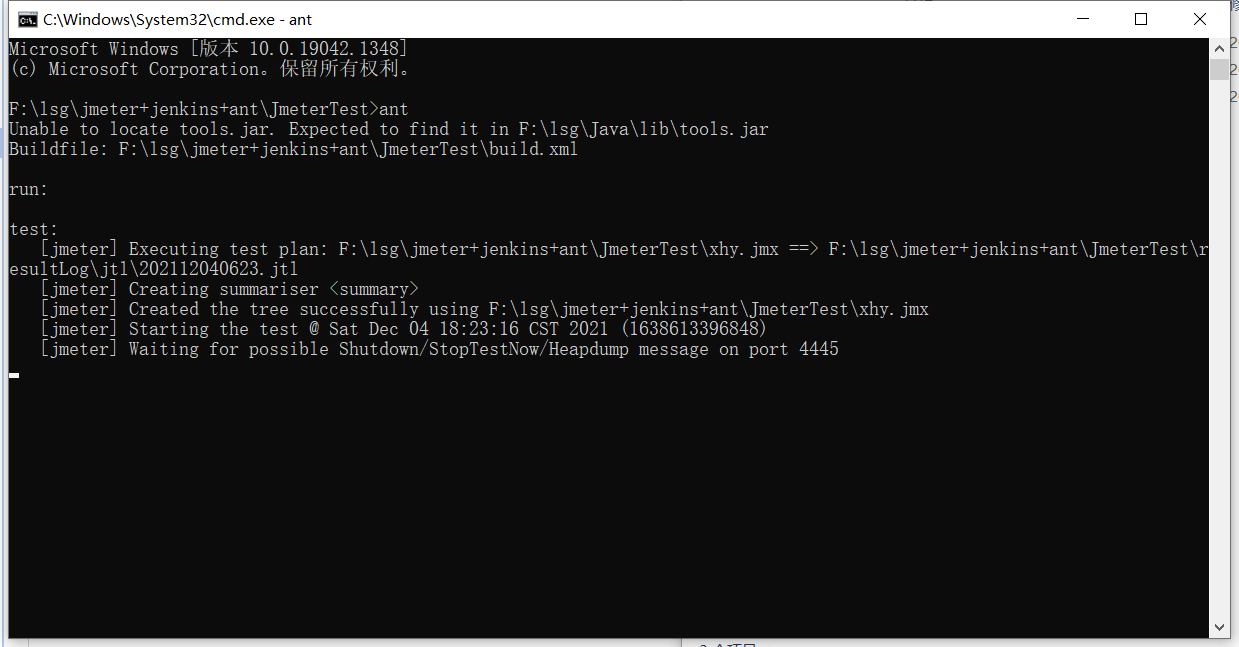
This indicates that the test is complete.
Then look at the output test report (this report diagram is not my own, but borrowed from a big guy)
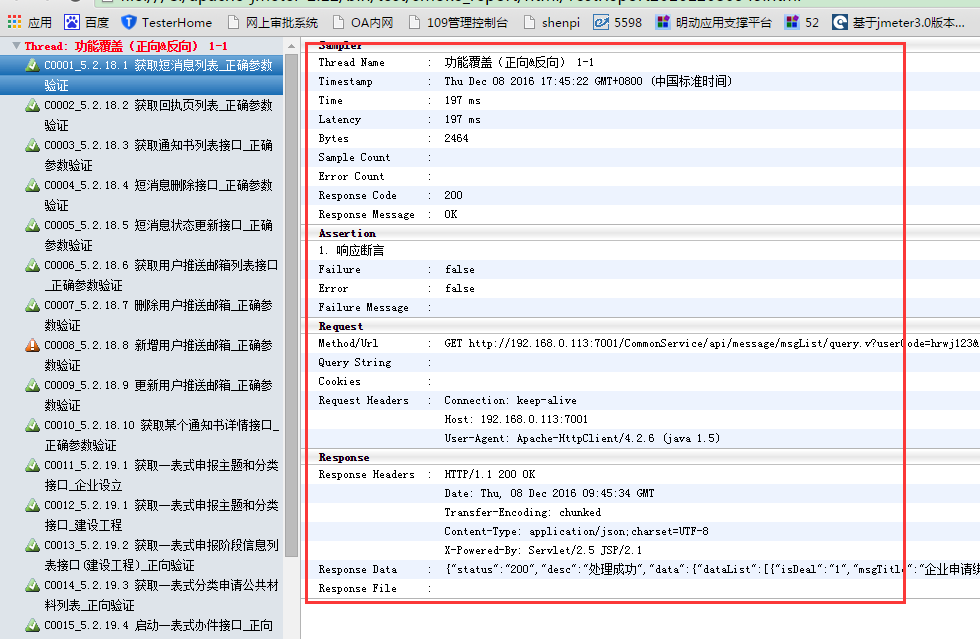
It can be seen from this test report that the input content is very clear, and the domain name, port, message body, various request headers and return results cover a comprehensive range. More importantly, you can see which interface reports an error immediately, and determine the problem by analyzing the return results and status codes.
So far, jmeter+ant outputs the test report. Let's talk about this first. Next time, let's talk about jmeter+ant+jenkins to build an automated test framework.