1 - Installation Instructions
This article will demonstrate that CentOS 7 installs highly available k8s 1.17 + in binary mode. Compared with other versions, the binary installation mode is not very different. You only need to distinguish the corresponding relationship of each component version.
In the production environment, it is recommended to use the Kubernetes version with a smaller version than 5. For example, the Kubernetes version after 1.19.5 can be used in the production environment.
2 - binary high availability kubernetes cluster installation
2.1 basic environment configuration
The host information and server IP address cannot be set to dhcp, but should be configured as static IP.
The VIP (virtual IP) should not be the same as the company's intranet IP. First, ping it. It can only be used if it is unavailable. VIP needs to be in the same LAN as the host! In the case of a public cloud, the VIP is the load balancing IP of the public cloud, such as the SLB address of Alibaba cloud and the ELB address of Tencent cloud. Note that the load balancing of the public cloud is the load balancing of the intranet.
192.168.0.107 k8s-master01 # 2C2G 40G
192.168.0.108 k8s-master02 # 2C2G 40G
192.168.0.109 k8s-master03 # 2C2G 40G
192.168.0.236 k8s-master-lb # VIP empty IP Do not occupy machine resources # If it is not a highly available cluster, the IP is the IP of Master01
192.168.0.110 k8s-node01 # 2C2G 40G
192.168.0.111 k8s-node02  # 2C2G 40G
K8s Service network segment: 10.96.0.0/12
K8s Pod network segment: 172.16.0.0/12
be careful
The host network segment, K8s Service network segment and Pod network segment cannot be duplicate.
System environment:
[root@k8s-node02 ~]# cat /etc/redhat-release
CentOS Linux release 7.9.2009 (Core)
Virtual machine environment:

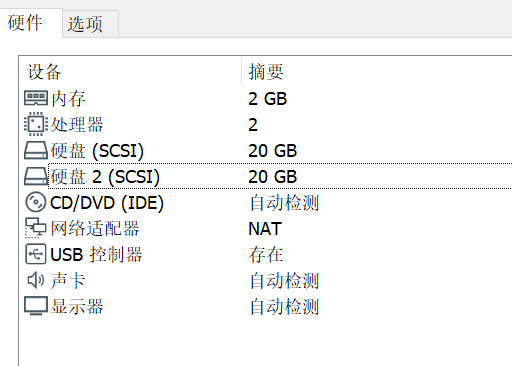
Configure all node hosts files
[root@k8s-master01 ~]# cat /etc/hosts
127.0.0.1   localhost localhost.localdomain localhost4 localhost4.localdomain4
::1         localhost localhost.localdomain localhost6 localhost6.localdomain6

192.168.0.107 k8s-master01
192.168.0.108 k8s-master02
192.168.0.109 k8s-master03
192.168.0.236 k8s-master-lb # If it is not a highly available cluster, the IP is the IP of Master01
192.168.0.110 k8s-node01
192.168.0.111 k8s-node02
CentOS 7 installation yum source is as follows:
curl -o /etc/yum.repos.d/CentOS-Base.repo https://mirrors.aliyun.com/repo/Centos-7.repo

yum install -y yum-utils device-mapper-persistent-data lvm2

yum-config-manager --add-repo https://mirrors.aliyun.com/docker-ce/linux/centos/docker-ce.repo

sed -i -e '/mirrors.cloud.aliyuncs.com/d' -e '/mirrors.aliyuncs.com/d' /etc/yum.repos.d/CentOS-Base.repo
Installation of necessary tools
yum install wget jq psmisc vim net-tools telnet yum-utils device-mapper-persistent-data lvm2 git -y
Close firewalld, dnsmasq and SELinux on all nodes (NetworkManager needs to be closed for centos7, but not for CentOS8)
systemctl disable --now firewalld
systemctl disable --now dnsmasq
systemctl disable --now NetworkManager

setenforce 0
sed -i 's#SELINUX=enforcing#SELINUX=disabled#g' /etc/sysconfig/selinux
sed -i 's#SELINUX=enforcing#SELINUX=disabled#g' /etc/selinux/config
Close swap partition on all nodes, fstab comment swap
swapoff -a && sysctl -w vm.swappiness=0
sed -ri '/^[^#]*swap/s@^@#@' /etc/fstab
Synchronization time of all nodes
Install ntpdate
rpm -ivh http://mirrors.wlnmp.com/centos/wlnmp-release-centos.noarch.rpm
yum install ntpdate -y
Synchronization time of all nodes. The time synchronization configuration is as follows:
ln -sf /usr/share/zoneinfo/Asia/Shanghai /etc/localtime
echo 'Asia/Shanghai' >/etc/timezone
ntpdate time2.aliyun.com
# Join crontab
*/5 * * * * /usr/sbin/ntpdate time2.aliyun.com
Configure limit for all nodes:
ulimit -SHn 65535
vim /etc/security/limits.conf
# Add the following at the end
* soft nofile 65536
* hard nofile 131072
* soft nproc 65535
* hard nproc 655350
* soft memlock unlimited
* hard memlock unlimited
The Master01 node logs in to other nodes without a key. The configuration files and certificates generated during installation are operated on Master01. Cluster management is also operated on Master01. A separate kubectl server is required on Alibaba cloud or AWS. The key configuration is as follows:
[root@k8s-master01 ~]# ssh-keygen -t rsa
Master01 configure password free login to other nodes
[root@k8s-master01 ~]# for i in k8s-master01 k8s-master02 k8s-master03 k8s-node01 k8s-node02;do ssh-copy-id -i .ssh/id_rsa.pub $i;done
Basic tools for installing all nodes
yum install wget jq psmisc vim net-tools yum-utils device-mapper-persistent-data lvm2 git -y
Master01 download installation files
[root@k8s-master01 ~]# cd /root/ ; git clone https://github.com/dotbalo/k8s-ha-install.git
Cloning into 'k8s-ha-install'...
remote: Enumerating objects: 12, done.
remote: Counting objects: 100% (12/12), done.
remote: Compressing objects: 100% (11/11), done.
remote: Total 461 (delta 2), reused 5 (delta 1), pack-reused 449
Receiving objects: 100% (461/461), 19.52 MiB | 4.04 MiB/s, done.
Resolving deltas: 100% (163/163), done.
All nodes upgrade the system and restart. The kernel is not upgraded here. The kernel will be upgraded separately in the next section:
Yum update - Y -- exclude = kernel * & & reboot centos7 needs to be upgraded, and CentOS8 can be upgraded as needed
2.2 kernel upgrade
CentOS7 needs to upgrade the kernel to 4.18 +, and the locally upgraded version is 4.19.
Download the kernel on the master01 node:
cd /root
wget http://193.49.22.109/elrepo/kernel/el7/x86_64/RPMS/kernel-ml-devel-4.19.12-1.el7.elrepo.x86_64.rpm
wget http://193.49.22.109/elrepo/kernel/el7/x86_64/RPMS/kernel-ml-4.19.12-1.el7.elrepo.x86_64.rpm
Transfer from master01 node to other nodes:
for i in k8s-master02 k8s-master03 k8s-node01 k8s-node02;do scp kernel-ml-4.19.12-1.el7.elrepo.x86_64.rpm kernel-ml-devel-4.19.12-1.el7.elrepo.x86_64.rpm $i:/root/ ; done
Install kernel on all nodes
cd /root && yum localinstall -y kernel-ml*
All nodes change the kernel boot order
grub2-set-default  0 && grub2-mkconfig -o /etc/grub2.cfg

grubby --args="user_namespace.enable=1" --update-kernel="$(grubby --default-kernel)"
Check if the default kernel is 4.19
[root@k8s-master02 ~]# grubby --default-kernel
/boot/vmlinuz-4.19.12-1.el7.elrepo.x86_64
Restart all nodes and check whether the kernel is 4.19
[root@k8s-master02 ~]# uname -a
Linux k8s-master02 4.19.12-1.el7.elrepo.x86_64 #1 SMP Fri Dec 21 11:06:36 EST 2018 x86_64 x86_64 x86_64 GNU/Linux
Install ipvsadm on all nodes:
yum install ipvsadm ipset sysstat conntrack libseccomp -y
All nodes are configured with ipvs module, which is NF in kernel version 4.19 +_ conntrack_ IPv4 has been changed to nf_conntrack, use NF below 4.18_ conntrack_ IPv4:
modprobe -- ip_vs
modprobe -- ip_vs_rr
modprobe -- ip_vs_wrr
modprobe -- ip_vs_sh
modprobe -- nf_conntrack

vim /etc/modules-load.d/ipvs.conf
Add the following
ip_vs
ip_vs_lc
ip_vs_wlc
ip_vs_rr
ip_vs_wrr
ip_vs_lblc
ip_vs_lblcr
ip_vs_dh
ip_vs_sh
ip_vs_fo
ip_vs_nq
ip_vs_sed
ip_vs_ftp
ip_vs_sh
nf_conntrack
ip_tables
ip_set
xt_set
ipt_set
ipt_rpfilter
ipt_REJECT
ipip
Then execute systemctl enable -- now SYSTEMd modules load Service.
Check whether to load:
[root@k8s-master01 ~]# lsmod | grep -e ip_vs -e nf_conntrack
nf_conntrack_ipv4      16384  23
nf_defrag_ipv4         16384  1 nf_conntrack_ipv4
nf_conntrack          135168  10 xt_conntrack,nf_conntrack_ipv6,nf_conntrack_ipv4,nf_nat,nf_nat_ipv6,ipt_MASQUERADE,nf_nat_ipv4,xt_nat,nf_conntrack_netlink,ip_vs
Enable some necessary kernel parameters in k8s cluster, and configure k8s kernel for all nodes:
cat <<EOF > /etc/sysctl.d/k8s.conf
net.ipv4.ip_forward = 1
net.bridge.bridge-nf-call-iptables = 1
net.bridge.bridge-nf-call-ip6tables = 1
fs.may_detach_mounts = 1
vm.overcommit_memory=1
vm.panic_on_oom=0
fs.inotify.max_user_watches=89100
fs.file-max=52706963
fs.nr_open=52706963
net.netfilter.nf_conntrack_max=2310720

net.ipv4.tcp_keepalive_time = 600
net.ipv4.tcp_keepalive_probes = 3
net.ipv4.tcp_keepalive_intvl =15
net.ipv4.tcp_max_tw_buckets = 36000
net.ipv4.tcp_tw_reuse = 1
net.ipv4.tcp_max_orphans = 327680
net.ipv4.tcp_orphan_retries = 3
net.ipv4.tcp_syncookies = 1
net.ipv4.tcp_max_syn_backlog = 16384
net.ipv4.ip_conntrack_max = 65536
net.ipv4.tcp_max_syn_backlog = 16384
net.ipv4.tcp_timestamps = 0
net.core.somaxconn = 16384
EOF
sysctl --system
After all nodes configure the kernel, restart the server to ensure that the kernel is still loaded after restart
reboot
lsmod | grep --color=auto -e ip_vs -e nf_conntrack
2.3 docker installation
Install docker CE 19.03 on all nodes
yum install docker-ce-19.03.* -y
reminder:
Since systemd is recommended for the new kubelet, you can change the CgroupDriver of docker to systemd.
mkdir /etc/docker
cat > /etc/docker/daemon.json <<EOF
{
  "exec-opts": ["native.cgroupdriver=systemd"]
}
EOF
All nodes are set to start Docker automatically:
systemctl daemon-reload && systemctl enable --now docker
2.4 k8s and etcd installation
k8s github: https://github.com/kubernetes/kubernetes/
Master01 download kubernetes installation package
[root@k8s-master01 ~]# wget https://dl.k8s.io/v1.20.0/kubernetes-server-linux-amd64.tar.gz
Note that the current version is 1.20.0. You need to download the latest 1.20.0 during installation X version:
https://github.com/kubernetes/kubernetes/blob/master/CHANGELOG/CHANGELOG-1.20.md
After opening the page, click:
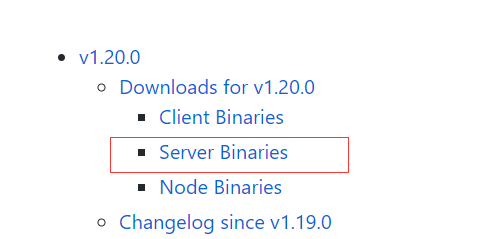
The following operations are performed in master01
Download etcd installation package
[root@k8s-master01 ~]# wget https://github.com/etcd-io/etcd/releases/download/v3.4.13/etcd-v3.4.13-linux-amd64.tar.gz
Unzip the kubernetes installation file
[root@k8s-master01 ~]# tar -xf kubernetes-server-linux-amd64.tar.gz --strip-components=3 -C /usr/local/bin kubernetes/server/bin/kube{let,ctl,-apiserver,-controller-manager,-scheduler,-proxy}
Extract the etcd installation file
[root@k8s-master01 ~]# tar -zxvf etcd-v3.4.13-linux-amd64.tar.gz --strip-components=1 -C /usr/local/bin etcd-v3.4.13-linux-amd64/etcd{,ctl}
Version view
[root@k8s-master01 ~]# kubelet --version
Kubernetes v1.20.0
[root@k8s-master01 ~]# etcdctl version
etcdctl version: 3.4.13
API version: 3.4
Send components to other nodes
MasterNodes='k8s-master02 k8s-master03'
WorkNodes='k8s-node01 k8s-node02'
for NODE in $MasterNodes; do echo $NODE; scp /usr/local/bin/kube{let,ctl,-apiserver,-controller-manager,-scheduler,-proxy} $NODE:/usr/local/bin/; scp /usr/local/bin/etcd* $NODE:/usr/local/bin/; done
for NODE in $WorkNodes; do scp /usr/local/bin/kube{let,-proxy} $NODE:/usr/local/bin/ ; done
Create / opt/cni/bin directory for all nodes
mkdir -p /opt/cni/bin
Switch branches, Master01 switches to 1.20 X branch (other versions can switch to other branches)
cd k8s-ha-install && git checkout manual-installation-v1.20.x
2.5 generating certificates
Binary installation is the most critical step. If one step is wrong, you must pay attention to the correctness of each step.
Master01 download certificate generation tool
wget "https://pkg.cfssl.org/R1.2/cfssl_linux-amd64" -O /usr/local/bin/cfssl
wget "https://pkg.cfssl.org/R1.2/cfssljson_linux-amd64" -O /usr/local/bin/cfssljson
chmod +x /usr/local/bin/cfssl /usr/local/bin/cfssljson
2.5.1 etcd certificate
Create etcd certificate directory for all Master nodes
mkdir /etc/etcd/ssl -p
Create kubernetes related directories for all nodes
mkdir -p /etc/kubernetes/pki
The Master01 node generates an etcd certificate
CSR file for generating certificate: certificate signature request file, configured with some domain names, companies and companies
[root@k8s-master01 pki]# cd /root/k8s-ha-install/pki

# Generate etcd CA certificate and key of CA certificate
cfssl gencert -initca etcd-ca-csr.json | cfssljson -bare /etc/etcd/ssl/etcd-ca

cfssl gencert \
   -ca=/etc/etcd/ssl/etcd-ca.pem \
   -ca-key=/etc/etcd/ssl/etcd-ca-key.pem \
   -config=ca-config.json \
   -hostname=127.0.0.1,k8s-master01,k8s-master02,k8s-master03,192.168.0.107,192.168.0.108,192.168.0.109 \
   -profile=kubernetes \
   etcd-csr.json | cfssljson -bare /etc/etcd/ssl/etcd
results of enforcement
2019/12/26 22:48:00 [INFO] generate received request
2019/12/26 22:48:00 [INFO] received CSR
2019/12/26 22:48:00 [INFO] generating key: rsa-2048
2019/12/26 22:48:01 [INFO] encoded CSR
2019/12/26 22:48:01 [INFO] signed certificate with serial number 250230878926052708909595617022917808304837732033
Copy the certificate to another node
MasterNodes='k8s-master02 k8s-master03'
WorkNodes='k8s-node01 k8s-node02'

for NODE in $MasterNodes; do
     ssh $NODE "mkdir -p /etc/etcd/ssl"
     for FILE in etcd-ca-key.pem  etcd-ca.pem  etcd-key.pem  etcd.pem; do
       scp /etc/etcd/ssl/${FILE} $NODE:/etc/etcd/ssl/${FILE}
     done
 done
2.5.2 k8s component certificates
Master01 generate kubernetes certificate
[root@k8s-master01 pki]# cd /root/k8s-ha-install/pki

cfssl gencert -initca ca-csr.json | cfssljson -bare /etc/kubernetes/pki/ca
10.96.0. It is the k8s service network segment. If you need to change the k8s service network segment, you need to change 10.96.0.1. If it is not a highly available cluster, 192.168.0.236 is the IP of Master01.
cfssl gencert -ca=/etc/kubernetes/pki/ca.pem -ca-key=/etc/kubernetes/pki/ca-key.pem -config=ca-config.json -hostname=10.96.0.1,192.168.0.236,127.0.0.1,kubernetes,kubernetes.default,kubernetes.default.svc,kubernetes.default.svc.cluster,kubernetes.default.svc.cluster.local,192.168.0.107,192.168.0.108,192.168.0.109 -profile=kubernetes apiserver-csr.json | cfssljson -bare /etc/kubernetes/pki/apiserver
Generate the aggregation certificate for apiserver. Requestheader-client-xxx requestheader-allowwd-xxx:aggerator
cfssl gencert -initca front-proxy-ca-csr.json | cfssljson -bare /etc/kubernetes/pki/front-proxy-ca

cfssl gencert -ca=/etc/kubernetes/pki/front-proxy-ca.pem   -ca-key=/etc/kubernetes/pki/front-proxy-ca-key.pem   -config=ca-config.json   -profile=kubernetes   front-proxy-client-csr.json | cfssljson -bare /etc/kubernetes/pki/front-proxy-client
Return results (ignore warnings)
2021/12/11 20:15:08 [INFO] generate received request
2021/12/11 20:15:08 [INFO] received CSR
2021/12/11 20:15:08 [INFO] generating key: rsa-2048

2021/12/11 20:15:08 [INFO] encoded CSR
2021/12/11 20:15:08 [INFO] signed certificate with serial number 597484897564859295955894546063479154194995827845
2021/12/11 20:15:08 [WARNING] This certificate lacks a "hosts" field. This makes it unsuitable for
websites. For more information see the Baseline Requirements for the Issuance and Management
of Publicly-Trusted Certificates, v.1.1.6, from the CA/Browser Forum (https://cabforum.org);
specifically, section 10.2.3 ("Information Requirements").
Generate certificate for controller manage
cfssl gencert \
   -ca=/etc/kubernetes/pki/ca.pem \
   -ca-key=/etc/kubernetes/pki/ca-key.pem \
   -config=ca-config.json \
   -profile=kubernetes \
   manager-csr.json | cfssljson -bare /etc/kubernetes/pki/controller-manager

# Note that if it is not a highly available cluster, 192.168.0.236:8443 is changed to the address of master01, and 8443 is changed to the port of apiserver, which is 6443 by default

# Set cluster: set a cluster item

kubectl config set-cluster kubernetes \
     --certificate-authority=/etc/kubernetes/pki/ca.pem \
     --embed-certs=true \
     --server=https://192.168.0.236:8443 \
     --kubeconfig=/etc/kubernetes/controller-manager.kubeconfig

# Set an environment item and a context

kubectl config set-context system:kube-controller-manager@kubernetes \
    --cluster=kubernetes \
    --user=system:kube-controller-manager \
    --kubeconfig=/etc/kubernetes/controller-manager.kubeconfig

# Set credentials sets a user item

kubectl config set-credentials system:kube-controller-manager \
     --client-certificate=/etc/kubernetes/pki/controller-manager.pem \
     --client-key=/etc/kubernetes/pki/controller-manager-key.pem \
     --embed-certs=true \
     --kubeconfig=/etc/kubernetes/controller-manager.kubeconfig

# Use an environment as the default

kubectl config use-context system:kube-controller-manager@kubernetes \
     --kubeconfig=/etc/kubernetes/controller-manager.kubeconfig

cfssl gencert \
   -ca=/etc/kubernetes/pki/ca.pem \
   -ca-key=/etc/kubernetes/pki/ca-key.pem \
   -config=ca-config.json \
   -profile=kubernetes \
   scheduler-csr.json | cfssljson -bare /etc/kubernetes/pki/scheduler

# Note that if it is not a highly available cluster, 192.168.0.236:8443 is changed to the address of master01, and 8443 is changed to the port of apiserver, which is 6443 by default

kubectl config set-cluster kubernetes \
     --certificate-authority=/etc/kubernetes/pki/ca.pem \
     --embed-certs=true \
     --server=https://192.168.0.236:8443 \
     --kubeconfig=/etc/kubernetes/scheduler.kubeconfig

kubectl config set-credentials system:kube-scheduler \
     --client-certificate=/etc/kubernetes/pki/scheduler.pem \
     --client-key=/etc/kubernetes/pki/scheduler-key.pem \
     --embed-certs=true \
     --kubeconfig=/etc/kubernetes/scheduler.kubeconfig

kubectl config set-context system:kube-scheduler@kubernetes \
     --cluster=kubernetes \
     --user=system:kube-scheduler \
     --kubeconfig=/etc/kubernetes/scheduler.kubeconfig

kubectl config use-context system:kube-scheduler@kubernetes \
     --kubeconfig=/etc/kubernetes/scheduler.kubeconfig

cfssl gencert \
   -ca=/etc/kubernetes/pki/ca.pem \
   -ca-key=/etc/kubernetes/pki/ca-key.pem \
   -config=ca-config.json \
   -profile=kubernetes \
   admin-csr.json | cfssljson -bare /etc/kubernetes/pki/admin

# Note that if it is not a highly available cluster, 192.168.0.236:8443 is changed to the address of master01, and 8443 is changed to the port of apiserver, which is 6443 by default

kubectl config set-cluster kubernetes --certificate-authority=/etc/kubernetes/pki/ca.pem --embed-certs=true --server=https://192.168.0.236:8443 --kubeconfig=/etc/kubernetes/admin.kubeconfig

kubectl config set-credentials kubernetes-admin --client-certificate=/etc/kubernetes/pki/admin.pem --client-key=/etc/kubernetes/pki/admin-key.pem --embed-certs=true --kubeconfig=/etc/kubernetes/admin.kubeconfig

kubectl config set-context kubernetes-admin@kubernetes --cluster=kubernetes --user=kubernetes-admin --kubeconfig=/etc/kubernetes/admin.kubeconfig

kubectl config use-context kubernetes-admin@kubernetes --kubeconfig=/etc/kubernetes/admin.kubeconfig
Create serviceaccount key - > Secret
openssl genrsa -out /etc/kubernetes/pki/sa.key 2048
 Return results

Generating RSA private key, 2048 bit long modulus (2 primes)
...................................................................................+++++
...............+++++
e is 65537 (0x010001)

openssl rsa -in /etc/kubernetes/pki/sa.key -pubout -out /etc/kubernetes/pki/sa.pub
Send certificate to other nodes
for NODE in k8s-master02 k8s-master03; do
for FILE in $(ls /etc/kubernetes/pki | grep -v etcd); do
scp /etc/kubernetes/pki/${FILE} $NODE:/etc/kubernetes/pki/${FILE};
done;
for FILE in admin.kubeconfig controller-manager.kubeconfig scheduler.kubeconfig; do
scp /etc/kubernetes/${FILE} $NODE:/etc/kubernetes/${FILE};
done;
done
View certificate file
[root@k8s-master01 pki]# ls /etc/kubernetes/pki/
admin.csr      apiserver.csr      ca.csr      controller-manager.csr      front-proxy-ca.csr      front-proxy-client.csr      sa.key         scheduler-key.pem
admin-key.pem  apiserver-key.pem  ca-key.pem  controller-manager-key.pem  front-proxy-ca-key.pem  front-proxy-client-key.pem  sa.pub         scheduler.pem
admin.pem      apiserver.pem      ca.pem      controller-manager.pem      front-proxy-ca.pem      front-proxy-client.pem      scheduler.csr

[root@k8s-master01 pki]# ls /etc/kubernetes/pki/ |wc -l
23
2.6 Etcd configuration of kubernetes system components
The etcd configuration is roughly the same. Note that the host name and IP address of the etcd configuration of each Master node are modified.
2.6.1 Master01
vim /etc/etcd/etcd.config.yml
name: 'k8s-master01'
data-dir: /var/lib/etcd
wal-dir: /var/lib/etcd/wal
snapshot-count: 5000
heartbeat-interval: 100
election-timeout: 1000
quota-backend-bytes: 0
listen-peer-urls: 'https://192.168.0.107:2380'
listen-client-urls: 'https://192.168.0.107:2379,http://127.0.0.1:2379'
max-snapshots: 3
max-wals: 5
cors:
initial-advertise-peer-urls: 'https://192.168.0.107:2380'
advertise-client-urls: 'https://192.168.0.107:2379'
discovery:
discovery-fallback: 'proxy'
discovery-proxy:
discovery-srv:
initial-cluster: 'k8s-master01=https://192.168.0.107:2380,k8s-master02=https://192.168.0.108:2380,k8s-master03=https://192.168.0.109:2380'
initial-cluster-token: 'etcd-k8s-cluster'
initial-cluster-state: 'new'
strict-reconfig-check: false
enable-v2: true
enable-pprof: true
proxy: 'off'
proxy-failure-wait: 5000
proxy-refresh-interval: 30000
proxy-dial-timeout: 1000
proxy-write-timeout: 5000
proxy-read-timeout: 0
client-transport-security:
  cert-file: '/etc/kubernetes/pki/etcd/etcd.pem'
  key-file: '/etc/kubernetes/pki/etcd/etcd-key.pem'
  client-cert-auth: true
  trusted-ca-file: '/etc/kubernetes/pki/etcd/etcd-ca.pem'
  auto-tls: true
peer-transport-security:
  cert-file: '/etc/kubernetes/pki/etcd/etcd.pem'
  key-file: '/etc/kubernetes/pki/etcd/etcd-key.pem'
  peer-client-cert-auth: true
  trusted-ca-file: '/etc/kubernetes/pki/etcd/etcd-ca.pem'
  auto-tls: true
debug: false
log-package-levels:
log-outputs: [default]
force-new-cluster: false
2.6.2 Master02
vim /etc/etcd/etcd.config.yml
name: 'k8s-master02'
data-dir: /var/lib/etcd
wal-dir: /var/lib/etcd/wal
snapshot-count: 5000
heartbeat-interval: 100
election-timeout: 1000
quota-backend-bytes: 0
listen-peer-urls: 'https://192.168.0.108:2380'
listen-client-urls: 'https://192.168.0.108:2379,http://127.0.0.1:2379'
max-snapshots: 3
max-wals: 5
cors:
initial-advertise-peer-urls: 'https://192.168.0.108:2380'
advertise-client-urls: 'https://192.168.0.108:2379'
discovery:
discovery-fallback: 'proxy'
discovery-proxy:
discovery-srv:
initial-cluster: 'k8s-master01=https://192.168.0.107:2380,k8s-master02=https://192.168.0.108:2380,k8s-master03=https://192.168.0.109:2380'
initial-cluster-token: 'etcd-k8s-cluster'
initial-cluster-state: 'new'
strict-reconfig-check: false
enable-v2: true
enable-pprof: true
proxy: 'off'
proxy-failure-wait: 5000
proxy-refresh-interval: 30000
proxy-dial-timeout: 1000
proxy-write-timeout: 5000
proxy-read-timeout: 0
client-transport-security:
  cert-file: '/etc/kubernetes/pki/etcd/etcd.pem'
  key-file: '/etc/kubernetes/pki/etcd/etcd-key.pem'
  client-cert-auth: true
  trusted-ca-file: '/etc/kubernetes/pki/etcd/etcd-ca.pem'
  auto-tls: true
peer-transport-security:
  cert-file: '/etc/kubernetes/pki/etcd/etcd.pem'
  key-file: '/etc/kubernetes/pki/etcd/etcd-key.pem'
  peer-client-cert-auth: true
  trusted-ca-file: '/etc/kubernetes/pki/etcd/etcd-ca.pem'
  auto-tls: true
debug: false
log-package-levels:
log-outputs: [default]
force-new-cluster: false
2.6.3 Master03
vim /etc/etcd/etcd.config.yml
name: 'k8s-master03'
data-dir: /var/lib/etcd
wal-dir: /var/lib/etcd/wal
snapshot-count: 5000
heartbeat-interval: 100
election-timeout: 1000
quota-backend-bytes: 0
listen-peer-urls: 'https://192.168.0.109:2380'
listen-client-urls: 'https://192.168.0.109:2379,http://127.0.0.1:2379'
max-snapshots: 3
max-wals: 5
cors:
initial-advertise-peer-urls: 'https://192.168.0.109:2380'
advertise-client-urls: 'https://192.168.0.109:2379'
discovery:
discovery-fallback: 'proxy'
discovery-proxy:
discovery-srv:
initial-cluster: 'k8s-master01=https://192.168.0.107:2380,k8s-master02=https://192.168.0.108:2380,k8s-master03=https://192.168.0.109:2380'
initial-cluster-token: 'etcd-k8s-cluster'
initial-cluster-state: 'new'
strict-reconfig-check: false
enable-v2: true
enable-pprof: true
proxy: 'off'
proxy-failure-wait: 5000
proxy-refresh-interval: 30000
proxy-dial-timeout: 1000
proxy-write-timeout: 5000
proxy-read-timeout: 0
client-transport-security:
  cert-file: '/etc/kubernetes/pki/etcd/etcd.pem'
  key-file: '/etc/kubernetes/pki/etcd/etcd-key.pem'
  client-cert-auth: true
  trusted-ca-file: '/etc/kubernetes/pki/etcd/etcd-ca.pem'
  auto-tls: true
peer-transport-security:
  cert-file: '/etc/kubernetes/pki/etcd/etcd.pem'
  key-file: '/etc/kubernetes/pki/etcd/etcd-key.pem'
  peer-client-cert-auth: true
  trusted-ca-file: '/etc/kubernetes/pki/etcd/etcd-ca.pem'
  auto-tls: true
debug: false
log-package-levels:
log-outputs: [default]
force-new-cluster: false
2.6.4 create Service
All Master nodes create etcd service s and start them
vim /usr/lib/systemd/system/etcd.service
[Unit]
Description=Etcd Service
Documentation=https://coreos.com/etcd/docs/latest/
After=network.target

[Service]
Type=notify
ExecStart=/usr/local/bin/etcd --config-file=/etc/etcd/etcd.config.yml
Restart=on-failure
RestartSec=10
LimitNOFILE=65536

[Install]
WantedBy=multi-user.target
Alias=etcd3.service
All Master nodes create the certificate directory of etcd
mkdir /etc/kubernetes/pki/etcd
ln -s /etc/etcd/ssl/* /etc/kubernetes/pki/etcd/

systemctl daemon-reload
systemctl enable --now etcd
View etcd status
export ETCDCTL_API=3
etcdctl --endpoints="192.168.0.109:2379,192.168.0.108:2379,192.168.0.107:2379" --cacert=/etc/kubernetes/pki/etcd/etcd-ca.pem --cert=/etc/kubernetes/pki/etcd/etcd.pem --key=/etc/kubernetes/pki/etcd/etcd-key.pem  endpoint status --write-out=table

2.7 high availability configuration
High availability configuration (Note: if it is not a high availability cluster, haproxy and keepalived do not need to be installed)
If you install on the cloud, you do not need to follow the steps in this chapter. You can directly use the lb on the cloud, such as alicloud slb, Tencent cloud elb, etc.
The public cloud should use its own load balancing, such as Alibaba cloud SLB and Tencent cloud ELB, to replace haproxy and keepalived, because most public clouds do not support keepalived. In addition, if Alibaba cloud is used, the kubectl controller cannot be placed on the master node. Tencent cloud is recommended because Alibaba cloud SLB has loopback problems, That is, the SLB proxy server cannot access SLB in reverse, but Tencent cloud has fixed this problem.
Slb -> haproxy -> apiserver
All Master nodes are installed with keepalived and haproxy
yum install keepalived haproxy -y
All masters are configured with HAProxy, and the configuration is the same
vim /etc/haproxy/haproxy.cfg
global
  maxconn  2000
  ulimit-n  16384
  log  127.0.0.1 local0 err
  stats timeout 30s

defaults
  log global
  mode  http
  option  httplog
  timeout connect 5000
  timeout client  50000
  timeout server  50000
  timeout http-request 15s
  timeout http-keep-alive 15s

frontend k8s-master
  bind 0.0.0.0:8443
  bind 127.0.0.1:8443
  mode tcp
  option tcplog
  tcp-request inspect-delay 5s
  default_backend k8s-master

backend k8s-master
  mode tcp
  option tcplog
  option tcp-check
  balance roundrobin
  default-server inter 10s downinter 5s rise 2 fall 2 slowstart 60s maxconn 250 maxqueue 256 weight 100
  server k8s-master01    192.168.0.107:6443  check
  server k8s-master02    192.168.0.108:6443  check
  server k8s-master03    192.168.0.109:6443  check
2.7.1 Master01 keepalived
All Master nodes are configured with KeepAlived. The configurations are different. Pay attention to differentiation[ root@k8s-master01 pki]# vim /etc/keepalived/keepalived.conf, pay attention to the IP and network card (interface parameter) of each node
! Configuration File for keepalived
global_defs {
    router_id LVS_DEVEL
}
vrrp_script chk_apiserver {
    script "/etc/keepalived/check_apiserver.sh"
    interval 5
    weight -5
    fall 2
    rise 1
}
vrrp_instance VI_1 {
    state MASTER
    interface eth0
    mcast_src_ip 192.168.0.107
    virtual_router_id 51
    priority 101
    nopreempt
    advert_int 2
    authentication {
        auth_type PASS
        auth_pass K8SHA_KA_AUTH
    }
    virtual_ipaddress {
        192.168.0.236
    }
    track_script {
      chk_apiserver
} }
2.7.2 Master02 keepalived
! Configuration File for keepalived
global_defs {
    router_id LVS_DEVEL
}
vrrp_script chk_apiserver {
    script "/etc/keepalived/check_apiserver.sh"
    interval 5
    weight -5
    fall 2
    rise 1
}
vrrp_instance VI_1 {
    state BACKUP
    interface eth0
    mcast_src_ip 192.168.0.108
    virtual_router_id 51
    priority 100
    nopreempt
    advert_int 2
    authentication {
        auth_type PASS
        auth_pass K8SHA_KA_AUTH
    }
    virtual_ipaddress {
        192.168.0.236
    }
    track_script {
      chk_apiserver
} }
2.7.3 Master03 keepalived
! Configuration File for keepalived
global_defs {
    router_id LVS_DEVEL
}
vrrp_script chk_apiserver {
    script "/etc/keepalived/check_apiserver.sh"
    interval 5
    weight -5
    fall 2
    rise 1
}
vrrp_instance VI_1 {
    state BACKUP
    interface eth0
    mcast_src_ip 192.168.0.109
    virtual_router_id 51
    priority 100
    nopreempt
    advert_int 2
    authentication {
        auth_type PASS
        auth_pass K8SHA_KA_AUTH
    }
    virtual_ipaddress {
        192.168.0.236
    }
    track_script {
      chk_apiserver
} }
2.7.4 health check configuration
All master nodes
[root@k8s-master01 keepalived]# cat /etc/keepalived/check_apiserver.sh

#!/bin/bash

err=0
for k in $(seq 1 3)
do
    check_code=$(pgrep haproxy)
    if [[ $check_code == "" ]]; then
        err=$(expr $err + 1)
        sleep 1
        continue
    else
        err=0
        break
    fi
done

if [[ $err != "0" ]]; then
    echo "systemctl stop keepalived"
    /usr/bin/systemctl stop keepalived
    exit 1
else
    exit 0
fi

chmod +x /etc/keepalived/check_apiserver.sh
All master nodes start haproxy and keepalived
[root@k8s-master01 keepalived]# systemctl daemon-reload
[root@k8s-master01 keepalived]# systemctl enable --now haproxy
[root@k8s-master01 keepalived]# systemctl enable --now keepalived
VIP test
[root@k8s-master01 pki]# ping 192.168.0.236
PING 192.168.0.236 (192.168.0.236) 56(84) bytes of data.
64 bytes from 192.168.0.236: icmp_seq=1 ttl=64 time=1.39 ms
64 bytes from 192.168.0.236: icmp_seq=2 ttl=64 time=2.46 ms
64 bytes from 192.168.0.236: icmp_seq=3 ttl=64 time=1.68 ms
64 bytes from 192.168.0.236: icmp_seq=4 ttl=64 time=1.08 ms
Important: if keepalived and haproxy are installed, you need to test whether keepalived is normal.
telnet 192.168.0.236 8443
If the ping fails and the telnet does not appear], it is considered that the VIP cannot continue to execute. It is necessary to check the problems of keepalived, such as the status of firewall and selinux, haproxy and keepalived, listening port, etc.
The firewall status of all nodes must be disable d and inactive: systemctl status firewalld
To view the selinux status of all nodes, it must be disable: getenforce
View the status of haproxy and kept haproxy on the master node: systemctl status kept haproxy
View listening port on master node: netstat -lntp
2.8 kubernetes component configuration
Create related directories for all nodes
mkdir -p /etc/kubernetes/manifests/ /etc/systemd/system/kubelet.service.d /var/lib/kubelet /var/log/kubernetes
2.8.1 Apiserver
Create Kube apiserver service for all Master nodes. Note that if it is not a highly available cluster, 192.168.0.236 is changed to the address of master01.
2.8.1.1 master01 configuration
Note that the k8s service network segment used in this document is 10.96.0.0/12. This network segment cannot duplicate the network segment of the host and Pod. Please modify it as needed.
[root@k8s-master01 pki]# cat /usr/lib/systemd/system/kube-apiserver.service

[Unit]
Description=Kubernetes API Server
Documentation=https://github.com/kubernetes/kubernetes
After=network.target

[Service]
ExecStart=/usr/local/bin/kube-apiserver \
      --v=2  \
      --logtostderr=true  \
      --allow-privileged=true  \
      --bind-address=0.0.0.0  \
      --secure-port=6443  \
      --insecure-port=0  \
      --advertise-address=192.168.0.107 \
      --service-cluster-ip-range=10.96.0.0/12  \
      --service-node-port-range=30000-32767  \
      --etcd-servers=https://192.168.0.107:2379,https://192.168.0.108:2379,https://192.168.0.109:2379 \
      --etcd-cafile=/etc/etcd/ssl/etcd-ca.pem  \
      --etcd-certfile=/etc/etcd/ssl/etcd.pem  \
      --etcd-keyfile=/etc/etcd/ssl/etcd-key.pem  \
      --client-ca-file=/etc/kubernetes/pki/ca.pem  \
      --tls-cert-file=/etc/kubernetes/pki/apiserver.pem  \
      --tls-private-key-file=/etc/kubernetes/pki/apiserver-key.pem  \
      --kubelet-client-certificate=/etc/kubernetes/pki/apiserver.pem  \
      --kubelet-client-key=/etc/kubernetes/pki/apiserver-key.pem  \
      --service-account-key-file=/etc/kubernetes/pki/sa.pub  \
      --service-account-signing-key-file=/etc/kubernetes/pki/sa.key  \
      --service-account-issuer=https://kubernetes.default.svc.cluster.local \
      --kubelet-preferred-address-types=InternalIP,ExternalIP,Hostname  \
      --enable-admission-plugins=NamespaceLifecycle,LimitRanger,ServiceAccount,DefaultStorageClass,DefaultTolerationSeconds,NodeRestriction,ResourceQuota  \
      --authorization-mode=Node,RBAC  \
      --enable-bootstrap-token-auth=true  \
      --requestheader-client-ca-file=/etc/kubernetes/pki/front-proxy-ca.pem  \
      --proxy-client-cert-file=/etc/kubernetes/pki/front-proxy-client.pem  \
      --proxy-client-key-file=/etc/kubernetes/pki/front-proxy-client-key.pem  \
      --requestheader-allowed-names=aggregator  \
      --requestheader-group-headers=X-Remote-Group  \
      --requestheader-extra-headers-prefix=X-Remote-Extra-  \
      --requestheader-username-headers=X-Remote-User
      # --token-auth-file=/etc/kubernetes/token.csv

Restart=on-failure
RestartSec=10s
LimitNOFILE=65535

[Install]
WantedBy=multi-user.target
2.8.1.2 master02 configuration
Note that the k8s service network segment used in this document is 10.96.0.0/12. This network segment cannot duplicate the network segment of the host and Pod. Please modify it as needed.
[root@k8s-master01 pki]# cat /usr/lib/systemd/system/kube-apiserver.service

[Unit]
Description=Kubernetes API Server
Documentation=https://github.com/kubernetes/kubernetes
After=network.target

[Service]
ExecStart=/usr/local/bin/kube-apiserver \
      --v=2  \
      --logtostderr=true  \
      --allow-privileged=true  \
      --bind-address=0.0.0.0  \
      --secure-port=6443  \
      --insecure-port=0  \
      --advertise-address=192.168.0.108 \
      --service-cluster-ip-range=10.96.0.0/12  \
      --service-node-port-range=30000-32767  \
      --etcd-servers=https://192.168.0.107:2379,https://192.168.0.108:2379,https://192.168.0.109:2379 \
      --etcd-cafile=/etc/etcd/ssl/etcd-ca.pem  \
      --etcd-certfile=/etc/etcd/ssl/etcd.pem  \
      --etcd-keyfile=/etc/etcd/ssl/etcd-key.pem  \
      --client-ca-file=/etc/kubernetes/pki/ca.pem  \
      --tls-cert-file=/etc/kubernetes/pki/apiserver.pem  \
      --tls-private-key-file=/etc/kubernetes/pki/apiserver-key.pem  \
      --kubelet-client-certificate=/etc/kubernetes/pki/apiserver.pem  \
      --kubelet-client-key=/etc/kubernetes/pki/apiserver-key.pem  \
      --service-account-key-file=/etc/kubernetes/pki/sa.pub  \
      --service-account-signing-key-file=/etc/kubernetes/pki/sa.key  \
      --service-account-issuer=https://kubernetes.default.svc.cluster.local \
      --kubelet-preferred-address-types=InternalIP,ExternalIP,Hostname  \
      --enable-admission-plugins=NamespaceLifecycle,LimitRanger,ServiceAccount,DefaultStorageClass,DefaultTolerationSeconds,NodeRestriction,ResourceQuota  \
      --authorization-mode=Node,RBAC  \
      --enable-bootstrap-token-auth=true  \
      --requestheader-client-ca-file=/etc/kubernetes/pki/front-proxy-ca.pem  \
      --proxy-client-cert-file=/etc/kubernetes/pki/front-proxy-client.pem  \
      --proxy-client-key-file=/etc/kubernetes/pki/front-proxy-client-key.pem  \
      --requestheader-allowed-names=aggregator  \
      --requestheader-group-headers=X-Remote-Group  \
      --requestheader-extra-headers-prefix=X-Remote-Extra-  \
      --requestheader-username-headers=X-Remote-User
      # --token-auth-file=/etc/kubernetes/token.csv

Restart=on-failure
RestartSec=10s
LimitNOFILE=65535

[Install]
WantedBy=multi-user.target
2.8.1.3 master03 configuration
Note that the k8s service network segment used in this document is 10.96.0.0/12. This network segment cannot duplicate the network segment of the host and Pod. Please modify it as needed.
[root@k8s-master01 pki]# cat /usr/lib/systemd/system/kube-apiserver.service

[Unit]
Description=Kubernetes API Server
Documentation=https://github.com/kubernetes/kubernetes
After=network.target

[Service]
ExecStart=/usr/local/bin/kube-apiserver \
      --v=2  \
      --logtostderr=true  \
      --allow-privileged=true  \
      --bind-address=0.0.0.0  \
      --secure-port=6443  \
      --insecure-port=0  \
      --advertise-address=192.168.0.109 \
      --service-cluster-ip-range=10.96.0.0/12  \
      --service-node-port-range=30000-32767  \
      --etcd-servers=https://192.168.0.107:2379,https://192.168.0.108:2379,https://192.168.0.109:2379 \
      --etcd-cafile=/etc/etcd/ssl/etcd-ca.pem  \
      --etcd-certfile=/etc/etcd/ssl/etcd.pem  \
      --etcd-keyfile=/etc/etcd/ssl/etcd-key.pem  \
      --client-ca-file=/etc/kubernetes/pki/ca.pem  \
      --tls-cert-file=/etc/kubernetes/pki/apiserver.pem  \
      --tls-private-key-file=/etc/kubernetes/pki/apiserver-key.pem  \
      --kubelet-client-certificate=/etc/kubernetes/pki/apiserver.pem  \
      --kubelet-client-key=/etc/kubernetes/pki/apiserver-key.pem  \
      --service-account-key-file=/etc/kubernetes/pki/sa.pub  \
      --service-account-signing-key-file=/etc/kubernetes/pki/sa.key  \
      --service-account-issuer=https://kubernetes.default.svc.cluster.local \
      --kubelet-preferred-address-types=InternalIP,ExternalIP,Hostname  \
      --enable-admission-plugins=NamespaceLifecycle,LimitRanger,ServiceAccount,DefaultStorageClass,DefaultTolerationSeconds,NodeRestriction,ResourceQuota  \
      --authorization-mode=Node,RBAC  \
      --enable-bootstrap-token-auth=true  \
      --requestheader-client-ca-file=/etc/kubernetes/pki/front-proxy-ca.pem  \
      --proxy-client-cert-file=/etc/kubernetes/pki/front-proxy-client.pem  \
      --proxy-client-key-file=/etc/kubernetes/pki/front-proxy-client-key.pem  \
      --requestheader-allowed-names=aggregator  \
      --requestheader-group-headers=X-Remote-Group  \
      --requestheader-extra-headers-prefix=X-Remote-Extra-  \
      --requestheader-username-headers=X-Remote-User
      # --token-auth-file=/etc/kubernetes/token.csv

Restart=on-failure
RestartSec=10s
LimitNOFILE=65535

[Install]
WantedBy=multi-user.target
2.8.1.4 start apiserver
Open Kube apiserver for all Master nodes
systemctl daemon-reload && systemctl enable --now kube-apiserver
Detect Kube server status
systemctl status kube-apiserver
· kube-apiserver.service - Kubernetes API Server
   Loaded: loaded (/usr/lib/systemd/system/kube-apiserver.service; enabled; vendor preset: disabled)
   Active: active (running) since Sat 2020-08-22 21:26:49 CST; 26s ago
These prompts in the system log can be ignored
Dec 11 20:51:15 k8s-master01 kube-apiserver: I1211 20:51:15.004739    7450 clientconn.go:948] ClientConn switching balancer to "pick_first"
Dec 11 20:51:15 k8s-master01 kube-apiserver: I1211 20:51:15.004843    7450 balancer_conn_wrappers.go:78] pickfirstBalancer: HandleSubConnStateChange: 0xc011bd4c80, {CONNECTING <nil>}
Dec 11 20:51:15 k8s-master01 kube-apiserver: I1211 20:51:15.010725    7450 balancer_conn_wrappers.go:78] pickfirstBalancer: HandleSubConnStateChange: 0xc011bd4c80, {READY <nil>}
Dec 11 20:51:15 k8s-master01 kube-apiserver: I1211 20:51:15.011370    7450 controlbuf.go:508] transport: loopyWriter.run returning. connection error: desc = "transport is closing"
2.8.2 ControllerManager
Configure Kube controller manager service for all Master nodes
Note that the k8s Pod network segment used in this document is 172.16.0.0/12. This network segment cannot duplicate the network segment of the host and k8s Service. Please modify it as needed.
[root@k8s-master01 pki]# cat /usr/lib/systemd/system/kube-controller-manager.service

[Unit]
Description=Kubernetes Controller Manager
Documentation=https://github.com/kubernetes/kubernetes
After=network.target

[Service]
ExecStart=/usr/local/bin/kube-controller-manager \
      --v=2 \
      --logtostderr=true \
      --address=127.0.0.1 \
      --root-ca-file=/etc/kubernetes/pki/ca.pem \
      --cluster-signing-cert-file=/etc/kubernetes/pki/ca.pem \
      --cluster-signing-key-file=/etc/kubernetes/pki/ca-key.pem \
      --service-account-private-key-file=/etc/kubernetes/pki/sa.key \
      --kubeconfig=/etc/kubernetes/controller-manager.kubeconfig \
      --leader-elect=true \
      --use-service-account-credentials=true \
      --node-monitor-grace-period=40s \
      --node-monitor-period=5s \
      --pod-eviction-timeout=2m0s \
      --controllers=*,bootstrapsigner,tokencleaner \
      --allocate-node-cidrs=true \
      --cluster-cidr=172.16.0.0/12 \
      --requestheader-client-ca-file=/etc/kubernetes/pki/front-proxy-ca.pem \
      --node-cidr-mask-size=24

Restart=always
RestartSec=10s

[Install]
WantedBy=multi-user.target
All Master nodes start Kube controller manager
[root@k8s-master01 pki]# systemctl daemon-reload

[root@k8s-master01 pki]# systemctl enable --now kube-controller-manager
Created symlink /etc/systemd/system/multi-user.target.wants/kube-controller-manager.service → /usr/lib/systemd/system/kube-controller-manager.service.
View startup status
[root@k8s-master01 pki]# systemctl enable --now kube-controller-manager
Created symlink from /etc/systemd/system/multi-user.target.wants/kube-controller-manager.service to /usr/lib/systemd/system/kube-controller-manager.service.

[root@k8s-master01 pki]# systemctl  status kube-controller-manager
· kube-controller-manager.service - Kubernetes Controller Manager
   Loaded: loaded (/usr/lib/systemd/system/kube-controller-manager.service; enabled; vendor preset: disabled)
   Active: active (running) since Fri 2020-12-11 20:53:05 CST; 8s ago
     Docs: https://github.com/kubernetes/kubernetes
 Main PID: 7518 (kube-controller)
2.8.3 Scheduler
Configure Kube Scheduler service for all Master nodes
[root@k8s-master01 pki]# cat /usr/lib/systemd/system/kube-scheduler.service

[Unit]
Description=Kubernetes Scheduler
Documentation=https://github.com/kubernetes/kubernetes
After=network.target

[Service]
ExecStart=/usr/local/bin/kube-scheduler \
      --v=2 \
      --logtostderr=true \
      --address=127.0.0.1 \
      --leader-elect=true \
      --kubeconfig=/etc/kubernetes/scheduler.kubeconfig

Restart=always
RestartSec=10s

[Install]
WantedBy=multi-user.target
[root@k8s-master01 pki]# systemctl daemon-reload

[root@k8s-master01 pki]# systemctl enable --now kube-scheduler
Created symlink /etc/systemd/system/multi-user.target.wants/kube-scheduler.service → /usr/lib/systemd/system/kube-scheduler.service.
2.9 TLS bootstrapping configuration
Create a bootstrap in Master01
Note that if it is not a highly available cluster, 192.168.0.236:8443 is changed to the address of master01, and 8443 is changed to the port of apiserver, which is 6443 by default.
cd /root/k8s-ha-install/bootstrap

kubectl config set-cluster kubernetes --certificate-authority=/etc/kubernetes/pki/ca.pem --embed-certs=true --server=https://192.168.0.236:8443 --kubeconfig=/etc/kubernetes/bootstrap-kubelet.kubeconfig

kubectl config set-credentials tls-bootstrap-token-user --token=c8ad9c.2e4d610cf3e7426e --kubeconfig=/etc/kubernetes/bootstrap-kubelet.kubeconfig

kubectl config set-context tls-bootstrap-token-user@kubernetes --cluster=kubernetes --user=tls-bootstrap-token-user --kubeconfig=/etc/kubernetes/bootstrap-kubelet.kubeconfig

kubectl config use-context tls-bootstrap-token-user@kubernetes --kubeconfig=/etc/kubernetes/bootstrap-kubelet.kubeconfig
Note: if you want to modify bootstrap secret. The token ID and token secret of yaml need to ensure that the strings in the red circle in the figure below are consistent and the digits are the same. Also make sure the yellow font of the last command is c8ad9c 2e4d610cf3e7426e should be consistent with the modified string.

[root@k8s-master01 bootstrap]# mkdir -p /root/.kube ; cp /etc/kubernetes/admin.kubeconfig /root/.kube/config

[root@k8s-master01 bootstrap]# kubectl create -f bootstrap.secret.yaml
secret/bootstrap-token-c8ad9c created
clusterrolebinding.rbac.authorization.k8s.io/kubelet-bootstrap created
clusterrolebinding.rbac.authorization.k8s.io/node-autoapprove-bootstrap created
clusterrolebinding.rbac.authorization.k8s.io/node-autoapprove-certificate-rotation created
clusterrole.rbac.authorization.k8s.io/system:kube-apiserver-to-kubelet created
clusterrolebinding.rbac.authorization.k8s.io/system:kube-apiserver created
2.10 node configuration
2.10.1 copy certificate
The Master01 Node copies the certificate to the Node node
cd /etc/kubernetes/

for NODE in k8s-master02 k8s-master03 k8s-node01 k8s-node02; do
     ssh $NODE mkdir -p /etc/kubernetes/pki /etc/etcd/ssl /etc/etcd/ssl
     for FILE in etcd-ca.pem etcd.pem etcd-key.pem; do
       scp /etc/etcd/ssl/$FILE $NODE:/etc/etcd/ssl/
     done
     for FILE in pki/ca.pem pki/ca-key.pem pki/front-proxy-ca.pem bootstrap-kubelet.kubeconfig; do
       scp /etc/kubernetes/$FILE $NODE:/etc/kubernetes/${FILE}
 done
 done
Execution results:
etcd-ca.pem                                                                                                                                                                    100% 1363   314.0KB/s   00:00
etcd.pem                                                                                                                                                                       100% 1505   429.1KB/s   00:00
etcd-key.pem                                                                                                                                                                   100% 1679   361.9KB/s   00:00
ca.pem                                                                                                                                                                         100% 1407   459.5KB/s   00:00
ca-key.pem                                                                                                                                                                     100% 1679   475.2KB/s   00:00
front-proxy-ca.pem                                                                                                                                                             100% 1143   214.5KB/s   00:00
bootstrap-kubelet.kubeconfig                                                                                                                                                   100% 2291   695.1KB/s   00:00
etcd-ca.pem                                                                                                                                                                    100% 1363   325.5KB/s   00:00
etcd.pem                                                                                                                                                                       100% 1505   301.2KB/s   00:00
etcd-key.pem                                                                                                                                                                   100% 1679   260.9KB/s   00:00
ca.pem                                                                                                                                                                         100% 1407   420.8KB/s   00:00
ca-key.pem                                                                                                                                                                     100% 1679   398.0KB/s   00:00
front-proxy-ca.pem                                                                                                                                                             100% 1143   224.9KB/s   00:00
bootstrap-kubelet.kubeconfig                                                                                                                                                   100% 2291   685.4KB/s   00:00
2.10.2 kubelet configuration
Create related directories for all nodes
mkdir -p /var/lib/kubelet /var/log/kubernetes /etc/systemd/system/kubelet.service.d /etc/kubernetes/manifests/
Configure kubelet service for all nodes
[root@k8s-master01 bootstrap]# vim  /usr/lib/systemd/system/kubelet.service

[Unit]
Description=Kubernetes Kubelet
Documentation=https://github.com/kubernetes/kubernetes
After=docker.service
Requires=docker.service

[Service]
ExecStart=/usr/local/bin/kubelet

Restart=always
StartLimitInterval=0
RestartSec=10

[Install]
WantedBy=multi-user.target
Configure the configuration file of kubelet service for all nodes
vim /etc/systemd/system/kubelet.service.d/10-kubelet.conf

[Service]
Environment="KUBELET_KUBECONFIG_ARGS=--bootstrap-kubeconfig=/etc/kubernetes/bootstrap-kubelet.kubeconfig --kubeconfig=/etc/kubernetes/kubelet.kubeconfig"
Environment="KUBELET_SYSTEM_ARGS=--network-plugin=cni --cni-conf-dir=/etc/cni/net.d --cni-bin-dir=/opt/cni/bin"
Environment="KUBELET_CONFIG_ARGS=--config=/etc/kubernetes/kubelet-conf.yml --pod-infra-container-image=registry.cn-hangzhou.aliyuncs.com/google_containers/pause-amd64:3.2"
Environment="KUBELET_EXTRA_ARGS=--node-labels=node.kubernetes.io/node='' "
ExecStart=
ExecStart=/usr/local/bin/kubelet $KUBELET_KUBECONFIG_ARGS $KUBELET_CONFIG_ARGS $KUBELET_SYSTEM_ARGS $KUBELET_EXTRA_ARGS
Create kubelet's configuration file
Note: if you change the k8s Service segment, you need to change the clusterDNS: configuration of kubelet-conf.yml to the tenth address of the k8s Service segment, such as 10.96.0.10
[root@k8s-master01 bootstrap]# vim /etc/kubernetes/kubelet-conf.yml

apiVersion: kubelet.config.k8s.io/v1beta1
kind: KubeletConfiguration
address: 0.0.0.0
port: 10250
readOnlyPort: 10255
authentication:
  anonymous:
    enabled: false
  webhook:
    cacheTTL: 2m0s
    enabled: true
  x509:
    clientCAFile: /etc/kubernetes/pki/ca.pem
authorization:
  mode: Webhook
  webhook:
    cacheAuthorizedTTL: 5m0s
    cacheUnauthorizedTTL: 30s
cgroupDriver: systemd
cgroupsPerQOS: true
clusterDNS:
- 10.96.0.10
clusterDomain: cluster.local
containerLogMaxFiles: 5
containerLogMaxSize: 10Mi
contentType: application/vnd.kubernetes.protobuf
cpuCFSQuota: true
cpuManagerPolicy: none
cpuManagerReconcilePeriod: 10s
enableControllerAttachDetach: true
enableDebuggingHandlers: true
enforceNodeAllocatable:
- pods
eventBurst: 10
eventRecordQPS: 5
evictionHard:
  imagefs.available: 15%
  memory.available: 100Mi
  nodefs.available: 10%
  nodefs.inodesFree: 5%
evictionPressureTransitionPeriod: 5m0s
failSwapOn: true
fileCheckFrequency: 20s
hairpinMode: promiscuous-bridge
healthzBindAddress: 127.0.0.1
healthzPort: 10248
httpCheckFrequency: 20s
imageGCHighThresholdPercent: 85
imageGCLowThresholdPercent: 80
imageMinimumGCAge: 2m0s
iptablesDropBit: 15
iptablesMasqueradeBit: 14
kubeAPIBurst: 10
kubeAPIQPS: 5
makeIPTablesUtilChains: true
maxOpenFiles: 1000000
maxPods: 110
nodeStatusUpdateFrequency: 10s
oomScoreAdj: -999
podPidsLimit: -1
registryBurst: 10
registryPullQPS: 5
resolvConf: /etc/resolv.conf
rotateCertificates: true
runtimeRequestTimeout: 2m0s
serializeImagePulls: true
staticPodPath: /etc/kubernetes/manifests
streamingConnectionIdleTimeout: 4h0m0s
syncFrequency: 1m0s
volumeStatsAggPeriod: 1m0s
Start all nodes kubelet
systemctl daemon-reload
systemctl enable --now kubelet
The system log is / var/log/messages
Unable to update cni config: no networks found in /etc/cni/net.d only the following information is displayed as normal.
View cluster status
[root@k8s-master01 bootstrap]# kubectl get node
2.10.3 Kube proxy configuration
Note that if it is not a highly available cluster, 192.168.0.236:8443 is changed to the address of master01, and 8443 is changed to the port of apiserver, which is 6443 by default.
The following operations are performed in Master01
cd /root/k8s-ha-install

kubectl -n kube-system create serviceaccount kube-proxy

kubectl create clusterrolebinding system:kube-proxy --clusterrole system:node-proxier --serviceaccount kube-system:kube-proxy

SECRET=$(kubectl -n kube-system get sa/kube-proxy \
    --output=jsonpath='{.secrets[0].name}')
JWT_TOKEN=$(kubectl -n kube-system get secret/$SECRET \
--output=jsonpath='{.data.token}' | base64 -d)
PKI_DIR=/etc/kubernetes/pki
K8S_DIR=/etc/kubernetes

kubectl config set-cluster kubernetes --certificate-authority=/etc/kubernetes/pki/ca.pem --embed-certs=true --server=https://192.168.0.236:8443 --kubeconfig=${K8S_DIR}/kube-proxy.kubeconfig

kubectl config set-credentials kubernetes --token=${JWT_TOKEN} --kubeconfig=/etc/kubernetes/kube-proxy.kubeconfig

kubectl config set-context kubernetes --cluster=kubernetes --user=kubernetes     --kubeconfig=/etc/kubernetes/kube-proxy.kubeconfig

kubectl config use-context kubernetes --kubeconfig=/etc/kubernetes/kube-proxy.kubeconfig
Send the systemd Service file of Kube proxy to other nodes in master01.
If you change the network segment of the cluster pod, you need to change Kube proxy / Kube proxy Clustercidr of conf: 172.16.0.0/12 network segment with parameter pod.
for NODE in k8s-master01 k8s-master02 k8s-master03; do
     scp ${K8S_DIR}/kube-proxy.kubeconfig $NODE:/etc/kubernetes/kube-proxy.kubeconfig
     scp kube-proxy/kube-proxy.conf $NODE:/etc/kubernetes/kube-proxy.conf
     scp kube-proxy/kube-proxy.service $NODE:/usr/lib/systemd/system/kube-proxy.service
 done
for NODE in k8s-node01 k8s-node02; do
     scp /etc/kubernetes/kube-proxy.kubeconfig $NODE:/etc/kubernetes/kube-proxy.kubeconfig
     scp kube-proxy/kube-proxy.conf $NODE:/etc/kubernetes/kube-proxy.conf
     scp kube-proxy/kube-proxy.service $NODE:/usr/lib/systemd/system/kube-proxy.service
 done
All nodes start Kube proxy
[root@k8s-master01 k8s-ha-install]# systemctl daemon-reload
[root@k8s-master01 k8s-ha-install]# systemctl enable --now kube-proxy
Created symlink /etc/systemd/system/multi-user.target.wants/kube-proxy.service → /usr/lib/systemd/system/kube-proxy.service.
2.11 installing Calico
The following steps are only performed in master01
cd /root/k8s-ha-install/calico/
Modify calico etcd The following locations for yaml
sed -i 's#etcd_endpoints: "http://<ETCD_IP>:<ETCD_PORT>"#etcd_endpoints: "https://192.168.0.107:2379,https://192.168.0.108:2379,https://192.168.0.109:2379"#g' calico-etcd.yaml
ETCD_CA=`cat /etc/kubernetes/pki/etcd/etcd-ca.pem | base64 | tr -d '\n'`
ETCD_CERT=`cat /etc/kubernetes/pki/etcd/etcd.pem | base64 | tr -d '\n'`
ETCD_KEY=`cat /etc/kubernetes/pki/etcd/etcd-key.pem | base64 | tr -d '\n'`

sed -i "s@# etcd-key: null@etcd-key: ${ETCD_KEY}@g; s@# etcd-cert: null@etcd-cert: ${ETCD_CERT}@g; s@# etcd-ca: null@etcd-ca: ${ETCD_CA}@g" calico-etcd.yaml

sed -i 's#etcd_ca: ""#etcd_ca: "/calico-secrets/etcd-ca"#g; s#etcd_cert: ""#etcd_cert: "/calico-secrets/etcd-cert"#g; s#etcd_key: "" #etcd_key: "/calico-secrets/etcd-key" #g' calico-etcd.yaml

# Change this to your own pod segment
POD_SUBNET="172.16.0.0/12"
Note that the following step is to put calico etcd Calico in yaml file_ IPV4POOL_ Change the network segment under CIDR to its own Pod network segment, that is, 192.168 x. Change X / 16 to its own cluster network segment and open the comment:

Therefore, when changing, please ensure that the network segment in this step has not been replaced uniformly. If it has been replaced, please change it back:

sed -i 's@# - name: CALICO_IPV4POOL_CIDR@- name: CALICO_IPV4POOL_CIDR@g; s@# value: "192.168.0.0/16"@ value: '"${POD_SUBNET}"'@g' calico-etcd.yaml
kubectl apply -f calico-etcd.yaml
View container status
[root@k8s-master01 calico]# kubectl get po -n kube-system
If the container status is abnormal, you can use kubectl describe or logs to view the container log.
2.12 installing CoreDNS
2.12.1 install the corresponding version (recommended)
cd /root/k8s-ha-install/
If you change the network segment of k8s service, you need to change the serviceIP of coredns to the tenth IP of k8s service.
sed -i "s#10.96.0.10#10.96.0.10#g" CoreDNS/coredns.yaml
Installing coredns
[root@k8s-master01 k8s-ha-install]# kubectl  create -f CoreDNS/coredns.yaml
serviceaccount/coredns created
clusterrole.rbac.authorization.k8s.io/system:coredns created
clusterrolebinding.rbac.authorization.k8s.io/system:coredns created
configmap/coredns created
deployment.apps/coredns created
service/kube-dns created
2.12.2 install the latest version of CoreDNS
git clone https://github.com/coredns/deployment.git

cd deployment/kubernetes

# ./deploy.sh -s -i 10.96.0.10 | kubectl apply -f -
serviceaccount/coredns created
clusterrole.rbac.authorization.k8s.io/system:coredns created
clusterrolebinding.rbac.authorization.k8s.io/system:coredns created
configmap/coredns created
deployment.apps/coredns created
service/kube-dns created

View status
# kubectl get po -n kube-system -l k8s-app=kube-dns
NAME                       READY   STATUS    RESTARTS   AGE
coredns-85b4878f78-h29kh   1/1     Running   0          8h
2.13 installing Metrics Server
In the new version of Kubernetes, the system resources are collected using Metrics server, which can collect the memory, disk, CPU and network utilization of nodes and pods through Metrics.
Installing metrics server
cd /root/k8s-ha-install/metrics-server-0.4.x/
kubectl create -f .
serviceaccount/metrics-server created
clusterrole.rbac.authorization.k8s.io/system:aggregated-metrics-reader created
clusterrole.rbac.authorization.k8s.io/system:metrics-server created
rolebinding.rbac.authorization.k8s.io/metrics-server-auth-reader created
clusterrolebinding.rbac.authorization.k8s.io/metrics-server:system:auth-delegator created
clusterrolebinding.rbac.authorization.k8s.io/system:metrics-server created
service/metrics-server created
deployment.apps/metrics-server created
apiservice.apiregistration.k8s.io/v1beta1.metrics.k8s.io created
Wait for the metrics server to start and check the status
[root@k8s-master01 metrics-server-0.4.x]# kubectl  top node
NAME           CPU(cores)   CPU%   MEMORY(bytes)   MEMORY%
k8s-master01   231m         5%     1620Mi          42%
k8s-master02   274m         6%     1203Mi          31%
k8s-master03   202m         5%     1251Mi          32%
k8s-node01     69m          1%     667Mi           17%
k8s-node02     73m          1%     650Mi           16%
2.14 cluster verification
Install busybox
cat<<EOF | kubectl apply -f -
apiVersion: v1
kind: Pod
metadata:
  name: busybox
  namespace: default
spec:
  containers:
  - name: busybox
    image: busybox:1.28
    command:
      - sleep
      - "3600"
    imagePullPolicy: IfNotPresent
  restartPolicy: Always
EOF
- Pod must be able to resolve Service
- Pod must be able to resolve services across namespace s
- Each node must be able to access kubernetes svc 443 of Kubernetes and service 53 of Kube DNS
- Pod and pod should be able to communicate before
- Can communicate with namespace
- Cross namespace communication
- Cross machine communication
Verify resolution
[root@k8s-master01 CoreDNS]# kubectl exec  busybox -n default -- nslookup kubernetes
Server:    192.168.0.10
Address 1: 192.168.0.10 kube-dns.kube-system.svc.cluster.local

Name:      kubernetes
Address 1: 192.168.0.1 kubernetes.default.svc.cluster.local

[root@k8s-master01 CoreDNS]# kubectl exec  busybox -n default -- nslookup kube-dns.kube-system
Server:    192.168.0.10
Address 1: 192.168.0.10 kube-dns.kube-system.svc.cluster.local

Name:      kube-dns.kube-system
Address 1: 192.168.0.10 kube-dns.kube-system.svc.cluster.local
2.15 installing dashboard
2.15.1 dashboard deployment
Dashboard is used to display various resources in the cluster. At the same time, you can also view the log of Pod in real time and execute some commands in the container through dashboard.
2.15.2 install the specified version of dashboard
cd /root/k8s-ha-install/dashboard/
[root@k8s-master01 dashboard]# kubectl  create -f .
serviceaccount/admin-user created
clusterrolebinding.rbac.authorization.k8s.io/admin-user created
namespace/kubernetes-dashboard created
serviceaccount/kubernetes-dashboard created
service/kubernetes-dashboard created
secret/kubernetes-dashboard-certs created
secret/kubernetes-dashboard-csrf created
secret/kubernetes-dashboard-key-holder created
configmap/kubernetes-dashboard-settings created
role.rbac.authorization.k8s.io/kubernetes-dashboard created
clusterrole.rbac.authorization.k8s.io/kubernetes-dashboard created
rolebinding.rbac.authorization.k8s.io/kubernetes-dashboard created
clusterrolebinding.rbac.authorization.k8s.io/kubernetes-dashboard created
deployment.apps/kubernetes-dashboard created
service/dashboard-metrics-scraper created
deployment.apps/dashboard-metrics-scraper created
2.15.3 install the latest version
Official GitHub address: https://github.com/kubernetes/dashboard
You can view the latest version of dashboard on the official dashboard
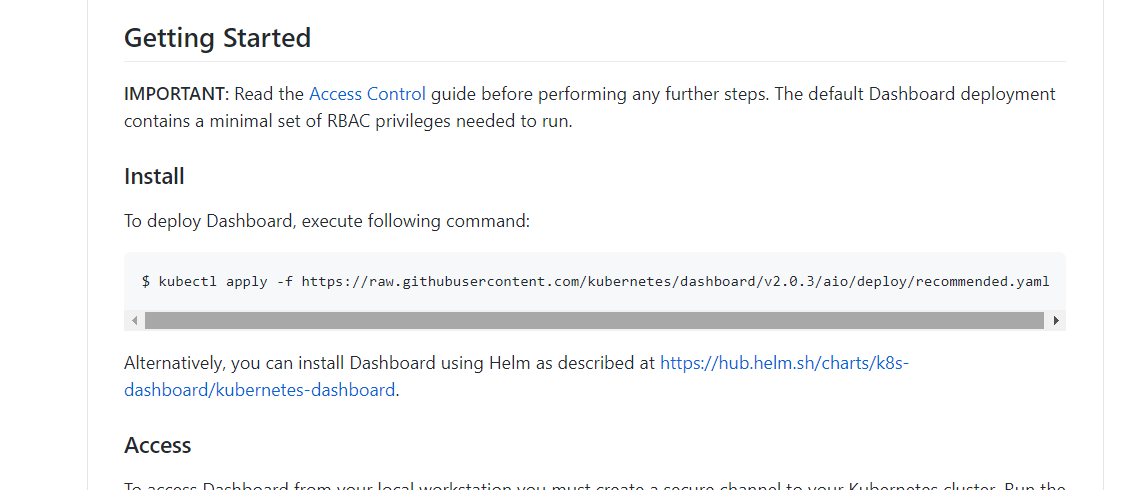
kubectl apply -f https://raw.githubusercontent.com/kubernetes/dashboard/v2.0.3/aio/deploy/recommended.yaml
Create administrator user
vim admin.yaml
apiVersion: v1
kind: ServiceAccount
metadata:
  name: admin-user
  namespace: kube-system
---
apiVersion: rbac.authorization.k8s.io/v1
kind: ClusterRoleBinding
metadata:
  name: admin-user
  annotations:
    rbac.authorization.kubernetes.io/autoupdate: "true"
roleRef:
  apiGroup: rbac.authorization.k8s.io
  kind: ClusterRole
  name: cluster-admin
subjects:
- kind: ServiceAccount
  name: admin-user
  namespace: kube-system
kubectl apply -f admin.yaml -n kube-system
2.15.4 login to dashboard
Add startup parameters to the startup file of Google Chrome to solve the problem of unable to access the Dashboard. Refer to Figure 1-1:
--test-type --ignore-certificate-errors

Figure 1-1 configuration of Google Chrome browser
Change the svc of the dashboard to NodePort:
kubectl edit svc kubernetes-dashboard -n kubernetes-dashboard
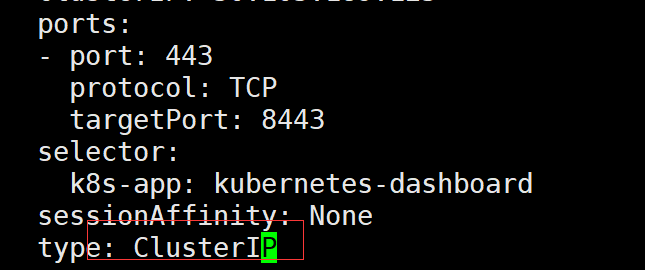
Change the ClusterIP to NodePort (if this step has been ignored for NodePort)
View port number:

According to the instance port number, you can access the dashboard through any host with Kube proxy installed or the IP + port of VIP:
To access Dashboard: https://192.168.0.236:18282 (please change 18282 to your own port) and select the login mode as token (i.e. Token Mode). Refer to Figure 1-2
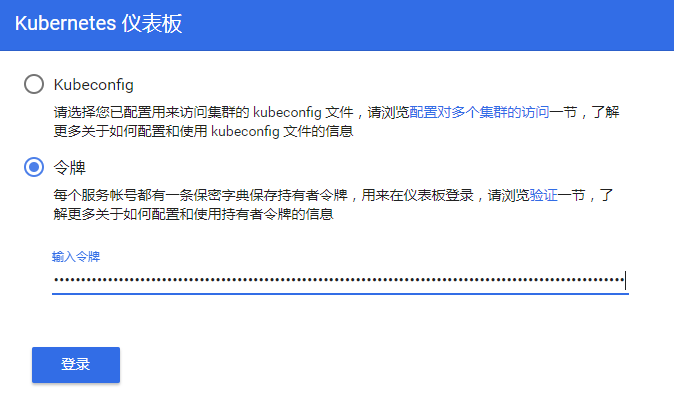
Figure 1-2 dashboard login method
To view the token value:
[root@k8s-master01 1.1.1]# kubectl -n kube-system describe secret $(kubectl -n kube-system get secret | grep admin-user | awk '{print $1}')
Name:         admin-user-token-r4vcp
Namespace:    kube-system
Labels:       <none>
Annotations:  kubernetes.io/service-account.name: admin-user
              kubernetes.io/service-account.uid: 2112796c-1c9e-11e9-91ab-000c298bf023

Type:  kubernetes.io/service-account-token

Data
====
ca.crt:     1025 bytes
namespace:  11 bytes
token:      eyJhbGciOiJSUzI1NiIsImtpZCI6IiJ9.eyJpc3MiOiJrdWJlcm5ldGVzL3NlcnZpY2VhY2NvdW50Iiwia3ViZXJuZXRlcy5pby9zZXJ2aWNlYWNjb3VudC9uYW1lc3BhY2UiOiJrdWJlLXN5c3RlbSIsImt1YmVybmV0ZXMuaW8vc2VydmljZWFjY291bnQvc2VjcmV0Lm5hbWUiOiJhZG1pbi11c2VyLXRva2VuLXI0dmNwIiwia3ViZXJuZXRlcy5pby9zZXJ2aWNlYWNjb3VudC9zZXJ2aWNlLWFjY291bnQubmFtZSI6ImFkbWluLXVzZXIiLCJrdWJlcm5ldGVzLmlvL3NlcnZpY2VhY2NvdW50L3NlcnZpY2UtYWNjb3VudC51aWQiOiIyMTEyNzk2Yy0xYzllLTExZTktOTFhYi0wMDBjMjk4YmYwMjMiLCJzdWIiOiJzeXN0ZW06c2VydmljZWFjY291bnQ6a3ViZS1zeXN0ZW06YWRtaW4tdXNlciJ9.bWYmwgRb-90ydQmyjkbjJjFt8CdO8u6zxVZh-19rdlL_T-n35nKyQIN7hCtNAt46u6gfJ5XXefC9HsGNBHtvo_Ve6oF7EXhU772aLAbXWkU1xOwQTQynixaypbRIas_kiO2MHHxXfeeL_yYZRrgtatsDBxcBRg-nUQv4TahzaGSyK42E_4YGpLa3X3Jc4t1z0SQXge7lrwlj8ysmqgO4ndlFjwPfvg0eoYqu9Qsc5Q7tazzFf9mVKMmcS1ppPutdyqNYWL62P1prw_wclP0TezW1CsypjWSVT4AuJU8YmH8nTNR1EXn8mJURLSjINv6YbZpnhBIPgUGk1JYVLcn47w
After entering the token value into the token, click login to access the Dashboard. Refer to figure 1-3:
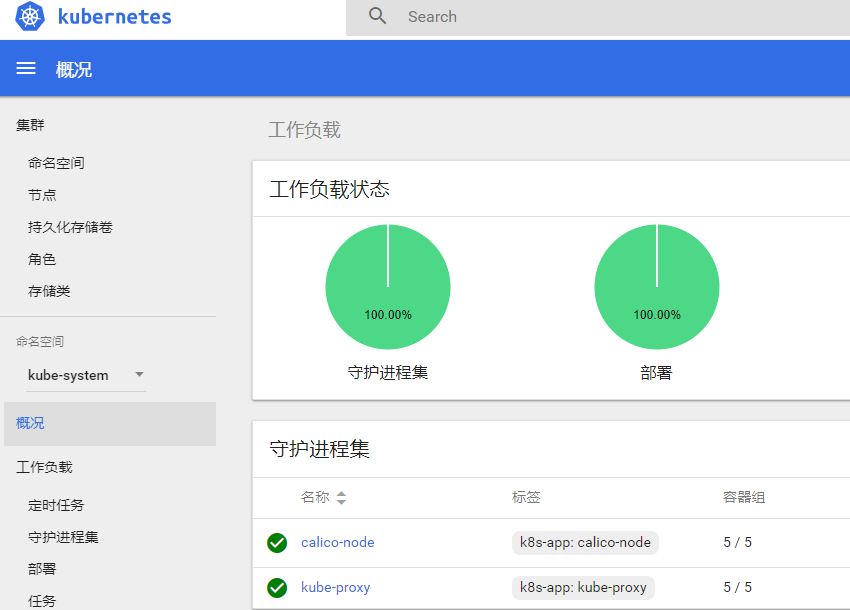
Figure 1-3 dashboard page
3 - Installation summary:
- kubeadm
- Binary
- Automated installation
- Ansible
- The Master node installation does not require write automation.
- Add a Node, playbook.
- Installation details
- Detailed configuration above
- In the production environment, etcd must be separated from the system disk, and ssd hard disk must be used.
- Docker data disk should also be separated from the system disk. If possible, ssd hard disk can be used