1, Pod management
Pod is the smallest deployable unit that can create and manage Kubernetes computing. A pod represents a process running in the cluster, and each pod has a unique ip.
A pod is similar to a pea pod and contains one or more containers (usually docker s). IPC, Network and UTC namespace are shared among multiple containers.
kubectl command
kubectl run 'image' --image='image name'
kubectl get pod		#View POD content
kubectl get pod -o wide		#View the content of pod in detail
kubectl describe pod 'podname'	#Check the details of the pod carefully
kubectl delete pod 'podname'	#Delete pod content
kubectl create
establish
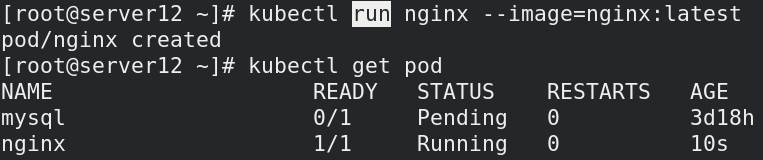
see

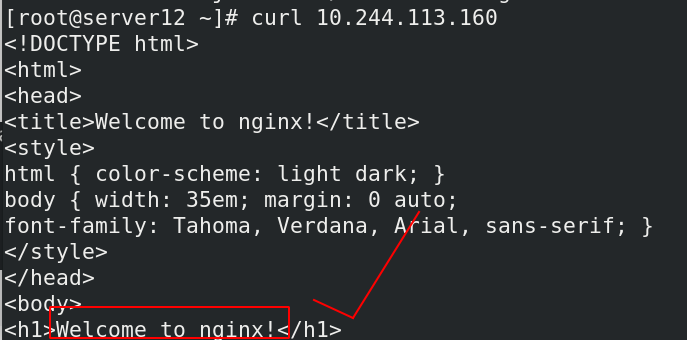
The test results show that the access is successful, indicating that there is no problem with the creation
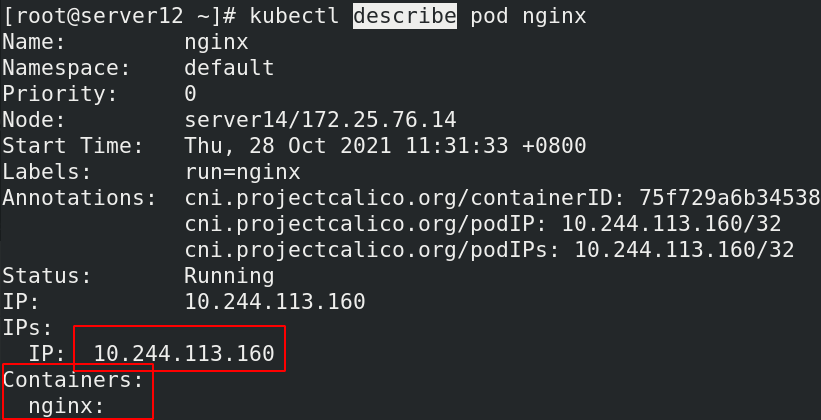
You can see the IP and container information by viewing the detailed pod content
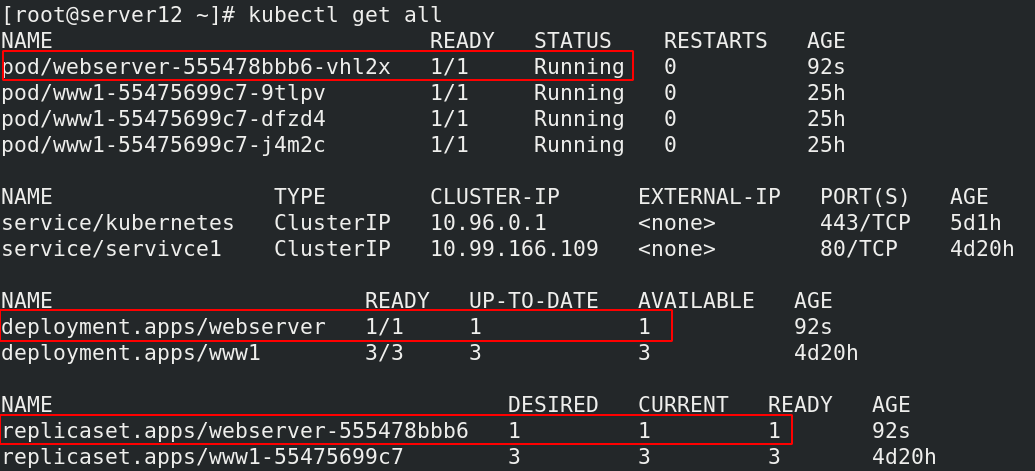
kubectl create deployment webserver --image=myapp:v1 #deployment command creation (declarative creation)

View pod details

Access test

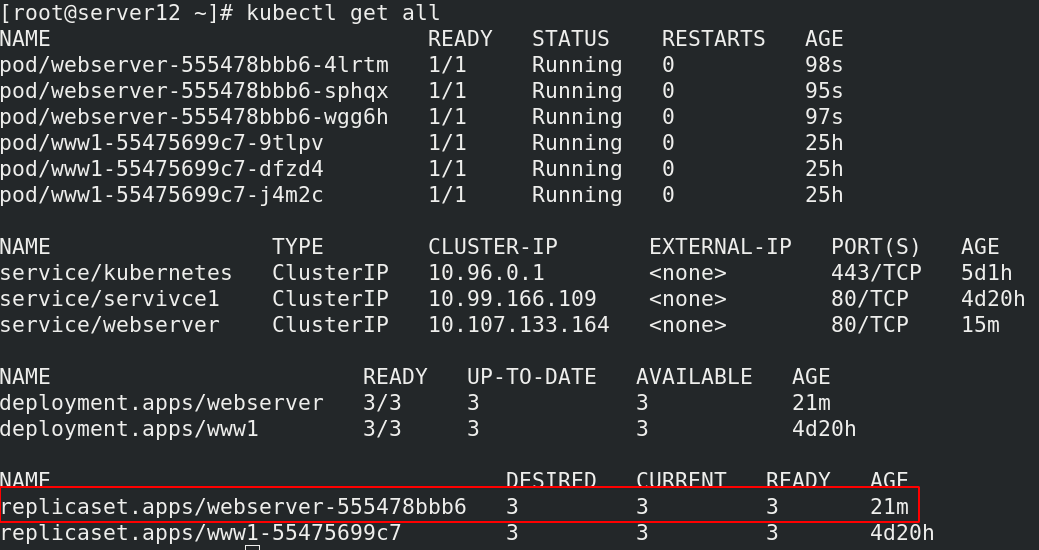
View all resources
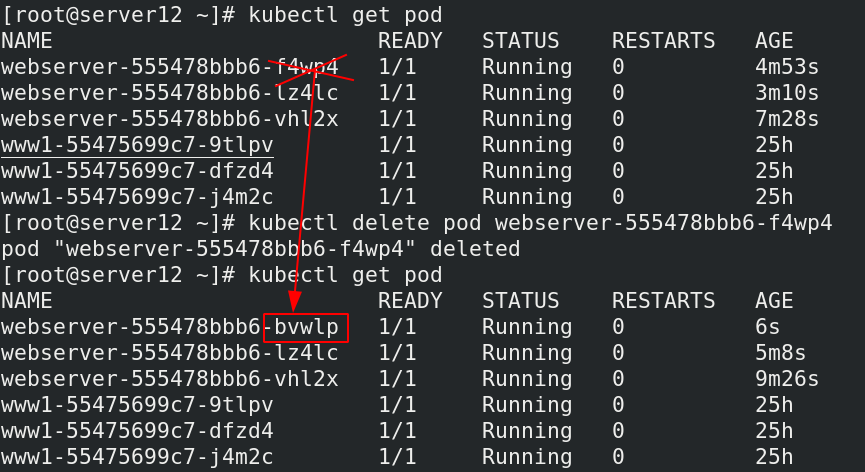
Delete the pod created by the statement
kubectl delete deployments.apps webserver
Delete pod

Service is an abstract concept, which defines the logical collection of multiple pods of a service and the policy of accessing pod. Generally, service is called micro service.
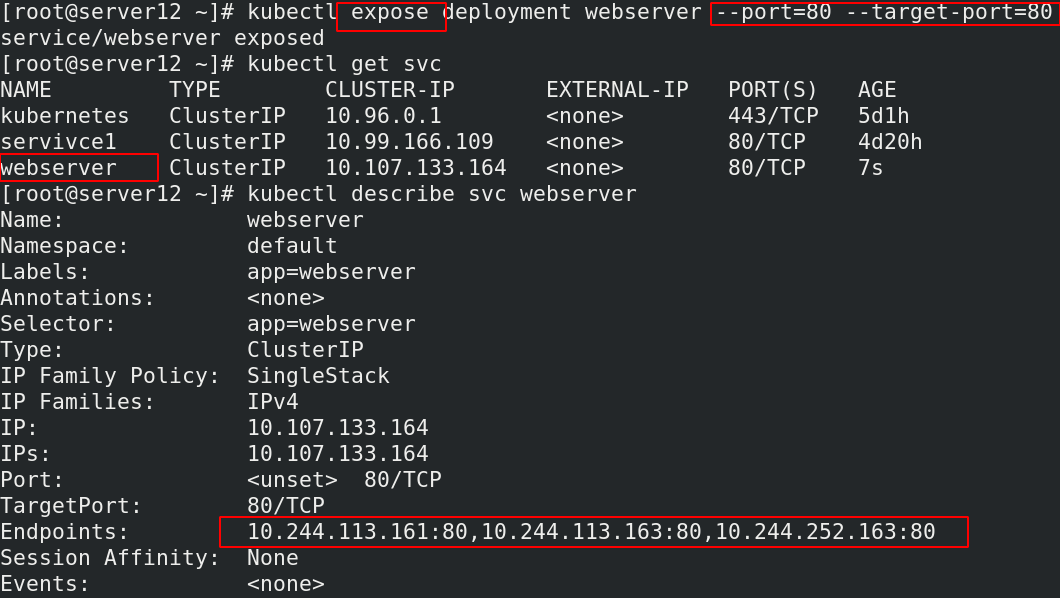
establish service
kubectl expose deployment nginx --port=80 --target-port=80
 here pod The client can service Access two of the backend by name Pod
ClusterIP: The default type is to automatically assign a virtual machine that can only be accessed within the cluster IP
use NodePort Type exposes the port for external clients to access Pod
kubectl edit svc nginx		#Modify the service type to NodePort
kubectl expose deployment nginx --port=80 --target-port=80 --type=NodePort		#You can also specify the type when creating a service
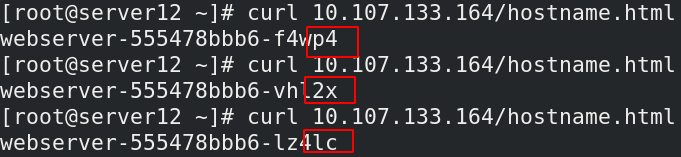
The access test indicates that the creation is successful
View more details

Delete one of the nodes and check the node information again. You will find that a new node will be added
Pod expansion and shrinkage
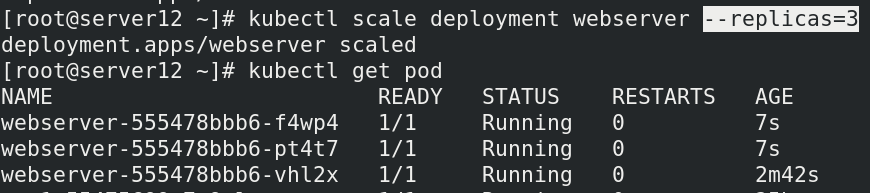
kubectl scale --replicas=6 deployment  nginx
kubectl scale --replicas=3 deployment  nginx
View the details of the pod, that is, you can view which node the pod is running on (ip address information)
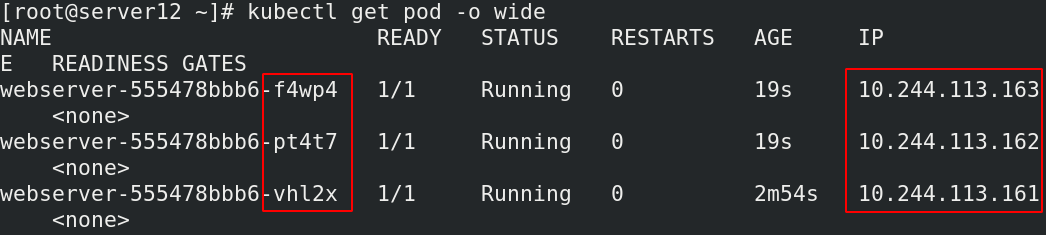
Connect the three replicas to view their ip addresses


View resource list

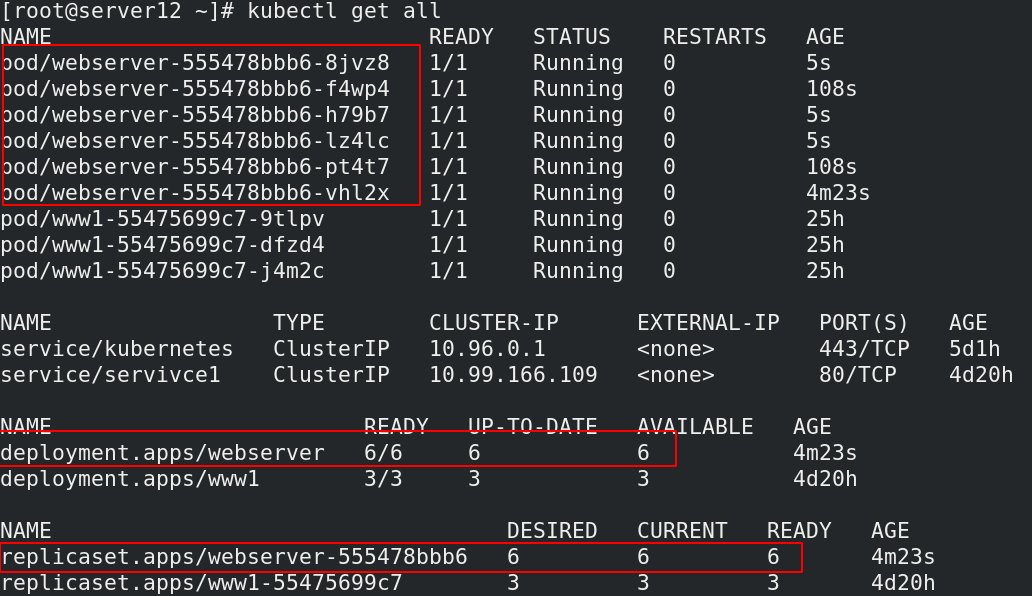
For the expansion of pod, the number of nodes is added to 6

View all resource information
Update pod image
kubectl set image deployment nginx nginx=nginx:1.16.0 --record
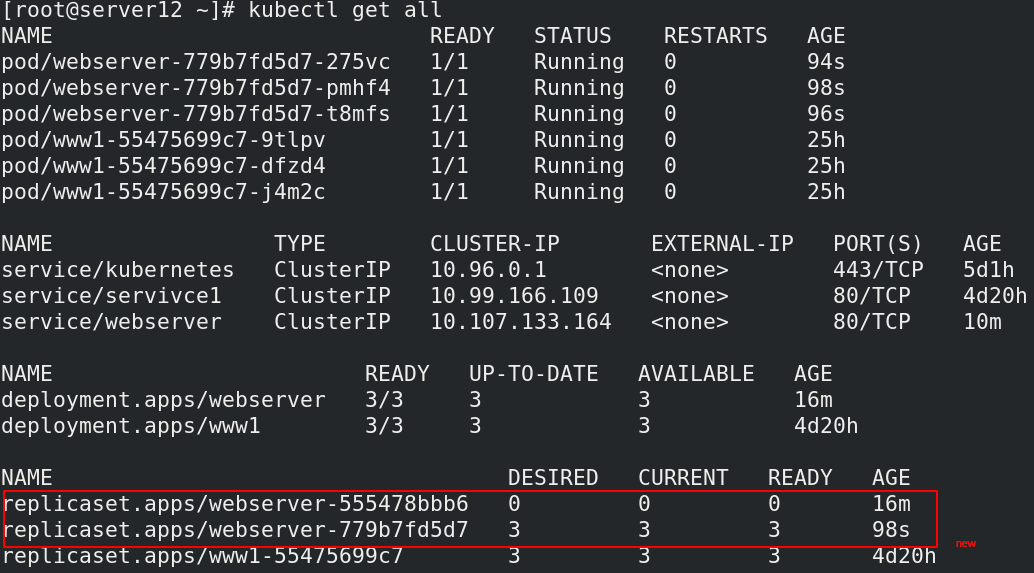
After updating the pod image, it is found that the three IDs of the pod are replaced with new ones, indicating that the image update is successful

pod rollback
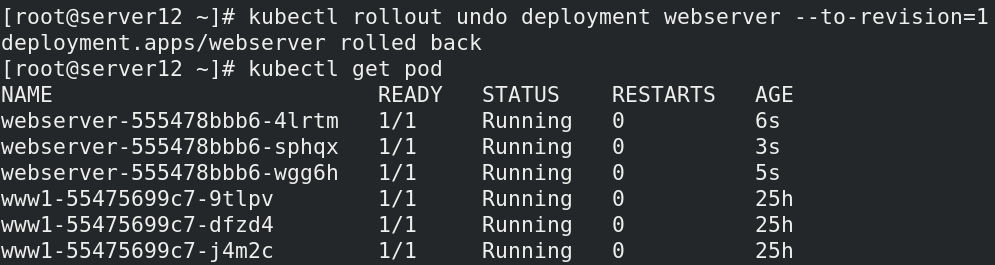
kubectl rollout history deployment nginx	#View historical versions
kubectl rollout undo deployment nginx --to-revision=1	#Rollback and set the version after rollback
View pod content
View all resource information

Delete old version resources

Review the list of all resources again
2, Resource list
The format is as follows:
apiVersion: group/version  #Indicates which group and version the api resource belongs to. A group can have multiple versions

kubectl api-versions		#Query command

kind: 		#Mark the resource types created, k8s mainly supporting the following resource categories
       Pod,ReplicaSet,Deployment,StatefulSet,DaemonSet,Job,Cronjob

metadata:	#metadata
        name: 	#Object name
        namespace: 	#Which namespace does the object belong to
        labels: 	#Specifies the resource label, which is a key value data

spec: 		#Define the desired state of the target resource

kubectl explain pod		#Query help documents
| Main parameter name | Field type | explain |
|---|---|---|
| version | String | This refers to the version of K8S API. At present, it is basically v1. You can query it with kubectl API version command |
| kind | String | This refers to the resource types and roles defined in the yaml file, such as Pod |
| metadata | Object | The fixed object of metadata is metadata |
| metadata.name | String | The name of the metadata object, which is filled in by ourselves, such as the name of Pod |
| metadata.namespace | String | Metadata object namespace, custom |
| Spec | Object | Define the object in detail and fix the direct write Spec |
| spec.containers[] | list | The container list definition of Spec object is a list type |
| spec.containers[].name | String | Defines the name of the container |
| spec.containers[].image | String | Define the image name to be used |
Check to ensure that the harbor warehouse is in good condition
server11:
cd harbor/
docker-compose start
docker-compose ps
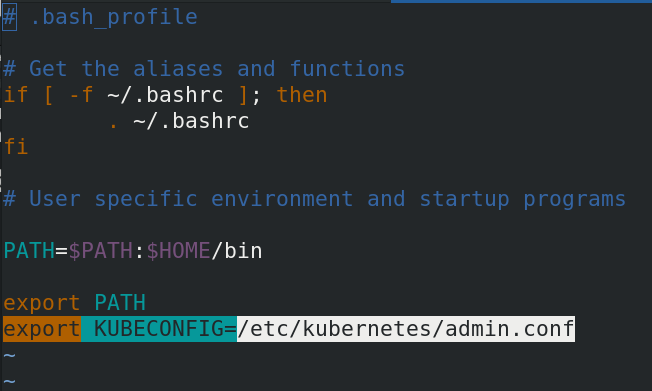
Add statement to file
vim .bash_profile
export KUBECONFIG=/etc/kubernetes/admin.conf
In this way, you do not have to add another node every time you restart the system
Check whether the node is intact (note that the node host should be turned on, otherwise the node host status will display not ready)

Autonomous Pod resource list
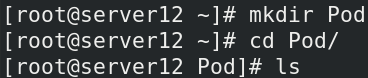
mkdir Pod
cd Pod
ls
vim pod.yaml
---
apiVersion: v1
kind: Pod
metadata:
name: pod-example
spec:
containers:
- name: nginx
image: nginx
---
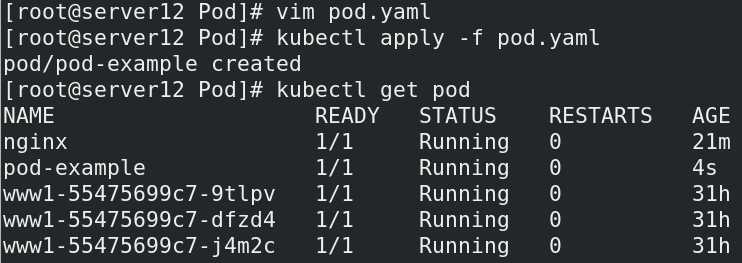
kubectl apply -f pod.yaml
kubectl get pod
Write a pod file and apply it to view the contents of the pod
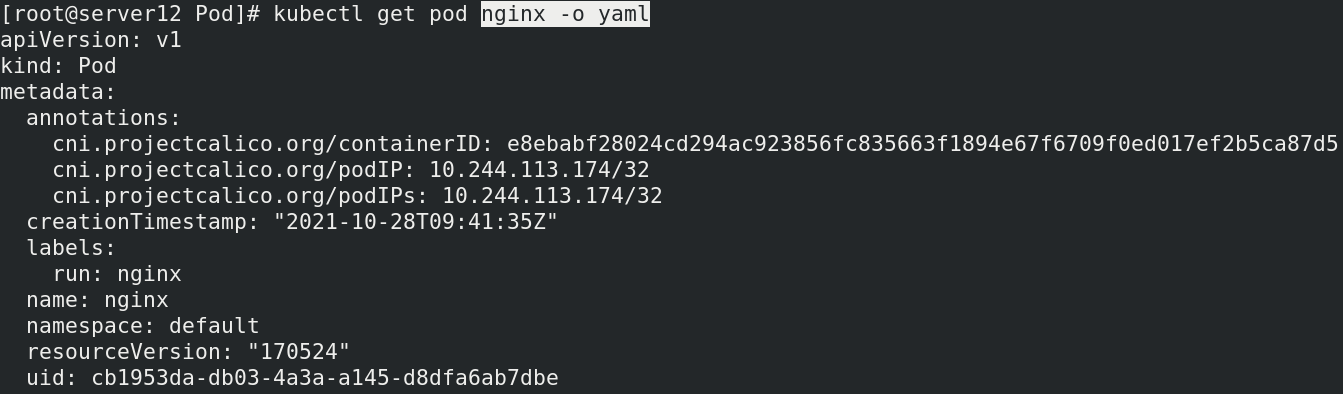
View the very detailed information of the pod
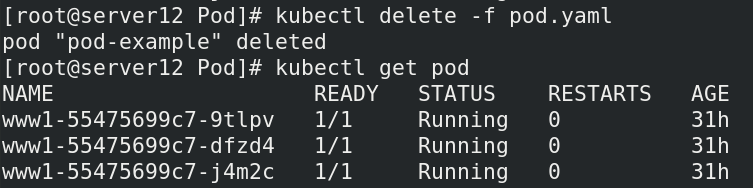
Recycle the newly created pod
vim pod.yaml
---
apiVersion: v1
kind: Pod
metadata:
  name: pod-example
spec:
  containers:
  - name: nginx
    image: nginx
  - name: busybox
    image: busyboxplus
    stdin: true
    tty: true
---
kubectl apply -f pod.yaml
kubectl get pod
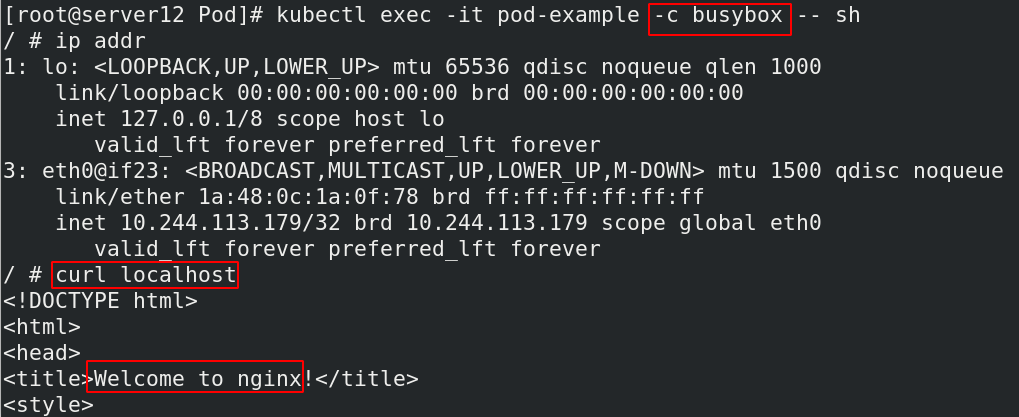
After entering the pod, it is found that both containers enter by default, but the one written in front of the file appears first

-c container name specifies to enter a container, but people can communicate between two containers
vim pod.yaml
---
apiVersion: v1
kind: Pod
metadata:
  name: pod-example
spec:
  containers:
  - name: nginx
    image: nginx
  - name: busybox
    image: nginx
---
kubectl apply -f pod.yaml
kubectl get pod

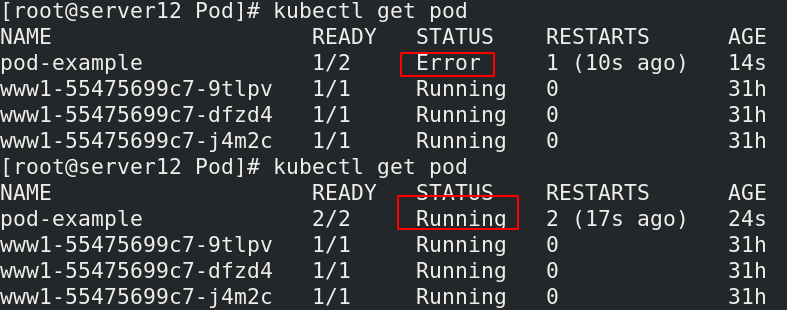
It was found that the error was reported at the beginning, and then the operation was successful
vim pod.yaml
---
apiVersion: v1
kind: Pod
metadata:
  name: pod-example
spec:
  containers:
  - name: nginx
    image: nginx
    imagePullPolicy: IfNotPresent
    ports:
      - name: http
        hostPort: 80
        containerPort: 80	#Specify port
---
kubectl apply -f pod.yaml
kubectl get pod
In the test of the assigned node host, it is found that there is no service of port 80

vim pod.yaml
---
apiVersion: v1
kind: Pod
metadata:
name: pod-example
spec:
containers:
- name: nginx
image: nginx
imagePullPolicy: IfNotPresent
ports:
- name: http
hostPort: 80
containerPort: 80
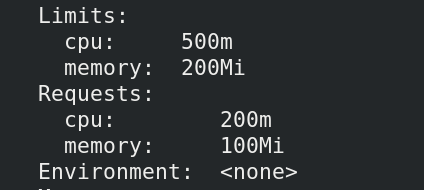
resources:
limits: #Constraints on authoring resources
cpu: 0.5
memory: 200Mi
requests:
cpu: 0.2
memory: 100Mi
---
kubectl apply -f pod.yaml
kubectl get pod
kubectl describe get pod 'podname'
The node host of pod can be modified by modifying the file

label
kubectl get pod --show-labels		#View label

kubectl get pod -l app			#Filter tags containing app s

kubectl get pod -L app

kubectl label pod demo version=v1	#Label

kubectl get pod --show-labels

kubectl label pod demo app=nginx --overwrite		#Change label
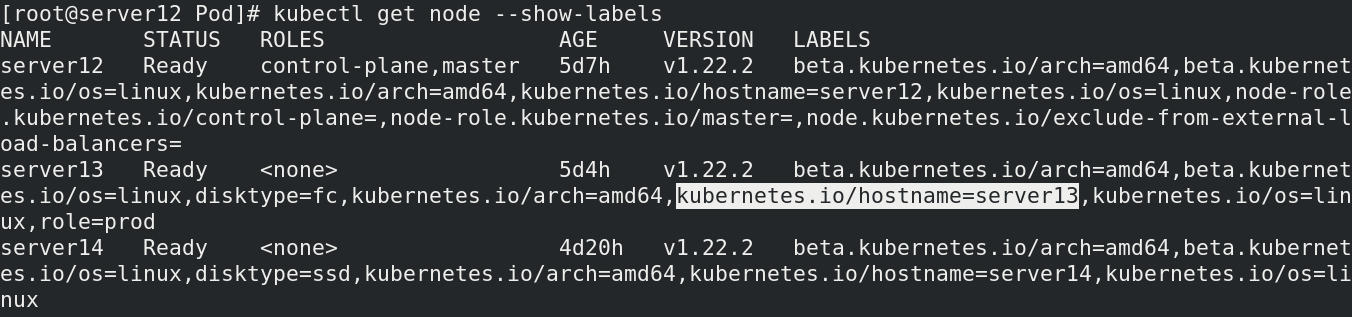
View the label content of the node host and copy the label content of the host that needs to be modified
vim pod.yaml
---
apiVersion: v1
kind: Pod
metadata:
name: pod-example
spec:
nodeSelector:
kubernetes.io/hostname: server13
hostNetwork: true
containers:
- name: nginx
image: nginx
imagePullPolicy: IfNotPresent
ports:
- name: http
hostPort: 80
containerPort: 80
resources:
limits:
cpu: 0.5
memory: 200Mi
requests:
cpu: 0.2
memory: 100Mi
---
kubectl apply -f pod.yaml
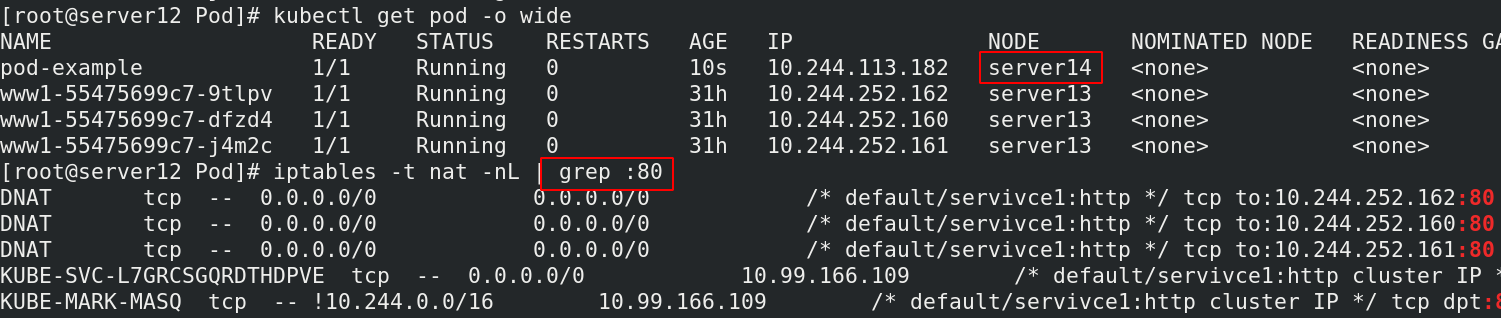
kubectl get pod -o wide
Check the node host and find that it has changed to server13

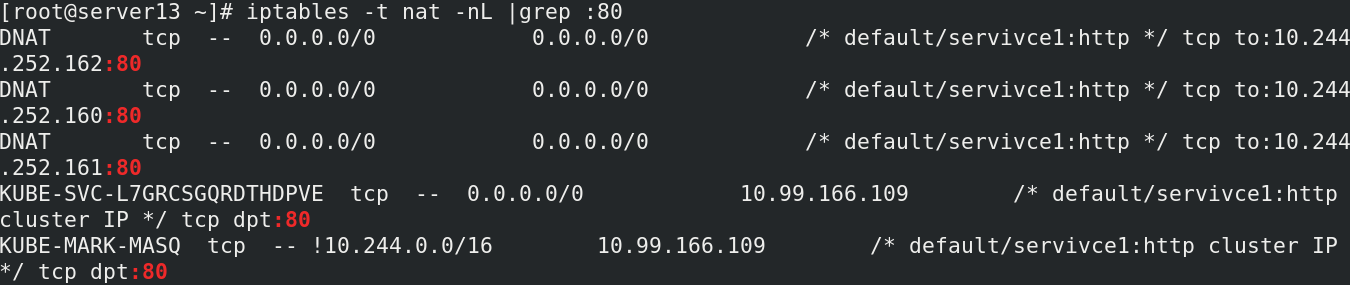
server13:
iptables -t nat -nL | grep :80
vim pod.yaml
---
apiVersion: v1
kind: Pod
metadata:
  name: pod-example
spec:
  nodeSelector:
    disktype: ssd
  hostNetwork: true
  containers:
  - name: nginx
    image: nginx
    imagePullPolicy: IfNotPresent
    ports:
      - name: http
        hostPort: 80
        containerPort: 80
    resources:
      limits:
        cpu: 0.5
        memory: 200Mi
      requests:
        cpu: 0.2
        memory: 100Mi
---
kubectl apply -f pod.yaml
kubectl get pod -o wide
kubectl describe pod pod-example

Node label selector
kubectl label nodes server2 disktype=ssd

kubectl get nodes -l disktype
3, Pod life cycle
- Pod can contain multiple containers in which applications run. Meanwhile, pod can also have one or more Init containers started before the application container.
- Init containers are very similar to ordinary containers, except for the following two points: they always run until completion. Init containers do not support Readiness because they must be in Pod
Before it is ready to run, each Init container must run successfully before the next one can run. - If the Init container of the Pod fails, Kubernetes will continue to restart the Pod until the Init container succeeds. However, if Pod
The corresponding restartPolicy value is Never, and it will not restart.
vim init.yamlapiVersion: v1
---
kind: Pod
metadata:
name: myapp-pod
labels:
app: myapp
spec:
containers:
- name: myapp-container
image: busybox
command: ['sh','-c','echo The app is running! && sleep 3600']
initContainers:
- name: init-myservice
image: busybox
command: ["sh", "-c", "until nslookup myservice.default.svc.cluster.local; do echo waiting for myservice; sleep 2; done"]
---
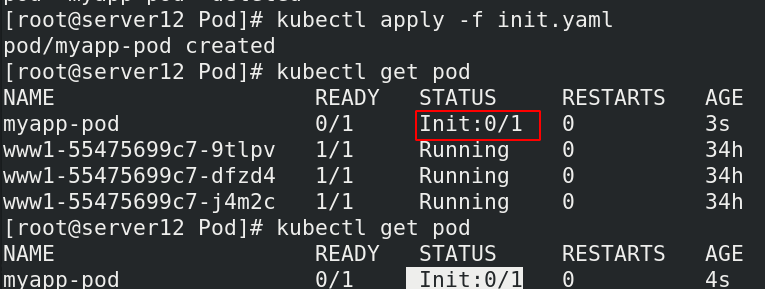
kubectl apply -f init.yaml
kubectl get pod #Discovery is still initializing
vim service.yaml
---
apiVersion: v1
kind: Service
metadata:
name: myservice
spec:
ports:
- protocol: TCP
port: 80
targetPort: 80
---
kubectl apply -f service.yaml
kubectl get pod
After the init.yaml file is applied, the pod is always in the initialization stage and cannot complete running
After applying the service file, the pod runs normally

probe
The probe is a periodic diagnosis of the container performed by kubelet:
- ExecAction: executes the specified command within the container. If the return code is 0 when the command exits, the diagnosis is considered successful.
- TCPSocketAction: TCP checks the IP address of the container on the specified port. If the port is open, the diagnosis is considered successful.
- HTTPGetAction: performs an HTTP Get request on the IP address of the container on the specified port and path. If the status code of the response is greater than or equal to 200 and less than
400, the diagnosis is considered successful.
Each probe will obtain one of the following three results:
- Success: the container passed the diagnosis.
- Failed: container failed diagnostics.
- Unknown: the diagnosis failed and no action will be taken.
liveness instance
kubectl exec -it liveness-http -- bash
root@liveness-http:/# cd /usr/local/nginx/html/
bash: cd: /usr/local/nginx/html/: No such file or directory
root@liveness-http:/# cd /usr/share/nginx/html/
root@liveness-http:/usr/share/nginx/html# ls
50x.html  index.html
root@liveness-http:/usr/share/nginx/html# echo testpage > test.html

kubectl exec -it liveness-http -- rm -f /usr/share/nginx/html/test.html
After running, it is found that it is not fully running

Enter the container and write a new test.html file in the nginx release directory

Check the operation of pod again and find that it can run
-w means watch monitoring. You can see the dynamic changes of pod

View the ip address of the pod

Access the test file under ip. The access is successful and the content we wrote appears

Delete the test file in the container and visit the test under the ip again. The discovery display 404 is displayed
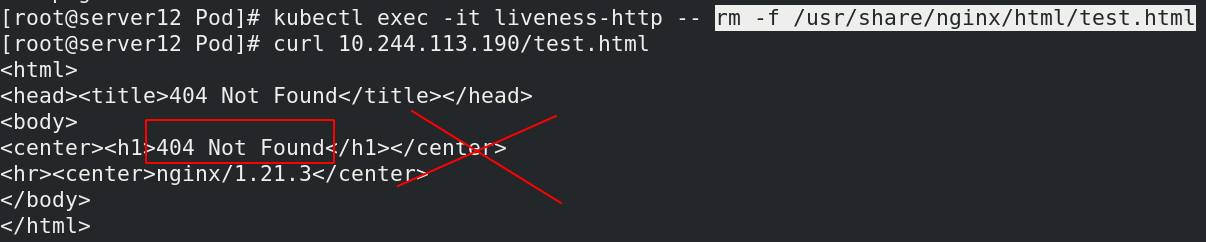
Kubectl describe pod liveness HTTP view the details and find that it is also a 404 error

4, Report an error today
Fields that lack containerPort need to be added to the resource list

vim pod.yaml
---
apiVersion: v1
kind: Pod
metadata:
  name: pod-example
spec:
  nodeSelector:
    disktype: ssd
  hostNetwork: true
  containers:
  - name: nginx
    image: nginx
    imagePullPolicy: IfNotPresent
    ports:
      - name: http
        hostPort: 80
        containerPort: 80
---
Apply again and find that the application is successful, beautiful brother!