Environmental description:
| host name | Operating System Version | ip | docker version | kubelet version | To configure | Remarks |
|---|---|---|---|---|---|---|
| master | Centos 7.6.1810 | 172.27.9.131 | Docker 18.09.6 | V1.14.2 | 2C2G | Remarks |
| node01 | Centos 7.6.1810 | 172.27.9.135 | Docker 18.09.6 | V1.14.2 | 2C2G | Remarks |
| node02 | Centos 7.6.1810 | 172.27.9.136 | Docker 18.09.6 | V1.14.2 | 2C2G | Remarks |
The deployment of k8s cluster is detailed in: Centos 7.6 Deploys k8s(v1.14.2) Cluster
See k8s Learning Materials for more details: Basic concepts, kubectl commands and data sharing
I. Kubernetes Core Components
1. Overview of Core Components
Kubernetes consists of the following core components:
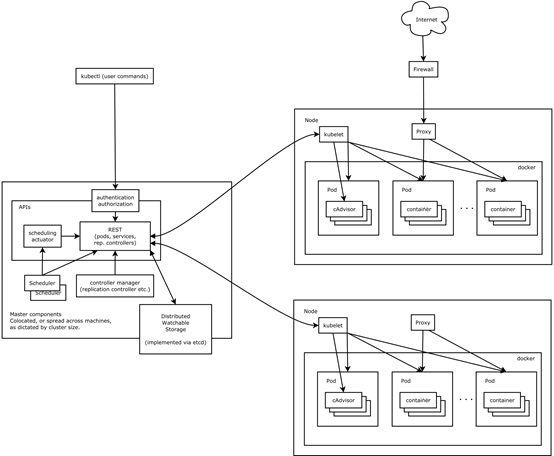
- etcd saves the state of the whole cluster.
- apiserver provides the only access to resource operation, and provides authentication, authorization, access control, API registration and discovery mechanisms.
- controller manager is responsible for maintaining the status of the cluster, such as fault detection, automatic expansion, rolling updates, etc.
- Schduler is responsible for resource scheduling, scheduling Pod to the corresponding machine according to the scheduled scheduling strategy.
- kubelet is responsible for maintaining the life cycle of containers, as well as managing Volume (CVI) and Network (CNI).
- Container runtime is responsible for image management and the real operation of Pod and container (CRI);
- kube-proxy is responsible for providing service discovery and load balancing within the cluster for Service
Deployment process

2. View Core Components
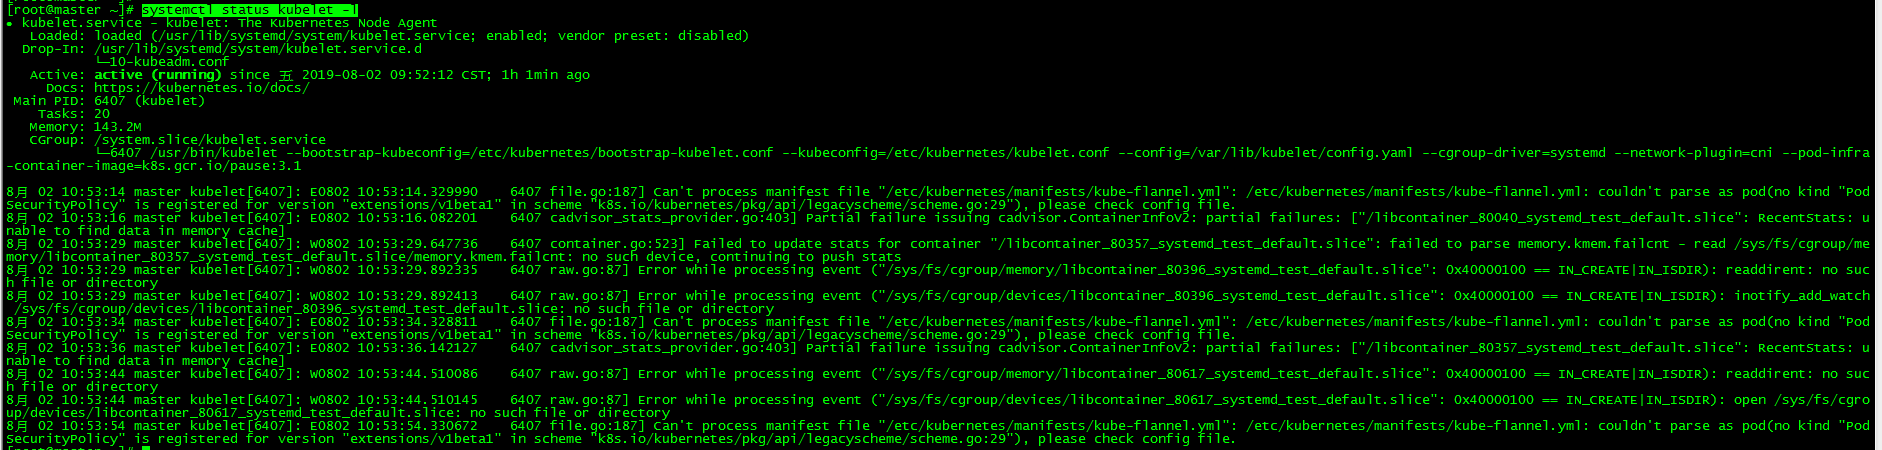
Kubelet is the only component that has been running as a regular system component. It runs other components as pod s.
2.1 Check Kubelet
Both master and node nodes can be viewed
[root@master ~]# systemctl status kubelet
2.2 View other components
[root@master ~]# kubectl get po -o custom-columns=POD:metadata.name,NODE:spec.nodeName --sort-by spec.nodeName -n kube-system
!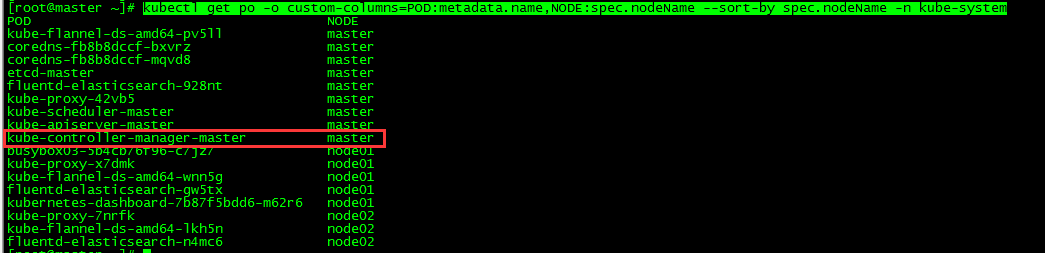
This article focuses on the core component controller manager
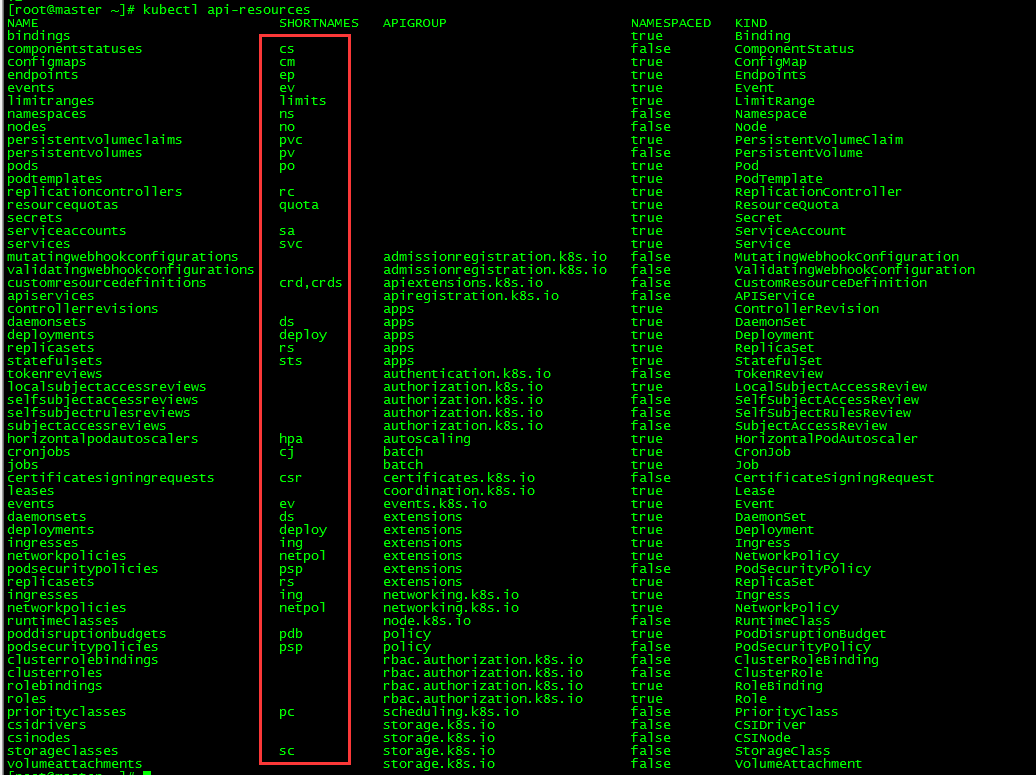
Short view of resources:
[root@master ~]# kubectl api-resources
Controller Manager
1. Introduction
_Controller Manager is composed of kube-controller-manager and cloud-controller-manager. It is the brain of Kubernetes. It monitors and maintains the status of the whole cluster through apiserver, such as fault detection, automatic expansion, rolling update, and ensures that the cluster is in the expected working state.
cloud-controller-manager is only needed when Cloud Provider is enabled in Kubernetes to cooperate with the control of cloud service providers, such as Node Controller, Route Controller and Service Controller.
2. Principles
_Controller Manager is the management and control center within the Kubernetes cluster. It is responsible for the management, automatic deployment and health monitoring of Node, Pod, service endpoint, service, resource quota, namespace, service account and other resources in the Kubernetes cluster. It also performs automatic repair for abnormal resources to ensure the collection. The resources of the group are always in the expected working state. For example, when a Node unexpectedly crashes, Controller Manager will automatically deploy Pod copies on the original right-hand node by selecting other nodes in the cluster according to the resource scheduling strategy.
_Controller Manager is a collection of controllers, including Replication Controller, Deployment Controller, RelicaSet, StatefulSet Controller, Daemon Controller, CronJob Controller, Node Controller, Resourcequota Controller, Namespace Controller, Service Account Controller, Token Controller. Controller, Service Controller and Endpoint Controller are the core managers of these controllers. Generally speaking, intelligent systems and automated systems often use a control system to constantly correct the state of the system. In Kubernetes cluster, the core working principle of each controller is that each controller checks the running state of the system through API server, and tries to modify the system state from "existing state" to "expected state".
Replication Controller
1. Introduction
Replication Controller continuously monitors the running pod list to ensure that the number of pods always matches its label selector. Replication Controller consists of three parts:
- Label selector (label selector) to determine which pod s are in Replication Controller scope
- Replica count (number of replicas), specifying the number of pod s to run
- pod template(pod template), used to create new copies of pod
2. Create Replication Controller
[root@master ~]# more nginx-rc.yaml
apiVersion: v1
kind: ReplicationController    #Type Replication Controller
metadata:
  name: nginx        #Name of Replication Controller
spec:
  replicas: 3        #Number of pod instances
  selector:          #pod selector
    app: nginx
  template:          #pod template
    metadata:
      labels:
        app: nginx
    spec:
      containers:
      - name: nginx
        image: nginx
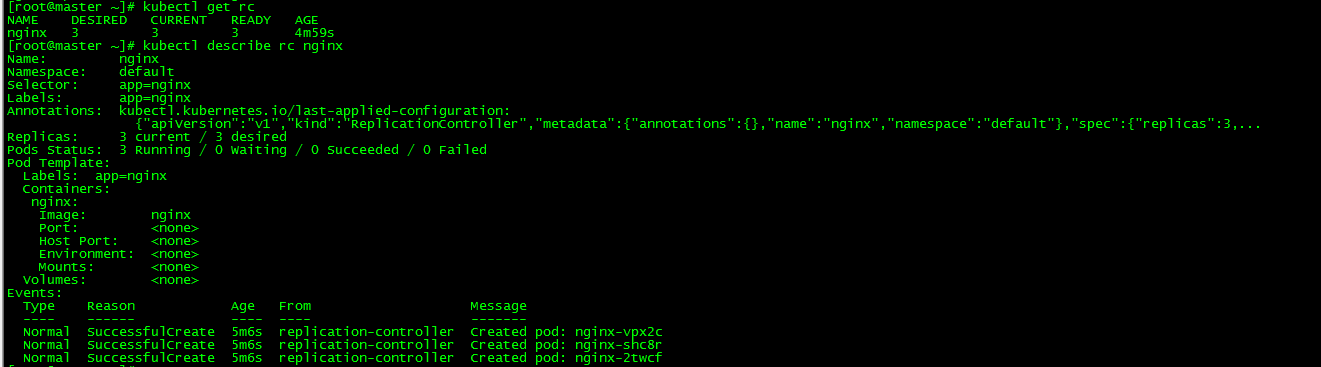
3. Check Replication Controller
[root@master ~]# kubectl get rc
[root@master ~]# kubectl describe rc nginx
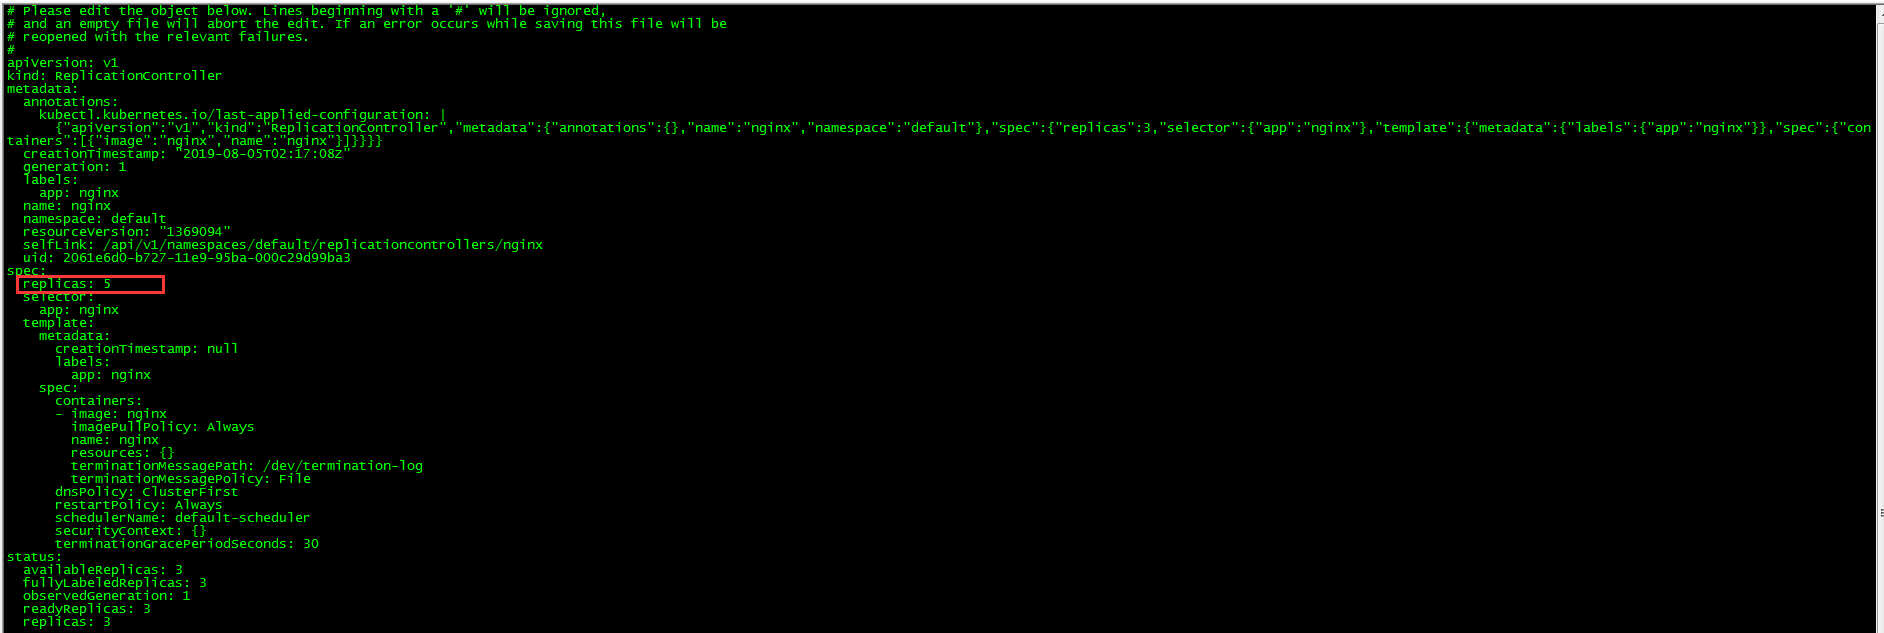
4. Expansion and contraction
Extension can be achieved by modifying the pod template and direct command
Capacity expansion
[root@master ~]# kubectl edit rc nginx

Shrinkage capacity
[root@master ~]# kubectl scale rc nginx --replicas=4

5. Delete pod
[root@master ~]# kubectl delete po nginx-2twcf
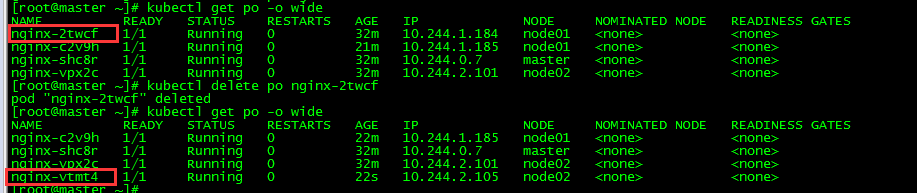
Delete pod nginx-2 twcf and find that the pod is deleted while k8s automatically adds a pod nginx-vtmt4, which also confirms the previous introduction that Replication Controller will continuously monitor the running pod list to ensure that the number of pods always matches its label selector.
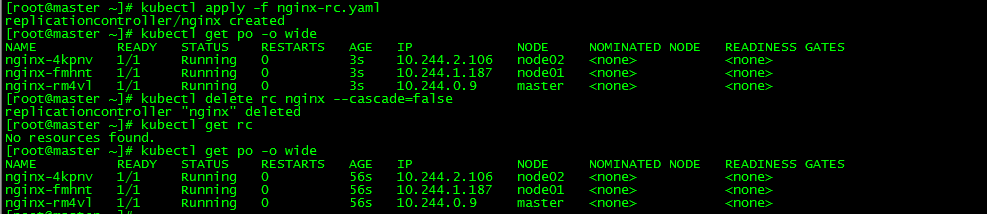
6. Delete Replication Controller
[root@master ~]# kubectl delete rc nginx

Deleting Replication Controller deletes all pods it manages, and if you want to retain pods, you can add the parameter "--cascade = false"
7. Labels
7.1 New Label
[root@master ~]# kubectl label po nginx-28d4k env=prod
7.2 Check labels
[root@master ~]# kubectl get po --show-labels
7.3 Change Label
[root@master ~]# kubectl label po nginx-28d4k app=test --overwrite
Changing the label of app=nginx will make the pod no longer match the label selector of Replication Controller, leaving only two matching pods. Replication Controller will start a new pod nginx-64w44 and restore the total number to three.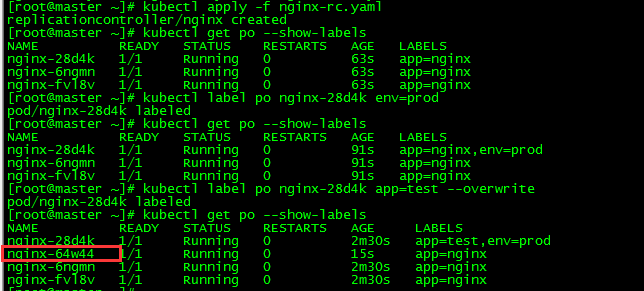
ReplicaSet
1. Introduction
ReplicaSet behaves exactly the same as Replication Controller, but the pod selector is more expressive. It is a new generation of Replication Controller and will be completely replaced (Replication Controller will eventually be discarded).
2. Create ReplicaSet
[root@master ~]# more httpd-rs.yaml
apiVersion: apps/v1    #api version
kind: ReplicaSet
metadata:
  name: httpd
spec:
  replicas: 3
  selector:
    matchExpressions:
      - key: app        #The label is app
        operator: In    #In: The value of Label must match one of the specified values
        values:
         - httpd        #The label value is httpd
  template:             #replicaset template
    metadata:
      labels:
        app: httpd
    spec:
      containers:
      - name: httpd
        image: httpd
The main improvement of ReplicaSet over ReplicationController is its more expressive label selector, and its pod selector is more expressive.

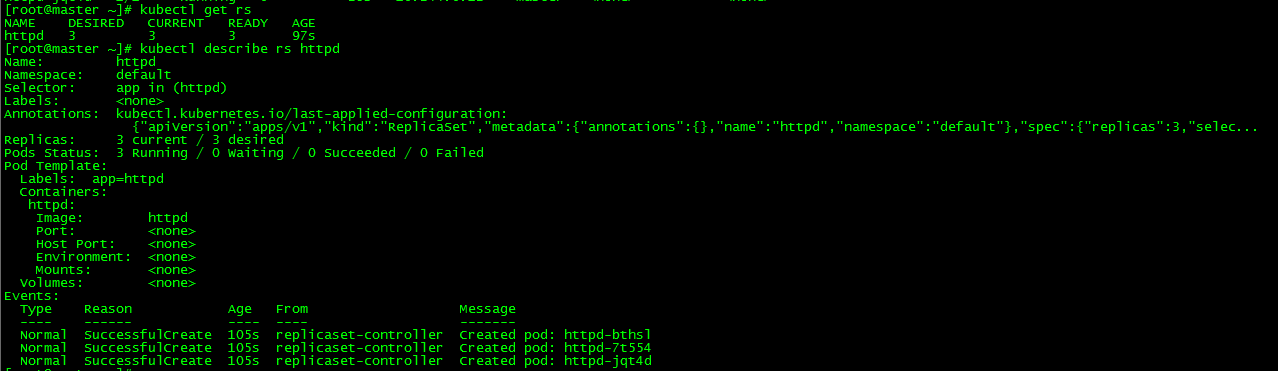
3. Check ReplicaSet
[root@master ~]# kubectl get rs
[root@master ~]# kubectl describe rs httpd
4. Delete ReplicaSet
[root@master ~]# kubectl delete rs httpd
Similarly, if you want to keep pod, you can add parameters -- cascade=false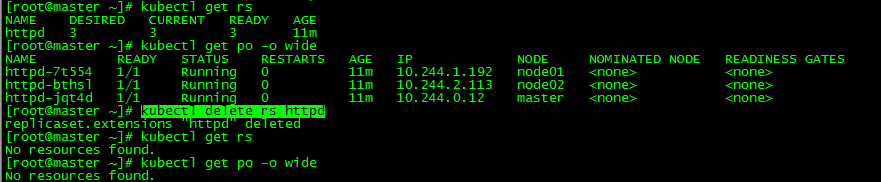
Deployment
1. Introduction
Deployment provides declarative updates for Pod and Replica Set (the next generation of Replication Controller). You just need to describe what you want in Deployment, and Deployment controller will help you change the actual state of Pod and Replica Set to your target state. You can define a new Deployment, or you can create a new one to replace the old one.
Typical application scenarios for Deployment include:
- Define Deployment to create Pod and ReplicaSet
- Rolling upgrade and rollback applications
- Expansion and Compression
- Suspend and continue Deployment
2. Deployment practice
Deployment related operations are detailed in: k8s Practice (3): pod Common Operations
VI. Daemon Set
1. Introduction
Unlike Replication Controller and ReplicaSet running and deploying a specific number of pods on the Kubemetes cluster, DaemonSet can only run one copy per Node. If the node is offline, DaemonSet will not recreate pods elsewhere. When a new node is added to the cluster, DaemonSet will immediately deploy a new pod reality. Case. If someone unintentionally deletes a pod, it also creates a new pod from the configured pod template.
DaemonSet guarantees that a container copy is run on each Node and is often used to deploy some cluster log, monitoring, or other system management applications. Typical applications include:
- Log collection, such as fluentd, logstash, etc.
- System monitoring, such as Prometheus Node Exporter, collectd, New Relic agent, Gangliagmond, etc.
- System programs, such as kube-proxy, kube-dns, glusterd, ceph, etc.
This paper takes filebeat as an example to practice.
2. Create DaemonSet
[root@master ~]# more filebeat-ds.yaml
apiVersion: apps/v1
kind: DaemonSet
metadata:
name: filebeat-ds
labels:
app: filebeat
spec:
selector:
matchLabels:
app: filebeat
template:
metadata:
labels:
app: filebeat
name: filebeat
spec:
containers:
- name: filebeat
image: ikubernetes/filebeat:5.6.5-alpine
env:
- name: REDIS_HOST
value: db.ilinux.io:6379
- name: LOG_LEVEL
value: info
[root@master ~]# kubectl apply -f filebeat-ds.yaml
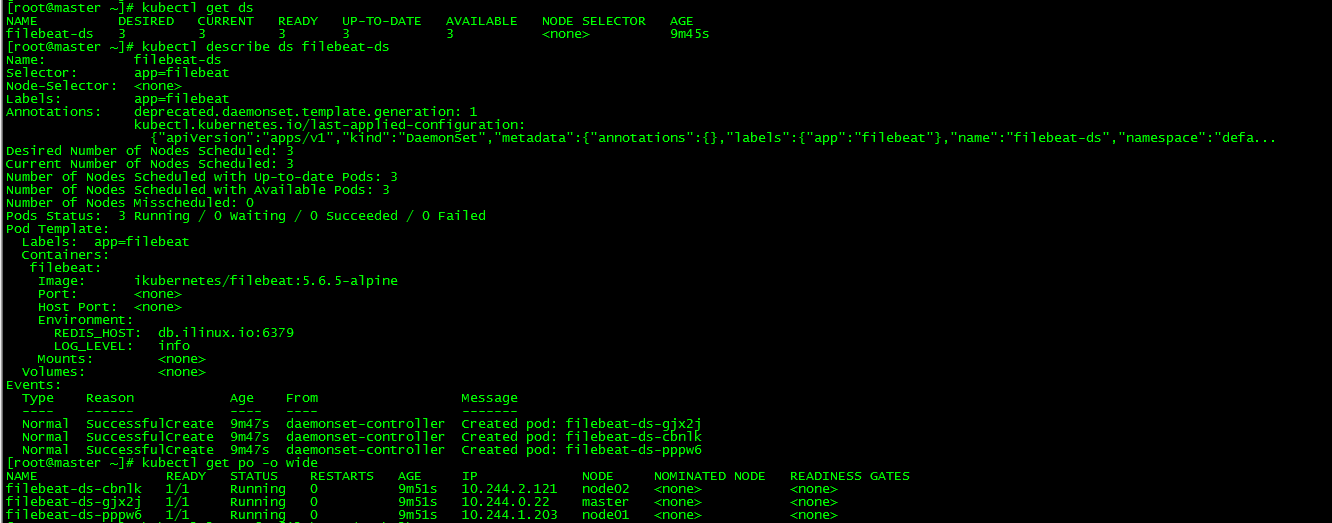
daemonset.apps/filebeat-ds created3. Check DaemonSet
[root@master ~]# kubectl get ds
[root@master ~]# kubectl describe ds filebeat-ds
[root@master ~]# kubectl get po -o wide
view log

4. Update DaemonSet
[root@master ~]# kubectl set image daemonsets filebeat-ds filebeat=ikubernetes/filebeat:5.6.6-alpine
DaemonSet updates image s by deleting and creating
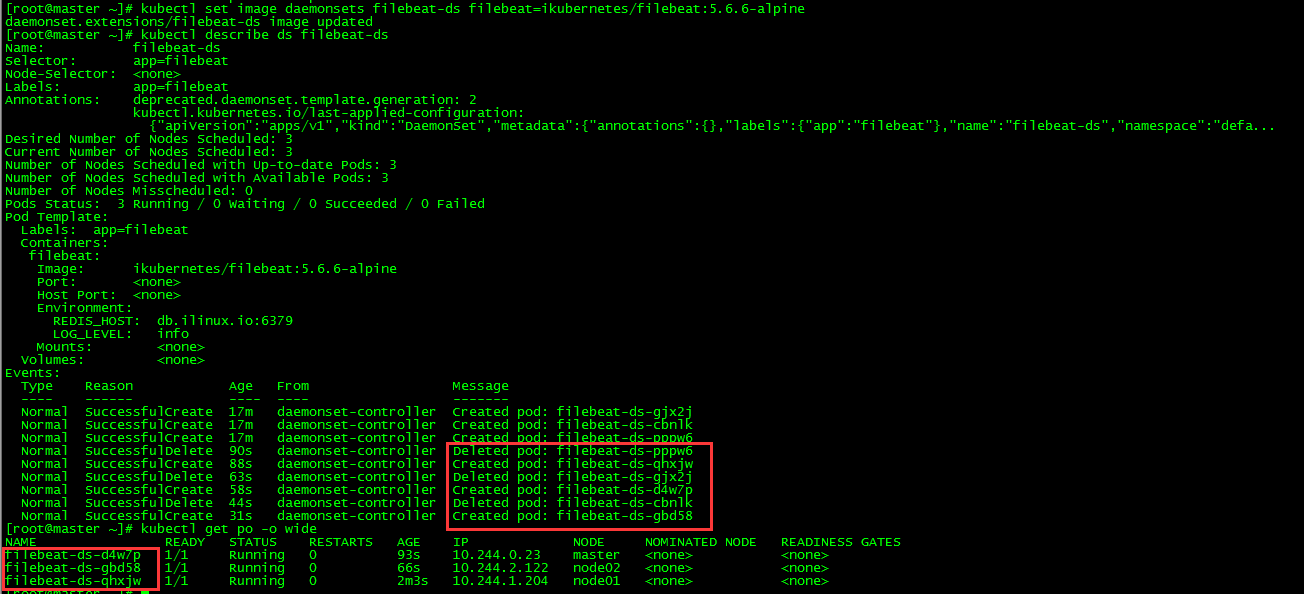
5. Roll back DaemonSet
5.1 Query History Version
[root@master ~]# kubectl rollout history ds filebeat-ds
5.2 Query for details of a historical version
[root@master ~]# kubectl rollout history ds filebeat-ds --revision=1
[root@master ~]# kubectl rollout history ds filebeat-ds --revision=2
5.3 rollback
[root@master ~]# kubectl rollout undo ds filebeat-ds --to-revision=1
5.4 View the DaemonSet status
[root@master ~]# kubectl rollout status ds/filebeat-ds
daemon set "filebeat-ds" successfully rolled out
[root@master ~]# kubectl describe ds filebeat-ds |grep Image
    Image:      ikubernetes/filebeat:5.6.5-alpine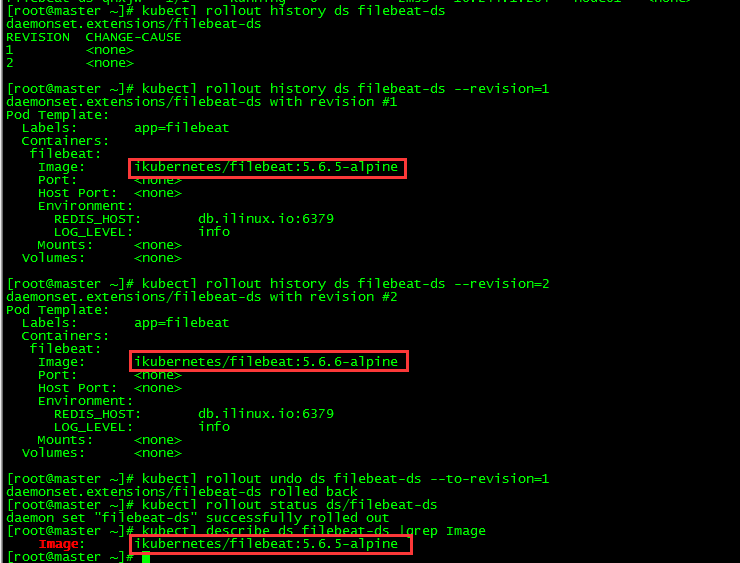
6. Delete DaemonSet
[root@master ~]# kubectl delete ds filebeat-ds
daemonset.extensions "filebeat-ds" deleted
VII. Job
1. Introduction
From the point of view of the running form of programs, we can divide Pod into two categories: long-running services (http server, daemon, mysql) and one-time tasks (such as parallel data computing, testing, batch processing, etc.). Replication Controller, ReplicaSet and DaemonSet create pods that run for long periods of time, while Job creates pods that are one-time services.
2. Create job s
[root@master ~]# more job.yaml
apiVersion: batch/v1    #The api version is batch/v1
kind: Job
metadata:
  name: pi
spec:
  template:
    spec:
      containers:
      - name: pi
        image: perl
        command: ["perl",  "-Mbignum=bpi", "-wle", "print bpi(2000)"]
      restartPolicy: Never    #If the setup container fails and does not restart, the new pod will be created directly.
  backoffLimit: 4    #Limit the number of new pod s, default 6
[root@master ~]# kubectl apply -f job.yaml
job.batch/pi created
3. View job s
[root@master ~]# kubectl get job
[root@master ~]# kubectl get po -o wide
View job Running Results
[root@master ~]# kubectl logs pi-g2499

The job is to find the circumference accurate to 2000 bits.
4. Parallel job
[root@master ~]# more multi-job.yaml
apiVersion: batch/v1
kind: Job
metadata:
  name: multi-job
spec:
  completions: 10    #Set the total number of successful Pod s completed by Job
  parallelism: 2    #Number of parallel executions of pod
  template:
    metadata:
      labels:
        app: multi-job
    spec:
      restartPolicy: OnFailure    #Restart after setup container failed
      containers:
      - name: busybox
        image: busybox
[root@master ~]# kubectl apply -f multi-job.yaml
job.batch/multi-job created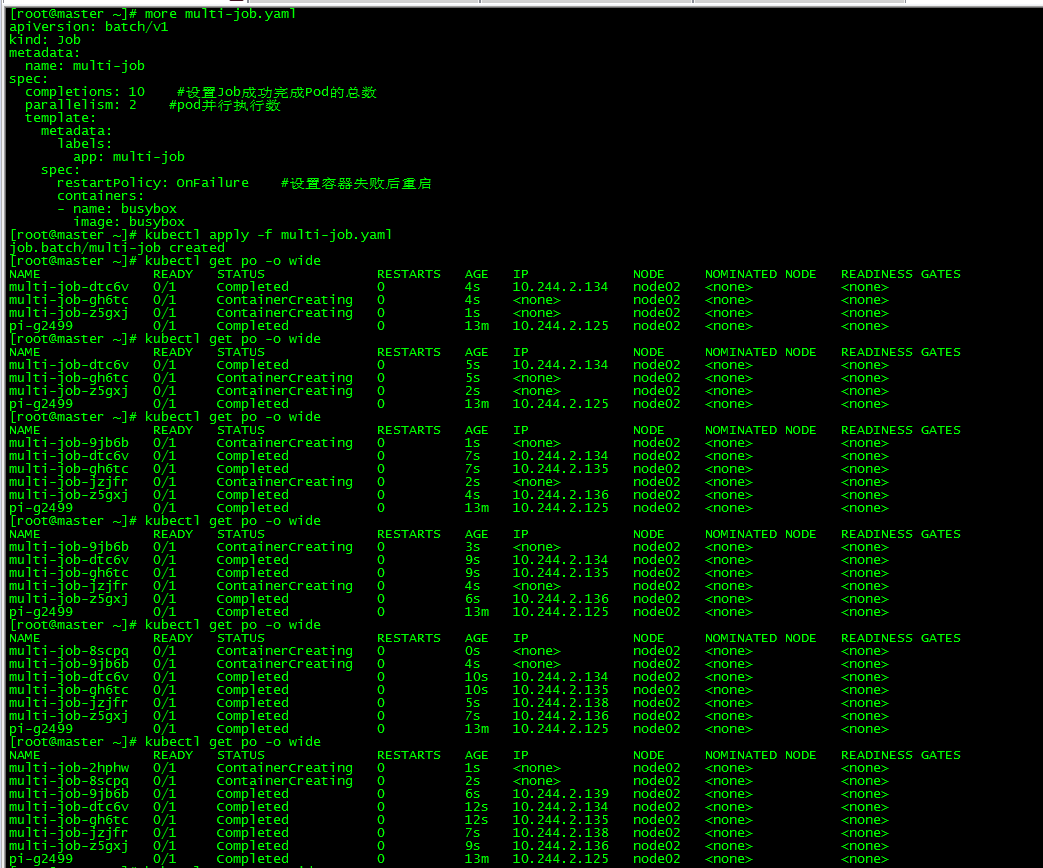

Run two job s at a time, and the number of pod s running is 10
5. Cronjob
New cronjob
[root@master ~]# more cronjob.yaml
apiVersion: batch/v1beta1
kind: CronJob
metadata:
  name: hello
spec:
  schedule: "*/1 * * * *"
  jobTemplate:
    spec:
      template:
        spec:
          containers:
          - name: hello
            image: busybox
            args:
            - /bin/sh
            - -c
            - date; echo Hello from the Kubernetes cluster
          restartPolicy: OnFailure
[root@master ~]# kubectl apply -f cronjob.yaml
cronjob.batch/hello created
View cronjob
[root@master ~]# kubectl get cronjobs
[root@master ~]# kubectl get job --watch

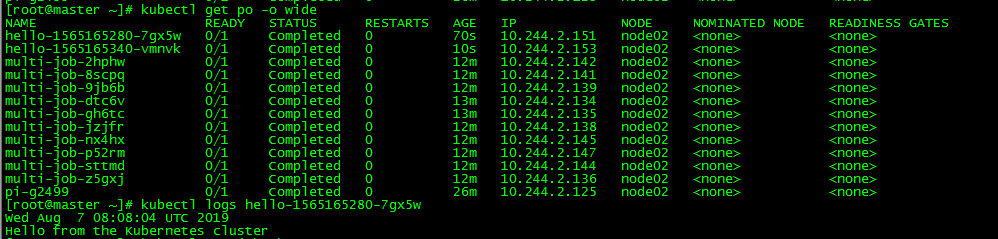
A job is generated every minute.
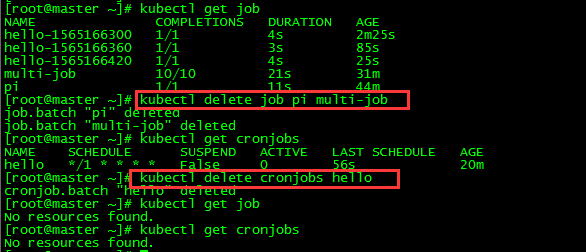
6. Delete job s
[root@master ~]# kubectl delete job pi multi-job
[root@master ~]# kubectl delete cronjobs hello
All scripts and configuration files in this article have been uploaded to github: https://github.com/loong576/k8s-Controller.git