preface
This paper introduces the installation of Kali system and the configuration of Frida environment under Kali system.
1, Basic configuration of Kali environment
1. Download Kali system and open Vmware.
- Kali official website Download the Vmware version Kali system, unzip it and open it with Vmware.
- Download the version kali-linux-2021.2-vmware-amd64 7z .
2. Environment configuration
-
By default, kali/kali is used as the default user to log in to the system in this version of kali system. The commands to obtain root permission are as follows:
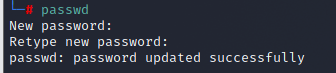
whami 	#	View current user kali
sudo su	#	Get root privileges
whami	#	View current user root
passwd	# Set new root password
-
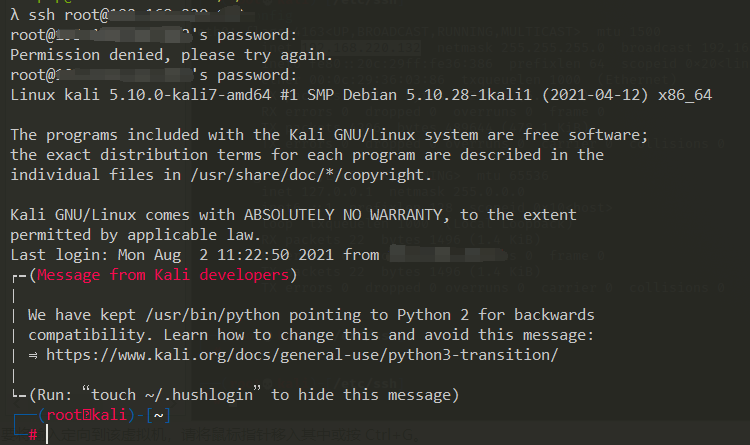
Open remote login SSH with the following command:
sudo su
cp /etc/ssh/sshd_config /etc/ssh/sshd_config.bak	#	Backup ssh profile
sed -i 's/#PermitRootLogin prohibit-password/PermitRootLogin yes/g' /etc/ssh/sshd_config	# Enable root remote login
systemctl enable --now ssh	#	Start ssh service

-
Log in with remote tools (cmder, MobalTerm, Xshell, etc.) and use cmder here (download link: https://cmder.net/ ).
-
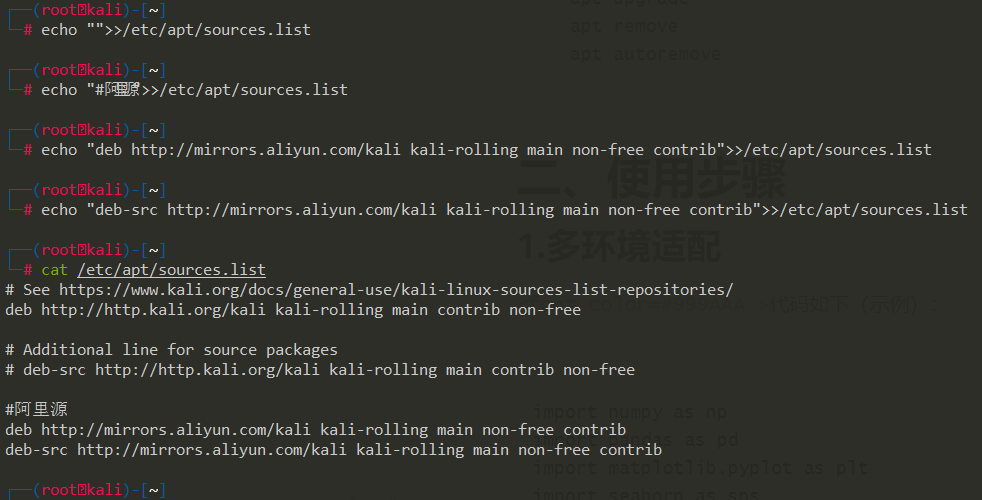
Change kali update source to Ali source
#	Ali's source address is as follows:
#	deb http://mirrors.aliyun.com/kali kali-rolling main non-free contrib
#	deb-src http://mirrors.aliyun.com/kali kali-rolling main non-free contrib
#	The update statement is as follows:
cp /etc/apt/sources.list /etc/apt/sources.list.bak	# Backup profile
echo "#	Ali source "> / etc / apt / sources.list
echo "deb http://mirrors.aliyun.com/kali kali-rolling main non-free contrib">>/etc/apt/sources.list
echo "deb-src http://mirrors.aliyun.com/kali kali-rolling main non-free contrib">>/etc/apt/sources.list
# After the configuration is completed, execute the instructions to update the software and system and clear the installation package
apt update
ape upgrade
apt remove
apt autoremove
2, pyenv installation of multi version environment control
1.pyenv installation
-
GitHub address: https://github.com/pyenv/pyenv#installation
-
Install pyenv
sudo su
curl -L https://raw.githubusercontent.com/pyenv/pyenv-installer/master/bin/pyenv-installer | bash

# If an error 443 connection error is reported, use the following statement
git clone https://github.com/pyenv/pyenv.git ~/.pyenv
If the following error is reported, copy
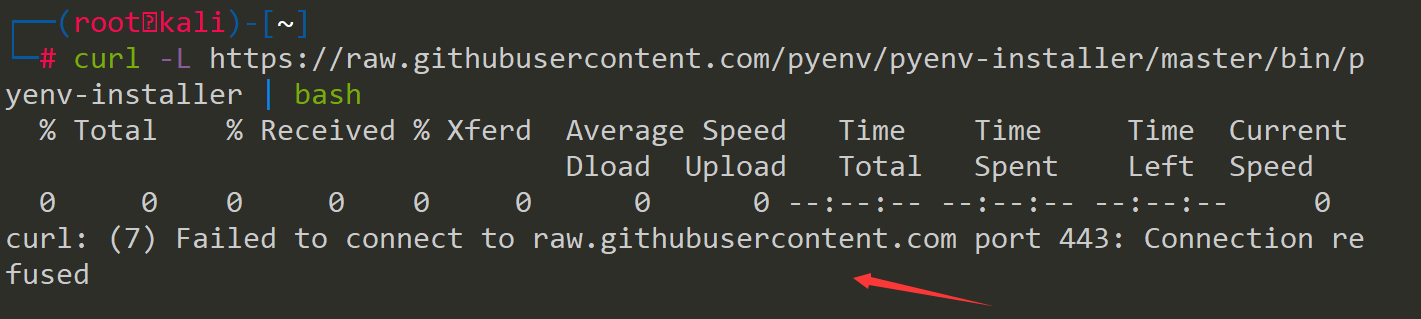
Copy file( https://github.com/pyenv/pyenv-installer/blob/master/bin/pyenv-installer )Directly authorize the execution.
-
Write configuration file
After testing, it is recommended to write ~ / The bashrc file does not install pyenv correctly (or I may have a configuration error...), configure the / etc/profile file here).
sudo su
# Early backup
cp /etc/profile /etc/profile.bak
# Write configuration
echo 'export PYENV_ROOT="/root/.pyenv"' >> /etc/profile
echo 'export PATH="$PYENV_ROOT/bin:$PATH"' >> /etc/profile
echo 'eval "$(pyenv init --path)"' >> /etc/profile

source /etc/profile	#	Save profile
-
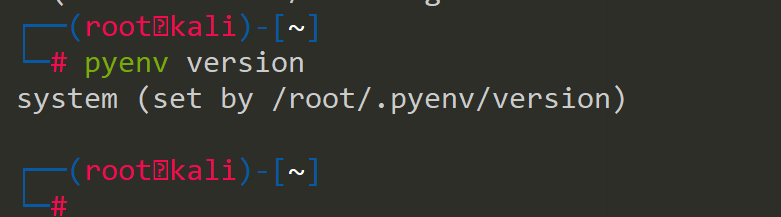
Check installation
pyenv version
-
Uninstall pyenv completely
# First remove the contents in the / etc/profile configuration file
source /etc/profile	#	Save profile
rm -fr /root/.pyenv	#	Completely delete the directory and downloaded python
-
pyenv basic instructions, see: https://www.cnblogs.com/louyefeng/p/12031272.html , you can also use the command to view help.
pyenv help
2. Install Python
-
Before installing Python, you need to install dependencies first, otherwise there will be an error related to missing dependencies.
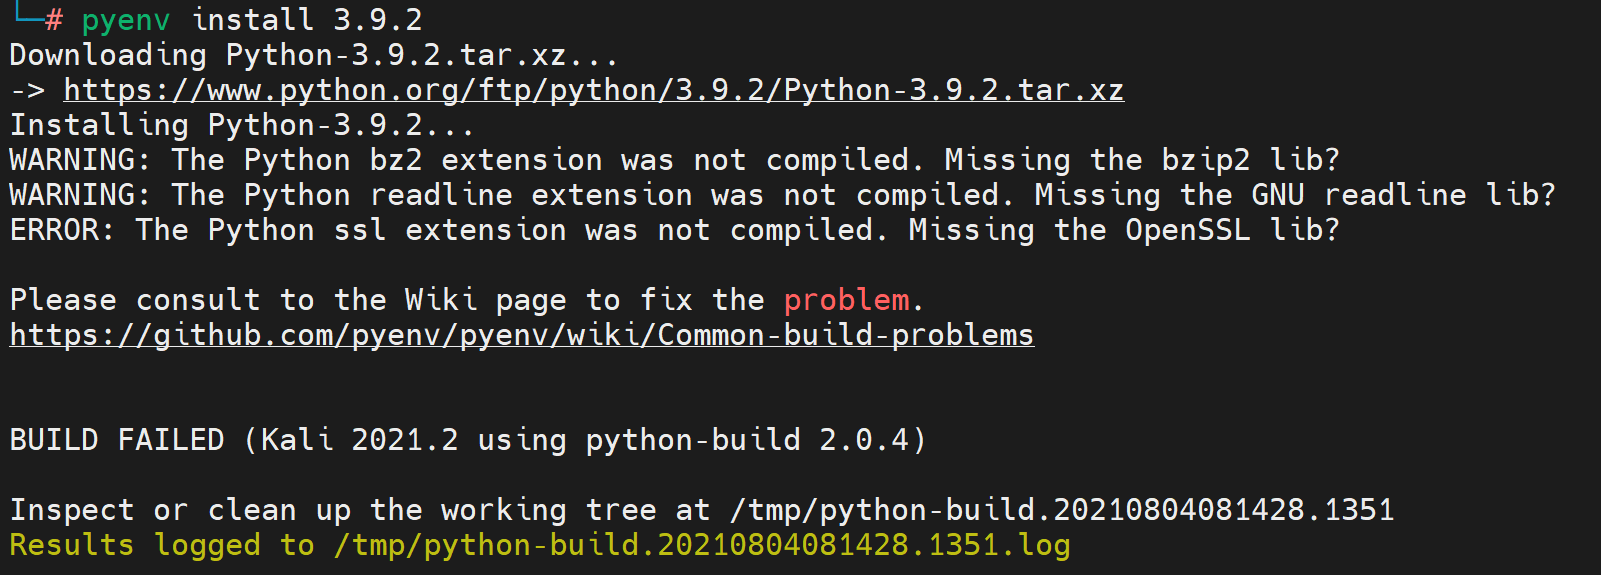
 sudo su
 apt install make build-essential libssl-dev zlib1g-dev \
libbz2-dev libreadline-dev libsqlite3-dev wget curl llvm \
libncursesw5-dev xz-utils tk-dev libxml2-dev libxmlsec1-dev libffi-dev liblzma-dev
-
From the above pyenv instructions, view the installable python versions as follows
pyenv install --list
-
After viewing, install the specified version of python
pyenv install 3.9.2 #	3.9 installation times Version 2
pyenv versions	#	View installed python versions
pyenv uninstall [Version number] # Uninstall the corresponding version of python
III Anaconda installation of multi version control platform
1.Anaconda installation
-
Download Anaconda at: https://www.anaconda.com/products/individual/download-success
sudo su
uname -a # Execute the command to view the linux kernel version, which downloads the x86 architecture
# Linux kali 5.10.0-kali9-amd64 #1 SMP Debian 5.10.46-1kali1 (2021-06-25) x86_64 GNU/Linux
wget https://repo.anaconda.com/archive/Anaconda3-2021.05-Linux-x86_64.sh

# Authorization, installation
chmod 777 Anaconda3-2021.05-Linux-x86_64.sh
./Anaconda3-2021.05-Linux-x86_64.sh
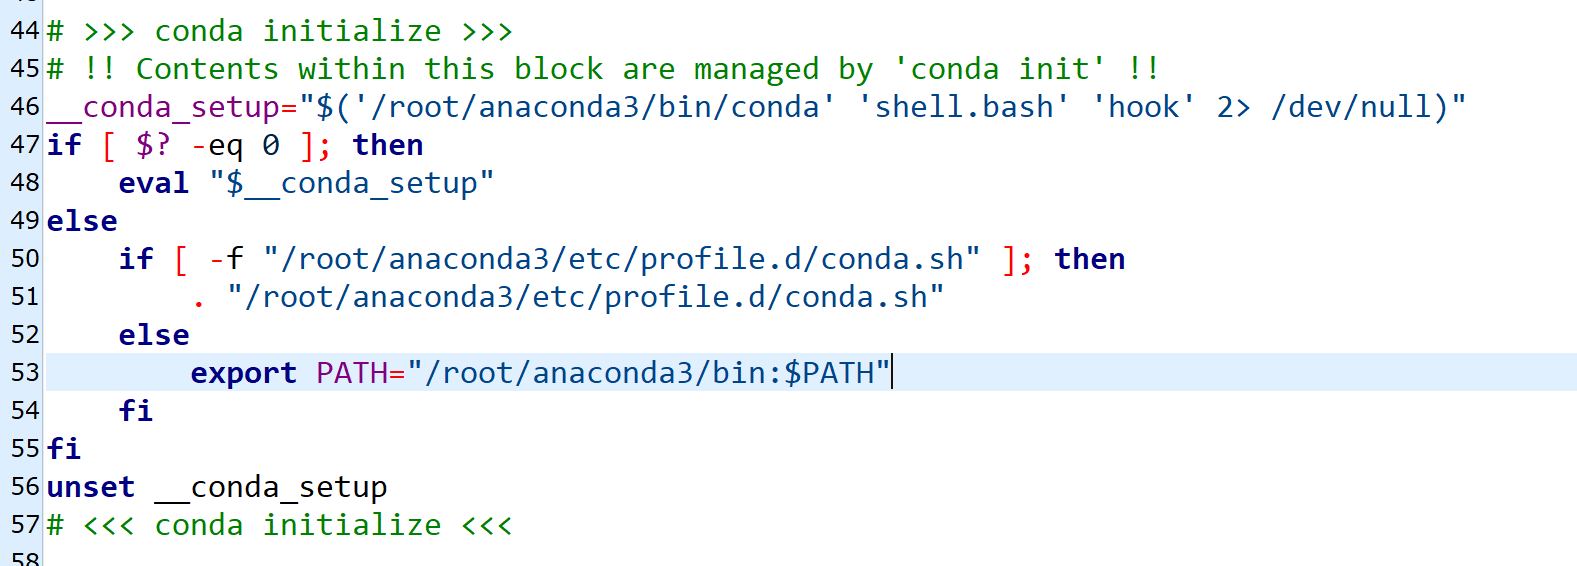
Note: always install according to the default path. Finally, you will be prompted whether to initialize. Under this kali system version, write / root / Bashrc file, unable to add environment variable.
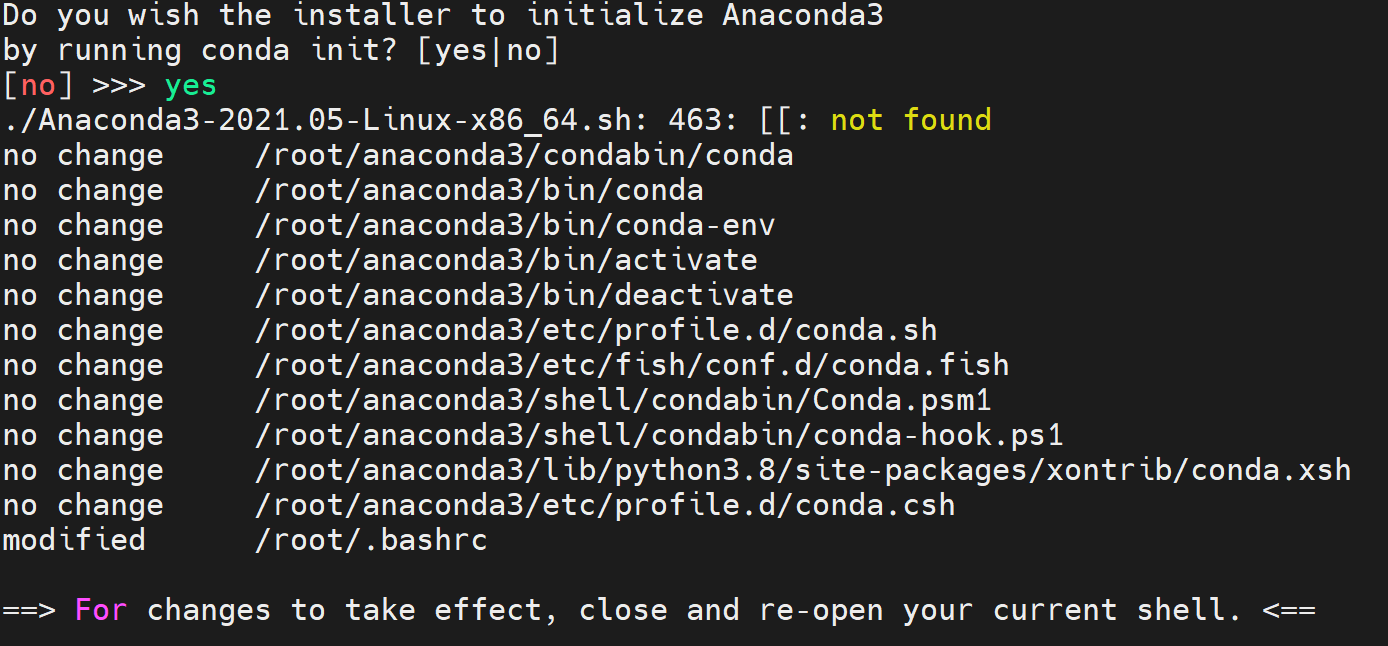
Solution: write to / root / Cut the configuration of bashrc file into / etc/profile.
source /etc/profile # Save configuration file source
-
Verify and disable the default base environment of conda.
conda --version	# View conda version
conda config --set auto_activate_base false # Close the default base environment and reopen the shell after execution

-
conda source switching
# Configure the software source of Beijing Institute of foreign languages here
conda config --add channels https://mirrors.bfsu.edu.cn/anaconda/cloud/bioconda/
conda config --add channels https://mirrors.bfsu.edu.cn/anaconda/cloud/conda-forge/
conda config --add channels https://mirrors.bfsu.edu.cn/anaconda/pkgs/free/
conda config --add channels https://mirrors.bfsu.edu.cn/anaconda/pkgs/main/
conda config --set show_channel_urls yes	# Show download channel when downloading

# View condarc configuration
cat ~/.condarc	# Here is / root / condarc
# or
conda config --show channels
-
conda use Command Reference:
- https://www.cnblogs.com/szj666/p/11014929.html
- https://zhuanlan.zhihu.com/p/255264471
# Exit virtual environment instruction under linux
conda deactivate
2. Configure Python environment and Frida
-
Frida website: https://github.com/frida/frida/
-
Create environment Frida_1280_Py380, based on Python 3.8 0
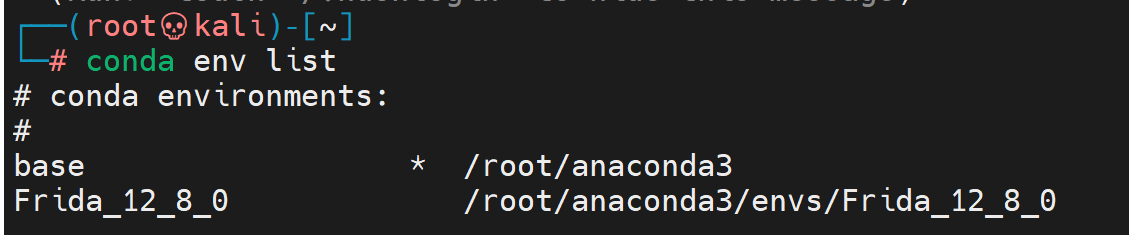
conda create -n Frida_1280_Py380 python=3.8.0
conda env list	# View all environments
-
Use environment Frida_1280_Py380, install Frida
conda activate Frida_1280_Py380
# Note the version correspondence of Frida, Frida tools and object
python -m pip install frida==12.8.0
python -m pip install frida-tools==5.3.0
python -m pip install objection==1.8.4
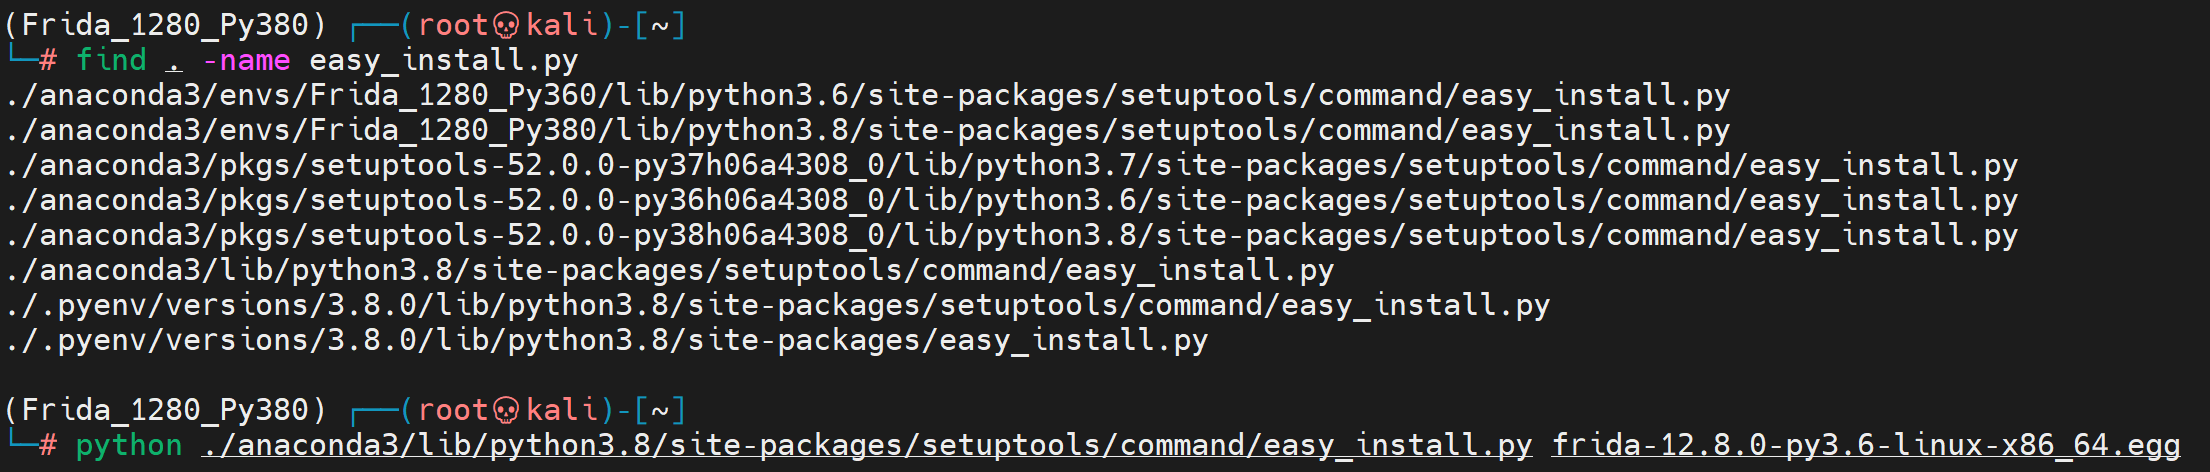
The installation of Frida Building wheel for frida (setup.py) is stuck. After reading for unlimited months, ERROR: Failed building wheel for frida error occurs.

Solution, refer to: https://blog.csdn.net/song_lee/article/details/105102108
firda 12.8.0 address: https://pypi.org/project/frida/12.8.0/#files
sudo su
wget https://files.pythonhosted.org/packages/b5/69/49c5e6922f290e6157ee5797e6545390c44e9a567eb0562771e0e0fea092/frida-12.8.0-py3.6-linux-x86_64.egg

# Find easy_install.py path
find . -name easy_install.py

python ./anaconda3/lib/python3.8/site-packages/setuptools/command/easy_install.py frida-12.8.0-py3.6-linux-x86_64.egg

# Reinstall frida12 8.0, successful
python -m pip install frida==12.8.0

4, Install Nodejs
-
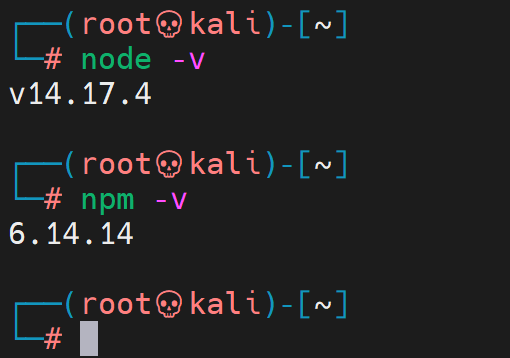
Download the specified version of nodejs from the official website( https://nodejs.org/en/download/ )For details, please refer to: Linux(Kali) installation node js
curl -o node-v14.17.4-linux-x64.tar.xz https://nodejs.org/dist/v14.17.4/node-v14.17.4-linux-x64.tar.xz

-
Unzip, install
tar -xvf node-v14.17.4-linux-x64.tar.xz	# Configure according to the downloaded version
mv node-v14.17.4-linux-x64 nodejs
mv nodejs/ /usr/local/sbin/
ln -s /usr/local/sbin/nodejs/bin/node /usr/local/sbin/ # Establish soft link
ln -s /usr/local/sbin/nodejs/bin/npm /usr/local/sbin/
-
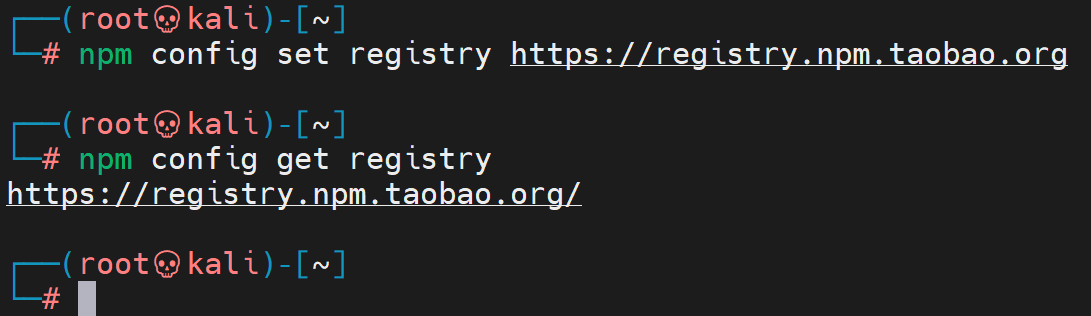
npm for Taobao source
npm config set registry https://registry.npm.taobao.org
npm config get registry	# verification
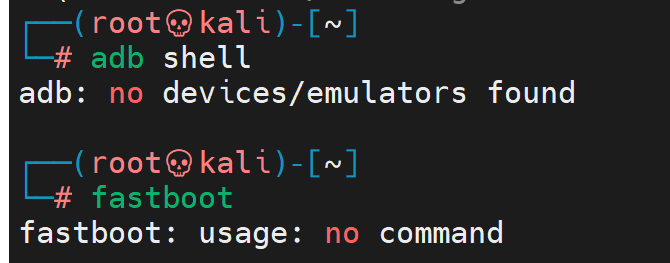
5, Install adb shell and fastboot
-
Download the adb shell at: https://developer.android.google.cn/studio/releases/platform-tools?hl=zh-cn
sudo su
# Note that the path here is / root
wget https://dl.google.com/android/repository/platform-tools-latest-linux.zip?hl=zh-cn
mv platform-tools-latest-linux.zip\?hl=zh-cn platform-tools-latest-linux.zip
7z -x platform-tools-latest-linux.zip

export PATH="/root/platform-tools:$PATH"	# Test setup environment variables
adb shell	# The command runs successfully. Write the following configuration file
fastboot 	# The command also runs successfully
echo 'export PATH="/root/platform-tools:$PATH"' >> /etc/profile
source /etc/profile	#	Save profile
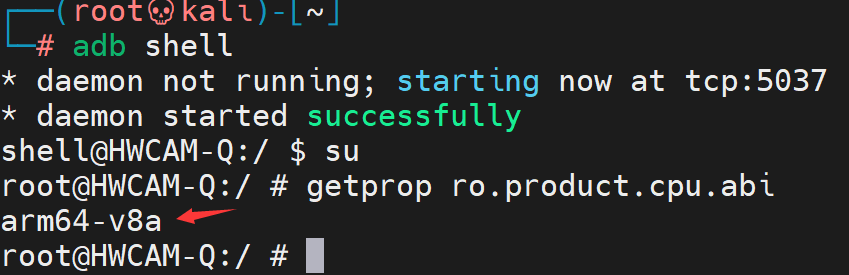
6, Import frida server from mobile phone
-
Download the corresponding Frida server version on the official website. GitHub address: https://github.com/frida/frida/releases/tag/12.8.0
-
View phone type
adb shell
su
getprop ro.product.cpu.abi

# to grant authorization
chmod 777 frida-server-12.8.0-android-arm64
# Start frida_server, default port 27042
./frida-server-12.8.0-android-arm64
-
Download Frida server and push it to the mobile terminal
sudo su
wget https://github.com/frida/frida/releases/download/12.8.0/frida-server-12.8.0-android-arm64.xz
xz -d frida-server-12.8.0-android-arm64.xz

adb push frida-server-12.8.0-android-arm64 /data/local/tmp