1. kubectl Basic Commands
1. Declarative resource management methods:
1. The only entry point for a kubernetes cluster to manage cluster resources is the interface that calls apiserver through the appropriate method
2. kubectl is the official CLI command-line tool for communicating with apiserver, organizing and transforming commands that users enter on the command-line into information that apiserver can recognize, thus providing an effective way to manage various k8s resources.
3. Commands of kubectl
kubectl --help
k8s Chinese Documents: http://docs.kubernetes.org.cn/683.html
4. It is convenient to add, delete and check resources, but it is not easy to change them.
//View k8s version information

kubectl version

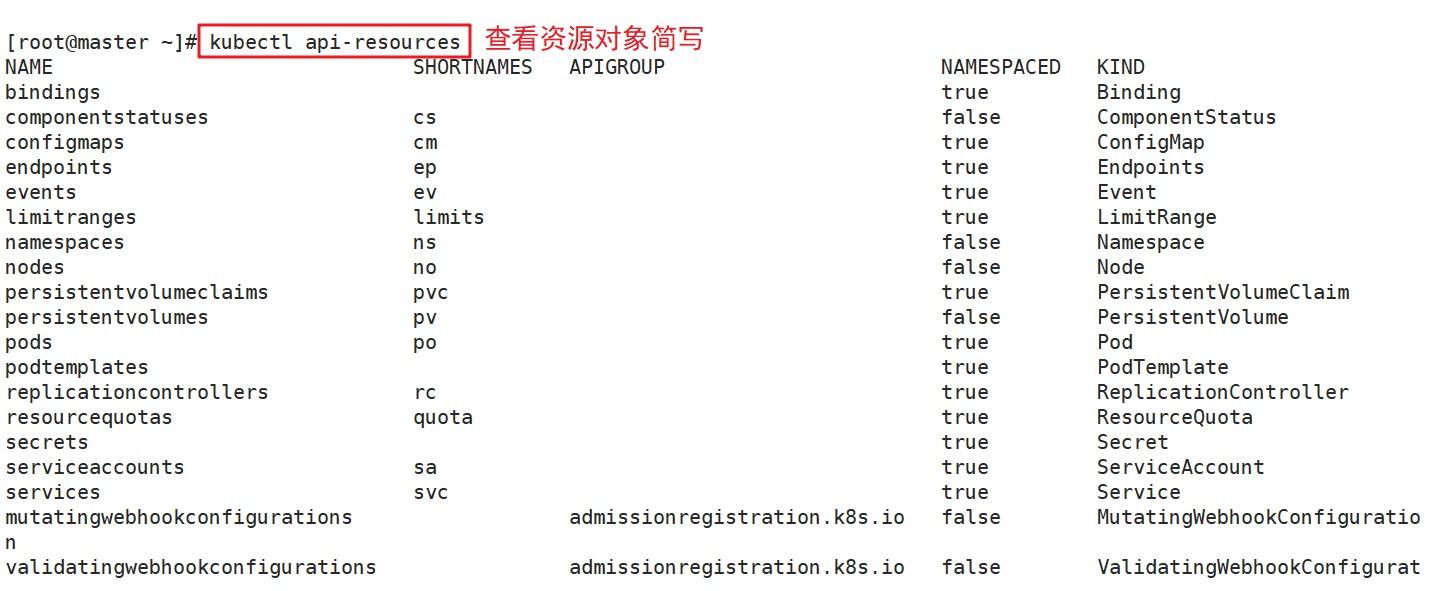
//View resource object abbreviations

kubectl api-resources
//View cluster information

[root@master ~]# kubectl cluster-info

Configure kubetcl autocompletion
//Configure kubectl autocompletion

source < (kubectl completion bash)

//node View Log

journalctl -u kubectl -f

2. Declarative Resource Management
adopt yaml Resource Configuration Inventory File Implements Resource Management

kubectl create/apply -f *.yaml
2. Viewing Basic Information
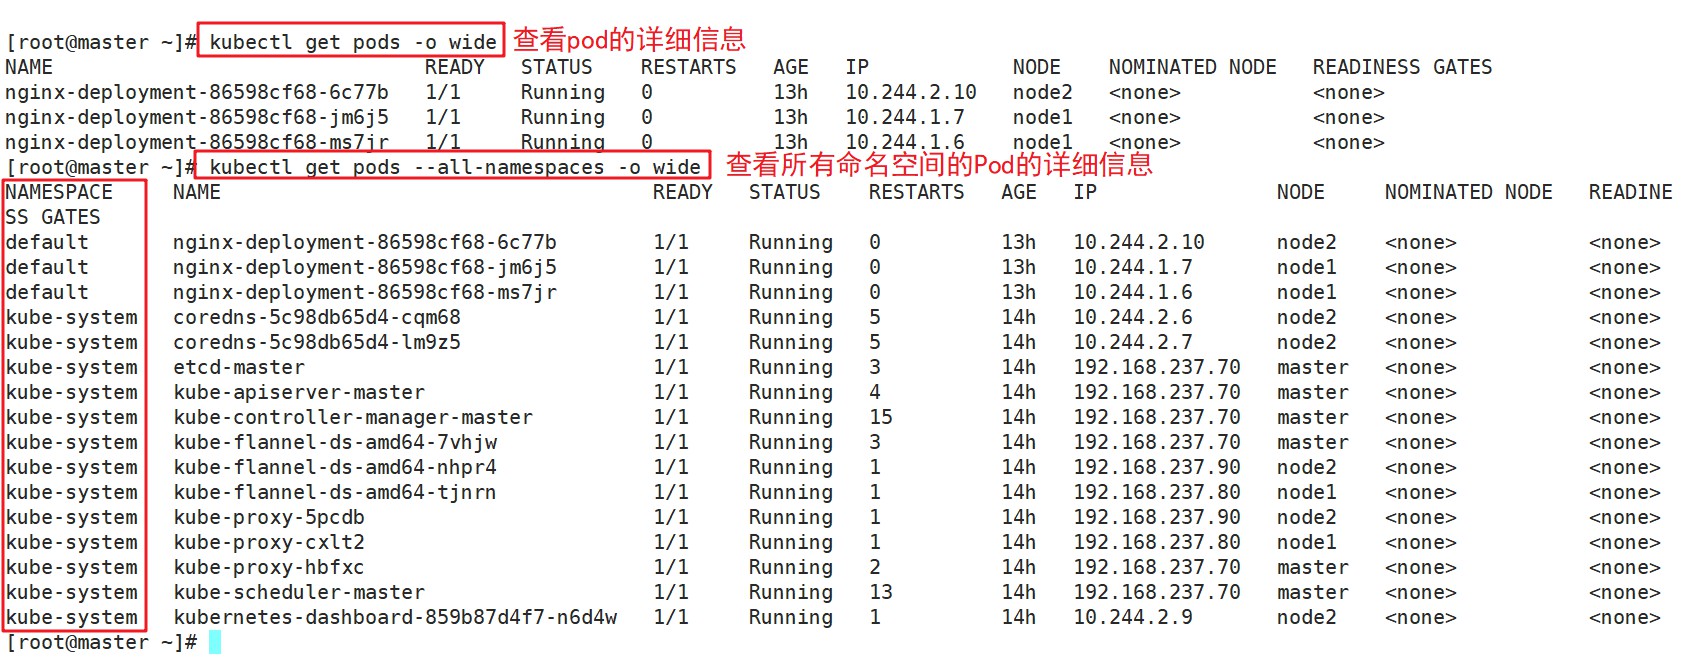
kubectl get <resource> [-o wide | json | yaml] [-n namespace]

Get information about resources,-n Specify the command space,-o Specify output format

resource It can be a specific resource name, such as pod nginx -xxx;It can also be a resource type, such as pod; perhaps all (Show only a few core resources, not complete)

--all-namespaces or-A :Represents displaying all command spaces,

--show-labels :Show all labels

-l app:Only show labels as app Resources

-l app=nginx :Show only contains app Label with a value of nginx Resources
//View master node status

kubectl get componentstatuses
kubectl get cs

//Role of Command Space: Allows the same type of resource rename for different command spaces
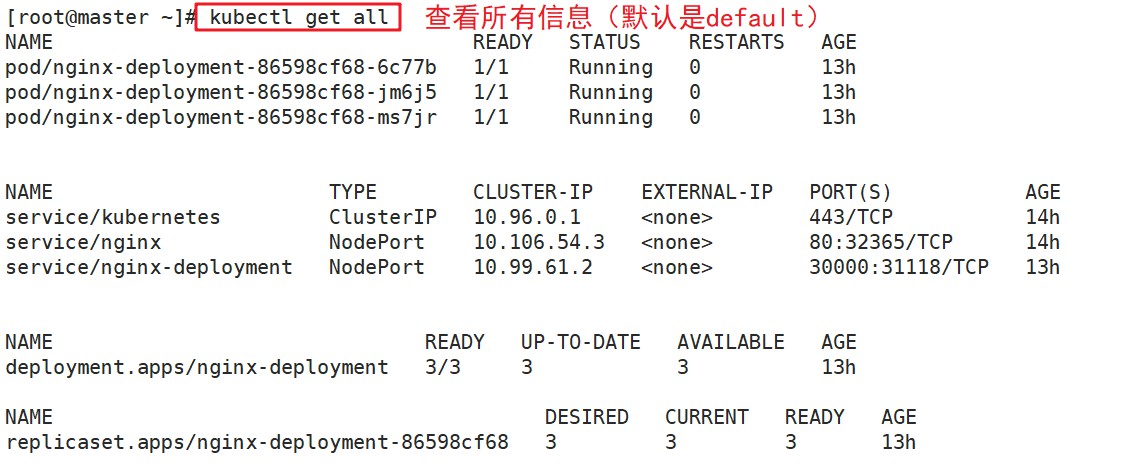
//View all resources in the default namespace

kubectl get all [-n default]

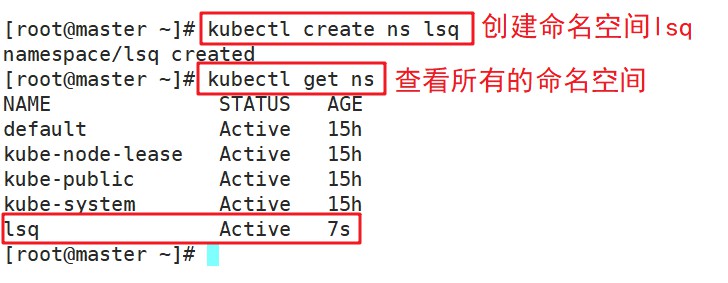
//Create namespace app

kubectl create ns app
kubectl get ns
//Delete namespace app

kubectl delete namespace app
kubectl get ns

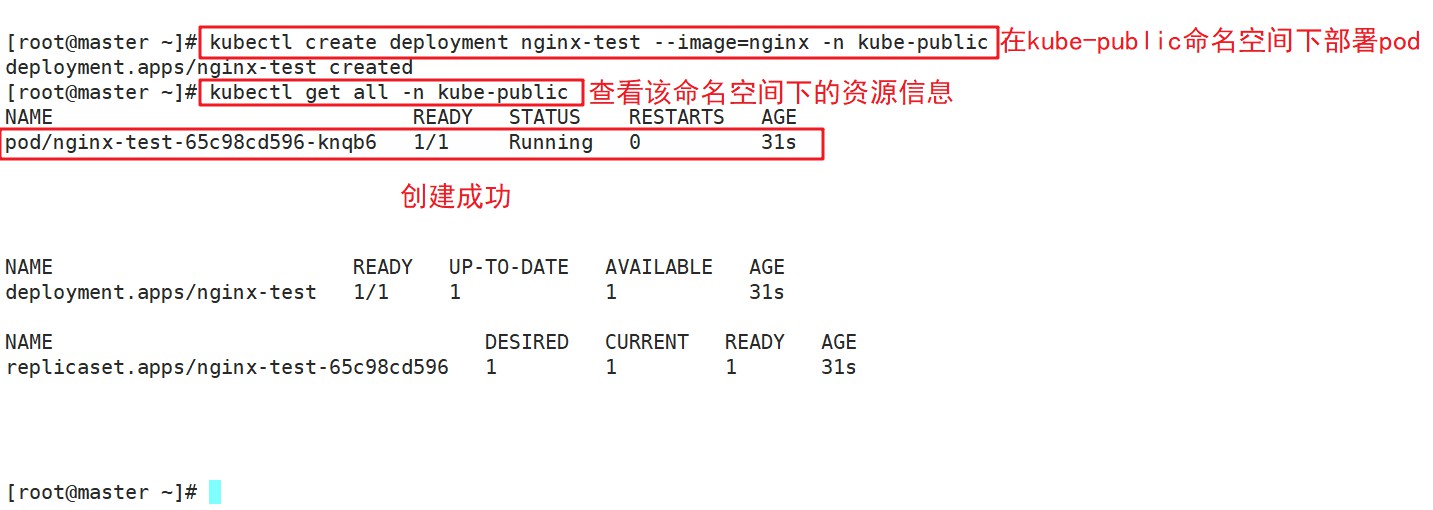
//Create a replica controller (deployment) in the namespace kube-public to start Pod (nginx-test)

kubectl create deployment nginx-test --image=nginx -n kube-public
//Describe the details of a resource

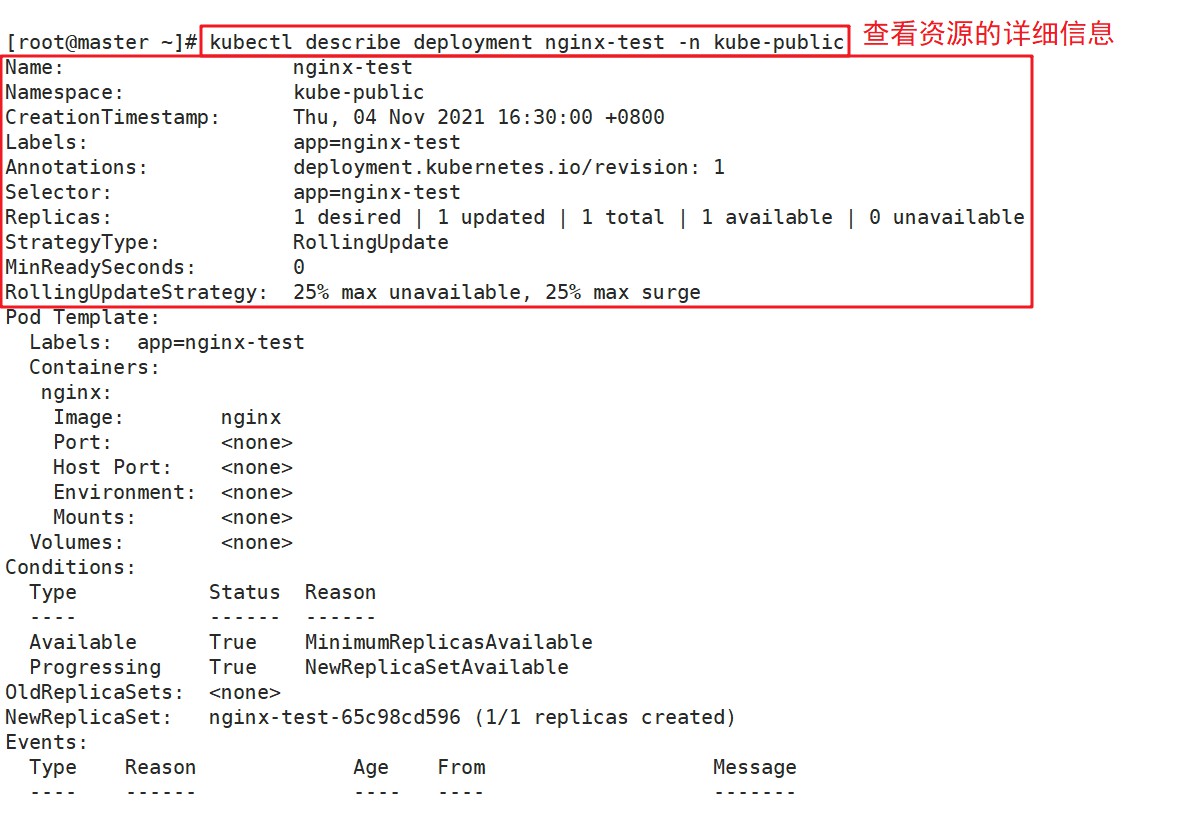
kubectl describe deployment nginx-test -n kube-public
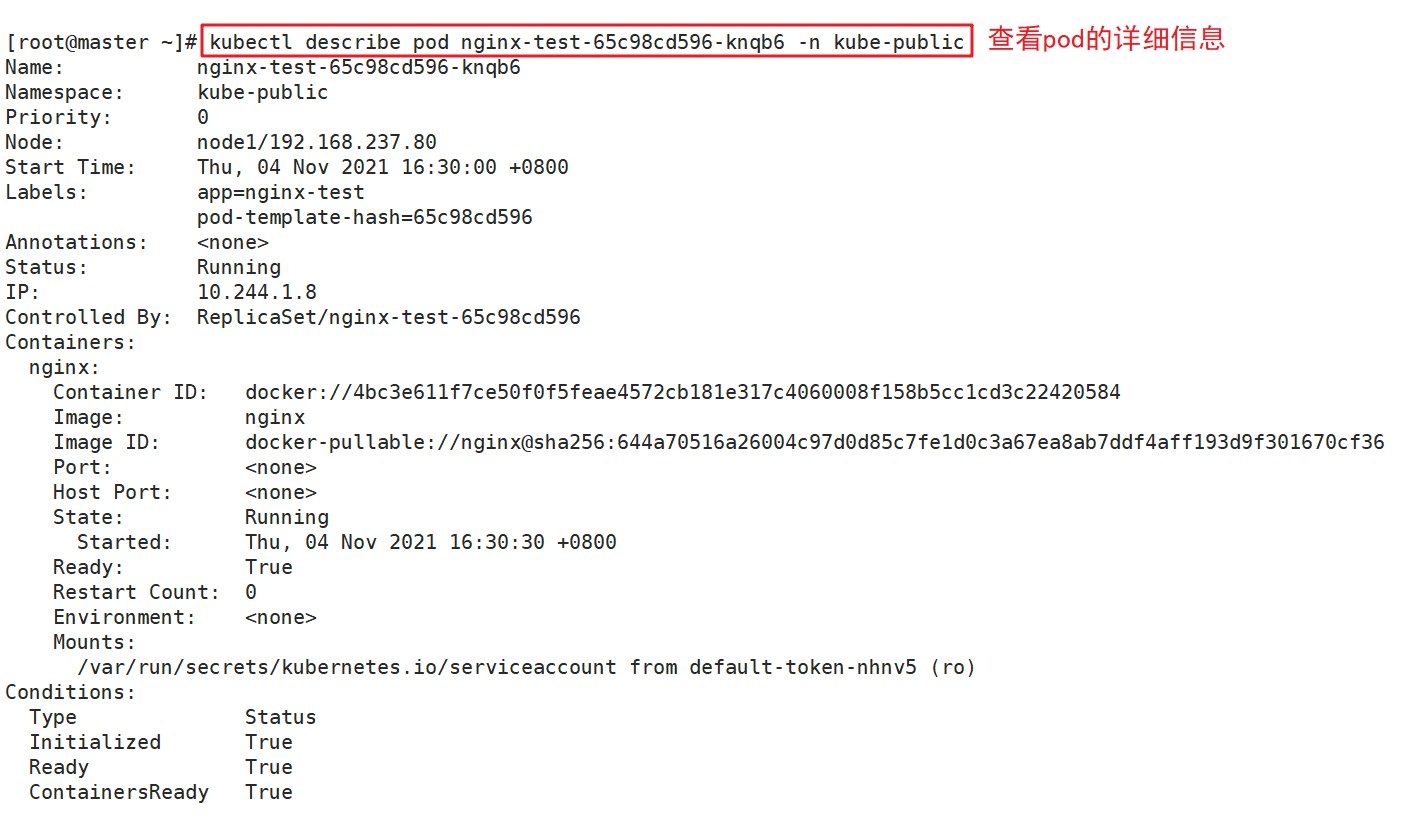
kubectl describe pod nginx-test -d47f99cb6-hv6gz -n kube-public
//View pod information in namespace kube-public

kubectl get pods -n kube-public

//kubectl exec can log on to the container across hosts, docker exec can only log on to the host where the container is located

kubectl exec -it nginx-wl-d47f99cb6-hv6gz bash -n kube-public


//Delete (restart) pod resource, delete pod will pull up again due to the presence of replica controllers such as deployment/rc

kubectl delete pod nginx-wl-d47f99cb6-hv6gz -n kube-public

//If the pod cannot be deleted and is always terminate d, force the pod to be deleted

kubectl delete pod (pod-name) -n (namespace) --force --grace-period=0

#grace-period indicates transitional lifetime, default 30s, allows POD to slowly terminate container processes on it before deleting pod, exiting gracefully, 0 means terminating pod immediately

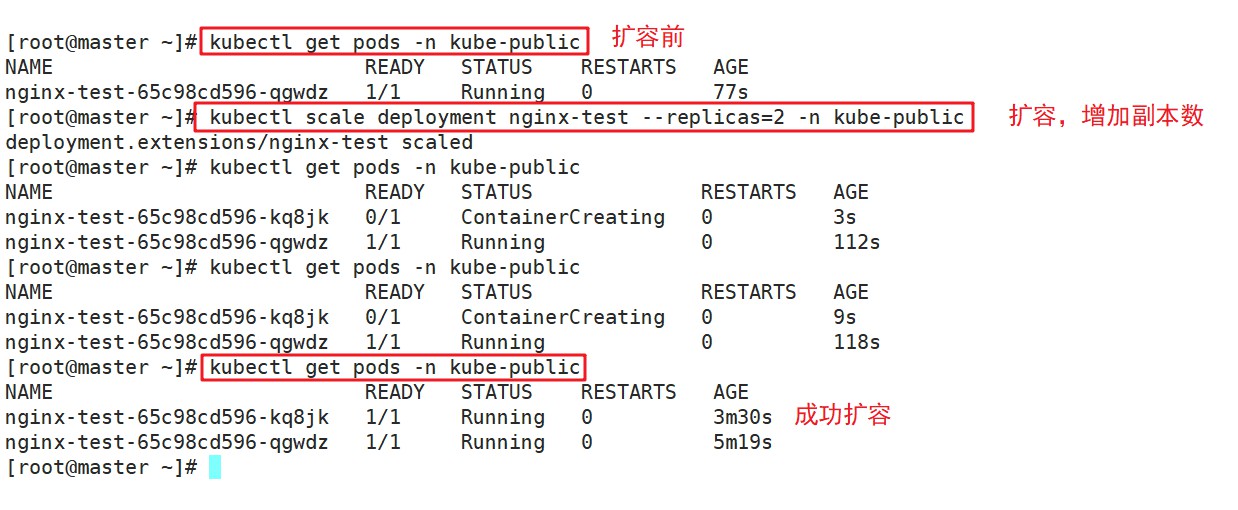
//Expansion

kubectl scale deployment nginx-test --replicas=2 -n kube-public
#Compact

kubectl scale deployment nginx-test --replicas=1 -n kube-public

//Delete replica controller (two representations)

kubectl delete deployment nginx-test -n kube-public
kubectl delete deployment/nginx-test -n kube-public

3. Life cycle of a project
Lifecycle: Create > Publish > Update > Rollback > Delete
1. Create kubectl run command
Create and run one or more container mirrors
Create a deployment or job to manage containers
kubectl run --help
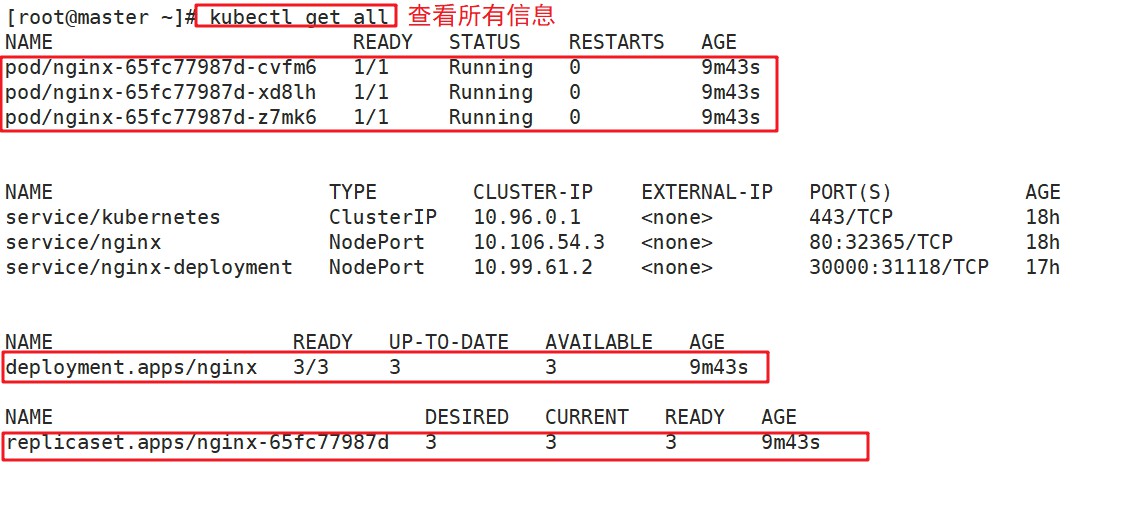
//Start nginx instance, expose container port 80, set number of copies 3

kubectl run nginx --image=nginx:1.14 --port=80 --replicas=3

kubectl get pods
kubectl get all

2. Publish the kubectl expose command
●Exposing resources as new Service

kubectl expose --help

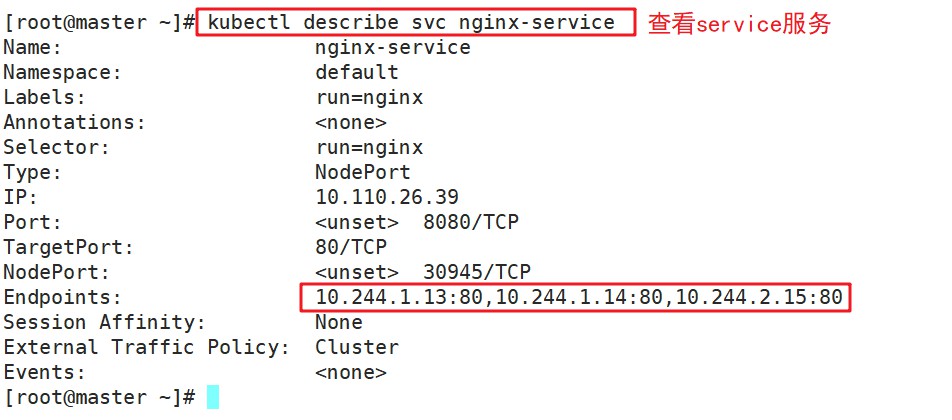
//Create a service for deployment's nginx and forward it to container's 80 port through Service's 80 port, Service's name is nginx-service, type is NodePort<br>
kubectl expose deployment nginx --port=80 --target-port=80 --name=nginx-service --type=NodePort

-----------------------------------------------
Kubernetes Why need Service, On the one hand, it's because Pod Of IP Not fixed(Pod Possible rebuilding),Another-On the other hand, it's because- -group Pod There is always a need for load balancing between instances.

Service adopt label Selector Implemented on a set Pod Access to.

For container applications, Kubernetes Provided based on VIP (fictitious IP)Bridge access Service, By Service Redirect to the appropriate Pod.

service Type of:

●ClusterIP:Provide a virtual within a cluster IP For Pod Visit( service Default type)

●NodePort:In each Node.Open a port on for external access. Kubernetes Will be in each Node.Open a port on and each Node All ports are the same, through NodeIP:NodePort Ways Kubernetes Programs outside the cluster are accessible Service.

notes:Each port can only be a service and the port range can only be 30000-32767

●LoadBalancer:Accessed through an external load balancer, typically deployed on a cloud platform LoadBalancer Additional fees are required
-----------------------------------------------

//View pod network status details and ports exposed by Service

kubectl get pods,svc -o wide

//View the node of the associated backend

kubectl get endpoints

//View service description information

kubectl describe svc nginx
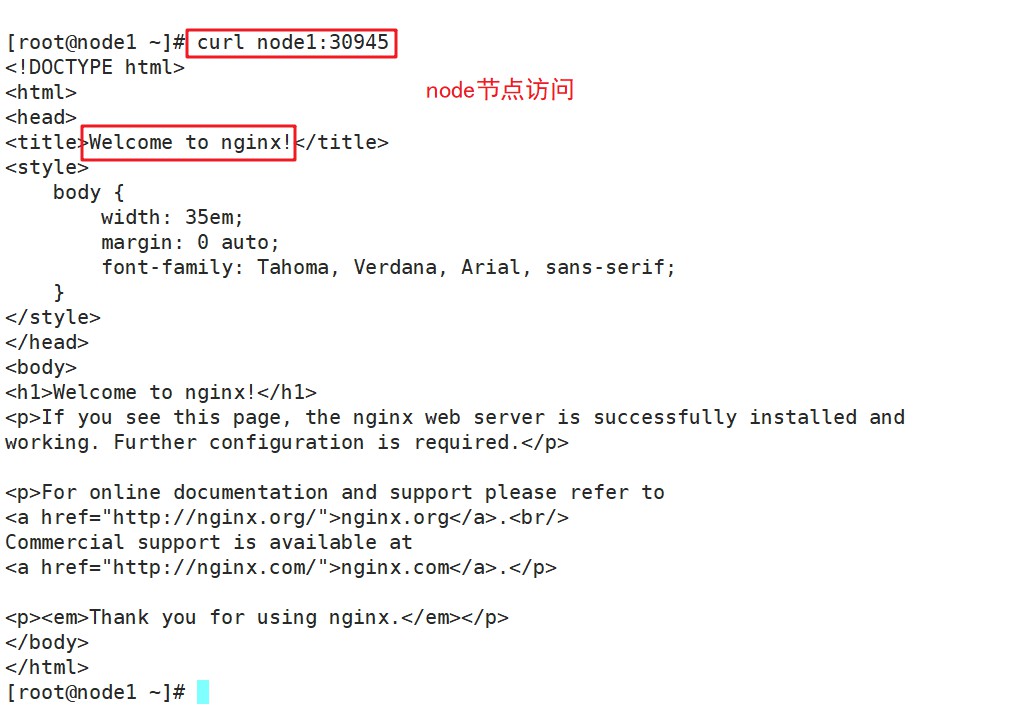
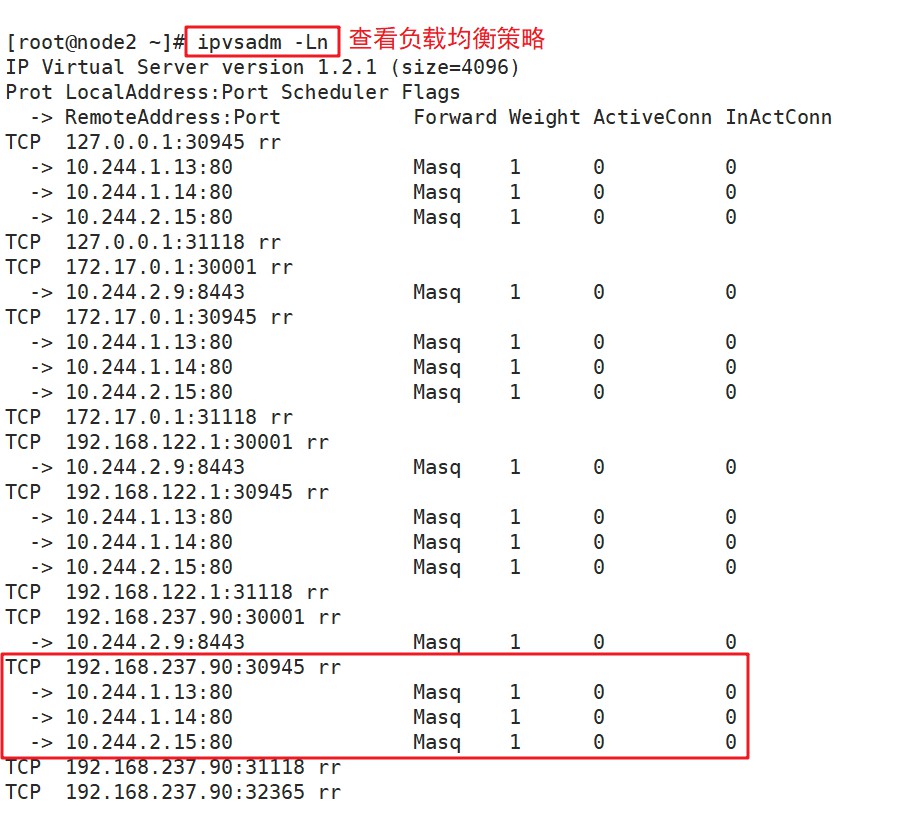
//Operate on Node 01 to view load balancing ports

yum install ipvsadm -y
ipvsadm -Ln

/Externally accessed IP And ports

TCP 192.168.237.80:44847 rr


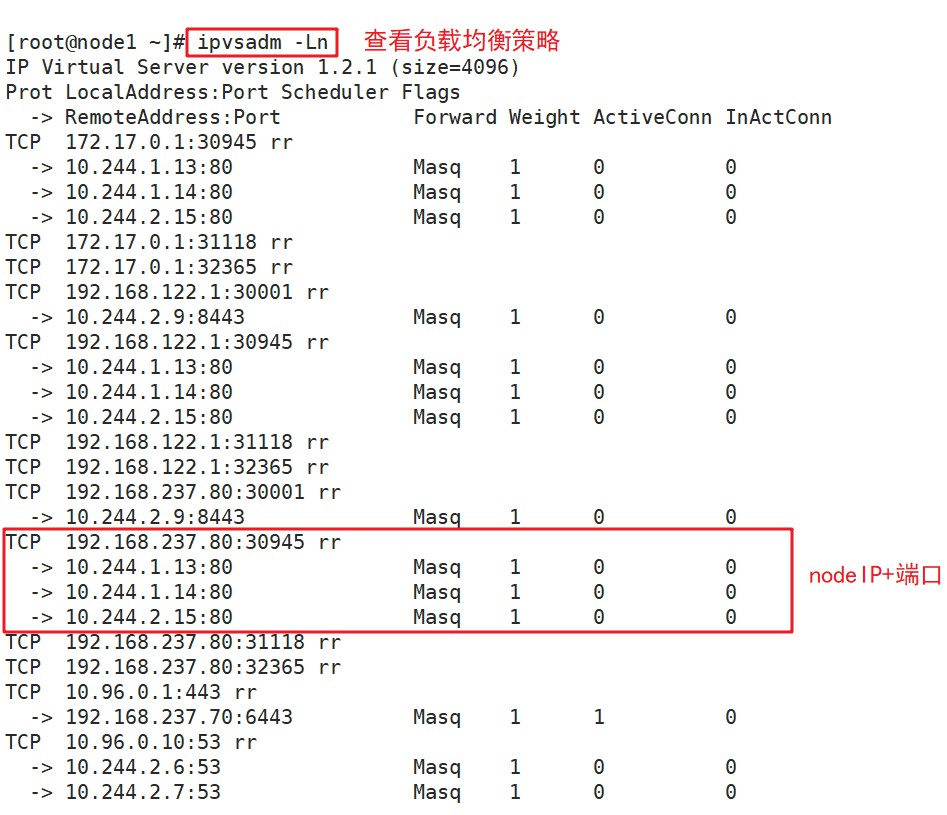
//IP and ports accessed within pod cluster group

TCP 10.0.0.189:80 rr

//Operate on the node02 node and view the load balancing port the same way

yum install ipvsadm -y
ipvsadm -Ln
TCP 192.168.237.90:31741 rr

TCP 10.0.0.189:80 rr

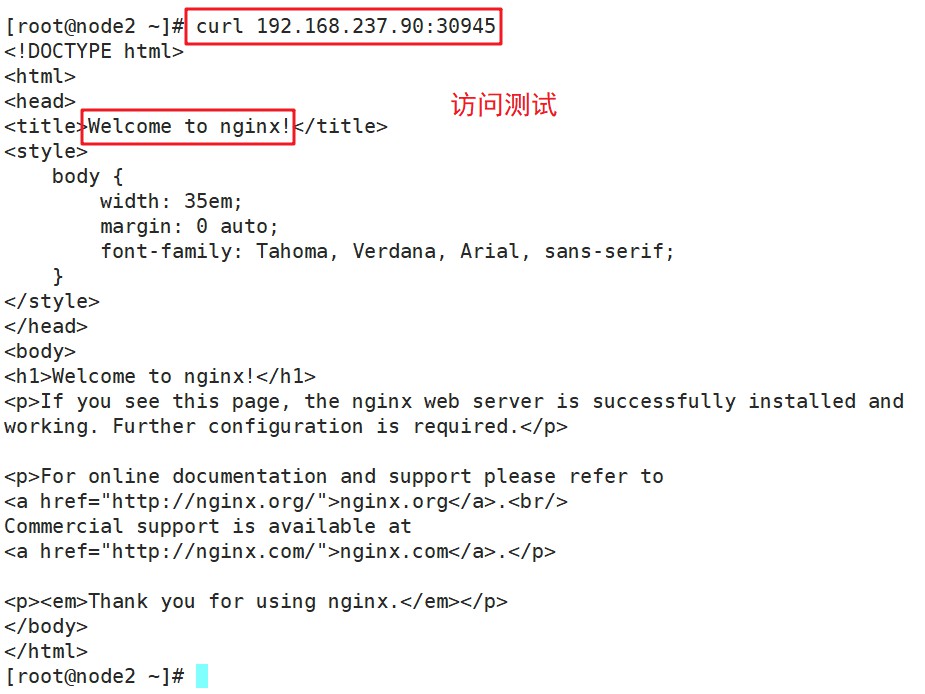
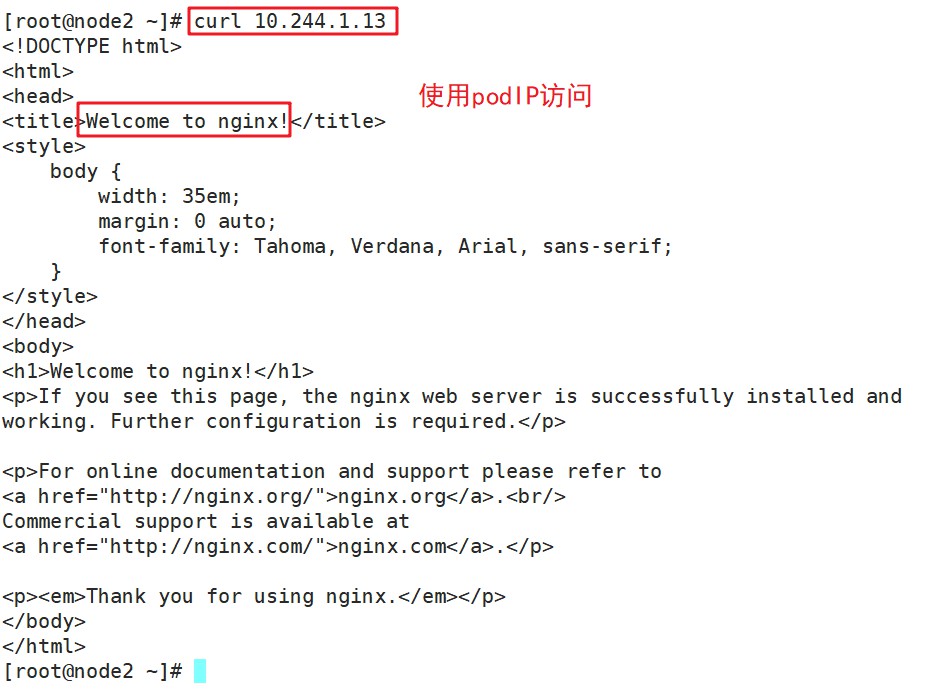
curl 10.0.0.189
curl 192.168.239.90:31741
//View access log in master 01 operation

kubect1 logs nginx-cdb6b5b95-fjm2x
kubectl logs nginx-cdb6b5b95-g28wz
kubectl logs nginx-cdb6b5b95-x4m24

3. Update kubect1 set
3,To update kubect1 set
●Change some information about existing application resources

kubectl set --help

//Get Modified Template

kubect1 set image --he1p
Examp1es:
# Set a deployment's nginx container image to 'nginx:1.9.1', and its busybox
container image to 'busybox'.

kubectl set image deploynent/nginx busybox=busybox nginx=nginx:1.9.1
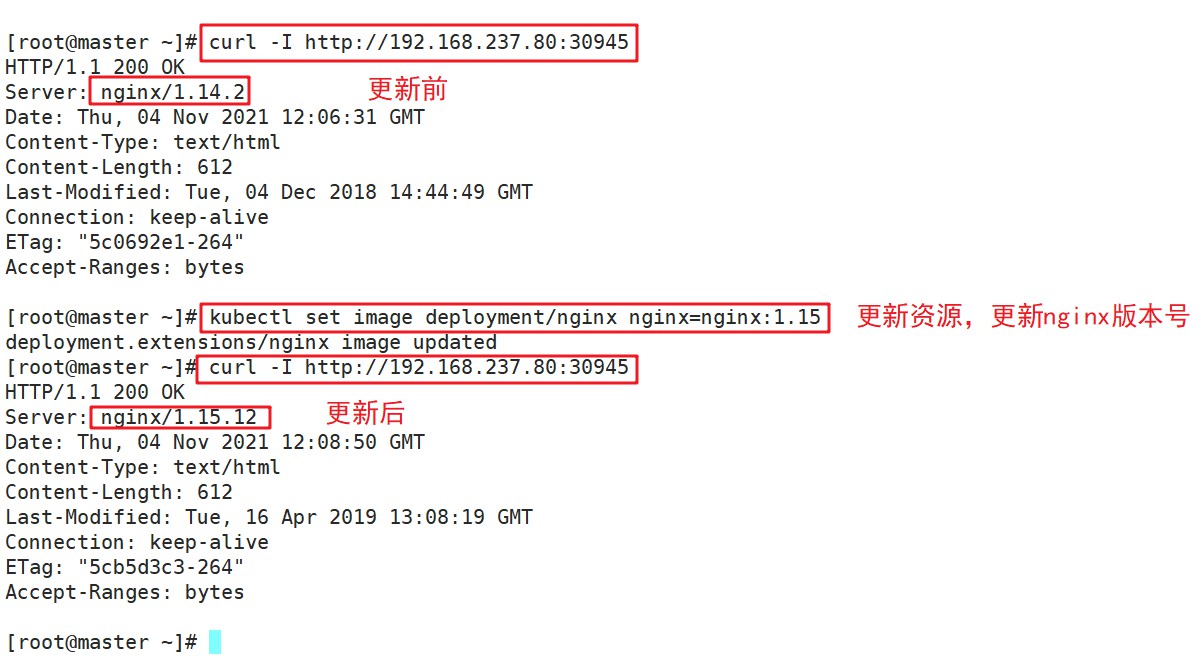
//View the current nginx version number

curl -I http://192.168.80.11:44847
curl -I http://192.168.80.12:44847

//Update nginx version to 1.15

kubect1 set image deployment/nginx nginx=nginx:1.15
//In a dynamically monitored pod state, since a scrolling update is used, a new pod is generated, then deleted -- the old pods, and so on

kubectl get pods -w


//Looking at the updated Pod's ip will change

kubectl get pods -o wide

//Look at nginx's version number again

curl -I http://192.168.237.80:44847
curl -I http://192.168.237.90:44847
See figure above, viewed
4. Roll back kubect1 rollout
●Rollback management of resources

kubect1 rollout --he1p

//View historical versions

kubectl rollout history deployment/nginx

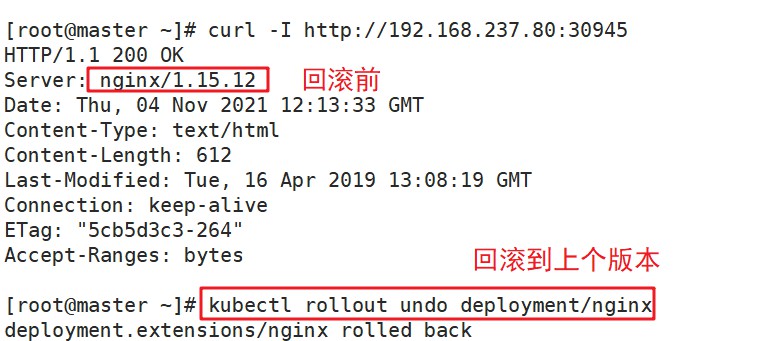
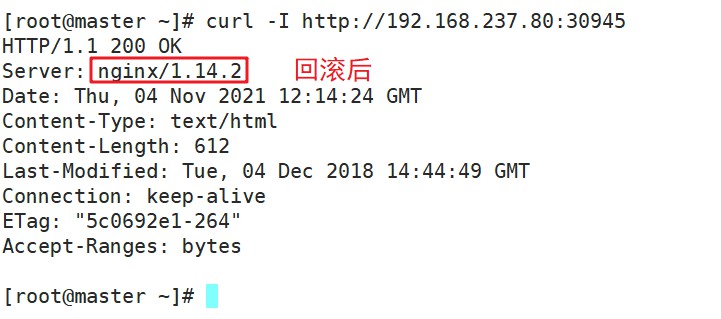
//Execute rollback to previous version

kubectl rollout undo deployment/nginx
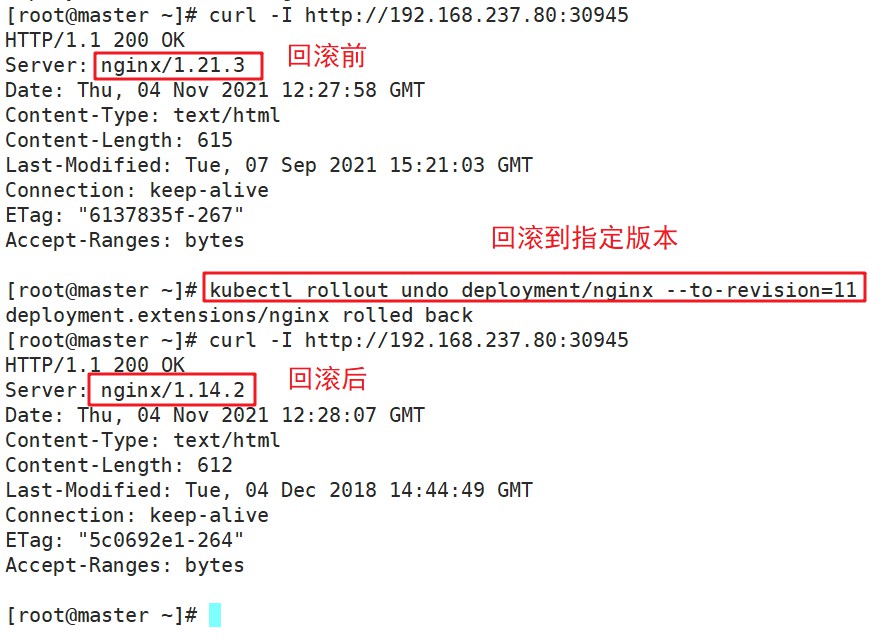
//Execute rollback to specified version

kubectl rol1out undo deployment/nginx --to-revision=11
//Check rollback status

kubectl rollout status deployment/nginx

5. Delete kubectl delete
//Delete replica controller

kubectl delete deployment/nginx

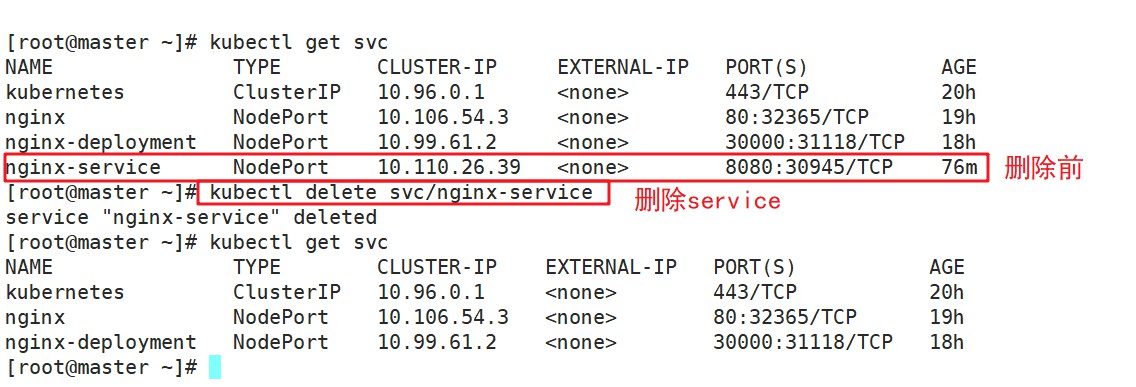
//Delete service

kubectl delete svc/nginx-service
kubectl get all
4. Canary Release - Statement Management Method
The Deployment controller supports custom control of the scrolling rhythm during updates, such as pause or resume updates.
For example, the update process is suspended immediately after the first batch of new Pod resources are created. At this time, there are only a few new versions of the application, the main part or the old version. Then, filter a small number of user requests to route to the new version of the OD application, and continue to see if it runs steadily as expected.
Continue rolling updates of the remaining Pod resources after you have determined that there is no problem, or roll back the update immediately. This is called Canary Publishing.
(1) Update the version of deployment and configure suspension deployment
kubectl set image deployment/nginx nginx=nginx:1.16 && kubectl rollout pause deployment/nginx

kubectl rollout status deployment/nginx


#Observe update status

(2) Monitoring the update process, you can see that a new resource has been added, but the old resource has not been deleted as expected because the pause pause command was used
kubectl get pods -w

curl [-I] 10.0.0.189
curl [-I] 192.168.80.11:44847

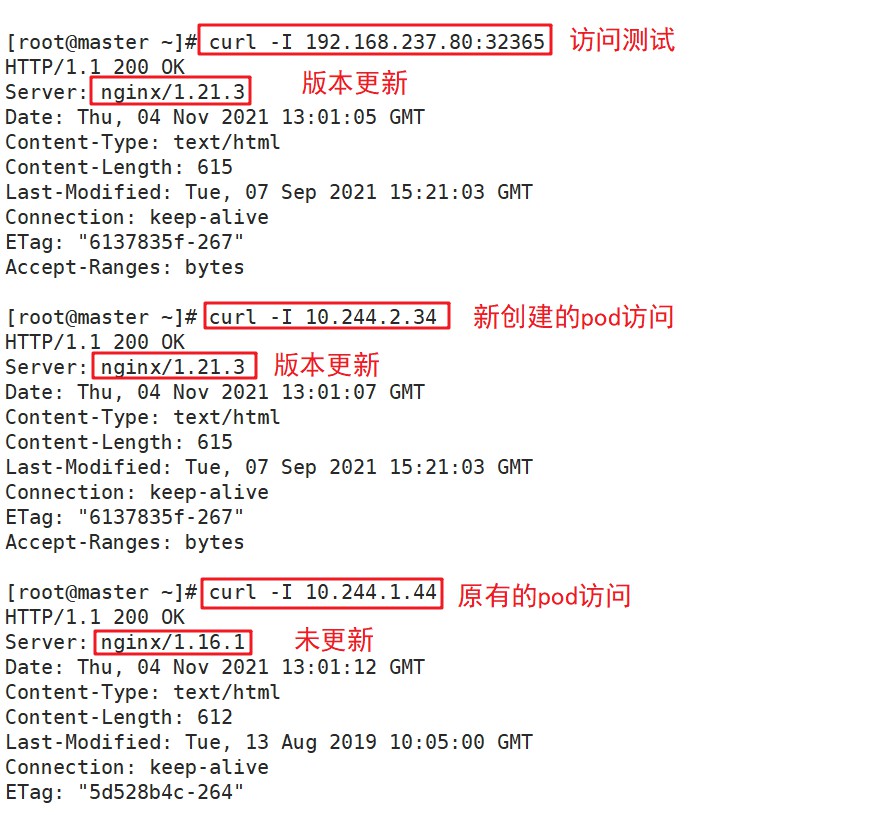
(3) Ensure that the updated pod is OK and continue to update
kubectl rollout resume deployment/nginx

(4) View the last update
kubectl get pods -W

curl [-I] 10.0.0.189
curl [-I] 192.168.80.11:44847
V. Declarative Management Method
1. Suitable for modifying resources
2. Declarative resource management methods rely on resource configuration manifest files to manage resources
The resource configuration manifest file has two formats: yaml (human and readable), json (easy to parse with api interface)
3. The management of resources is applied to the k8s cluster through declarative commands, which are pre-defined in the System-Resource configuration list.
4. Syntax Format: kubectl create/app1y/delete-f xxx.yaml
Differences between kubectl create and kubectl apply
kubectl create -f xxx.yaml (Not recommended, cannot update, must first delete)

kubectl apply -f xxx.yaml (Establish+Update, reusable)
If the kind value in the yaml file is deployment, both commands above can create a deployment and generate the appropriate number of pod s
Difference:
kubectl create:
(1) The kubectl create command deletes all existing things first and regenerates new ones from the yaml file. So the configuration in the yaml file must be complete
(2) The kubectl create command, which executes the replace command with the same yaml file, will not succeed and fail out.
kubectl apply:
The kubectl apply command upgrades an existing one based on what is listed in the configuration file. So the contents of the yaml file can only write attributes that need to be upgraded
//View Resource Configuration List

kubectl get deployment nginx -o yaml
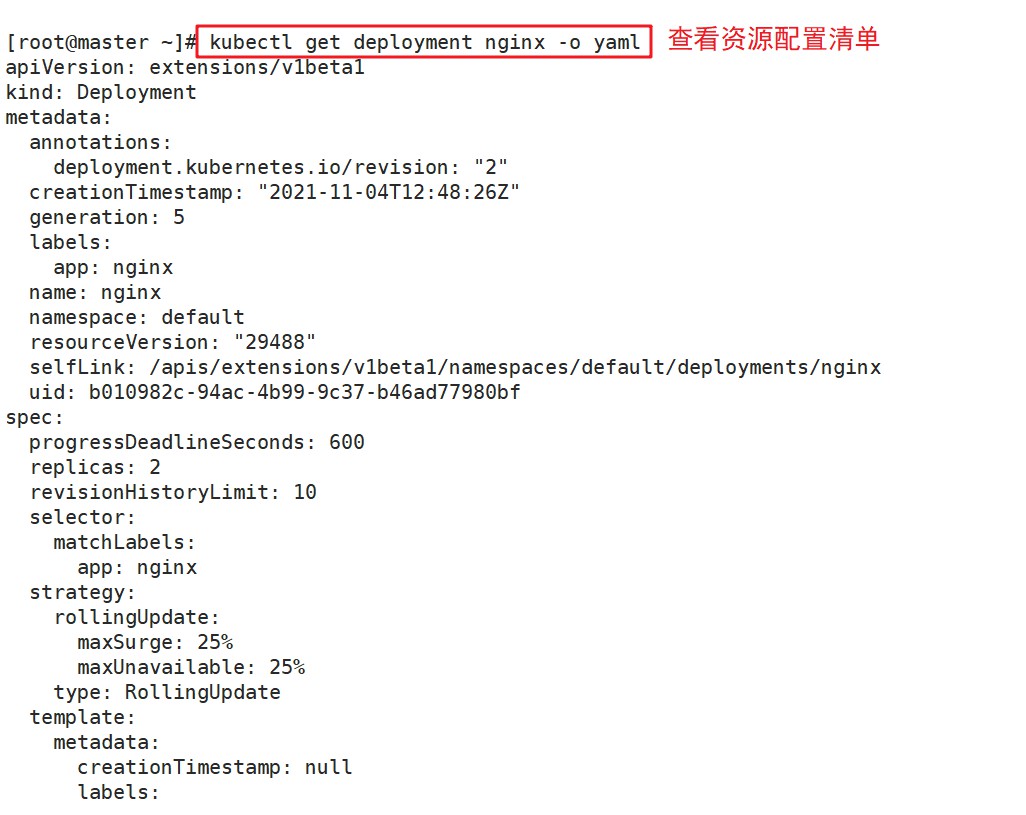
//Explain Resource Configuration List

kubectl explain deployment.metadata

kubectl get service nginx -o yaml
kubectl explain service.metadata
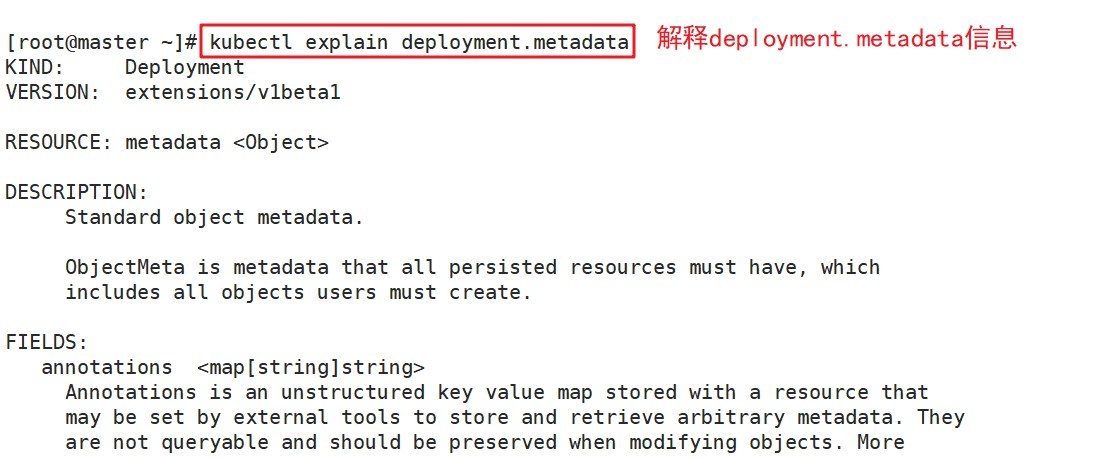
service is viewed the same way, omit the diagram
//Modify the Resource Configuration List and apply it
Offline modifications:
Modify the yaml file and make it valid with the kubectl apply -f xxx.yaml file
Note: When apply does not work, use delete to clear the resource before apply creates it
kubectl get service nginx -o yaml > nginx-svc.yaml
vim nginx-svc.yaml
#Modify port: 8080
kubectl delete -f nginx-svc.yaml
kubectl apply -f nginx-svc.yaml
kubectl get svc

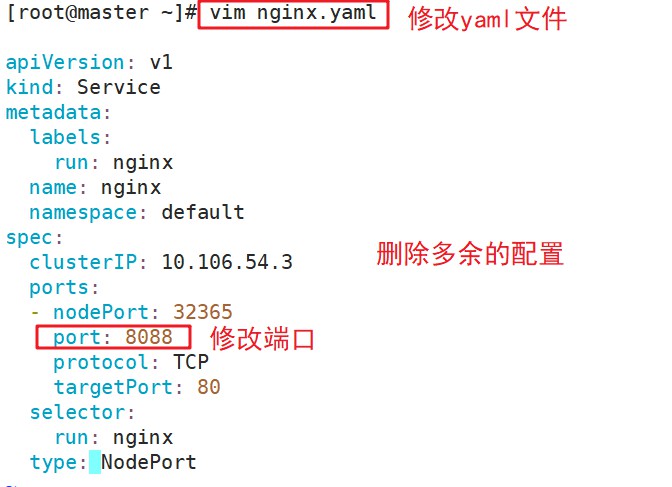


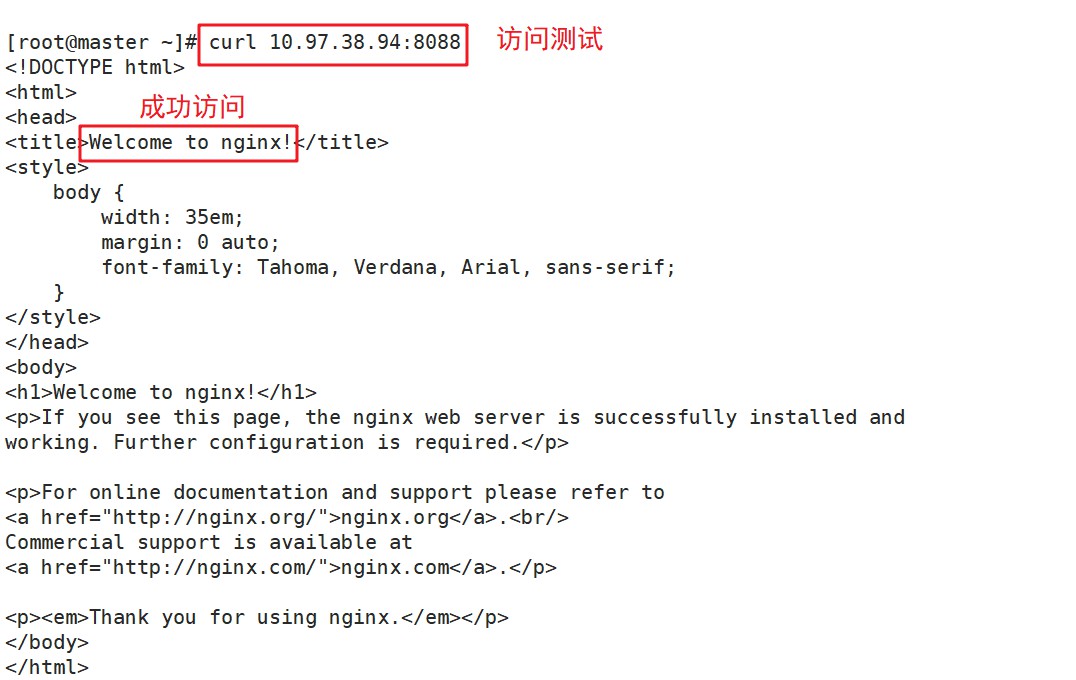
Online modifications:
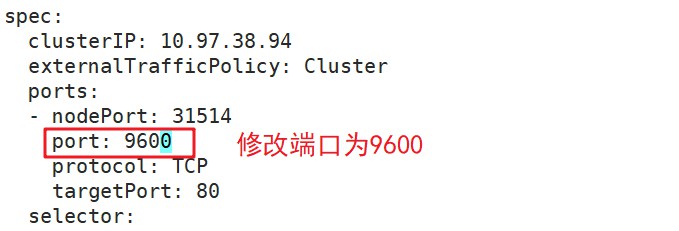
Use kubectl edit service nginx directly
Edit the resource configuration list online and save the exit to take effect immediately (e.g. port:888)
PS: This modification will not modify the contents of the yaml file


//Delete Resource Configuration List
 Statement Delete:

kubectl delete service nginx

Declarative Delete:

kubectl delete -f nginx-svc.yaml