preface
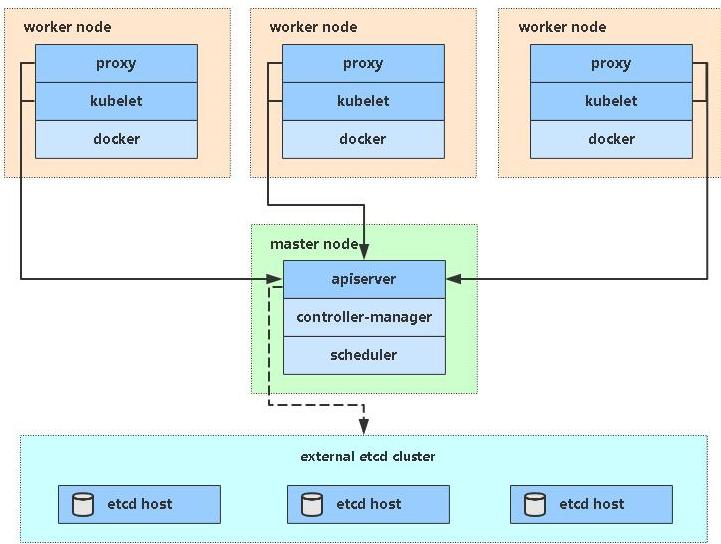
Kubedm is a K8s deployment tool that provides kubedm init and kubedm join for rapid deployment
Deploy the Kubernetes cluster.
1, Introduction to kubedm deployment mode
kubeadm is a tool launched by the official community for rapid deployment of kubernetes clusters. This tool can
Deploy a kubernetes cluster in two instructions:
- First, create a Master node kubedm init
- Second, add the Node node to the current cluster $kubedm join < IP and port of the master Node >
2, Installation requirements
Before you start, you need to meet the following conditions to deploy Kubernetes cluster machines:
- One or more machines, operating system centos7 x-86_ x64
- Hardware configuration: 2GB or more RAM, 2 CPUs or more CPUs, hard disk 30GB or more
- Network interworking between all machines in the cluster
- You can access the Internet. You need to pull the image
- Disable swap partition
3, Ultimate goal
(1) Install Docker and kubedm on all nodes
(2) Deploy Kubernetes Master
(3) Deploy container network plug-in
(4) Deploy the Kubernetes Node and add the node to the Kubernetes cluster
(5) Deploy the Dashboard Web page to visually view Kubernetes resources
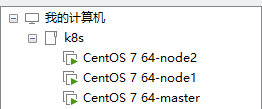
4, Prepare environment
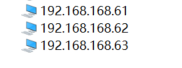
Role IP
centos7-master 192.168.168.61
centos7-node1 192.168.168.62
centos7-node2 192.168.168.63
5, System initialization
1. Turn off the firewall
$ systemctl stop firewalld((permanently closed)
$ systemctl disable firewalld((temporarily closed)
Commands for firewalls
- Open firewall
systemctl start firewalld.service #Start firewall (effective immediately)
systemctl enable firewalld.service #firewall boot
- View the status of the firewall
firewall-cmd --state
2. Close selinux
$ sed -i 's/enforcing/disabled/' /etc/selinux/config # permanent
$ setenforce 0 # temporary
Method 2:
vi /etc/selinux/config
Change the status of SELINUX to disabled, then restart and reboot
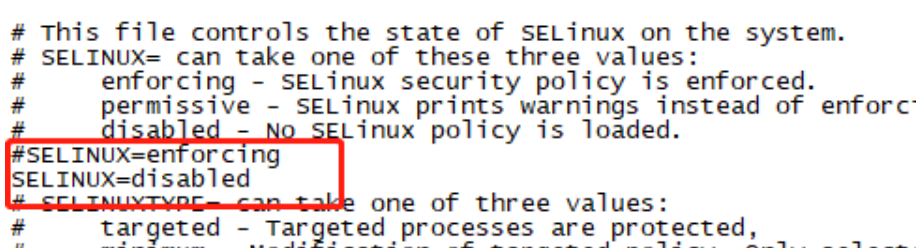
Note:
1.selinux is a component used to enhance security. It is very complex and is generally disabled directly
2. Close selinux to allow the container to access the file system of the host
3. Close swap
$ swapoff -a # temporary
$ vim /etc/fstab # permanent
"/ dev / mapper / CentOS swap" in the comment


Note:
1.swap is equivalent to "virtual memory". When the physical memory is insufficient, take out part of the hard disk space and use it for SWAP partition (virtual memory), so as to solve the problem of insufficient memory capacity.
2. After version 1.8, kubelet requires that swap must be closed
3. The free - M command can check the space size of the swap area. After commenting, we use this command to find that swap in the swap area has not been closed because it needs to be restarted to take effect
4. Configure host name
$ hostnamectl set-hostname <hostname>
Note: if this step is missing, an error will be reported when kubedm join is executed later, prompting that the hostname of all other machines cannot be the same for nodes with the same name. The work node can write node01 and node02
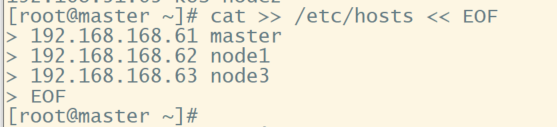
5. Add hosts in the master
$ cat >> /etc/hosts << EOF
192.168.168.61 master
192.168.168.62 node1
192.168.168.63 node2
EOF
Note: only execute in master
6. Deliver the bridged IPv4 traffic to the iptables chain
$ cat > /etc/sysctl.d/k8s.conf << EOF
net.bridge.bridge-nf-call-ip6tables = 1
net.bridge.bridge-nf-call-iptables = 1
EOF
$ sysctl --system # take effect
Take master as an example.... node1 and node2 perform the same operation
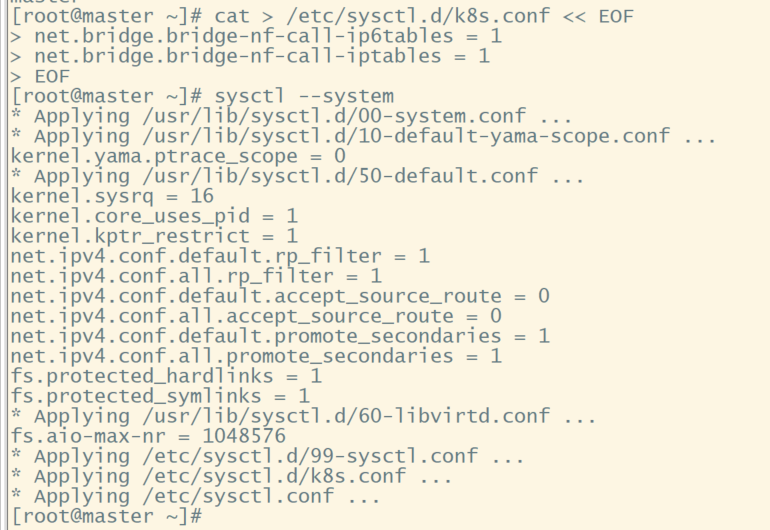
Note: k8s this network needs to set the kernel parameter bridge NF call iptables = 1. Without this, an error will be reported when adding a network later.
7. Time synchronization
$ yum install ntpdate -y
$ ntpdate time.windows.com
This command is required on all three machines.

6, Install docker / kubedm / kubelet on all nodes
By default, the CRI (container runtime) of Kubernetes is Docker, so Docker is installed first.
1. Install Docker
Refer to the previous docker installation tutorial
$ wget https://mirrors.aliyun.com/docker-ce/linux/centos/docker-ce.repo -0 /etc/yum.repos.d/docker-ce.repo
$ yum -y install docker-ce-18.06.1.ce-3.el7
$ systemctl enable docker && systemctl start docker
$ docker --version
2. Add alicloud YUM software source
Set warehouse address
# cat > /etc/docker/daemon.json << EOF
{
"registry-mirrors": ["https://b9pmyelo.mirror.aliyuncs.com"]
}
EOF
Add yum source
$ cat > /etc/yum.repos.d/kubernetes.repo << EOF
[kubernetes]
name=Kubernetes
baseurl=https://mirrors.aliyun.com/kubernetes/yum/repos/kubernetes-el7-x86_64
enabled=1
gpgcheck=0
repo_gpgcheck=0
gpgkey=https://mirrors.aliyun.com/kubernetes/yum/doc/yum-key.gpg
https://mirrors.aliyun.com/kubernetes/yum/doc/rpm-package-key.gpg
EOF
3. Install kubedm, kubelet and kubectl
$ yum install -y kubelet-1.17.0 kubeadm-1.17.0 kubectl-1.17.0
$ systemctl enable kubelet
Note: Yum install kubectl kubelet kubedm will install the latest version of 1.19.4 by default. However, if it is inconsistent with the version of kubedm init -- kubernetes version = 1.18.0, an error will be reported. Therefore, I specify the version after yum
7, Deploy Kubernetes Master
1. Execute at 192.168.168.61 (Master)
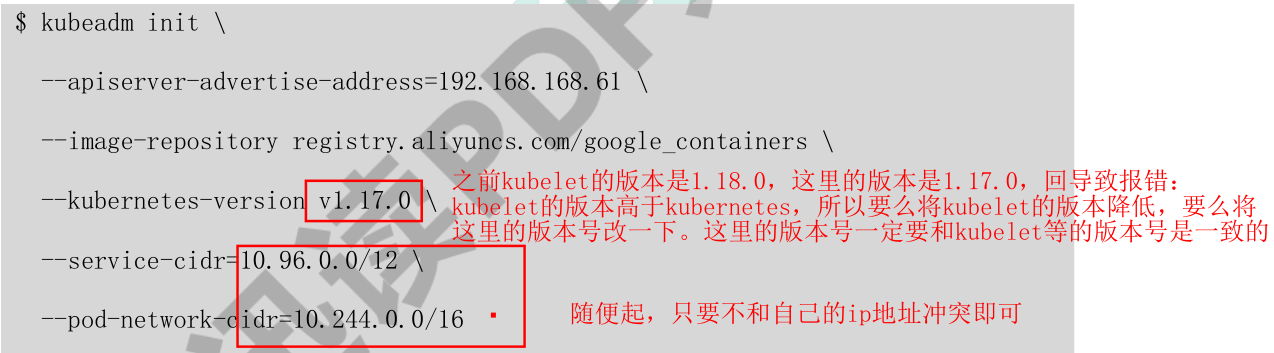
$ kubeadm init \
--apiserver-advertise-address=192.168.168.61 \
--image-repository registry.aliyuncs.com/google_containers \
--kubernetes-version v1.17.0 \
--service-cidr=10.96.0.0/12 \
--pod-network-cidr=10.244.0.0/16
Due to the default pull image address k8s gcr. IO cannot be accessed in China. Specify the address of Alibaba cloud image warehouse here.

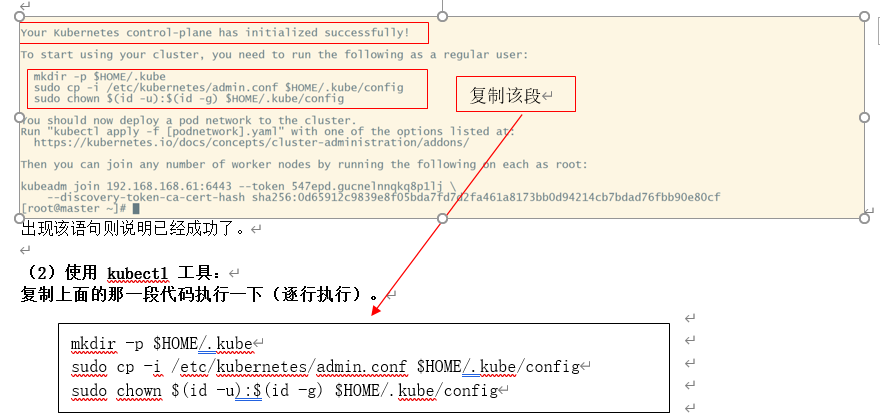

2. Use kubectl tool:
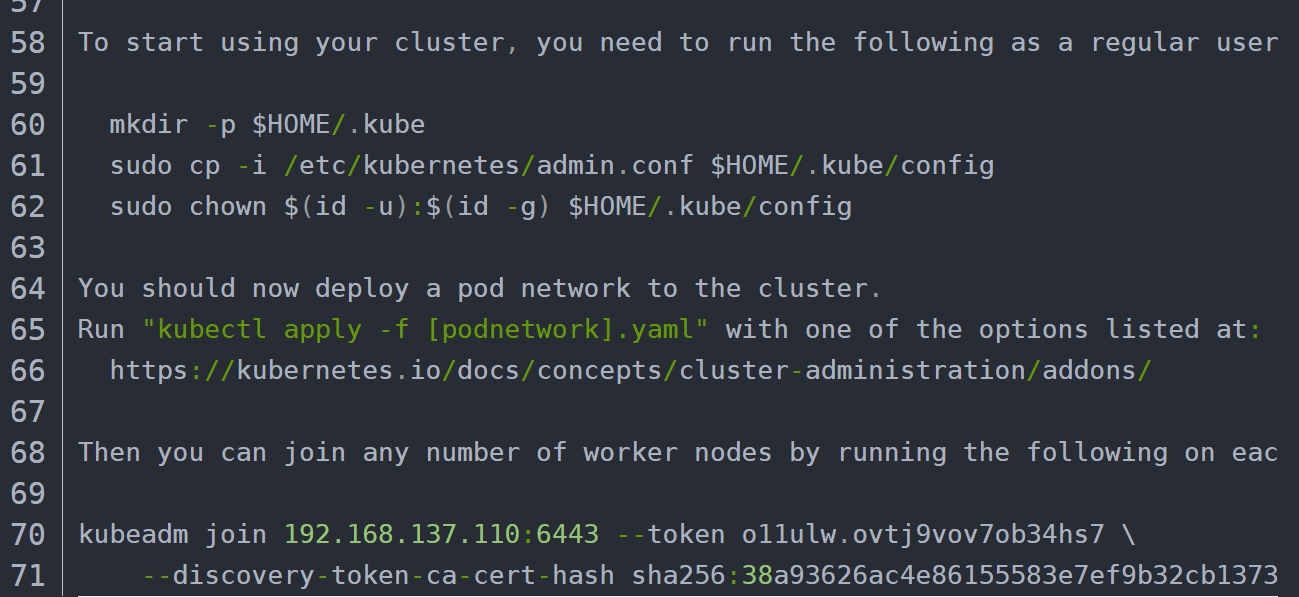
mkdir -p $HOME/.kube
sudo cp -i /etc/kubernetes/admin.conf $HOME/.kube/config
sudo chown $(id -u):$(id -g) $HOME/.kube/config
$ kubectl get nodes
8, Join Kubernetes Node
1. Execute at 192.168.31.62/63 (Node)
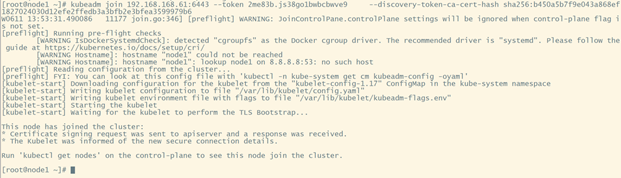
Add a new node to the cluster and execute the kubedm join command output in kubedm init (the one executed in the master node):
$  kubeadm join 192.168.168.61:6443 --token 547epd.gucnelnnqkq8p1lj \
    --discovery-token-ca-cert-hash sha256:0d65912c9839e8f05bda7fd7d2fa461a8173bb0d94214cb7bdad76fbb90e80cf
This step is similar to the master node. Kubedm will also help us install some necessary images

Error: because this statement cannot be executed in the master node, it should be added to the node node. Take node1 as an example.
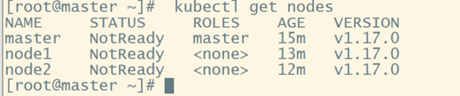
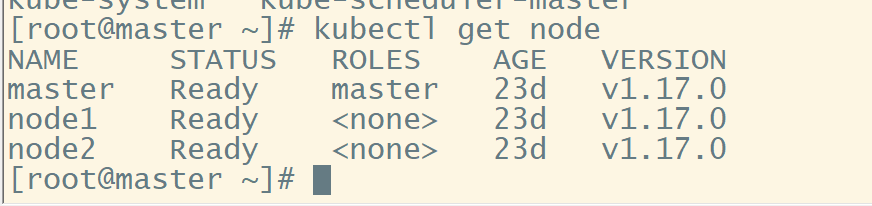
At this time, execute the [kubectl get nodes] command in the master node, as shown in the following figure, indicating that the node has been added.
Record the following kubedm join, which needs to be executed when other nodes join the Kubernetes cluster.
$  kubeadm join 192.168.168.61:6443 --token 547epd.gucnelnnqkq8p1lj \
    --discovery-token-ca-cert-hash sha256:0d65912c9839e8f05bda7fd7d2fa461a8173bb0d94214cb7bdad76fbb90e80cf
Create kubectl
mkdir -p $HOME/.kube
sudo cp -i /etc/kubernetes/admin.conf $HOME/.kube/config
sudo chown $(id -u):$(id -g) $HOME/.kube/config
$ kubectl get nodes
Note:
1. Do not configure $home / If Kube / config is used, the kubectl command is unavailable,
2. The node node is written in a different way. This behavior of the node: sudo CP - I / etc / kubernetes / kubelet conf.conf $HOME/. kube/config
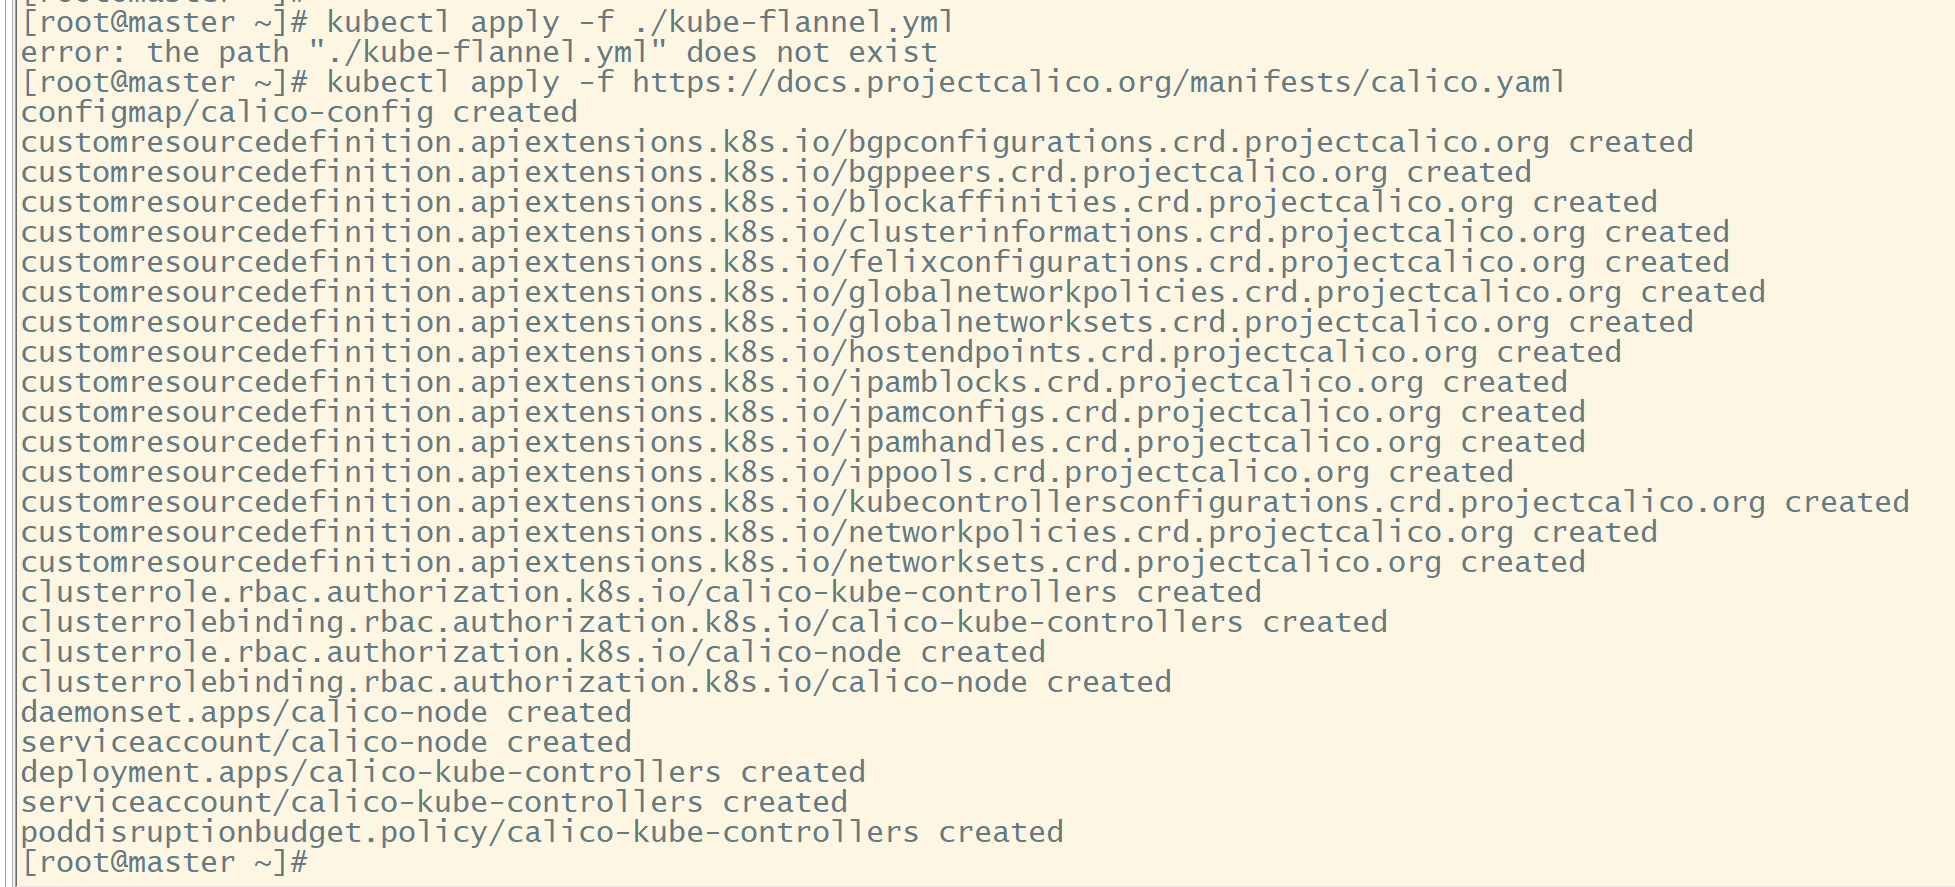
9, Install calico network (master node)
[root@master01 ~]# kubectl apply -f https://docs.projectcalico.org/manifests/calico.yaml
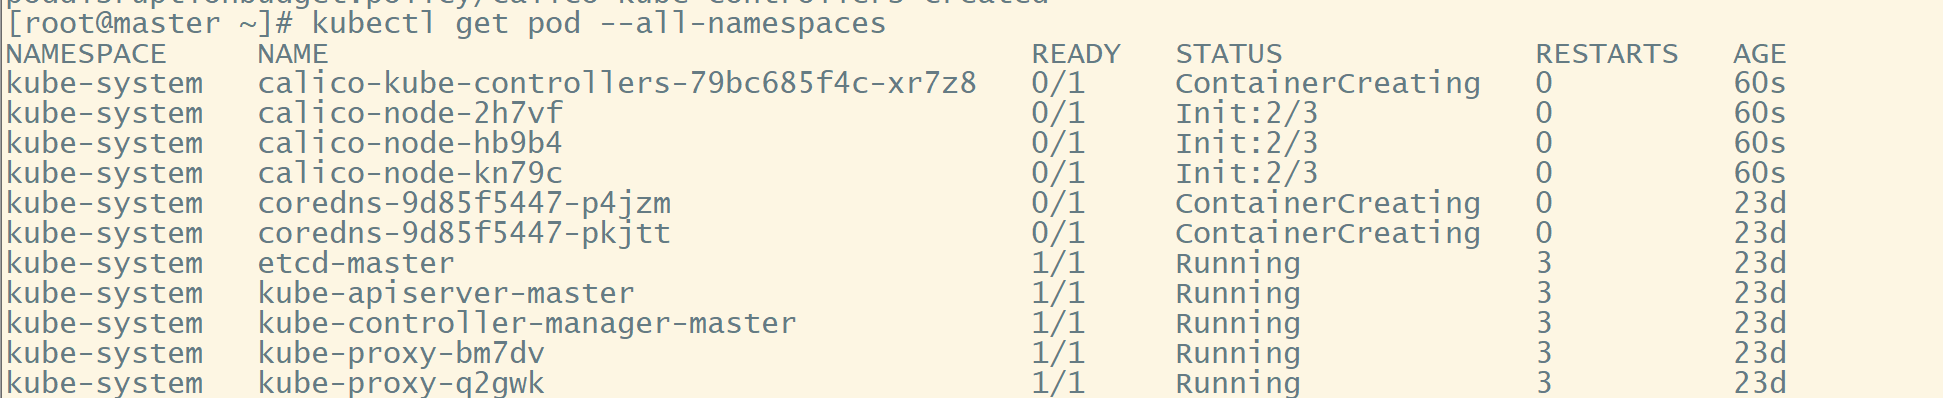
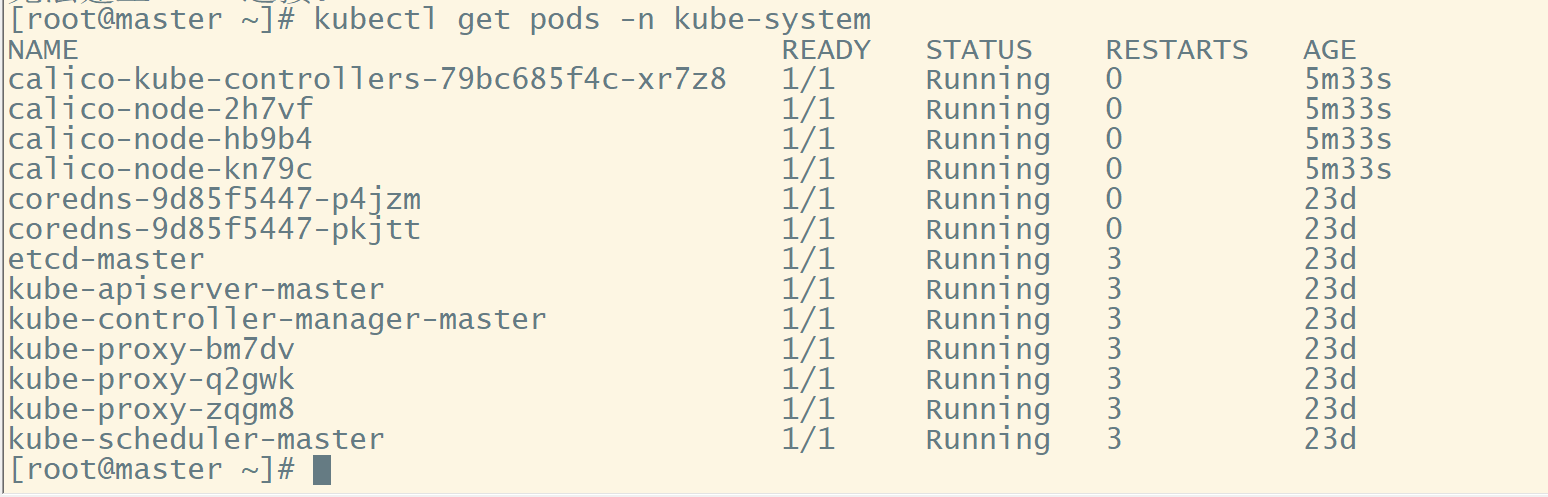
After installing calico network, enter kubectl get node later, and you can see that the STATUS of the node changes from NotReady to Ready
After installation, you can view the status through the following commands
10, Test kubernetes cluster
1 create a pod in the Kubernetes cluster and verify whether it works normally:
$ kubectl create deployment nginx --image=nginx

2. Check the installation status until the container enters Running
kubectl get pod

3. External exposure services
$ kubectl expose deployment nginx --port=80 --type=NodePort

View status
$ kubectl get pod,svc

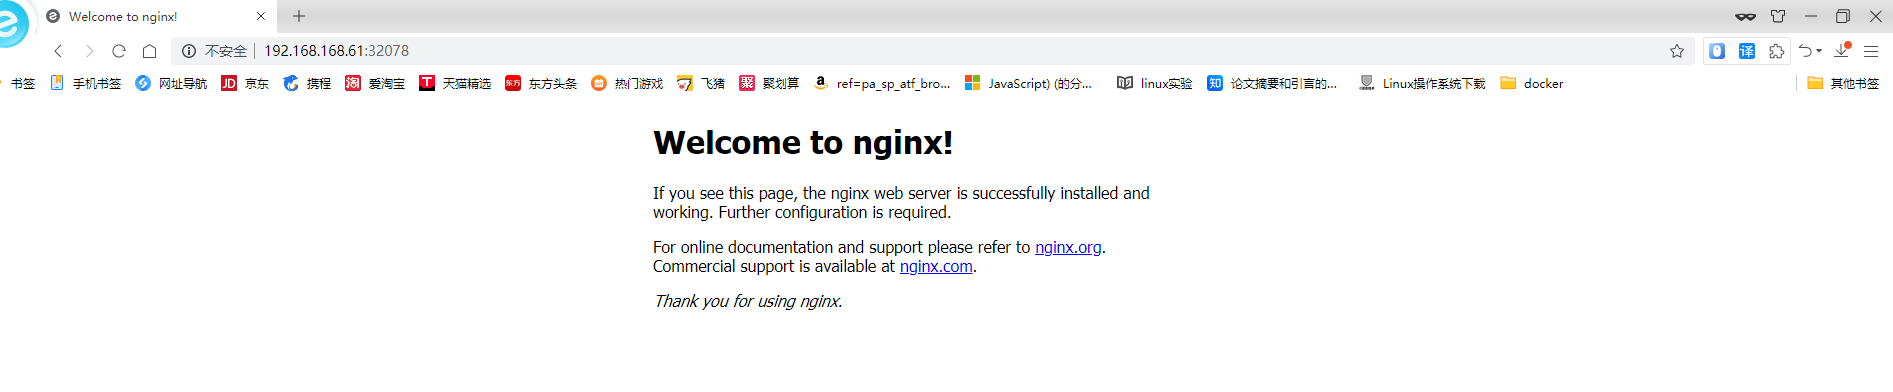
Access test: access nginx service through Ip + exposed port of any Node
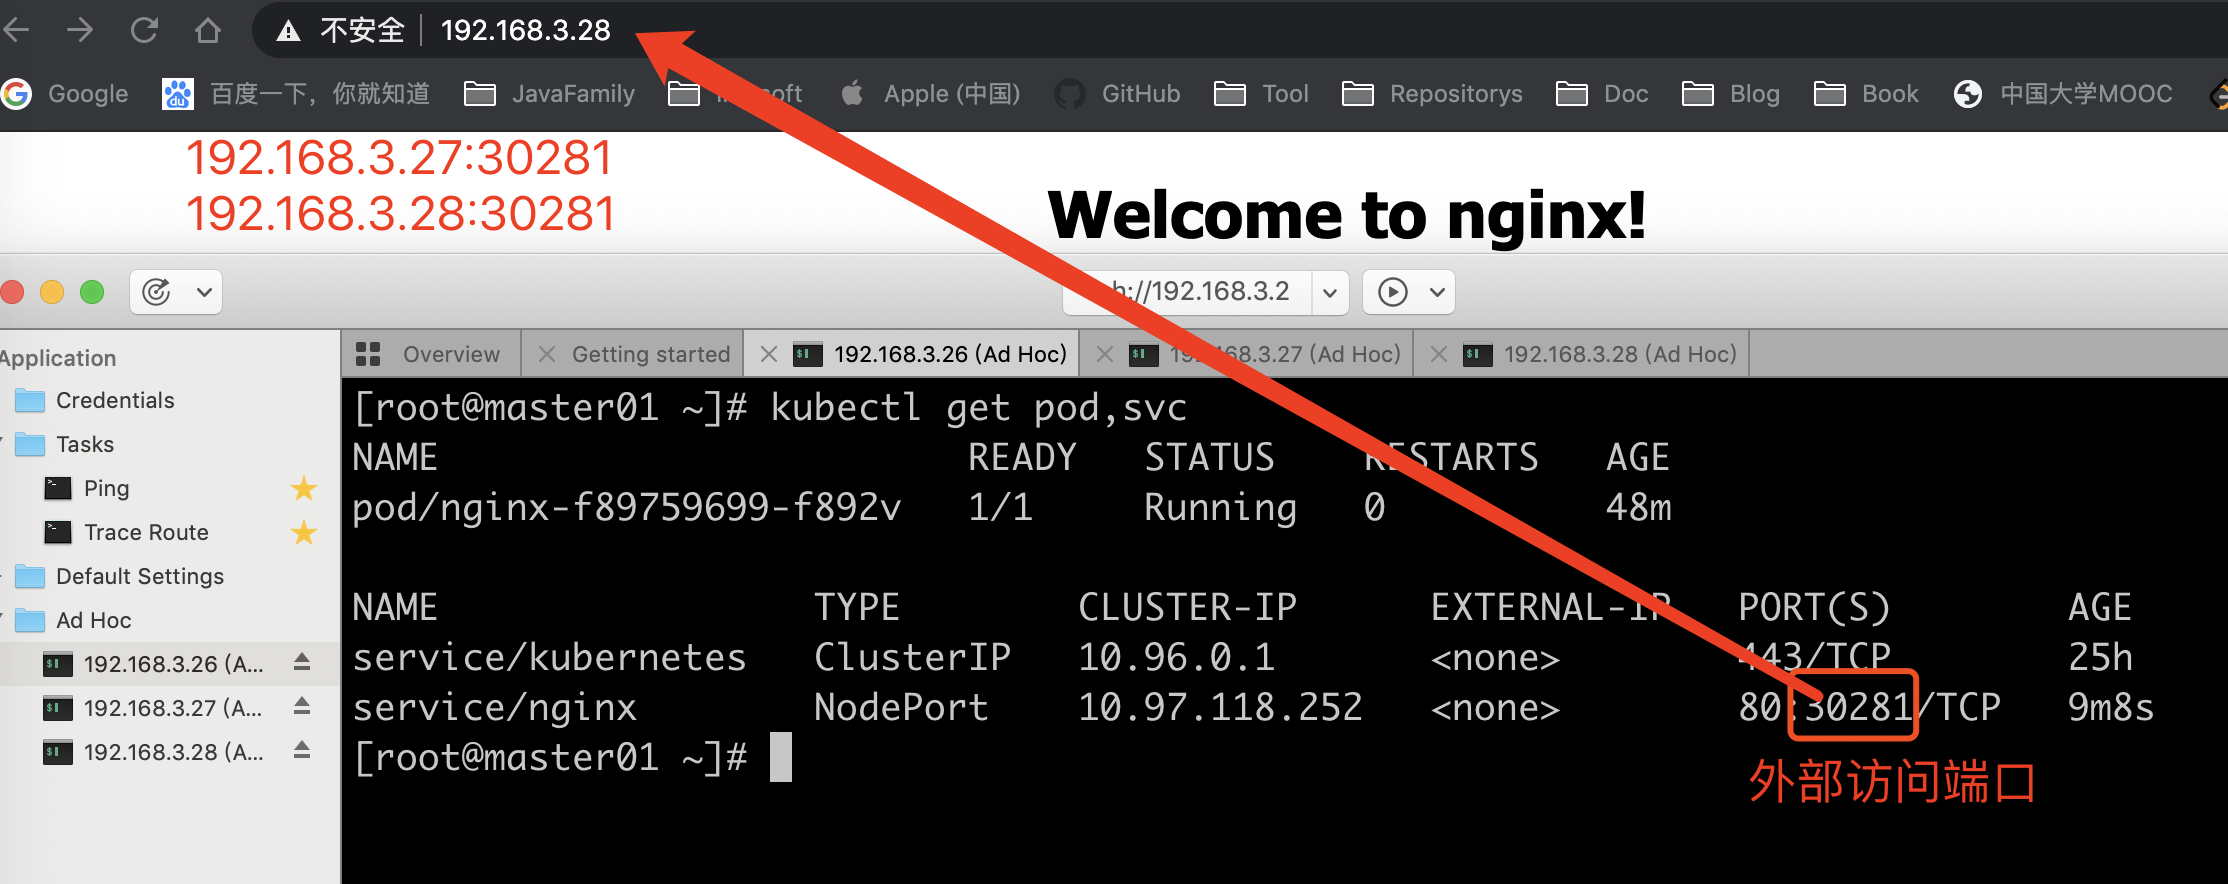
Access address: http://NodeIP:Port