1, KubeSphere - set up Redis cluster
In the previous article, we introduced how to use KubeSphere to create mysql master-slave replication structure in k8s. In this article, we use KubeSphere to build Redis cluster in k8s. The following is the address of the previous article:
https://blog.csdn.net/qq_43692950/article/details/122819844
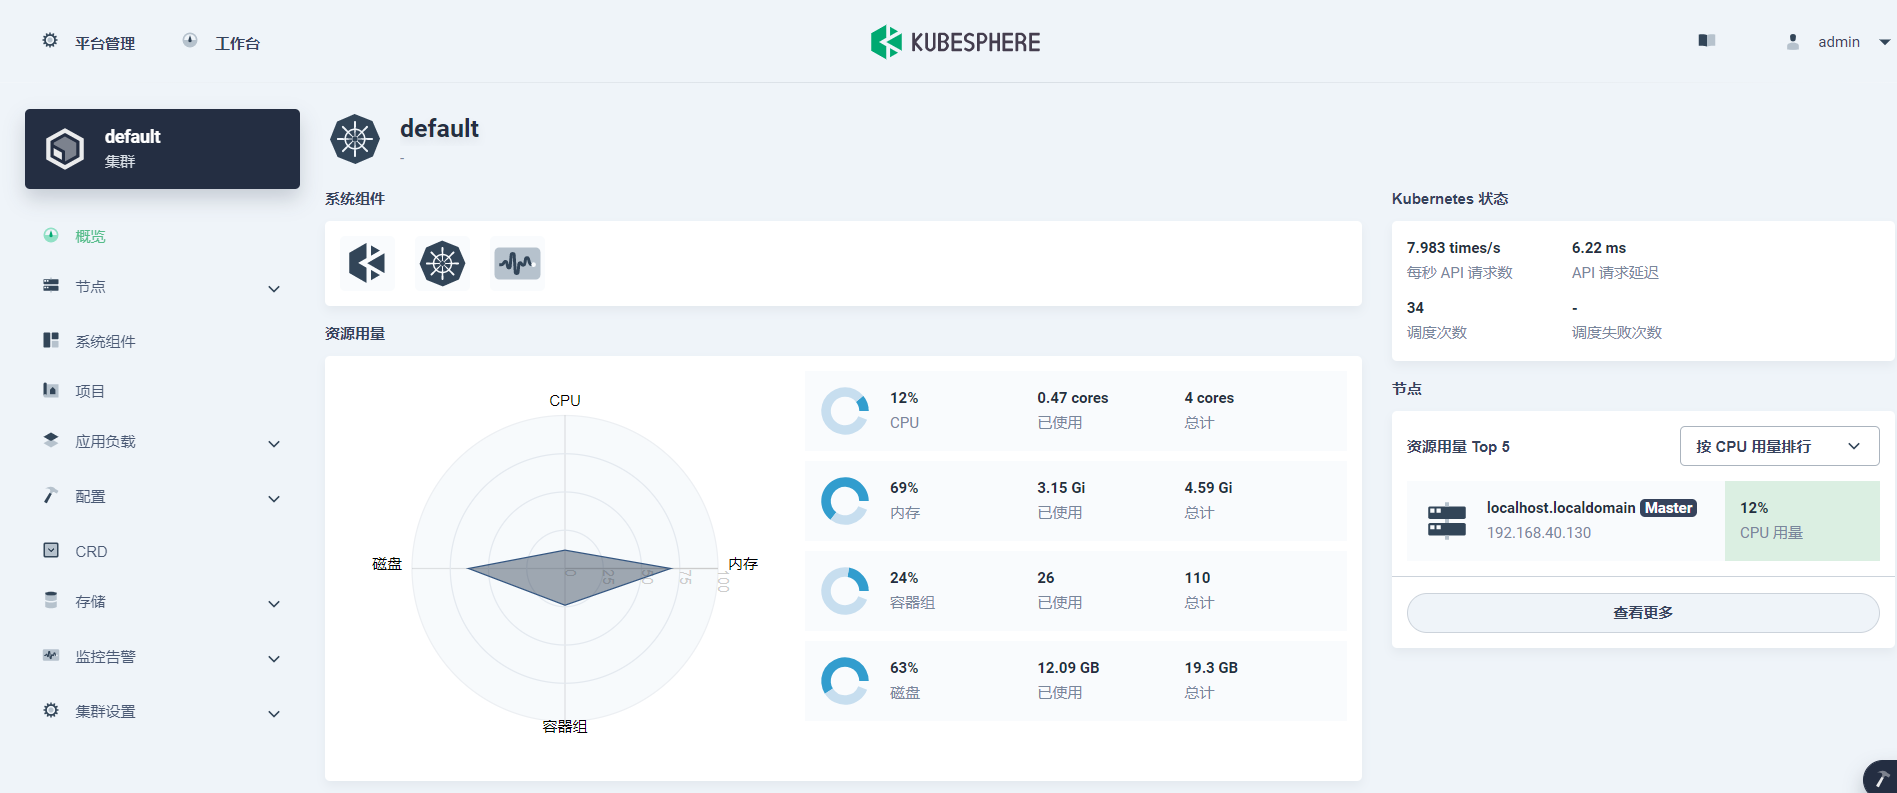
Before the experiment, please ensure that the k8s and kubesphere environments have been installed:
2, Create redis Conf configuration dictionary

Name the configuration:
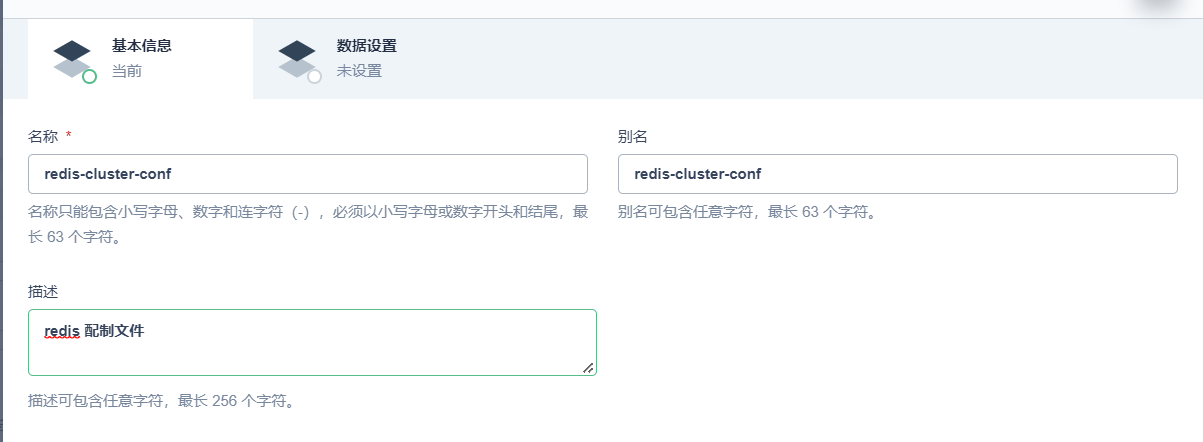
Add data. The key is redis Conf, write the following value:
cluster-enabled yes
cluster-config-file nodes.conf
cluster-node-timeout 5000
cluster-require-full-coverage no
cluster-migration-barrier 1
appendonly yes


3, Create redis service
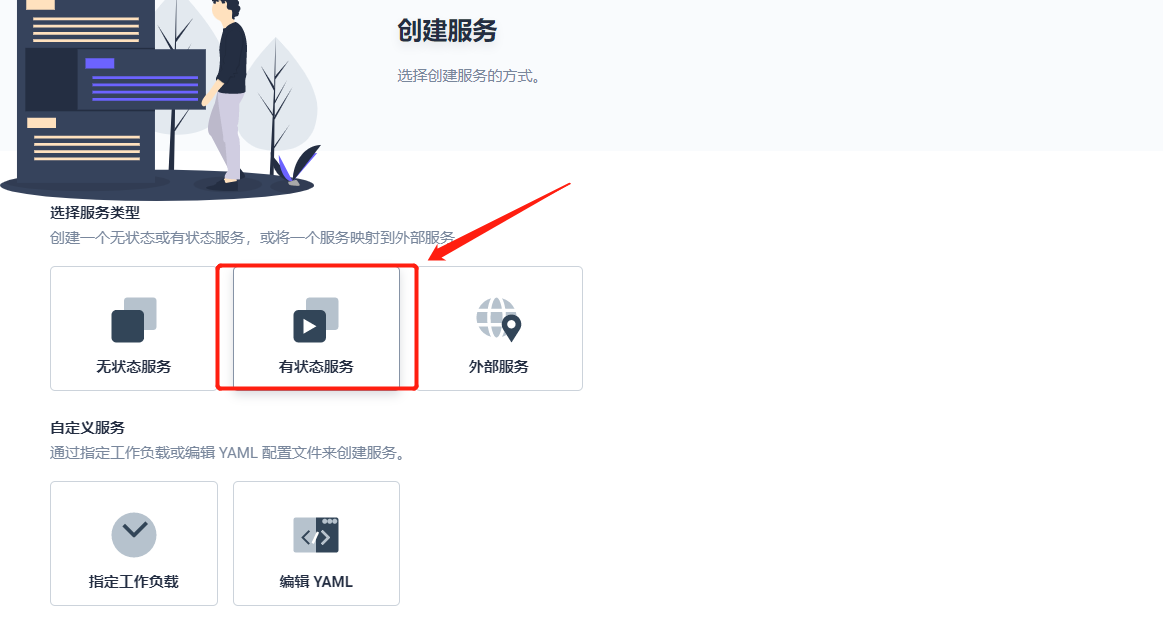
Click create and select stateful service:
Also create a name for the service:
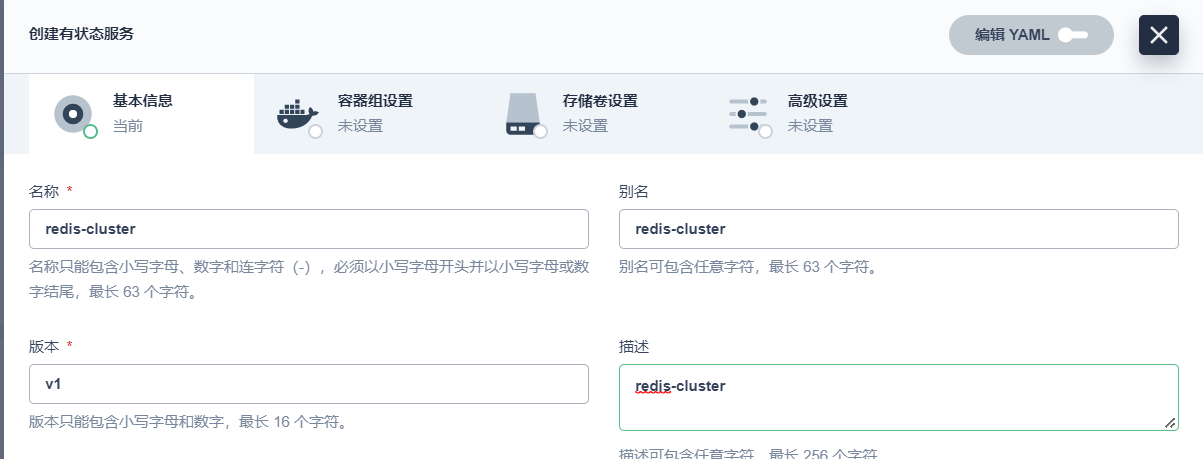
We choose 6 containers to build a three master and three slave structure:

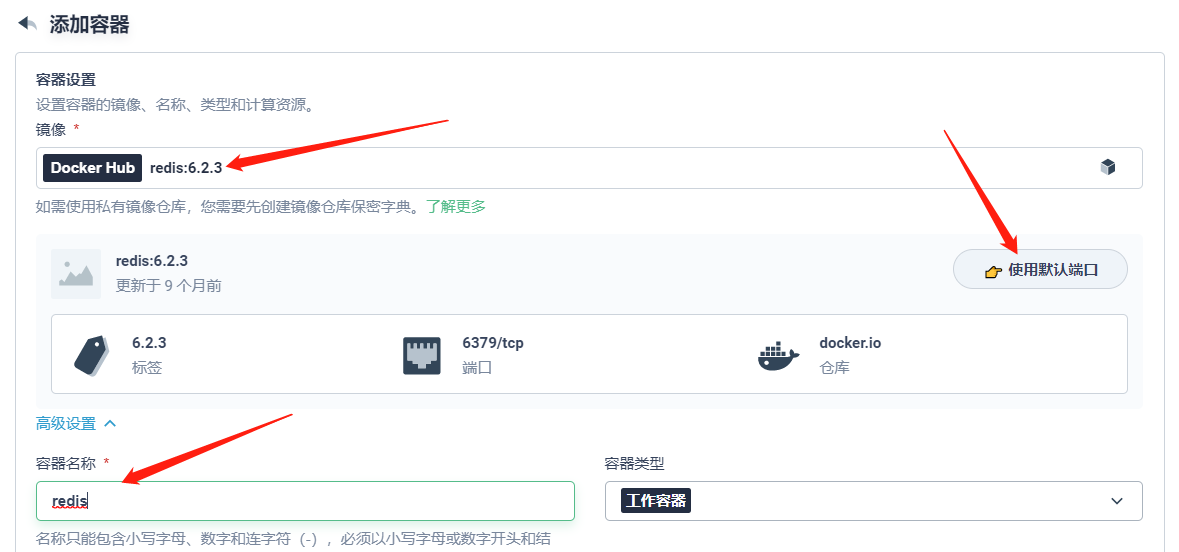
I choose redis: version 6.2.3 as the image, use the default port, and set the resource limit reasonably according to the size of my service:
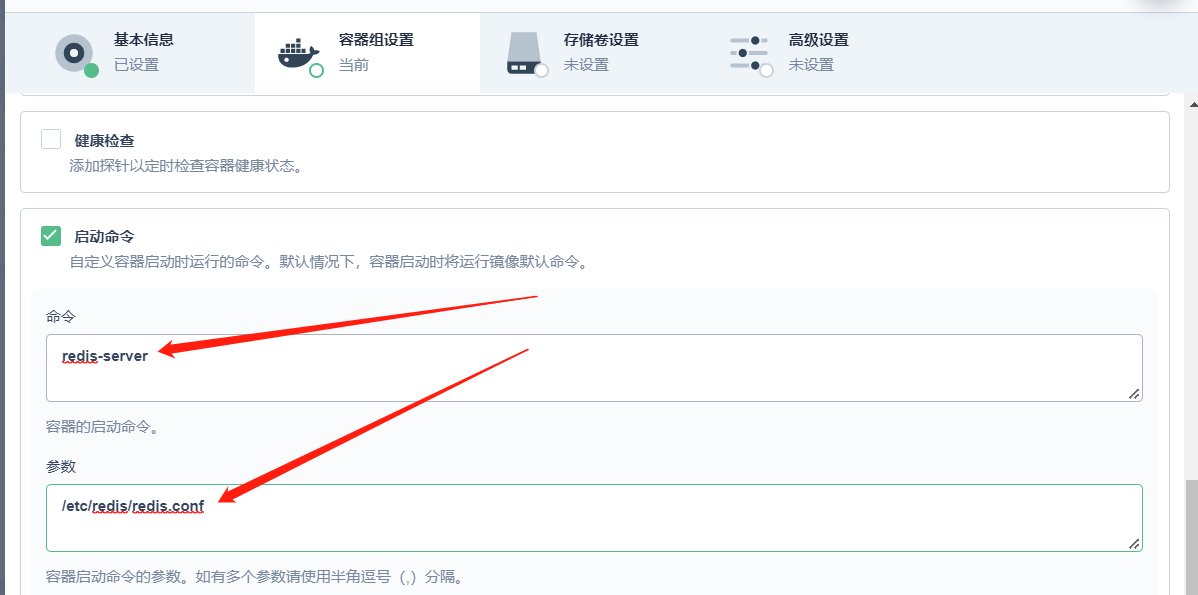
Also, this is the start command of redis: redis server / etc / redis / redis conf
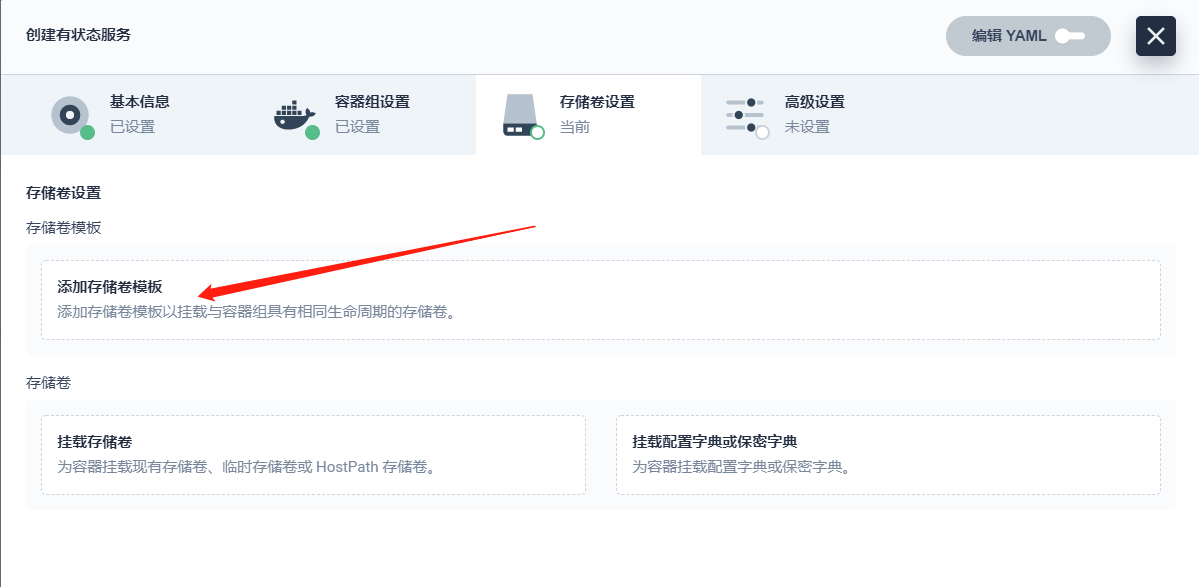
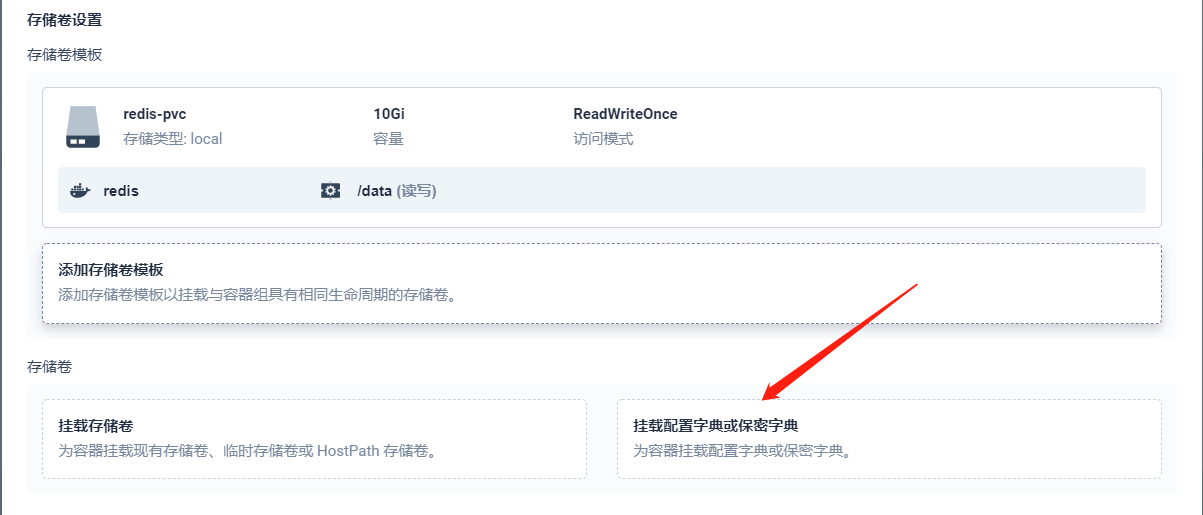
After clicking next, here we will select the storage volume template to make different containers correspond to different storage volumes:
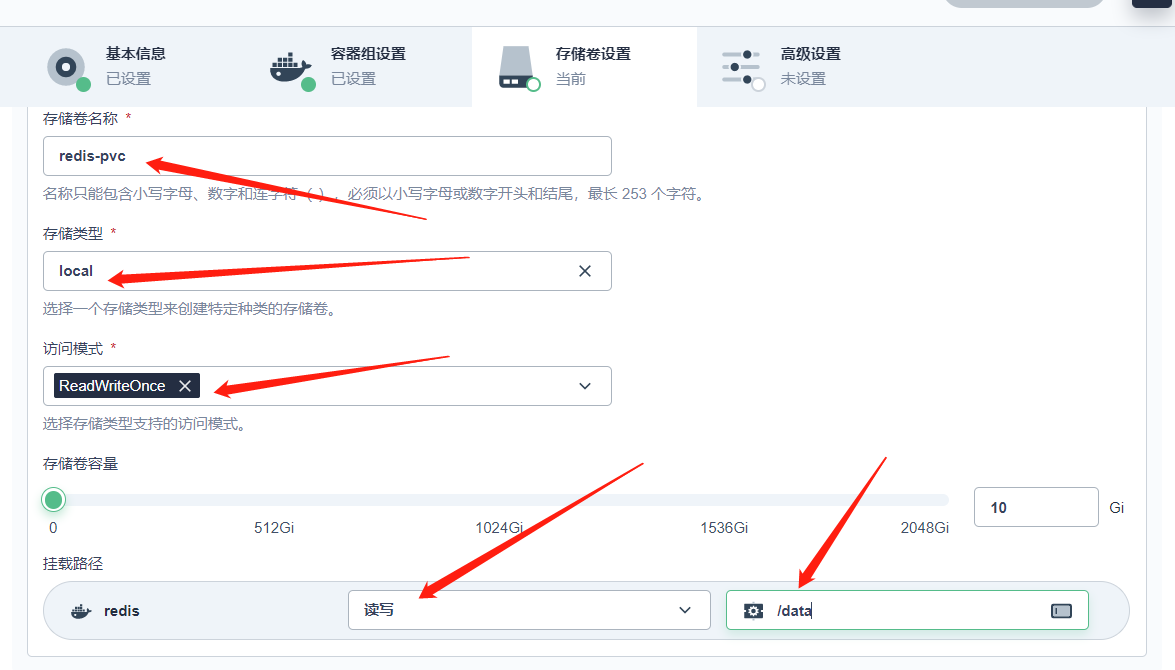
Select the storage type, access mode, and container size, and mount it to / data of redis:
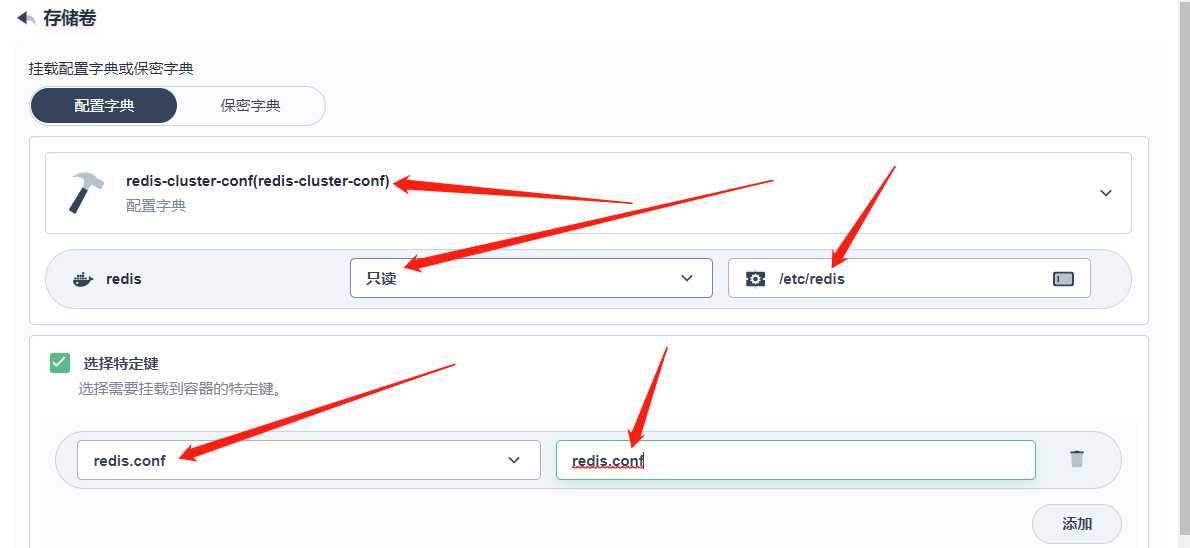
Then select mount configuration to mount redis conf :
Select the configuration dictionary created above and mount it under / etc/redis:
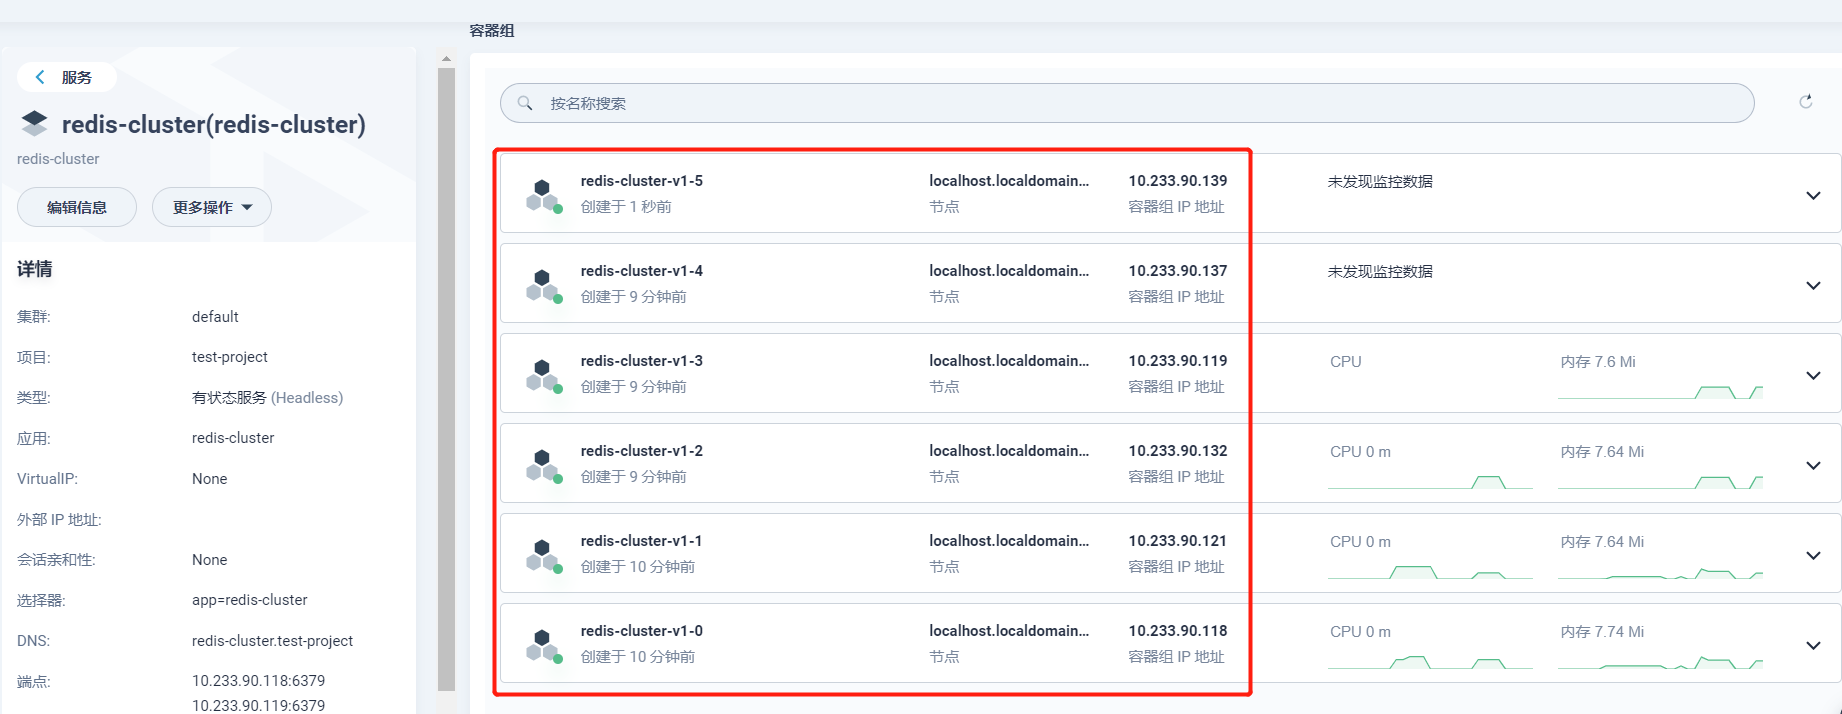
Then next, create, click the service to enter the details, and you can see the created container:
Since we all use the stateful method and Headless is used by default, we can use the dns domain name for each redis access. The format is:
(podname).(headless server name).(namespace).svc.cluster.local
Here we pass: container name DNS of the service svc. cluster. local :
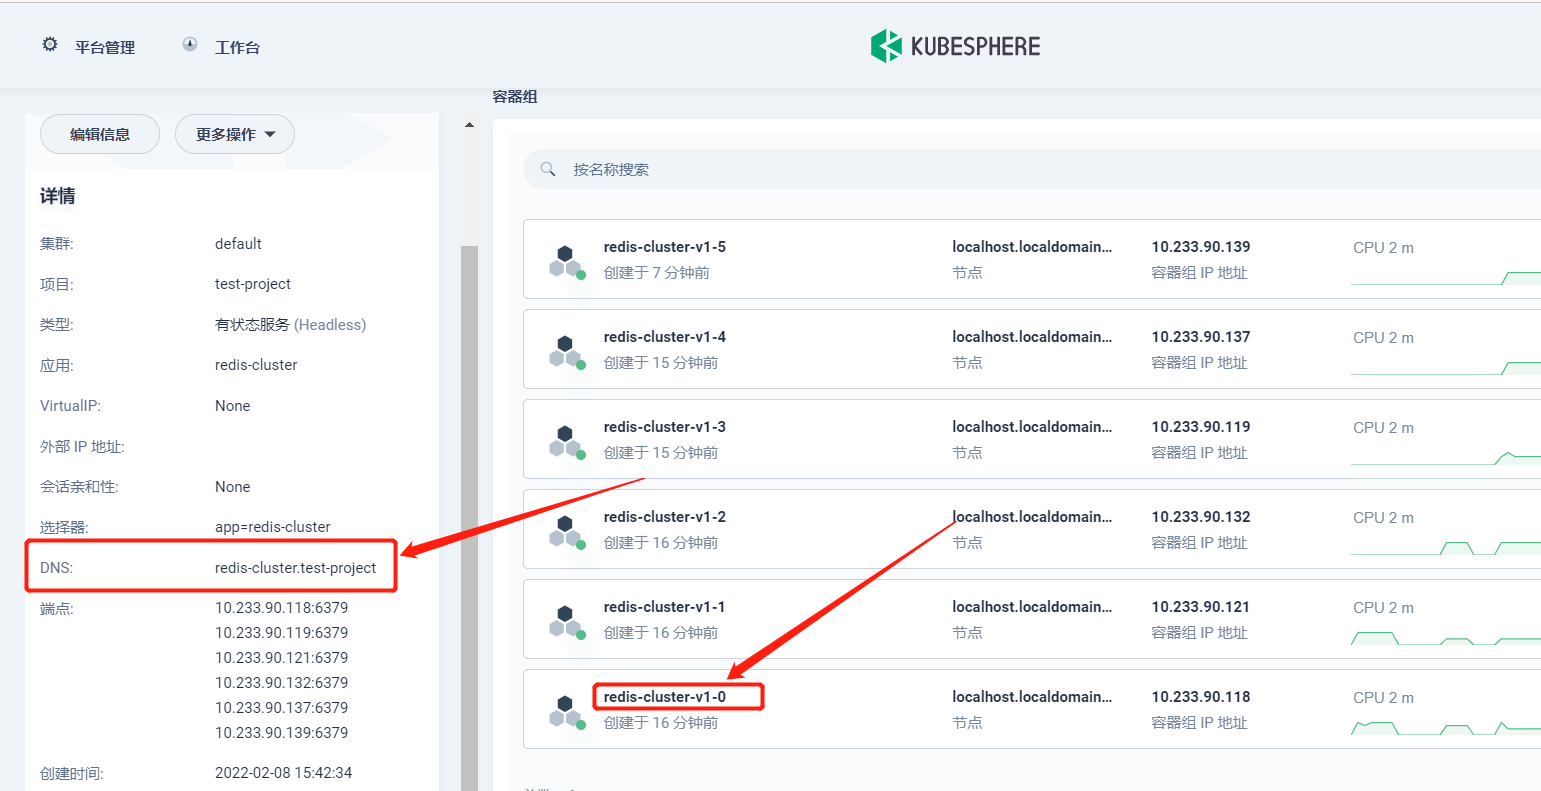
Therefore, if you visit redis of redis-cluster-v1-0, you can directly visit redis-cluster-v1-0 redis-cluster. test-project. svc. cluster. Local: 6379. For example, enter the redis-cluster-v1-2 terminal and link to the above address:

Therefore, we can initialize the redis cluster through the domain name. Enter the terminal of a redis node and enter the following command to initialize the cluster:
redis-cli --cluster create redis-cluster-v1-0.redis-cluster.test-project.svc.cluster.local:6379 redis-cluster-v1-0.redis-cluster.test-project.svc.cluster.local:6379 redis-cluster-v1-0.redis-cluster.test-project.svc.cluster.local:6379 redis-cluster-v1-0.redis-cluster.test-project.svc.cluster.local:6379 redis-cluster-v1-0.redis-cluster.test-project.svc.cluster.local:6379 redis-cluster-v1-0.redis-cluster.test-project.svc.cluster.local:6379 --cluster-replicas 1
Enter yes below to use this fragmentation scheme:
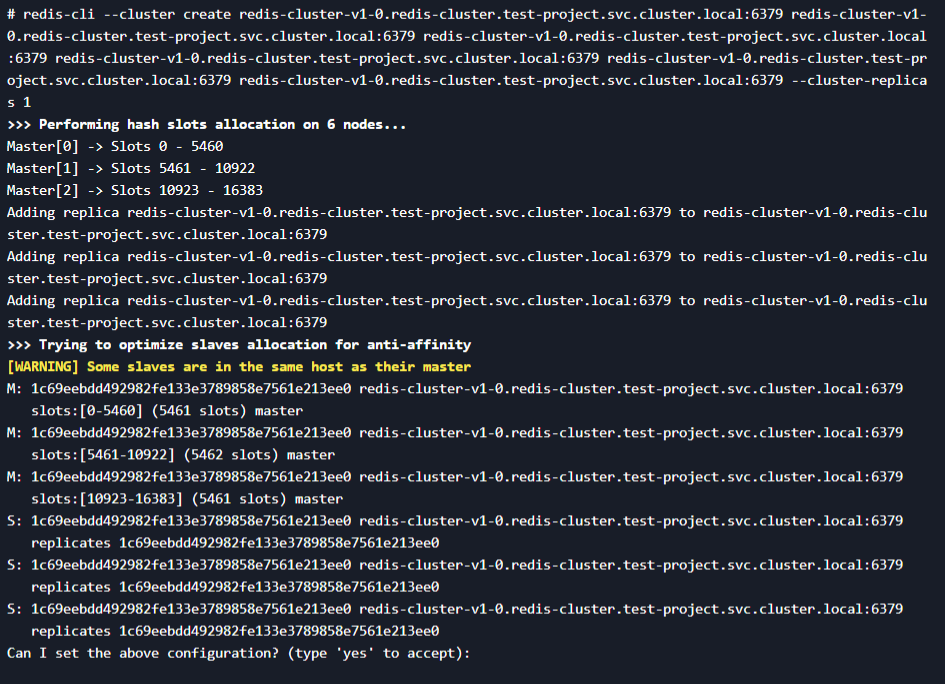
At this point, you will find an error:
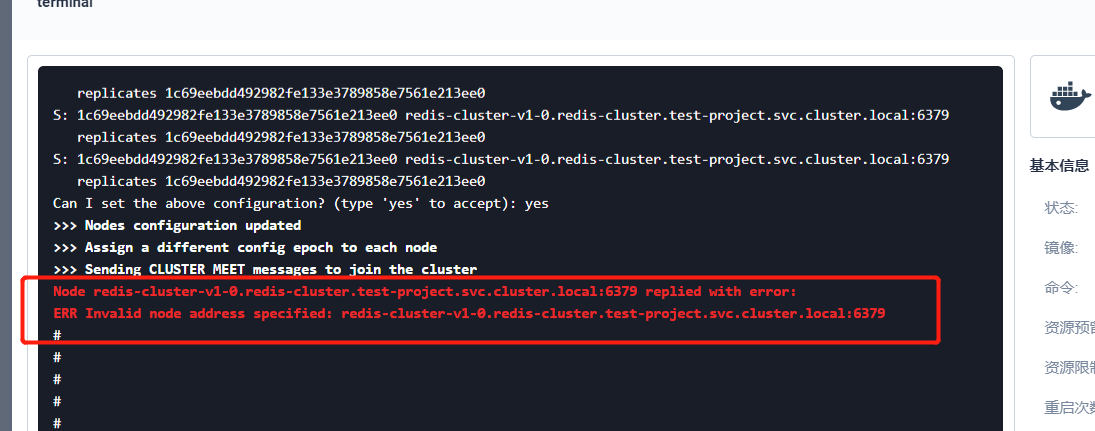
This is because redis does not support domain names very well. You can use ip + port. However, in K8S, the container will start automatically when it goes down, and the ip may change after startup. Therefore, it is not advisable to use ip + port to initialize the cluster in K8S. What is the method? At this time, we suggest that some of the new tools of redis-tris can be installed together with redis-tris for cluster management. However, we do not recommend that we use a new tool of redis-tris for cluster management.
4, Create Ubuntu
Someone has packaged the image of redis cube. We can directly use it to create a service selection. In yml mode, enter the following contents:
apiVersion: apps/v1
kind: Deployment
metadata:
  labels:
    app: redis-cluster-tools
  name: redis-cluster-tools
spec:
  replicas: 1
  selector:
    matchLabels:
      app: redis-cluster-tools
  template:
    metadata:
      labels:
        app: redis-cluster-tools
      name: pos-redis
    spec:
     containers:
     - name: pos-redis
       image: sunnywang/redis-tools-ubuntu:v0.5.1
       imagePullPolicy: IfNotPresent
       args:
       - /bin/bash
       - -c
       - sleep 3600
After clicking Create, you can see the created container in the container group. Click terminal to enter the container and initialize the master node:
redis-trib.py create `dig +short redis-cluster-v1-0.redis-cluster.test-project.svc.cluster.local`:6379 `dig +short redis-cluster-v1-1.redis-cluster.test-project.svc.cluster.local`:6379 `dig +short redis-cluster-v1-2.redis-cluster.test-project.svc.cluster.local`:6379
Then add a replica node for the master:
redis-trib.py replicate --master-addr `dig +short redis-cluster-v1-0.redis-cluster.test-project.svc.cluster.local`:6379 --slave-addr `dig +short redis-cluster-v1-3.redis-cluster.test-project.svc.cluster.local`:6379
redis-trib.py replicate \ --master-addr `dig +short redis-cluster-v1-1.redis-cluster.test-project.svc.cluster.local`:6379 --slave-addr `dig +short redis-cluster-v1-4.redis-cluster.test-project.svc.cluster.local`:6379
redis-trib.py replicate --master-addr `dig +short redis-cluster-v1-2.redis-cluster.test-project.svc.cluster.local`:6379 --slave-addr `dig +short redis-cluster-v1-5.redis-cluster.test-project.svc.cluster.local`:6379