brief introduction
For the enterprise application architecture, it is certainly not limited to one server. According to my imagination: at least one server that deploys the back-end interface; one server that deploys the front-end page; one server that acts as a proxy; one server that loads the database, etc., which does not include load balancing for some applications, but now most enterprises use the cloud server Yes, the traditional computer rooms are used less. Because of the high cost, our company uses Alibaba cloud's Cloud server.
But a generous friend surnamed Xu can only sponsor one server for me. At this time, I thought of Docker. As long as I open several more containers, I can simulate multiple servers, corresponding to multiple IP S.
So this chapter first explains how to install Docker, and then 11 examples how to install and configure Nginx, Tomcat and MySQL in the Docker container. The original plan uses Oracle, but because the server configuration is too low, every time the Oracle container runs, it will cause server downtime, so it has to be changed to MySQL.
Considering that the Docker container will be initialized from the image every time it is restarted, the article will use a lot of mount, and the specific principle will be discussed in the last chapter.
Docker installation
1. Use uname-r to view the system kernel. Docker requires the kernel version of CentOS system to be higher than 3.10
[root@VM_60_202_centos ~]# uname -r
3.10.0-862.9.1.el7.x86_64
2. Be ready to update yum to the latest. No older Docker has been installed
[root@VM_60_202_centos ~]# yum update -- latest version of yum package
[root@VM_60_202_centos ~]# yum remove docker docker-client docker-client-latest docker-common docker-latest docker-latest-logrotate docker-logrotate docker-selinux docker-engine-selinux docker-engine docker.io
                                         --Delete old version Docker
3. Install the required software package. Yum util provides the function of Yum config manager. The other two are dependent on the device mapper driver
[root@VM_60_202_centos ~]# yum install -y yum-utils device-mapper-persistent-data lvm2
4. The latest version of Docker is divided into two versions, Docker Ce (Community Edition) and Docker EE (Enterprise Edition). CE version is free, if we study or general application, CE is enough. We install the Community Edition. The data source warehouse can be set as follows, and the official data source of Docker or Alibaba cloud data source can be selected:
[root@VM_60_202_centos ~]# yum-config-manager --add-repo https://download.docker.com/linux/centos/docker-ce.repo
--Add official data source

[root@VM_60_202_centos ~]# yum-config-manager --add-repo https://mirrors.aliyun.com/docker-ce/linux/centos/docker-ce.repo
--Add alicloud data source
5. Install Docker
[root@VM_60_202_centos ~]# yum list docker-ce --showduplicates | sort -r
--List what can be installed docker Edition
[root@VM_60_202_centos ~]# yum install docker-ce
--Download the latest version
[root@VM_60_202_centos ~]# yum install -y docker-ce-18.03.1.ce-1.el7.centos
--Install the specified version
6. Start Docker
[root@VM_60_202_centos ~]# systemctl start docker -- start
[root@VM_60_202_centos ~]# systemctl stop docker -- close
[root@VM_60_202_centos ~]# systemctl restart docker -- restart
7. Verify installation
[root@VM_60_202_centos ~]# docker --version -- view the installed docker version
[root@VM_60_202_centos ~]# docker run hello-world
Tomcat container
1, Find the Tomcat image from the data source. Usually download the official image of the highest stars.
[root@VM_60_202_centos ~]# docker search tomcat -- query the official image of tomcat
[root@VM_60_202_centos ~]# docker pull tomcat -- download the image named "tomcat"
[root@VM_60_202_centos ~]# docker images -- view all local images

2. Host creates mount directory and starts Tomcat container
[root@VM_60_202_centos ~]# mkdir -p /u01/tomcat/webapps/tomcat1
--Create directory/u01/tomcat/webapps/tomcat1,Used for mounting Tomcat Of

[root@VM_60_202_centos ~]# mkdir -p /u01/tomcat/webapps/tomcat2
--Create directory/u01/tomcat/webapps/tomcat2,Used for mounting Tomcat Of
--And separately/u01/tomcat/webapps/tomcat1 and/u01/tomcat/webapps/tomcat2 Place the prepared different war Bag (though it's all kerryNginxServlet.war,But the content is different)

[root@VM_60_202_centos ~]# docker run --name=my_tomcat1 -v /u01/tomcat/webapps/tomcat1:/usr/local/tomcat/webapps -p 8001:8080 -d tomcat
--Start a Tomcat Container, named my_tomcat1;Map port 8080 of the container to 8001 of the host
--Will host the/u01/tomcat/webapps/tomcat1 Directory mounted to container/usr/local/tomcat/webapps Catalog

[root@VM_60_202_centos ~]# docker run --name=my_tomcat2 -v /u01/tomcat/webapps/tomcat2:/usr/local/tomcat/webapps -p 8002:8080 -d tomcat
--Run one more Tomcat Containers, naming my_tomcat2,For load balancing
3. Verify Tomcat container
[root@VM_60_202_centos ~]# curl http://localhost:8001/kerryNginxServlet/servletA
<h2> hello I am Kerry!</h2><h1>This is the servlet test A!</h1>

[root@VM_60_202_centos ~]# curl http://localhost:8002/kerryNginxServlet/servletA
<h2> hello I am Kerry!</h2><h1>This is the servlet test B!</h1>
Nginx container
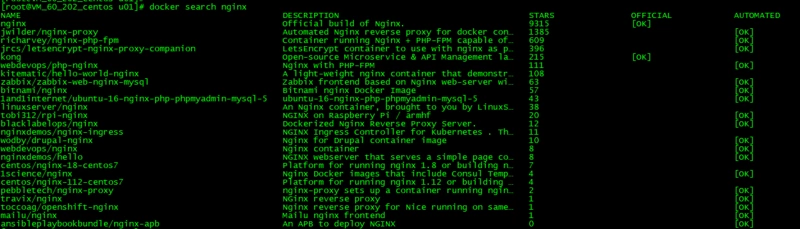
1. Similarly, look up the Nginx image from the data source. Usually download the official image of the highest stars.
[root@VM_60_202_centos ~]# docker search nginx -- query the official image of nginx
[root@VM_60_202_centos ~]# docker pull nginx -- download the image named "nginx"
[root@VM_60_202_centos ~]# docker images -- view all local images
2. Host creates mount directory and edits configuration file
[root@VM_60_202_centos ~]# mkdir -p /u01/nginx
[root@VM_60_202_centos ~]# mkdir -p /u01/nginx/conf.d
[root@VM_60_202_centos ~]# touch /u01/nginx/nginx.conf
[root@VM_60_202_centos ~]# touch /u01/nginx/conf.d/default.conf
Then vi edits the / u01/nginx/nginx.conf file
user  root;
worker_processes  1;

error_log  /var/log/nginx/error.log warn;
pid        /var/run/nginx.pid;
events {
    worker_connections  1024;
}

http {
    include       /etc/nginx/mime.types;
    default_type  application/octet-stream;

    log_format  main  '$remote_addr - $remote_user [$time_local] "$request" '
                      '$status $body_bytes_sent "$http_referer" '
                      '"$http_user_agent" "$http_x_forwarded_for"';

    access_log  /var/log/nginx/access.log  main;

    sendfile        on;
    #tcp_nopush     on;
    keepalive_timeout  65;
    #gzip  on;
    include /etc/nginx/conf.d/*.conf;

    upstream tomcatServer {
      server t1:8080;
      server t2:8080;
    }
}
Edit / u01/nginx/conf.d/default.conf file
server {
    listen       80;
    server_name localhost;
    location / {
        proxy_pass   http://tomcatServer;
    }
}
3. Start Nginx container
[root@VM_60_202_centos ~]# docker run --name=my_nginx1 --link=my_tomcat1:t1 --link=my_tomcat2:t2 -v /u01/nginx/nginx.conf:/etc/nginx/nginx.conf -v /u01/nginx/conf.d:/etc/nginx/conf.d -p 8000:80 -d nginx
--Function Nginx Container named my_nginx1
--to my_tomcat1,my_tomcat2 Containers are aliased separately, t1,t2(Will be in my_nginx1 Of/etc/hosts Automatic configuration in file)
--mount/u01/nginx/nginx.conf Document and/u01/nginx/conf.d Catalog
--Map port number 80 of the container to port 8000 of the host

[root@VM_60_202_centos ~]# curl http://localhost:8000/kerryNginxServlet/servletA
<h2> hello I am Kerry!</h2><h1>This is the servlet test A!</h1>

[root@VM_60_202_centos ~]# curl http://localhost:8000/kerryNginxServlet/servletA
<h2> hello I am Kerry!</h2><h1>This is the servlet test B!</h1>
Because the load balancing is configured, you can access the http://localhost : when 8000/kerryNginxServlet/servletA, there will be an average probability of access http://localhost : 8001/kerryNginxServlet/servletA and http://localhost:8002/kerryNginxServlet/servletA
MySQL container
1. Find the MySQL image from the data source. Usually download the official image of the highest stars.
[root@VM_60_202_centos ~]# docker search mysql -- Query official mysql image
[root@VM_60_202_centos ~]# docker pull mysql -- download the image named "mysql"
[root@VM_60_202_centos ~]# docker images -- view all local images
2. Create mount directory
[root@VM_60_202_centos ~]# mkdir -p /u01/mysql/data /u01/mysql/logs /u01/mysql/conf

--data Directory will be mapped to mysql Container configuration data file storage path
--logs Directory will be mapped to mysql Log directory for container
--conf The configuration files in the directory will be mapped to mysql Configuration file for container
3. Start MySQL container
docker run -p 3306:3306 --name my_mysql1 -v /u01/mysql/conf:/etc/mysql/conf.d -v /u01/mysql/logs:/logs -v /u01/mysql/data:/var/lib/mysql -e MYSQL_ROOT_PASSWORD=kerry -d mysql

-p 3306:3306: Map the 3306 port of the container to the 3306 port of the host.
-v Mount.
-e MYSQL_ROOT_PASSWORD=kerry: Initialization root The password of the user.
4. Remote connection to database
When connecting to the database remotely, an error may be reported:
ERROR 2059 (HY000): Authentication plugin 'caching_sha2_password' cannot be loaded
When installing mysql8, if you choose password encryption and then connect with the client, such as navicate, you will be prompted to connect with caching-sha2-password. Because the client does not support this plug-in, you can modify it in the following ways:
1) Enter container
docker exec -it my_mysql1 bash
2) Enter mysql
mysql -uroot -pkerry
3) Modify user login permission information
Query user information first
mysql> select host,user,plugin,authentication_string from mysql.user;
+-----------+------------------+-----------------------+------------------------------------------------------------------------+
| host      | user             | plugin                | authentication_string                                                  |
+-----------+------------------+-----------------------+------------------------------------------------------------------------+
| %         | root             | caching_sha2_password | *B9C0EAD50A12474280CBCFD8CFB40DF416A93E02                              |
| localhost | mysql.infoschema | caching_sha2_password | $A$005$THISISACOMBINATIONOFINVALIDSALTANDPASSWORDTHATMUSTNEVERBRBEUSED |
| localhost | mysql.session    | caching_sha2_password | $A$005$THISISACOMBINATIONOFINVALIDSALTANDPASSWORDTHATMUSTNEVERBRBEUSED |
| localhost | mysql.sys        | caching_sha2_password | $A$005$THISISACOMBINATIONOFINVALIDSALTANDPASSWORDTHATMUSTNEVERBRBEUSED |
| localhost | root             | mysql_native_password | *B9C0EAD50A12474280CBCFD8CFB40DF416A93E02                              |
+-----------+------------------+-----------------------+------------------------------------------------------------------------+
5 rows in set (0.00 sec)
host% means unlimited ip localhost means that the password needs to be changed if plugin is not MySQL native password.
As you can see above, the root user does not limit ip, but the plugin needs to be modified. Of course, in order to cope with various application scenarios, the following SQL can be executed uniformly:
ALTER USER 'root'@'%' IDENTIFIED BY 'kerry' PASSWORD EXPIRE NEVER;
ALTER USER 'root'@'%' IDENTIFIED WITH mysql_native_password BY 'kerry';
FLUSH PRIVILEGES; #Refresh authority
After the change, you can use other clients to connect to the database. At this time, the user information of the query database is:
mysql> select host,user,plugin,authentication_string from mysql.user;
+-----------+------------------+-----------------------+------------------------------------------------------------------------+
| host      | user             | plugin                | authentication_string                                                  |
+-----------+------------------+-----------------------+------------------------------------------------------------------------+
| %         | root             | mysql_native_password | *B9C0EAD50A12474280CBCFD8CFB40DF416A93E02                              |
| localhost | mysql.infoschema | caching_sha2_password | $A$005$THISISACOMBINATIONOFINVALIDSALTANDPASSWORDTHATMUSTNEVERBRBEUSED |
| localhost | mysql.session    | caching_sha2_password | $A$005$THISISACOMBINATIONOFINVALIDSALTANDPASSWORDTHATMUSTNEVERBRBEUSED |
| localhost | mysql.sys        | caching_sha2_password | $A$005$THISISACOMBINATIONOFINVALIDSALTANDPASSWORDTHATMUSTNEVERBRBEUSED |
| localhost | root             | mysql_native_password | *B9C0EAD50A12474280CBCFD8CFB40DF416A93E02                              |
+-----------+------------------+-----------------------+------------------------------------------------------------------------+
Other
1. Principle of mounting
File system operation in docker. Docker images are stored in a series of read-only layers. When we open a container, docker reads the read-only image and adds a read-write layer at the top. If the running container modifies the existing file, the file will be copied from the read-only layer at the bottom to the read-write layer at the top. The old version of the file in the read-write layer is hidden under the file, but it is not destroyed - it still exists under the mirror. When docker's containers are deleted and the image is restarted, a new container will be opened without any changes - these changes will be lost. The combination of this read-only layer and the read-write layer at the top is called the Union File System by docker.
In order to save (persistent) data and share data between containers, Docker puts forward the concept of volumes. Very simply, volumes are directories (or files), which are external default federated file systems or normal directories and files that exist in the host file system.
2. The strategy of storing MySQL table data on the local host is not complete, and will be explained in another part with an example of the actual project in the future.