After the launch of Huawei video editing service version 6.2.0, we have brought two major changes: rich and diverse AI capabilities and flexible integration methods. In order to let developers get started faster, today's Xiaobian has brought a specific integration method of video editing atomic power SDK. Come and try!
1 development preparation
For detailed preparation steps, please refer to the official website of Huawei developer Alliance:
https://developer.huawei.com/...
2 code development
1.1 edit project
1.1.1 setting the authentication information of the application
You can use the api_key or Access Token to set application authentication information.
- Use the setAccessToken method to set the Access Token. You can initialize the setting once when the application starts without setting it multiple times.
MediaApplication.getInstance().setAccessToken("your access token");Use the setApiKey method to set the api_key, which also does not need to be set multiple times.
MediaApplication.getInstance().setApiKey("your ApiKey");
1.1.2 set the unique ID, i.e. License ID.
The License ID is a valid voucher for control. Developers need to ensure the uniqueness of the License ID.
MediaApplication.getInstance().setLicenseId("License ID");1.1.3 initialize the Editor running environment
To create an editing project, first create an Editor object and initialize the running environment. When you leave the edit project, you should release the Editor instance.
(1) Create Editor object
HuaweiVideoEditor editor = HuaweiVideoEditor.create(getApplicationContext());
(2) Specifies the layout location of the preview window
The preview window is responsible for rendering the video image, which is implemented by creating a SurfaceView inside the video editing atomic power SDK. Before creating a window, the developer needs to specify the layout position of the preview window in the application.
<LinearLayout
    android:id="@+id/video_content_layout"
    android:layout_width="0dp"
    android:layout_height="0dp"
    android:background="@color/video_edit_main_bg_color"
    android:gravity="center"
    android:orientation="vertical" />
// Specify preview window
LinearLayout mSdkPreviewContainer = view.findViewById(R.id.video_content_layout);

// Sets the layout hosted by the preview window
editor.setDisplay(mSdkPreviewContainer);
(3) Initialize the running environment. If the License authentication fails, a LicenseException will be thrown.
Creating an Editor object does not occupy actual system resources. Developers need to manually select the time of environment initialization. At this time, the video editing atomic power SDK will create necessary threads and timers.
try {
        editor.initEnvironment();
   } catch (LicenseException error) {
        SmartLog.e(TAG, "initEnvironment failed: " + error.getErrorMsg());
        finish();
        return;
   }
1.1.4 adding videos and pictures
Create a video swimlane and add pictures or video materials on the swimlane through the file path.
// Get timeline object
HVETimeLine timeline = editor.getTimeLine();

// Create a video Lane
HVEVideoLane videoLane = timeline.appendVideoLane();

// At the end of the video lane, add video resources
HVEVideoAsset videoAsset = vidoeLane.appendVideoAsset("test.mp4");

// At the end of the video lane, add a picture resource
HVEImageAsset imageAsset = vidoeLane.appendImageAsset("test.jpg");
1.1.5 adding music
Create a music lane and add music material on the lane through the file path.
// Create a music Lane

HVEAudioLane audioLane = timeline.appendAudioLane();

// At the end of the audio swimlane, create a music resource

HVEAudioAsset audioAsset = audioLane.appendAudioAsset("test.mp3");
1.1.6 add stickers and text
Create a swimlane with sticker text, and add stickers and text on the swimlane through the file path. The text content needs to be specified.
// Create sticker text swimlane
HVEStickerLane stickerLane = timeline.appendStickerLane();

// Add a sticker at the end of the lane
HVEStickerAsset stickerAsset = stickerLane.appendStickerAsset("test.png");

// Add text at the end of the lane
HVEWordAsset wordAsset = stickerLane.appendWord("Enter text",0,3000);
1.1.7 adding special effects
Special effects are divided into external effects and embedded effects.
Outreach effects. Added in the special effect swimlane, the length of time can be adjusted arbitrarily across multiple resources.
// Create a special effect Lane

HVEEffectLane effectLane = timeline.appendEffectLane();

// Create a color adjustment effect and add it to position 0 for 3000ms

HVEEffect effect = effectLane.appendEffect(new HVEEffect.Options(HVEEffect.EFFECT_COLORADJUST, "", ""), 0, 3000);
- Embedded special effects. Adding to a resource can only work on a single resource, and the length of time cannot be adjusted separately.
// Create a color adjustment inline effect

HVEEffect effect = videoAsset.appendEffectUniqueOfType(new HVEEffect.Options(HVEEffect.EFFECT_COLORADJUST, "", ""), ADJUST);
1.1.8 playback timeline
To play the timeline, you need to specify the start point and end point. After that, the timeline will advance backward according to the fixed frame rate, and the preview screen and sound will play synchronously. Through the registered playback callback, you can receive playback progress, pause, playback completion and playback failure events.
// Register playback progress callback
editor.setPlayCallback(callback);

// Play full timeline
editor.playTimeLine(timeline.getStartTime(), timeline.getEndTime());
1.1.9 export
After editing, generate a new video from the resources on the timeline through the export interface. Then set the export callback to monitor the export progress, completion and failure events, and specify the frame rate, resolution and generation path of the exported video.
// Export video path
String outputPath =
Environment.getExternalStoragePublicDirectory(Environment.DIRECTORY_PICTURES)
                    + File.separator + Constant.LOCAL_VIDEO_SAVE_PATH
                    + File.separator + VideoExportActivity.getTime() + ".mp4";

// Export resolution
HVEVideoProperty videoProperty = new HVEVideoProperty(1920, 1080);

// Export video
HVEExportManager.exportVideo(targetEditor, callback, videoProperty, outputPath);
1.2 project draft
You can query the local draft list through the HVE Project Manager Manager, and copy, delete and rename the draft.
1.2.1 Save Draft
// Save editor locally
editor.saveProject();
1.2.2 restore draft
// Create an instance of Editor through the draft ID
HuaweiVideoEditor editor = HuaweiVideoEditor.create(getApplicationContext(), projectId);
1.3 material management
After AGC arranges the material column, use the interface provided by the material management module to query and download the specified materials. For specific steps, please refer to:
https://developer.huawei.com/...
1.4 AI algorithm integration
The video editing atomic power SDK provides multiple AI algorithms such as exclusive filters, character tracking, portrait resurrection and AI coloring. Developers can freely choose to access and integrate. Refer to the following steps for AI capability integration:
https://developer.huawei.com/...
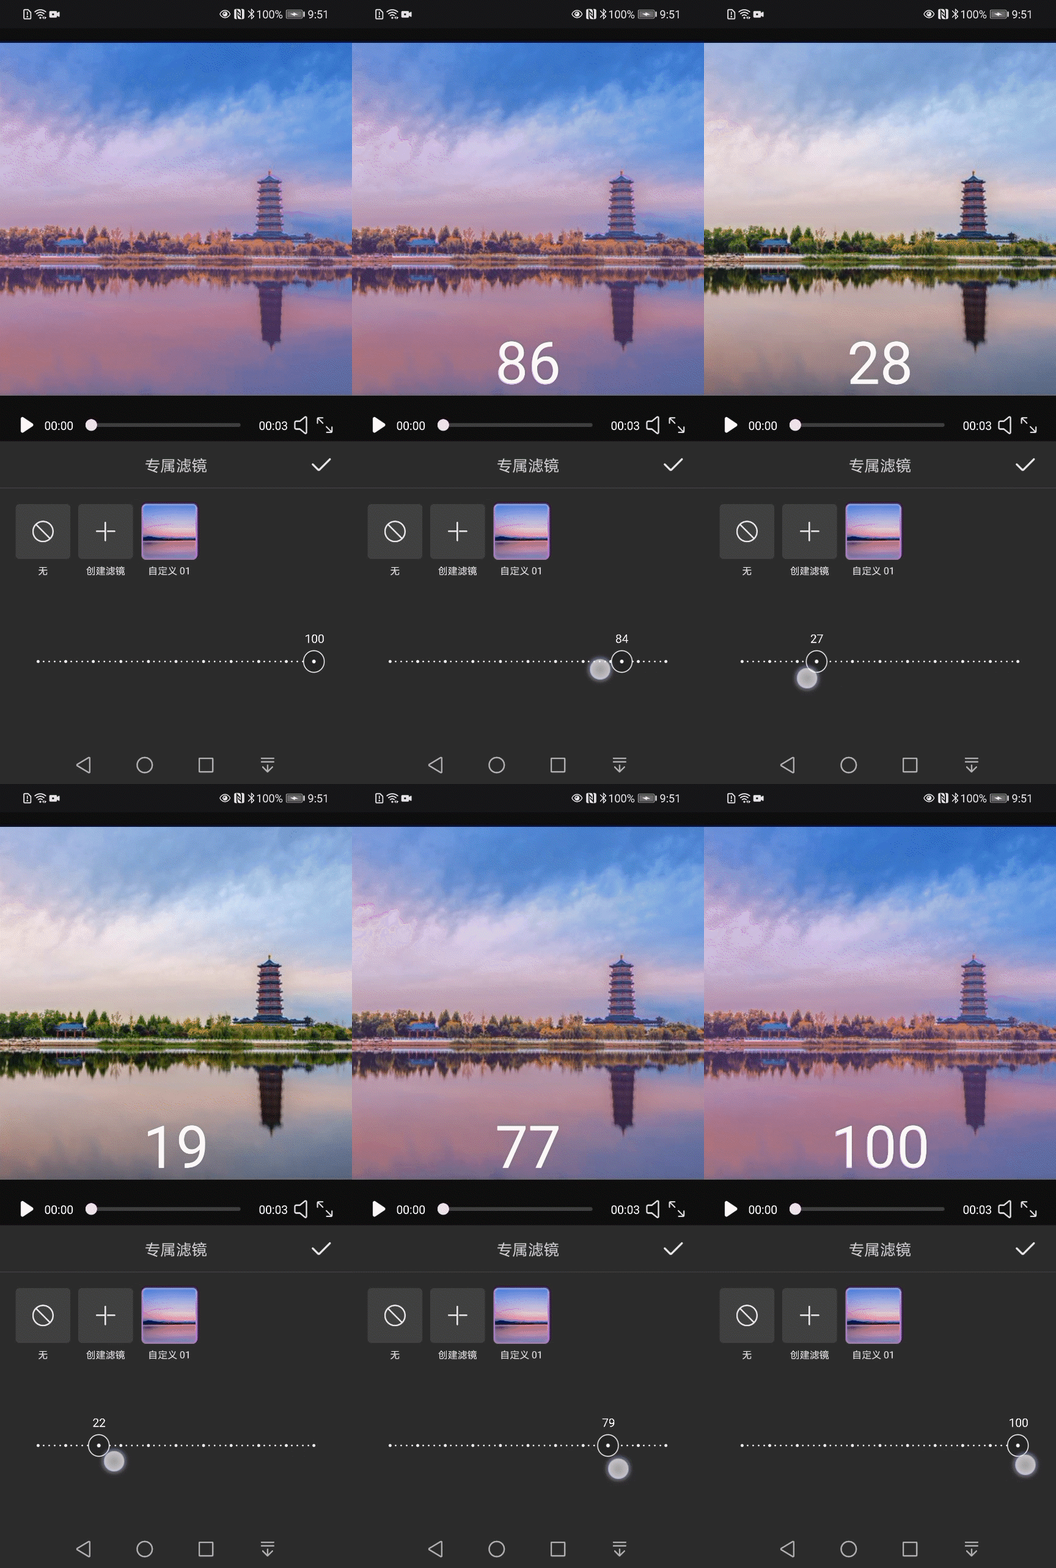
1.4.1 exclusive filter
Support user-defined filters, apply user-defined filter effects to input videos and images, and support the diversified image beautification needs of the scene.
Exclusive filter display.gif
// Create a dedicated filter algorithm engine
HVEExclusiveFilter filterEngine = new HVEExclusiveFilter();

// Initialize dedicated filter algorithm engine
mFilterEngine.initExclusiveFilterEngine(new HVEAIInitialCallback() {
        @Override
        public void onProgress(int progress) {
        // Initialize progress callback
        }

        @Override
        public void onSuccess() {
            // Initialization succeeded
        }

        @Override
        public void onError(int errorCode, String errorMessage) {
            // initialization failed
        }
    });

// Create a single image filter and specify a Bitmap and the name of the filter
// Returns the filter ID, through which you can query all filter related information in the database
String effectId = mFilterEngine.createExclusiveEffect(bitmap, "Custom filter 01");

// Add the filter to the special effect lane, starting at 0, with a duration of 3000ms
effectLane.appendEffect(new HVEEffect.Options(
    HVEEffect.CUSTOM_FILTER + mSelectName, effectId, ""), 0, 3000);
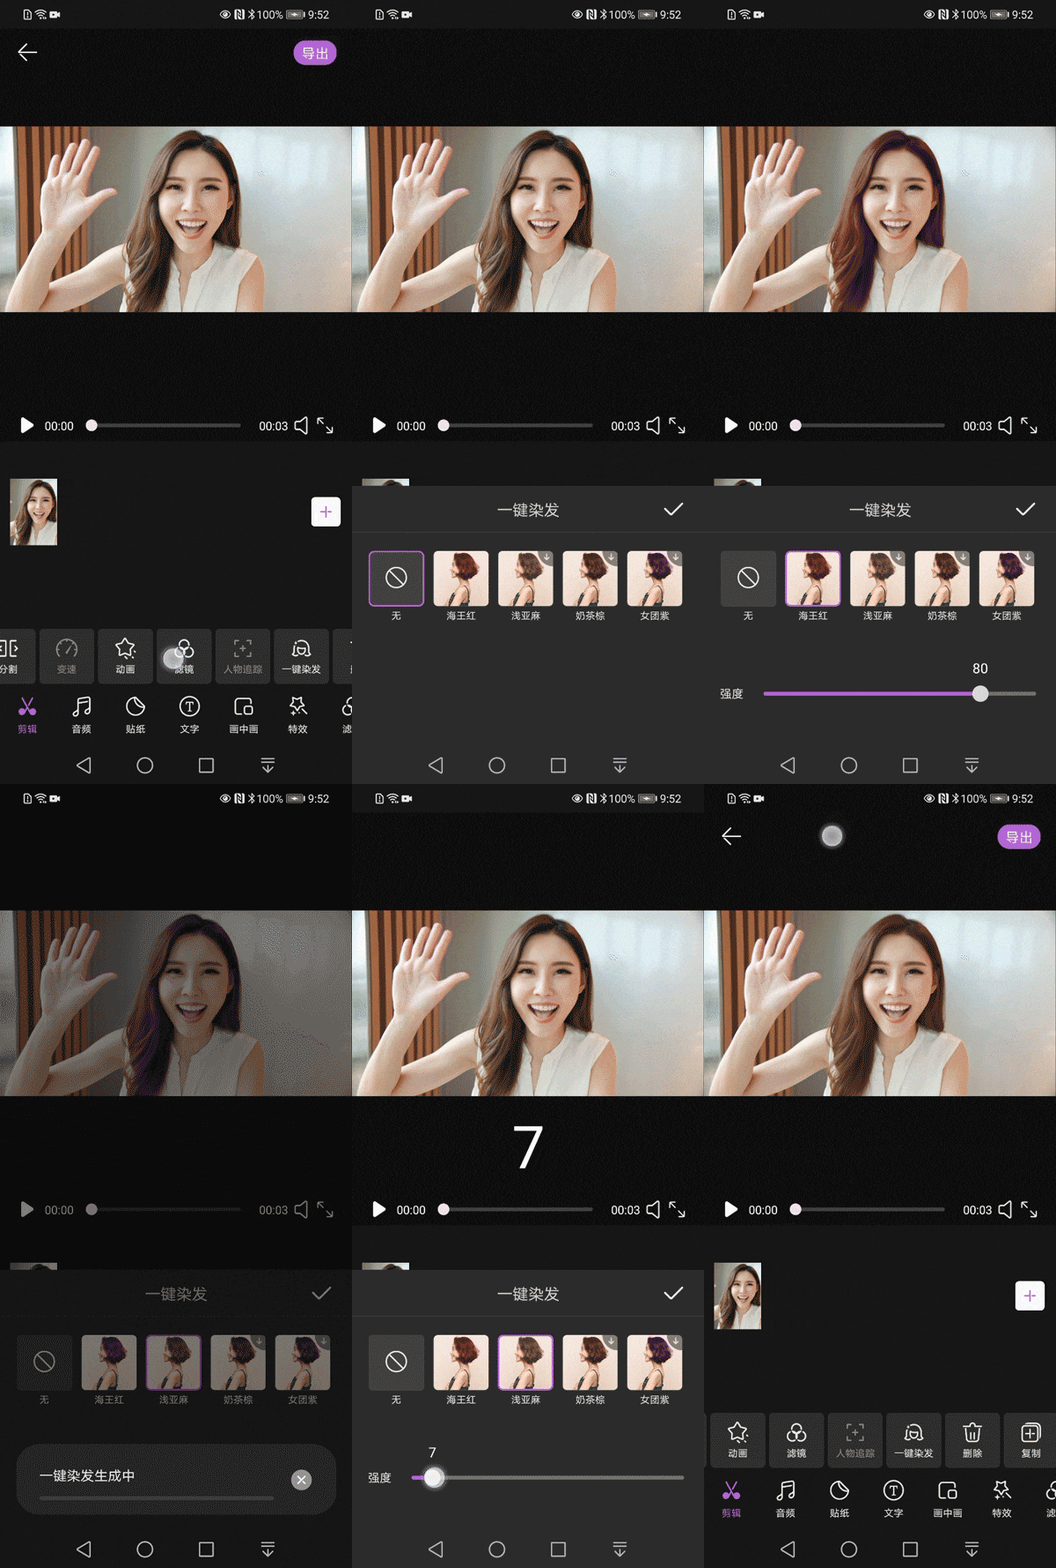
1.4.2 one button hair dyeing
Input a single or multiple person photo, detect the person, and realize one click hair dyeing based on the reference color card style, and the dyeing degree can be pulled and adjusted.
One click hair dyeing.gif
// One click hair dyeing AI algorithm initialization
asset.initHairDyeingEngine(new HVEAIInitialCallback() {
        @Override
        public void onProgress(int progress) {
        // Initialization progress
        }

        @Override
        public void onSuccess() {
        // Initialization succeeded
        }

        @Override
        public void onError(int errorCode, String errorMessage) {
        // initialization failed
    }
   });

// Add one click hair dyeing effect to specify color card and default intensity.
asset.addHairDyeingEffect(new HVEAIProcessCallback() {
        @Override
        public void onProgress(int progress) {
            // One click hair dyeing progress.
        }

        @Override
        public void onSuccess() {
            // One click hair dyeing successful
        }

        @Override
        public void onError(int errorCode, String errorMessage) {
            // One click hair dyeing failed
        }
    }, colorPath, defaultStrength);

// Remove one click hair dyeing effect
asset.removeHairDyeingEffect();
1.4.3 portrait Resurrection
Input a single or multiple person photo to drive the characters in the photo to smile, nod and other actions to achieve the effect of portrait resurrection.
Portrait resurrection.gif
// Add portrait resurrection effect
asset.addFaceReenactAIEffect(new HVEAIProcessCallback() {
        @Override
        public void onProgress(int progress) {
        // Portrait resurrection processing progress
        }

        @Override
        public void onSuccess() {
        // Portrait resurrection processing succeeded
        }

        @Override
        public void onError(int errorCode, String errorMessage) {
        // Portrait resurrection processing failed
        }
    });

// Remove portrait resurrection effect
asset.removeFaceReenactAIEffect();
Learn more > >
visit Official website of Huawei developer Alliance
obtain Development guidance document
Huawei mobile service open source warehouse address: GitHub,Gitee
Follow us and learn the latest technical information of HMS Core for the first time~