Related articles
Learning CANoe from scratch (I) -- new project
Learning CANoe from scratch (II) -- creating dbc files with CANdb + +
Learning CANoe from scratch (III) -- creation and use of system variables
Learning CANoe from scratch (IV) -- design panel
Learning CANoe from scratch (V) -- CAPL test node
Learning CANoe from scratch (VI) -- XML test node
Learn CANoe from scratch (7) - NET test node
Learning from module CANoe
Learning CANoe from scratch (IX) -- breakpoint debugging
Learning CANoe from scratch (x) -- Signal Generator
Learning CANoe from scratch (XI) -- Statistics Window
Learning CANoe from scratch (12) -- Trace Window
preface
The previous blog has built the project. I want to talk about writing Case through a simple demo in the next few blogs. Today I will talk about two ways to create XML Test Module.
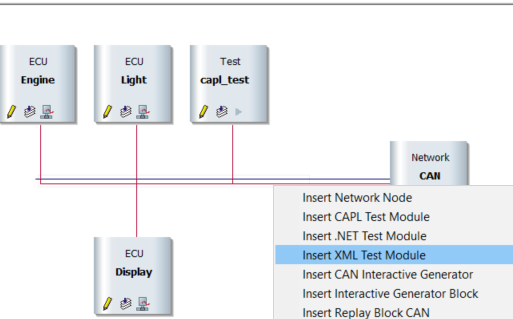
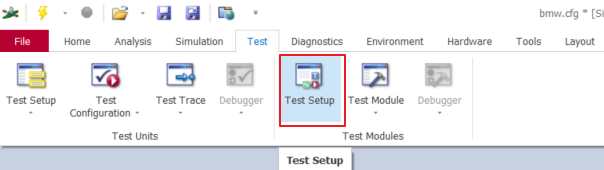
Create XMLTest Module on Bus
1. Right click Bus and select insert XMLTest Module
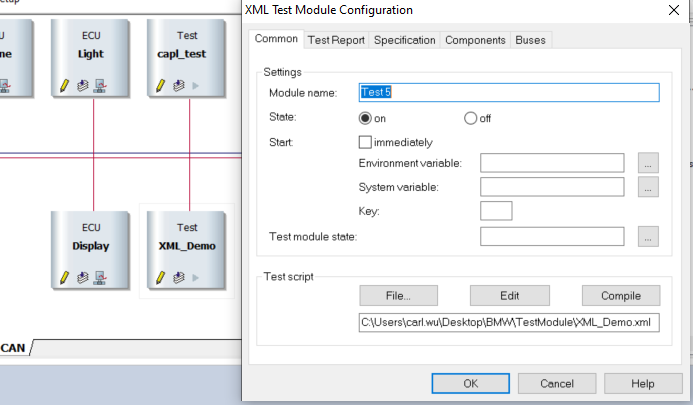
2. Right click on the node again and select "Configuration", then click "file", and then name me "XML" in the place of the selected file_ Demo. XML, and then click OK
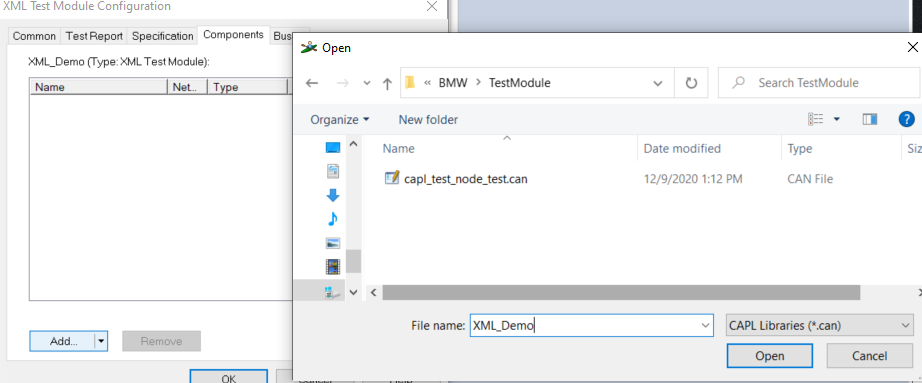
3. Then click Components to add (create) the can XML file_ Demo. can
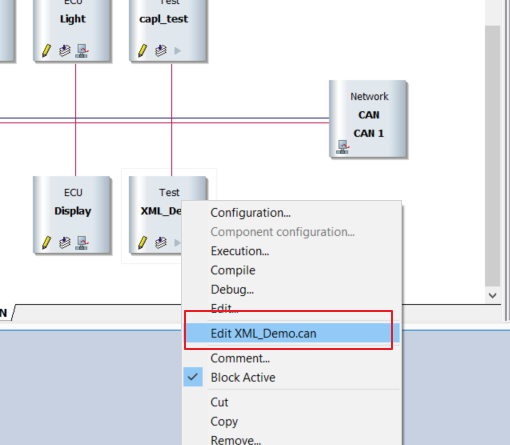
4. Right click and select Edit XML_Demo.can file, CAPL Browser creates a blank file
5. We simply create two case s, as shown in the following code:
/*@!Encoding:1252*/
includes
{
}
variables
{
  word TestStepIndex=0;
  word subTestStepIndex=0;
  char TestStepText[200];
  char tempText[200];
}
testcase Set_EngineState() // set speed
{
  TestStepIndex = 1;
  subTestStepIndex= 1;
  snprintf(TestStepText, elcount(TestStepText), "%d.%d", TestStepIndex,subTestStepIndex );
  TestStep(TestStepText, "Set Engine Speed.");
  setSignal(EngineSpeed,1000);
  testStepPass(TestStepText, "Set Engine Speed to 1000");
}
testcase Set_LightState() //Set light
{
  TestStepIndex = 1;
  subTestStepIndex= 1;
  snprintf(TestStepText, elcount(TestStepText), "%d.%d", TestStepIndex,subTestStepIndex );
  TestStep(TestStepText, "Set Flash Light..");
  setSignal(FlashLight,1);
  testStepPass(TestStepText, "Open Flash Light");

  TestStepIndex = 2;
  subTestStepIndex= 1;
  snprintf(TestStepText, elcount(TestStepText), "%d.%d", TestStepIndex,subTestStepIndex );
  TestStep(TestStepText, "Set Head Light..");
  setSignal(HeadLight,1);
  testStepPass(TestStepText, "Open Head Light");
}
//void MainTest ()
//{
//    read_EngineState();
//    read_LightState();
//}
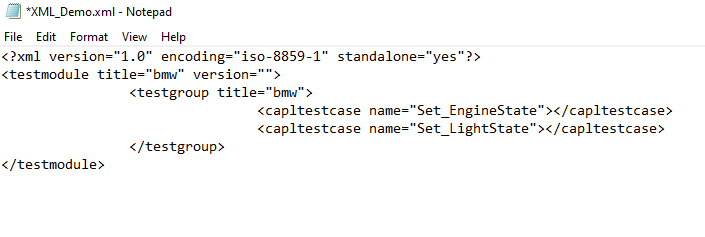
6. Right click and select Edit to open an XML file_ Demo. XML blank file, we simply add a few lines of XML code. For more XML programming, please refer to
Tag syntax commonly used in XML programming in CANoe
<?xml version="1.0" encoding="iso-8859-1" standalone="yes"?>
<testmodule title="bmw" version="">
		<testgroup title="bmw">
				<capltestcase name="Set_EngineState"></capltestcase>
				<capltestcase name="Set_LightState"></capltestcase>
		</testgroup>
</testmodule>
7. Run the project and double-click the XML node to click test
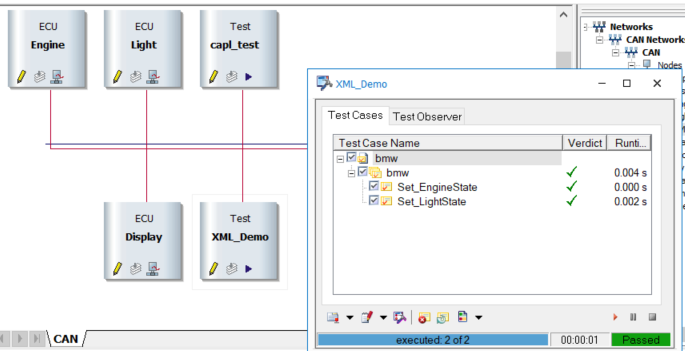
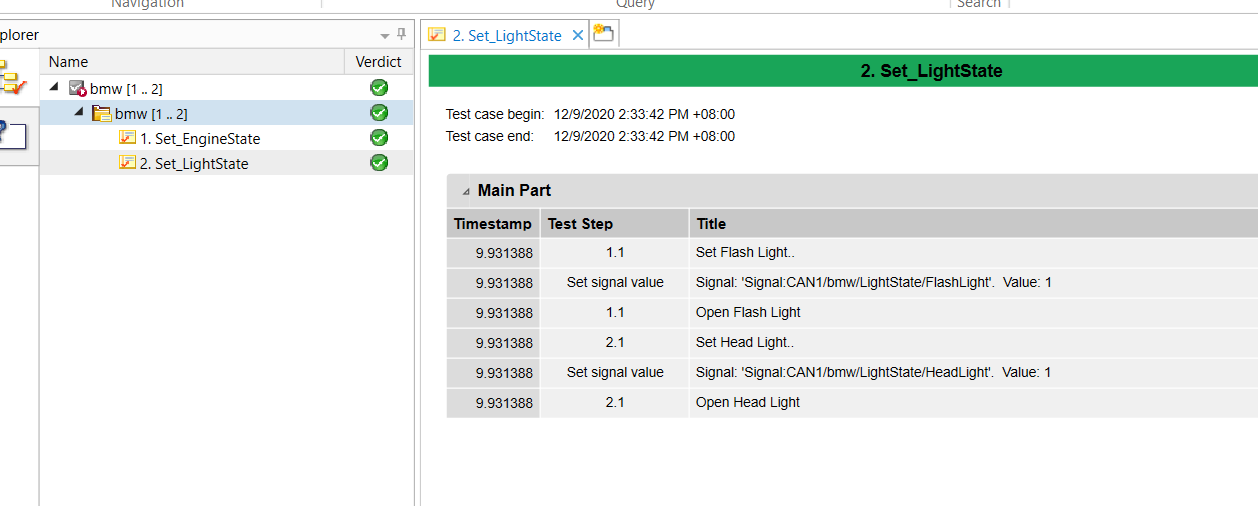
8. Test report, as shown in the figure below.
Create XMLTest Module in Test SetUp

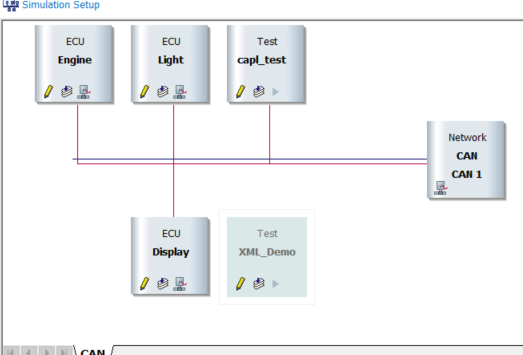
1. Right click the XML node and select Block Active to disable it, or left click the XML node and press the space bar to disable it.
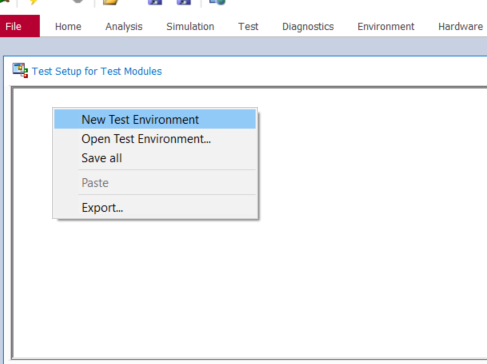
2. Select Test Setup and create a new test environment named bmw_test_xml.tse
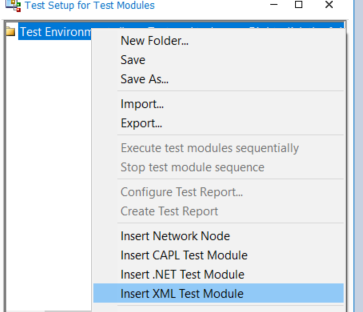
3. Right click and select insert XML Test Module,
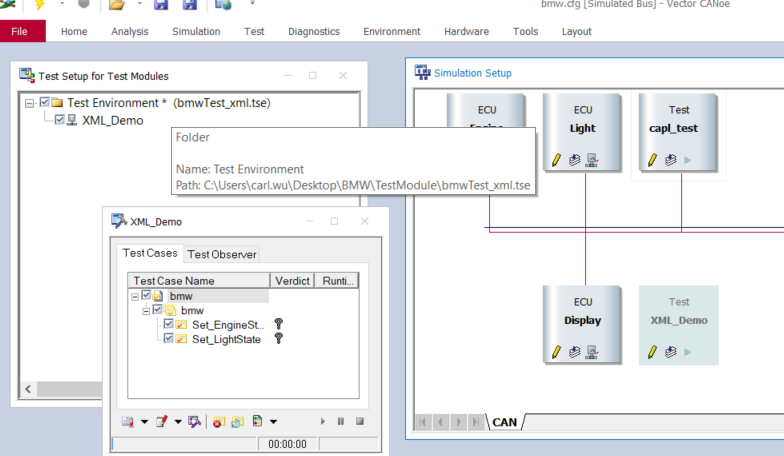
4. XML_Demo.xml and XML_ Demo. When can is loaded, the configuration method is the same as above, as shown in the following figure.
--------
Copyright notice: This is the original article of CSDN blogger "ant soldier", which follows the CC 4.0 BY-SA copyright agreement. Please attach the original source link and this notice for reprint.
Original link: https://blog.csdn.net/qq_34414530/article/details/110921559