Learning note 0314 - Linux Installation
- Preview content:
- After class summary
Preview content:
1.1 beginning of learning 1.2 agreement 1.3 understanding Linux 1.4 installing virtual machines 1.5 installing centos7 1.6 / 1.7 configuring IP 1.8 troubleshooting of network problems 1.9 remote connection to Linux using PuTTY 1.10 connecting to Linux using xshell 1.11 PuTTY key authentication 1.12 xshell key authentication 1.13 single user mode 1.14 rescue mode 1.15 cloning virtual machines 1.16 Linux machine mutual login
1, Necessary software for building LINUX learning environment
- VMware Workstation virtual machine
- Centos 7.6 mirroring
- xshell software (PuTTY, etc.)
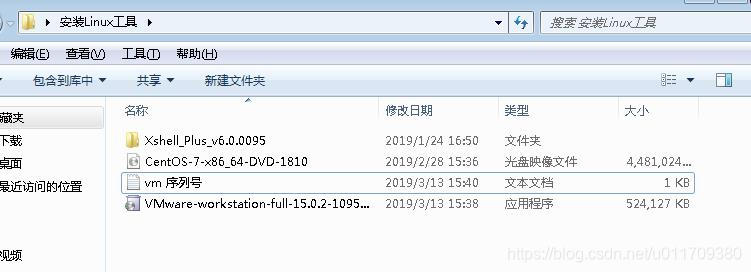
PS: the above software can be used address Download and obtain, and recommend a download software Proxyee Down , you can also download files on a disk. At present, individuals are using it. It is perfect to use it with Google chrome.
Website: https://github.com/aminglinux/linux201 Resource website: http://r.aminglinux.com
2, Build linux system
1.VM installation tutorial and creating virtual machine
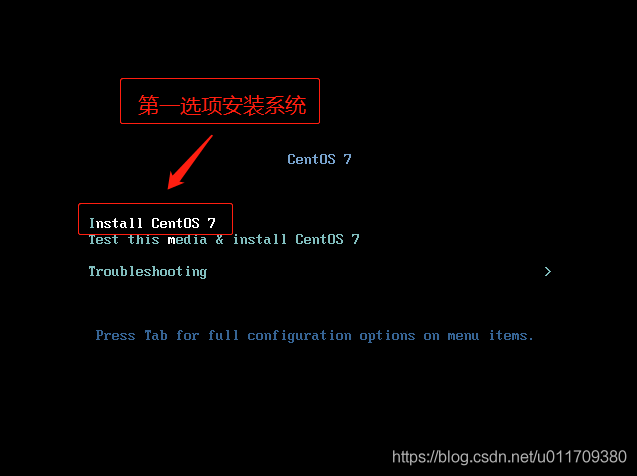
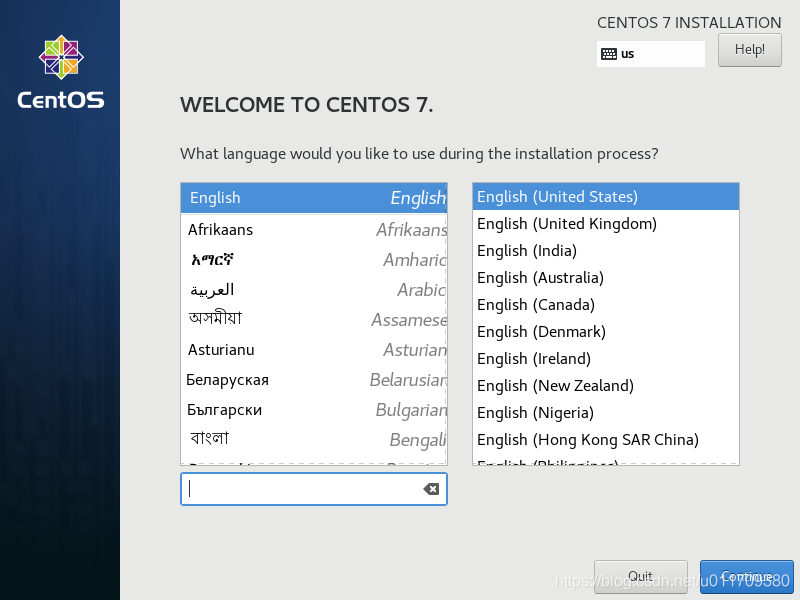
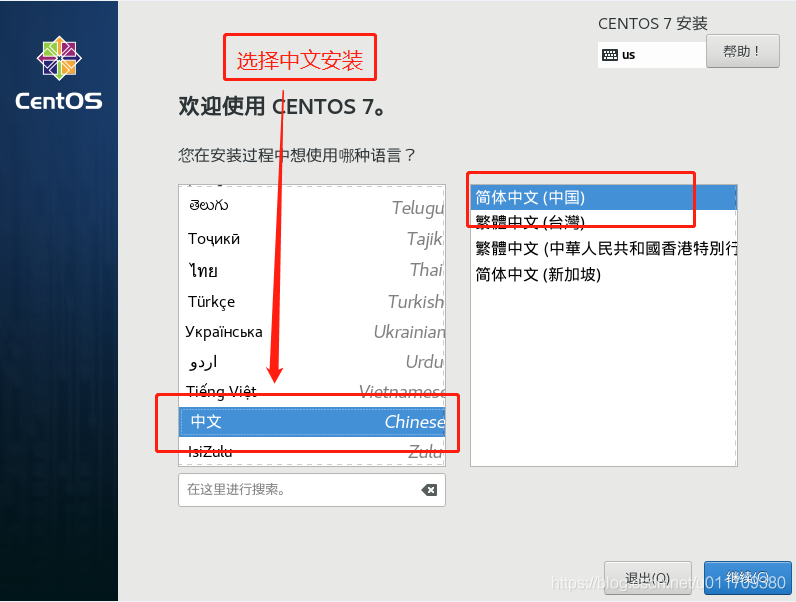
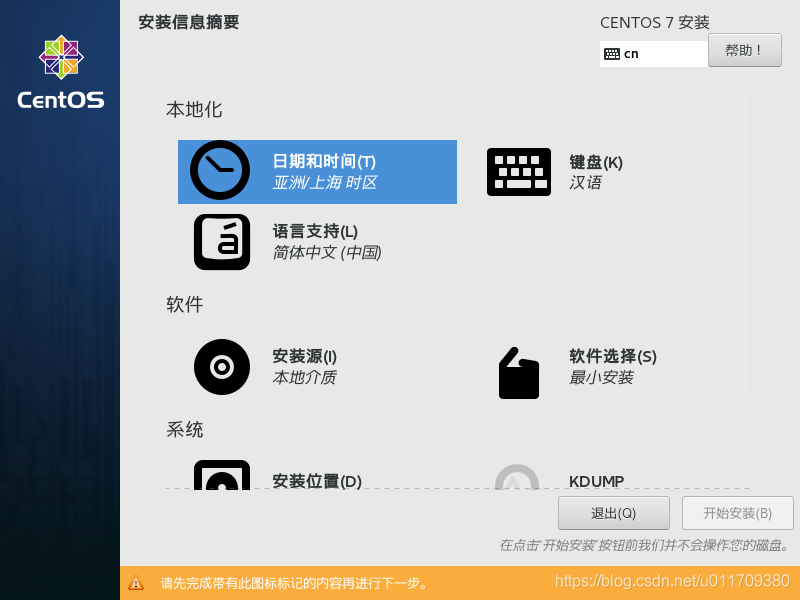
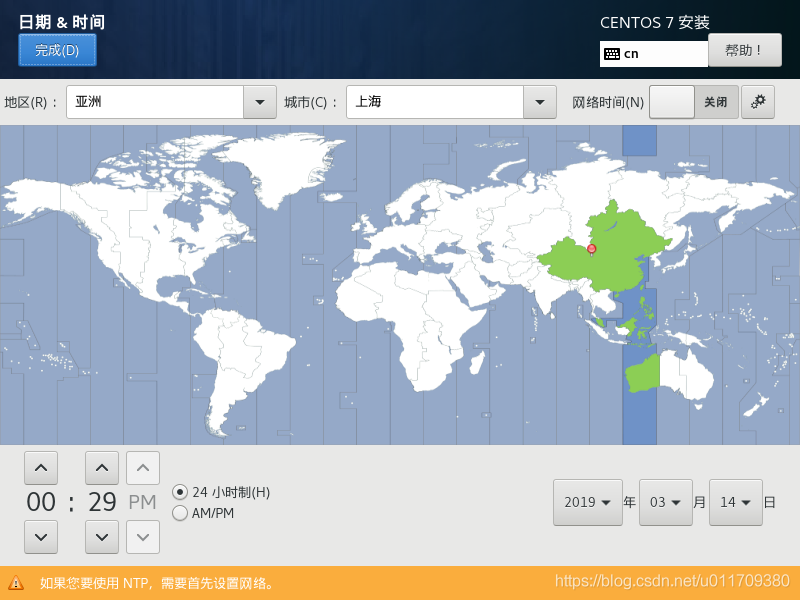
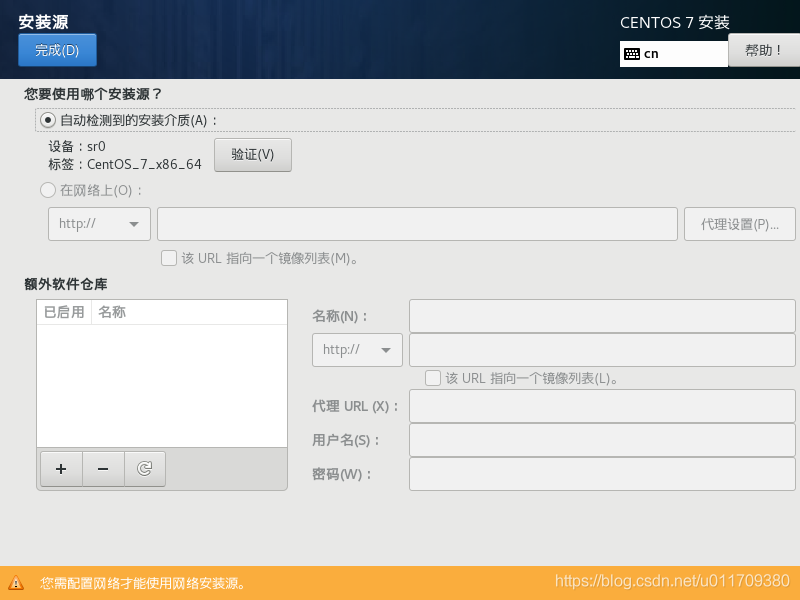
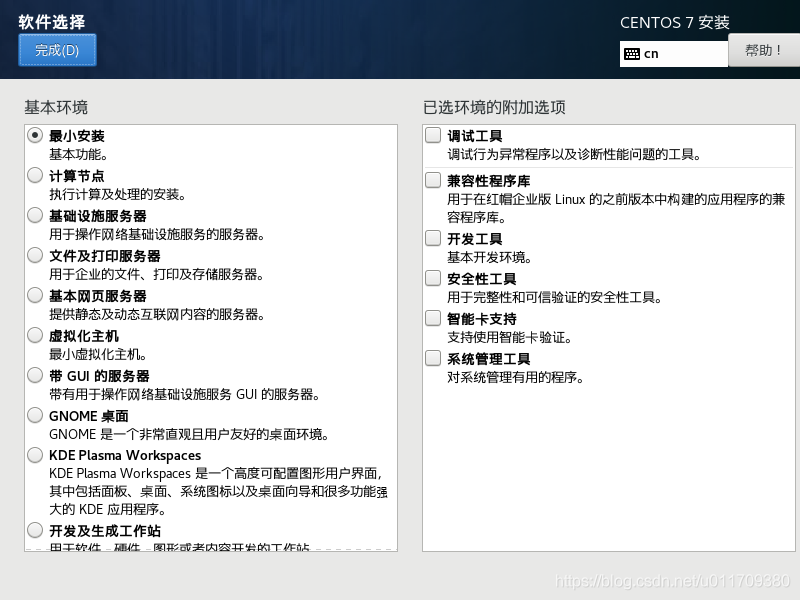
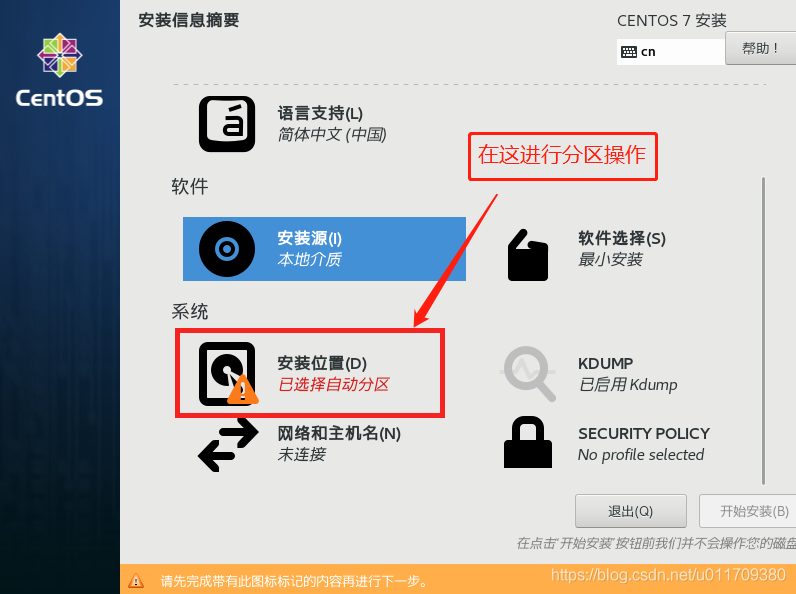
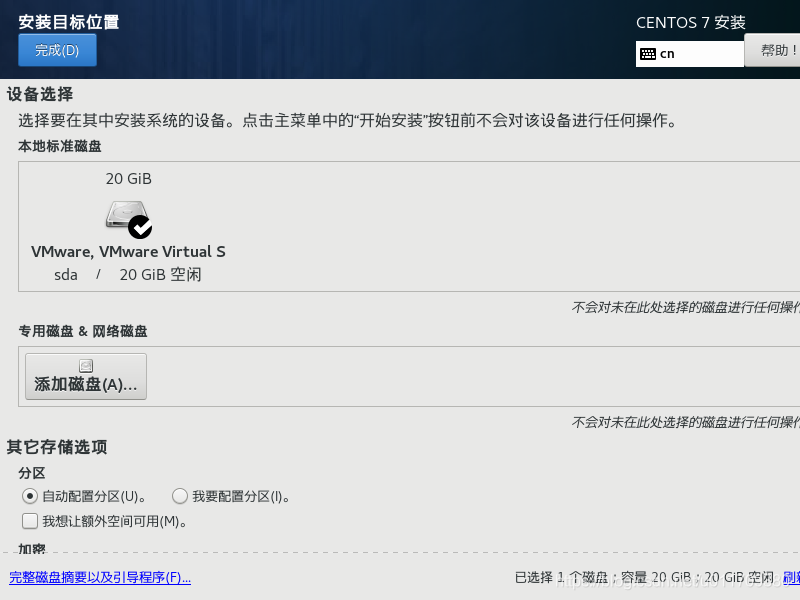
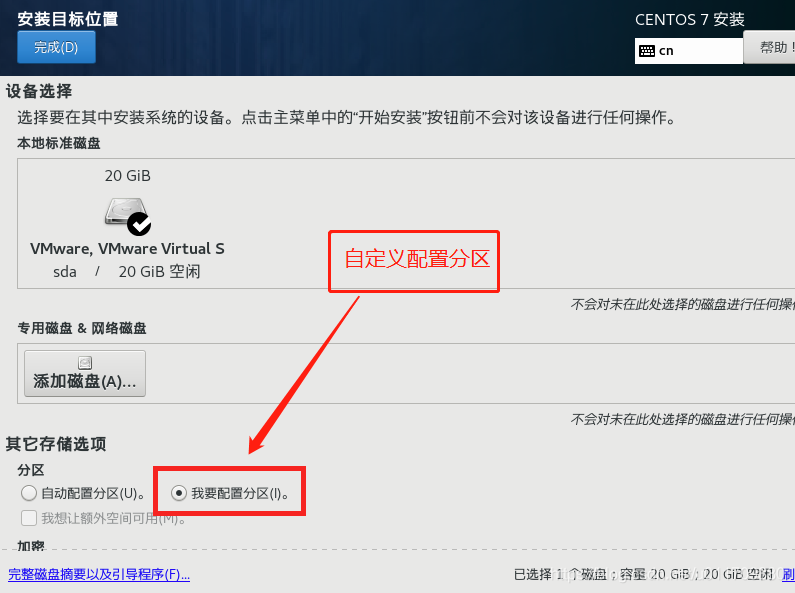
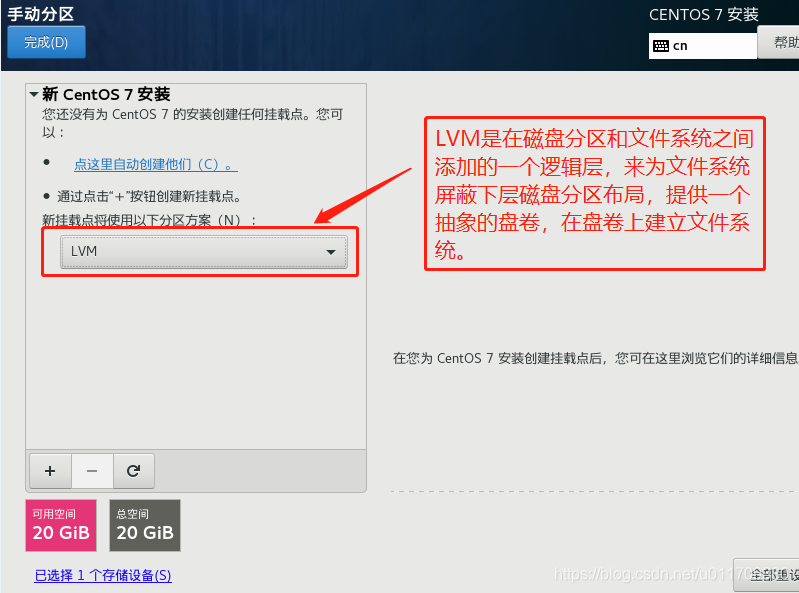
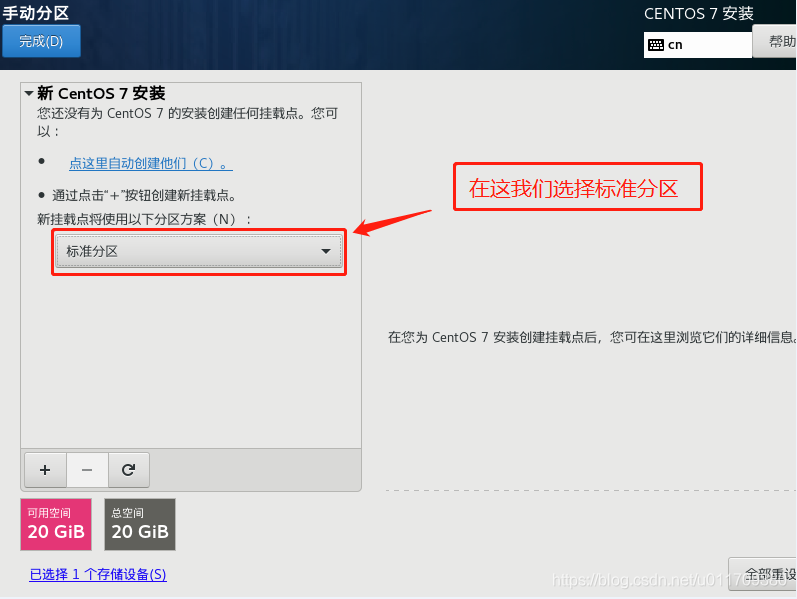
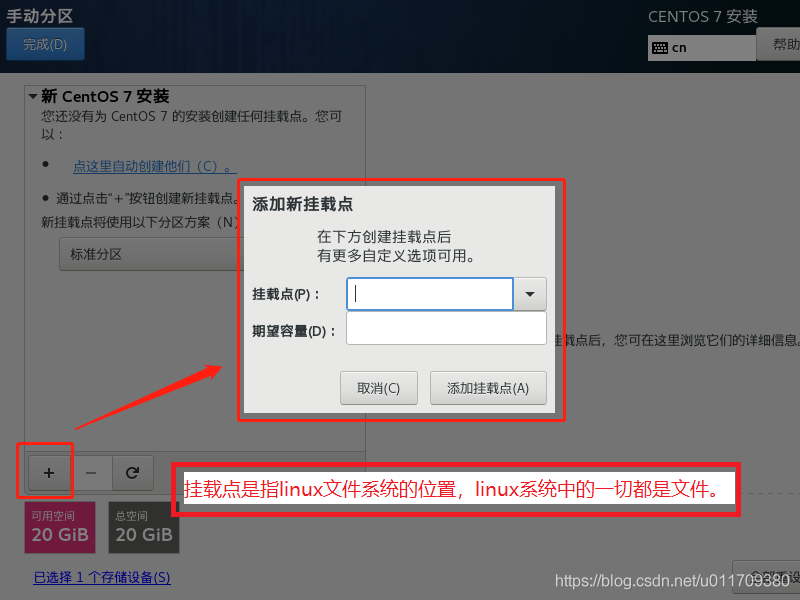
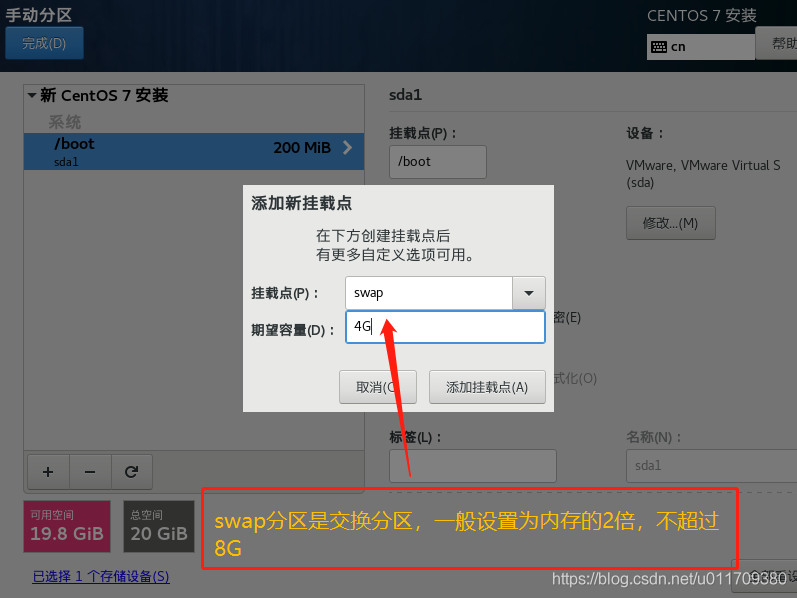
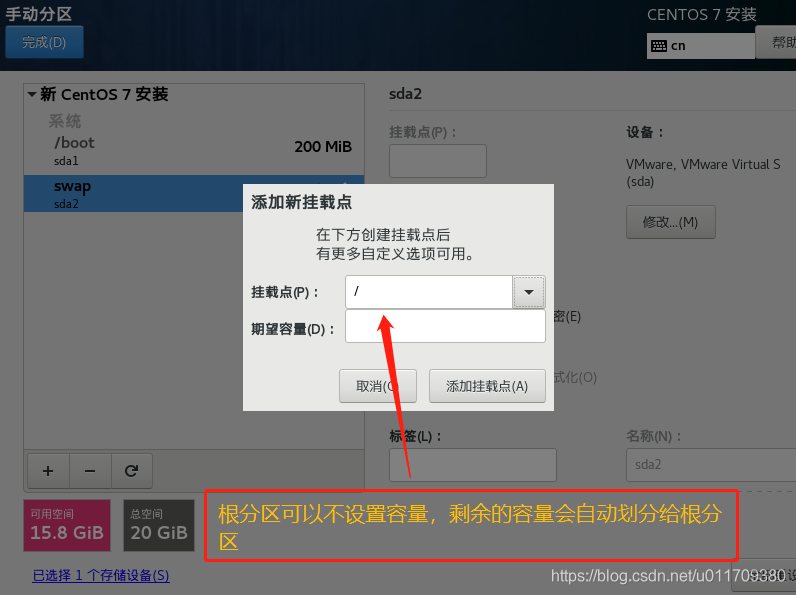
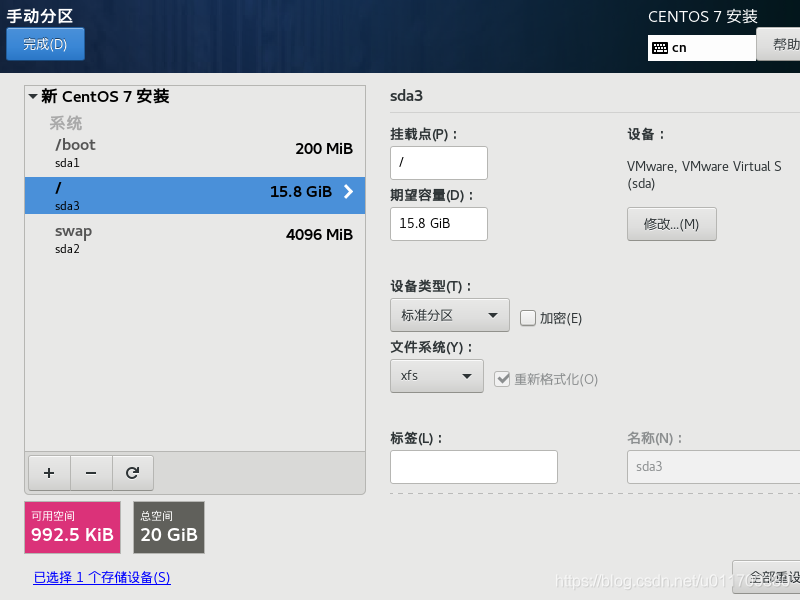
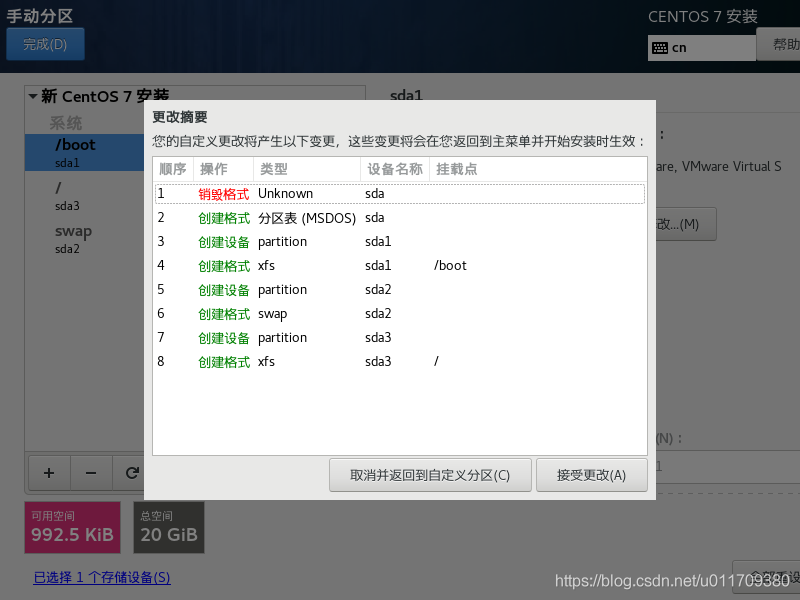
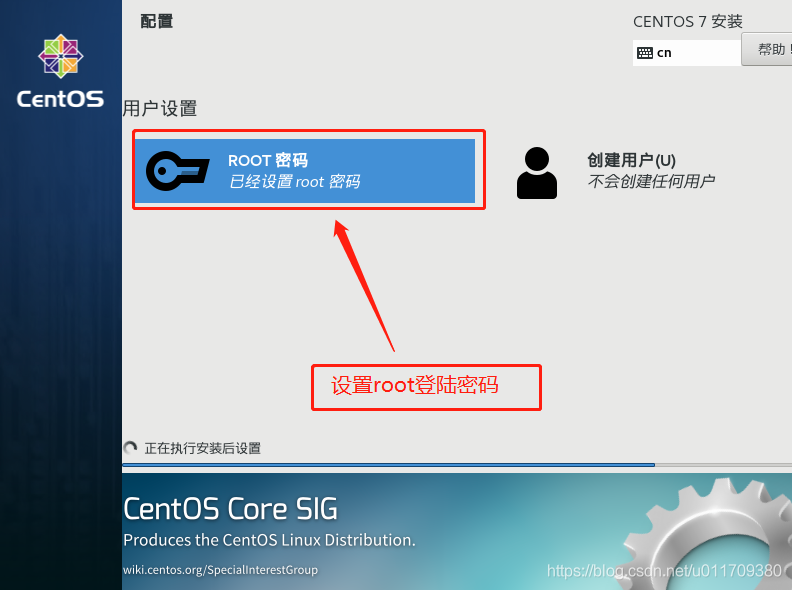
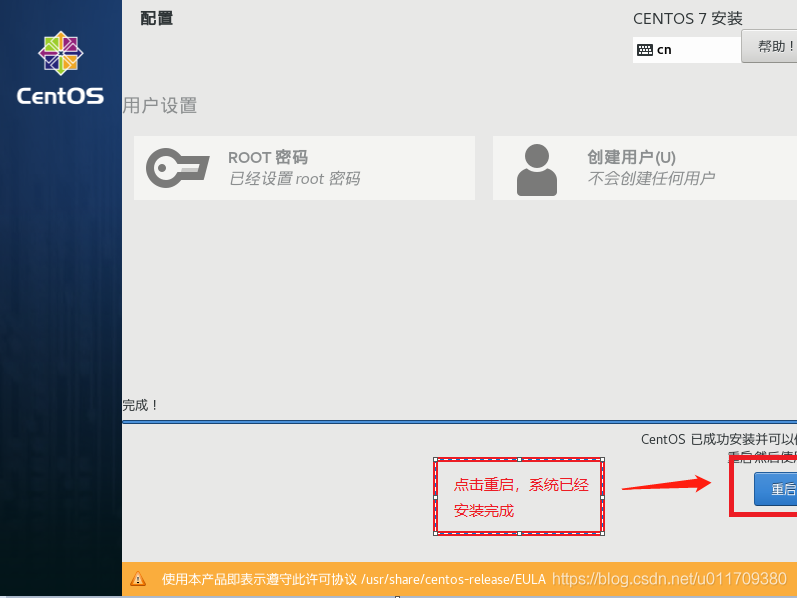
2. Virtual machine installation linux


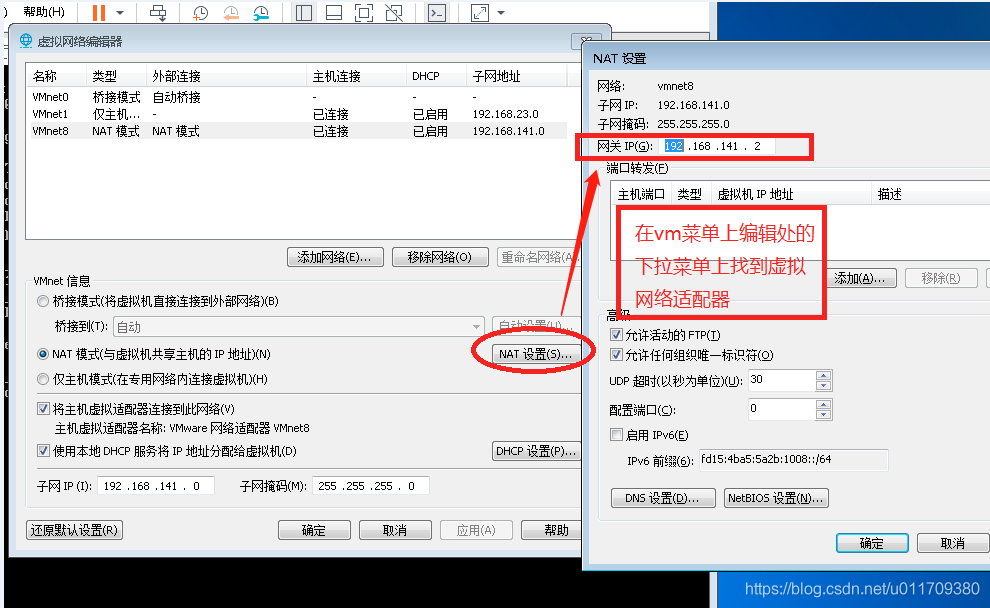
3. Set a fixed IP address for the linux system


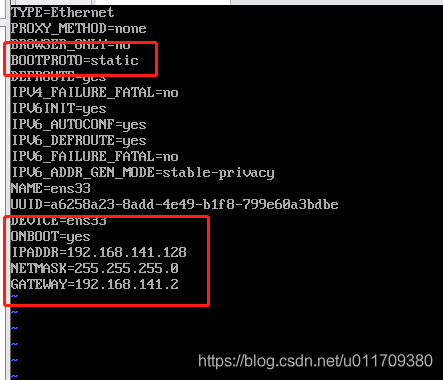
> vi /etc/sysconfig/network-scripts/ifcfg-eth33 #This file is the address of the network card, vi Edit can open and modify network card information#

> BOOTPROTO=static   #Set as static address#
> ONBOOT=yes	  #Set startup#
> IPADDR=192.168.141.128	#Set up network card IP address#
> NETMASK=255.255.255.0   #Set subnet mask#
> GATEWAY=192.168.141.2   #Settings just viewed net gateway#


Note: vi After editing, you need to press“:(English status input wq preservation. ( linux (case sensitive)
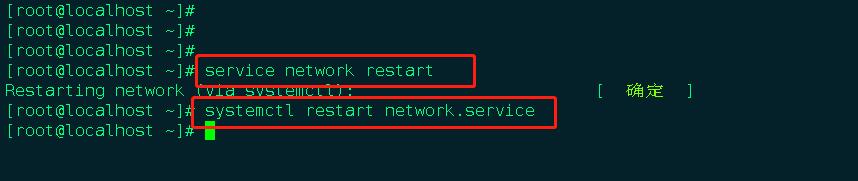
>service network restart   #This is the command to restart the network card
>systemctl restart network.service   #This is the life of restarting the network card

Note: after restarting the network card, the remote software can be used xshell Remote connection.
#This is xshell A color scheme that can copy the code and save it txt File, save rename file as: skycolor.xcs,Import xshell Ready to use#
[skycolor]
text=00ff80
cyan(bold)=00ffff
text(bold)=e9e9e9
magenta=c000c0
green=80ff00
green(bold)=3c5a38
background=042028
cyan=00c0c0
red(bold)=ff0000
yellow=c0c000
magenta(bold)=ff00ff
yellow(bold)=ffff00
red=ff4500
white=c0c0c0
blue(bold)=1e90ff
white(bold)=fdf6e3
black=000000
blue=00bfff
black(bold)=808080
[Names]
name0=skycolor
count=1
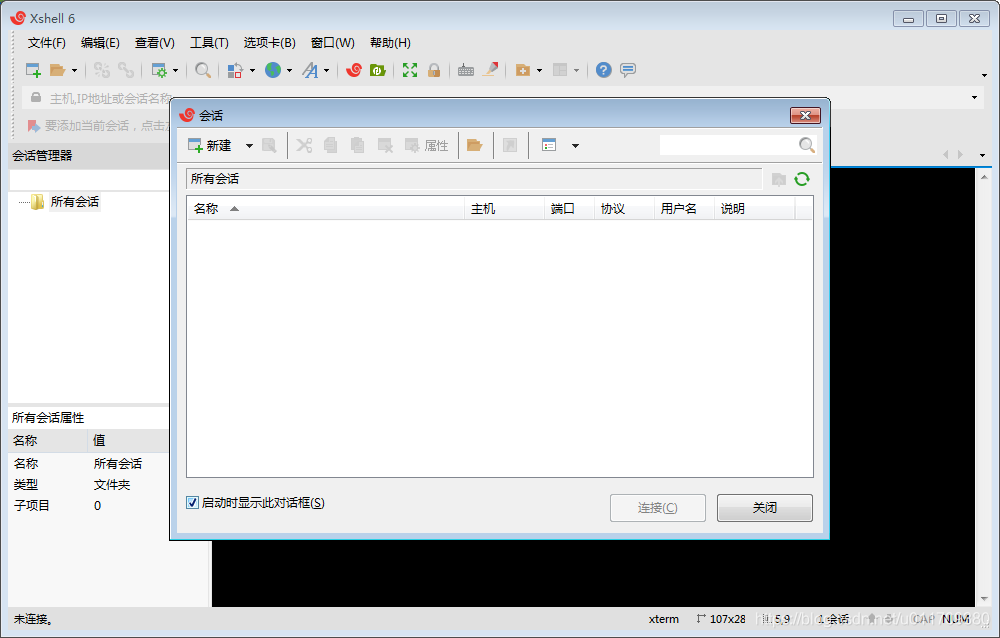
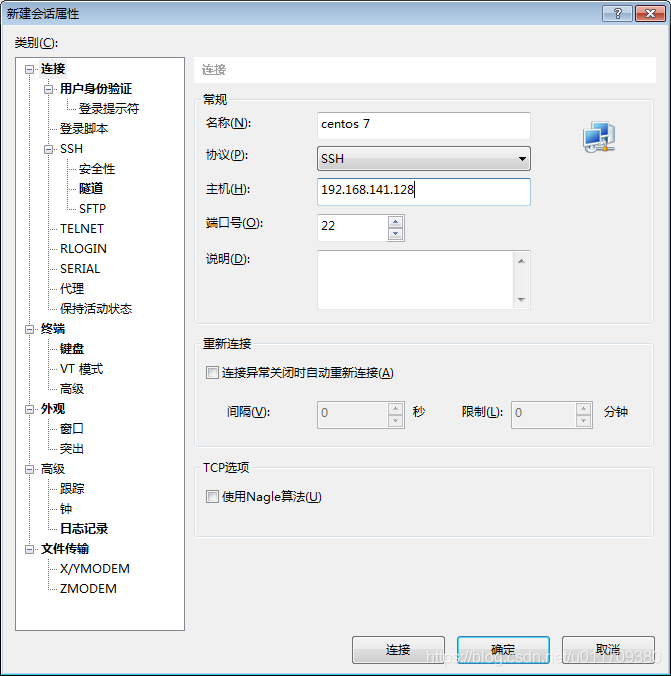
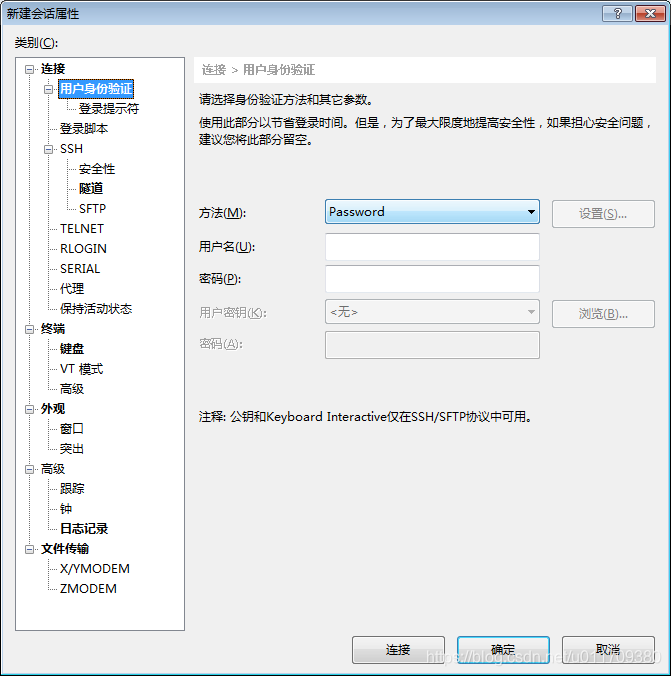
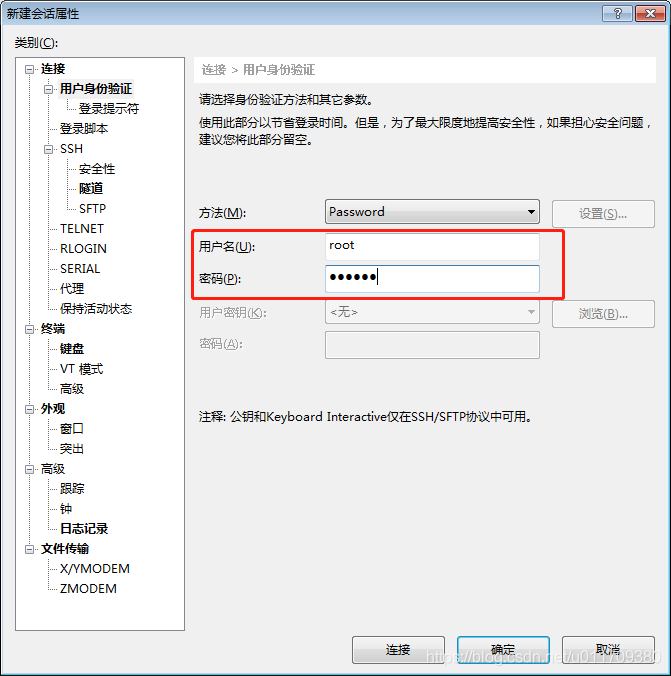
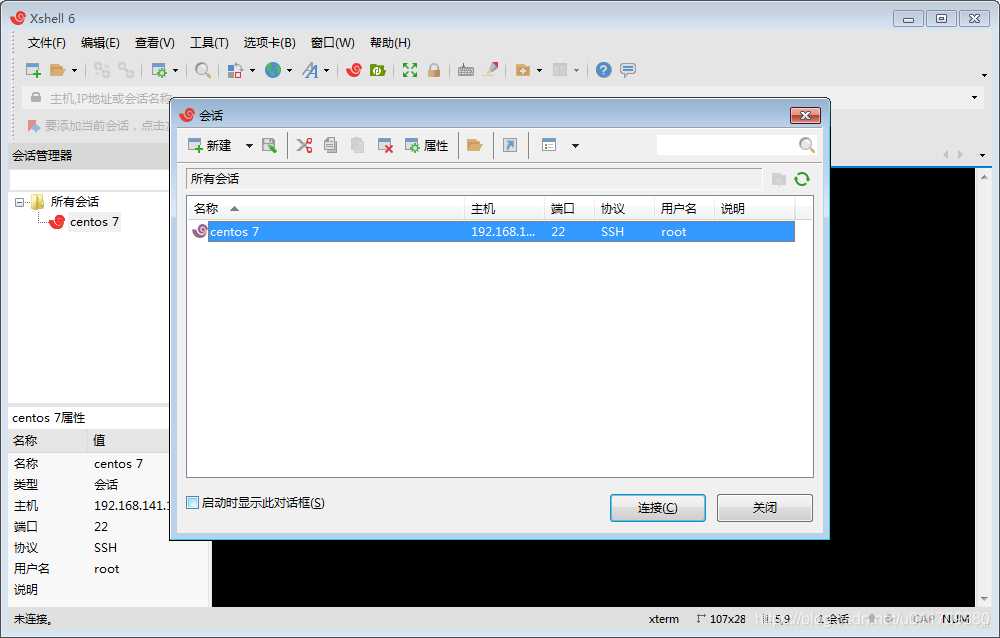
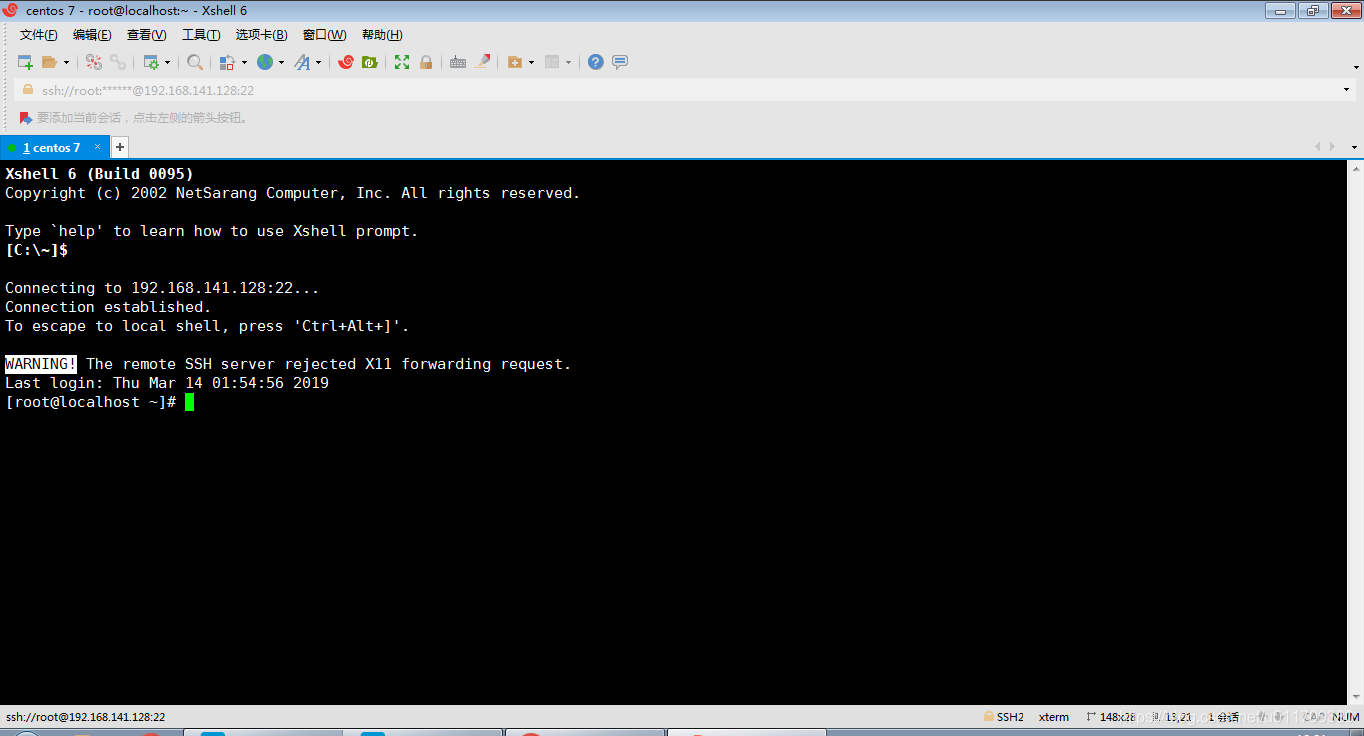
4.xshel remote connection to linux
The following method is to log in to the linux system with the root password

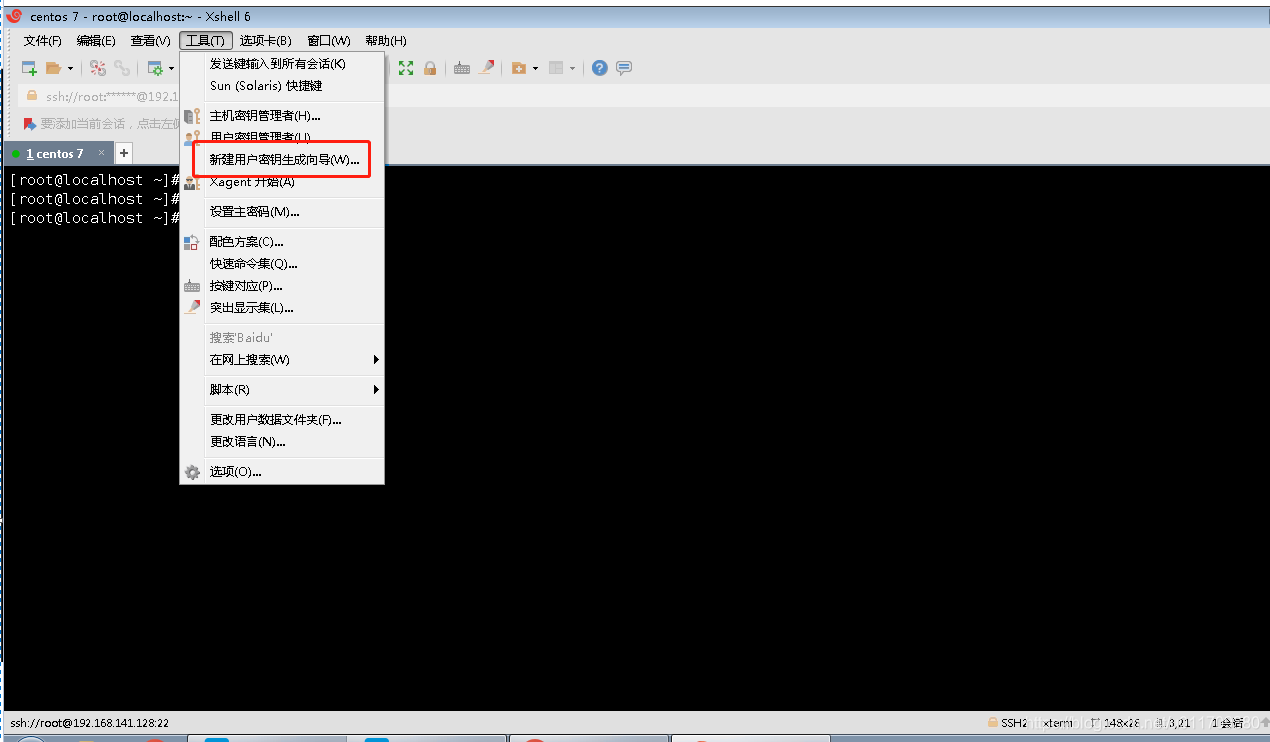
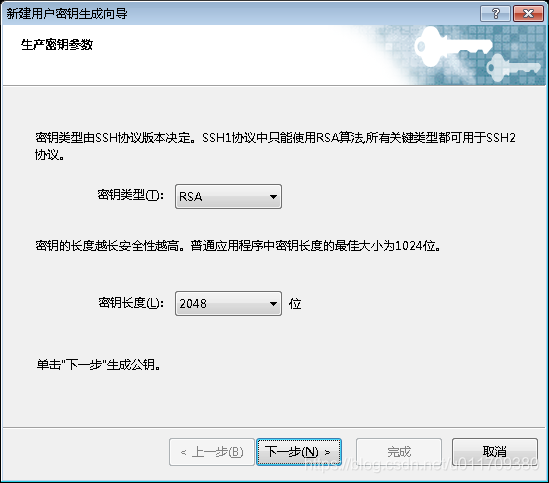
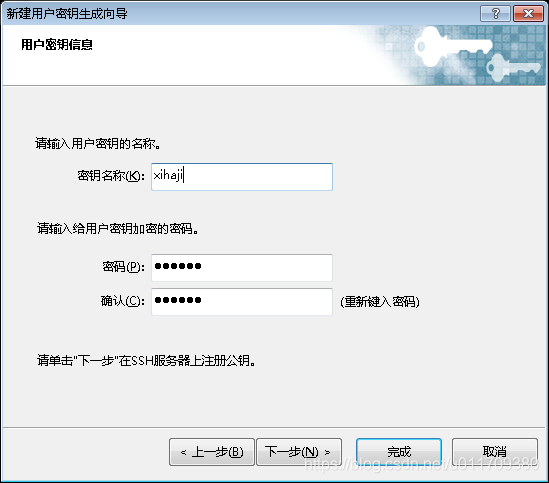
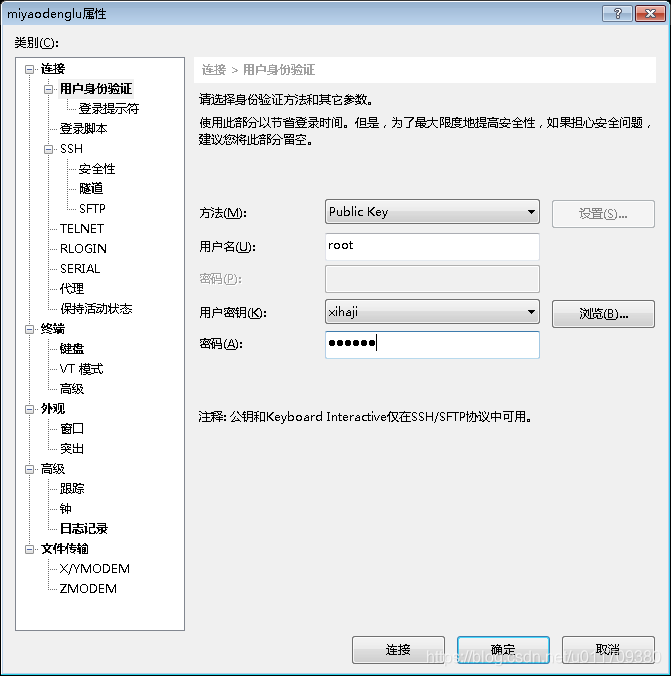
The following method is to log in with a key

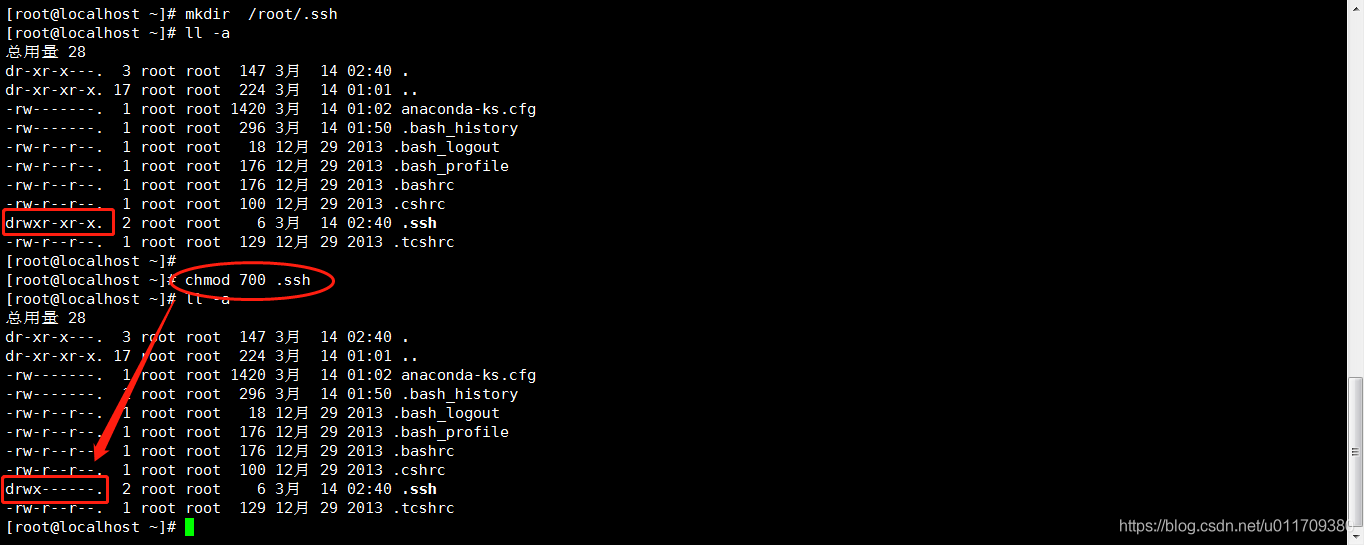
mkdir /root/.ssh   #Create one in the root directory ssh file
ll -a  #Lists all files in the current directory

chmod 700 .ssh #Here you are Set the permission of ssh folder to 700 "rwx ------"
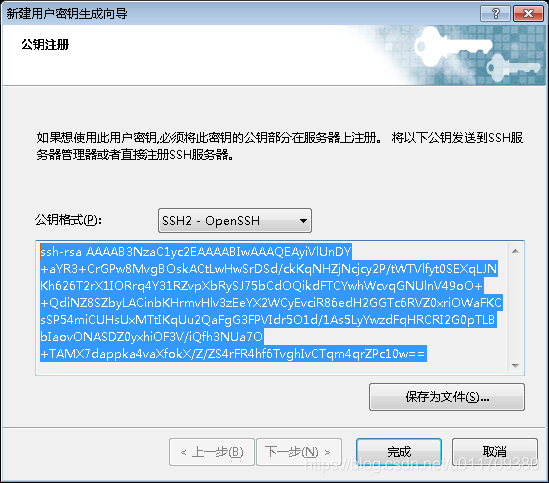
Copy the public key input just created

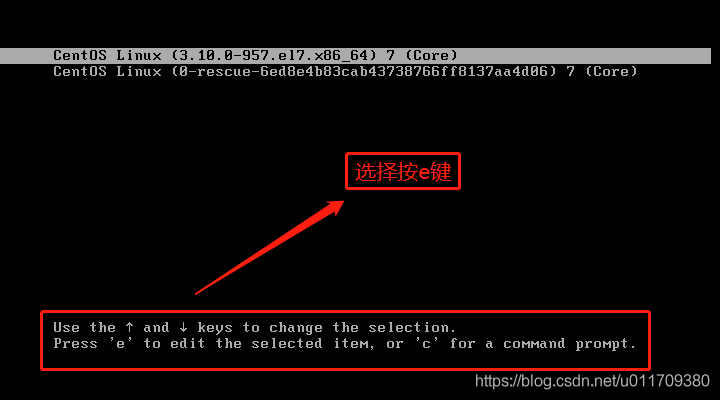
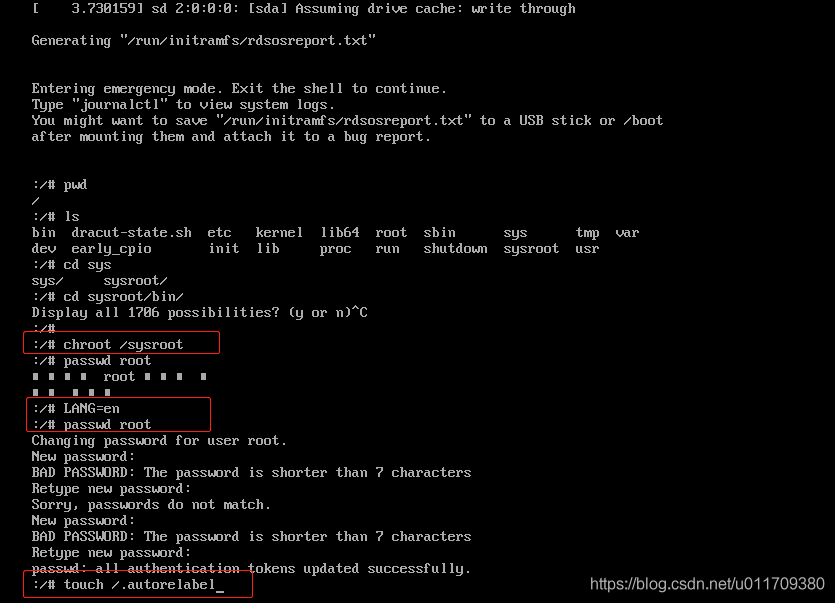
5. Single user mode
What if you forget your root password? When grub does not have a password.
ro stands for readonly

rw means read write sysroot is the directory where the system is located
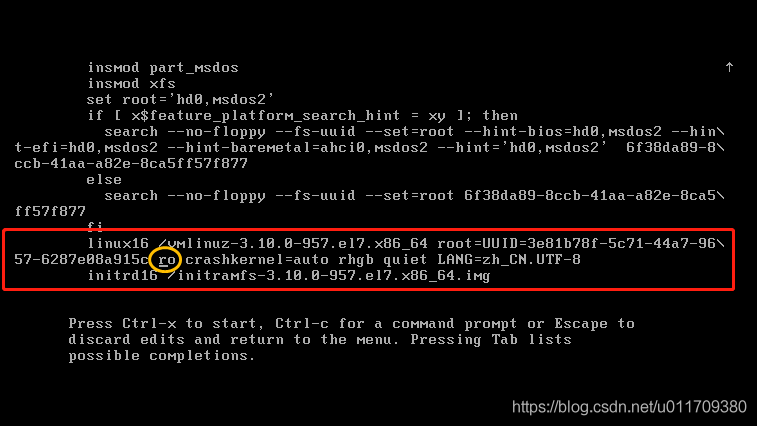
 chroot /sysroot/   #Represents switching to the root user directory
 LANG=en     #The representative changed the mode to English, changed the root password, and changed the garbled code to English
 passwd  root  #Change root password
 touch /.autorelabel #Is an operation related to selinux
 exit		#sign out
 reboot   #restart
6.linux-01 log in to linux-02 with a key
##Use command ssh-keygen Generate public key#

[root@linux-01 .ssh]# ssh-keygen
Generating public/private rsa key pair.
Enter file in which to save the key (/root/.ssh/id_rsa):
Enter passphrase (empty for no passphrase):
Enter same passphrase again:
Your identification has been saved in /root/.ssh/id_rsa.
Your public key has been saved in /root/.ssh/id_rsa.pub.
The key fingerprint is:
SHA256:sxF1osdmG59Y5HD7YhH8Y71Vf40yZaC2a34qLsYWO3g root@linux-02
The key's randomart image is:
+---[RSA 2048]----+
|          +.*.   |
|         + O.oo .|
|        o O =+ o+|
|         * Bo+= *|
|        S + =+..+|
|      .  + o . . |
|     o o. o      |
|    . E .o  .    |
|     + +..oo     |
+----[SHA256]-----

##View generated public key##
[root@linux-01 ~]# ls /root/.ssh/
authorized_keys  id_rsa  id_rsa.pub
[root@linux-01 ~]# cat /root/.ssh/id_rsa.pub
ssh-rsa AAAAB3NzaC1yc2EAAAADAQABAAABAQCtLq7BON1b8vgicPTa5jl5tj/UGvlB/Rn42/Xl/IMZPuSoBpTL6VYtbvlV6NIXK1cRrseBU6hpCzKcUP/GvnKR4PODENkPKq+3KC4A/KSy49axovtr0/ISJV5wTWeH+SO/XHtke8pg8lRtHHBek36gcEVbBGAVge93PVCkZPjFDzqYmMB1ND0xULzViFGOfx830TUINWV8eEWNRtqtdOzpB+jSlqA84stLsiRqAzQLhVIdAcSLGqq+rDnLEvzOcUxA9fZxt7qH7Kc0aFQOKsvzZZrUkldi+n/Ny7bqxXhG9FyVXNzrcelfqtgCGL+te2961kJtPmG9cNxfAvedC+mb root@linux-01
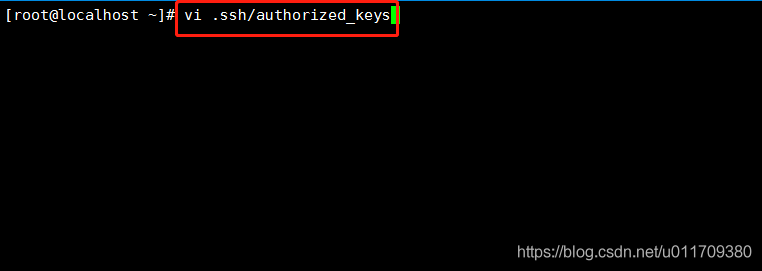
##Place public key in linux-02 upper##
[root@linux-02 .ssh]# vi authorized_keys   ##Copy and paste the public key generated by linux-01 to this file
##stay linux-01 Password free login linux-02#
##linux-01 computer IP 192.168.141.128
##linux-02 computer IP 192.168.141.129

[root@linux-01 ~]# ssh 192.168.141.129
Last login: Fri Mar 15 01:39:16 2019 from 192.168.141.128
[root@linux-02 ~]#
After class summary
1, Common linux operating systems
I have learned about some common linux operating systems: centos (rehl Community Edition), rehl, ubuntu, suse, debian. centos and ubuntu have been used, but others have not been used yet
linux history: https://commons.wikimedia.org/wiki/File:Linux_Distribution_Timeline.svg Kernel official website: https://www.kernel.org/ centos official website: https://www.centos.org/
2, Knowledge points mentioned in class
1.selinux shutdown
#Temporarily Closed selinux,It will be started next time#
[root@localhost ~]# getenforce    ##see sulinux State of#
Enforcing    ##On behalf of##
[root@localhost ~]# setenforce 0  ##Temporarily Closed selinux#
[root@localhost ~]# getenforce
Permissive  ##Representative closed##

#Permanent shutdown selinux#
[root@localhost ~]# vim /etc/sysconfig/selinux  ##Modify profile##

# This file controls the state of SELinux on the system.
# SELINUX= can take one of these three values:
#     enforcing - SELinux security policy is enforced.
#     permissive - SELinux prints warnings instead of enforcing.
#     disabled - No SELinux policy is loaded.

SELINUX=enforcing         "Modify here as SELINUX=disable"

# SELINUXTYPE= can take one of three values:
#     targeted - Targeted processes are protected,
#     minimum - Modification of targeted policy. Only selected processes are protected.
#     mls - Multi Level Security protection.
SELINUXTYPE=targeted
2. Modify the startup display
##Modify startup screen##
[root@localhost ~]# vim /etc/motd
[root@localhost ~]# exit
 Logout
Connection closing...Socket close.
Connection closed by foreign host.
Disconnected from remote host(CentOS 7.6) at 23:43:21.
Type `help' to learn how to use Xshell prompt.
[C:\~]$
Connecting to 192.168.241.88:22...
Connection established.
To escape to local shell, press 'Ctrl+Alt+]'.
Last login: Thu Mar 14 23:32:04 2019 from 192.168.241.1
welcome to linux!
[root@localhost ~]#
3. System operation level
[root@localhost ~]# ll /usr/lib/systemd/system/runlevel*target
lrwxrwxrwx. 1 root root 15 2 August 28-21:06 /usr/lib/systemd/system/runlevel0.target -> poweroff.target
lrwxrwxrwx. 1 root root 13 2 August 28-21:06 /usr/lib/systemd/system/runlevel1.target -> rescue.target
lrwxrwxrwx. 1 root root 17 2 August 28-21:06 /usr/lib/systemd/system/runlevel2.target -> multi-user.target
lrwxrwxrwx. 1 root root 17 2 August 28-21:06 /usr/lib/systemd/system/runlevel3.target -> multi-user.target
lrwxrwxrwx. 1 root root 17 2 August 28-21:06 /usr/lib/systemd/system/runlevel4.target -> multi-user.target
lrwxrwxrwx. 1 root root 16 2 August 28-21:06 /usr/lib/systemd/system/runlevel5.target -> graphical.target
lrwxrwxrwx. 1 root root 13 2 August 28-21:06 /usr/lib/systemd/system/runlevel6.target -> reboot.target

Level 0 represents shutdown
 Level 1 represents a single user
 Levels 2, 3 and 4 represent multiple users. Level 3 enters the system after normal startup
 Level 5 represents the graphical interface
 Level 6 represents restart
4. Key file configuration
[root@localhost .ssh]# cat /etc/ssh/sshd_config

#	$OpenBSD: sshd_config,v 1.100 2016/08/15 12:32:04 naddy Exp $

# This is the sshd server system-wide configuration file.  See
# sshd_config(5) for more information.

# This sshd was compiled with PATH=/usr/local/bin:/usr/bin

# The strategy used for options in the default sshd_config shipped with
# OpenSSH is to specify options with their default value where
# possible, but leave them commented.  Uncommented options override the
# default value.

# If you want to change the port on a SELinux system, you have to tell
# SELinux about this change.
# semanage port -a -t ssh_port_t -p tcp #PORTNUMBER
#
#Port 22
#AddressFamily any
#ListenAddress 0.0.0.0
#ListenAddress ::

HostKey /etc/ssh/ssh_host_rsa_key
#HostKey /etc/ssh/ssh_host_dsa_key
HostKey /etc/ssh/ssh_host_ecdsa_key
HostKey /etc/ssh/ssh_host_ed25519_key

# Ciphers and keying
#RekeyLimit default none

# Logging
#SyslogFacility AUTH
SyslogFacility AUTHPRIV
#LogLevel INFO

# Authentication:

#LoginGraceTime 2m
#PermitRootLogin yes
#StrictModes yes
#MaxAuthTries 6
#MaxSessions 10

#PubkeyAuthentication yes

# The default is to check both .ssh/authorized_keys and .ssh/authorized_keys2
# but this is overridden so installations will only check .ssh/authorized_keys

AuthorizedKeysFile	.ssh/authorized_keys    "Here is the folder where the key is set, key file name "

#AuthorizedPrincipalsFile none

#AuthorizedKeysCommand none
#AuthorizedKeysCommandUser nobody

# For this to work you will also need host keys in /etc/ssh/ssh_known_hosts
#HostbasedAuthentication no
# Change to yes if you don't trust ~/.ssh/known_hosts for
# HostbasedAuthentication
#IgnoreUserKnownHosts no
# Don't read the user's ~/.rhosts and ~/.shosts files
#IgnoreRhosts yes

# To disable tunneled clear text passwords, change to no here!
#PasswordAuthentication yes
#PermitEmptyPasswords no
PasswordAuthentication yes

# Change to no to disable s/key passwords
#ChallengeResponseAuthentication yes
ChallengeResponseAuthentication no

# Kerberos options
#KerberosAuthentication no
#KerberosOrLocalPasswd yes
#KerberosTicketCleanup yes
#KerberosGetAFSToken no
#KerberosUseKuserok yes

# GSSAPI options
GSSAPIAuthentication yes
GSSAPICleanupCredentials no
#GSSAPIStrictAcceptorCheck yes
#GSSAPIKeyExchange no
#GSSAPIEnablek5users no

# Set this to 'yes' to enable PAM authentication, account processing,
# and session processing. If this is enabled, PAM authentication will
# be allowed through the ChallengeResponseAuthentication and
# PasswordAuthentication.  Depending on your PAM configuration,
# PAM authentication via ChallengeResponseAuthentication may bypass
# the setting of "PermitRootLogin without-password".
# If you just want the PAM account and session checks to run without
# PAM authentication, then enable this but set PasswordAuthentication
# and ChallengeResponseAuthentication to 'no'.
# WARNING: 'UsePAM no' is not supported in Red Hat Enterprise Linux and may cause several
# problems.
UsePAM yes

#AllowAgentForwarding yes
#AllowTcpForwarding yes
#GatewayPorts no
X11Forwarding yes
#X11DisplayOffset 10
#X11UseLocalhost yes
#PermitTTY yes
#PrintMotd yes
#PrintLastLog yes
#TCPKeepAlive yes
#UseLogin no
#UsePrivilegeSeparation sandbox
#PermitUserEnvironment no
#Compression delayed
#ClientAliveInterval 0
#ClientAliveCountMax 3
#ShowPatchLevel no
#UseDNS yes
#PidFile /var/run/sshd.pid
#MaxStartups 10:30:100
#PermitTunnel no
#ChrootDirectory none
#VersionAddendum none

# no default banner path
#Banner none

# Accept locale-related environment variables
AcceptEnv LANG LC_CTYPE LC_NUMERIC LC_TIME LC_COLLATE LC_MONETARY LC_MESSAGES
AcceptEnv LC_PAPER LC_NAME LC_ADDRESS LC_TELEPHONE LC_MEASUREMENT
AcceptEnv LC_IDENTIFICATION LC_ALL LANGUAGE
AcceptEnv XMODIFIERS

# override default of no subsystems
Subsystem	sftp	/usr/libexec/openssh/sftp-server

# Example of overriding settings on a per-user basis
#Match User anoncvs
#	X11Forwarding no
#	AllowTcpForwarding no
#	PermitTTY no
#	ForceCommand cvs server
5.Centos7 modifying grub password
##The system now generates a password##
[root@localhost .ssh]# grub2-mkpasswd-pbkdf2
Enter password:
Reenter password:
PBKDF2 hash of your password is grub.pbkdf2.sha512.10000.971367C1E3C46E524C5706199FDF1F3E085D07CFA5A04E98124D358F4054CD7B8C5380684233860A8DE69440A8237EAE7A8571961573BDDF1694236E287C8A61.A3ADDD1AD834C0EDB5E09B2A89CA4D57620FB9C111434A0D597B450E8200CAC52102FA808939B3BB4A8D26B2C86B294E8A165B1D3F189EF13616958949FB49B6
[root@localhost .ssh]#

##find grub configuration file##
[root@localhost .ssh]# cd  /boot/grub2/
[root@localhost grub2]# ll
 Total consumption 32
-rw-r--r--. 1 root root   84 3 January 4:30 device.map
drwxr-xr-x. 2 root root   25 3 January 4:30 fonts
-rw-r--r--. 1 root root 4235 3 January 4:31 grub.cfg   ##This file is a configuration file##
-rw-r--r--. 1 root root 1024 3 January 4:31 grubenv
drwxr-xr-x. 2 root root 8192 3 January 4:30 i386-pc
drwxr-xr-x. 2 root root 4096 3 January 4:30 locale
[root@localhost grub2]# cp grub.cfg  grub.cfg.bak  ##Backup profile##
[root@localhost grub2]# vim grub.cfg

### BEGIN /etc/grub.d/00_header ###   ##Insert the following below##
set superusers="root"
export superusers
password_pbkdf2 root   "Note that this is a line " grub.pbkdf2.sha512.10000.971367C1E3C46E524C5706199FDF1F3E085D07CFA5A04E98124D358F4054CD7B8C5380684233860A8DE69440A8237EAE7A8571961573BDDF1694236E287C8A61.A3ADDD1AD834C0EDB5E09B2A89CA4D57620FB9C111434A0D597B450E8200CAC52102FA808939B3BB4A8D26B2C86B294E8A165B1D3F189EF13616958949FB49B6
6. View system information
##View system kernel information#
[root@linux-01 ~]# uname -r
3.10.0-957.el7.x86_64
[root@linux-01 ~]#

##View system version information##
[root@linux-01 ~]# cat  /etc/centos-release
CentOS Linux release 7.6.1810 (Core)

##Modify system hostname#
[root@localhost ~]#  hostnamectl set-hostname linux-01