Learning proxy server
The proxy server acts as an intermediary between the client and the server to hide some information of the client
There are two most common agents on linux, one is http agent, the other is socks agent
Network connection
Normal connection
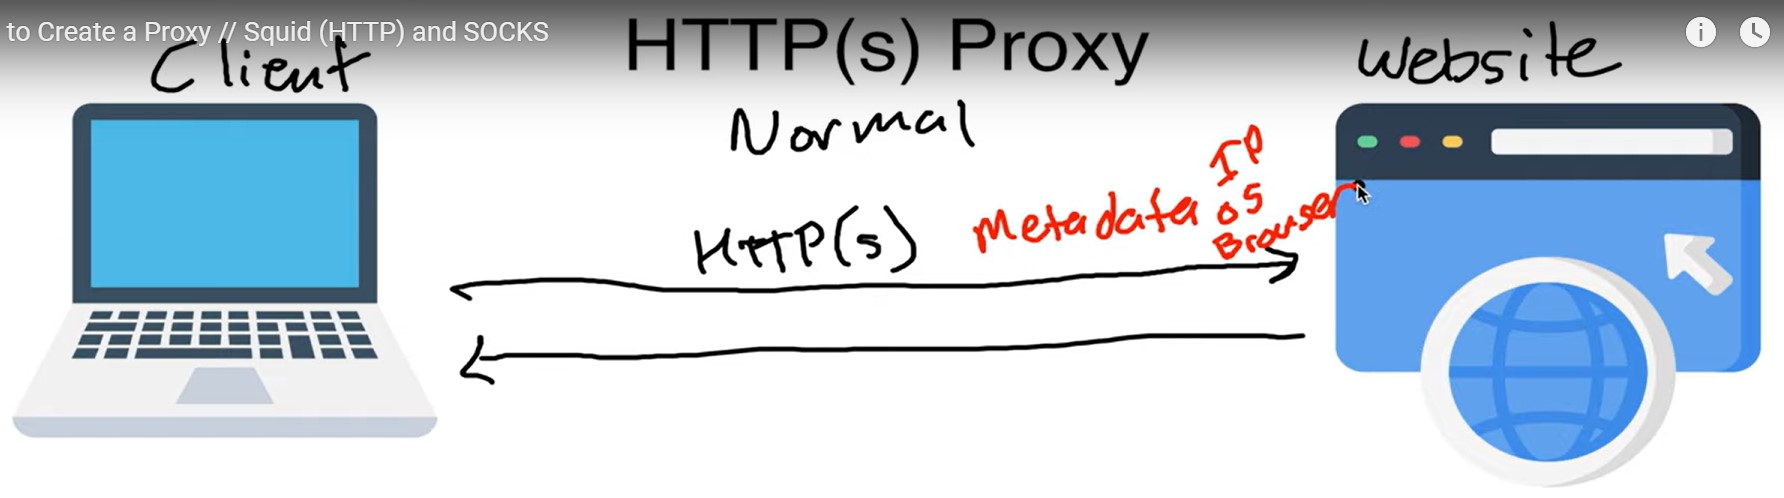
The client sends an HTTP request to the server, and the server responds to the HTTP result
The IP address, operating system and browser information of the client will be obtained by the server.
http proxy
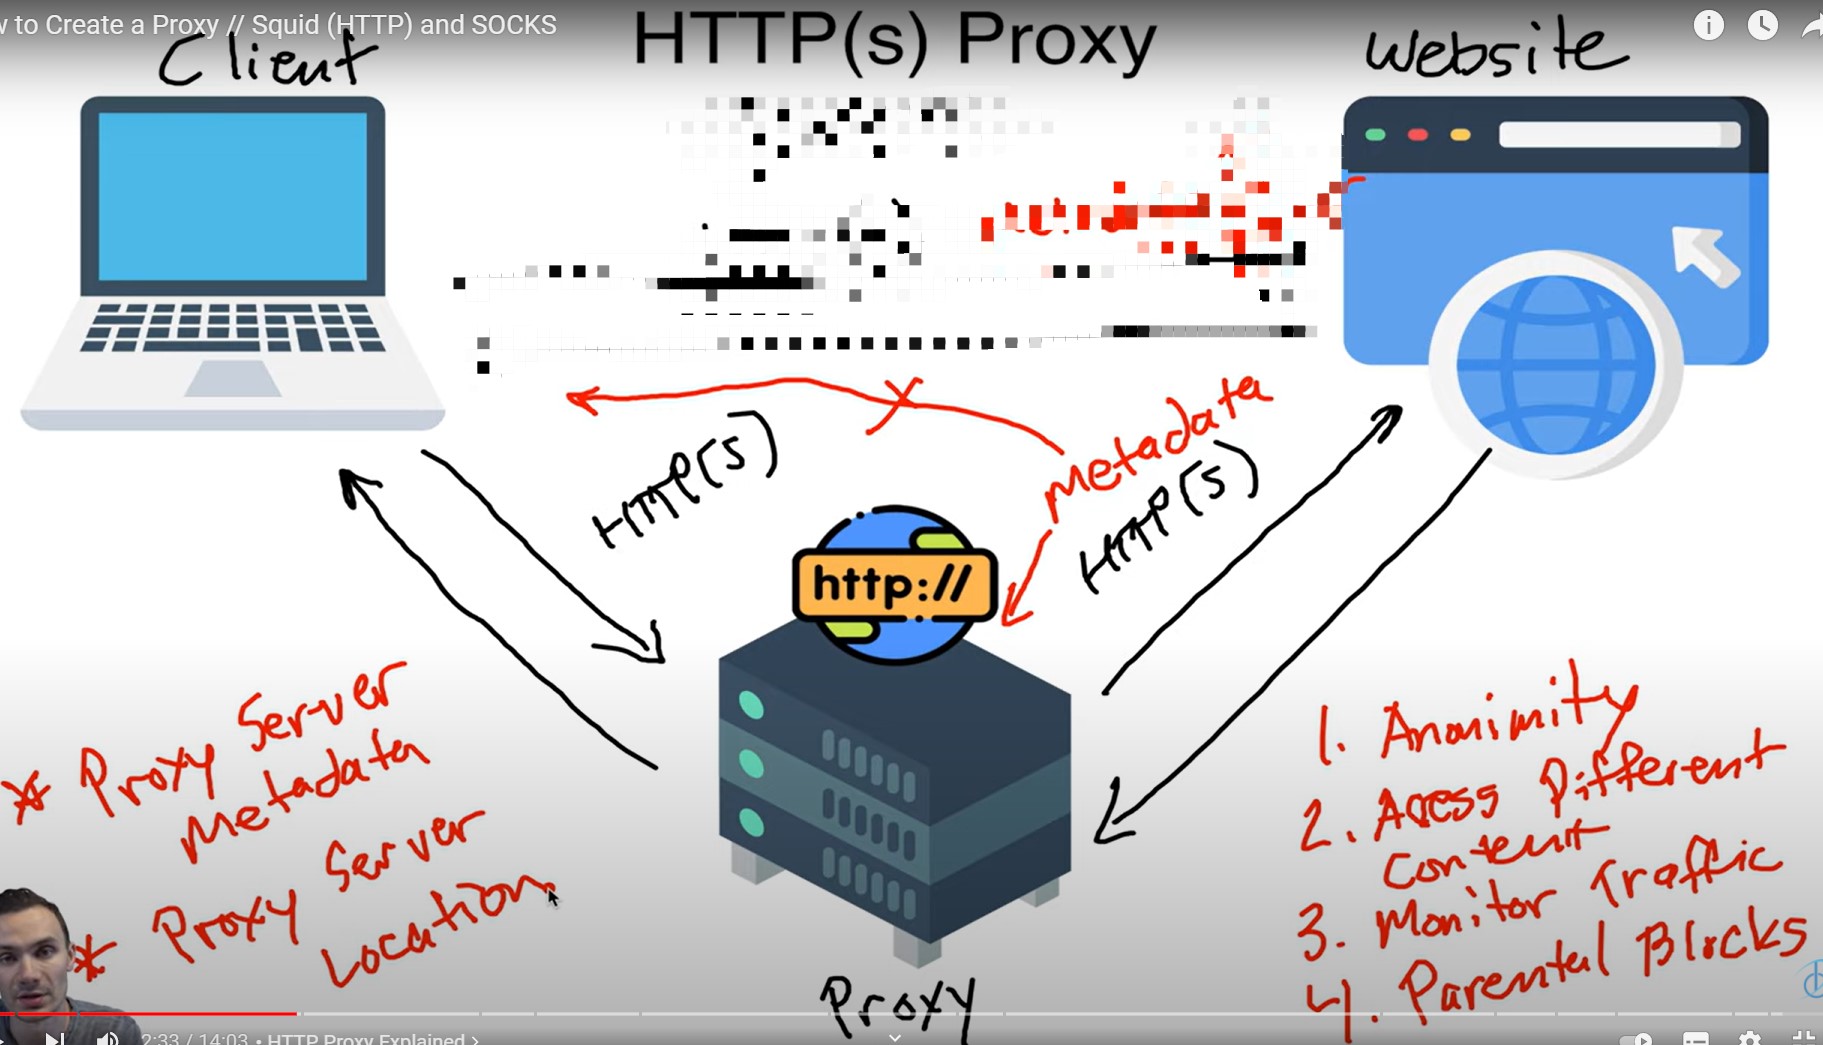
The client sends the HTTP request to the proxy server, the proxy server forwards the data to the server, the server responds to the HTTP result to the proxy server, and the proxy server returns the HTTP result to the client
At this time, the IP address, operating system and browser information obtained by the server are actually the information of the proxy server
socks proxy
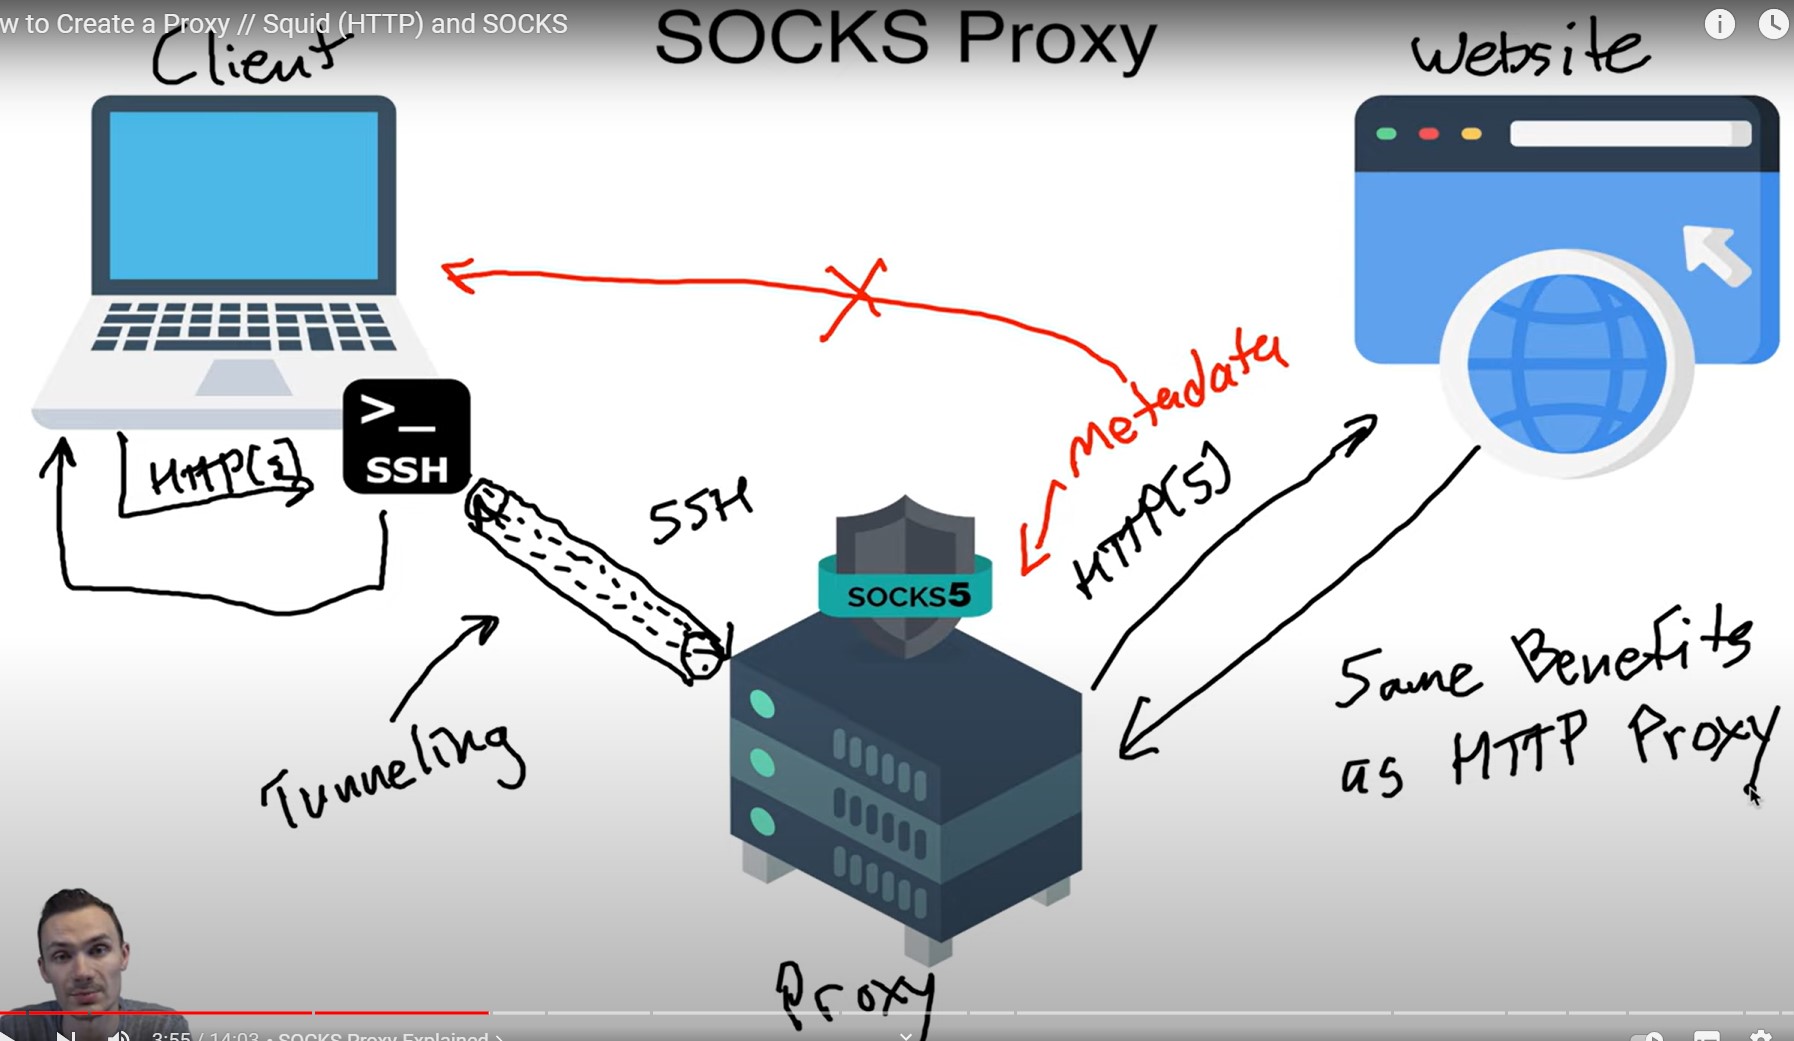
Establish ssh connection between client and proxy server. The client sends the HTTP request through the ssh pipeline, the proxy server sends the data to the website server, the website server responds to the HTTP result, the proxy server returns the HTTP result through the ssh pipeline, and the client displays the result
Compared with http proxy, it has one more ssh pipeline establishment process. The advantages are the same as http proxy.
Demonstrate the process of establishing an agent
http proxy
Proxy server (ubuntu 20.04)
# Install squid agent software
sudo apt install squid

# Backup profile
sudo cp /etc/squid/squid.conf /etc/squid/squid.conf.default

# Edit profile
sudo vi /etc/squid/squid.conf
## Search http_access allow
## Open http_access allow localnet

# Restart squid app
sudo systemctl restart squid

# Make sure the squid application is started
sudo systemctl status squid
client
Use postman, click Settings - > proxy - > check add a custom proxy configuration, uncheck use the system proxy - > enter the address and port of squid (3128 by default) - > and then access the website in postman
View proxy connection requests
sudo vim /var/log/squid/access.log
Add more configurations (user name, password) to the proxy server
# Edit squid configuration
sudo vim /etc/squid/squid.conf

## Query acl and add the following statement before acl localnet src 0.0.0.1-0.255.255.255
## The first is to add basic program parameters to tell us the basic authentication to use next
auth_param basic program /usr/lib/squid/basic_ncsa_auth /etc/squid/htpasswd
## Then add the parameters, the basic domain Squid proxy cache Web server, which just tells us to provide authentication for this authentication
auth_param basic realm Squid Proxy Caching Web Server
## Tell the acl of the agent that needs to be authenticated
acl authenticated proxy_auth REQUIRED
## Tell allowed IP addresses
acl authenticated_ips src 192.168.45.5/32

## Query http_access allow localnet, modify it to look like the following. This sentence indicates that the following two conditions must be observed before using the proxy server
http_access allow authenticated authenticated_ips

# When creating a PASSWORD file, remember to modify USERNAME and PASSWORD
sudo printf "USERNAME:$(openssl passwd -crypt PASSWORD)\n" | sudo tee -a /etc/squid/htpasswd

# Restart squid
sudo systemctl restart squid
Configure the username and password of the agent for postman
Open postman and fill in the user name and password in settings - > proxy - > proxy auth - > proxy auth
socks proxy
This is much simpler than http proxy. All the following operations are performed on the client. use
# Connect to server 192.168.70.4 and listen on port 40932
ssh root@192.168.70.4 -D 40932

# Check whether the listening port is started
netstat -natp | grep 40932
Use the proxy software, such as SwitchyOmega, to enter the local IP address (for example, localhost), port (40932), open the connection, and then use it