Set up front desk system
Static resources
new project -> Static Web- Static Web
Save project to hm49 \ code \ Leyou portal
Unzip the Leyou portal file of the course
Copy directly to new project
live-server
Without webpack, we can't run this project using webpack dev server to achieve hot deployment.
Not a single page
Therefore, here we use another hot deployment method: live server,
brief introduction
Address; https://www.npmjs.com/package/live-server

This is a small development server with hot loading function. Use it to display your HTML / JavaScript / CSS, but it can't be used to deploy the final website.
Installation and operating parameters
To install, use the npm command. It is recommended to install globally. It can be used anywhere in the future
npm install -g live-server
When running, directly enter the command:
live-server
In addition, you can follow some parameters to configure after running the command:
- --port=NUMBER - select the port to use. The default value is PORT env var or 8080
- --host=ADDRESS - select the host address to bind. The default value is IP env var or 0.0.0.0 ("any address")
- --No browser - disable automatic Web browser startup
- --browser=BROWSER - specifies to use the browser instead of the system default
- --quiet | -q - prohibit recording
- --verbose | -V - more logging (record all requests, display all listening IPv4 interfaces, etc.)
- --open=PATH - start the browser to PATH instead of server root
- --watch=PATH - comma separated paths to specifically monitor changes (default: view everything)
- --ignore=PATH - comma separated path string to ignore( anymatch -compatible definition)
- --ignorePattern=RGXP - the regular expression of the file is ignored (i.e. * \. jade) (in favor of -- ignore is not recommended)
- --middleware=PATH - the path to export the. js file of the middleware function to be added; it can be the name without path or the extension referring to the middleware bundled in the middleware folder
- --Entry file = path - provide this file (server root) in place of the missing file (useful for single page applications)
- --mount=ROUTE:PATH - provide path content under the defined route (there may be multiple definitions)
- --spa - convert request from / abc to / abc (convenient for single page application)
- --wait=MILLISECONDS - (default 100ms) wait for all changes and reload
- --htpasswd=PATH - enables HTTP auth that expects the htpasswd file located in PATH
- --CORS - enable CORS for any source (reflecting the request source, supporting requests for credentials)
- --https=PATH - path to HTTPS configuration module
- --proxy=ROUTE:URL - proxy all requests to the URL
- --help | -h - display concise tips and exit
- --version | -v - displays the version and exits
test
We enter the Leyou portal directory and enter the command:
live-server --port=9002
If you can't install or run, you must turn off the front-end project of the management page and try again, because the port may be occupied
Domain name access
Now we can only access through: http://127.0.0.1:9002
We want to access: http://www.leyou.com
Step 1: modify the hosts file and add a line of configuration:
127.0.0.1 www.leyou.com
The second step is to modify the nginx configuration and reverse proxy www.leyou.com to 127.0.0.1:9002
The configuration should be written to the first
server {
    listen       80;
    server_name  www.leyou.com;

    proxy_set_header X-Forwarded-Host $host;
    proxy_set_header X-Forwarded-Server $host;
    proxy_set_header X-Forwarded-For $proxy_add_x_forwarded_for;

    location / {
        proxy_pass http://127.0.0.1:9002;
        proxy_connect_timeout 600;
        proxy_read_timeout 600;
    }
}
Reload nginx configuration: nginx.exe -s reload
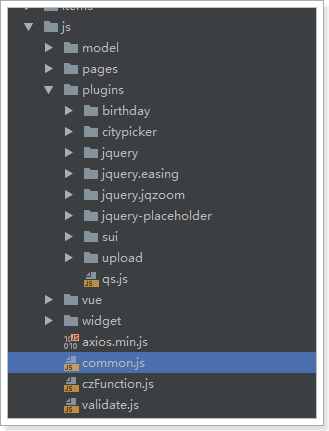
common.js
In order to facilitate subsequent development, we defined some tools in the foreground system and put them in common.js:
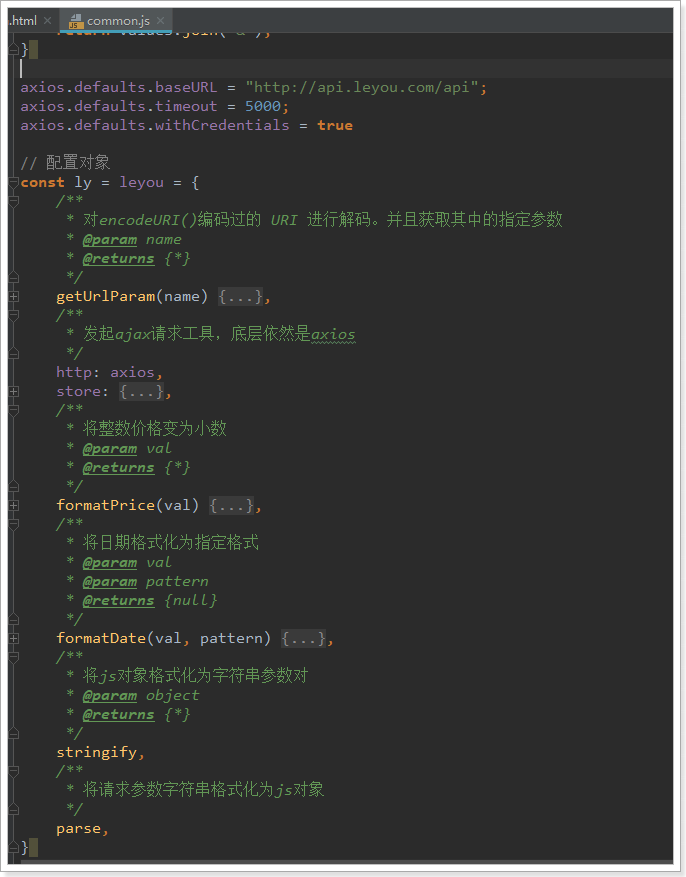
Firstly, some global configurations are made for axios, such as request timeout, basic path of request, whether cross domain operation of cookie s is allowed, etc
The defined object ly, also known as leyou, contains the following properties:
- getUrlParam(key): get the parameters in the url path
- http: alias of the axios object. You can use ly.http.get() to initiate ajax requests later
- store: local storage is easy to operate, which will be described in detail later
- formatPrice: format the price. If a string is passed in, it will be expanded by 100 and converted to a number. If a number is passed in, it will be reduced by 100 times and converted to a string
- Format date (val, pattern): formats the date object val according to the specified pattern template
- stringify: converts an object to a parameter string
- parse: changes the parameter string to a js object
Elasticsearch introduction and installation
When users visit our home page, they usually search directly to find the goods they want to buy.
The number of goods is very large, and the classification is complex. How to correctly display the goods users want, filter reasonably and promote the transaction as soon as possible is the core of the search system.
In the face of such complex search business and data volume, it is difficult to use traditional database search. Generally, we will use full-text retrieval technology, such as Solr, which we have learned before.
Today, however, we are going to talk about another full-text retrieval technology: elastic search.
brief introduction
Elastic
Elastic official website: https://www.elastic.co/cn/

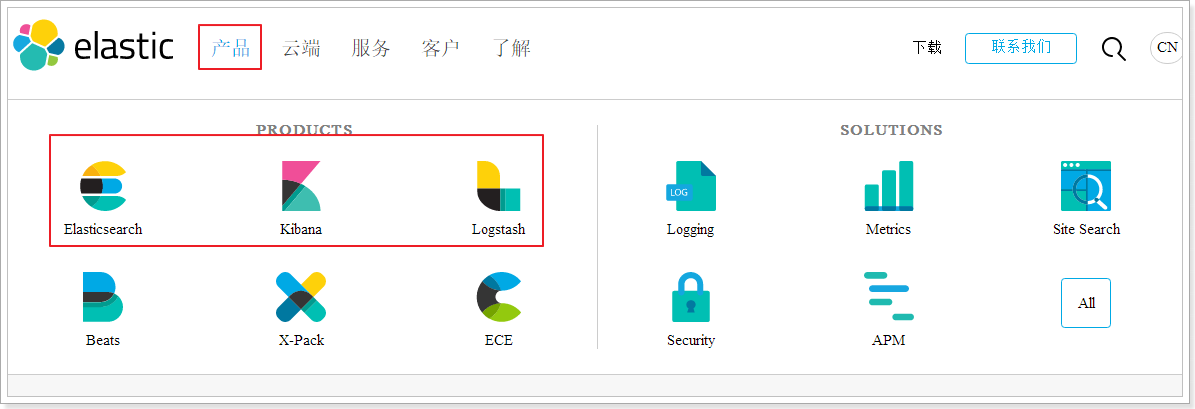
Elastic has a complete product line and solutions: Elasticsearch, Kibana, Logstash, etc. the above three are the ELK technology stack.
Elasticsearch
Elasticsearch website: https://www.elastic.co/cn/products/elasticsearch
As mentioned above, Elasticsearch has the following features:
- Distributed, no need to build clusters manually (solr needs to be configured manually, and Zookeeper is used as the registration center)
- Restful style, all API s follow the Rest principle and are easy to use
- For near real-time search, data updates are almost completely synchronized in Elasticsearch.
At present, the latest version of Elasticsearch is 6.3.1, so we use 6.3.0
Virtual machine JDK1.8 and above is required
install and configure
In order to simulate the real scene, we will install Elasticsearch under linux.
Create a new user leyou
For security reasons, elasticsearch is not allowed to run under the root account by default.
Create user:
useradd leyou
Set password:
passwd leyou
Switch users:
su - leyou
Upload the installation package and unzip it
We will upload the installation package to the: / home/leyou directory

Decompression:
tar -zxvf elasticsearch-6.2.4.tar.gz
We rename the directory:
mv elasticsearch-6.3.0/ elasticsearch

Enter to view the directory structure:

Modify configuration
We go to the config Directory: cd config
There are two configuration files that need to be modified:

- jvm.options
Elasticsearch is based on Lucene, and the underlying layer of Lucene is implemented in java, so we need to configure jvm parameters.
Edit jvm.options:
vim jvm.options
The default configuration is as follows:
-Xms1g
-Xmx1g
Too much memory. Let's turn it down:
-Xms512m
-Xmx512m
- elasticsearch.yml
vim elasticsearch.yml
- Modify the data and log directory:
path.data: /home/leyou/elasticsearch/data # Data directory location
path.logs: /home/leyou/elasticsearch/logs # Log directory location
We modified the data and logs directories to point to the installation directory of elasticsearch. However, these two directories do not exist, so we need to create them.
Enter the root directory of elasticsearch and create:
mkdir data
mkdir logs
- Modify the bound ip:
network.host: 0.0.0.0 # Bind to 0.0.0.0 and allow any ip to access
Only local access is allowed by default. After it is modified to 0.0.0.0, it can be accessed remotely
At present, we are doing stand-alone installation. If we want to do cluster, we only need to add other node information to this configuration file.
Other configurable information of elasticsearch.yml:
| Attribute name | explain |
|---|---|
| cluster.name | Configure the cluster name of elasticsearch. The default is elasticsearch. It is suggested to change it to a meaningful name. |
| node.name | For the node name, es will specify a name randomly by default. It is recommended to specify a meaningful name to facilitate management |
| path.conf | Set the storage path of the configuration file. The tar or zip package is installed in the config folder under the es root directory by default, and the rpm is installed in / etc/ elasticsearch by default |
| path.data | Set the storage path of index data. The default is the data folder under the es root directory. You can set multiple storage paths separated by commas |
| path.logs | Set the storage path of the log file. The default is the logs folder under the es root directory |
| path.plugins | Set the storage path of plug-ins. The default is the plugins folder under the es root directory |
| bootstrap.memory_lock | Set to true to lock the memory used by ES and avoid memory swap |
| network.host | Set bind_host and publish_host, set to 0.0.0.0 to allow Internet access |
| http.port | Set the http port of external service. The default value is 9200. |
| transport.tcp.port | Communication port between cluster nodes |
| discovery.zen.ping.timeout | Set the timeout time of ES automatic discovery node connection, which is 3 seconds by default. If the network delay is high, it can be set larger |
| discovery.zen.minimum_master_nodes | The minimum number of primary nodes. The formula of this value is: (master_eligible_nodes / 2) + 1. For example, if there are three qualified primary nodes, it should be set to 2 |
function
Enter the elasticsearch/bin directory and you can see the following executable file:

Then enter the command:
./elasticsearch
An error was found and the startup failed.
Error 1: kernel too low

We are using CentOS 6, whose linux kernel version is 2.6. The Elasticsearch plug-in requires at least version 3.5. But it doesn't matter. We can disable this plug-in.
Modify the elasticsearch.yml file and add the following configuration at the bottom:
bootstrap.system_call_filter: false
Then restart
Error 2: insufficient file permissions

[1]: max file descriptors [4096] for elasticsearch process likely too low, increase to at least [65536]
We use the leyou user instead of root, so the file permissions are insufficient.
First log in as root.
Then modify the configuration file:
vim /etc/security/limits.conf
Add the following:
* soft nofile 65536

* hard nofile 131072

* soft nproc 4096

* hard nproc 4096
Error 3: insufficient threads
In the error report just now, there is another line:
[1]: max number of threads [1024] for user [leyou] is too low, increase to at least [4096]
This is because there are not enough threads.
Continue to modify the configuration:
vim /etc/security/limits.d/90-nproc.conf
Modify the following:
* soft nproc 1024
Replace with:
* soft nproc 4096
Error 4: process virtual memory
[3]: max virtual memory areas vm.max_map_count [65530] likely too low, increase to at least [262144]
vm.max_map_count: limit the number of VMA (virtual memory area) that a process can own. Continue to modify the configuration file:
vim /etc/sysctl.conf
Add the following:
vm.max_map_count=655360
Then execute the command:
sysctl -p
Restart terminal window
After all errors are corrected, be sure to restart your Xshell terminal, otherwise the configuration will be invalid.
Exception in thread "main" java.nio.file.AccessDeniedException: /root/home/searchengine/elasticsearc
Startup failed because of insufficient permissions
However, you can't start it with root, so you need to modify the permissions
Modify with command
chown -R ITCAST:ITCAST /home/leyou/eal
https://blog.csdn.net/czczcz_/article/details/83308702

ERROR: [2] bootstrap checks failed
[1]: max file descriptors [4096] for elasticsearch process is too low, increase to at least [65536]
[2]: max number of threads [3767] for user [ITCAST] is too low, increase to at least [4096]
You'd better restart after modification
After startup
We can see

You can see that two ports are bound:
- 9300: communication interface between cluster nodes
- 9200: client access interface
We access in the browser: http://192.168.56.101:9200
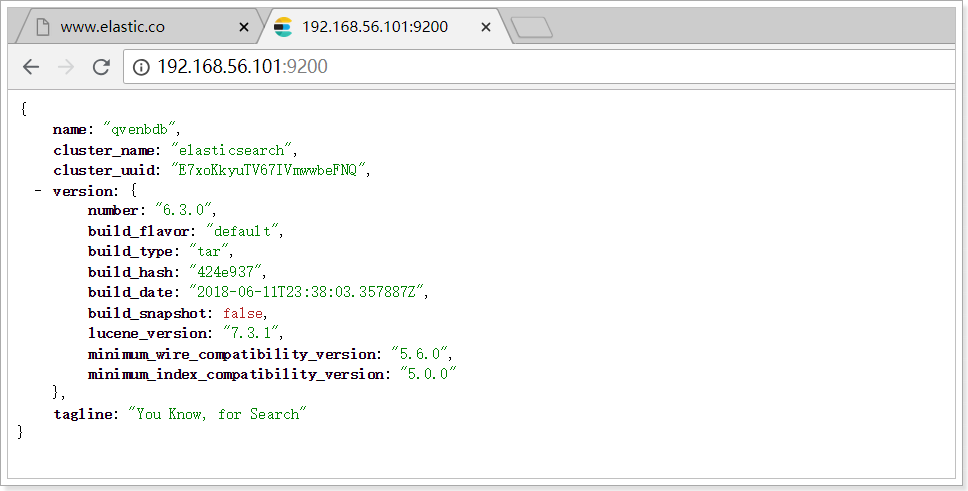
Install Kibana
What is Kibana?

Kibana is a data statistics tool of Elasticsearch index library based on Node.js. It can use the aggregation function of Elasticsearch to generate various charts, such as column chart, line chart, pie chart, etc.
It also provides a console for operating Elasticsearch index data, and provides some API tips, which is very helpful for us to learn Elasticsearch syntax.
install
Because kibana depends on node, node is not installed in our virtual machine, but in window. So we choose to use kibana under window.
The latest version is consistent with elasticsearch, which is also 6.3.0

Unzip into hm49\tools
Configuration run
to configure
Enter the config directory under the installation directory and modify the kibana.yml file:
Modify the address of elasticsearch server:
elasticsearch.url: "http://192.168.56.101:9200"
function
Enter the bin directory under the installation directory:

Double click Run

It is found that kibana's listening port is 5601
We visit: http://127.0.0.1:5601
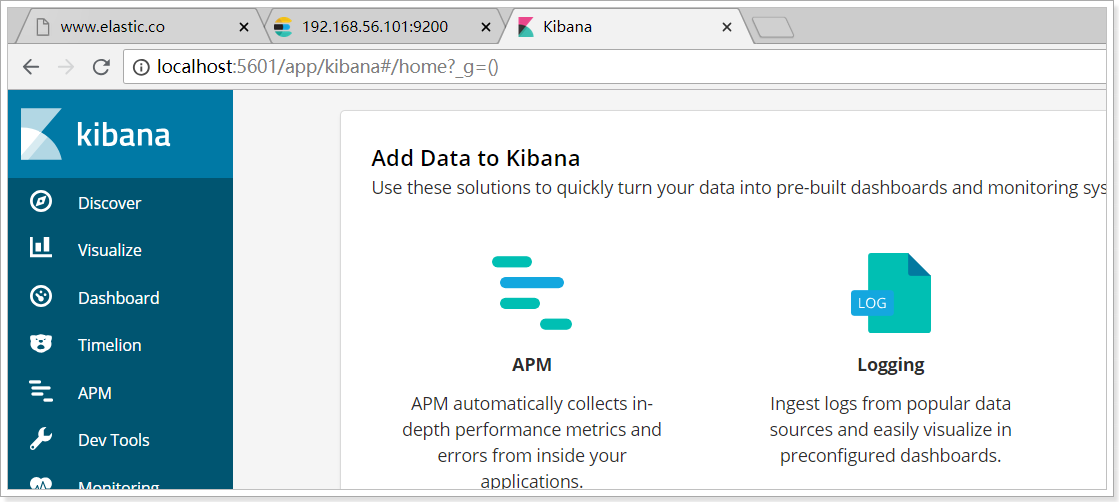
Console
Select the DevTools menu on the left to enter the console page:

On the right side of the page, we can enter the request to access elastic search.

Install ik word splitter
Lucene's IK word breaker was not maintained as early as 2012. Now we need to maintain and upgrade the version based on it, and develop it as an integrated plug-in of elasticsearch. It is maintained and upgraded together with elasticsearch, and the version is the same. The latest version is 6.3.0
install
Upload the zip package in the pre class materials and unzip it into the plugins directory of Elasticsearch Directory:
Unzip the file using the unzip command:
unzip elasticsearch-analysis-ik-6.3.0.zip -d ik-analyzer
Then restart elasticsearch:
API
Elasticsearch provides a Rest style API, namely http request interface, and also provides client APIs in various languages
Rest style API
Document address: https://www.elastic.co/guide/en/elasticsearch/reference/current/index.html

Client API
Elasticsearch supports many clients: https://www.elastic.co/guide/en/elasticsearch/client/index.html

After clicking Java Rest Client, you will find two more:

The Low Level Rest Client is a low-level package that provides some basic functions but is more flexible
The High Level Rest Client is a high-level package based on the Low Level Rest Client. It has richer and more complete functions, and the API will become simpler

How to learn
It is recommended to learn the Rest style API first to understand the underlying implementation of the request and the request body format.
Api and usage examples mixed notes
This part will combine the introduction of Api with the later Demo project. Therefore, the corresponding parts are put together to facilitate understanding and query of engineering examples
Spring Data Elasticsearch instance preparation
brief introduction
Spring Data Elasticsearch is a sub module under the Spring Data project.
Check the official website of Spring Data: http://projects.spring.io/spring-data/

The mission of Spring Data is to provide a familiar and consistent Spring based programming model for data access, while still retaining the special characteristics of the underlying data store.
It makes it easy to use data access technology, relational and non relational databases, map reduce framework and cloud based data services. This is an umbrella project that contains many subprojects specific to a given database. Behind these exciting technology projects are developed by many companies and developers.
The mission of Spring Data is to provide a unified programming interface for various data access, whether it is a relational database (such as MySQL), a non relational database (such as Redis), or an index database such as Elasticsearch. So as to simplify the developer's code and improve the development efficiency.
Modules containing many different data operations:

Page of Spring Data Elasticsearch: https://projects.spring.io/spring-data-elasticsearch/
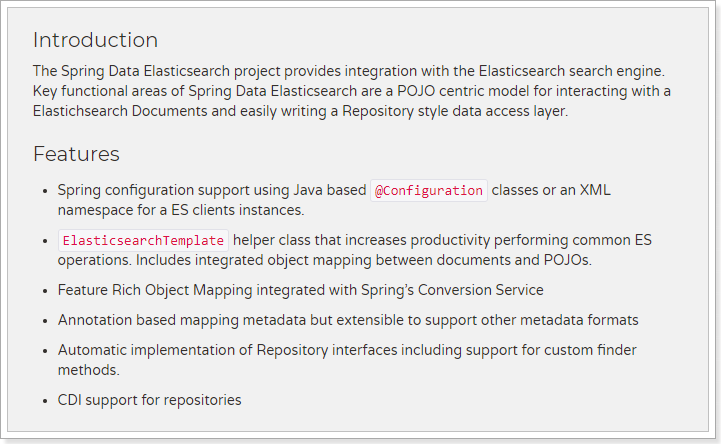
features:
- Support Spring's @ Configuration based java Configuration mode or XML Configuration mode
- Provides a convenient tool class * * ElasticsearchTemplate * * for operating ES. This includes implementing automatic intelligent mapping between documents and POJO s.
- Use Spring's data transformation service to realize the function rich object mapping
- Annotation based metadata mapping, and can be extended to support more different data formats
- The corresponding implementation method is automatically generated according to the persistence layer interface without manual writing of basic operation code (similar to mybatis, it is automatically implemented according to the interface). Of course, manual customization query is also supported
Create Demo project
Direct maven creation

pom dependency:
<?xml version="1.0" encoding="UTF-8"?>
<project xmlns="http://maven.apache.org/POM/4.0.0" xmlns:xsi="http://www.w3.org/2001/XMLSchema-instance"
	xsi:schemaLocation="http://maven.apache.org/POM/4.0.0 http://maven.apache.org/xsd/maven-4.0.0.xsd">
	<modelVersion>4.0.0</modelVersion>

	<groupId>com.leyou.demo</groupId>
	<artifactId>elasticsearch</artifactId>
	<version>0.0.1-SNAPSHOT</version>
	<packaging>jar</packaging>

	<name>elasticsearch</name>
	<description>Demo project for Spring Boot</description>

	<parent>
		<groupId>org.springframework.boot</groupId>
		<artifactId>spring-boot-starter-parent</artifactId>
		<version>2.0.6.RELEASE</version>
		<relativePath/> <!-- lookup parent from repository -->
	</parent>

	<properties>
		<project.build.sourceEncoding>UTF-8</project.build.sourceEncoding>
		<project.reporting.outputEncoding>UTF-8</project.reporting.outputEncoding>
		<java.version>1.8</java.version>
	</properties>

	<dependencies>
		<dependency>
			<groupId>org.springframework.boot</groupId>
			<artifactId>spring-boot-starter-data-elasticsearch</artifactId>
		</dependency>
		<dependency>
			<groupId>org.springframework.boot</groupId>
			<artifactId>spring-boot-starter-test</artifactId>
			<scope>test</scope>
		</dependency>
	</dependencies>

	<build>
		<plugins>
			<plugin>
				<groupId>org.springframework.boot</groupId>
				<artifactId>spring-boot-maven-plugin</artifactId>
			</plugin>
		</plugins>
	</build>
</project>
application.yml file configuration:
spring:
  data:
    elasticsearch:
      cluster-name: elasticsearch
      cluster-nodes: 192.168.56.101:9300
Entity class
First, we prepare the entity class:
public class Item {
    Long id;
    String title; //title
    String category;// classification
    String brand; // brand
    Double price; // Price
    String images; // Picture address
}
mapping
Spring Data declares the mapping attributes of fields through annotations. There are three annotations:
- @Document acts on the class, marking the entity class as a document object, which generally has four attributes
- indexName: the name of the corresponding index library
- Type: corresponds to the type in the index library
- shards: the number of shards. The default value is 5
- Replicas: number of replicas. The default is 1
- @id acts on the member variable and marks a field as the id primary key
- @Field acts on the member variable, marks it as the field of the document, and specifies the field mapping attribute:
- Type: field type. The value is enumeration: FieldType
- Index: whether to index. Boolean type. The default is true
- Store: whether to store. Boolean type. The default is false
- analyzer: word breaker Name: ik_max_word
Example:
@Document(indexName = "item",type = "docs", shards = 1, replicas = 0)
public class Item {
    @Id
    private Long id;

    @Field(type = FieldType.Text, analyzer = "ik_max_word")
    private String title; //title

    @Field(type = FieldType.Keyword)
    private String category;// classification

    @Field(type = FieldType.Keyword)
    private String brand; // brand

    @Field(type = FieldType.Double)
    private Double price; // Price

    @Field(index = false, type = FieldType.Keyword)
    private String images; // Picture address
}
Operation index
Basic concepts
Elasticsearch is also a full-text search library based on Lucene. Its essence is to store data. Many concepts are similar to MySQL.
Comparison relationship:
Index( indices)--------------------------------Databases database

  Type( type)-----------------------------Table data sheet

     Documentation( Document)----------------Row that 's ok

	   Field( Field)-------------------Columns column
detailed description:
| concept | explain |
|---|---|
| Index Libraries | Indexes is the plural of index, which represents many indexes, |
| type | Type is to simulate the concept of table in mysql. There can be different types of indexes under an index library, such as commodity index and order index, with different data formats. However, this will lead to confusion in the index library, so this concept will be removed in future versions |
| document | The original data stored in the index library. For example, each item of commodity information is a document |
| field | Properties in document |
| Mapping configuration | The data type, attribute, index, storage and other characteristics of the field |
Is it similar to the concepts in Lucene and solr.
In addition, there are some cluster related concepts in SolrCloud, and similar concepts in Elasticsearch:
- Indexes (plural of index): the logical complete index collection1
- shard: each part after data splitting
- replica: replication of each shard
It should be noted that Elasticsearch itself is distributed, so even if you have only one node, Elasticsearch will slice and copy your data by default. When you add new data to the cluster, the data will be balanced among the newly added nodes.
Create index
grammar
Elasticsearch adopts Rest style API, so its API is an http request. You can initiate http requests with any tool
Request format for index creation:
-
Request method: PUT
-
Request path: / index library name
-
Request parameter: json format:
{ "settings": { "number_of_shards": 3, "number_of_replicas": 2 } }- Settings: index library settings
- number_of_shards: number of Shards
- number_of_replicas: number of replicas
- Settings: index library settings
Create with kibana
kibana's console can simplify http requests, for example:

Therefore, the server address of elasticsearch is omitted
And there are grammar tips, very comfortable.
View index settings
grammar
Get request can help us view index information. Format:
GET /Index library name
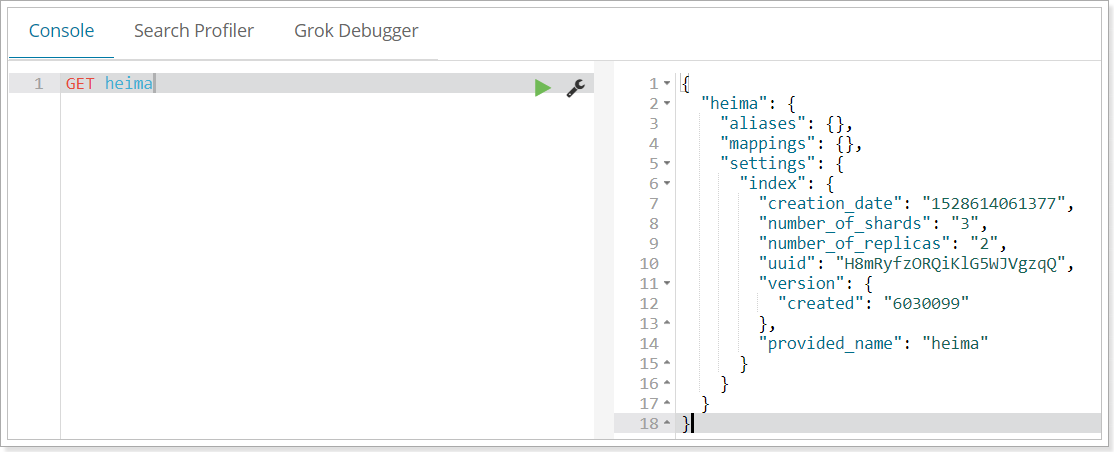
Alternatively, we can use * to query all index library configurations:
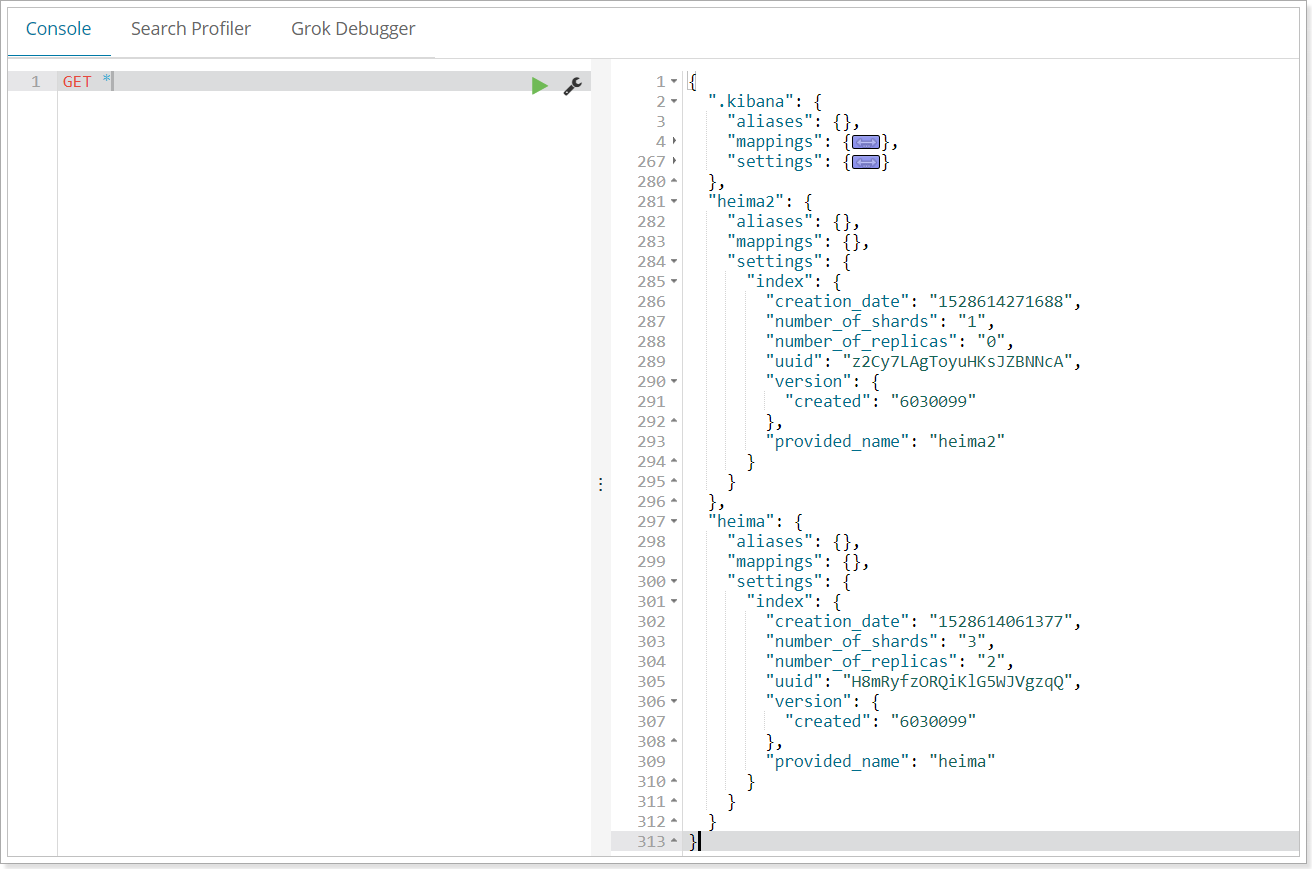
Delete index
Use DELETE request
grammar
DELETE /Index library name
Example


Of course, we can also use the HEAD request to check whether the index exists:

Mapping configuration
Create mapping field
grammar
The request mode is still PUT
PUT /Index library name/_mapping/Type name
{
  "properties": {
    "Field name": {
      "type": "type",
      "index": true,
      "store": true,
      "analyzer": "Tokenizer "
    }
  }
}
- Type name: This is the concept of type, which is similar to different tables in the database
Field name: it can be filled in arbitrarily. Many attributes can be specified, such as: - Type: type, which can be text, long, short, date, integer, object, etc
- Index: whether to index. The default value is true
- Store: store or not. The default value is false
- analyzer: word splitter. ik_max_word here uses ik word splitter
Example
Initiate request:
PUT heima/_mapping/goods
{
  "properties": {
    "title": {
      "type": "text",
      "analyzer": "ik_max_word"
    },
    "images": {
      "type": "keyword",
      "index": "false"
    },
    "price": {
      "type": "float"
    }
  }
}
Response result:
{
  "acknowledged": true
}
View mapping relationships
Syntax:
GET /Index library name/_mapping
Example:
GET /heima/_mapping
Response:
{
  "heima": {
    "mappings": {
      "goods": {
        "properties": {
          "images": {
            "type": "keyword",
            "index": false
          },
          "price": {
            "type": "float"
          },
          "title": {
            "type": "text",
            "analyzer": "ik_max_word"
          }
        }
      }
    }
  }
}
Detailed explanation of field properties
type
The data types supported in Elasticsearch are very rich:
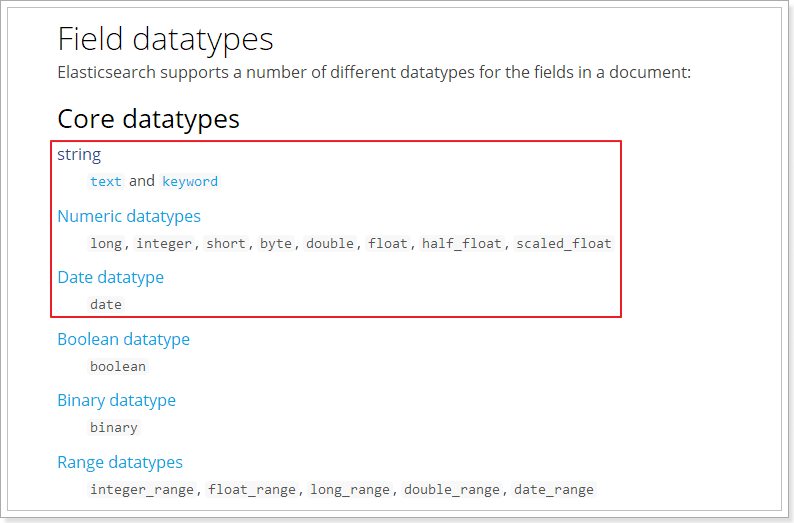
Let's say a few key points:
-
There are two types of String:
- text: participle, not aggregation
- keyword: non separable words. The data will be matched as complete fields and can participate in aggregation
-
Numerical: numerical type, divided into two categories
- Basic data types: long, integer, short, byte, double, float, half_float
- High precision type of floating point number: scaled_float
- You need to specify an accuracy factor, such as 10 or 100. elasticsearch will multiply the real value by this factor, store it, and restore it when it is taken out.
-
Date: date type
elasticsearch can format the date as a string for storage, but it is recommended that we store it as a millisecond value and a long value to save space.
index
Index affects the index of the field.
- True: if the field is indexed, it can be used for search. The default value is true
- false: the field will not be indexed and cannot be used for search
The default value of index is true, which means that all fields will be indexed without any configuration.
However, some fields we don't want to be indexed, such as the picture information of goods, we need to manually set the index to false.
store
Whether to store the data additionally.
When learning lucene and solr, we know that if the store of a field is set to false, the value of this field will not appear in the document list and will not be displayed in the user's search results.
However, in elastic search, you can find results even if store is set to false.
The reason is that when Elasticsearch creates a document index, it will backup the original data in the document and save it to an attribute called _source. In addition, we can filter _sourceto select which to display and which not to display.
If the store is set to true, an extra copy of data will be stored outside the _source, which is redundant. Therefore, generally, we will set the store to false. In fact, the default value of the store is false.
boost
The incentive factor is the same as that in lucene
Others will not be explained one by one. We don't use much. Please refer to the official documents:
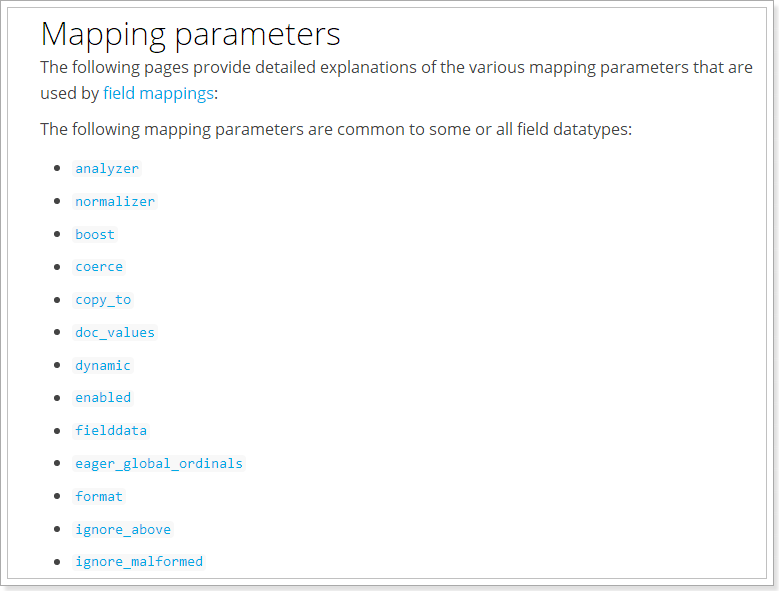
New data
Randomly generated id
Through POST request, data can be added to an existing index library.
Syntax:
POST /Index library name/Type name
{
    "key":"value"
}
Example:
POST /heima/goods/
{
    "title":"Mi phones",
    "images":"http://image.leyou.com/12479122.jpg",
    "price":2699.00
}
Response:
{
  "_index": "heima",
  "_type": "goods",
  "_id": "r9c1KGMBIhaxtY5rlRKv",
  "_version": 1,
  "result": "created",
  "_shards": {
    "total": 3,
    "successful": 1,
    "failed": 0
  },
  "_seq_no": 0,
  "_primary_term": 2
}
View data through kibana:
get _search
{
    "query":{
        "match_all":{}
    }
}
{
  "_index": "heima",
  "_type": "goods",
  "_id": "r9c1KGMBIhaxtY5rlRKv",
  "_version": 1,
  "_score": 1,
  "_source": {
    "title": "Mi phones",
    "images": "http://image.leyou.com/12479122.jpg",
    "price": 2699
  }
}
- _ Source: source document information. All data is in it.
- _ id: the unique identifier of this document, which is not associated with the document's own id field
Custom id
If we want to specify the id when adding, we can do this:
POST /Index library name/type/id value
{
    ...
}
Example:
POST /heima/goods/2
{
    "title":"Rice mobile phone",
    "images":"http://image.leyou.com/12479122.jpg",
    "price":2899.00
}
Data obtained:
{
  "_index": "heima",
  "_type": "goods",
  "_id": "2",
  "_score": 1,
  "_source": {
    "title": "Rice mobile phone",
    "images": "http://image.leyou.com/12479122.jpg",
    "price": 2899
  }
}
Intelligent judgment
When learning Solr, we found that when adding data, we can only use the fields with mapping attributes configured in advance, otherwise an error will be reported.
However, there is no such provision in elastic search.
In fact, Elasticsearch is very intelligent. You don't need to set any mapping mapping mapping for the index library. It can also judge the type according to the data you enter and add data mapping dynamically.
Test:
POST /heima/goods/3
{
    "title":"Super meter mobile phone",
    "images":"http://image.leyou.com/12479122.jpg",
    "price":2899.00,
    "stock": 200,
    "saleable":true
}
We added two additional fields: stock inventory and whether saleable is on the shelf.
Look at the results:
{
  "_index": "heima",
  "_type": "goods",
  "_id": "3",
  "_version": 1,
  "_score": 1,
  "_source": {
    "title": "Super meter mobile phone",
    "images": "http://image.leyou.com/12479122.jpg",
    "price": 2899,
    "stock": 200,
    "saleable": true
  }
}
Look at the mapping relationship of the index library:
{
  "heima": {
    "mappings": {
      "goods": {
        "properties": {
          "images": {
            "type": "keyword",
            "index": false
          },
          "price": {
            "type": "float"
          },
          "saleable": {
            "type": "boolean"
          },
          "stock": {
            "type": "long"
          },
          "title": {
            "type": "text",
            "analyzer": "ik_max_word"
          }
        }
      }
    }
  }
}
Both stock and saleable were successfully mapped.
Modify data
Change the request method just added to PUT to modify it. However, the id must be specified for modification,
- If the document corresponding to id exists, modify it
- If the document corresponding to id does not exist, it will be added
For example, we modify the data with id 3:
PUT /heima/goods/3
{
    "title":"Super rice mobile phone",
    "images":"http://image.leyou.com/12479122.jpg",
    "price":3899.00,
    "stock": 100,
    "saleable":true
}
result:
{
  "took": 17,
  "timed_out": false,
  "_shards": {
    "total": 9,
    "successful": 9,
    "skipped": 0,
    "failed": 0
  },
  "hits": {
    "total": 1,
    "max_score": 1,
    "hits": [
      {
        "_index": "heima",
        "_type": "goods",
        "_id": "3",
        "_score": 1,
        "_source": {
          "title": "Super rice mobile phone",
          "images": "http://image.leyou.com/12479122.jpg",
          "price": 3899,
          "stock": 100,
          "saleable": true
        }
      }
    ]
  }
}
Delete data
To DELETE a DELETE request, you need to DELETE it according to the id:
grammar
DELETE /Index library name/Type name/id value
Instance Template index operation
Create indexes and maps
Create index

An API for creating indexes is provided in ElasticsearchTemplate:

It can be generated automatically according to the class information, or you can manually specify indexName and Settings
mapping
Mapping related API s:

The mapping can be generated according to the bytecode information (annotation configuration) of the class, or written manually
Here we use the bytecode information of the class to create an index and map:
@RunWith(SpringRunner.class)
@SpringBootTest(classes = ItcastElasticsearchApplication.class)
public class IndexTest {

    @Autowired
    private ElasticsearchTemplate elasticsearchTemplate;

    @Test
    public void testCreate(){
        // When creating an index, it will be created according to the @ Document annotation information of the Item class
        elasticsearchTemplate.createIndex(Item.class);
        // Configuring the mapping will automatically complete the mapping according to the id, Field and other fields in the Item class
        elasticsearchTemplate.putMapping(Item.class);
    }
}
result:
GET /item
{
  "item": {
    "aliases": {},
    "mappings": {
      "docs": {
        "properties": {
          "brand": {
            "type": "keyword"
          },
          "category": {
            "type": "keyword"
          },
          "images": {
            "type": "keyword",
            "index": false
          },
          "price": {
            "type": "double"
          },
          "title": {
            "type": "text",
            "analyzer": "ik_max_word"
          }
        }
      }
    },
    "settings": {
      "index": {
        "refresh_interval": "1s",
        "number_of_shards": "1",
        "provided_name": "item",
        "creation_date": "1525405022589",
        "store": {
          "type": "fs"
        },
        "number_of_replicas": "0",
        "uuid": "4sE9SAw3Sqq1aAPz5F6OEg",
        "version": {
          "created": "6020499"
        }
      }
    }
  }
}
Delete index
API for deleting indexes:

It can be deleted according to the class name or index name.
Example:
@Test
public void deleteIndex() {
    elasticsearchTemplate.deleteIndex("heima");
}
Instance Repository document operation
The strength of Spring Data is that you don't need to write any DAO processing, and automatically perform CRUD operations according to the method name or class information. As long as you define an interface and inherit some sub interfaces provided by the Repository, you can have various basic crud functions.
We just need to define the interface and inherit it.
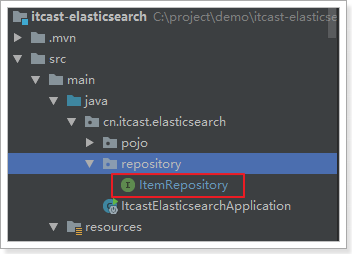
public interface ItemRepository extends ElasticsearchRepository<Item,Long> {
}
Let's take a look at the inheritance relationship of the Repository:

We see an ElasticsearchRepository interface:
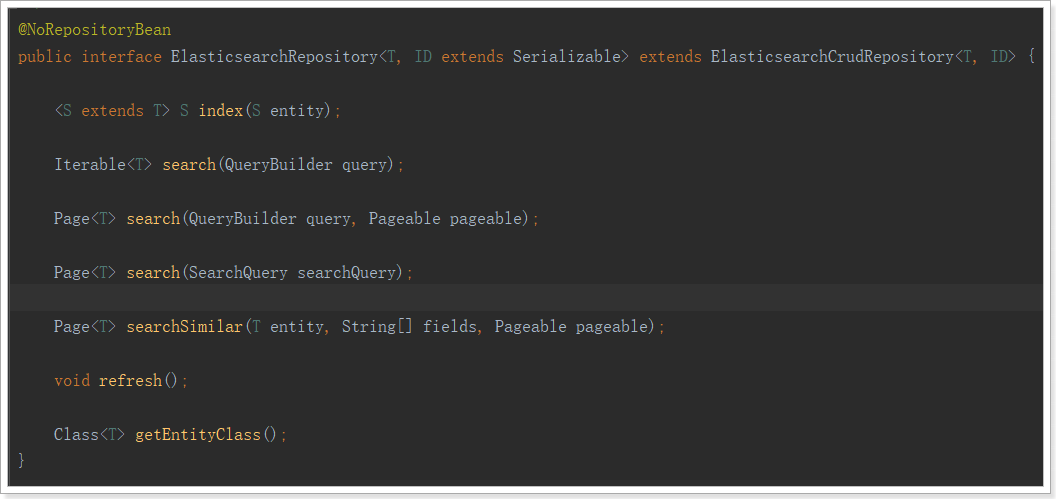
New document
@Autowired
private ItemRepository itemRepository;

@Test
public void index() {
    Item item = new Item(1L, "Xiaomi mobile phone 7", " mobile phone",
                         "millet", 3499.00, "http://image.leyou.com/13123.jpg");
    itemRepository.save(item);
}
Check the page:
GET /item/_search
result:
{
  "took": 14,
  "timed_out": false,
  "_shards": {
    "total": 1,
    "successful": 1,
    "skipped": 0,
    "failed": 0
  },
  "hits": {
    "total": 1,
    "max_score": 1,
    "hits": [
      {
        "_index": "item",
        "_type": "docs",
        "_id": "1",
        "_score": 1,
        "_source": {
          "id": 1,
          "title": "Xiaomi mobile phone 7",
          "category": " mobile phone",
          "brand": "millet",
          "price": 3499,
          "images": "http://image.leyou.com/13123.jpg"
        }
      }
    ]
  }
}
Batch add
code:
@Test
public void indexList() {
    List<Item> list = new ArrayList<>();
    list.add(new Item(2L, "Nut phone R1", " mobile phone", "hammer", 3699.00, "http://image.leyou.com/123.jpg"));
    list.add(new Item(3L, "Huawei META10", " mobile phone", "Huawei", 4499.00, "http://image.leyou.com/3.jpg"));
    // Receive object collection to realize batch addition
    itemRepository.saveAll(list);
}
Go to the page again to query:
{
  "took": 5,
  "timed_out": false,
  "_shards": {
    "total": 1,
    "successful": 1,
    "skipped": 0,
    "failed": 0
  },
  "hits": {
    "total": 3,
    "max_score": 1,
    "hits": [
      {
        "_index": "item",
        "_type": "docs",
        "_id": "2",
        "_score": 1,
        "_source": {
          "id": 2,
          "title": "Nut phone R1",
          "category": " mobile phone",
          "brand": "hammer",
          "price": 3699,
          "images": "http://image.leyou.com/13123.jpg"
        }
      },
      {
        "_index": "item",
        "_type": "docs",
        "_id": "3",
        "_score": 1,
        "_source": {
          "id": 3,
          "title": "Huawei META10",
          "category": " mobile phone",
          "brand": "Huawei",
          "price": 4499,
          "images": "http://image.leyou.com/13123.jpg"
        }
      },
      {
        "_index": "item",
        "_type": "docs",
        "_id": "1",
        "_score": 1,
        "_source": {
          "id": 1,
          "title": "Xiaomi mobile phone 7",
          "category": " mobile phone",
          "brand": "millet",
          "price": 3499,
          "images": "http://image.leyou.com/13123.jpg"
        }
      }
    ]
  }
}
Modify document
Modification and addition are the same interface, and the distinction is based on id, which is similar to launching PUT requests on the page.
Basic query
ElasticsearchRepository provides some basic query methods:

Let's try to query all:
@Test
public void testQuery(){
    Optional<Item> optional = this.itemRepository.findById(1l);
    System.out.println(optional.get());
}

@Test
public void testFind(){
    // Query all and sort by price descending order
    Iterable<Item> items = this.itemRepository.findAll(Sort.by(Sort.Direction.DESC, "price"));
    items.forEach(item-> System.out.println(item));
}
result:

Custom method
Another powerful feature of Spring Data is the automatic implementation of functions based on method names.
For example, your method name is: findByTitle, then it will know that you query according to the title, and then automatically help you complete it without writing an implementation class.
Of course, the method name must comply with certain conventions:
| Keyword | Sample | Elasticsearch Query String |
|---|---|---|
| And | findByNameAndPrice | {"bool" : {"must" : [ {"field" : {"name" : "?"}}, {"field" : {"price" : "?"}} ]}} |
| Or | findByNameOrPrice | {"bool" : {"should" : [ {"field" : {"name" : "?"}}, {"field" : {"price" : "?"}} ]}} |
| Is | findByName | {"bool" : {"must" : {"field" : {"name" : "?"}}}} |
| Not | findByNameNot | {"bool" : {"must_not" : {"field" : {"name" : "?"}}}} |
| Between | findByPriceBetween | {"bool" : {"must" : {"range" : {"price" : {"from" : ?,"to" : ?,"include_lower" : true,"include_upper" : true}}}}} |
| LessThanEqual | findByPriceLessThan | {"bool" : {"must" : {"range" : {"price" : {"from" : null,"to" : ?,"include_lower" : true,"include_upper" : true}}}}} |
| GreaterThanEqual | findByPriceGreaterThan | {"bool" : {"must" : {"range" : {"price" : {"from" : ?,"to" : null,"include_lower" : true,"include_upper" : true}}}}} |
| Before | findByPriceBefore | {"bool" : {"must" : {"range" : {"price" : {"from" : null,"to" : ?,"include_lower" : true,"include_upper" : true}}}}} |
| After | findByPriceAfter | {"bool" : {"must" : {"range" : {"price" : {"from" : ?,"to" : null,"include_lower" : true,"include_upper" : true}}}}} |
| Like | findByNameLike | {"bool" : {"must" : {"field" : {"name" : {"query" : "?*","analyze_wildcard" : true}}}}} |
| StartingWith | findByNameStartingWith | {"bool" : {"must" : {"field" : {"name" : {"query" : "?*","analyze_wildcard" : true}}}}} |
| EndingWith | findByNameEndingWith | {"bool" : {"must" : {"field" : {"name" : {"query" : "*?","analyze_wildcard" : true}}}}} |
| Contains/Containing | findByNameContaining | {"bool" : {"must" : {"field" : {"name" : {"query" : "**?**","analyze_wildcard" : true}}}}} |
| In | findByNameIn(Collection<String>names) | {"bool" : {"must" : {"bool" : {"should" : [ {"field" : {"name" : "?"}}, {"field" : {"name" : "?"}} ]}}}} |
| NotIn | findByNameNotIn(Collection<String>names) | {"bool" : {"must_not" : {"bool" : {"should" : {"field" : {"name" : "?"}}}}}} |
| Near | findByStoreNear | Not Supported Yet ! |
| True | findByAvailableTrue | {"bool" : {"must" : {"field" : {"available" : true}}}} |
| False | findByAvailableFalse | {"bool" : {"must" : {"field" : {"available" : false}}}} |
| OrderBy | findByAvailableTrueOrderByNameDesc | {"sort" : [{ "name" : {"order" : "desc"} }],"bool" : {"must" : {"field" : {"available" : true}}}} |
For example, let's define a method to query by price range:
public interface ItemRepository extends ElasticsearchRepository<Item,Long> {

    /**
     * Query by price range
     * @param price1
     * @param price2
     * @return
     */
    List<Item> findByPriceBetween(double price1, double price2);
}
Then add some test data:
@Test
public void indexList() {
    List<Item> list = new ArrayList<>();
    list.add(new Item(1L, "Xiaomi mobile phone 7", "mobile phone", "millet", 3299.00, "http://image.leyou.com/13123.jpg"));
    list.add(new Item(2L, "Nut phone R1", "mobile phone", "hammer", 3699.00, "http://image.leyou.com/13123.jpg"));
    list.add(new Item(3L, "Huawei META10", "mobile phone", "Huawei", 4499.00, "http://image.leyou.com/13123.jpg"));
    list.add(new Item(4L, "millet Mix2S", "mobile phone", "millet", 4299.00, "http://image.leyou.com/13123.jpg"));
    list.add(new Item(5L, "glory V10", "mobile phone", "Huawei", 2799.00, "http://image.leyou.com/13123.jpg"));
    // Receive object collection to realize batch addition
    itemRepository.saveAll(list);
}
There is no need to write the implementation class, and then we run it directly:
@Test
public void queryByPriceBetween(){
    List<Item> list = this.itemRepository.findByPriceBetween(2000.00, 3500.00);
    for (Item item : list) {
        System.out.println("item = " + item);
    }
}
result:

Although the basic query and user-defined methods are very powerful, it is not enough if it is a complex query (fuzzy, wildcard, entry query, etc.). At this point, we can only use native queries.
query
Let's query from 4 blocks:
- Basic query
- _ source filtering
- Result filtering
- Advanced query
- sort
Basic query
Basic grammar
GET /Index library name/_search
{
    "query":{
        "Query type":{
            "query criteria":"Query condition value"
        }
    }
}
The query here represents a query object, which can have different query properties
- Query type:
- For example: match_all, match, term, range, etc
- Query criteria: query criteria are written differently according to different types, which will be explained in detail later
Query all (match_all)
Example:
GET /heima/_search
{
    "query":{
        "match_all": {}
    }
}
- Query: represents the query object
- match_all: query all
result:
{
  "took": 2,
  "timed_out": false,
  "_shards": {
    "total": 3,
    "successful": 3,
    "skipped": 0,
    "failed": 0
  },
  "hits": {
    "total": 2,
    "max_score": 1,
    "hits": [
      {
        "_index": "heima",
        "_type": "goods",
        "_id": "2",
        "_score": 1,
        "_source": {
          "title": "Rice mobile phone",
          "images": "http://image.leyou.com/12479122.jpg",
          "price": 2899
        }
      },
      {
        "_index": "heima",
        "_type": "goods",
        "_id": "r9c1KGMBIhaxtY5rlRKv",
        "_score": 1,
        "_source": {
          "title": "Mi phones",
          "images": "http://image.leyou.com/12479122.jpg",
          "price": 2699
        }
      }
    ]
  }
}
- took: query time, in milliseconds
- time_out: whether to time out
- _shards: slice information
- hits: search results overview object
- Total: the total number of items searched
- max_score: the highest score of the document in all results
- hits: the document object array of search results. Each element is a searched document information
- _Index: index library
- _Type: document type
- _id: document id
- _Score: document score
- _Source: the source data of the document
match query
Let's add a piece of data to facilitate the test:
PUT /heima/goods/3
{
    "title":"Xiaomi TV 4 A",
    "images":"http://image.leyou.com/12479122.jpg",
    "price":3899.00
}
Now, there are 2 mobile phones and 1 TV in the index library:
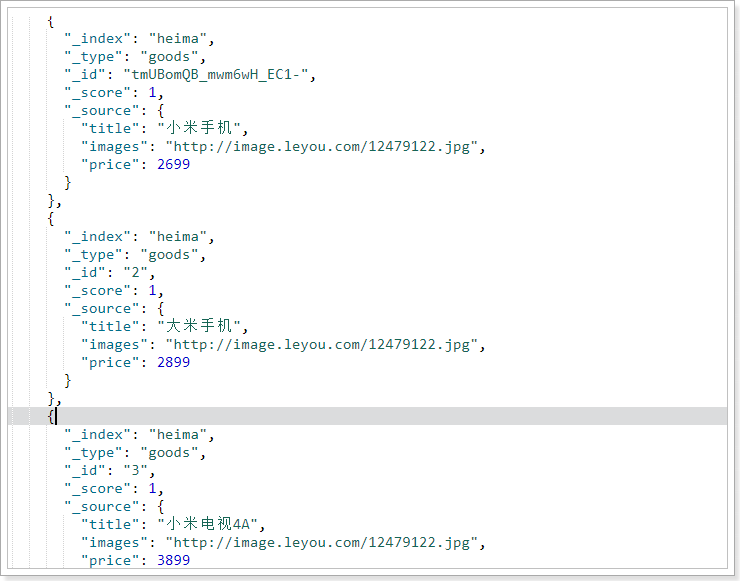
- or relation
match type query will segment the query criteria, and then query. The relationship between multiple terms is or
GET /heima/_search
{
    "query":{
        "match":{
            "title":"Mi TV"
        }
    }
}
result:
"hits": {
    "total": 2,
    "max_score": 0.6931472,
    "hits": [
        {
            "_index": "heima",
            "_type": "goods",
            "_id": "tmUBomQB_mwm6wH_EC1-",
            "_score": 0.6931472,
            "_source": {
                "title": "Mi phones",
                "images": "http://image.leyou.com/12479122.jpg",
                "price": 2699
            }
        },
        {
            "_index": "heima",
            "_type": "goods",
            "_id": "3",
            "_score": 0.5753642,
            "_source": {
                "title": "Xiaomi TV 4 A",
                "images": "http://image.leyou.com/12479122.jpg",
                "price": 3899
            }
        }
    ]
}
In the above case, not only TV but also those related to Xiaomi will be queried. The relationship between multiple words is or.
- and relation
In some cases, we need to find more accurately. We want this relationship to become and, which can be done as follows:
GET /heima/_search
{
    "query":{
        "match": {
          "title": {
            "query": "Mi TV",
            "operator": "and"
          }
        }
    }
}
result:
{
  "took": 2,
  "timed_out": false,
  "_shards": {
    "total": 3,
    "successful": 3,
    "skipped": 0,
    "failed": 0
  },
  "hits": {
    "total": 1,
    "max_score": 0.5753642,
    "hits": [
      {
        "_index": "heima",
        "_type": "goods",
        "_id": "3",
        "_score": 0.5753642,
        "_source": {
          "title": "Xiaomi TV 4 A",
          "images": "http://image.leyou.com/12479122.jpg",
          "price": 3899
        }
      }
    ]
  }
}
In this example, only entries containing both Xiaomi and TV will be searched.
- Between or and?
Choosing between or and is a bit too black or white. If there are 5 query word items after the conditional word segmentation given by the user, what should I do to find a document containing only 4 words? Setting the operator parameter to and will only exclude this document.
Sometimes this is exactly what we expect, but in most application scenarios of full-text search, we want to include those documents that may be relevant while excluding those that are less relevant. In other words, we want to be in the middle of something.
match query supports minimum_should_match minimum matching parameter, which allows us to specify the number of word items that must be matched to indicate whether a document is relevant. We can set it to a specific number. The more common way is to set it to a percentage, because we can't control the number of words users enter when searching:
GET /heima/_search
{
    "query":{
        "match":{
            "title":{
            	"query":"Millet curved TV",
            	"minimum_should_match": "75%"
            }
        }
    }
}
In this example, the search statement can be divided into three words. If you use the and relationship, you need to meet three words at the same time to be searched. Here we use the minimum number of brands: 75%, that is to say, as long as it matches 75% of the total number of entries, here 3 * 75% is about 2. Therefore, as long as it contains 2 entries, the conditions are met.
result:
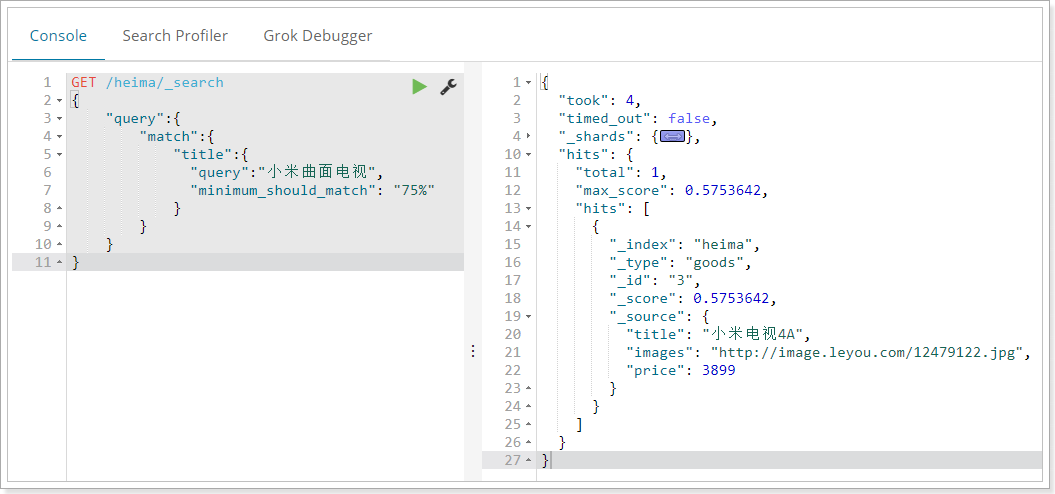
multi_match
multi_match is similar to match, except that it can be queried in multiple fields
GET /heima/_search
{
    "query":{
        "multi_match": {
            "query":    "millet",
            "fields":   [ "title", "subTitle" ]
        }
	}
}
In this example, we will query the word Xiaomi in the title field and subtitle field
Term matching
term queries are used for exact value matching, which may be numbers, times, Booleans, or those non segmented strings
GET /heima/_search
{
    "query":{
        "term":{
            "price":2699.00
        }
    }
}
result:
{
  "took": 2,
  "timed_out": false,
  "_shards": {
    "total": 3,
    "successful": 3,
    "skipped": 0,
    "failed": 0
  },
  "hits": {
    "total": 1,
    "max_score": 1,
    "hits": [
      {
        "_index": "heima",
        "_type": "goods",
        "_id": "r9c1KGMBIhaxtY5rlRKv",
        "_score": 1,
        "_source": {
          "title": "Mi phones",
          "images": "http://image.leyou.com/12479122.jpg",
          "price": 2699
        }
      }
    ]
  }
}
Multi entry exact matching (terms)
terms query is the same as term query, but it allows you to specify multiple values for matching. If this field contains any of the specified values, the document meets the following conditions:
GET /heima/_search
{
    "query":{
        "terms":{
            "price":[2699.00,2899.00,3899.00]
        }
    }
}
result:
{
  "took": 4,
  "timed_out": false,
  "_shards": {
    "total": 3,
    "successful": 3,
    "skipped": 0,
    "failed": 0
  },
  "hits": {
    "total": 3,
    "max_score": 1,
    "hits": [
      {
        "_index": "heima",
        "_type": "goods",
        "_id": "2",
        "_score": 1,
        "_source": {
          "title": "Rice mobile phone",
          "images": "http://image.leyou.com/12479122.jpg",
          "price": 2899
        }
      },
      {
        "_index": "heima",
        "_type": "goods",
        "_id": "r9c1KGMBIhaxtY5rlRKv",
        "_score": 1,
        "_source": {
          "title": "Mi phones",
          "images": "http://image.leyou.com/12479122.jpg",
          "price": 2699
        }
      },
      {
        "_index": "heima",
        "_type": "goods",
        "_id": "3",
        "_score": 1,
        "_source": {
          "title": "Xiaomi TV 4 A",
          "images": "http://image.leyou.com/12479122.jpg",
          "price": 3899
        }
      }
    ]
  }
}
Result filtering
By default, elastic search will save the document in the search results_ All fields of source are returned.
If we only want to get some of these fields, we can add them_ source filtering
Specify fields directly
Example:
GET /heima/_search
{
  "_source": ["title","price"],
  "query": {
    "term": {
      "price": 2699
    }
  }
}
Returned results:
{
  "took": 12,
  "timed_out": false,
  "_shards": {
    "total": 3,
    "successful": 3,
    "skipped": 0,
    "failed": 0
  },
  "hits": {
    "total": 1,
    "max_score": 1,
    "hits": [
      {
        "_index": "heima",
        "_type": "goods",
        "_id": "r9c1KGMBIhaxtY5rlRKv",
        "_score": 1,
        "_source": {
          "price": 2699,
          "title": "Mi phones"
        }
      }
    ]
  }
}
Specify includes and excludes
We can also:
- includes: to specify the fields you want to display
- Exclude: to specify the fields you do not want to display
Both are optional.
Example:
GET /heima/_search
{
  "_source": {
    "includes":["title","price"]
  },
  "query": {
    "term": {
      "price": 2699
    }
  }
}
The result will be the same as the following:
GET /heima/_search
{
  "_source": {
     "excludes": ["images"]
  },
  "query": {
    "term": {
      "price": 2699
    }
  }
}
Advanced query
Boolean combination (bool)
bool combines various other queries through must (and), must_not (not), and should (or)
GET /heima/_search
{
    "query":{
        "bool":{
        	"must":     { "match": { "title": "rice" }},
        	"must_not": { "match": { "title":  "television" }},
        	"should":   { "match": { "title": "mobile phone" }}
        }
    }
}
result:
{
  "took": 10,
  "timed_out": false,
  "_shards": {
    "total": 3,
    "successful": 3,
    "skipped": 0,
    "failed": 0
  },
  "hits": {
    "total": 1,
    "max_score": 0.5753642,
    "hits": [
      {
        "_index": "heima",
        "_type": "goods",
        "_id": "2",
        "_score": 0.5753642,
        "_source": {
          "title": "Rice mobile phone",
          "images": "http://image.leyou.com/12479122.jpg",
          "price": 2899
        }
      }
    ]
  }
}
Range query
The range query finds numbers or times that fall within a specified range
GET /heima/_search
{
    "query":{
        "range": {
            "price": {
                "gte":  1000.0,
                "lt":   2800.00
            }
    	}
    }
}
The range query allows the following characters:
| Operator | explain |
|---|---|
| gt | greater than |
| gte | Greater than or equal to |
| lt | less than |
| lte | Less than or equal to |
Fuzzy query
We added a new item:
POST /heima/goods/4
{
    "title":"apple mobile phone",
    "images":"http://image.leyou.com/12479122.jpg",
    "price":6899.00
}
Fuzzy query is the fuzzy equivalent of term query. It allows users to search for the spelling deviation between the entry and the actual entry, but the editing distance of the deviation shall not exceed 2: that is, the number of letters of the deviation
GET /heima/_search
{
  "query": {
    "fuzzy": {
      "title": "appla"
    }
  }
}
The above query can also query apple mobile phones
We can specify the allowable editing distance through fuzziness:
GET /heima/_search
{
  "query": {
    "fuzzy": {
        "title": {
            "value":"appla",
            "fuzziness":1
        }
    }
  }
}
Filter
Filter in condition query
All queries will affect the score and ranking of documents. If we need to filter the query results and do not want the filter criteria to affect the score, we should not use the filter criteria as the query criteria. Instead, use the filter method:
GET /heima/_search
{
    "query":{
        "bool":{
        	"must":{ "match": { "title": "Mi phones" }},
        	"filter":{
                "range":{"price":{"gt":2000.00,"lt":3800.00}}
        	}
        }
    }
}
Note: bool combination condition filtering can also be performed again in the filter.
No query criteria, direct filtering
If a query has only filter, no query conditions, and you don't want to score, we can use constant_score to replace the bool query with only filter statement. The performance is exactly the same, but it is very helpful to improve the simplicity and clarity of the query.
GET /heima/_search
{
    "query":{
        "constant_score":   {
            "filter": {
            	 "range":{"price":{"gt":2000.00,"lt":3000.00}}
            }
        }
}
sort
Single field sorting
Sort allows us to sort according to different fields, and specify the sorting method through order
GET /heima/_search
{
  "query": {
    "match": {
      "title": "Mi phones"
    }
  },
  "sort": [
    {
      "price": {
        "order": "desc"
      }
    }
  ]
}
Multi field sorting
Suppose we want to use price and _score (score) together for query, and the matching results are sorted by price first, and then by correlation score:
GET /goods/_search
{
    "query":{
        "bool":{
        	"must":{ "match": { "title": "Mi phones" }},
        	"filter":{
                "range":{"price":{"gt":200000,"lt":300000}}
        	}
        }
    },
    "sort": [
      { "price": { "order": "desc" }},
      { "_score": { "order": "desc" }}
    ]
}
Instance - advanced query
Basic query
Let's look at the basic playing methods first
@Test
public void testQuery(){
    // Term query
    MatchQueryBuilder queryBuilder = QueryBuilders.matchQuery("title", "millet");
    // Execute query
    Iterable<Item> items = this.itemRepository.search(queryBuilder);
    items.forEach(System.out::println);
}
The search method of Repository requires the QueryBuilder parameter. elasticSearch provides us with an object QueryBuilders:

QueryBuilders provides a large number of static methods for generating various types of query objects, such as QueryBuilder objects such as entry, fuzzy, wildcard, etc.
result:

Elastic search provides many available query methods, but it is not flexible enough. It is difficult to play with filtering or aggregate query.
Custom query
Let's first look at the most basic match query:
@Test
public void testNativeQuery(){
    // Build custom query builder
    NativeSearchQueryBuilder queryBuilder = new NativeSearchQueryBuilder();
    // Add basic word segmentation query
    queryBuilder.withQuery(QueryBuilders.matchQuery("title", "millet"));
    // Perform a search to get results
    Page<Item> items = this.itemRepository.search(queryBuilder.build());
    // Total number of prints
    System.out.println(items.getTotalElements());
    // Total pages printed
    System.out.println(items.getTotalPages());
    items.forEach(System.out::println);
}
Native searchquerybuilder: a query condition builder provided by Spring to help build the request body in json format
Page < item >: the default is a paged query, so a paged result object is returned, including the following attributes:
- totalElements: total number of items
- totalPages: total pages
- Iterator: iterator, which implements the iterator interface, so it can directly iterate to get the data of the current page
- Other properties:

result

Paging query
Using NativeSearchQueryBuilder, paging can be easily realized:
@Test
public void testNativeQuery(){
    // Build query criteria
    NativeSearchQueryBuilder queryBuilder = new NativeSearchQueryBuilder();
    // Add basic word segmentation query
    queryBuilder.withQuery(QueryBuilders.termQuery("category", "mobile phone"));

    // Initialize paging parameters
    int page = 0;
    int size = 3;
    // Set paging parameters
    queryBuilder.withPageable(PageRequest.of(page, size));

    // Perform a search to get results
    Page<Item> items = this.itemRepository.search(queryBuilder.build());
    // Total number of prints
    System.out.println(items.getTotalElements());
    // Total pages printed
    System.out.println(items.getTotalPages());
    // Size per page
    System.out.println(items.getSize());
    // Current page
    System.out.println(items.getNumber());
    items.forEach(System.out::println);
}
result:

It is found that the paging in Elasticsearch starts from page 0.
sort
Sorting is also done through NativeSearchQueryBuilder:
@Test
public void testSort(){
    // Build query criteria
    NativeSearchQueryBuilder queryBuilder = new NativeSearchQueryBuilder();
    // Add basic word segmentation query
    queryBuilder.withQuery(QueryBuilders.termQuery("category", "mobile phone"));

    // sort
    queryBuilder.withSort(SortBuilders.fieldSort("price").order(SortOrder.DESC));

    // Perform a search to get results
    Page<Item> items = this.itemRepository.search(queryBuilder.build());
    // Total number of prints
    System.out.println(items.getTotalElements());
    items.forEach(System.out::println);
}
result:

aggregations
Aggregation makes it extremely convenient for us to realize the statistics and analysis of data. For example:
- What brand of mobile phone is the most popular?
- The average price, the highest price and the lowest price of these mobile phones?
- How about the monthly sales of these mobile phones?
The implementation of these statistical functions is much more convenient than the sql of the database, and the query speed is very fast, which can realize the real-time search effect.
Basic concepts
There are many types of aggregations in Elasticsearch. The two most commonly used are bucket and metric:
bucket
Bucket is used to group data in a certain way. Each group of data is called a bucket in ES. For example, we can get Chinese bucket, British bucket and Japanese bucket by dividing people according to nationality... Or we can divide people according to age: 01010202030040, etc.
There are many ways to divide buckets in Elasticsearch:
- Date Histogram Aggregation: grouping by date ladder. For example, if the ladder is given as week, it will be automatically divided into a group every week
- Histogram Aggregation: grouped by numerical ladder, similar to date
- Terms Aggregation: grouped according to the content of the entries. The exactly matched entries are a group
- Range Aggregation: range grouping of values and dates, specifying the start and end, and then grouping by segment
- ......
bucket aggregations are only responsible for grouping data without calculation. Therefore, another kind of aggregation is often nested in the bucket: metrics aggregations, that is, metrics
metrics
After grouping, we generally perform aggregation operations on the data in the group, such as average, maximum, minimum, sum, etc., which are called metrics in ES
Some common measurement aggregation methods:
- Avg Aggregation: Average
- Max Aggregation: find the maximum value
- Min Aggregation: find the minimum value
- Percentiles Aggregation: calculate the percentage
- Stats Aggregation: returns avg, max, min, sum, count, etc
- Sum Aggregation: Sum
- Top hits Aggregation: find the first few
- Value Count Aggregation: find the total number
- ......
To test aggregation, we first import some data in batch
Create index:
PUT /cars
{
  "settings": {
    "number_of_shards": 1,
    "number_of_replicas": 0
  },
  "mappings": {
    "transactions": {
      "properties": {
        "color": {
          "type": "keyword"
        },
        "make": {
          "type": "keyword"
        }
      }
    }
  }
}
Note: in ES, the fields that need to be aggregated, sorted and filtered are handled in a special way, so they cannot be segmented. Here, we set the fields of color and make as keyword type. This type will not be segmented and can participate in aggregation in the future
Import data
POST /cars/transactions/_bulk
{ "index": {}}
{ "price" : 10000, "color" : "red", "make" : "honda", "sold" : "2014-10-28" }
{ "index": {}}
{ "price" : 20000, "color" : "red", "make" : "honda", "sold" : "2014-11-05" }
{ "index": {}}
{ "price" : 30000, "color" : "green", "make" : "ford", "sold" : "2014-05-18" }
{ "index": {}}
{ "price" : 15000, "color" : "blue", "make" : "toyota", "sold" : "2014-07-02" }
{ "index": {}}
{ "price" : 12000, "color" : "green", "make" : "toyota", "sold" : "2014-08-19" }
{ "index": {}}
{ "price" : 20000, "color" : "red", "make" : "honda", "sold" : "2014-11-05" }
{ "index": {}}
{ "price" : 80000, "color" : "red", "make" : "bmw", "sold" : "2014-01-01" }
{ "index": {}}
{ "price" : 25000, "color" : "blue", "make" : "ford", "sold" : "2014-02-12" }
Aggregate into barrels
First, we divide the barrels according to the color of the car
GET /cars/_search
{
    "size" : 0,
    "aggs" : {
        "popular_colors" : {
            "terms" : {
              "field" : "color"
            }
        }
    }
}
- size: the number of queries is set to 0 here, because we don't care about the searched data, but only about the aggregation results to improve efficiency
- aggs: declare that this is an aggregate query, which is the abbreviation of aggregations
- popular_colors: give this aggregation a name, any.
- Terms: the way to divide buckets. Here, it is divided according to terms
- Field: the field that divides the bucket
- Terms: the way to divide buckets. Here, it is divided according to terms
- popular_colors: give this aggregation a name, any.
result:
{
  "took": 1,
  "timed_out": false,
  "_shards": {
    "total": 1,
    "successful": 1,
    "skipped": 0,
    "failed": 0
  },
  "hits": {
    "total": 8,
    "max_score": 0,
    "hits": []
  },
  "aggregations": {
    "popular_colors": {
      "doc_count_error_upper_bound": 0,
      "sum_other_doc_count": 0,
      "buckets": [
        {
          "key": "red",
          "doc_count": 4
        },
        {
          "key": "blue",
          "doc_count": 2
        },
        {
          "key": "green",
          "doc_count": 2
        }
      ]
    }
  }
}
- hits: the query result is empty because we set the size to 0
- Aggregations: results of aggregations
- popular_colors: the aggregate name we define
- buckets: for the found bucket, each different color field value will form a bucket
- key: the value of the color field corresponding to this bucket
- doc_count: the number of documents in this bucket
Through the aggregation results, we found that the current red car is more popular!
In barrel measurement
The previous example tells us the number of documents in each bucket, which is very useful. But usually, our application needs to provide more complex document metrics. For example, what is the average price of a car of each color?
Therefore, we need to tell Elasticsearch which field to use and which measurement method to use for operation. These information should be nested in the bucket, and the measurement operation will be based on the documents in the bucket
Now, let's add the measure of price average to the aggregation result just now:
GET /cars/_search
{
    "size" : 0,
    "aggs" : {
        "popular_colors" : {
            "terms" : {
              "field" : "color"
            },
            "aggs":{
                "avg_price": {
                   "avg": {
                      "field": "price"
                   }
                }
            }
        }
    }
}
- Aggs: we added a new aggs to the previous aggs(popular_colors). Visible metrics are also an aggregation
- avg_price: the name of the aggregate
- avg: the type of measurement. Here is the average value
- Field: the field of the measurement operation
result:
...
  "aggregations": {
    "popular_colors": {
      "doc_count_error_upper_bound": 0,
      "sum_other_doc_count": 0,
      "buckets": [
        {
          "key": "red",
          "doc_count": 4,
          "avg_price": {
            "value": 32500
          }
        },
        {
          "key": "blue",
          "doc_count": 2,
          "avg_price": {
            "value": 20000
          }
        },
        {
          "key": "green",
          "doc_count": 2,
          "avg_price": {
            "value": 21000
          }
        }
      ]
    }
  }
...
You can see that each bucket has its own AVG_ The price field, which is the result of the measurement aggregation
Embedded barrel
In the case just now, we embed metric operations in the bucket. In fact, buckets can not only nest operations, but also nest other buckets. That is, in each group, there are more groups.
For example, we want to count the manufacturers of cars of each color, and then divide the barrels according to the make field
GET /cars/_search
{
    "size" : 0,
    "aggs" : {
        "popular_colors" : {
            "terms" : {
              "field" : "color"
            },
            "aggs":{
                "avg_price": {
                   "avg": {
                      "field": "price"
                   }
                },
                "maker":{
                    "terms":{
                        "field":"make"
                    }
                }
            }
        }
    }
}
- The original color bucket and avg calculations are unchanged
- Maker: add a new bucket called maker under the nested aggs
- terms: the division type of bucket is still an entry
- filed: it is divided according to the make field
Partial results:
...
{"aggregations": {
    "popular_colors": {
      "doc_count_error_upper_bound": 0,
      "sum_other_doc_count": 0,
      "buckets": [
        {
          "key": "red",
          "doc_count": 4,
          "maker": {
            "doc_count_error_upper_bound": 0,
            "sum_other_doc_count": 0,
            "buckets": [
              {
                "key": "honda",
                "doc_count": 3
              },
              {
                "key": "bmw",
                "doc_count": 1
              }
            ]
          },
          "avg_price": {
            "value": 32500
          }
        },
        {
          "key": "blue",
          "doc_count": 2,
          "maker": {
            "doc_count_error_upper_bound": 0,
            "sum_other_doc_count": 0,
            "buckets": [
              {
                "key": "ford",
                "doc_count": 1
              },
              {
                "key": "toyota",
                "doc_count": 1
              }
            ]
          },
          "avg_price": {
            "value": 20000
          }
        },
        {
          "key": "green",
          "doc_count": 2,
          "maker": {
            "doc_count_error_upper_bound": 0,
            "sum_other_doc_count": 0,
            "buckets": [
              {
                "key": "ford",
                "doc_count": 1
              },
              {
                "key": "toyota",
                "doc_count": 1
              }
            ]
          },
          "avg_price": {
            "value": 21000
          }
        }
      ]
    }
  }
}
...
- We can see that the new aggregate maker is nested in the bucket of each original color.
- Each color is grouped according to the make field
- Information we can read:
- There are 4 red cars in total
- The average price of a red car is $32500.
- Three of them are made by Honda and one by BMW.
Other ways of dividing barrels
As mentioned earlier, there are many ways to divide buckets, such as:
- Date Histogram Aggregation: grouping by date ladder. For example, if the ladder is given as week, it will be automatically divided into a group every week
- Histogram Aggregation: grouped by numerical ladder, similar to date
- Terms Aggregation: grouped according to the content of the entries. The exactly matched entries are a group
- Range Aggregation: range grouping of values and dates, specifying the start and end, and then grouping by segment
In the case just now, we used Terms Aggregation, which is to divide buckets according to entries.
Next, let's learn some more practical:
Ladder bucket Histogram
Principle:
histogram is to group numeric fields according to a certain ladder size. You need to specify a ladder value (interval) to divide the ladder size.
give an example:
For example, you have a price field. If you set the value of interval to 200, the ladder will be like this:
0,200,400,600,...
Listed above is the key of each ladder and the starting point of the interval.
If the price of a commodity is 450, which ladder will it fall into? The calculation formula is as follows:
bucket_key = Math.floor((value - offset) / interval) * interval + offset
Value: the value of the current data, in this case 450
Offset: the starting offset, which is 0 by default
Interval: step interval, such as 200
So you get key = Math.floor((450 - 0) / 200) * 200 + 0 = 400
Operation:
For example, we group the prices of cars and specify an interval of 5000:
GET /cars/_search
{
  "size":0,
  "aggs":{
    "price":{
      "histogram": {
        "field": "price",
        "interval": 5000
      }
    }
  }
}
result:
{
  "took": 21,
  "timed_out": false,
  "_shards": {
    "total": 5,
    "successful": 5,
    "skipped": 0,
    "failed": 0
  },
  "hits": {
    "total": 8,
    "max_score": 0,
    "hits": []
  },
  "aggregations": {
    "price": {
      "buckets": [
        {
          "key": 10000,
          "doc_count": 2
        },
        {
          "key": 15000,
          "doc_count": 1
        },
        {
          "key": 20000,
          "doc_count": 2
        },
        {
          "key": 25000,
          "doc_count": 1
        },
        {
          "key": 30000,
          "doc_count": 1
        },
        {
          "key": 35000,
          "doc_count": 0
        },
        {
          "key": 40000,
          "doc_count": 0
        },
        {
          "key": 45000,
          "doc_count": 0
        },
        {
          "key": 50000,
          "doc_count": 0
        },
        {
          "key": 55000,
          "doc_count": 0
        },
        {
          "key": 60000,
          "doc_count": 0
        },
        {
          "key": 65000,
          "doc_count": 0
        },
        {
          "key": 70000,
          "doc_count": 0
        },
        {
          "key": 75000,
          "doc_count": 0
        },
        {
          "key": 80000,
          "doc_count": 1
        }
      ]
    }
  }
}
You will find that there are a large number of buckets with 0 documents in the middle, which looks ugly.
We can add a parameter min_doc_count is 1 to restrict the minimum number of documents to 1, so that the bucket with the number of documents of 0 will be filtered
Example:
GET /cars/_search
{
  "size":0,
  "aggs":{
    "price":{
      "histogram": {
        "field": "price",
        "interval": 5000,
        "min_doc_count": 1
      }
    }
  }
}
result:
{
  "took": 15,
  "timed_out": false,
  "_shards": {
    "total": 5,
    "successful": 5,
    "skipped": 0,
    "failed": 0
  },
  "hits": {
    "total": 8,
    "max_score": 0,
    "hits": []
  },
  "aggregations": {
    "price": {
      "buckets": [
        {
          "key": 10000,
          "doc_count": 2
        },
        {
          "key": 15000,
          "doc_count": 1
        },
        {
          "key": 20000,
          "doc_count": 2
        },
        {
          "key": 25000,
          "doc_count": 1
        },
        {
          "key": 30000,
          "doc_count": 1
        },
        {
          "key": 80000,
          "doc_count": 1
        }
      ]
    }
  }
}
Perfect,!
If you use kibana to turn the result into a column chart, it will look better:

Bucket range
Range bucket division is similar to step bucket division. It also groups numbers according to stages, but the range method requires you to specify the start and end sizes of each group.
Instance aggregation
Aggregate into barrels
Buckets are grouped. For example, here we group by brand: = group by
@Test
public void testAgg(){
    NativeSearchQueryBuilder queryBuilder = new NativeSearchQueryBuilder();
    // No results are queried. Add a result set filter that does not include any fields
    queryBuilder.withSourceFilter(new FetchSourceFilter(new String[]{""}, null));
    // 1. Add a new aggregation with the aggregation type of terms, the aggregation name of brands and the aggregation field of brand
    queryBuilder.addAggregation(
        AggregationBuilders.terms("brands").field("brand"));
    // 2. For aggregate query, the result needs to be forcibly converted to AggregatedPage type
    AggregatedPage<Item> aggPage = (AggregatedPage<Item>) this.itemRepository.search(queryBuilder.build());
    // 3. Parse the aggregation result set, and perform forced conversion according to the aggregation type and field. brand - is a string type, aggregation type - term aggregation, and brands - obtains the aggregation object through the aggregation name
    // 3.1. Take the aggregation named brands from the results,
    // Because it is term aggregation using String type fields, the result should be strongly converted to StringTerm type
    StringTerms agg = (StringTerms) aggPage.getAggregation("brands");
    // 3.2. Obtaining barrels
    List<StringTerms.Bucket> buckets = agg.getBuckets();
    // 3.3 traversal
    for (StringTerms.Bucket bucket : buckets) {
        // 3.4. Get the key in the bucket, that is, the brand name
        System.out.println(bucket.getKeyAsString());
        // 3.5. Get the number of documents in the bucket
        System.out.println(bucket.getDocCount());
    }

}
Results displayed:

Key API s:
- AggregationBuilders: aggregated build factory class. All aggregations are built by this class. Look at its static methods:
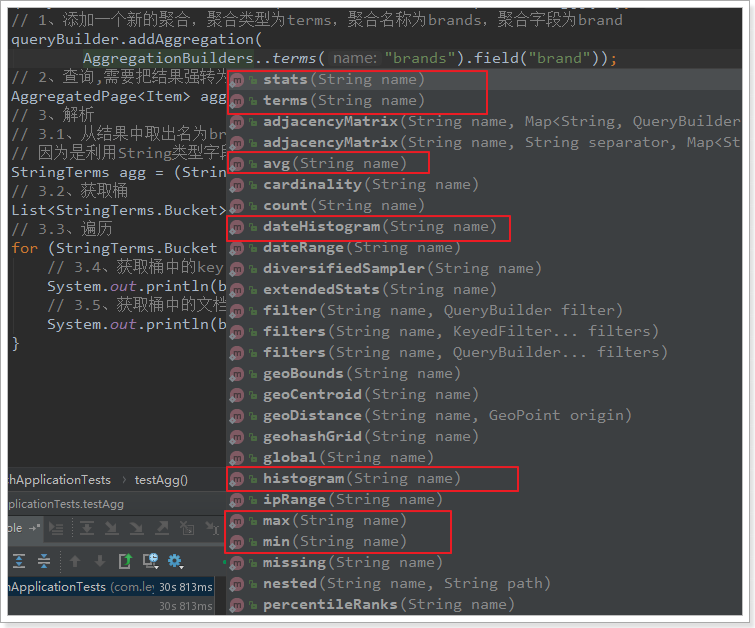
- AggregatedPage: the result class of the aggregate query. It is a sub interface of page < T >

AggregatedPage expands the functions related to aggregation based on the function of Page. In fact, it is a kind of encapsulation of aggregation results. You can refer to the JSON structure of aggregation results.

The returned results are all Aggregation type objects, but they are represented by different subclasses according to different field types
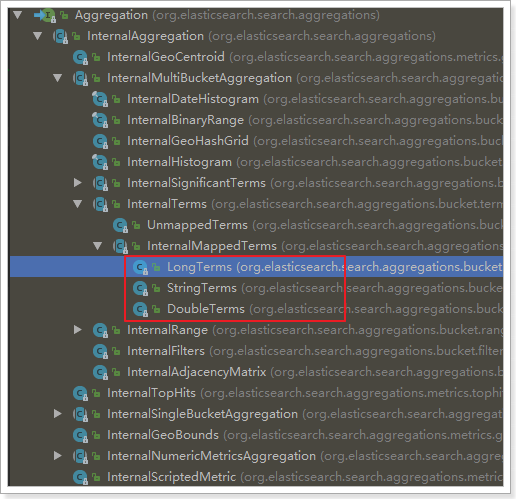
Let's look at the comparison between the JSON result of the query on the page and the Java class:
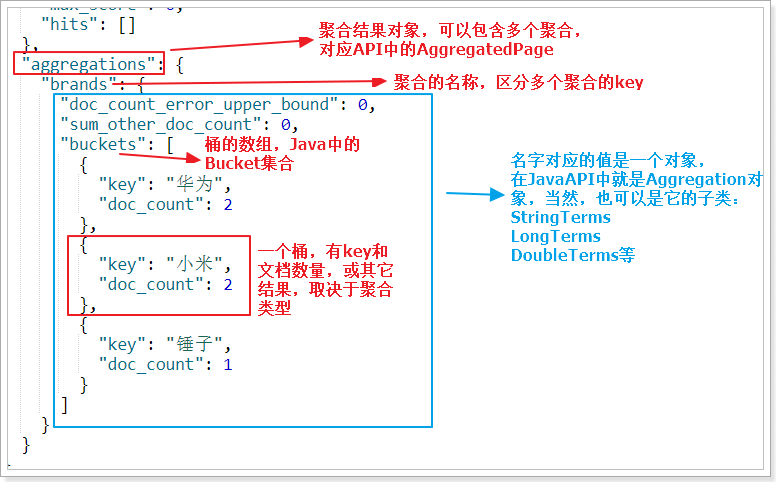
Nested aggregation, averaging
code:
@Test
public void testSubAgg(){
    NativeSearchQueryBuilder queryBuilder = new NativeSearchQueryBuilder();
    // Do not query any results
    queryBuilder.withSourceFilter(new FetchSourceFilter(new String[]{""}, null));
    // 1. Add a new aggregation with the aggregation type of terms, the aggregation name of brands and the aggregation field of brand
    queryBuilder.addAggregation(
        AggregationBuilders.terms("brands").field("brand")
        .subAggregation(AggregationBuilders.avg("priceAvg").field("price")) // Perform nested aggregation in the brand aggregation bucket and calculate the average value
    );
    // 2. Query, you need to force the result to the AggregatedPage type
    AggregatedPage<Item> aggPage = (AggregatedPage<Item>) this.itemRepository.search(queryBuilder.build());
    // 3. Analysis
    // 3.1. Take the aggregation named brands from the results,
    // Because it is term aggregation using String type fields, the result should be strongly converted to StringTerm type
    StringTerms agg = (StringTerms) aggPage.getAggregation("brands");
    // 3.2. Obtaining barrels
    List<StringTerms.Bucket> buckets = agg.getBuckets();
    // 3.3 traversal
    for (StringTerms.Bucket bucket : buckets) {
        // 3.4. Get the key in the bucket, i.e. brand name 3.5. Get the number of documents in the bucket
        System.out.println(bucket.getKeyAsString() + ",common" + bucket.getDocCount() + "platform");

        // 3.6. Obtain sub aggregation results:
        InternalAvg avg = (InternalAvg) bucket.getAggregations().asMap().get("priceAvg");
        System.out.println("Average selling price:" + avg.getValue());
    }

}
result:
