linux desktop applet development diary 2
Use Pyqt5 to make an interface and connect the camera
preface
After the last time, we installed the environment, then we will start our UI, and it is expected to complete the content of connecting the camera
Project requirements - what you think
- It is mainly developed in python language
- Able to display the contents of the camera
- Able to display a list of recognized contents
- Can be priced
Let's start a new record
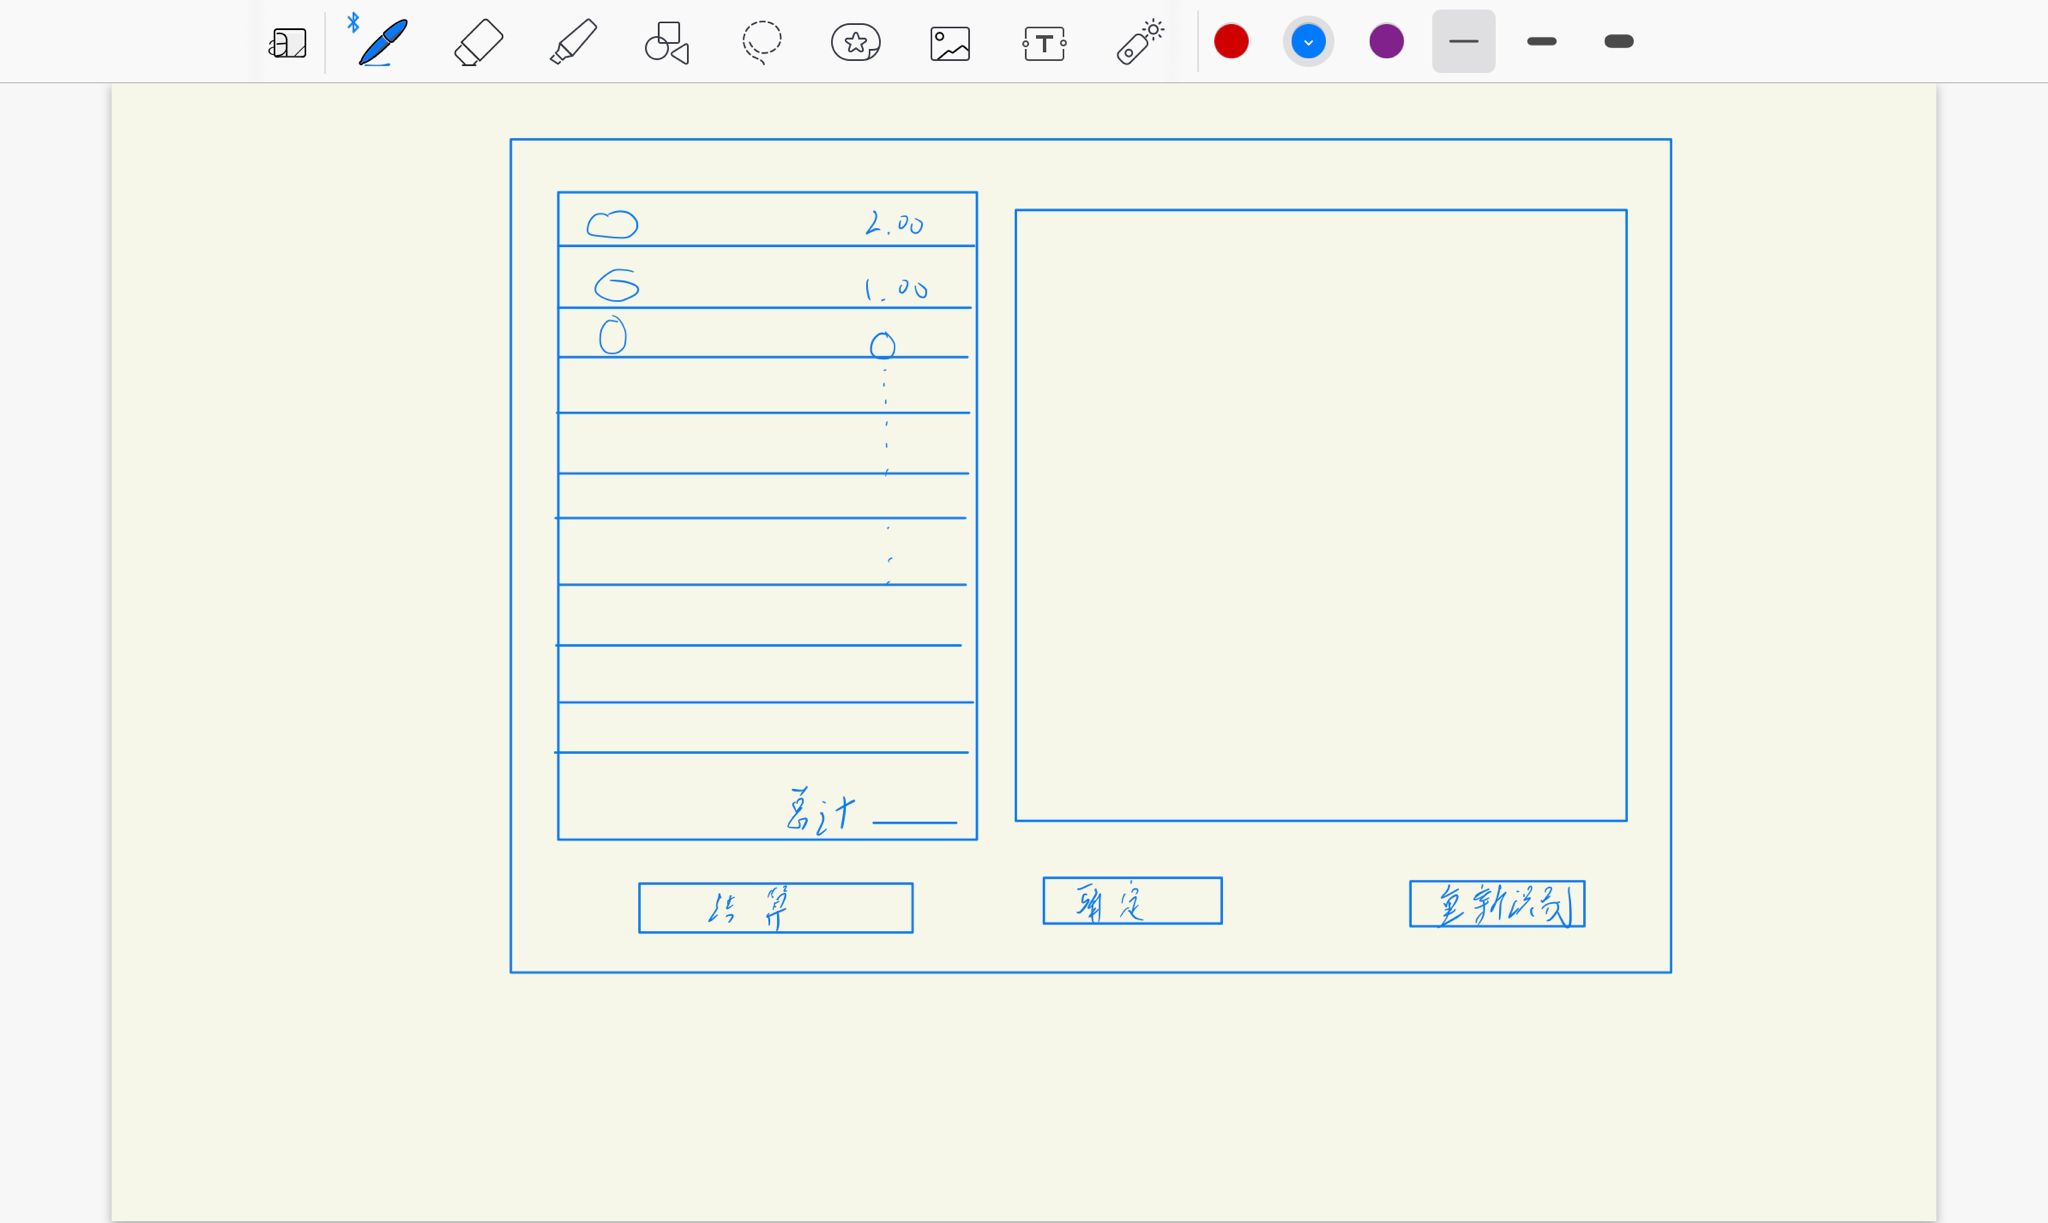
Step 1: design UI interface
I drew one casually
Step 2 connect the camera with python
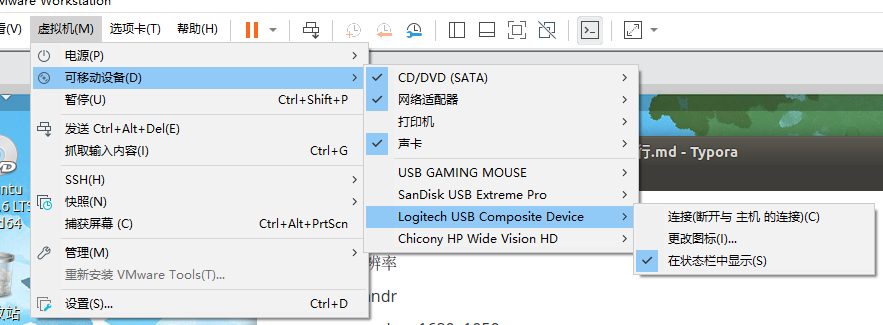
Because my camera is a virtual machine, I should first connect my camera to the virtual machine. Because my camera is a usb camera, I should turn on the corresponding service, as shown in the figure below

Then let's connect
Install the OpenCV library we need
#Activate virtual environment
conda activate yolo
#Update pip
python3 -m pip install --upgrade pip
#Install the opencv library. This version is applicable to my pyqt5
pip3 install opencv-python==4.3.0.36

In this way, the library we need is installed (I have a problem here: after I install it, my vscode is not detected, and then I restart vscode, so if I encounter the same problem, I suggest restarting the software, but first check whether I have successfully installed it)
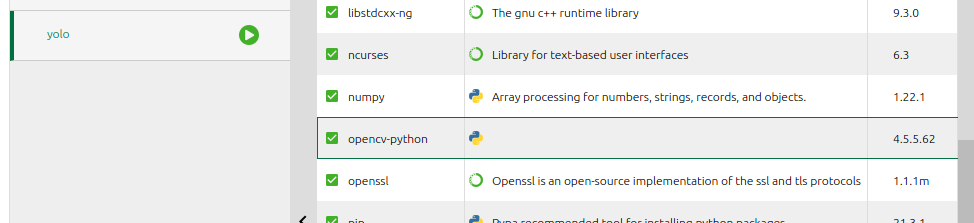
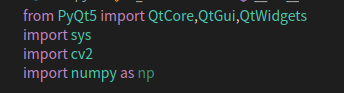
After restart, the reference library is blue-green, indicating that vscode has detected these libraries
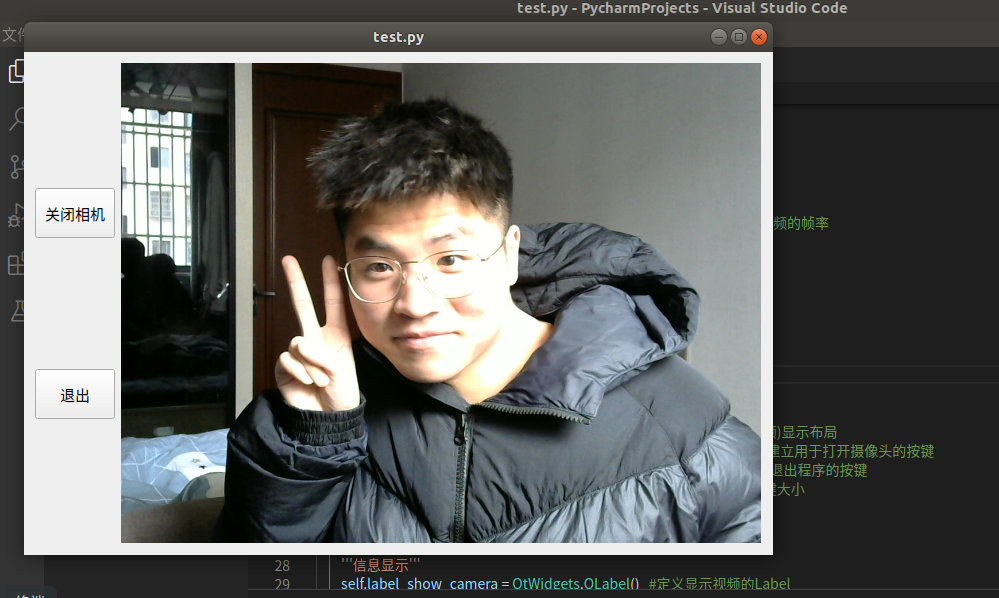
Then let's test whether the camera is connected
I copied and pasted the code of the blog and tested it
python3+pyqt5+pycharm turn on the camera display_ ZJE-CSDN blog_ Pyqt5 turn on the camera
from PyQt5 import QtCore,QtGui,QtWidgets
import sys
import cv2
import numpy as np

class Ui_MainWindow(QtWidgets.QWidget):
    def __init__(self,parent=None):
        super().__init__(parent) #Constructor of parent class

        self.timer_camera = QtCore.QTimer() #Define a timer to control the frame rate of the displayed video
        self.cap = cv2.VideoCapture()       #Video stream
        self.CAM_NUM = 0                    #0 indicates that the video stream comes from the built-in camera of the notebook

        self.set_ui()                       #Initialization program interface
        self.slot_init()                    #Initialize slot function

    '''Program interface layout'''
    def set_ui(self):
        self.__layout_main = QtWidgets.QHBoxLayout()           #General layout
        self.__layout_fun_button = QtWidgets.QVBoxLayout()      #Key layout
        self.__layout_data_show = QtWidgets.QVBoxLayout()       #Data (video) display layout
        self.button_open_camera = QtWidgets.QPushButton('Turn on the camera') #Create a key to turn on the camera
        self.button_close = QtWidgets.QPushButton('sign out')           #Create a key to exit the program
        self.button_open_camera.setMinimumHeight(50)                #Set key size
        self.button_close.setMinimumHeight(50)

        self.button_close.move(10,100)                      #Move key
        '''information display '''
        self.label_show_camera = QtWidgets.QLabel()   #Define the Label that displays the video
        self.label_show_camera.setFixedSize(641,481)    #Set the size of the Label for video display to 641x481
        '''Add keys to key layout'''
        self.__layout_fun_button.addWidget(self.button_open_camera) #Put the key to open the camera into the key layout
        self.__layout_fun_button.addWidget(self.button_close)       #Put the key to exit the program into the key layout
        '''Add some controls to the general layout'''
        self.__layout_main.addLayout(self.__layout_fun_button)      #Add the key layout to the general layout
        self.__layout_main.addWidget(self.label_show_camera)        #Add the Label used to display video to the general layout
        '''After the general layout is arranged, the general layout can be passed into the following functions as parameters'''
        self.setLayout(self.__layout_main) #All controls will not be displayed until this step

    '''Initialize all slot functions'''
    def slot_init(self):
        self.button_open_camera.clicked.connect(self.button_open_camera_clicked)    #If the key is clicked, the button is called_ open_ camera_ clicked()
        self.timer_camera.timeout.connect(self.show_camera) #If the timer ends, call show_camera()
        self.button_close.clicked.connect(self.close)#If the key is clicked, close() will be called. Note that this close is the parent qtwidgets QWidget comes with it. It will close the program

    '''One of the slot functions'''
    def button_open_camera_clicked(self):
        if self.timer_camera.isActive() == False:   #If the timer does not start
            flag = self.cap.open(self.CAM_NUM) #If the parameter is 0, it means to open the built-in camera of the notebook. If the parameter is the path of the video file, it means to open the video
            if flag == False:       #flag indicates whether open() is successful
                msg = QtWidgets.QMessageBox.warning(self,'warning',"Please check whether the camera is connected to the computer correctly",buttons=QtWidgets.QMessageBox.Ok)
            else:
                self.timer_camera.start(30)  #The timer starts to count for 30ms, and the result is to take a frame from the camera for display every 30ms
                self.button_open_camera.setText('Turn off the camera')
        else:
            self.timer_camera.stop()  #off timer
            self.cap.release()        #Release video stream
            self.label_show_camera.clear()  #Clear video display area
            self.button_open_camera.setText('Turn on the camera')

    def show_camera(self):
        flag,self.image = self.cap.read()  #Read from video stream

        show = cv2.resize(self.image,(640,480))     #Reset the size of the read frame to 640x480
        show = cv2.cvtColor(show,cv2.COLOR_BGR2RGB) #The video color is converted back to RGB, which is the real color
        showImage = QtGui.QImage(show.data,show.shape[1],show.shape[0],QtGui.QImage.Format_RGB888) #Convert the read video data into QImage form
        self.label_show_camera.setPixmap(QtGui.QPixmap.fromImage(showImage))  #Display QImage in the Label displaying the video
if __name__ =='__main__':
    app = QtWidgets.QApplication(sys.argv)  #Fixed, indicating application
    ui = Ui_MainWindow()                    #Instantiate Ui_MainWindow
    ui.show()                               #Call show() of ui to display. Similarly, show () is derived from the parent class qtwidgets QWidget
    sys.exit(app.exec_())                   #Without this sentence, the program interface will flash by
Then I succeeded. I'm still very happy (* ▽ *)
problem
Click start to find that there is an error and the prompt has been abandoned (the core has been dumped). I refer to this blog and reduce the version of opencv. If the version still reports an error, then reduce the version again
Another problem is that is too laggy on the interface when I first run, and the camera is opened without response. I thought there was an error, but when I ran the second time, I succeeded, so if I failed the first time, I'll see if there is a problem in the second time. If there is a problem, I'll read the error report again.
At the same time, you need to check your camera. If you open the camera and prompt that you can't find the camera, you need to modify the number of your camera. This is the place noted below. As for how to change this number, you can try one by one, or you can search how to view the camera number (my default 0 is OK) (you can search how to view the camera number by yourself)

The third step is to design the interface to complete the function
First of all, let's learn and interpret the code copied above, so that we can make a similar one by ourselves. We won't repeat it when looking at the code.
Reference articles include the following
What is the slot function - Search (bing.com)
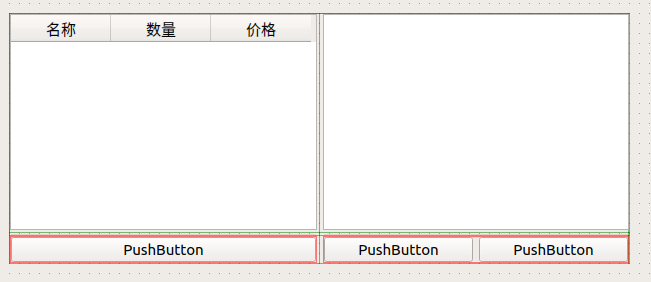
Drawing with design tools
The layout components are used
On the left is a table, on the right is a video, and below is the corresponding button
Complete the function of video pause
In short, when releasing the video stream, I don't empty the video display area, so the displayed image will stop at the last one, just like intercepting it
(because my project is related to object recognition, my assumption is that after clicking confirm, the video will be suspended, and the user will confirm whether the information in the table and the information in the picture are correct, and then click to clinch a deal. Therefore, this function is required in my assumption, but it needs to be modified to display the picture after processing in the later stage)
The code is as follows
Here, I have also modified the function name and variable name. Please pay attention to it (slightly changed and changed a few lines of code)
- I put the open camera on the initialization. As soon as I run the camera, it is open
- The name of the definition button is modified, and the code for clearing the video display area is deleted to complete the screenshot effect
from PyQt5 import QtCore,QtGui,QtWidgets
import sys
import cv2
import numpy as np

class Ui_MainWindow(QtWidgets.QWidget):
    def __init__(self,parent=None):
        super().__init__(parent) #Constructor of parent class

        self.timer_camera = QtCore.QTimer() #Define a timer to control the frame rate of the displayed video
        self.cap = cv2.VideoCapture()       #Video stream
        self.CAM_NUM = 0                    #0 indicates that the video stream comes from the built-in camera of the notebook

        self.set_ui()                       #Initialization program interface
        ''' Check whether the camera is connected and started'''
        self.open_camera()
        self.slot_init()                    #Initialize slot function


    '''Program interface layout'''
    def set_ui(self):
        self.__layout_main = QtWidgets.QHBoxLayout()           #General layout
        self.__layout_fun_button = QtWidgets.QVBoxLayout()      #Key layout
        self.__layout_data_show = QtWidgets.QVBoxLayout()       #Data (video) display layout
        self.button_confirm = QtWidgets.QPushButton('Reconfirmation') #Create a key to turn on the camera
        self.button_close = QtWidgets.QPushButton('sign out')           #Create a key to exit the program
        self.button_confirm.setMinimumHeight(50)                #Set key size
        self.button_close.setMinimumHeight(50)

        self.button_close.move(10,100)                      #It doesn't seem to matter to remove the sentence of moving the button
        '''information display '''
        self.label_show_camera = QtWidgets.QLabel()   #Define the Label that displays the video
        self.label_show_camera.setFixedSize(641,481)    #Set the size of the Label for video display to 641x481
        '''Add keys to key layout'''
        self.__layout_fun_button.addWidget(self.button_confirm) #Put the key to open the camera into the key layout
        self.__layout_fun_button.addWidget(self.button_close)       #Put the key to exit the program into the key layout
        '''Add some controls to the general layout'''
        self.__layout_main.addLayout(self.__layout_fun_button)      #Add the key layout to the general layout
        self.__layout_main.addWidget(self.label_show_camera)        #Add the Label used to display video to the general layout
        '''After the general layout is arranged, the general layout can be passed into the following functions as parameters'''
        self.setLayout(self.__layout_main) #All controls will not be displayed until this step

    '''Initialize all slot functions'''
    def slot_init(self):
        self.button_confirm.clicked.connect(self.open_camera)    #If the key is clicked, the button is called_ confirm()
        self.timer_camera.timeout.connect(self.show_camera) #If the timer ends, call show_camera()
        self.button_close.clicked.connect(self.close) #If the key is clicked, close() will be called. Note that this close is the parent qtwidgets QWidget comes with it. It will close the program

    '''One of the slot functions'''
    def open_camera(self):
        if self.timer_camera.isActive() == False:   #If the timer does not start
            flag = self.cap.open(self.CAM_NUM) #If the parameter is 0, it means to open the built-in camera of the notebook. If the parameter is the path of the video file, it means to open the video
            if flag == False:       #flag indicates whether open() is successful
                msg = QtWidgets.QMessageBox.warning(self,'warning',"Please check whether the camera is connected to the computer correctly",buttons=QtWidgets.QMessageBox.Ok)
            else:
                self.timer_camera.start(30)  #The timer starts to count for 30ms, and the result is to take a frame from the camera for display every 30ms
                self.button_confirm.setText('determine')
        else:
            self.timer_camera.stop()  #off timer
            self.cap.release()        #Release video stream
            # self.label_show_camera.clear()  #Clear video display area
            self.button_confirm.setText('Reconfirmation')

    def show_camera(self):
        flag,self.image = self.cap.read()  #Read from video stream

        show = cv2.resize(self.image,(640,480))     #Reset the size of the read frame to 640x480
        show = cv2.cvtColor(show,cv2.COLOR_BGR2RGB) #The video color is converted back to RGB, which is the real color
        showImage = QtGui.QImage(show.data,show.shape[1],show.shape[0],QtGui.QImage.Format_RGB888) #Convert the read video data into QImage form
        self.label_show_camera.setPixmap(QtGui.QPixmap.fromImage(showImage))  #Display QImage in the Label displaying the video

if __name__ =='__main__':
    app = QtWidgets.QApplication(sys.argv)  #Fixed, indicating application
    ui = Ui_MainWindow()                    #Instantiate Ui_MainWindow
    ui.show()                               #Call show() of ui to display. Similarly, show () is derived from the parent class qtwidgets QWidget
    sys.exit(app.exec_())                   #Without this sentence, the program interface will flash by
Add display table function
The reference articles are as follows
Here I revised my code to make it a drawing designed for the above. At the same time, I set the contents of the form as non editable
The code is as follows
The code for the camera has not been modified, so it has not been pasted
The revised contents include:
- Change general layout to grid layout
- Added table layout
- Another key layout is added
- Change table to non editable
- Exit button deleted
- Set the size of the label
from PyQt5 import QtCore,QtGui,QtWidgets
from PyQt5.QtWidgets import QHeaderView
from PyQt5.QtWidgets import QAbstractItemView

import sys
import cv2
import numpy as np

class Ui_MainWindow(QtWidgets.QWidget):
    def __init__(self,parent=None):
        super().__init__(parent) #Constructor of parent class

        self.timer_camera = QtCore.QTimer() #Define a timer to control the frame rate of the displayed video
        self.cap = cv2.VideoCapture()       #Video stream
        self.CAM_NUM = 0                    #0 indicates that the video stream comes from the built-in camera of the notebook

        self.set_ui()                       #Initialization program interface
        ''' Check whether the camera is connected and started'''
        self.open_camera()
        self.slot_init()                    #Initialize slot function


    '''Program interface layout'''
    def set_ui(self):
        self.__layout_main = QtWidgets.QGridLayout()           #General layout
        self.__layout_fun_button1 = QtWidgets.QHBoxLayout()      #Key layout 1
        self.__layout_fun_button2 = QtWidgets.QHBoxLayout()      #Key layout 2
        self.__layout_data_show = QtWidgets.QVBoxLayout()       #Data (video) display layout
        self.__layout_list_show  = QtWidgets.QVBoxLayout()          #Table layout

        self.button_confirm = QtWidgets.QPushButton('Reconfirmation') #Create a key to turn on the camera
        # self.button_close = QtWidgets.QPushButton('sign out')               #Create a key to exit the program
        self.button_settle_accounts = QtWidgets.QPushButton('Check out') #Create closing button
        self.list_show =  QtWidgets.QTableWidget(6,3)                          #Create table
        self.label_account = QtWidgets.QLabel("Total price")                          #Create label

        '''set butten size '''
        self.button_confirm.setMinimumHeight(50)                #Set key size
        # self.button_close.setMinimumHeight(50)
        self.button_settle_accounts.setMinimumHeight(50)
        self.label_account.setMinimumHeight(50)


        # self.button_close.move(10,100)                      #It doesn't seem to matter to remove the sentence of moving the button
        '''set label font'''
        font = QtGui.QFont()
        font.setPixelSize(18)
        self.label_account.setFont(font)

        '''set list'''
        self.list_show.setHorizontalHeaderLabels(["name","quantity","Unit Price"])
        self.list_show.horizontalHeader().setSectionResizeMode(QHeaderView.Stretch)# adaptive size
        self.list_show.setEditTriggers(QAbstractItemView.EditTrigger(False))    #Make the contents of the table non editable
        '''information display '''
        self.label_show_camera = QtWidgets.QLabel()   #Define the Label that displays the video
        self.label_show_camera.setFixedSize(641,481)    #Set the size of the Label for video display to 641x481
        '''Add keys to key layout'''
        self.__layout_fun_button1.addWidget(self.button_confirm) #Put the reconfirmed key into the key layout
        # self.__layout_fun_button1.addWidget(self.button_close)       #Put the key to exit the program into the key layout
        self.__layout_fun_button2.addWidget(self.button_settle_accounts) #Put the checkout key into the key layout
        '''Add table to table layout'''
        self.__layout_list_show.addWidget(self.list_show)           #Add table to table layout
        self.__layout_list_show.addWidget(self.label_account) #Add total price label to table layout


        '''Add some controls to the general layout'''
        self.__layout_main.addLayout(self.__layout_list_show,0,0)            #Add table layout to general layout
        self.__layout_main.addLayout(self.__layout_fun_button1,1,1)      #Add the key layout to the general layout
        self.__layout_main.addLayout(self.__layout_fun_button2,1,0)      #Add the key layout to the general layout
        self.__layout_main.addWidget(self.label_show_camera,0,1)        #Add the Label used to display video to the general layout

        '''After the general layout is arranged, the general layout can be passed into the following functions as parameters'''
        self.setLayout(self.__layout_main) #All controls will not be displayed until this step

    '''Initialize all slot functions'''
    def slot_init(self):
        self.button_confirm.clicked.connect(self.open_camera)    #If the key is clicked, the button is called_ confirm()
        self.timer_camera.timeout.connect(self.show_camera) #If the timer ends, call show_camera()
The overall effect is shown in the figure below. It can be enlarged or reduced freely

The possible problem is that it took a long time to find out how to prohibit editing.
There are also things that need to know a little about the layout of the interface.
ok, the diary of the second episode is over. After the next chapter, let's try to connect to the next chapter.
last
To sum up: I really can't do anything. It took me two mornings to finish these things. There are many things I can't understand. In the end, I slowly felt the function I wanted. I really don't know. If I really sit on the development platform in the future, what will I do if I can't understand the English development document (> <). It's really a big head at the sight of these all English things.
However, I have achieved the effect I want. I still need to encourage myself.
Then let's start the record of our third chapter diary.