Linux disk partition
preparation in advance
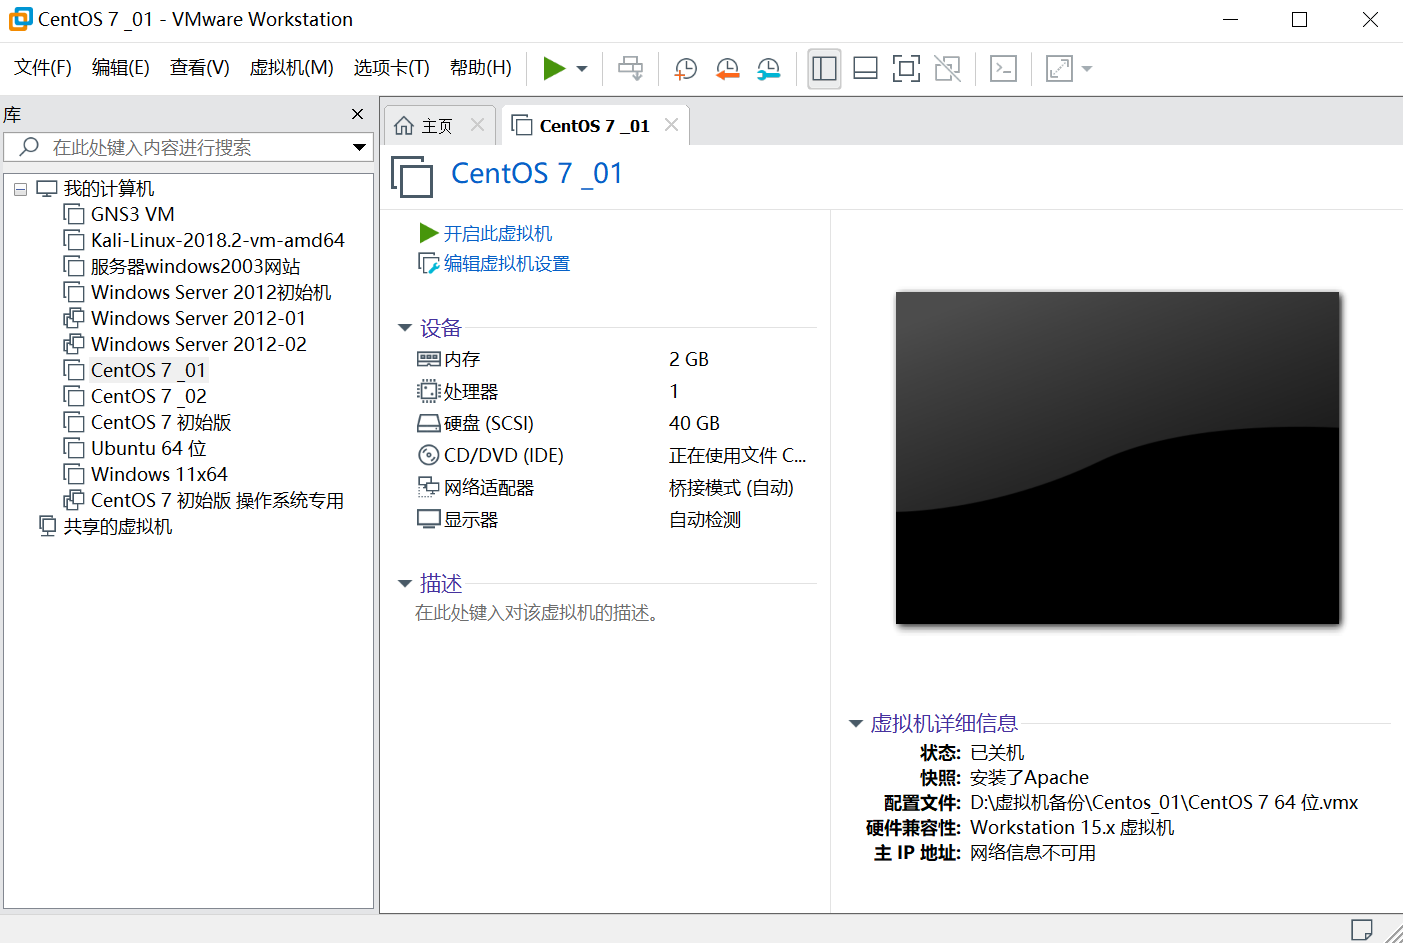
The first step is to open the virtual machine and click Edit virtual machine settings
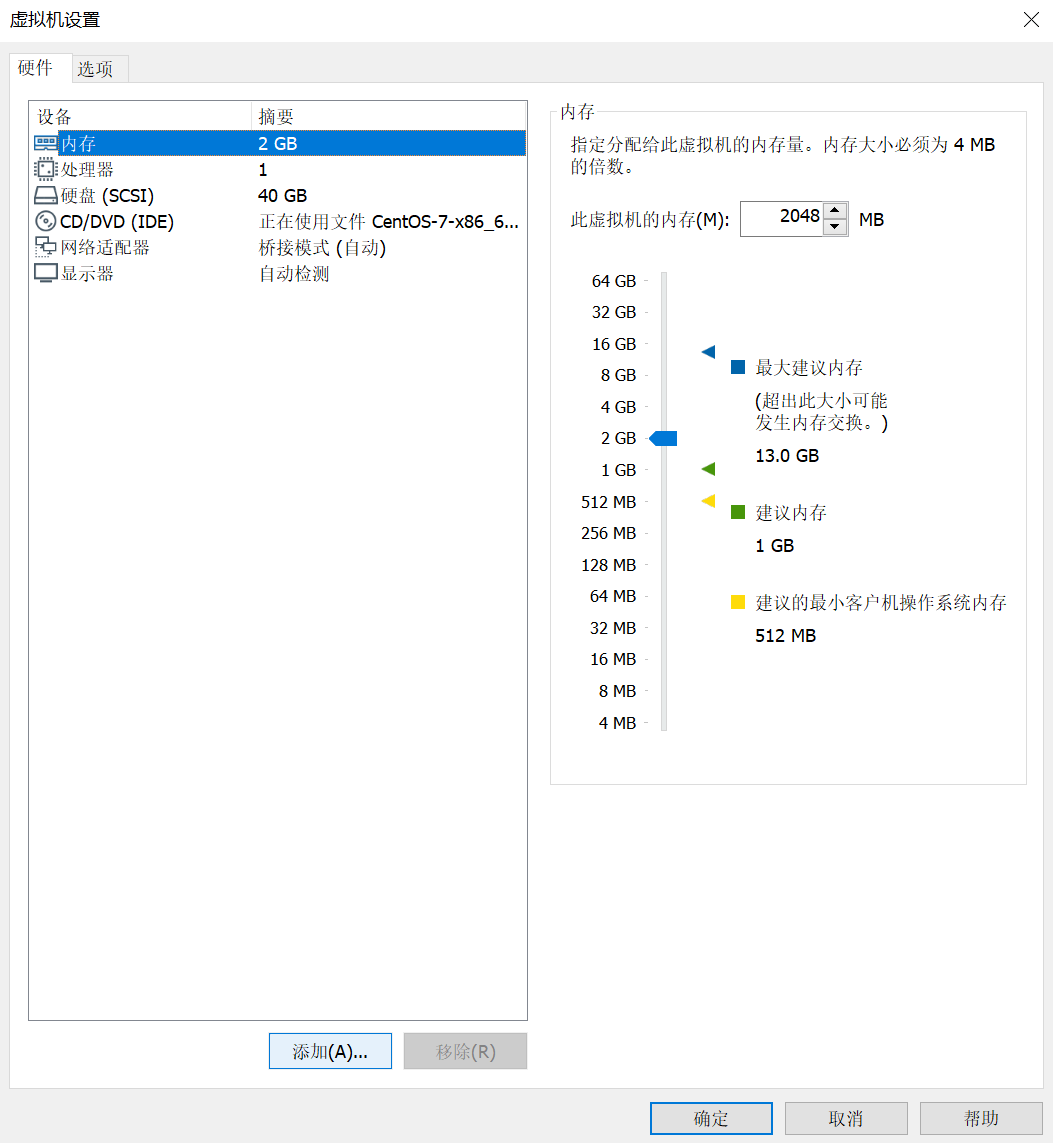
 Click the Add button
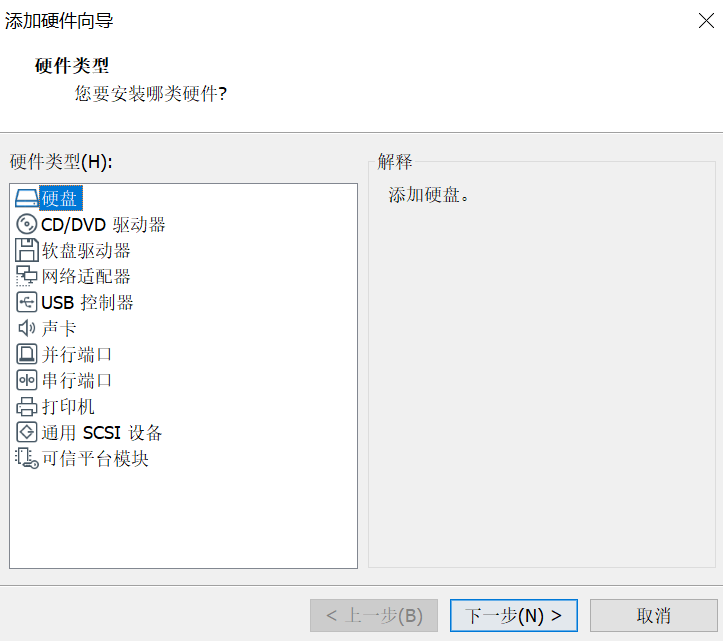
 Select the hard drive and click next
Select SCSI type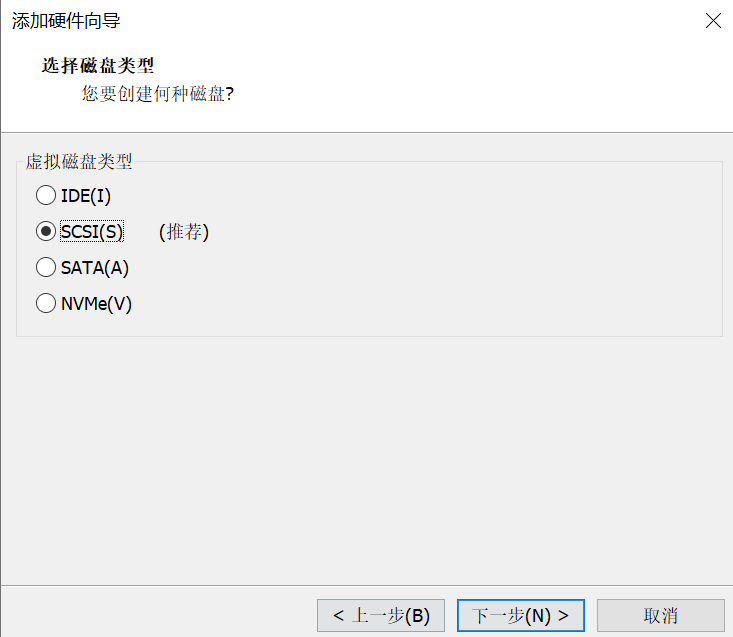 Select create new virtual hard disk
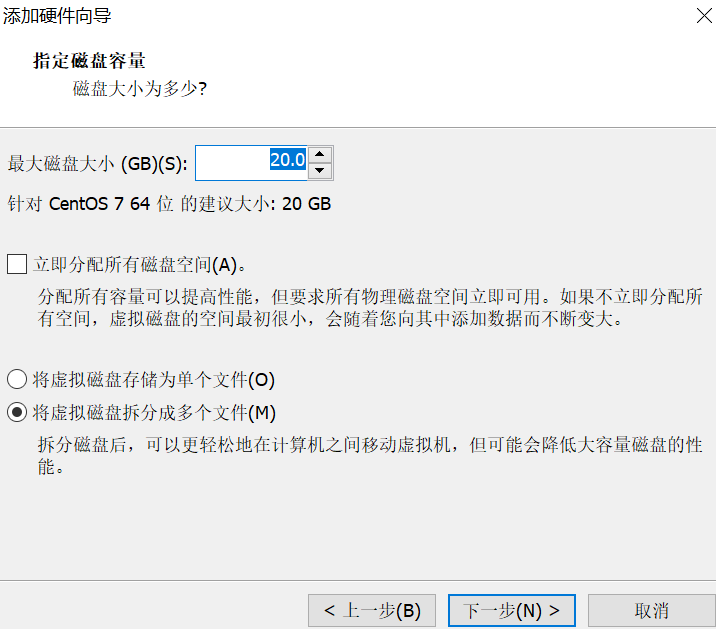
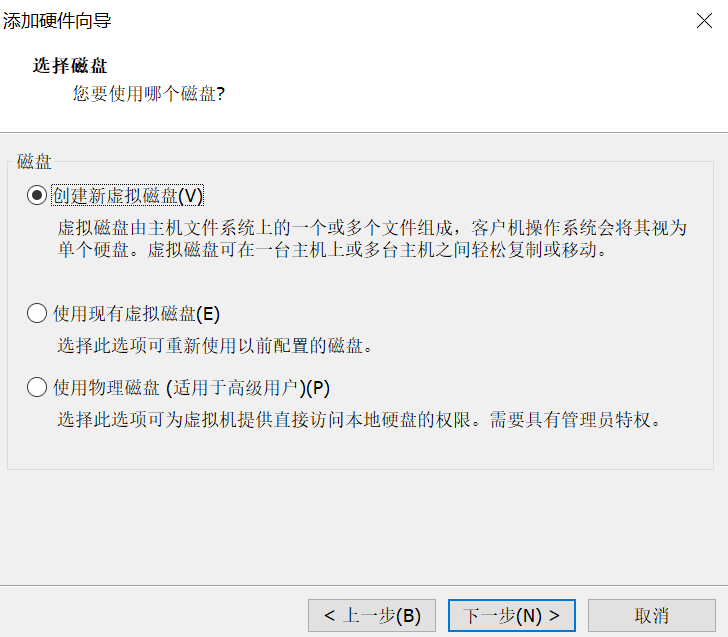 Specify the disk size and select the second or third option (remember not to select the first one, because the first one will allow your physical machine to allocate space to the virtual machine)
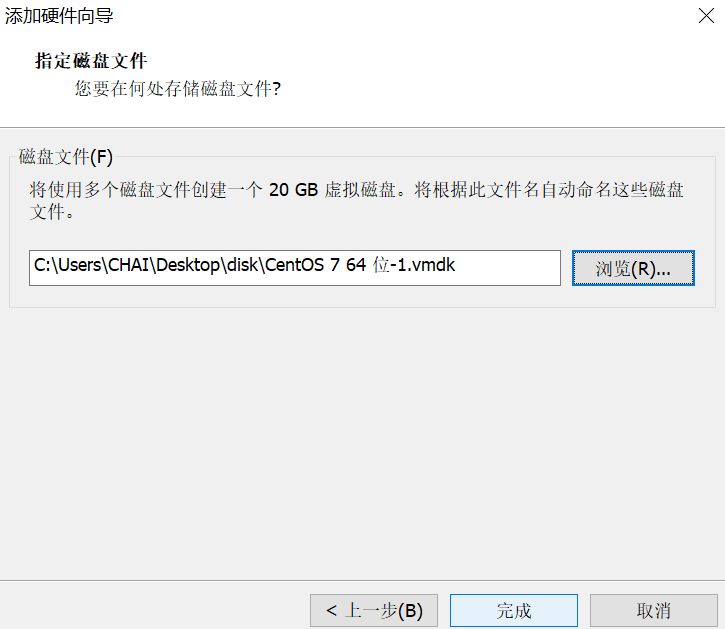
Add the path and click next
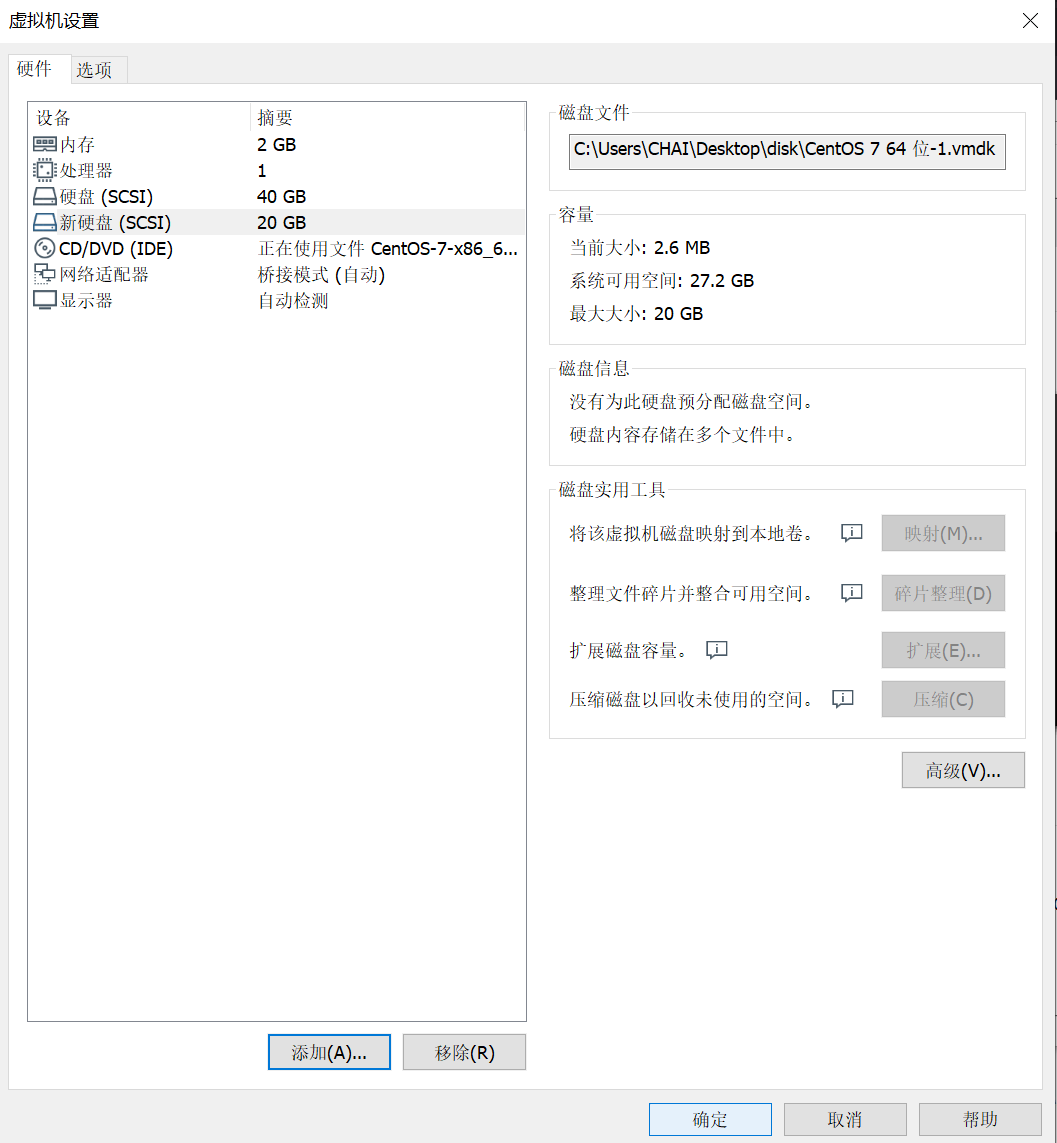
 Click OK and start
Command part
First, use the view disk allocation command: lsblk
[root@localhost ~]# lsblk
NAME            MAJ:MIN RM  SIZE RO TYPE MOUNTPOINT
sda               8:0    0   40G  0 disk
├─sda1            8:1    0    1G  0 part /boot
└─sda2            8:2    0   39G  0 part
  ├─centos-root 253:0    0   37G  0 lvm  /
  └─centos-swap 253:1    0    2G  0 lvm  [SWAP]
sdb               8:16   0   20G  0 disk
sr0              11:0    1  9.5G  0 rom  /run/media/root/CentOS 7 x86_64
Enter the disk allocation interface: / dev/sbd
n: To allocate new space p: to allocate main area e: to allocate extended area d: to delete partition w: to save partition p: to view allocation
There should be at least one primary partition and at most four extended partitions, and there can be no extended partitions. Primary partition + extended partition must be less than or equal to 4.
Disk capacity: primary partition capacity + extended partition capacity
Extended partition capacity: the sum of all logical partition capacities
[root@localhost ~]# fdisk /dev/sdb
 Welcome fdisk (util-linux 2.23.2).

The changes remain in memory until you decide to write the changes to disk.
Think twice before using the write command.


command(input m get help): n
Partition type:
   p   primary (0 primary, 0 extended, 4 free)
   e   extended
Select (default p): p
 Partition number (1-4,Default 1):
Start sector (2048-41943039,The default is 2048):
The default value 2048 will be used
Last a sector, +a sector or +size{K,M,G} (2048-41943039,The default is 41943039): +10G
 Partition 1 is set to Linux Type, size set to 10 GiB
command(input m get help): n
Partition type:
   p   primary (1 primary, 0 extended, 3 free)
   e   extended
Select (default p): e
 Partition number (2-4,Default 2):
Start sector (20973568-41943039,The default is 20973568):
The default value 20973568 will be used
Last a sector, +a sector or +size{K,M,G} (20973568-41943039,The default is 41943039):
The default value 41943039 will be used
 Partition 2 is set to Extended Type, size set to 10 GiB
Partition type:
   p   primary (1 primary, 1 extended, 2 free)
   l   logical (numbered from 5)
Select (default p): l
 Add logical partition 5
 Start sector (20975616-41943039,The default is 20975616):
The default value 20975616 will be used
Last a sector, +a sector or +size{K,M,G} (20975616-41943039,The default is 41943039):
The default value 41943039 will be used
 Partition 5 is set to Linux Type, size set to 10 GiB
 command(input m get help): p

disk /dev/sdb: 21.5 GB, 21474836480 Bytes, 41943040 sectors
Units = a sector of 1 * 512 = 512 bytes
 Sector Size (logic/Physics): 512 byte / 512 byte
I/O size(minimum/optimum): 512 byte / 512 byte
 Disk label type: dos
 Disk identifier: 0 x528312a2

   equipment Boot      Start         End      Blocks   Id  System
/dev/sdb1            2048    20973567    10485760   83  Linux
/dev/sdb2        20973568    41943039    10484736    5  Extended
/dev/sdb5        20975616    41943039    10483712   83  Linux

command(input m get help): w
The partition table has been altered!

Calling ioctl() to re-read partition table.
Synchronizing disks.
View disks after disk allocation and saving: lsblk
At this point, we will find that the sdb has been allocated into a primary partition, an extended region, and a logical region
[root@localhost ~]# lsblk
NAME            MAJ:MIN RM  SIZE RO TYPE MOUNTPOINT
sda               8:0    0   40G  0 disk
├─sda1            8:1    0    1G  0 part /boot
└─sda2            8:2    0   39G  0 part
  ├─centos-root 253:0    0   37G  0 lvm  /
  └─centos-swap 253:1    0    2G  0 lvm  [SWAP]
sdb               8:16   0   20G  0 disk
├─sdb1            8:17   0   10G  0 part
├─sdb2            8:18   0    1K  0 part
└─sdb5            8:21   0   10G  0 part
sr0              11:0    1  9.5G  0 rom  /run/media/root/CentOS 7 x86_64
Create a disk mount point (the extended area does not need to be mounted)
In Linux, all devices must be mounted before they can be used. Mounting is the association between the device and the directory.
[root@localhost ~]# mkdir /media/sdb1
[root@localhost ~]# mkdir /media/sdb5
Format the allocated area. The format type is ext4 (the extended area does not need to be formatted)
The common file systems of Linux are ext4, Centos and Redhat, ext4 and xfs
[root@localhost ~]# mkfs.ext4 /dev/sdb1
mke2fs 1.42.9 (28-Dec-2013)
File system label=
OS type: Linux
 Block size=4096 (log=2)
Block size=4096 (log=2)
Stride=0 blocks, Stripe width=0 blocks
655360 inodes, 2621440 blocks
131072 blocks (5.00%) reserved for the super user
 First data block=0
Maximum filesystem blocks=2151677952
80 block groups
32768 blocks per group, 32768 fragments per group
8192 inodes per group
Superblock backups stored on blocks:
	32768, 98304, 163840, 229376, 294912, 819200, 884736, 1605632

Allocating group tables: complete
Writing inode surface: complete
Creating journal (32768 blocks): complete
Writing superblocks and filesystem accounting information: complete

[root@localhost ~]# mkfs.ext4 /dev/sdb5
mke2fs 1.42.9 (28-Dec-2013)
File system label=
OS type: Linux
 Block size=4096 (log=2)
Block size=4096 (log=2)
Stride=0 blocks, Stripe width=0 blocks
655360 inodes, 2620928 blocks
131046 blocks (5.00%) reserved for the super user
 First data block=0
Maximum filesystem blocks=2151677952
80 block groups
32768 blocks per group, 32768 fragments per group
8192 inodes per group
Superblock backups stored on blocks:
	32768, 98304, 163840, 229376, 294912, 819200, 884736, 1605632

Allocating group tables: complete
Writing inode surface: complete
Creating journal (32768 blocks): complete
Writing superblocks and filesystem accounting information: complete
Mount the formatted hard disk
It can also be modified using vim /etc/fstab
Disk location + mount point + file type + defaults 0 0 0 0 0 0 0 does not update automatically and does not check
[root@localhost ~]# echo "/dev/sdb1 /media/sdb1  ext4 defaules 0 0" >> /etc/fstab
[root@localhost ~]# echo "/dev/sdb5 /media/sdb5  ext4 defaults 0 0" >> /etc/fstab
After all the hard disks are mounted, we can see that the newly added hard disk is successfully mounted and can be used.
[root@localhost ~]# mount -a
! [insert picture description here]( https://img-blog.csdnimg.cn/69b7e8a0ccac40e3a5b64d9e70939e89.png?x-oss-process=image/watermark,type_ZHJvaWRzYW5zZmFsbGJhY2s,shadow_50,text_Q1NETiBAQ0hBSS0=,size_20,color_FFFFFF,t_70,g_se,x_16