The previous article learned about disk partition, format, mount and other related knowledge. This article will explain RAID and LVM technology.
Disk management operation is mainly used by operation and maintenance personnel. If it's just a developer, you can skip this article first. But in many small companies, it is often one person for multiple use, and the operation and maintenance, development are usually the same person, so the requirements for personal skills are higher. Even if not, it is beneficial and harmless to learn more about the relevant concepts.
This paper will first explain the theoretical knowledge of RAID technology and demonstrate raid operation through a case, and then demonstrate LVM technology to solve the problem of dynamic adjustment of storage resources.
1, Independent redundant disk array (RAID)
RAID(Redundant Array of Independent Disk) technology combines multiple hard disk devices into a disk array with larger capacity and better security, and cuts the data into multiple sections and stores them on different physical hard disk devices, improves the overall performance of the disk array by using decentralized read-write technology, and synchronizes the copies of multiple important data to different physical hard disk devices at the same time, which is very good Data redundancy backup effect of.
In short, RAID technology can improve disk read-write performance, and redundant backup data can ensure data reliability. However, the performance and reliability can not be satisfied very well at the same time, so a trade-off between the two results in different raid schemes.
1.1 RAID scheme and features
It is said that there are at least a dozen RAID disk array schemes at present. However, they are all based on the trade-off between read-write performance and reliability. Therefore, only a few representative schemes are introduced.
| programme | Characteristic |
|---|---|
| RAID0 | High disk read / write performance, but low data reliability |
| RAID1 | Low disk device utilization, but high data reliability |
| RAID5 | Compromise between cost, read / write performance and data security |
| RAID10 | Data security and reliability are more important than cost |
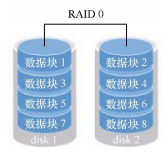
1.1.1 RAID0
Multiple physical hard disk devices are connected in series through hardware or software to form a large volume group, and the data is written to each physical hard disk in turn.
Ideally, disk read-write performance will be improved several times, but if any one of the disks is damaged, the whole system data will be destroyed. In other words, RAID0 can effectively improve the throughput speed of disk data, but it does not have the ability of data backup and error repair.
The schematic diagram is as follows:
1.1.2 RAID1
As mentioned above, RAID0 improves the speed of disk reading and writing, but because it writes data to each disk in turn and stores data separately, if one disk fails, the data of the whole system will be damaged. Therefore, if there is a high demand for data, but there is no demand for disk read-write speed, this scheme is not suitable, and RAID1 scheme is needed.
The schematic diagram of RAID1 is as follows:
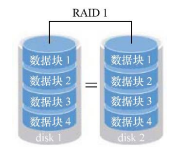
RAID1 is to bind multiple hard disks and write data to multiple disks at the same time, so there will be multiple copies of data. When one of the hard disks fails, it will automatically restore the normal use of data in the way of hot exchange.
Although the data security is guaranteed through the form of replica, the utilization rate of disk device is not high. From the schematic diagram, if it is two disks, the utilization rate is only 50%, so the cost is increased.
1.1.3 RAID5
The former two schemes favor disk speed and data security respectively, while RAID5 is a compromise among read-write performance, data security and cost.
The schematic diagram is as follows:
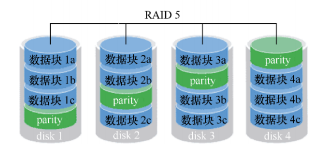
RAID5 technology is to save data parity information of hard disk devices to other hard disk devices. This advantage is that any of these devices will not appear fatal defects after being damaged. The parity part of the figure stores the parity information of the data.
In short, RAID5 does not actually back up the real data information in the hard disk (only one copy of the data), but attempts to reconstruct the damaged data through parity information when the hard disk device has problems.
This scheme takes into account the read-write speed, data security and storage cost of the hard disk device.
1.1.4 RAID10
Although RAID5 seems to have a compromise solution in terms of cost, disk reading and writing, and data security, in fact, many enterprises, especially financial enterprises, have much higher data value than disk price, so cost is not the first consideration. In this context, RAID10 technology is generally used.
RAID10 scheme is actually a combination of RAID0 and RAID1. The schematic diagram is as follows:
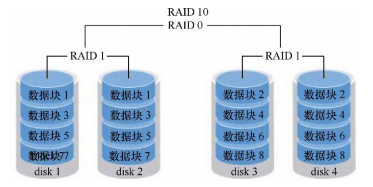
As shown in the figure, at least four hard disks are needed to build RAID10. First, two raids are combined to make RAID1 to ensure the data has a copy to ensure the security. Then, the combined two RAID1 are combined with RAID0 to further improve the reading and writing speed of the device.
Theoretically, as long as the hard disks in the same group are not all broken, 50% of the hard disk devices can be damaged without data loss.
Because the RAID10 scheme inherits the high read-write speed of RAID0 and the data security of RAID1, the performance of RAID10 exceeds RAID5 without considering the cost, so it has become a widely used storage technology.
Note: due to the limited space, other schemes are not listed one by one. It should be noted that the cost, disk performance, data security and other factors should be considered according to the actual demand, and the most appropriate scheme for the demand scenario should be selected according to the demand.
1.2 mdadm command
Through the explanation of the previous article "linux entry series 12 - partition, format and mount of disk management", it is very easy to deploy RAID after learning the disk device management. Therefore, if you haven't mastered it, it is recommended to return to the previous article first.
Before formally operating raid, let's take a look at the management command mdadm of RAID disk array in linux.
Syntax format:
mdadm [mode parameters] RAID name [options] [member disk list]
Parameter options:
| parameter | Effect |
|---|---|
| -a | Name of inspection equipment |
| -n | Specify the number of devices |
| -l | Level, specify RAID level |
| -C | Create RAID |
| -v | Show detailed process |
| -f | Damage of simulation equipment |
| -r | Remove, remove device |
| -D | View details |
1.3 example 1-RAID10 deployment
1.3.1 environmental preparation
We directly add multiple disks to the virtual machine to demonstrate the RAID operation. The commands and steps used in the production environment are consistent.
To avoid the interference between experiments, we clone a new Centos virtual machine for demonstration
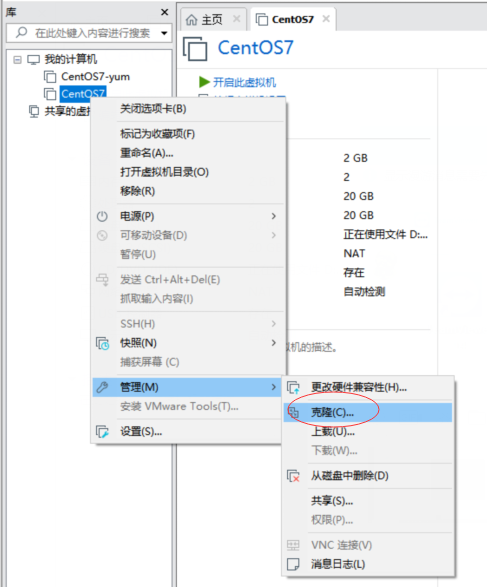
Click clone to open the virtual machine Wizard
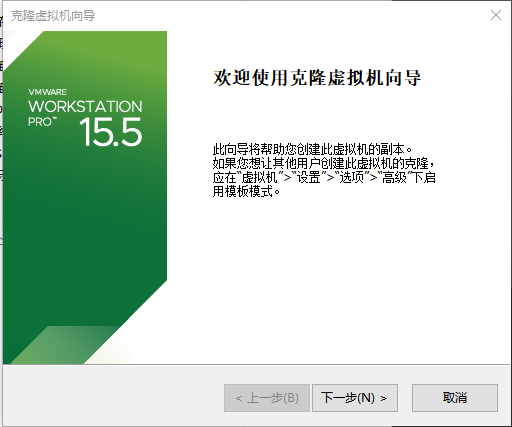
Click Next
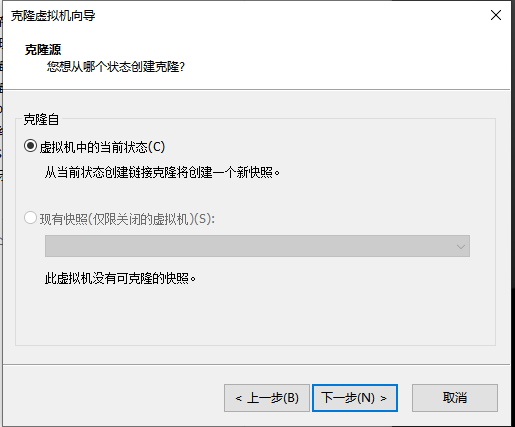
Save the default selection "current state in virtual machine", and click "next"
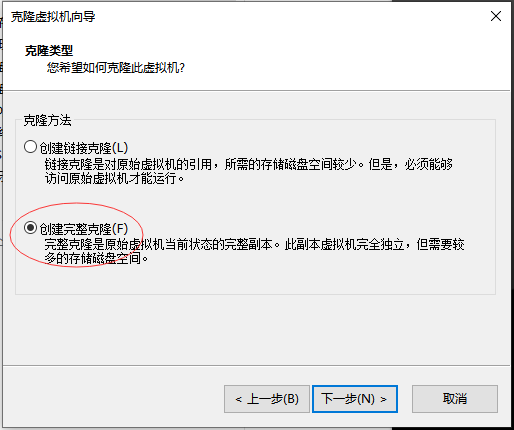
Select "create full clone" and click "next"
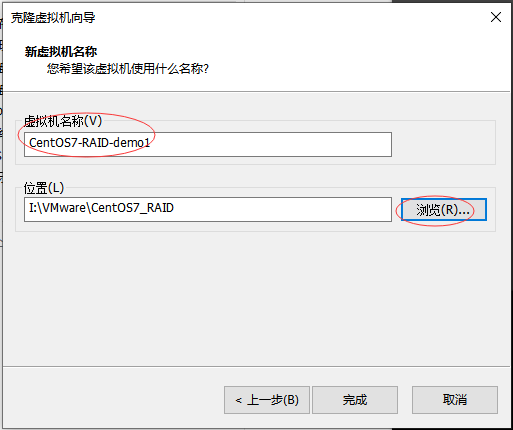
Modify the location where the virtual machine name has been stored as required, and click finish
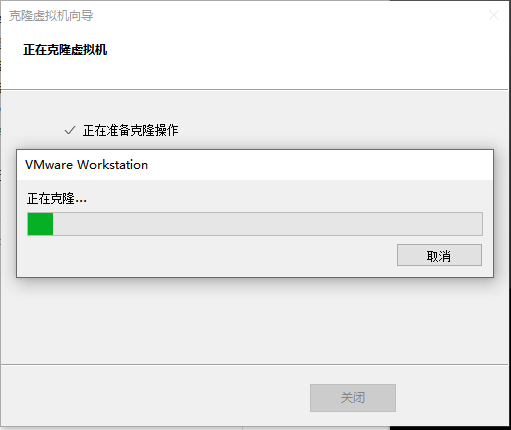
Wait for the clone to complete (depending on the performance of different machines, the clone time is different)
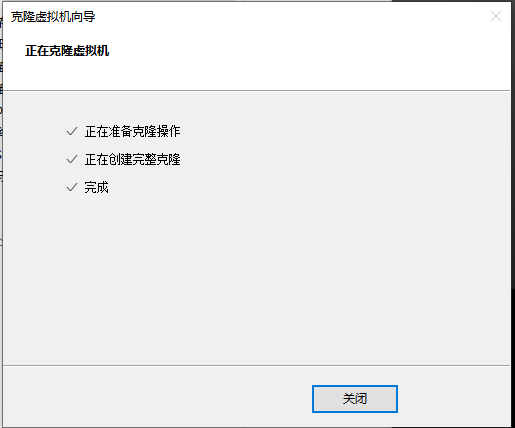
So the new virtual machine is ready.
1.3.2 create RAID10
As mentioned before, RAID10 requires at least four disks, so let's add four disks first.
(1) Add disk
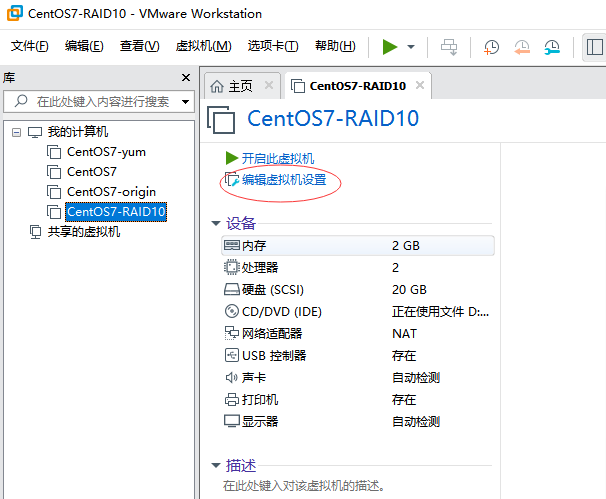
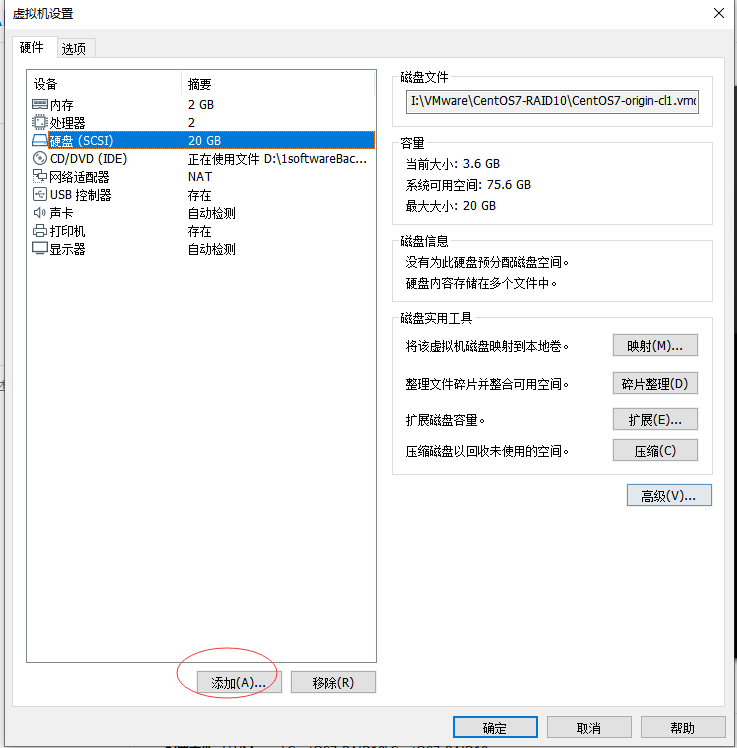
Select the virtual machine you just cloned and click "Edit virtual machine settings"
In the pop-up "virtual machine settings" window, click "add"
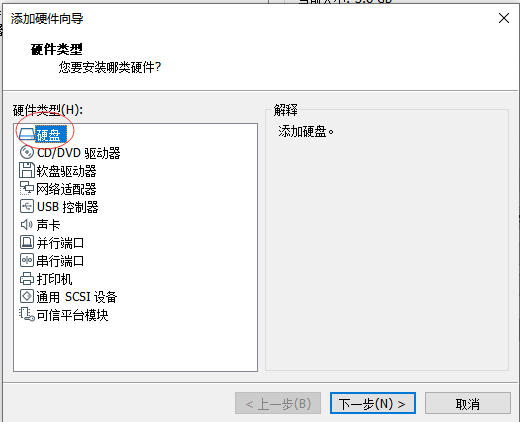
Select "hard disk" in the pop-up "Add Hardware Wizard", and then click "next"
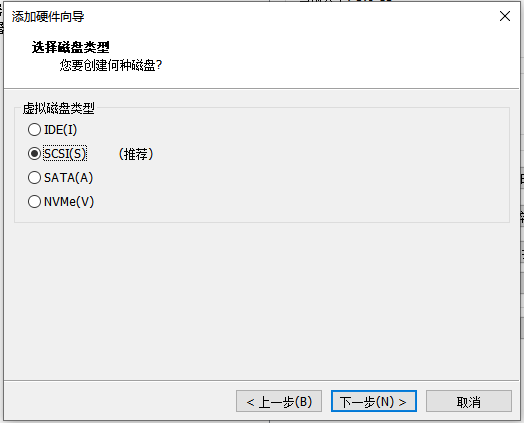
Save the default "SCSI" for disk type, and click "next"
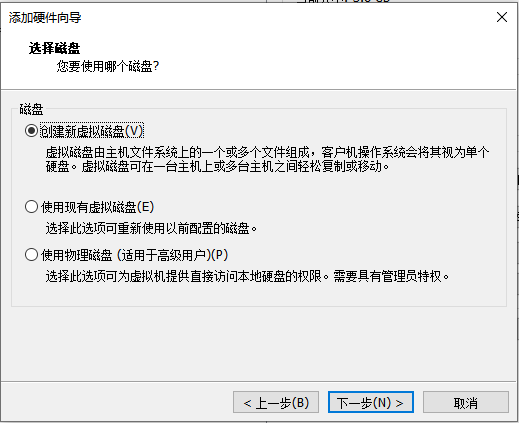
The disk type remains the default "create new virtual machine disk", click "next"
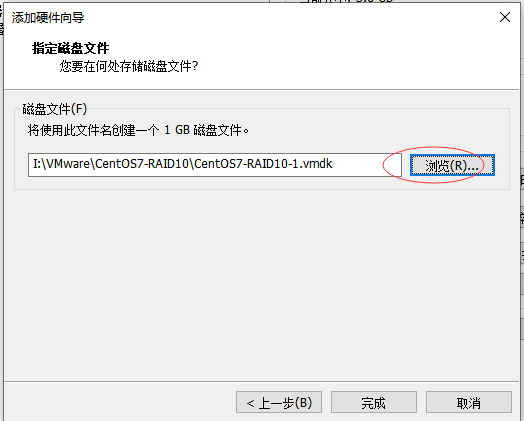
Set the disk size as required. Set it to 1G here. Click next

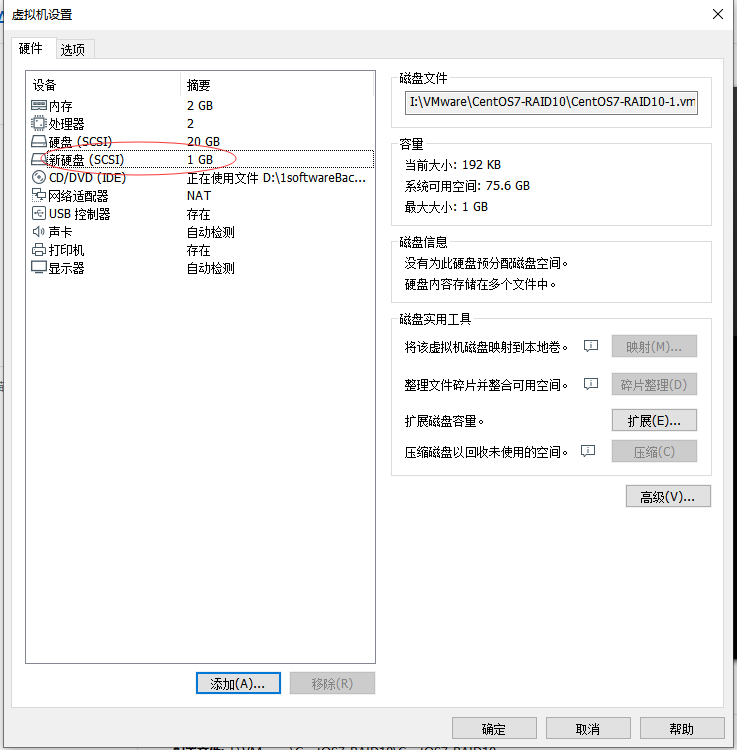
Select the storage path of the disk file and click the "finish" button
You can see that the disk you just added has succeeded.
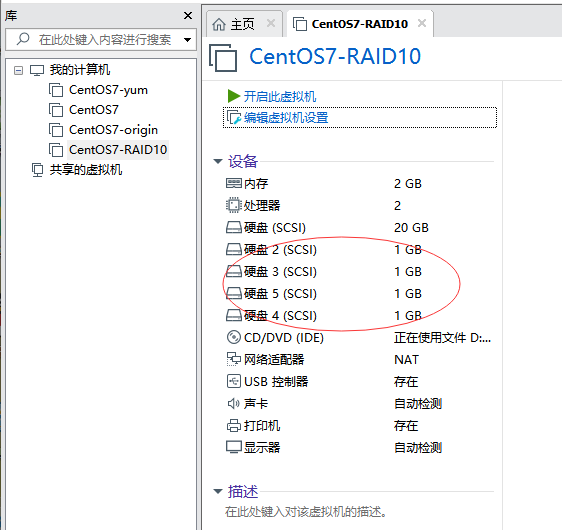
Click the "add" button in the upper interface, and add 3 more disks in the same way, with a total of 4 new disks added.
(2) Create RAID10 disk array
Start the virtual machine that just added the disk, and use lsblk or fdisk explained earlier to view the disk device
[root@origin ~]# lsblk
NAME            MAJ:MIN RM  SIZE RO TYPE MOUNTPOINT
sda               8:0    0   20G  0 disk
├─sda1            8:1    0  500M  0 part /boot
└─sda2            8:2    0 19.5G  0 part
  ├─centos-swap 253:0    0    2G  0 lvm  [SWAP]
  └─centos-root 253:1    0 17.5G  0 lvm  /
sdb               8:16   0    1G  0 disk
sdc               8:32   0    1G  0 disk
sdd               8:48   0    1G  0 disk
sde               8:64   0    1G  0 disk
sr0              11:0    1  3.9G  0 rom  /run/media/root/CentOS 7 x86_64
[root@origin ~]# fdisk -l
Disk /dev/sde: 1073 MB, 1073741824 bytes, 2097152 sectors
Units = sectors of 1 * 512 = 512 bytes
Sector size (logical/physical): 512 bytes / 512 bytes
I/O size (minimum/optimal): 512 bytes / 512 bytes

Disk /dev/sdb: 1073 MB, 1073741824 bytes, 2097152 sectors
Units = sectors of 1 * 512 = 512 bytes
Sector size (logical/physical): 512 bytes / 512 bytes
I/O size (minimum/optimal): 512 bytes / 512 bytes

Disk /dev/sdd: 1073 MB, 1073741824 bytes, 2097152 sectors
Units = sectors of 1 * 512 = 512 bytes
Sector size (logical/physical): 512 bytes / 512 bytes
I/O size (minimum/optimal): 512 bytes / 512 bytes

Disk /dev/sdc: 1073 MB, 1073741824 bytes, 2097152 sectors
Units = sectors of 1 * 512 = 512 bytes
Sector size (logical/physical): 512 bytes / 512 bytes
I/O size (minimum/optimal): 512 bytes / 512 bytes
...Omit part of the content
[root@origin ~]#
You can see the disks just added: sdb, sdc, sdd, and sde. The device names are: / dev/sdb, / dev/sdc, / dev/sdd, / dev/sde
Next, create RAID10 with the mdadm command
[root@origin ~]# mdadm -Cv /dev/md0 -a yes -n 4 -l 10 /dev/sdb /dev/sdc /dev/sdd /dev/sde
mdadm: layout defaults to n2
mdadm: layout defaults to n2
mdadm: chunk size defaults to 512K
mdadm: size set to 1047552K
mdadm: Defaulting to version 1.2 metadata
mdadm: array /dev/md0 started.
[root@origin ~]#
The C parameter represents the creation of a RAID array card; - v parameter shows the creation process, and a device name / dev/md0 is appended to it, so / dev/md0 is the name of the created RAID disk array; - a yes parameter represents the automatic creation of device files; - n 4 parameter represents the use of four hard disks to deploy the RAID disk array; and - l 10 parameter represents the RAID10 scheme.
After creating the disk array successfully, the next step is to format it
1.3.3 format RAID
Format RAID disk array with mkfs command
[root@origin ~]# mkfs.ext4 /dev/md0
mke2fs 1.42.9 (28-Dec-2013)
Filesystem label=
OS type: Linux
Block size=4096 (log=2)
Fragment size=4096 (log=2)
Stride=128 blocks, Stripe width=256 blocks
131072 inodes, 523776 blocks
26188 blocks (5.00%) reserved for the super user
First data block=0
Maximum filesystem blocks=536870912
16 block groups
32768 blocks per group, 32768 fragments per group
8192 inodes per group
Superblock backups stored on blocks:
        32768, 98304, 163840, 229376, 294912
Allocating group tables: done
Writing inode tables: done
Creating journal (8192 blocks): done
Writing superblocks and filesystem accounting information: done
[root@origin ~]#
1.3.4 mount disk array
Create directory and mount disk array
[root@origin ~]# mkdir /raid
[root@origin ~]# mount /dev/md0 /raid
[root@origin ~]# df -h
Filesystem               Size  Used Avail Use% Mounted on
/dev/mapper/centos-root   18G  4.5G   14G  26% /
devtmpfs                 905M     0  905M   0% /dev
tmpfs                    914M  140K  914M   1% /dev/shm
tmpfs                    914M  9.0M  905M   1% /run
tmpfs                    914M     0  914M   0% /sys/fs/cgroup
/dev/sda1                497M  119M  379M  24% /boot
/dev/sr0                 3.9G  3.9G     0 100% /run/media/root/CentOS 7 x86_64
/dev/md0                 2.0G  6.0M  1.9G   1% /raid
[root@origin ~]#
Eh, careful friends may have doubts, and even start to wonder if they have made mistakes. Four disks have been added in the front, each disk is 1G, and the total amount should be 4G, but here we see that the size of / dev/md0 is 2G?
Yes, you are right. According to the RAID10 scheme explained earlier, the capacity will be reduced. Here you can see that in the case of four disks, the available capacity will be reduced by half.
We also need to write the mount information to the configuration file to make it permanent
[root@origin ~]# echo "/dev/md0 /raid ext4 defaults 0 0">>/etc/fstab
[root@origin ~]# cat /etc/fstab
...Omit part of the content
/dev/md0 /raid ext4 defaults 0 0
[root@origin ~]#
This mounts the disk array to the raid directory.
1.3.5 viewing disk array information
View disk array information
[root@origin ~]# mdadm -D /dev/md0
/dev/md0:
...Omit part of the content
    Number   Major   Minor   RaidDevice State
       0       8       16        0      active sync   /dev/sdb
       1       8       32        1      active sync   /dev/sdc
       2       8       48        2      active sync   /dev/sdd
       3       8       64        3      active sync   /dev/sde
[root@origin ~]#
You can see that four of the four disks in the four disk array are working properly.
At this point, the deployment of RAID10 scheme is completed. It can be seen that the whole operation flow is consistent with the addition of hard disk, which requires the steps of creation, format, mount, etc., which is very simple.
1.4 instance 2 - repair the broken disk in RAID10
This experiment simulates the replacement operation after a hard disk in the disk array breaks down, so continue to perform the following operations in the front environment.
1.4.1 damage of simulation equipment
Simulating device corruption with the - f parameter of the mdadm command
[root@origin ~]# mdadm /dev/md0 -f /dev/sdb
mdadm: set /dev/sdb faulty in /dev/md0
[root@origin ~]# mdadm -D /dev/md0
/dev/md0:
...Omit part of the content
    Number   Major   Minor   RaidDevice State
       0       0        0        0      removed
       1       8       32        1      active sync   /dev/sdc
       2       8       48        2      active sync   /dev/sdd
       3       8       64        3      active sync   /dev/sde
       0       8       16        -      faulty   /dev/sdb
[root@origin ~]#
After confirming that a physical hard disk device is damaged and cannot be used normally, use the mdadm command to remove it, then check the status of RAID disk array, and find that the status of / dev/sdb disk has changed.
In RAID10 level disk array, the use of RAID10 disk array is not affected when there is a fault disk in RAID1 disk array. After purchasing a new hard disk device, we can use the mdadm command to replace it. During this period, we can create or delete files in the /RAID directory normally.
Because we are in the virtual machine simulation, in order to be more realistic, first restart the system, and then continue the subsequent operation.
After reboot, it is found that the damaged disk is no longer in the disk array
[root@origin ~]# mdadm -D /dev/md0
/dev/md0:
...Omit part of the content
    Number   Major   Minor   RaidDevice State
       0       0        0        0      removed
       1       8       32        1      active sync   /dev/sdc
       2       8       48        2      active sync   /dev/sdd
       3       8       64        3      active sync   /dev/sde
[root@origin ~]# lsblk
NAME            MAJ:MIN RM  SIZE RO TYPE   MOUNTPOINT
sda               8:0    0   20G  0 disk
├─sda1            8:1    0  500M  0 part   /boot
└─sda2            8:2    0 19.5G  0 part
  ├─centos-swap 253:0    0    2G  0 lvm    [SWAP]
  └─centos-root 253:1    0 17.5G  0 lvm    /
sdb               8:16   0    1G  0 disk
sdc               8:32   0    1G  0 disk
└─md0             9:0    0    2G  0 raid10 /raid
sdd               8:48   0    1G  0 disk
└─md0             9:0    0    2G  0 raid10 /raid
sde               8:64   0    1G  0 disk
└─md0             9:0    0    2G  0 raid10 /raid
sr0              11:0    1  3.9G  0 rom
1.4.2 remove the disk array directory mount
[root@origin ~]# df -h
Filesystem               Size  Used Avail Use% Mounted on
/dev/mapper/centos-root   18G  4.5G   14G  26% /
devtmpfs                 905M     0  905M   0% /dev
tmpfs                    914M   80K  914M   1% /dev/shm
tmpfs                    914M  8.9M  905M   1% /run
tmpfs                    914M     0  914M   0% /sys/fs/cgroup
/dev/md0                 2.0G  6.0M  1.9G   1% /raid
/dev/sda1                497M  134M  363M  27% /boot
[root@origin ~]# umount /raid/
[root@origin ~]# df -h
Filesystem               Size  Used Avail Use% Mounted on
/dev/mapper/centos-root   18G  4.5G   14G  26% /
devtmpfs                 905M     0  905M   0% /dev
tmpfs                    914M   80K  914M   1% /dev/shm
tmpfs                    914M  8.9M  905M   1% /run
tmpfs                    914M     0  914M   0% /sys/fs/cgroup
/dev/sda1                497M  134M  363M  27% /boot
[root@origin ~]#
To add a disk, you need to unmount it first
1.4.3 add disk and add disk array
After unmounting, we use the - a parameter of the mdadm command to add disks
[root@origin ~]# mdadm /dev/md0 -a /dev/sdb
mdadm: added /dev/sdb
[root@origin ~]# mdadm -D /dev/md0
/dev/md0:
...Omit part of the content
    Number   Major   Minor   RaidDevice State
       4       8       16        0      active sync   /dev/sdb
       1       8       32        1      active sync   /dev/sdc
       2       8       48        2      active sync   /dev/sdd
       3       8       64        3      active sync   /dev/sde
[root@origin ~]#
You can see that the / dev/sdb device joined the disk array successfully
1.4.4 remounting the disk array
[root@origin ~]# mount -a
[root@origin ~]# df -h
Filesystem               Size  Used Avail Use% Mounted on
/dev/mapper/centos-root   18G  4.5G   14G  26% /
devtmpfs                 905M     0  905M   0% /dev
tmpfs                    914M   80K  914M   1% /dev/shm
tmpfs                    914M  8.9M  905M   1% /run
tmpfs                    914M     0  914M   0% /sys/fs/cgroup
/dev/sda1                497M  119M  379M  24% /boot
/dev/md0                 2.0G  6.0M  1.9G   1% /raid
You can see that the disk array / dev/md0 is successfully mounted to the / raid directory again.
Because of the previous / etc/fstab file and the addition of records, there is no need to add them here.
At this point, it is simulated that after the device fails, the process of repairing it with a new disk is repeated.
1.5 example 3-RAID5 + backup disk scheme
According to the RAID10 deployment scheme above, up to 50% of hard disk devices are allowed to fail. The disks in the same group can work normally as long as they are not completely damaged, but in extreme cases, if all the disk devices in the same RAID1 are damaged, data loss will also be caused. In this case, we use an additional backup disk to solve the problem. This hard disk is usually idle. Once there is a hard disk failure in the RAID disk array, it will automatically replace it.
In order to avoid interference, a virtual machine is cloned again, and the RAID 5 scheme is used for demonstration.
There is nothing special about using RAID5, just to demonstrate the use of RAID5, because the previous examples 1 and 2 are using RAID10.
Because RAID5 needs at least 3 disks, and this scheme also needs a backup disk, so after the new machine is cloned in the virtual machine, 4 hard disks are added.
1.5.1 create RAID5
Creating RAID5 with mdadm command
[root@origin ~]# mdadm -Cv /dev/md0 -n 3 -l 5 -x 1 /dev/sdb /dev/sdc /dev/sdd /dev/sde
mdadm: layout defaults to left-symmetric
mdadm: layout defaults to left-symmetric
mdadm: chunk size defaults to 512K
mdadm: size set to 1047552K
mdadm: Defaulting to version 1.2 metadata
mdadm: array /dev/md0 started.
[root@origin ~]#
Parameter - n 3 represents the number of hard disks needed to create this RAID5 disk array, parameter - l 5 represents the RAID level, and parameter - x 1 represents a backup disk.
[root@origin ~]# mdadm -D /dev/md0
/dev/md0:
...Omit parts
    Number   Major   Minor   RaidDevice State
       0       8       16        0      active sync   /dev/sdb
       1       8       32        1      active sync   /dev/sdc
       4       8       48        2      active sync   /dev/sdd
       3       8       64        -      spare   /dev/sde
Check the / dev/md0 disk array to see that there is a backup disk waiting (spare).
1.5.2 format RAID5 disk array
Format the disk array to ext4 file format with mkfs command
[root@origin ~]# mkfs.ext4 /dev/md0
mke2fs 1.42.9 (28-Dec-2013)
Filesystem label=
OS type: Linux
Block size=4096 (log=2)
Fragment size=4096 (log=2)
Stride=128 blocks, Stripe width=256 blocks
131072 inodes, 523776 blocks
26188 blocks (5.00%) reserved for the super user
First data block=0
Maximum filesystem blocks=536870912
16 block groups
32768 blocks per group, 32768 fragments per group
8192 inodes per group
Superblock backups stored on blocks:
        32768, 98304, 163840, 229376, 294912
Allocating group tables: done
Writing inode tables: done
Creating journal (8192 blocks): done
Writing superblocks and filesystem accounting information: done
[root@origin ~]#
1.5.3 mount disk array to directory
[root@origin ~]# echo "/dev/md0 /raid ext4 defaults 0 0" >> /etc/fstab
[root@origin ~]# mkdir /raid
[root@origin ~]# mount -a
[root@origin ~]# df -h
Filesystem               Size  Used Avail Use% Mounted on
...Omit part of the content
/dev/md0                 2.0G  6.0M  1.9G   1% /raid
[root@origin ~]#
1.5.4 damage of analog disk
Once again, we simulate removing the hard disk device / dev/sdb from the disk array
[root@origin ~]# mdadm /dev/md0 -f /dev/sdb
mdadm: set /dev/sdb faulty in /dev/md0
[root@origin ~]# mdadm -D /dev/md0
/dev/md0:
...Omit part of the content
    Number   Major   Minor   RaidDevice State
       3       8       64        0      active sync   /dev/sde
       1       8       32        1      active sync   /dev/sdc
       4       8       48        2      active sync   /dev/sdd
       0       8       16        -      faulty   /dev/sdb
[root@origin ~]#
Quickly check the status of the / dev/md0 disk array and find that the backup disk / dev/sde has been automatically replaced and data synchronization has started.
1.5.5 recovering damaged disks
In the real scenario, we need to ensure that there is an idle backup disk at any time in case of accident. Therefore, we need to replace or repair the disk / dev/sdb that just broke. After recovery, it will automatically become an idle backup disk. Once a device breaks down, it will automatically top up, so as to ensure data security.
Because the above step is the simulated / dev/sdb device, which is still in use although it is broken, restart the virtual machine (it is found that / dev/sdb is gone after restart, and if it is not restarted, it will prompt that the / dev/sdd device is busy and cannot successfully perform the following steps), and then perform the following operations:
[root@origin ~]# mdadm -D /dev/md0
/dev/md0:
...Omit part of the content
    Number   Major   Minor   RaidDevice State
       3       8       64        0      active sync   /dev/sde
       1       8       32        1      active sync   /dev/sdc
       4       8       48        2      active sync   /dev/sdd
[root@origin ~]# umount /raid/
[root@origin ~]# mdadm /dev/md0 -a /dev/sdb
mdadm: added /dev/sdb
[root@origin ~]# mount -a
[root@origin ~]# df -h
Filesystem               Size  Used Avail Use% Mounted on
/dev/mapper/centos-root   18G  4.5G   14G  26% /
devtmpfs                 905M     0  905M   0% /dev
tmpfs                    914M   80K  914M   1% /dev/shm
tmpfs                    914M  8.9M  905M   1% /run
tmpfs                    914M     0  914M   0% /sys/fs/cgroup
/dev/sda1                497M  134M  363M  27% /boot
/dev/md0                 2.0G  6.0M  1.9G   1% /raid
[root@origin ~]# mdadm -D /dev/md0
/dev/md0:
...Omit part of the content
    Number   Major   Minor   RaidDevice State
       3       8       64        0      active sync   /dev/sde
       1       8       32        1      active sync   /dev/sdc
       4       8       48        2      active sync   /dev/sdd

       5       8       16        -      spare   /dev/sdb
[root@origin ~]#
As you can see, the / dev/sdb device automatically becomes a backup disk after adding. This ensures data security.
2, Logical volume manager (LVM)
RAID disk array technology is used to manage disk devices, which can effectively provide read-write performance and data security of disk devices, but after hard disk device partition or deployment of RAID disk array, hard disk partition size is difficult to adjust, and LVM (logical volume manager) technology allows users to dynamically adjust hard disk resources.
2.1 LVM overview
LVM (Logical Volume Manager) is a mechanism used by Linux system to manage hard disk partitions. The original intention of creating LVM is to solve the problem that hard disk devices are not easy to modify the partition size after creating partitions.
Although it is theoretically feasible to expand or shrink the traditional hard disk partition, it may cause data loss.
LVM architecture is as follows:

LVM technology adds a logical layer between hard disk partition and file system. It provides an abstract volume group, which can combine multiple hard disks into volumes. In this way, users do not need to care about the underlying structure and layout of the physical hard disk device, and can realize the dynamic adjustment of the hard disk partition.
Physical volumes are at the bottom of LVM, which can be understood as physical hard disks, hard disk partitions or RAID disk arrays. A volume group is built on top of a physical volume. A volume group can contain multiple physical volumes, and you can continue to add new physical volumes to the volume group after it is created. The logical volume is established with the idle resources in the volume group, and the logical volume can dynamically expand or shrink the space after establishment.
In the production environment, it is impossible to accurately evaluate the usage of each hard disk partition in the future, which will lead to the insufficient use of the originally allocated hard disk partition. With the increase of business, we need to expand the capacity when the disk is not enough, or we need to simplify and shrink the disk partition when the business is reduced. These can be solved by LVM.
When you deploy LVM, you need to configure physical volumes, volume groups, and logical volumes one by one. Common commands are as follows:
| function | Physical volume management | Volume group management | Logical volume management |
|---|---|---|---|
| scanning | pvscan | vgscan | lvscan |
| establish | pvcreate | vgcreate | lvcreate |
| display | pvdisplay | vgdisplay | lvdisplay |
| delete | pvremove | vgremove | lvremove |
| extend | vgextend | lvextend | |
| narrow | vgreduce | lvreduce |
2.2 case practice
To avoid interference, clone a virtual machine again, and add 2 disks (the purpose of adding 2 disks is to demonstrate adding disks to the volume group of LVM, and there may be more disks).
The general steps are as follows: first, create the physical volume for the two new hard disks, then combine the two hard disks and cut the combined volume group into a 150MB logical volume device according to the requirements, and finally format the logical volume device into an EXT4 file system and mount it for use.
2.2.1 deploy LVM
(1) Let disk devices support LVM
[root@origin ~]# lsblk
NAME            MAJ:MIN RM  SIZE RO TYPE MOUNTPOINT
sda               8:0    0   20G  0 disk
├─sda1            8:1    0  500M  0 part /boot
└─sda2            8:2    0 19.5G  0 part
  ├─centos-swap 253:0    0    2G  0 lvm  [SWAP]
  └─centos-root 253:1    0 17.5G  0 lvm  /
sdb               8:16   0    1G  0 disk
sdc               8:32   0    1G  0 disk
sr0              11:0    1  3.9G  0 rom  /run/media/root/CentOS 7 x86_64
[root@origin ~]# pvcreate /dev/sdb /dev/sdc
  Physical volume "/dev/sdb" successfully created
  Physical volume "/dev/sdc" successfully created
[root@origin ~]# pvscan
  PV /dev/sda2   VG centos          lvm2 [19.51 GiB / 0    free]
  PV /dev/sdc                       lvm2 [1.00 GiB]
  PV /dev/sdb                       lvm2 [1.00 GiB]
  Total: 3 [21.51 GiB] / in use: 1 [19.51 GiB] / in no VG: 2 [2.00 GiB]
[root@origin ~]#
Check the two devices in the new home just now: sdb and sdc. Create a physical volume and view it through the pvscan command to create a physical volume.
(2) Disk devices joining volume groups
[root@origin ~]# vgcreate storage /dev/sdb /dev/sdc
  Volume group "storage" successfully created
[root@origin ~]# vgdisplay
  --- Volume group ---
  VG Name               storage
  System ID
  Format                lvm2
  Metadata Areas        2
  Metadata Sequence No  1
  VG Access             read/write
  VG Status             resizable
  MAX LV                0
  Cur LV                0
  Open LV               0
  Max PV                0
  Cur PV                2
  Act PV                2
  VG Size               1.99 GiB
  PE Size               4.00 MiB
  Total PE              510
  Alloc PE / Size       0 / 0
  Free  PE / Size       510 / 1.99 GiB
  VG UUID               EKcctk-C1nM-Y2W8-s7pS-1bq8-W9ie-UTJM8Z
...Omit part of the content
[root@origin ~]# vgscan
  Reading all physical volumes.  This may take a while...
  Found volume group "storage" using metadata type lvm2
  Found volume group "centos" using metadata type lvm2
[root@origin ~]#
Create a volume group named storage with vgcreate and view it through vgdisplay or vgscan.
(3) Create logical volume
Cut out a logical volume device of about 150MB. Here we need to pay attention to the problem of cutting units. There are two kinds of measurement units when cutting logical volumes. The first is based on capacity, and the parameter used is - L. For example, use - L 150M to generate a logical volume with a size of 150MB. The other is based on the number of basic units. The parameter used is - L. The size of each base cell defaults to 4MB. For example, using - l 37 can generate a logical volume with a size of 37 × 4MB=148MB.
[root@origin ~]# lvcreate -n vo -l 37 storage
  Logical volume "vo" created
[root@origin ~]# lvscan
  ACTIVE            '/dev/storage/vo' [148.00 MiB] inherit
  ACTIVE            '/dev/centos/root' [17.51 GiB] inherit
  ACTIVE            '/dev/centos/swap' [2.00 GiB] inherit
[root@origin ~]# lvdisplay
  --- Logical volume ---
  LV Path                /dev/storage/vo
  LV Name                vo
  VG Name                storage
  LV UUID                qziHT9-1qTT-1CRa-TIoq-cosz-Hhn0-jX5CVm
  LV Write Access        read/write
  LV Creation host, time origin, 2020-01-01 22:14:18 +0800
  LV Status              available
  '#' open                 0
  LV Size                148.00 MiB
  Current LE             37
  Segments               1
  Allocation             inherit
  Read ahead sectors     auto
  - currently set to     8192
  Block device           253:2
...Omit part of the content
[root@origin ~]#
After creating a logical volume with the name vo through lvcreate, you can view the size of / dev/storage/vo as 148M (LV Size 148.00 MiB) just set through lvdisplay.
(4) Format and mount logical volumes
[root@origin ~]# mkfs.ext4 /dev/storage/vo
mke2fs 1.42.9 (28-Dec-2013)
Filesystem label=
OS type: Linux
Block size=1024 (log=0)
Fragment size=1024 (log=0)
Stride=0 blocks, Stripe width=0 blocks
38000 inodes, 151552 blocks
7577 blocks (5.00%) reserved for the super user
First data block=1
Maximum filesystem blocks=33816576
19 block groups
8192 blocks per group, 8192 fragments per group
2000 inodes per group
Superblock backups stored on blocks:
        8193, 24577, 40961, 57345, 73729
Allocating group tables: done
Writing inode tables: done
Creating journal (4096 blocks): done
Writing superblocks and filesystem accounting information: done
[root@origin ~]# mkdir /lvm
[root@origin ~]# mount /dev/storage/vo /lvm
[root@origin ~]# echo "/dev/storage/vo /lvm ext4 defaults 0 0" >> /etc/fstab
[root@origin ~]#
After formatting the logical volume, mount it to the lvm directory, and write the mounting information to the fstab file to make it automatically take effect when it is turned on.
(5) View mount status
[root@origin ~]# df -h
Filesystem               Size  Used Avail Use% Mounted on
/dev/mapper/centos-root   18G  4.5G   14G  26% /
devtmpfs                 905M     0  905M   0% /dev
tmpfs                    914M  140K  914M   1% /dev/shm
tmpfs                    914M  9.0M  905M   1% /run
tmpfs                    914M     0  914M   0% /sys/fs/cgroup
/dev/sda1                497M  119M  379M  24% /boot
/dev/sr0                 3.9G  3.9G     0 100% /run/media/root/CentOS 7 x86_64
/dev/mapper/storage-vo   140M  1.6M  128M   2% /lvm
[root@origin ~]# echo "test">/lvm/test.txt
[root@origin ~]# ls /lvm/
lost+found  test.txt
[root@origin ~]#
Through df command, you can see the success of the mount and successfully write the file to lvm directory.
2.2.2 LVM expansion
The capacity created in the previous step is 148M, which will be expanded to 300M as shown below
(1) Unload device and mount point Association
[root@origin ~]# umount /lvm
[root@origin ~]#
(2) Expand logical volumes
Expand the logical volume vo in the previous experiment to 300MB
[root@origin ~]# lvextend -L 300M /dev/storage/vo
  Extending logical volume vo to 300.00 MiB
  Logical volume vo successfully resized
[root@origin ~]# lvdisplay
  --- Logical volume ---
  LV Path                /dev/storage/vo
  LV Name                vo
  VG Name                storage
  LV UUID                qziHT9-1qTT-1CRa-TIoq-cosz-Hhn0-jX5CVm
  LV Write Access        read/write
  LV Creation host, time origin, 2020-01-01 22:14:18 +0800
  LV Status              available
  '#' open                 0
  LV Size                300.00 MiB
 ...Omit part of the content
You can see that the logical volume size of / dev/storage/vo after expansion is 300M.
(3) Check hard disk integrity and reset hard disk capacity
[root@origin ~]# e2fsck -f /dev/storage/vo
e2fsck 1.42.9 (28-Dec-2013)
Pass 1: Checking inodes, blocks, and sizes
Pass 2: Checking directory structure
Pass 3: Checking directory connectivity
Pass 4: Checking reference counts
Pass 5: Checking group summary information
/dev/storage/vo: 12/38000 files (0.0% non-contiguous), 10455/151552 blocks
[root@origin ~]# resize2fs /dev/storage/vo
resize2fs 1.42.9 (28-Dec-2013)
Resizing the filesystem on /dev/storage/vo to 307200 (1k) blocks.
The filesystem on /dev/storage/vo is now 307200 blocks long.
[root@origin ~]#
(4) Re mount the device
[root@origin ~]# mount -a
[root@origin ~]# df -h
Filesystem               Size  Used Avail Use% Mounted on
/dev/mapper/centos-root   18G  4.5G   14G  26% /
devtmpfs                 905M     0  905M   0% /dev
tmpfs                    914M  140K  914M   1% /dev/shm
tmpfs                    914M  9.0M  905M   1% /run
tmpfs                    914M     0  914M   0% /sys/fs/cgroup
/dev/sda1                497M  119M  379M  24% /boot
/dev/sr0                 3.9G  3.9G     0 100% /run/media/root/CentOS 7 x86_64
/dev/mapper/storage-vo   287M  2.1M  266M   1% /lvm
[root@origin ~]#
You can see that after the expansion, the size of lvm directory is 300M (the figure above actually shows 287M).
This completes the logical volume expansion.
2.2.3 LVM shrinkage
Compared with the expansion of logical volume, the risk of data loss is greater when the logical volume is compressed, so the data must be backed up in advance in the production environment.
In order to ensure data security, Linux system stipulates that the integrity of the file system should be checked before the LVM logical volume is shrunk.
In the previous step, the lvm capacity is 300M after expansion. In this demonstration, the lvm capacity is reduced to 100M. The steps are as follows:
(1) Unmount file system
[root@origin ~]# umount /lvm
[root@origin ~]#
(2) Check file system integrity
[root@origin ~]#  e2fsck -f /dev/storage/vo
e2fsck 1.42.9 (28-Dec-2013)
Pass 1: Checking inodes, blocks, and sizes
Pass 2: Checking directory structure
Pass 3: Checking directory connectivity
Pass 4: Checking reference counts
Pass 5: Checking group summary information
/dev/storage/vo: 12/76000 files (0.0% non-contiguous), 15761/307200 blocks
[root@origin ~]#
(3) Shrink logical volume
Reduce the capacity of logical volume vo to 100MB
[root@origin ~]# resize2fs /dev/storage/vo 100M
resize2fs 1.42.9 (28-Dec-2013)
Resizing the filesystem on /dev/storage/vo to 102400 (1k) blocks.
The filesystem on /dev/storage/vo is now 102400 blocks long.
[root@origin ~]# lvreduce -L 100M /dev/storage/vo
  WARNING: Reducing active logical volume to 100.00 MiB
  THIS MAY DESTROY YOUR DATA (filesystem etc.)
Do you really want to reduce vo? [y/n]: y
  Reducing logical volume vo to 100.00 MiB
  Logical volume vo successfully resized
[root@origin ~]#
(4) Remount the file system
[root@origin ~]# mount -a
[root@origin ~]# df -h
Filesystem               Size  Used Avail Use% Mounted on
/dev/mapper/centos-root   18G  4.5G   14G  26% /
devtmpfs                 905M     0  905M   0% /dev
tmpfs                    914M  140K  914M   1% /dev/shm
tmpfs                    914M  9.0M  905M   1% /run
tmpfs                    914M     0  914M   0% /sys/fs/cgroup
/dev/sda1                497M  119M  379M  24% /boot
/dev/sr0                 3.9G  3.9G     0 100% /run/media/root/CentOS 7 x86_64
/dev/mapper/storage-vo    93M  1.6M   85M   2% /lvm
[root@origin ~]#
You can see that the lvm directory has been reduced to 93M, which completes the shrink operation of the logical volume.
2.2.4 LVM snapshot function
The logical volume snapshot function is similar to the restore operating system, which can restore the logical volume state to a specified point in time.
LVM snapshot function has two features: the snapshot volume can only be used once, and it will be deleted automatically once the restore operation is performed; the capacity of the snapshot volume must be equal to the capacity of the logical volume to prevent data loss.
(1) View current volume group information
[root@origin ~]# vgdisplay
  --- Volume group ---
  VG Name               storage
  System ID
  Format                lvm2
  Metadata Areas        2
  Metadata Sequence No  4
  VG Access             read/write
  VG Status             resizable
  MAX LV                0
  Cur LV                1
  Open LV               1
  Max PV                0
  Cur PV                2
  Act PV                2
  VG Size               1.99 GiB
  PE Size               4.00 MiB
  Total PE              510
  Alloc PE / Size       25 / 100.00 MiB
  Free  PE / Size       485 / 1.89 GiB
  ...Omit part of the content
You can see that 100M has been used in the volume group, and the idle capacity is still 1.89G. (Alloc PE / Size 25 / 100.00 MiB, Free PE / Size 485 / 1.89 GiB)
(2) Generate snapshot volume
[root@origin ~]# lvcreate -L 100M -s -n SNAP /dev/storage/vo
  Logical volume "SNAP" created
[root@origin ~]# lvdisplay
  --- Logical volume ---
  LV Path                /dev/storage/vo
  LV Name                vo
  VG Name                storage
  LV UUID                qziHT9-1qTT-1CRa-TIoq-cosz-Hhn0-jX5CVm
  LV Write Access        read/write
  LV Creation host, time origin, 2020-01-01 22:14:18 +0800
  LV snapshot status     source of
                         SNAP [active]
  LV Status              available
  '#' open                 1
  LV Size                100.00 MiB
  Current LE             25
  Segments               1
  Allocation             inherit
  Read ahead sectors     auto
  - currently set to     8192
  Block device           253:2

  --- Logical volume ---
  LV Path                /dev/storage/SNAP
  LV Name                SNAP
  VG Name                storage
  LV UUID                TVfDRL-LnYd-z76K-fOuS-AD3C-Sw49-7jPgPo
  LV Write Access        read/write
  LV Creation host, time origin, 2020-01-01 22:40:10 +0800
  LV snapshot status     active destination for vo
  LV Status              available
  '#' open                 0
  LV Size                100.00 MiB
  Current LE             25
  COW-table size         100.00 MiB
  COW-table LE           25
  Allocated to snapshot  0.01%
  Snapshot chunk size    4.00 KiB
  Segments               1
  Allocation             inherit
  Read ahead sectors     auto
  - currently set to     8192
  Block device           253:3
 ...Omit part of the content
Use the lvcreate command to generate a snapshot logical volume called SNAP. At this time, the storage space occupation of the logical volume is 0.01%. (Allocated to snapshot 0.01%)
(3) Add files to the logical volume to view the snapshot volume space usage
[root@origin ~]# dd if=/dev/zero of=/lvm/files count=1 bs=50M
1+0 records in
1+0 records out
52428800 bytes (52 MB) copied, 0.289668 s, 181 MB/s
[root@origin ~]# ls /lvm/
files  lost+found  test.txt
[root@origin ~]# df -h
Filesystem               Size  Used Avail Use% Mounted on
...Omit part of the content
/dev/mapper/storage-vo    93M   52M   35M  61% /lvm
[root@origin ~]# lvdisplay
...Omit part of the content
  --- Logical volume ---
  LV Path                /dev/storage/SNAP
  LV Name                SNAP
  VG Name                storage
  LV UUID                TVfDRL-LnYd-z76K-fOuS-AD3C-Sw49-7jPgPo
  LV Write Access        read/write
  LV Creation host, time origin, 2020-01-01 22:40:10 +0800
  LV snapshot status     active destination for vo
  LV Status              available
  '#' open                 0
  LV Size                100.00 MiB
  Current LE             25
  COW-table size         100.00 MiB
  COW-table LE           25
  Allocated to snapshot  50.29%
  Snapshot chunk size    4.00 KiB
  Segments               1
  Allocation             inherit
  Read ahead sectors     auto
  - currently set to     8192
  Block device           253:3
...Omit part of the content
Create a 50MB garbage file in the directory where the logical volume is mounted, and then check the status of snapshot volume / dev/storage/SNAP and logical volume / dev/storage/vo. It can be found that the storage space consumption has increased. The snapshot volume consumption is Allocated to snapshot 50.29%.
(4) Restoring a logical volume from a snapshot volume
Restore the state of logical volume / dev/storage/vo through the snapshot volume / dev/storage/SNAP just created.
Unmount directory before restoring
[root@origin ~]# umount /lvm/
[root@origin ~]# lvconvert --merge /dev/storage/SNAP
  Merging of volume SNAP started.
  vo: Merged: 72.9%
  vo: Merged: 100.0%
  Merge of snapshot into logical volume vo has finished.
  Logical volume "SNAP" successfully removed
[root@origin ~]#
You can see that after restoring the logical volume, the snapshot volume is automatically deleted, and there will be no / dev/storage/SNAP through lvdisplay command.
(5) Remount logical volumes and view files
[root@origin ~]# mount -a
[root@origin ~]# ls /lvm/
lost+found  test.txt
[root@origin ~]#
As you can see, the files just created after the restore are missing, which restores the logical volume to the state when the snapshot was created.
2.2.5 deleting logical volumes
When you want to redeploy LVM in a production environment or when you no longer need to use LVM, you can remove LVM.
Important data information needs to be backed up in advance, and then logical volumes, volume groups, and physical volume devices need to be deleted in turn. The order cannot be reversed.
(1) Unmount
[root@origin ~]# umount /lvm/
Remove the mount association between the logical volume and the directory, delete the permanently valid device parameters in the configuration file, find the line "/ dev/storage/vo /lvm ext4 defaults 0 0" previously added in the / etc/fstab file and delete it.
(2) Delete logical volume
[root@origin ~]# lvremove /dev/storage/vo
Do you really want to remove active logical volume vo? [y/n]: y
  Logical volume "vo" successfully removed
[root@origin ~]#
(3) Delete volume group
[root@origin ~]# vgremove storage
  Volume group "storage" successfully removed
[root@origin ~]#
Only the volume group name is written, and the absolute path of the device is not required.
(4) Delete physical volume
[root@origin ~]# pvremove /dev/sdb /dev/sdc
  Labels on physical volume "/dev/sdb" successfully wiped
  Labels on physical volume "/dev/sdc" successfully wiped
[root@origin ~]#
After the above operations are completed, when lvdisplay, vgdisplay and pvdisplay are executed to view LVM information, no information will be seen, indicating that the deletion is successful.
Through the above and the demonstration of this article, I have basically mastered the disk management related operations under CentOS 7. If the non operation and maintenance personnel do not have to have a very deep understanding, it is enough.
This article talks about a lot of disk related commands. It's natural to be familiar with them by typing more. In the next article, I will add some knowledge about SSH services, and then I will start to explain the deployment and use of application services (such as apache, mail system, mysql, dynamic website deployment, etc.).