This article is reproduced from: https://zhuanlan.zhihu.com/p/68378809
Author: tangtao Hangzhou University of Electronic Science and technology www.promiselee.com cn/tao
introduce
This article will show you GuiLite How it works, what the architecture looks like, and then you'll understand why GuiLite is the smallest and simplest GUI library.
Quick answer:
- Just 5000 lines of C + + code
- Use only basic C + + features (classes, virtual functions) without complex syntax
- All rendering is based on draw_pixel, no algorithm
- Complete documentation and small field demonstrations for reference
background
- GuiLite is a quasi system GUI framework with 5000 lines of C + + code. It can run on all platforms (for example, iOS, Android, Linux, Windows, macOS, Docker and MCU with or without OS).
- GuiLite is embeddable and runs within other UI frameworks (for example, Qt, MFC, Winform, Cocoa). You can use both the GuiLite function and the host UI function.
- GuiLite renders UI independent of OS and graphics library
- GuiLite can use multiple languages (for example, Swift, Java, C, Golang).
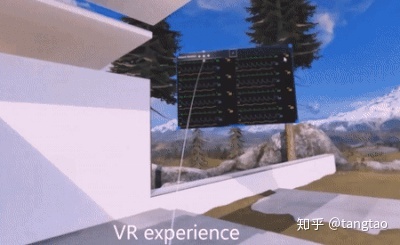
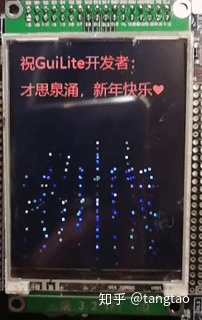
Here are some demos:


What does GuiLite do?
GuiLite does only two things: widget management and rendering.
Widget management includes:
- Add / remove GUI elements (e.g. buttons, labels, dialog boxes), set title and location
- Scheduling / response input message: by analyzing the location information from the message, GuiLite will find the widget that should respond and the call response function (such as on_mouse_click, on_keyboard_click)
- Scheduling / responding to customer messages: by analyzing the ID of the message, GuiLite will find the response function and call it (for example, on_timer, on_custmer_refresh)
Rendering includes:
- Draw pixels, lines, rectangles
- Set frame layer: when drawing, you should enter the frame layer key so that the drawing is on a specific layer
- Update frame layer: when the frame layer changes (for example, open / close dialog box), GuiLite will determine which frame map pixel should be displayed on the screen
Note: rendering is not dependent on widget management. In some cases, you can render lines / text / bitmaps directly in the GUI system without using any widgets. For example: MCU platform with limited resources.
How to customize / extend GuiLite?
In order to make GuiLite simple and clear, GuiLite only provides the implementation of basic widgets (such as buttons, labels, keyboard, spinx, etc.). If you want to do more on widgets, you can do this:
- Update widget code directly in GuiLite
- Add a new widget file and implement the new widget by referencing the GuiLite widget code.
If you want to extend the drawing method (for example, drawing circles / eclipses, etc.), you can directly on the surface Add your method to CPP.
How to render? See drawing function_ XXX () on surface cpp,word.cpp,bitmap.cpp.
Code introduction
Core folder:
- Implement message scheduling / response, multi frame layer management and presentation for all platforms
- Adapter GuiLite on Windows / Linux / Android / iOS / macOS or no operating system in adapter folder
Widget folder:
- This is the code for the controller (e.g., button, label, keyboard) and container (e.g., view, dialog box, page turning); You can redraw your own widgets by modifying this code.
- Here is the code for message conversion (for example, finger press / release), which passes the finger press / release message to the touched widget and calls the callback function if defined.
Widget management
Widgets include button, spinbox, label, keyboard, dialog and view; GuiLite will link all widgets by function: connect, and then GuiLite will easily and quickly find / add / remove any widgets. All connections look like a tree.
For example, when you click the button, the device gets your finger position (x, y) to send the root of the tree. GuiLite will find the button you clicked by comparing location information, and then call the response function (for example, redraw button / change button state).
How do I create a widget?
All widgets are derived from class c_wnd. When the class is instantiated, a widget will be created. At this time, the widget is still independent of the UI system and cannot respond to any user operations.
How to link / unlink widgets
By using the "connect()" function, we can link this widget to the widget tree, and then the widget can respond to user touch / keyboard operations.
int c_wnd::connect(c_wnd *parent, unsigned short resource_id, const char* str,
           short x, short y, short width, short height, WND_TREE* p_child_tree )
{
    if(0 == resource_id)
    {
        ASSERT(FALSE);
        return -1;
    }

    m_resource_id = resource_id;
    m_parent  = parent;
    m_status = STATUS_NORMAL;

    if (parent)
    {
        m_z_order = parent->m_z_order;
        m_surface = parent->m_surface;
    }
    if(NULL == m_surface)
    {
        ASSERT(FALSE);
        return -2;
    }

    /* (cs.x = x * 1024 / 768) for 1027*768=>800*600 quickly*/
    m_wnd_rect.m_left    = x;
    m_wnd_rect.m_top    = y;
    m_wnd_rect.m_right    = (x + width - 1);
    m_wnd_rect.m_bottom = (y + height - 1);

    c_rect rect;
    get_screen_rect(rect);
    ASSERT(m_surface->is_valid(rect));

    pre_create_wnd();
    set_str(str);

    if ( 0 != parent )
    {
        parent->add_child_2_tail(this);
    }

    if (load_child_wnd(p_child_tree) >= 0)
    {
        load_cmd_msg();
        on_init_children();
    }
    return 0;
}
Unlink this widget from the UI system by using the "disconnect()" function. The widget then remains in memory but no longer responds to user touch / keyboard operations.
void c_wnd::disconnect()
{
    if (0 == m_resource_id)
    {
        return;
    }

    if (NULL != m_top_child)
    {
        c_wnd *child = m_top_child;
        c_wnd *next_child = NULL;

        while (child)
        {
            next_child = child->m_next_sibling;
            child->disconnect();
            child = next_child;
        }
    }

    if (0 != m_parent)
    {
        m_parent->unlink_child(this);
    }
    m_focus_child = 0;
    m_resource_id = 0;
}
Render
Rendering includes rendering methods and graphics management.
- All rendering methods are based on draw_pixel() function
- So far, GuiLite supports 3 frame layers and can handle 3-layer overlapping scenes
void c_surface::draw_pixel(int x, int y, unsigned int rgb, unsigned int z_order)
{
    if (x >= m_width || y >= m_height || x < 0 || y < 0)
    {
        return;
    }
    if (z_order > m_max_zorder)
    {
        ASSERT(FALSE);
        return;
    }
    rgb = GL_ROUND_RGB_32(rgb);
    if (z_order == m_max_zorder)
    {
        return draw_pixel_on_fb(x, y, rgb);
    }

    if (z_order > m_top_zorder)
    {
        m_top_zorder = (Z_ORDER_LEVEL)z_order;
    }

    if (0 == m_frame_layers[z_order].rect.PtInRect(x, y))
    {
        ASSERT(FALSE);
        return;
    }
    ((unsigned short*)(m_frame_layers[z_order].fb))[x + y * m_width] = GL_RGB_32_to_16(rgb);

    if (z_order == m_top_zorder)
    {
        return draw_pixel_on_fb(x, y, rgb);
    }

    bool is_covered = false;
    for (int tmp_z_order = Z_ORDER_LEVEL_MAX - 1; tmp_z_order > z_order; tmp_z_order--)
    {
        if (TRUE == m_frame_layers[tmp_z_order].rect.PtInRect(x, y))
        {
            is_covered = true;
            break;
        }
    }

    if (!is_covered)
    {
        draw_pixel_on_fb(x, y, rgb);
    }
}
int c_surface::set_frame_layer(c_rect& rect, unsigned int z_order)
{
    if (rect == m_frame_layers[z_order].rect)
    {
        return 0;
    }
    if (rect.m_left < 0 || rect.m_left >= m_width ||
        rect.m_right < 0 || rect.m_right >= m_width ||
        rect.m_top < 0 || rect.m_top >= m_height ||
        rect.m_bottom < 0 || rect.m_bottom >=m_height)
    {
        ASSERT(FALSE);
        return -1;
    }
    if (!(z_order > Z_ORDER_LEVEL_0 && z_order < Z_ORDER_LEVEL_MAX))
    {
        ASSERT(FALSE);
        return -2;
    }
    if (z_order < m_top_zorder)
    {
        ASSERT(FALSE);
        return -3;
    }
    m_top_zorder = (Z_ORDER_LEVEL)z_order;

    c_rect old_rect = m_frame_layers[z_order].rect;
    //Recover the lower layer
    int src_zorder = (Z_ORDER_LEVEL)(z_order - 1);
    int display_width = m_display->get_width();
    int display_height = m_display->get_height();

    for (int y = old_rect.m_top; y <= old_rect.m_bottom; y++)
    {
        for (int x = old_rect.m_left; x <= old_rect.m_right; x++)
        {
            if (!rect.PtInRect(x, y))
            {
                unsigned int rgb = ((unsigned short*)
                                   (m_frame_layers[src_zorder].fb))[x + y * m_width];
                draw_pixel_on_fb(x, y, GL_RGB_16_to_32(rgb));
            }
        }
    }

    m_frame_layers[z_order].rect = rect;
    if (rect.IsEmpty())
    {
        m_top_zorder = (Z_ORDER_LEVEL)(z_order - 1);
    }
    return 0;
}
rendering method
- Basic rendering function: surface_cpp.cpp::draw_xxx()
- Bitmap rendering function: bitmap cpp::draw_ bitmap_ xxx()
- To gain GPU advantages, you can draw_xxx() refactoring with GPU function
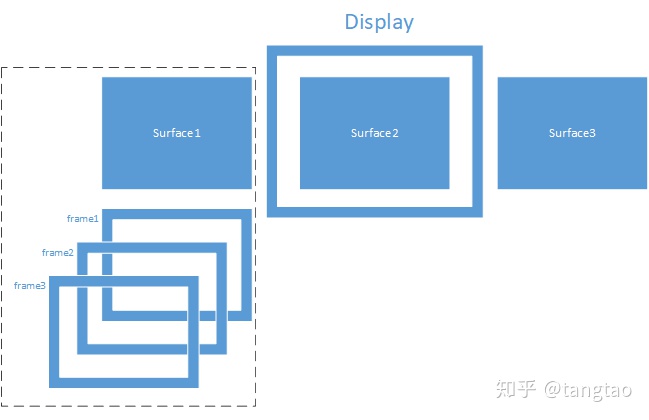
Graphics layer

- Display layer: this layer is used for physical display devices. A UI has only one display layer
- Surface layer: a display layer has many surface layers, and a surface layer represents a page turning
- Frame layer: a surface layer has many frame layers, and a frame layer represents a layer in the Z direction
Let's see how to create a display:
c_display::c_display(void* phy_fb, unsigned int display_width, unsigned int display_height,
                        unsigned int surface_width, unsigned int surface_height,
                        unsigned int color_bytes, unsigned int surface_cnt,
                        EXTERNAL_GFX_OP* gfx_op)
{
    if (color_bytes != 2 && color_bytes != 4)
    {
        log_out("Support 16 bits, 32 bits color only!");
        ASSERT(FALSE);
    }

    m_width = display_width;
    m_height = display_height;
    m_color_bytes = color_bytes;
    m_phy_fb = phy_fb;
    m_phy_read_index = m_phy_write_index = 0;
    memset(m_surface_group, 0, sizeof(m_surface_group));
    m_surface_cnt = surface_cnt;
    ASSERT(m_surface_cnt <= SURFACE_CNT_MAX);

    for (int i = 0; i < m_surface_cnt; i++)
    {
        m_surface_group[i] = phy_fb ? new c_surface
            (this, surface_width, surface_height, color_bytes) :
            new c_surface_no_fb(this, surface_width, surface_height, color_bytes, gfx_op);
    }
}
Issued on June 8, 2019