As the last article in this introductory series, we will demonstrate how to build a LNMP environment to build a personal blog site in the CentOS7 environment.
The common ways to build a website are LAMP, LNMP, IIS, Nginx, Tomcat, etc. This paper demonstrates the more popular way to build a dynamic WEB site based on LNMP.
As mentioned in "Linux entry Series 6 - rpm and Yum warehouse for package management" above, there are several ways to install software on Linux: by compiling source code, by rpm, and by Yum warehouse. Up to now, the previous articles are all installed by Yum or rpm. This article demonstrates the installation by source package.
1, LNMP environment overview
Let's look at two common concepts: LAMP and LNMP.
1.1 LAMP
LAMP refers to the installation of Apache Web server, MySQL database server and PHP development server in Linux operating system, as well as some corresponding extension software.
LAMP is simply: Linux+Apache+MySQL+PHP.
LAMP is a very popular open source software system to build dynamic websites, which has good stability and compatibility. Many enterprises and individuals choose to build their own websites on LAMP development platform.
1.2 LNMP
LNMP refers to the installation of Nginx web server, MySQL database server and PHP development server in Linux operating system, as well as some corresponding extension software.
LNMP is simply: Linux+Nginx+MySQL+PHP.
Compared with LAMP, LNMP uses nginx web server to replace Apache Web server. Nginx is a high-performance HTTP web server and reverse proxy server. Its execution efficiency is very high, and its configuration is relatively simple compared with Apache. Therefore, nginx is adopted by many large companies at home and abroad in a short time, which has the momentum of replacing Apache (currently, the usage of Apache and Ngnix is basically the same), which is the reason why LNMP is adopted in this paper.
2, Linux software installation mode
As mentioned above, the main ways to install software in Linux are: by compiling source code, by RPM, by YUM warehouse, by a third party or self-made one click installation package.
Here are the differences of several installation methods.
2.1 RPM installation
RPM is the red hat software package manager. It is designed to solve some dependency problems during the installation of service programs. Similar to the control panel in Windows system, it will establish a unified database file, record software information in detail and analyze dependency automatically. When it does, it will give prompt information, so as to reduce the difficulty of installation. The installer only needs installation prompt The specified dependency is enough.
Rpm was originally designed for red hat, its advantages have been recognized by the public, and its use scope is not limited to the red hat system. At present, most of the software provides RPM installation package for direct use.
2.2 YUM warehouse installation
Although RPM automatically solves some dependencies between software services, it still requires the installation personnel to install the corresponding dependent services themselves. With the development of software technology, some large-scale software may rely on a lot of other services, but if you want to solve these problems manually, it is still very inefficient.
So in order to solve this problem and further reduce the difficulty of software installation, yum software warehouse was born. Yum software warehouse can automatically analyze the required software package and its related dependencies according to the requirements of users, and then automatically download the software package from the server and install it into the system.
The RPM software package in Yum software warehouse can be officially released by red hat, released by a third party, or written by itself. This method is very convenient and recommended.
2.3 source code installation
Before RPM was released, to install software in Linux system, you can only install it in the way of source package. It requires the installer to compile the code and solve many software dependencies by himself. When installing, upgrading and uninstalling the service program, the dependency of other programs and libraries should be taken into account. Therefore, it is difficult to verify, install, uninstall, query and upgrade the management software.
Generally, when the software service program only provides the way of source code, it is installed in this way.
2.4 third party one key installation package
This method is the simplest. In order to further simplify the installation process, some third-party companies have written the installation script, which only needs the installation script to complete the deployment of complex environment.
There are a lot of LNMP one key integrated environment installation packages. I'm familiar with the LNMP one key installation package, but I haven't used it. You can go to the official website to learn about it.
The official website is: https://lnmp.org/
2.5 how to choose
The order we should consider when installing software in the actual production environment is generally: YUM--RPM -- source code -- other ways. Generally, we first consider using the YUM warehouse for installation. If there is no RPM installation package in the YUM warehouse, we are considering compiling the source code for installation.
This article demonstrates how to install the LNMP environment through source code.
3, Install LNMP by compiling source code
3.1 environmental preparation
First, clone and prepare a virtual machine, and take a snapshot to prevent it from quickly returning to its initial state in case of any problem during the installation process, saving time.
3.1.1 firewall and SELinux settings
To simplify the installation, turn off the firewall and SELinux.
Some enterprises in the production environment are protected by hardware firewall, and some are protected by software firewall, which can be set according to the actual needs.
[root@lnmp ~]# firewall-cmd --state
running
[root@lnmp ~]# systemctl stop firewalld.service
[root@lnmp ~]# systemctl disable firewalld
[root@lnmp ~]# firewall-cmd --state
not running
[root@lnmp ~]# getenforce
Enforcing
[root@lnmp ~]# setenforce 0
[root@lnmp ~]# vim /etc/selinux/config
...Omit part of the content
SELINUX=disabled
...Omit part of the content
[root@lnmp ~]# getenforce
Disabled
Modify the / etc/selinux/config file to disable selinux save exit.
The meaning of each step is no longer to say, forget to go back to see the previous article.
3.1.2 setting up network YUM
Because the download table of yum provided by CentOS is slow, replace yum with ALI's.
yum of ali centos7 is: http://mirrors.aliyun.com/repo/Centos-7.repo
You also need to install the extension yum: http://mirrors.aliyun.com/repo/epel-7.repo
[root@lnmp ~]# cd /etc/yum.repos.d/
[root@lnmp yum.repos.d]# rm -rf *
[root@lnmp yum.repos.d]# wget http://mirrors.aliyun.com/repo/Centos-7.repo
...Omit display
[root@lnmp yum.repos.d]# wget http://mirrors.aliyun.com/repo/epel-7.repo
...Omit display
[root@lnmp yum.repos.d]# ls
Centos-7.repo  epel-7.repo
[root@lnmp yum.repos.d]# yum clean all
...Omit display
[root@lnmp yum.repos.d]# yum makecache
...Omit display
3.1.3 install compilation tools and dependent software packages
To compile the source code, you need to install the following tools and dependency packages: GCC gcc-c + + PCRE devel OpenSSL OpenSSL devel zlib devel ncurses devel cmake bison libxml2 devel
[root@lnmp yum.repos.d]# yum -y install gcc gcc-c++ pcre-devel openssl openssl-devel zlib-devel ncurses-devel cmake bison libxml2-devel libpng-devel
...Omit display
3.1.4 download the source package of each component
The source versions used in this example are:
| assembly | Version and package name |
|---|---|
| nginx | nginx-1.12.2.tar.gz |
| mysql | mysql-5.5.62.tar.gz |
| php | php-7.1.29.tar.gz |
Considering that the download packets are sometimes slow, I uploaded to SkyDrive, and the official account reply: lnmp can download the relevant packages.
If you need different versions of the source package, go to the corresponding official website to download it
mysql official website: https://www.mysql.com/
nginx official website: http://nginx.org/
php official website: https://www.php.net/
After finding the corresponding version package address on the official website, you can download it directly in the virtual machine through the wget command, or upload it directly to the virtual machine with the package I prepared.
This demonstration directly uploads the above packages to the virtual machine. First, create the lnmp directory in the root directory, and then upload the source code to this directory
[root@lnmp ~]# pwd
/root
[root@lnmp ~]# mkdir lnmp
[root@lnmp ~]# cd lnmp
[root@lnmp lnmp]# pwd
/root/lnmp
[root@lnmp lnmp]# ls
mysql-5.5.62.tar.gz  nginx-1.12.2.tar.gz  php-7.1.29.tar.gz
In this way, the source package is ready for installation one by one.
3.2 Nginx installation
When we used to use rpm or yum to install the program, we would do a lot of automatic operations for us. Because now we are installing by compiling the source code, we urgently need to compile and create users by ourselves.
3.2.1 creating nginx users
[root@lnmp lnmp]# useradd -r -s /sbin/nologin nginx
3.2.2 decompress the source package
[root@lnmp lnmp]# pwd
/root/lnmp
[root@lnmp lnmp]# tar -zxvf nginx-1.12.2.tar.gz
...Omit display
3.2.3 compile source code
[root@lnmp lnmp]# cd nginx-1.12.2/
[root@lnmp nginx-1.12.2]# pwd
/root/lnmp/nginx-1.12.2
[root@lnmp nginx-1.12.2]# ./configure --prefix=/usr/local/nginx --user=nginx --group=nginx --with-http_stub_status_module --with-http_ssl_module
...Omit display
[root@lnmp nginx-1.12.2]# echo $?
0
[root@lnmp nginx-1.12.2]#
$? If it is 0, there is no problem. If it is 1, it is necessary to solve the related dependency problem according to the error
3.2.4 generate installation files
[root@lnmp nginx-1.12.2]# make
...Omit display
3.2.5 perform installation
[root@lnmp nginx-1.12.2]# make install
...Omit display
3.2.6 writing startup shell script
Nginx doesn't provide startup script officially, so if you want to start nginx with startup, you need to write your own shell script.
Create nginx custom shell script file in / etc/init.d / directory and enter the following
[root@lnmp nginx-1.12.2]# vim /etc/init.d/nginx
#!/bin/bash
#author:heimatengyun
#chkconfig:2345 99 33
#description:nginx server tools

ngxc="/usr/local/nginx/sbin/nginx"
pidf="/usr/local/nginx/logs/nginx.pid"
ngxc_fpm="/usr/local/php/sbin/php-fpm"
pidf_fpm="/usr/local/php/var/run/php-fpm.pid"
case "$1" in
   start)
        $ngxc -t &> /dev/null
        if [ $? -eq 0 ];then
                     $ngxc
                     $ngxc_fpm
                     echo "nginx service start sucess!"
        else
                     $ngxc -t
        fi
        ;;
    stop)
        kill -s QUIT $(cat $pidf)
        kill -s QUIT $(cat $pidf_fpm)
                     echo "nginx service stop sucess!"
        ;;
    restart)
        $0 stop
        $0 start
        ;;
    reload)
        $ngxc -t &> /dev/null
        if [ $? -eq 0 ];then
                   kill -s HUP $(cat $pidf)
                   kill -s HUP $(cat $pidf_fpm)
                   echo "reload nginx config success!"
         else
                   $ngxc -t
         fi
         ;;
     *)
         echo "please input stop|start|restart|reload."
         exit 1
esac
Save and exit.
The file is also provided with the installation package. The public ID can reply to lnmp. If you forget the syntax related to the shell script, you can go back to the article: "getting started with linux series 8--shell programming"
The script you just created does not have execute permission. Add execute permission for it
[root@lnmp nginx-1.12.2]# ll /etc/init.d/nginx
-rw-r--r-- 1 root root 1082 Feb 16 13:55 /etc/init.d/nginx
[root@lnmp nginx-1.12.2]# chmod +x /etc/init.d/nginx
[root@lnmp nginx-1.12.2]# ll /etc/init.d/nginx
-rwxr-xr-x 1 root root 1082 Feb 16 13:55 /etc/init.d/nginx
[root@lnmp nginx-1.12.2]#
Add the script to the boot entry
[root@lnmp nginx-1.12.2]# chkconfig --add nginx
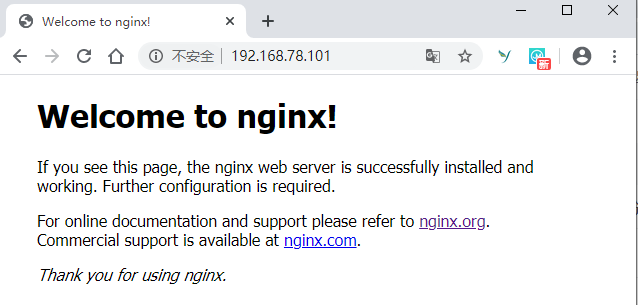
3.2.7 testing nginx
[root@lnmp nginx-1.12.2]# systemctl start nginx
[root@lnmp nginx-1.12.2]# netstat -antp
Active Internet connections (servers and established)
Proto Recv-Q Send-Q Local Address           Foreign Address         State       PID/Program name
tcp        0      0 0.0.0.0:80              0.0.0.0:*               LISTEN      19501/nginx: master
...Omit part of the content
See that 80 ports are started. It's OK
When you visit the browser, you can see the welcome interface, which indicates that nginx is installed successfully.
3.3 MySQL installation
Next, install mysql
3.3.1 create mysql user
[root@lnmp lnmp]# useradd -r -s /sbin/nologin mysql
3.3.2 decompress the source package
[root@lnmp lnmp]# cd /root/lnmp/
[root@lnmp lnmp]# ls
mysql-5.5.62.tar.gz  nginx-1.12.2         php-7.1.29.tar.gz
nginx                nginx-1.12.2.tar.gz
[root@lnmp lnmp]# tar -zxvf mysql-5.5.62.tar.gz
...Omit display
[root@lnmp lnmp]# cd mysql-5.5.62/
3.3.3 compiling source code
[root@lnmp mysql-5.5.62]# pwd
/root/lnmp/mysql-5.5.62
[root@lnmp mysql-5.5.62]# cmake -DCMAKE_INSTALL_PREFIX=/usr/local/mysql -DMYSQL_UNIX_ADDR=/tmp/mysql.sock -DEXTRA_CHARSETS=all -DDEFAULT_CHARSET=utf8 -DDEFAULT_COLLATION=utf8_general_ci -DWITH_MYISAM_STORAGE_ENGINE=1 -DWITH_INNOBASE_STORAGE_ENGINE=1 -DWITH_MEMORY_STORAGE_ENGINE=1 -DWITH_READLINE=1 -DENABLED_LOCAL_INFILE=1 -DMYSQL_USER=mysql -DMYSQL_TCP_PORT=3306
...Omit display
3.3.4 generate installation files
[root@lnmp mysql-5.5.62]# make
...Omit display
The generation process is about 10 minutes
3.3.5 perform installation
[root@lnmp mysql-5.5.62]# make install
...Omit display
After installation, to facilitate command execution, add soft connection
[root@lnmp mysql-5.5.62]# ln -s /usr/local/mysql/bin/* /usr/local/bin
3.3.6 initial configuration
(1) Modify data directory permission
Switch to the mysql installation directory, modify the directory permissions, and change the master permissions of the data directory to mysql
[root@lnmp mysql-5.5.62]# cd /usr/local/mysql/
[root@lnmp mysql]# ll
total 56
drwxr-xr-x  2 root root  4096 Feb 16 14:23 bin
-rw-r--r--  1 root root 17987 Aug 29  2018 COPYING
drwxr-xr-x  3 root root    17 Feb 16 14:23 data
drwxr-xr-x  2 root root    52 Feb 16 14:23 docs
drwxr-xr-x  3 root root  4096 Feb 16 14:23 include
-rw-r--r--  1 root root   301 Aug 29  2018 INSTALL-BINARY
drwxr-xr-x  3 root root  4096 Feb 16 14:23 lib
drwxr-xr-x  4 root root    28 Feb 16 14:23 man
drwxr-xr-x 10 root root  4096 Feb 16 14:23 mysql-test
-rw-r--r--  1 root root  2496 Aug 29  2018 README
drwxr-xr-x  2 root root    29 Feb 16 14:23 scripts
drwxr-xr-x 27 root root  4096 Feb 16 14:23 share
drwxr-xr-x  4 root root  4096 Feb 16 14:23 sql-bench
drwxr-xr-x  2 root root  4096 Feb 16 14:23 support-files
[root@lnmp mysql]# chown -R root .
[root@lnmp mysql]# chown -R mysql data
[root@lnmp mysql]# ll
total 56
drwxr-xr-x  2 root  root  4096 Feb 16 14:23 bin
-rw-r--r--  1 root  root 17987 Aug 29  2018 COPYING
drwxr-xr-x  3 mysql root    17 Feb 16 14:23 data
drwxr-xr-x  2 root  root    52 Feb 16 14:23 docs
drwxr-xr-x  3 root  root  4096 Feb 16 14:23 include
-rw-r--r--  1 root  root   301 Aug 29  2018 INSTALL-BINARY
drwxr-xr-x  3 root  root  4096 Feb 16 14:23 lib
drwxr-xr-x  4 root  root    28 Feb 16 14:23 man
drwxr-xr-x 10 root  root  4096 Feb 16 14:23 mysql-test
-rw-r--r--  1 root  root  2496 Aug 29  2018 README
drwxr-xr-x  2 root  root    29 Feb 16 14:23 scripts
drwxr-xr-x 27 root  root  4096 Feb 16 14:23 share
drwxr-xr-x  4 root  root  4096 Feb 16 14:23 sql-bench
drwxr-xr-x  2 root  root  4096 Feb 16 14:23 support-files
[root@lnmp mysql]#
(2) Generate mysql configuration file
The original / etc/my.cnf file exists by default. Directly copy and overwrite the my-medium.cnf file after installation
[root@lnmp mysql]# cp -a /root/lnmp/mysql-5.5.62/support-files/my-medium.cnf /etc/my.cnf
cp: overwrite '/etc/my.cnf'? y
[root@lnmp mysql]#
(3) mysql initialization
Use the official MySQL install DB script to initialize and generate the authorization table
[root@lnmp mysql]# cd /usr/local/mysql
[root@lnmp mysql]# ./scripts/mysql_install_db  --user=mysql
...Omit display
3.3.7 msyql setting startup
Unlike nginx, which has to write its own startup shell script, msyql has officially provided it. The file mysql-5.5.62/support-files/mysql.server is the startup script, which has no execution permission by default and needs to be added manually.
[root@lnmp mysql]#  ll /etc/init.d/mysqld   #The document does not exist in advance
ls: cannot access /etc/init.d/mysqld: No such file or directory
[root@lnmp mysql]# cd /root/lnmp/mysql-5.5.62/support-files/
[root@lnmp support-files]# cp -a mysql.server /etc/init.d/mysqld
[root@lnmp support-files]# ll /etc/init.d/mysqld
-rw-r--r-- 1 root root 10565 Feb 16 14:17 /etc/init.d/mysqld
[root@lnmp support-files]# chmod +x /etc/init.d/mysqld
[root@lnmp support-files]# chkconfig --add mysqld  #Add boot entry
[root@lnmp support-files]# chkconfig mysqld on  #Allow service self start
3.3.8 start and test mysql
[root@lnmp support-files]# systemctl start mysqld
[root@lnmp support-files]# netstat -antp
...Omit output
If you see that there are 3306 ports, mysql starts successfully. After successful startup, root does not have a password and can log in directly.
[root@lnmp support-files]# mysql -uroot -p
Enter password:  #No password at the beginning, just enter
...Omit part of the content
mysql> exit
Bye
[root@lnmp support-files]#
Set login password for root administrator
[root@lnmp support-files]# mysqladmin -uroot password 123456
[root@lnmp support-files]# mysql -uroot -p123456
...Omit part of the content
mysql> exit
Bye
[root@lnmp support-files]#
After changing the password through mysqladmin command, you need the password to log in again.
At this point, msyql installation succeeded.
3.4 installation of php7
3.4.1 decompress and install
[root@lnmp support-files]# cd /root/lnmp/
[root@lnmp lnmp]# tar -zxvf php-7.1.29.tar.gz
...Omit part of the content
[root@lnmp lnmp]# cd php-7.1.29/
3.4.2 compiling source code
[root@lnmp lnmp]# cd php-7.1.29/
[root@lnmp php-7.1.29]# ./configure --prefix=/usr/local/php/ --with-config-file-path=/usr/local/php/etc/ --with-mysqli=/usr/local/mysql/bin/mysql_config --enable-soap --enable-mbstring=all --enable-sockets --with-pdo-mysql=/usr/local/mysql --with-gd --without-pear --enable-fpm
...Omit part of the content
3.4.3 generating documents
[root@lnmp php-7.1.29]# make
...Omit output
The generation process is about 10 minutes
3.4.5 perform installation
[root@lnmp php-7.1.29]# make install
...Omit output
3.4.6 generate configuration file
Copy the php.ini-production file of the source package to / usr/local/php/etc / and rename it php.ini
[root@lnmp php-7.1.29]# ll /usr/local/php/etc/php.ini
ls: cannot access /usr/local/php/etc/php.ini: No such file or directory
[root@lnmp php-7.1.29]# cp -a /root/lnmp/php-7.1.29/php.ini-production /usr/local/php/etc/php.ini
[root@lnmp php-7.1.29]#
Create a soft connection, easy to use php commands
[root@lnmp php-7.1.29]# ln -s /usr/local/php/bin/* /usr/local/bin/
[root@lnmp php-7.1.29]# ln -s /usr/local/php/sbin/* /usr/local/sbin/
After PHP is installed, you also need to configure Nginx to connect to PHP so that it can parse PHP files.
3.5 configure Nginx to connect to PHP
3.5.1 configure php
For php7, two files need to be modified: usr / local / PHP / etc / PHP fpm.conf and / usr / local / PHP / etc / PHP fpm.d/www.conf. Note that these two files do not exist at the beginning, and both need to be modified through the official template file.
php-fpm.conf file, on line 17, cancel the comment before; pid = run/php-fpm.pid
[root@lnmp php-7.1.29]# cd /usr/local/php/etc/
[root@lnmp etc]# cp -a php-fpm.conf.default php-fpm.conf
[root@lnmp etc]# vim php-fpm.conf
...Omit part of the content
pid = run/php-fpm.pid
...Omit part of the content
Save and exit.
Www.conf file does not exist by default. You need to change the name of / usr / local / PHP / etc / PHP fpm.d/www.conf.default to www.conf, and then modify it. In line 23-24, change the user name from the default nobody to nginx
[root@lnmp etc]# cd /usr/local/php/etc/php-fpm.d/
[root@lnmp php-fpm.d]# cp -a www.conf.default www.conf
[root@lnmp php-fpm.d]# vim www.conf
...Omit part of the content
user = nginx
group = nginx
...Omit part of the content
3.5.2 configure nginx
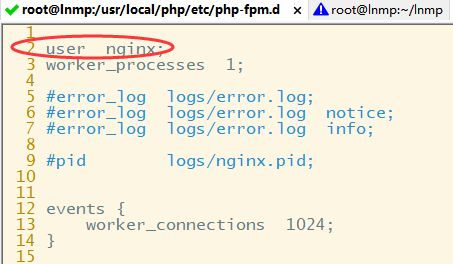
In order to enable nginx to process php files, you also need to configure the previously installed nginx. To configure / usr/local/nginx/conf/nginx.conf, there are two main modifications. One is to cancel the comment on the second line and change user to nginx; the other is to cancel the comment on lines 65-71 and include the fastcgi_params after lines 70
Change to fastcgi.conf.
[root@lnmp php-fpm.d]# vim /usr/local/nginx/conf/nginx.conf
...Omit part of the content
user  nginx;
...Omit part of the content
        location ~ \.php$ {
            root           html;
            fastcgi_pass   127.0.0.1:9000;
            fastcgi_index  index.php;
            fastcgi_param  SCRIPT_FILENAME  /scripts$fastcgi_script_name;
            include        fastcgi.conf;
        }
 ...Omit part of the content
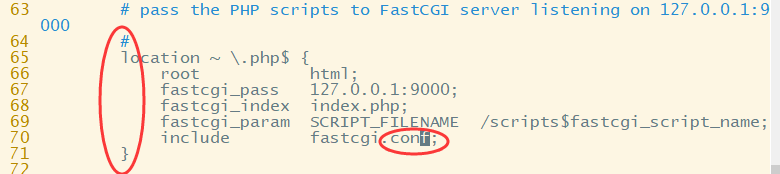
Through the above configuration of nginx, you can identify the. php suffix file
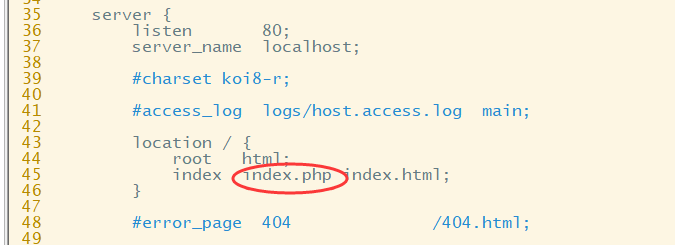
You also need to set the default page and priority to load php files automatically
[root@lnmp html]# vim /usr/local/nginx/conf/nginx.conf
...Omit part of the content
         location / {
             root   html;
             index  index.php index.html;
         }
 ...Omit part of the content
After the modification, restart the configuration and restart the nginx service
[root@lnmp php-fpm.d]# systemctl daemon-reload
[root@lnmp php-fpm.d]# systemctl restart nginx
Now that all components of lnmp environment have been set up, test whether they have been installed
3.6 installation test
Create a php file under the website directory / usr/local/nginx/html / for testing
[root@lnmp php-fpm.d]# cd /usr/local/nginx/html/
[root@lnmp html]# ls
50x.html  index.html
[root@lnmp html]# vim index.php
<?php
  phpinof();
Save and exit, test and access the file in the browser. If the following interface appears, it means that the environment is all configured
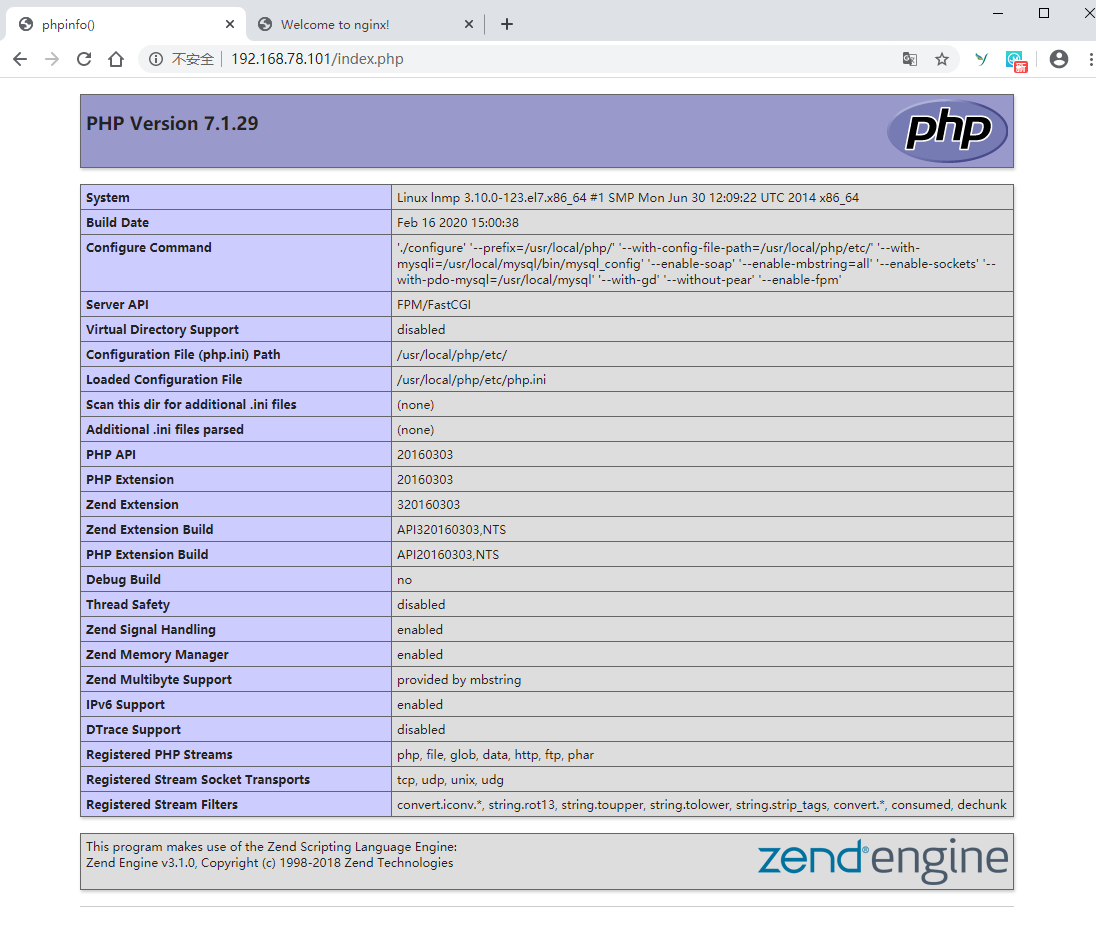
At this point, the LNMP environment is ready.
4, Personal blog website construction
At present, there are many open source CMS, blogs and personal websites, and it is easy to own a personal website without writing a line of code. Discuz! X is a very mature old community forum system in China. It is developed based on PHP+MySQL. After more than ten years of research and development, it has become one of the most mature and widely covered forum website systems in the world.
This example is based on Discuz x3.4 for demonstration, and also detects whether the LNMP environment built in front is normal. I have put the discuz? X3.4 compression package and the LNMP environment source package together. If you need to restore lnm on the public account, you can get all the packages and scripts in this article. You can also download the corresponding version on the official website according to your needs.
Official download address
https://gitee.com/3dming/DiscuzL/attach_files
4.1 upload and unzip
Continue the previous experiment, upload the dz source code to the / root/lnmp/dz folder, unzip and copy the content under the upload directory to the website data directory of nginx / usr/local/nginx/html
[root@lnmp lnmp]# pwd
/root/lnmp
[root@lnmp lnmp]# mkdir dz
[root@lnmp lnmp]# cd dz/
[root@lnmp dz]# ls
Discuz_X3.4_SC_UTF8.zip
[root@lnmp lnmp]# unzip Discuz_X3.4_SC_UTF8.zip
...Omit display
[root@lnmp dz]# ls
Discuz_X3.4_SC_UTF8.zip  qqqun.png  readme  readme.html  upload  utility
[root@lnmp dz]# ll /usr/local/nginx/html/
total 12
-rw-r--r-- 1 root root 537 Feb 16 13:51 50x.html
-rw-r--r-- 1 root root 612 Feb 16 13:51 index.html
-rw-r--r-- 1 root root  19 Feb 16 15:39 index.php
[root@lnmp dz]# rm -rf /usr/local/nginx/html/*
[root@lnmp dz]# ll /usr/local/nginx/html/
total 0
[root@lnmp dz]# cp -r upload/* /usr/local/nginx/html/
[root@lnmp html]# chown -Rf nginx:nginx /usr/local/nginx/html
[root@lnmp html]# chmod -Rf 755 /usr/local/nginx/html/
After copying the content of the website, change the directory permission user to the nginx user created previously, with the read-write permission of 755.
The permission setting must be correct, otherwise the 4.3 test will not pass.
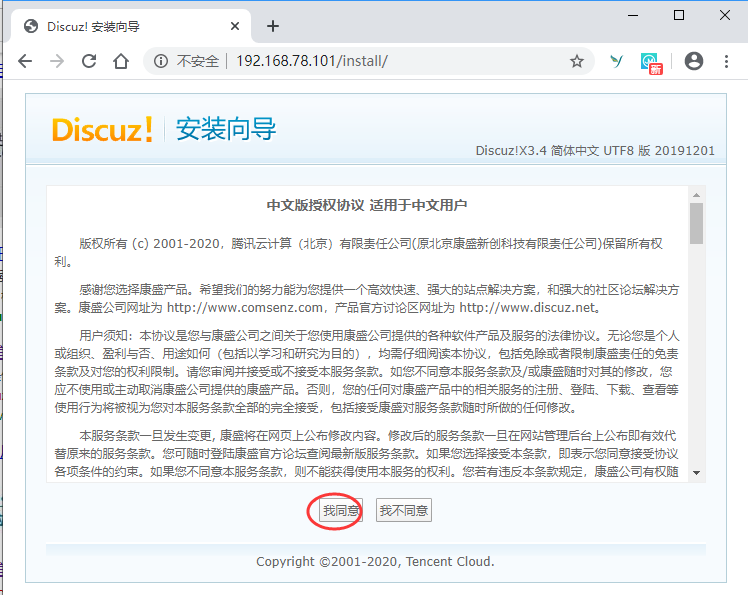
4.2 accept permission to start installation
The browser enters the ip address, automatically enters the installation interface, and agrees to enter the next step
4.3 check the installation environment and directory permissions
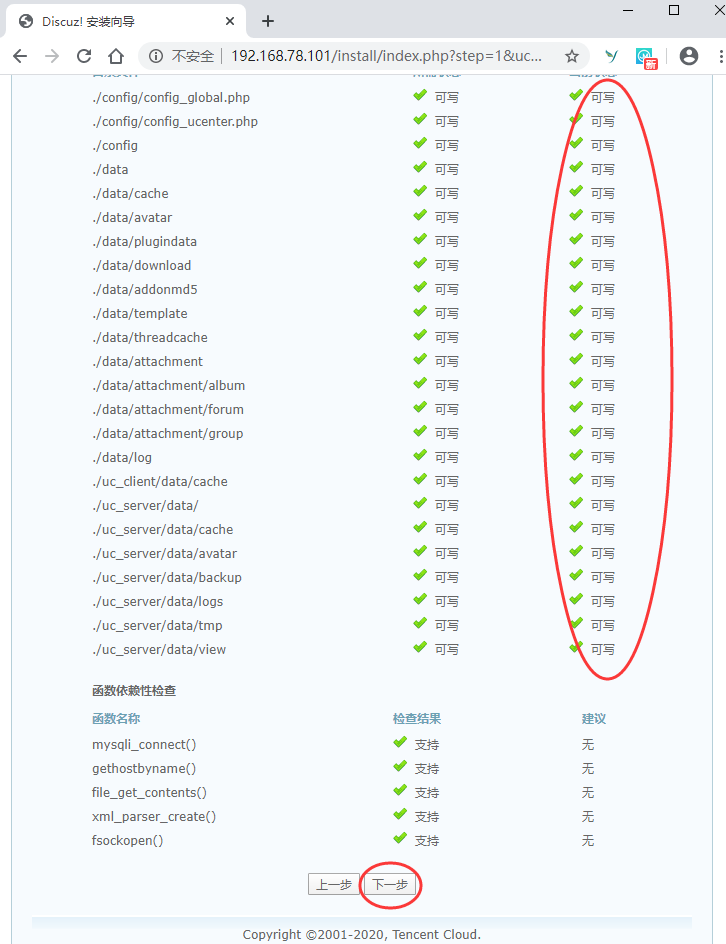
After the directory permission test is passed, click next
4.4 select installation mode
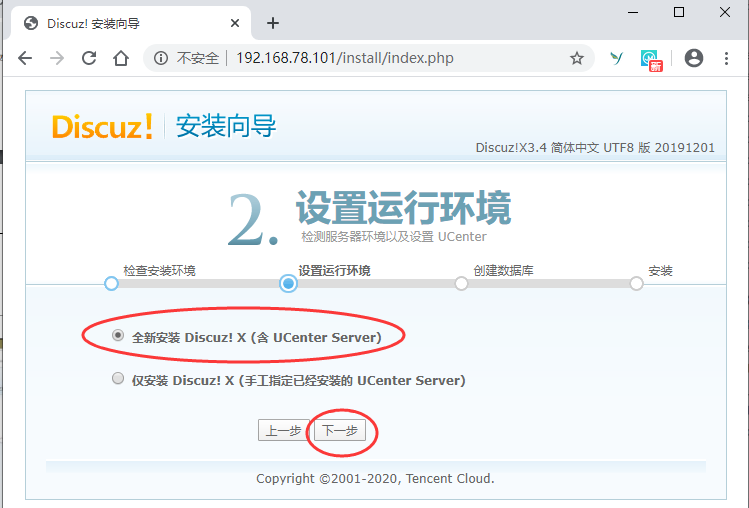
Keep the default selection and click next. UCenter Server is the management platform of the site, which can synchronize member account and password information among multiple sites.
4.5 configuration database information

Configure the mysql database connection information created before, and the database will be created automatically. Click next after filling in
4.6 installation and access
If the above steps are filled in correctly, the data will be created and the website will be initialized automatically. Automatically enter the homepage after completion

home page
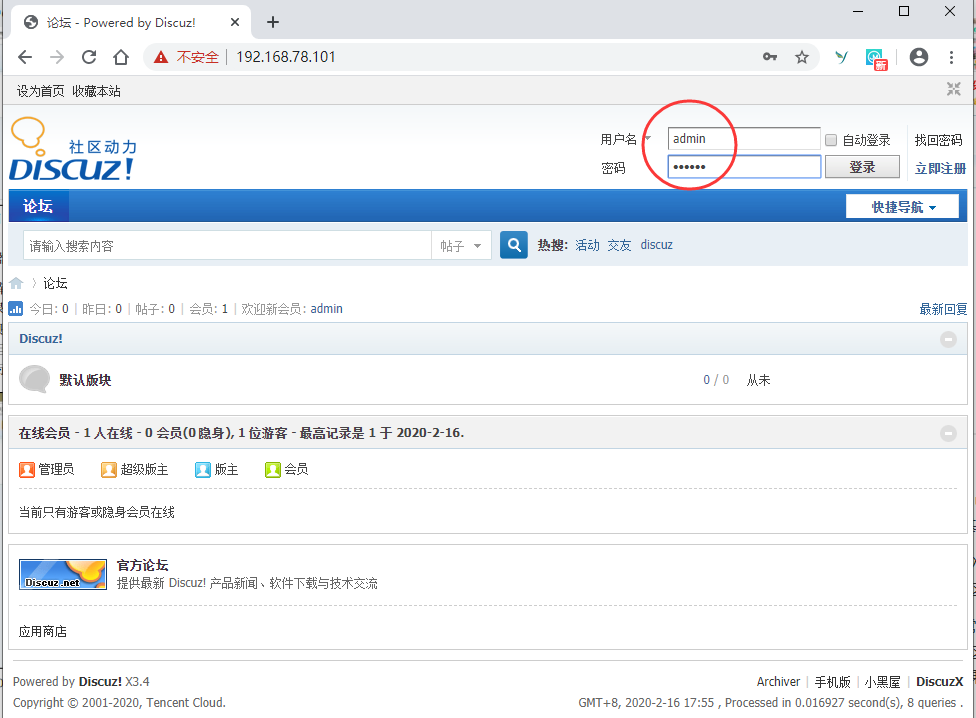
Log in through the website account and password set in 4.5.
This is very simple to build a personal forum. Other personal blogs are built in the same way. so easy!
epilogue
This is the end of this series of Linux introduction articles. I believe that you have got a preliminary introduction to the basic management of Linux system and the configuration and use of common services through the learning of this series.
As the most basic introductory knowledge, we must master it. As long as we knock on it several times and follow the steps several times, we will naturally be familiar with it. After mastering these basic knowledge, we can be competent for the routine management work in the enterprise.
Linux is widely used, and the skills required for different roles and positions are different. If you are a big data developer, with these knowledge reserves, you will continue the journey of big data; if you are an operation and maintenance personnel, these knowledge is far from enough, and I will launch a complete Linux operation and maintenance and advanced series later if I have time. Welcome to pay attention to the company self-study help to understand the real-time dynamics.