1, Understanding DHCP services
1.DHCP definition
DHCP (Dynamic Host Configuration Protocol) is a LAN network protocol. It refers to a range of IP addresses controlled by the server. When the client logs in to the server, it can automatically obtain the IP address and subnet mask assigned by the server. By default, DHCP, as a service component of Windows Server, will not be automatically installed by the system. It also needs to be manually installed and configured by the administrator.
DHCP adopts C/S architecture, C-client, S-server and client / server architecture
The DHCP service corresponds to the transport layer UDP protocol. Because it is a C/S architecture, the client port number is 67 and the server port number is 68
2.2 benefits
Reduce administrator workload
Avoid the possibility of input errors
Avoid IP address conflicts
When changing the lP address segment, there is no need to reconfigure the IP address of each user
Improved IP address utilization
Convenient client configuration
3.DHCP allocation method
Automatic assignment: permanently used after being assigned to an IP address
Manual assignment: the DHCP server administrator specifies the IP address specifically
Dynamic allocation: release the IP after use for use by other clients
2, DHCP working process
The process that a client obtains an IP address from a DHCP server is called DHCP lease. The process is divided into four steps:
1. The client requests the P address
When a DHCP client is started, the client does not have an IP address, so the client needs to obtain a legal address through DHCP ● at this time, the DHCP client sends DHCP Discover discovery information by broadcasting to find the DHCP server;
2. Server response
When the DHCP server receives the information from the client requesting the lP address, it looks for whether there is a legal IP address provided to the client in its own IP address pool
If yes, the DHCP server marks the IP address, adds it to the DHCP Offer message, and then broadcasts a DHCP Offer message
3. The client selects the IP address
The client selects the IP address replied by the first DHCP server, and wants to broadcast and send a DHCP request to all DHCP servers in the LAN. It selects which IP and which DHCP (there are two reasons for sending DHCP requests. The first layer is to notify all DHCP servers so that the unselected server can recover the unused address. The second layer is to notify the selected server that the IP address client will use.)
4. The server determines the lease
After receiving the DHCP Request message, the DHCP server broadcasts a successful confirmation to the client in the form of DHCP ACK message, which contains the valid lease of IP address and other configurable information ● when the client receives the DHCP ACK message, configure the IP address and complete the initialization of TCP/IP‘
PS:
Re login: each time the DHCP client logs in to the network again, it does not need to send the DHCP Discover information, but directly send the DHCP Request information containing the IP address assigned last time
Renew lease:
When the lease term of the IP address leased by the DHCP server to the client reaches 50%, the lease needs to be updated; ● the client directly sends a DHCP Request package to the server providing the lease to update the existing address lease.
3, Dynamically configure host addresses using DHCP
1.DHCP service advantages
Automatically assign addresses to a large number of clients and provide centralized management
Reduce management and maintenance costs and improve network configuration efficiency
2. The assignable address information mainly includes:
IP address and subnet mask of the network card
Corresponding network address and broadcast address
Default gateway address
DNS server address
4, DHCP relay principle and configuration
1. Parameters in DHCP configuration file
	#Set global configuration parameters
	defau7t-lease-time 21600;      #The default lease is 6 hours in seconds I
	max-lease-time 43200;           #The maximum lease is 12 hours in seconds
	option domain-name "benet.com";         #Specify default domain name
	option domain-name-servers 202.106.0.20,202.106.148.1;      			#Specify DNS server address
	ddns-update-style none;          #Disable DNS dynamic updates

	#Subnet segment declaration (applies to the whole subnet segment, and some configuration parameters have priority over the global configuration parameters)
	subnet 192.168.100.0 netmask 255.255.255.0 {         #Declare the network segment address to be assigned
	range 192.168.100.128 192.168.100.200;               #Set address pool
	option routers 192.168.100.1;               #Specify the default gateway address
	}

	#Host host declaration (assign a fixed IP address to a single machine)
	host hostname{                         #Specify the name of the client that needs to be assigned a fixed IP address
	hardware ethernet 00:c0:c3:22:46:81;         #Specify the MAC address of the host
	fixed-address 192.168.4.100;        #Specify the IP address reserved for this host
	}
2. Step explanation
1) Turn off firewall and selinux
	[root@localhost ~]# systemctl stop firewalld.service
	[root@localhost ~]# setenforce 0

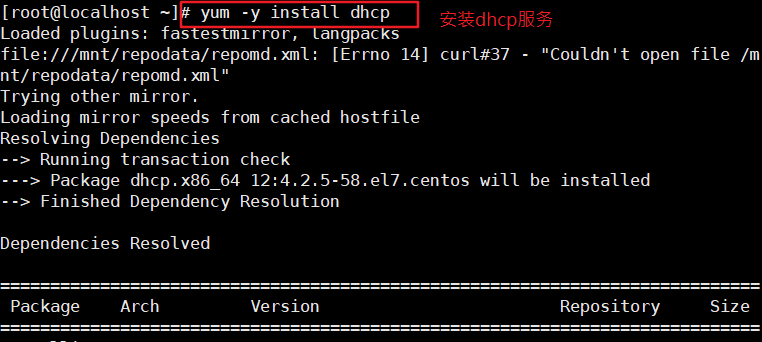
2) Install the service and view the relevant configuration files
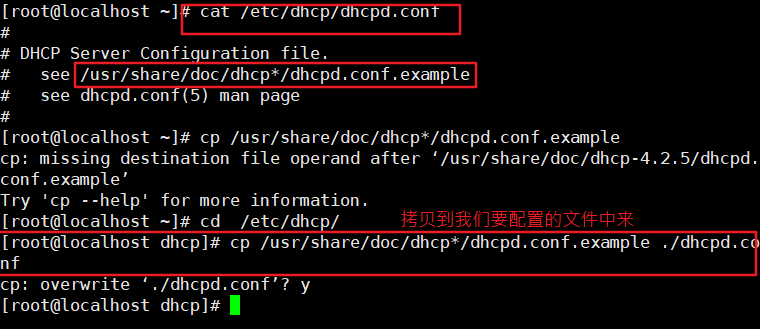
	 [root@localhost ~]# yum install -y dhcp       #Install DHCP service
	[root@localhost ~]# rpm -qc dhcp               #View related configuration files
	/etc/dhcp/dhcpd.conf                             #We just need 				 Configure the / etc / DHCP / DHCP pd.conf document
	/etc/dhcp/dhcpd6.conf
	/etc/openldap/schema/dhcp.schema
	/etc/sysconfig/dhcpd
	/var/lib/dhcpd/dhcpd.leases
	/var/lib/dhcpd/dhcpd6.leases
	[root@localhost ~]# vim /etc/dhcp/dhcpd.conf

	# DHCP Server Configuration file.
	#   see /usr/share/doc/dhcp*/dhcpd.conf.example          #You can copy this document
	#   see dhcpd.conf(5) man page

3) Copy and modify the / etc / DHCP / DHCP pd.conf configuration file
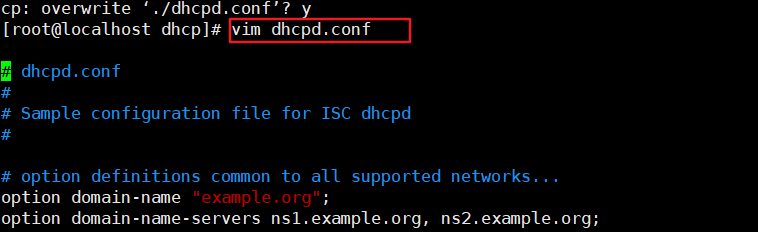
	[root@localhost ~]# cp /usr/share/doc/dhcp-4.2.5/dhcpd.conf.example /etc/dhcp/dhcpd.conf
	cp: Overwrite"/etc/dhcp/dhcpd.conf"? yes             #Copy and overwrite the above documents, and 4.2.5 represents the version

	[root@localhost ~]# cd /etc/dhcp/                          #Switch to the directory where dhcpd.conf is located
	[root@localhost dhcp]# vim dhcpd.conf         #Enter the editor to view the configuration file
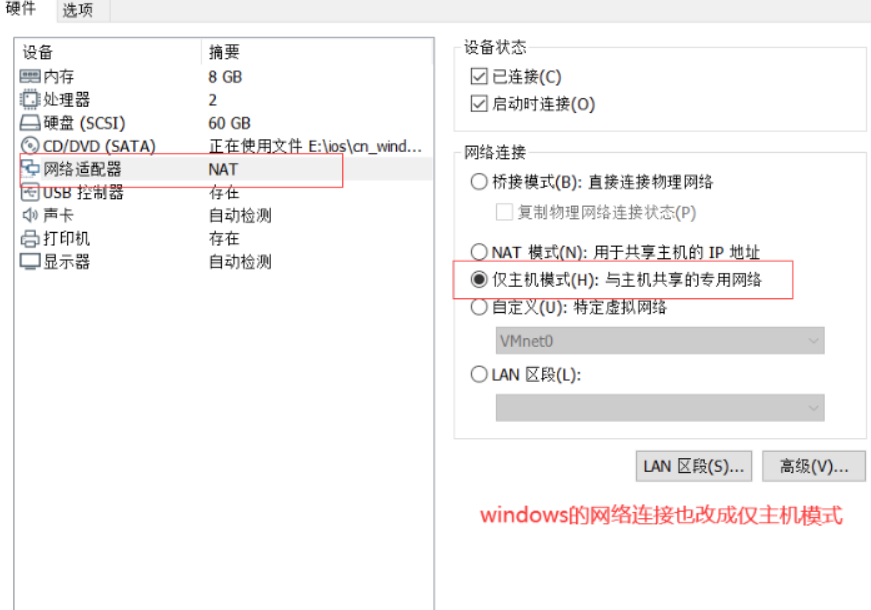
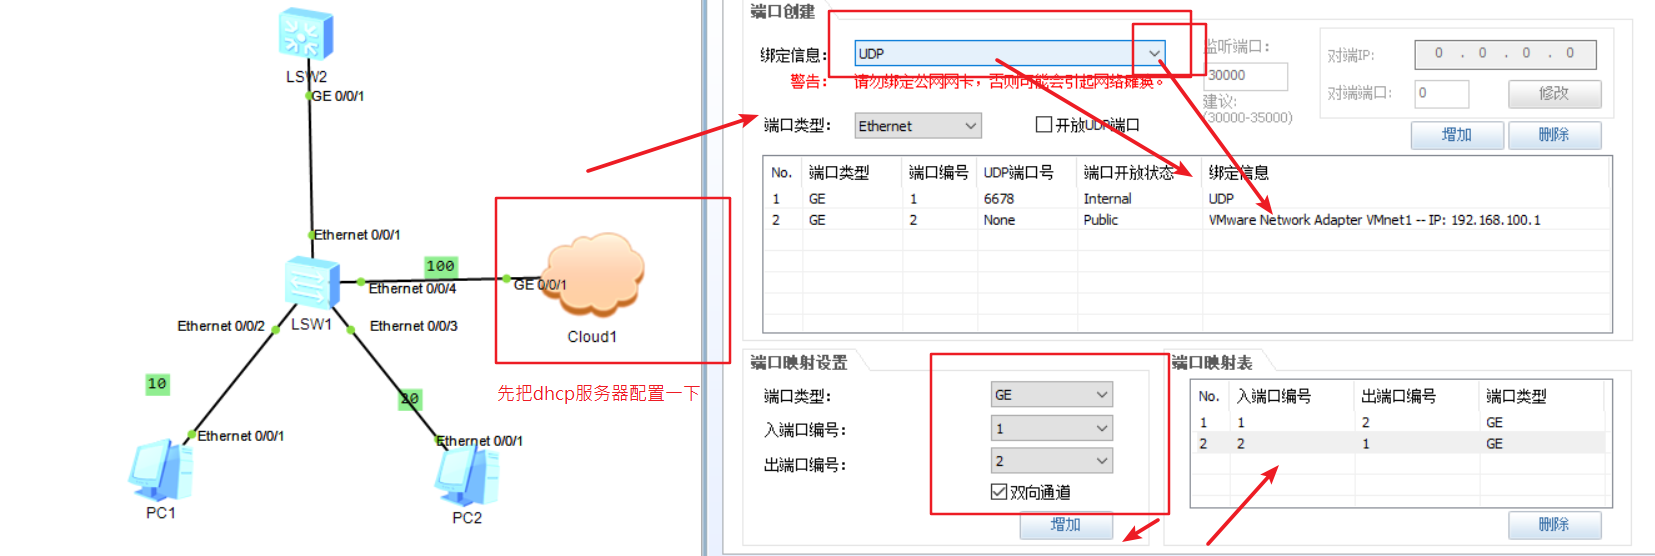
4) Change the network card connection mode to host only
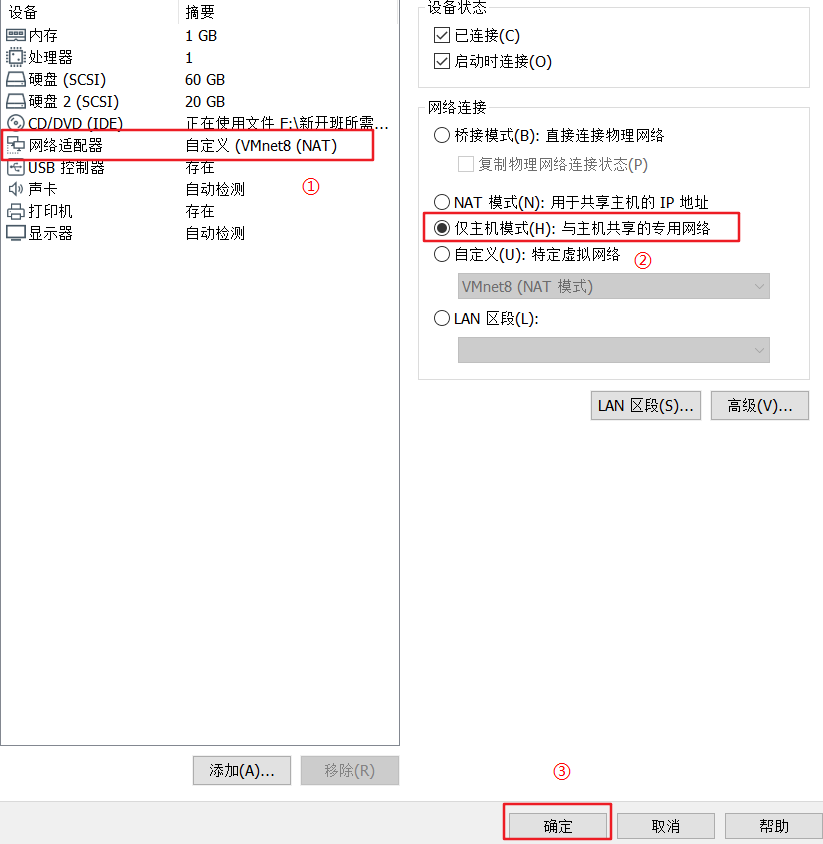
After the change is completed, the Xshell is disconnected, and you need to enter the terminal of the virtual machine to change the configuration
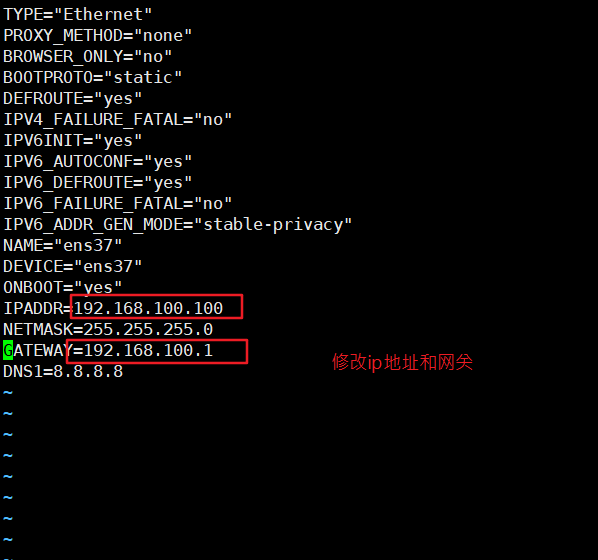
5) Modify network card
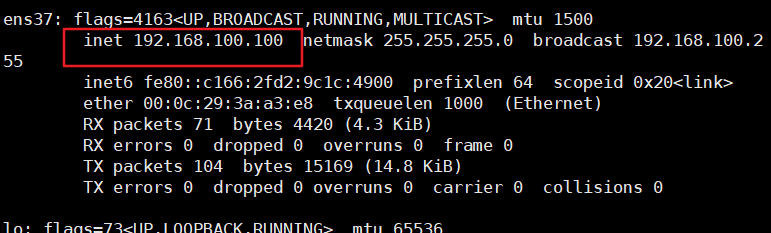
	[root@localhost dhcp]# vim /etc/sysconfig/network-scripts/ifcfg-ens33
	#Modify the ip address and gateway of the network card. The network segment is the network segment of your computer VMnet1, and then save and exit
	[root@localhost dhcp]# systemctl restart network               #service network restart
	root@localhost dhcp]# ifconfig               #Check whether the ip address is configured

6) Modify profile
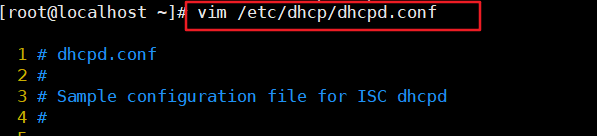
[root@localhost ~]# cd /etc/dhcp/ #Switch to the directory where dhcpd.conf is located
[root@localhost dhcp]# vim dhcpd.conf #Modify profile
In last line mode: set nu set number
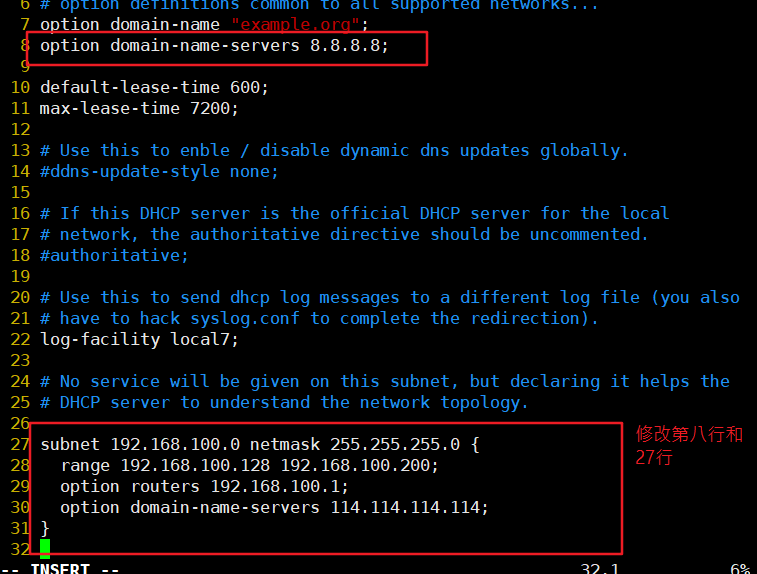
#Line 8 modifies the default global DNS address
option domain-name-servers 8.8.8.8;
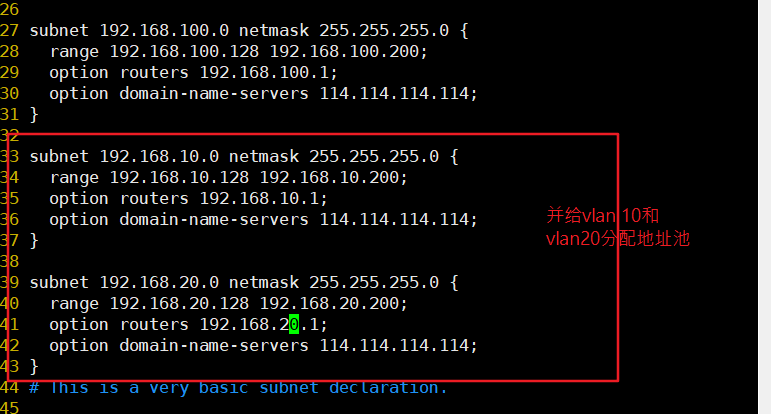
#Directly modify line 27
subnet 192.168.100.0 netmask 255.255.255.0 {
range 192.168.100.128 192.168.100.200;
option routers 192.168.100.1;
option domain-name-servers 114.114.114.114;
}
subnet 192.168.10.0 netmask 255.255.255.0{
range 192.168.10.128 192.168.10.200;
option routers 192.168.10.1;
}
subnet 192.168.20.0 netmask 255.255.255.0{
range 192.168.20.128 192.168.20.200;
option routers 192.168.20.1;
}
[root@localhost dhcp]# systemctl start dhcpd #Start dhcp service
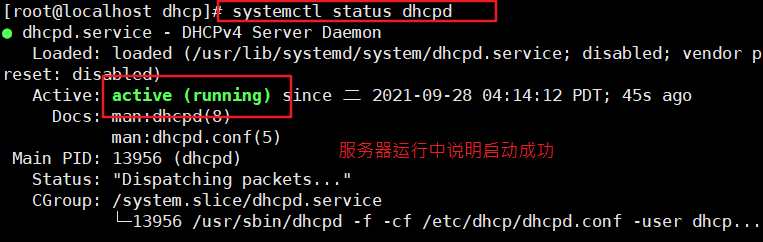
[root@localhost dhcp]# systemctl status dhcpd #See if it started successfully
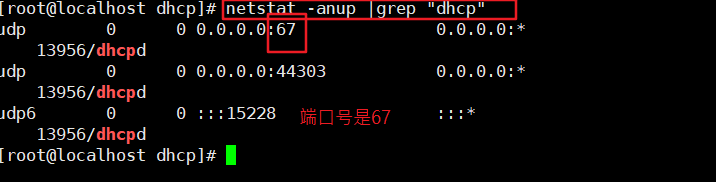
[root@localhost dhcp]# netstat -anup | grep "dhcp" #Check the network status and filter out the dhcp port


7) Verify regional and global priorities
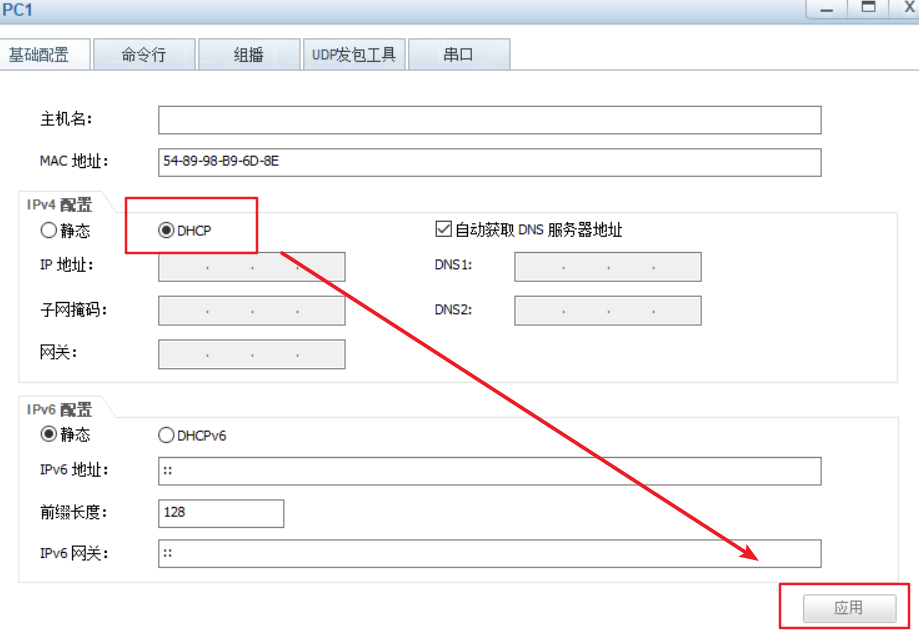
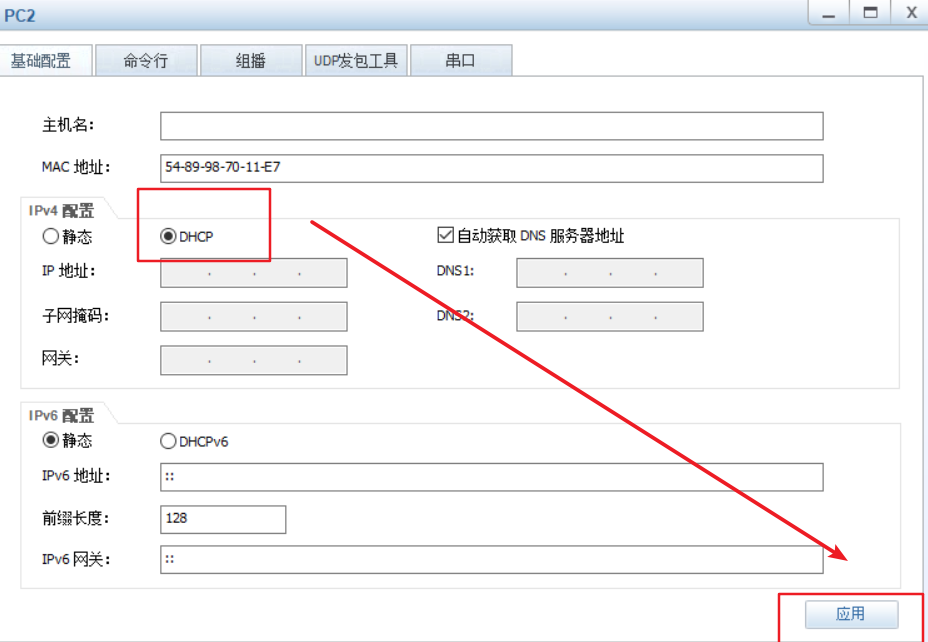
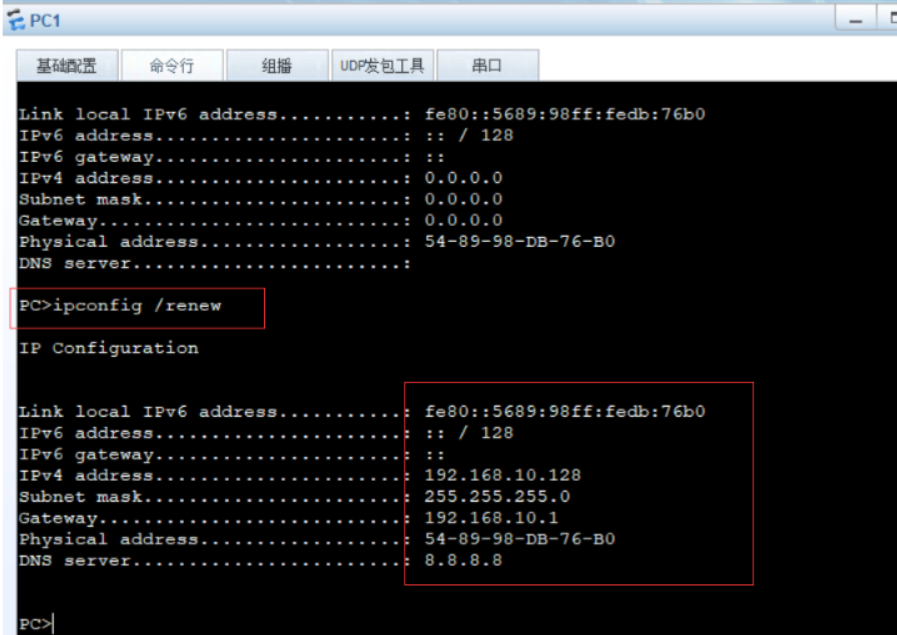
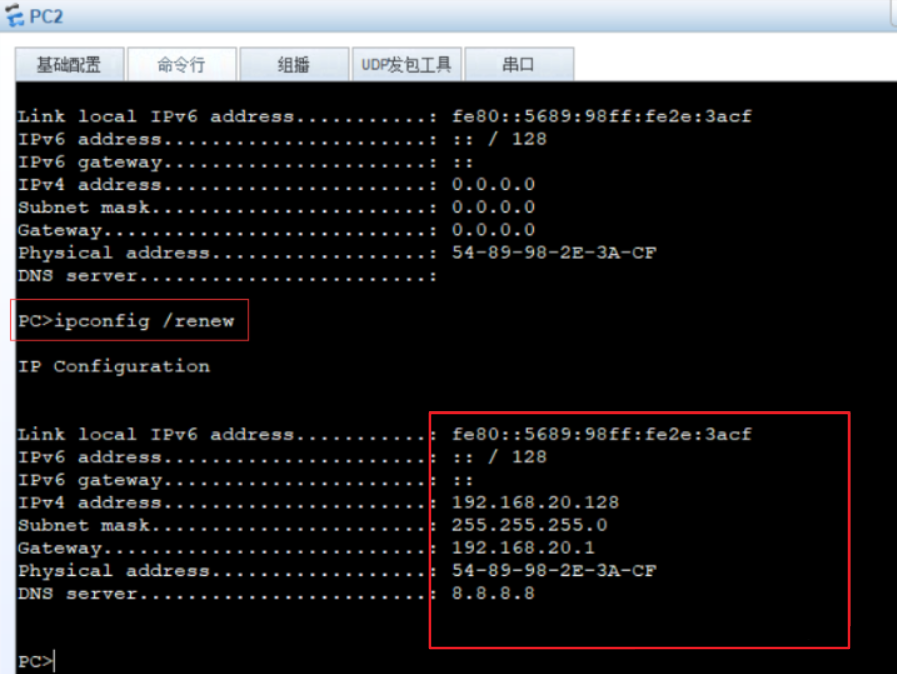
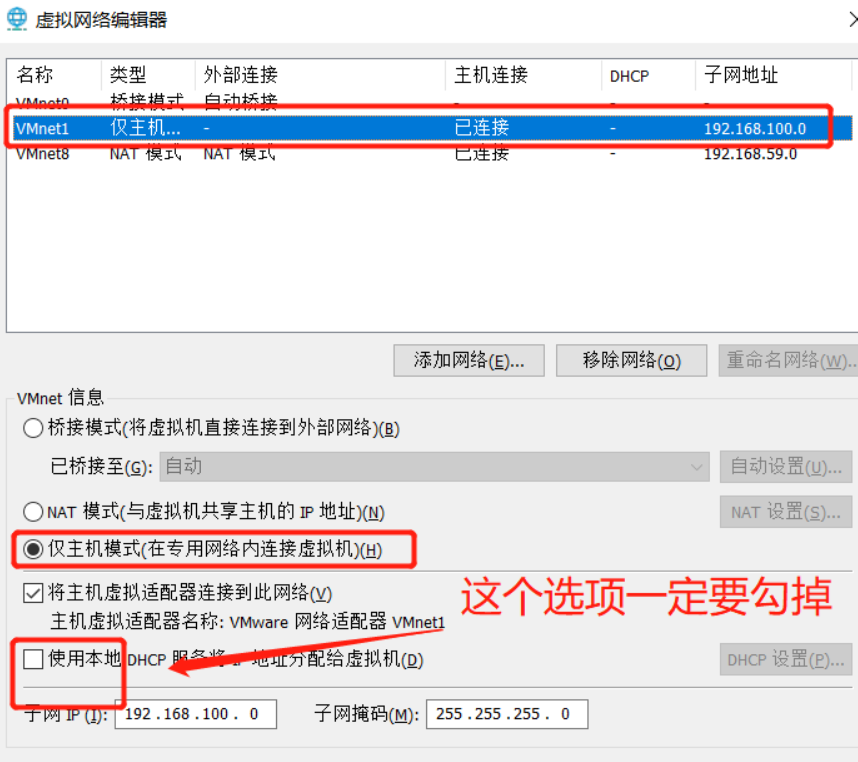
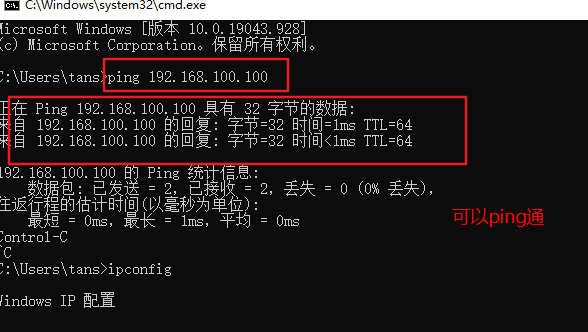
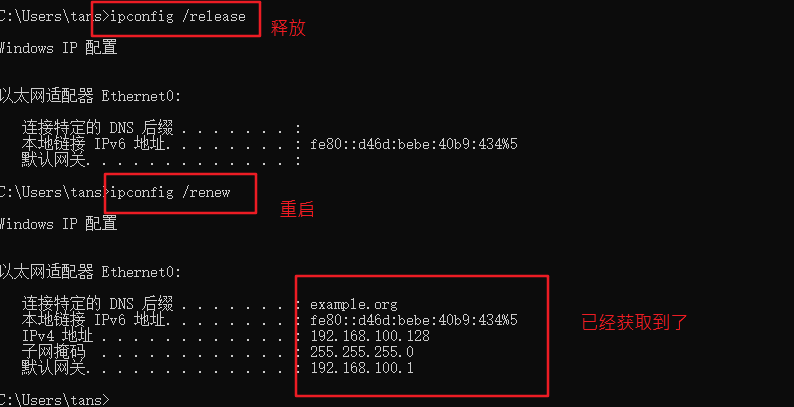
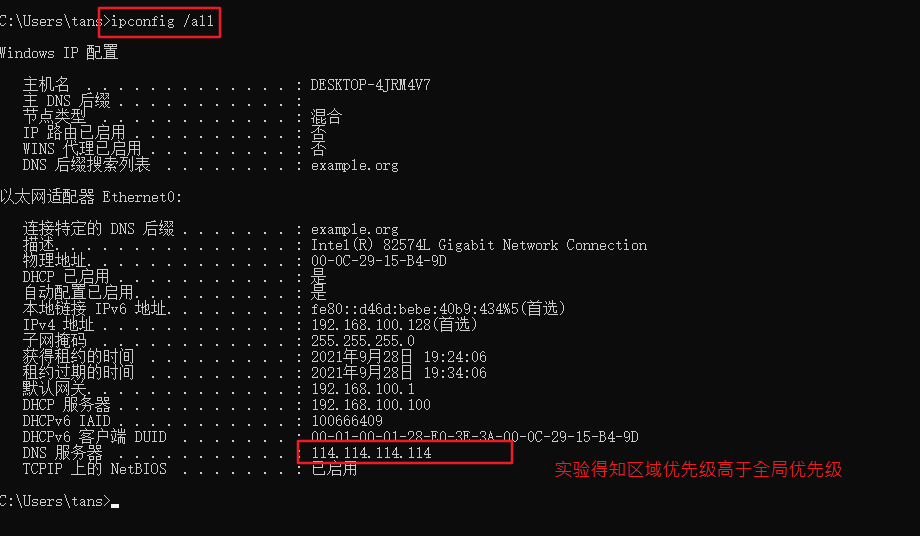
	#windows sets the virtual network card to host only mode
	#The virtual network editor is also set to host only mode. Be sure to tick off the option to use local DHCP

	#Test whether the dhcp server can be ping ed in the cmd of windows system, and then release and restart the network
	ping 192.168.100.100  ping once dhcp Server, see if you can ping through
	ipconfig  View network card information
	ipconfig /release  Release address
	ipconfig /renew    Get address again
	ipconfig /all  You can see the details,
3.dhcp relay configuration
1) Prepare the required equipment and set up the server
2) Configure layer 2 switch SW1
	<Huawei>undo terminal mo
	<Huawei>sys
	[Huawei]sys SW1
	[SW1]user-interface console 0
	[SW1-ui-console0]idle-timeout 0 0
	[SW1-ui-console0]q

	[SW1]vlan batch 10 20 100

	[SW1]int e0/0/2
	[SW1-Ethernet0/0/2]port link-type access
	[SW1-Ethernet0/0/2]port default vlan 10

	[SW1-Ethernet0/0/2]int e0/0/3
	[SW1-Ethernet0/0/3]port link-type access
	[SW1-Ethernet0/0/3]port default vlan 20

	[SW1-Ethernet0/0/3]int e0/0/4
	[SW1-Ethernet0/0/4]port link-type access
	[SW1-Ethernet0/0/4]port default vlan 100

	[SW1-Ethernet0/0/4]int e0/0/1
	[SW1-Ethernet0/0/1]port link-type trunk
	[SW1-Ethernet0/0/1]port trunk allow-pass vlan all
3) Configure layer 3 switch
	<Huawei>undo terminal monitor
	<Huawei>sys
	[Huawei]sys SW2
	[SW2]user-interface console 0
	[SW2-ui-console0]idle-timeout 0 0
	[SW2-ui-console0]q

	[SW2]int g0/0/1
	[SW2-GigabitEthernet0/0/1]port link-type trunk
	[SW2-GigabitEthernet0/0/1]port trunk allow-pass vlan all

	#Enable dhcp function
	[SW2]dhcp enable

	#Distribution relay
	[SW2]vlan batch 10 20 100
	[SW2]int vlan 10
	[SW2-Vlanif10]ip add 192.168.10.1 24
	[SW2-Vlanif10]dhcp select relay
	[SW2-Vlanif10]dhcp relay server-ip 192.168.100.100

	[SW2-Vlanif10]int vlan 20
	[SW2-Vlanif20]ip add 192.168.20.1 24
	[SW2-Vlanif20]dhcp select relay
	[SW2-Vlanif20]dhcp relay server-ip 192.168.100.100

	[SW2-Vlanif20]int vlan 100
	[SW2-Vlanif100]ip add 192.168.100.1 24
	[SW2-Vlanif100]dhcp select relay
	[SW2-Vlanif100]dhcp relay server-ip 192.168.100.100
4) Test. Now ping the server
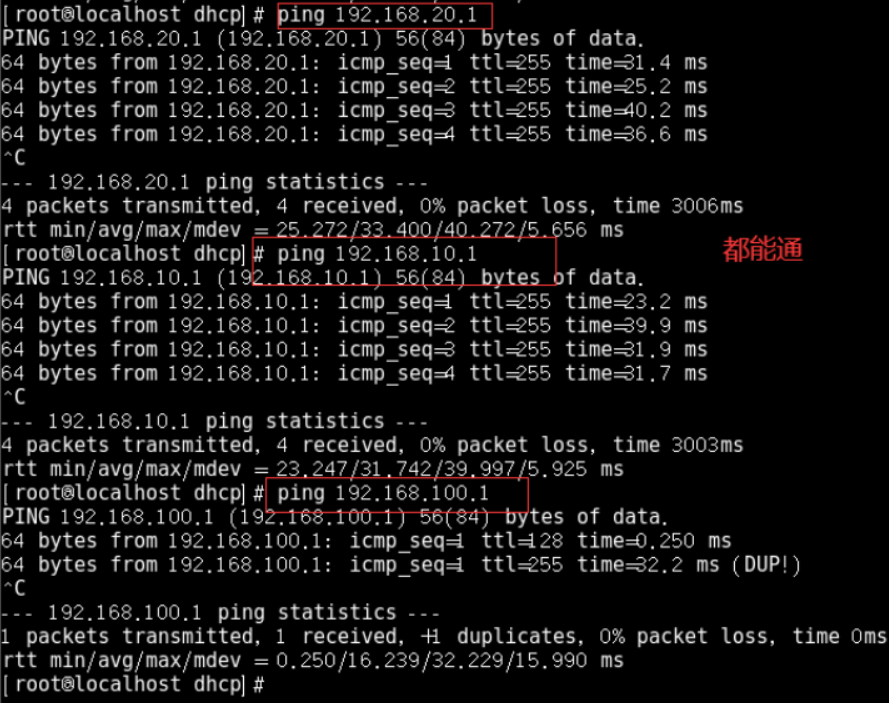
5) PC test