I. Preface
Linux cluster can be divided into two categories: high availability cluster and load balancing cluster. Only high availability clusters are discussed here, and load balancing is explained in the next blog post.
High Availability Cluster (HA) consists of two or more servers, usually two servers, one of which works and the other is redundant. When the server providing the service goes down, the redundant server will continue to provide the service instead of the downed server. High availability cluster with only two nodes is also called dual hot standby, even if two servers backup each other. Thus, without manual intervention, the automatic guarantee system can continue to provide services to the outside world. Dual hot standby is only one kind of high availability cluster. High availability cluster system can support more than two nodes, provide more and more advanced functions than dual hot standby, and better meet the changing needs of users.
Open source software for high availability cluster includes Heartbeat and Keepalived.
Introduction to Keepalived
Keepalived is highly available through the VRRP (Virtual Router Redundancy Protocal) protocol. The VRRP protocol will make up a group of multiple routers with the same functions, in which there is a master master master node and N (N >= 1) backup standby nodes. When working, the master sends VRRP packets to each backup in the form of multicast. When the backup receives VRRP packets from the master, it will think that the master is down. At this point, we need to decide who is called the new master according to the priority of each backup to provide services.
Keepalived has three modules: core, check and vrrp. The core module is the core function of Keepalived, which is responsible for the initiation, maintenance of the main process and loading and parsing of the global configuration file; the check module is responsible for the health check; and the VRRP module is used to implement the VRRP protocol.
Keepalived official website: https://www.keepalived.org/
Creating Keepalived High Availability Cluster
The following uses Keepalived+Nginx to implement a highly available Web cluster.
3.1 Prepare Cluster Nodes
Prepare two server s, one as master node and one as backup node.
Master node: hostname: master node, IP Address: 192.168.56.110
backup node: hostname: datanode 1, IP Address: 192.168.56.111
Virtual IP(VIP): 192.168.56.100
Both server s need to install Keepalived and Nginx, and close the firewall and selinux after installing the service. Here, for example, installing on master node is the same as installing on backup node. The following installations are done using yum:
Install Keepalived as follows:
[root@masternode ~]# rpm -qa |grep keepalived
[root@masternode ~]# yum install -y keepalived
[root@masternode ~]# rpm -qa |grep keepalived
keepalived-1.3.5-8.el7_6.x86_64
Install Nginx as follows:
[root@masternode ~]# rpm -qa |grep nginx
[root@masternode ~]# yum install -y nginx
Loaded plugins: fastestmirror, langpacks
Loading mirror speeds from cached hostfile
 * base: mirrors.huaweicloud.com
 * extras: mirrors.huaweicloud.com
 * updates: mirrors.huaweicloud.com
No package nginx available.
Error: Nothing to do
The hint is that there is no nginx package in the yum source, indicating that by default, there is no nginx source in Centos7, but the Nginx official website provides the source address of Centos:
Nginx source address of 64-bit system: rpm-Uvh http://nginx.org/packages/centos/7/x86_64/RPMS/nginx-1.16.0-1.el7.ngx.x86_64.rpm
No distinction between 32 and 64 Nginx source addresses: rpm-Uvh http://Nginx.org/packages/centos/7/noarch/RPMS/Nginx-release-centos-7-0.el7.ngx.noarch.rpm
Or add an extension source for CentOS:
[root@masternode ~]# yum install -y epel-release
[root@masternode ~]# yum search nginx
......
[root@masternode media]# yum install -y nginx
......
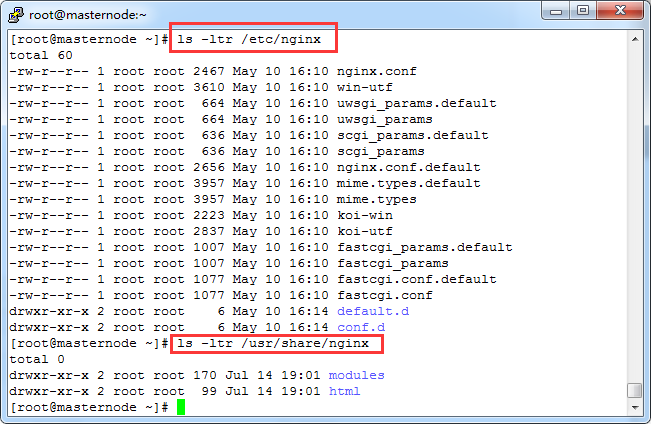
After installing Nginx in yum, the default path is:
/ etc/nginx is the installation directory of Nginx programs, and / etc/share/nginx/html is the root directory of the website.
Close the firewall and selinux as follows:
[root@masternode ~]# systemctl stop firewalld.service
[root@masternode ~]# systemctl disable firewalld.service
Removed symlink /etc/systemd/system/multi-user.target.wants/firewalld.service.
Removed symlink /etc/systemd/system/dbus-org.fedoraproject.FirewallD1.service.
[root@masternode ~]# getenforce
Disabled
The backup node is also prepared according to the above steps.
3.2 Setting up keepalived master master server
Edit the Keepalived configuration file on the master server, empty the original configuration, and set the VIP to 100. The VIP here refers to Virtual IP, or "virtual IP", or floating IP, because this IP is configurated by Keepalived to the server. The server provides services by this VIP when the master machine goes down. The VIP is assigned to the backup, which is insensitive to the user.
First look at the network card ifcfg-enp0s8, ready to bind VIP to this network card.
[root@masternode network-scripts]# ls -l ifcfg-enp0s8
-rw------- 1 root root 328 May 27  2018 ifcfg-enp0s8
[root@masternode network-scripts]# pwd
/etc/sysconfig/network-scripts
[root@masternode network-scripts]# ls -l ifcfg-enp0s8
-rw------- 1 root root 328 May 27  2018 ifcfg-enp0s8
Edit the configuration file/etc/keepalived/keepalived.conf, set as follows:
[root@masternode ~]# cd /etc/keepalived
[root@masternode keepalived]# ls -ltr
total 4
-rw-r--r-- 1 root root  560 Jul 14 21:23 keepalived.conf
[root@masternode keepalived]# vim /etc/keepalived/keepalived.conf
! Configuration File for keepalived

global_defs { #Define global parameters
   notification_email { #Notify this email address when problems arise
     admin@moonxy.com
   }
   notification_email_from root@moonxy.com #Define email address
   smtp_server 127.0.0.1 #Represents sending using the native mail server
   smtp_connect_timeout 30
   router_id LVS_DEVEL
}

vrrp_script chk_nginx { # chk_nginx is a custom name, which will be used later
    script "/usr/local/sbin/check_nginx.sh" #Custom scripts for monitoring Nginx services
    interval 3 #Execute the script every 3 seconds
}

vrrp_instance VI_1 {
    state MASTER #Define the role as master
    interface enp0s8 #For which network card to monitor VIP
    virtual_router_id 51
    priority 100 #The weight is 100, and the weight of master is larger than that of backup.
    advert_int 1
    authentication {
        auth_type PASS
        auth_pass moonxy>com #Custom Password
    }
    virtual_ipaddress {
        192.168.56.100 #Define VIP
    }
    track_script {
        chk_nginx #Define the monitoring script, which corresponds to the name after vrrp_script
    }
}
To achieve high availability, Keepalived must monitor the Nginx service, but it does not have this function. It needs to be implemented by a custom script and set to 755 privileges, as follows:
[root@masternode ~]# cd /usr/local/sbin
[root@masternode sbin]# vim /usr/local/sbin/check_nginx.sh
#!/bin/bash
#author:moonxy
#Time variable for logging
d=`date --date today +%Y%m%d_%H:%M:%S`
#Calculate the number of Nginx processes
n=`ps -C nginx --no-heading|wc -l`
#If the number of processes is 0, start Nginx and check the number of nginx processes again
#If the number is still 0, it means that Nginx can't start. Keepalived needs to be turned off at this time.
if [ $n -eq "0"]; then
    systemctl start nginx
    n2=`ps -C nginx --no-heading|wc -l`
    if [ $n2 -eq "0" ]; then
        echo "$d nginx down,keepalived will stop" >> /var/log/check_nginx.log
        systemctl stop keepalived
    fi
fi
[root@masternode sbin]# chmod 755 /usr/local/sbin/check_nginx.sh
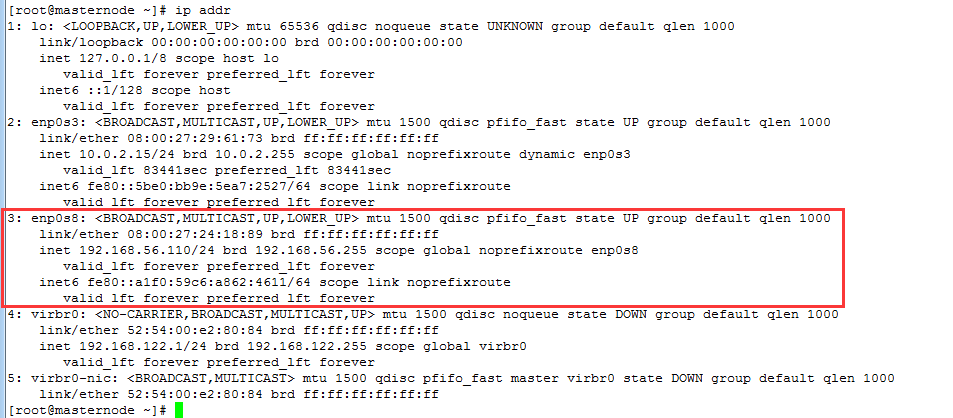
Before starting keepalived, use ip addr or ip add to view the IP address bound by network card enp0s8, as follows:
After starting the keepalived service, it is found that the network card enp0s8 has bound the address of VIP: 192.168.56.100, and when starting the keepalived service, it will automatically start nginx through the detection script/usr/local/sbin/check_nginx.sh, as follows:
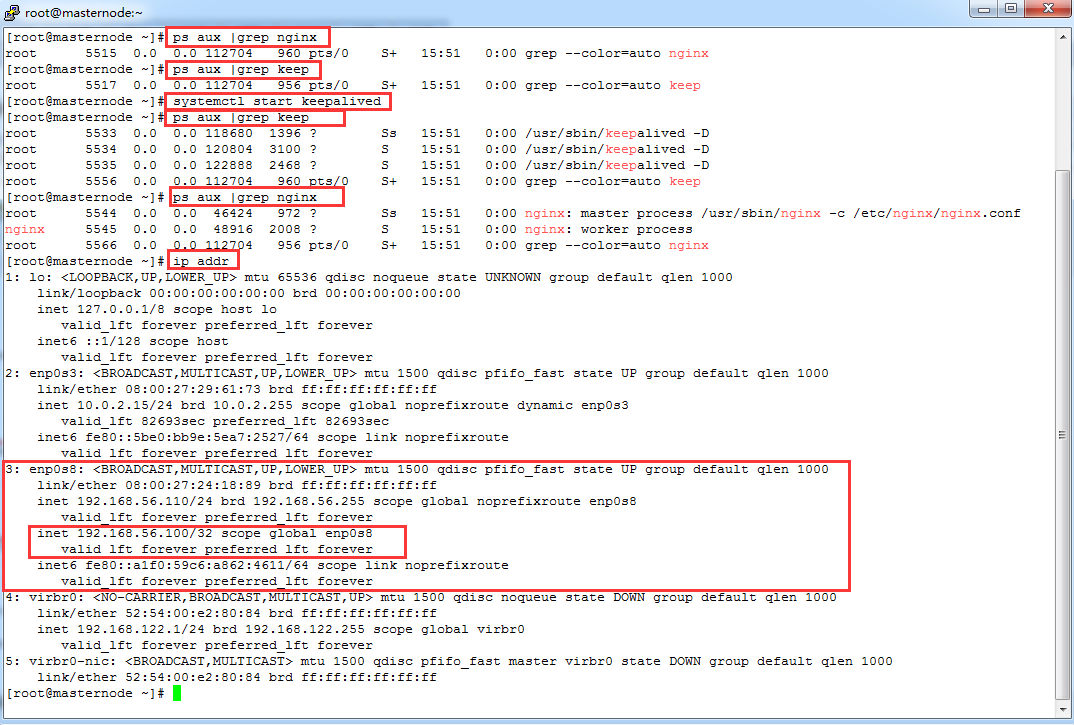
Even if nginx suddenly stops serving in use, as long as the keepalived service is normal, the script will be checked every three seconds to start nginx.
3.3 Set up the keepalived backup slave server
In the same way, set the backup slave server, edit / etc/keepalived/keepalived.conf and create / usr/local/sbin/check_nginx.sh, but in / etc/keepalived/keepalived.conf, set the state to BACKUP and the priority to 90, as follows:
[root@datanode1 keepalived]# vim keepalived.conf
! Configuration File for backup keepalived

global_defs {
   notification_email {
     admin@moonxy.com
   }
   notification_email_from root@moonxy.com
   smtp_server 127.0.0.1
   smtp_connect_timeout 30
   router_id LVS_DEVEL
}

vrrp_script chk_nginx {
    script "/usr/local/sbin/check_nginx.sh"
    interval 3
}

vrrp_instance VI_1 {
    state BACKUP
    interface enp0s8
    virtual_router_id 51
    priority 90
    advert_int 1
    authentication {
        auth_type PASS
        auth_pass moonxy>com
    }
    virtual_ipaddress {
        192.168.56.100
    }
    track_script {
        chk_nginx
    }
}
Start the Keepalived service and view the process as follows:

You can see that the keepalived and nginx processes have been started.
/ usr/local/sbin/check_nginx.sh is the same as master's content and does not need to be modified.
3.4 Distinguishing Master from Slave Nginx Servers
The Nginx version of master master master master server is 1.16.0

Access master address: 192.168.56.110, index.html
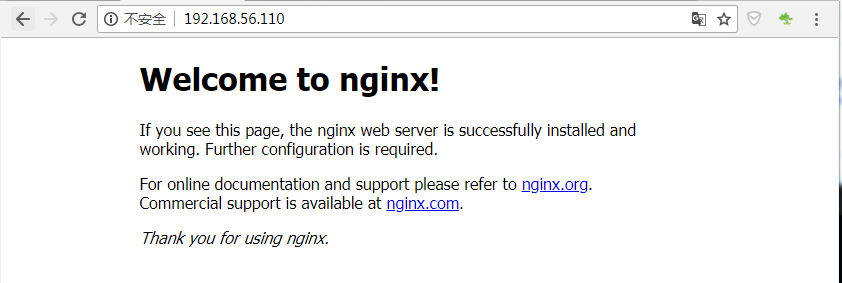
The Nginx version of backup slave server is 1.12.2

Access backup address: 192.168.56.111, index.html
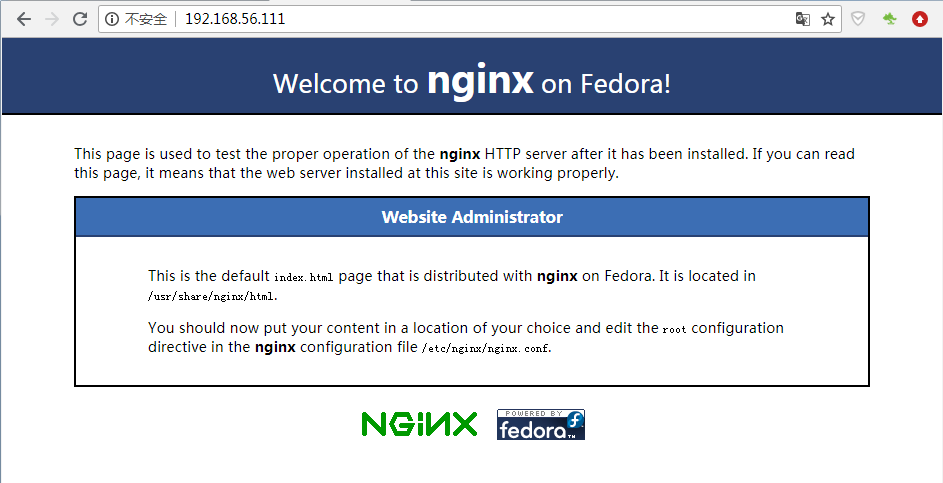
Visit VIP address: 192.168.56.100, index.html as follows:

Because the nginx versions of the two servers are different and the home pages are just different, it is easy to distinguish between the master and slave servers. If you use the same version of nginx, in order to distinguish between master and slave servers, you can modify index.html in the root directory of the website to distinguish.
By installing nginx in yum, you can first find the default configuration file of nginx's virtual host, / etc/nginx/nginx.conf or / etc/nginx/conf.d/default.conf, find the root directory of the website, / usr/share/nginx/html, and modify the contents of index.html home page, as follows:

3.5 Testing Keepalived High Availability
When a downtime in a simulated production environment stops the Keepalived service on the master server, the VIP address will be released from the master and bound to the backup as follows:
Stop the master's keepalived first, as follows:
[root@masternode nginx]# systemctl stop keepalived
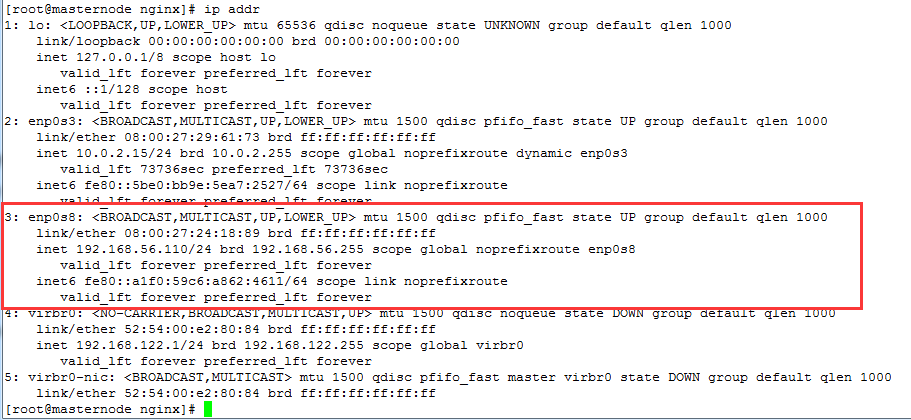
VIP has been released as follows:
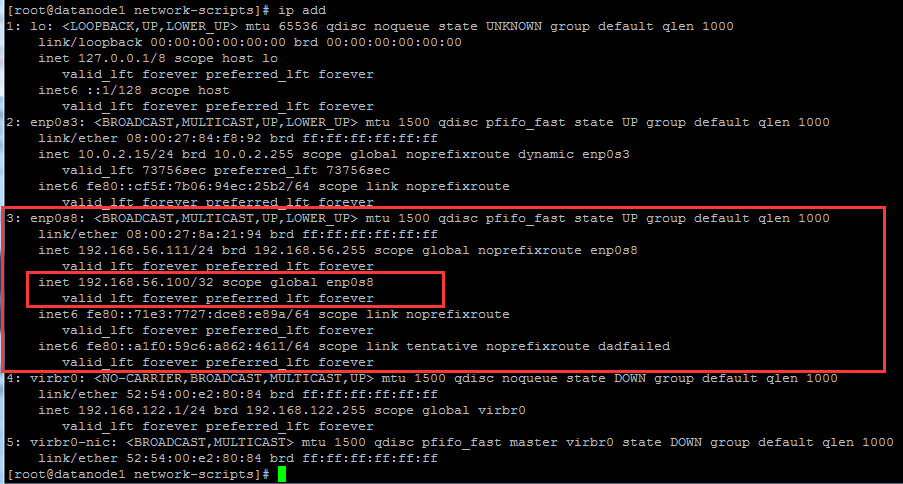
It is found that VIP is bound to the backup server at this time, as follows:
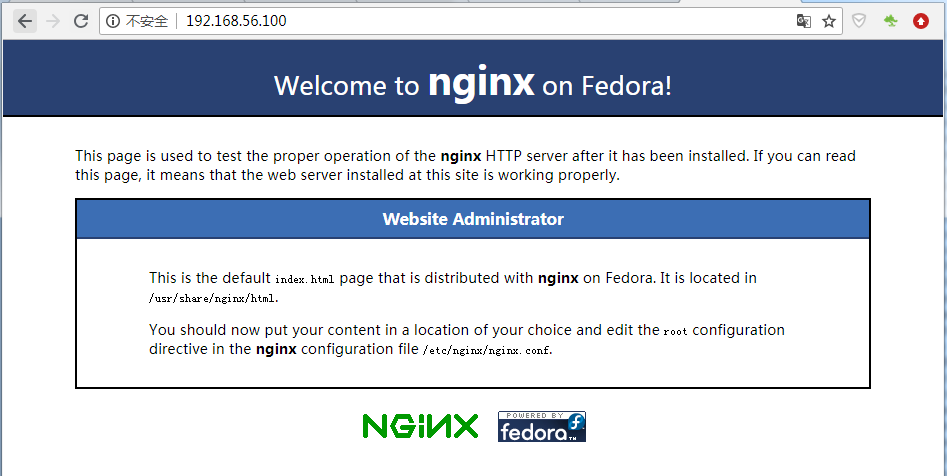
Visit the VIP address and find that the backup server has been switched to nginx, as follows:
If the keepalived of the master is started at this time, it will switch to the nginx of the master when the VIP is accessed again, because the master has a high priority.
Be careful:
After stopping keeping alived, nginx on their servers can still be accessed normally, but directly through their respective IP addresses.
Keepalived and Nginx can also be configured on different server s, and mcast_src_ip can be configured in keepalived.conf.