LNMP Basics
What is LNMP
- One of the mainstream enterprise website platforms
- 50: Linux operating system
- N:Nginx website service software
- M:MySQL.MariaDB database
- P: Website development language (PHP.Perl.Python)
Difference between static website and dynamic website
- Static web page:
(1) Static web page can not be simply translated into static web page. It mainly refers to that there is no program code in the web page, only HTML (Hypertext Markup Language), and the general suffix is. html,.htm, or. xml. Although the static page once made of the page, the content will not change. However, static web pages also include some dynamic parts, which are mainly GIF animations, etc
(2) When a static web page is opened, users can double-click it directly, and the content of the page opened by anyone at any time is unchanged.
- Dynamic web page:
(1) Dynamic web page is a kind of web page programming technology which is opposite to static web page. In addition to HTML tags, the dynamic web page file also includes some program codes with specific functions. These codes can make the browser and the server interact, so the server dynamically generates the web page content according to the different requests of customers.
That is to say, compared with the static web page, the page code has not changed, but the displayed content can change with the result of time, environment or database operation.
(2) Dynamic web pages have no direct relationship with the visual dynamic effects of various animations and rolling captions on the web pages. Dynamic web pages can be pure text content or contain various animation content. These are only the expression forms of the specific content of the web pages. No matter whether the web pages have dynamic effects or not, as long as the dynamic web site technology (such as PHP, ASP, JSP, etc.) is adopted The generated pages can be called dynamic pages.
Deploy LNMP environment
problem
- Install and deploy Nginx, MariaDB and PHP environments
- Install and deploy Nginx, MariaDB, PHP and PHP FPM;
- Start Nginx, MariaDB and FPM services;
- And test whether LNMP works normally.
programme
At present, the website generally has dynamic and static data. By default, nginx can only process static data. Any data accessed by users is directly returned to the corresponding file. If a script is accessed, a script will be directly returned to the user. The user does not have a script interpreter, and does not understand the script source code! The topology of the website is shown in figure-1.
Therefore, LNMP (Linux, Nginx, MySQL, PHP) needs to be integrated to achieve dynamic website effect.
LNMP in CentOS system, source installation Nginx, use RPM package to install MariaDB, PHP, PHP-FPM software.
The list of software to be installed during operation is as follows:
nginx
mariadb,mariadb-server,mariadb-devel
php,php-fpm,php-mysql
Remarks: mariadb (database client software), mariadb server (database server software), mariadb devel (dependency package of other client software), PHP (interpreter), PHP FPM (Process Manager Service), PHP MySQL (database extension package of PHP).
Step 1: install the software
1. Install nginx dependency package and source code nginx
[root@proxy ~]# yum -y install gcc openssl-devel pcre-devel
[root@proxy ~]# useradd -s /sbin/nologin  nginx
[root@proxy ~]# tar -xvf nginx-1.12.2.tar.gz
[root@proxy ~]# cd nginx-1.12.2
[root@proxy nginx-1.12.2]# ./configure   \
> --user=nginx   --group=nginx \
> --with-http_ssl_module
[root@proxy ~]# make && make install
2. Install MariaDB
Mariadb includes the software in the new version of RHEL7 CD, which can be installed directly using Yum after configuring the yum source
[root@proxy ~]# yum -y install mariadb mariadb-server mariadb-devel
3. Install php and php FPM
[root@proxy ~]# yum  -y  install  php   php-mysql
[root@proxy ~]# yum  -y  install   php-fpm
Step 2: start the service
1. Start Nginx service
It should be noted here that if other service software (such as httpd) listening to port 80 has been started on the server, the service needs to be shut down first, otherwise there will be conflicts.
[root@proxy ~]# systemctl stop httpd / / if the service exists, close it
[root@proxy ~]# /usr/local/nginx/sbin/nginx / / start the Nginx service
[root@proxy ~]# netstat -utnlp | grep :80
tcp    0    0 0.0.0.0:80        0.0.0.0:*        LISTEN        32428/nginx
2. Start MySQL service
[root@proxy ~]# Systemctl start MariaDB / / start the server
[root@proxy ~]# systemctl status mariadb / / view the service status
[root@proxy ~]# systemctl enable mariadb / / set boot to start
3. Start PHP-FPM service
[root@proxy ~]# Systemctl start PHP FPM / / start the service
[root@proxy ~]# Systemctl status PHP FPM / / view the service status
[root@proxy ~]# Systemctl enable PHP FPM / / set startup
4. Verify whether the service is started successfully
[root@proxy ~]# ss  -ntulp  |  grep  :80                       #nginx port
tcp    LISTEN     0      128       *:80                    *:*                   users:(("nginx",pid=3951,fd=6),("nginx",pid=3950,fd=6))
[root@proxy ~]# ss  -ntulp  |  grep  :3306                    #mariadb port
tcp    LISTEN     0      50        *:3306                  *:*                   users:(("mysqld",pid=4292,fd=14))
[root@proxy ~]# ss  -ntulp  |  grep  :9000                   #PHP FPM port
tcp    LISTEN     0      128    127.0.0.1:9000                  *:*                   users:(("php-fpm",pid=4361,fd=0),("php-fpm",pid=4360,fd=0),("php-fpm",pid=4359,fd=0),("php-fpm",pid=4358,fd=0),("php-fpm",pid=4357,fd=0),("php-fpm",pid=4355,fd=6))
How FastCGI works
About FastCGI
FastCGI technology currently supports PHP.C/C++.Java.Perl.Python.RUby, etc
Workflow
- Load FastCGI process manager when WebServer starts
- FastCGI process manager initialization, start multiple interpreter processes
- When a client request arrives at the Web Server, the FastCGI process manager selects and connects to an interpreter
- The FastCGI subprocess returns the result after processing, and returns the standard output and error information from the same connection to the Web Server
FastCGI disadvantages
- Because it is a multiprocess, it consumes more server memory than CGI multithreading. The PHP-CGI interpreter uses 7 to 25 megabytes of memory per process. Multiplying this number by 50 or 100 is a large amount of memory
- The Nginx+PHP(FastCGI) server consumes 150M memory (1015M) by opening 10 Nginx processes and 1280M memory (20M64) by opening 64 PHP CGI processes under 30000 concurrent connections
Configure FastCGI
[root@proxy ~]# vim /etc/php-fpm.d/www.conf
[www]
listen = 127.0.0.1:9000                     //php port number
listen.allowed_clients = 127.0.0.1
pm.max_children = 50                        //Maximum number of processes
pm.start_servers = 5                        //Minimum number of processes
Building LNMP platform
Question:
By adjusting the Nginx server configuration, the following goals are achieved:
Configure fast CGI to support PHP web page
Create a PHP test page to test the effect of using PHP to connect to the database
The plan:
Two RHEL7 virtual machines are used, one as LNMP server (192.168.4.5) and the other as Linux client for test (192.168.4.10), as shown in figure-2.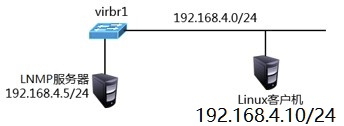
Nginx with FastCGI technology can support PHP page architecture, as shown in figure-3.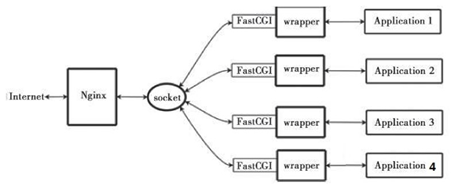
Configure nginx to realize two functions:
1. If the user is visiting a static web page, directly return to
2. If the user visits a dynamic web page, it will be delivered to php
Location matches the address bar of the user (starting from the back of the domain name). It supports regularity. There can be multiple locations in the same website, and "location /" has the lowest priority
Step 1: PHP FPM configuration file
1. View PHP FPM configuration file
[root@proxy etc]# vim /etc/php-fpm.d/www.conf
[www]
listen = 127.0.0.1:9000            //PHP port number
pm.max_children = 32                //Maximum number of processes
pm.start_servers = 15                //Minimum number of processes
Step 2: modify nginx configuration file and start
[root@proxy conf]# vim  /usr/local/nginx/conf/nginx.conf
 35     server {
 36         listen       80;
 37         server_name  localhost;
 43         location / {
 44             root   html;
 45             index  index.html index.htm;
 #Set the default home page as index.php. When the user writes only the domain name or IP in the browser address bar, and doesn't say what page to visit, the server will return the default home page index.php to the user
 46         }                                                         #Static web page
 65         location ~ \.php$ {
 66             root           html;
 67             fastcgi_pass   127.0.0.1:9000;         #Forward request to native 9000 port, PHP interpreter
 68             fastcgi_index  index.php;                            #dd drop the original 68 lines
 69             include        fastcgi.conf;                         #Load other profiles
 70         }                                                         #Dynamic web page
 [root@proxy conf]# /usr/local/nginx/sbin/nginx -s reload
 #Please ensure that nginx is in the start state first, otherwise, the command will give an error message as follows:
#[error] open() "/usr/local/nginx/logs/nginx.pid" failed (2: No such file or directory)
Step 3: create PHP page and test whether LNMP architecture can parse PHP page
1. To create a PHP test page 1, please refer to lnmp_soft/php_scripts/test.php:
[root@proxy ~]# vim /usr/local/nginx/html/test.php
<?php
$i="This is a test Page";
echo $i;
?>
2. The client accesses the php page
[root@localhost]$ firefox 192.168.4.5/test.php
Visit the following pages:
3. Connect and query mariadb database
You can refer to LNMP ﹐ soft / PHP ﹐ scripts / mysql.php:
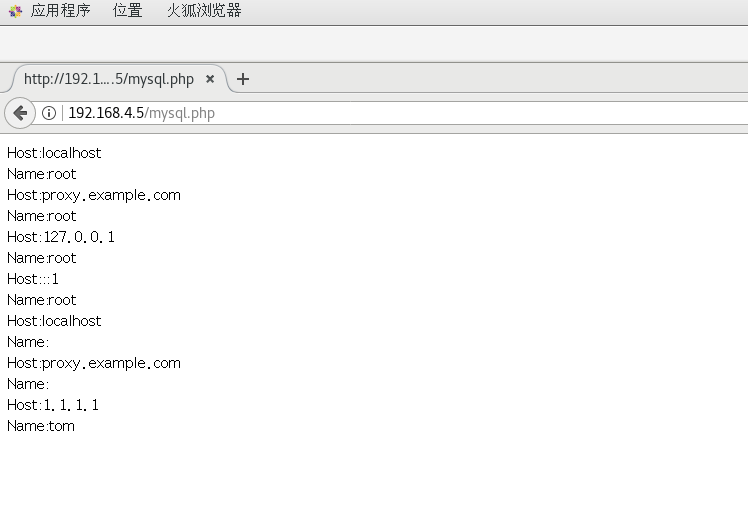
[root@proxy ~]# cd lnmp_soft/php_scripts/                #Switch to template directory
[root@proxy php_scripts]# ls
Discuz_X3.4_SC_UTF8.zip  mem.php  mysql.php  php-memcached-demo.tar.gz  test.php  web_demo.tar.gz
[root@proxy php_scripts]# cp  mysql.php   /usr/local/nginx/html/      #Copy to web root
[root@proxy ~]# vim /usr/local/nginx/html/mysql.php
<?php
$mysqli = new mysqli('localhost','root','Password','mysql');
//Note: root is the account name of mysql database. The password needs to be changed to the actual mysql password. If there is no password, leave it blank
//localhost is the domain name or IP of the database, mysql is the name of the database
if (mysqli_connect_errno()){
    die('Unable to connect!'). mysqli_connect_error();
}
$sql = "select * from user";
$result = $mysqli->query($sql);
while($row = $result->fetch_array()){
    printf("Host:%s",$row[0]);
    printf("</br>");
    printf("Name:%s",$row[1]);
    printf("</br>");
}
?>
[root@proxy php_scripts]# mysql  -e  "grant all on  *.* to tom@1.1.1.1 identified by '123'"
[root@proxy php_scripts]# /usr/local/nginx/sbin/nginx -s reload
4. The client accesses the php page
[@rootlocalhost ~]$ firefox 192.168.4.5/mysql.php
LNMP FAQ
The default access log file for Nginx is / usr/local/nginx/logs/access.log
The default error log file for Nginx is / usr/local/nginx/logs/error.log
If dynamic website access fails, you can refer to the error log for error information.
If you shut down the php service, an error will be reported when you visit the dynamic web page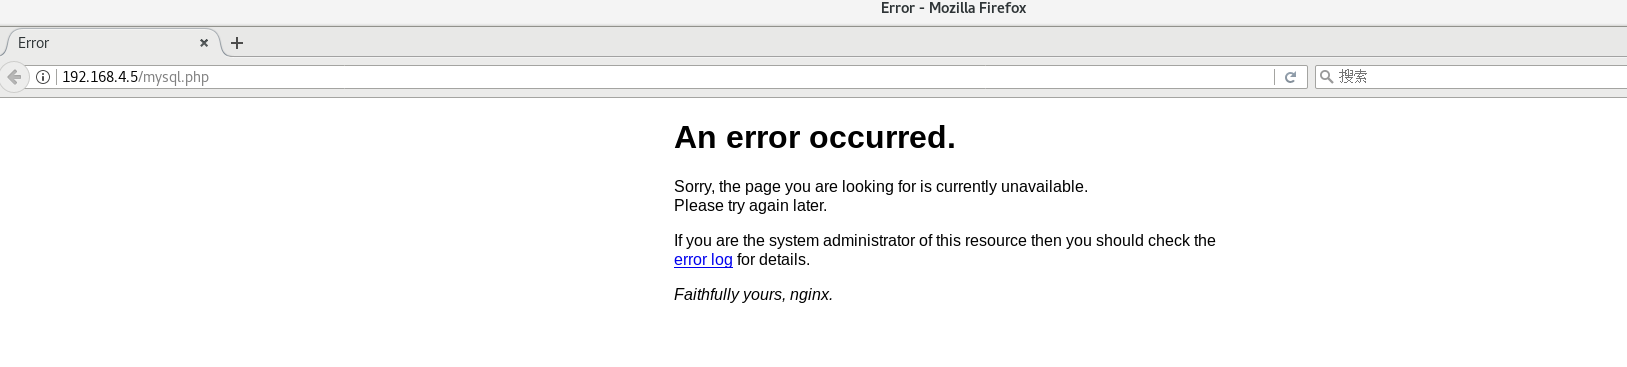
php FAQ
php file should end with semicolon. If the script content does not have semicolon to refresh the page, an error cannot be reported
The default error log file for PHP is / var / log / PHP FPM / www-error.log
At this time, you will visit the following page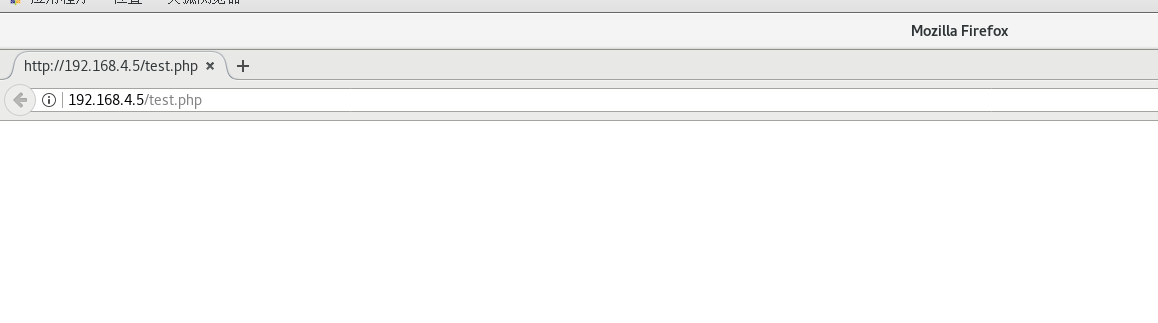
LNMP summary
1. Nginx, PHP FPM, MariaDB service
2.nginx.conf configuration
3.test.php script syntax
LNMP
User (client) -- > nginx) -- > PHP) -- > MySQL (MariaDB)
URL Rewrite
What is address rewrite
- The process of obtaining a visiting URL request and then rewriting it into another URL that the server can handle
Benefits of address rewriting
- Shorten URL to hide actual path and improve security
- Easy to remember and type
- Easy to be included by search engines
rewrite syntax
- rewrite basic statement
rewrite regex replacement flag
(regex indicates support for regular)
if (condition) { }
regular expression
The regular expression matching pattern is as follows:
- Match case:~
- Case insensitive match:~*
- Case sensitive mismatch:~
- Case insensitive mismatch:~*
rewrite option
rewrite Sentence
- rewrite regex replancement flag
- flag:Stop executing other override rules,according to URL Continue to search other location,Address bar unchanged
- break: Stop execution of other override rules,Complete this requirement
- redirect: 302 temporary redirect ,Address bar change,Crawler does not update URL
- permanent: 301 Permanent Redirect ,Address bar change,Crawler update URL
Address rewrite case
Question:
By adjusting the Nginx server configuration, the following goals are achieved:
All requests to access a.html are redirected to b.html;
All requests to visit 192.168.4.5 are redirected to www.360.cn;
All visit the following sub pages of 192.168.4.5/ and redirect to the same page under www.360.cn /;
Implement firefox and curl to access the same page file and return different content.
The plan:
For address rewrite of Nginx server, the main configuration parameters are rewrite:
rewrite regex replacement flag
rewrite old address new address [options]
case
1. Visiting http://www.360buy.com will automatically jump to http://www.jd.com.
2. Visiting http://www.baidu.com will automatically jump to https://www.baidu.com.
Step 1: modify the configuration file (visit a.html and redirect to b.html)
1. Modify the service configuration of nginx
[root@proxy ~]# vim /usr/local/nginx/conf/nginx.conf
.. ..
   server {
        listen       80;
        server_name  localhost;
     rewrite /a.html  /b.html;
location / {
    root   html;
index  index.html index.htm;
}
}
2. Reload the configuration file
[root@proxy nginx]# echo  hahahahhah  >  /usr/local/nginx/html/b.html
[root@proxy nginx]# /usr/local/nginx/sbin/nginx  -s  reload
##At this time, the actual access to a.html is b.html
3. Client access test
[root@localhost ~]$ firefox 192.168.4.5/a.html
The visit page is as follows
Step 2: visit a.html and redirect to b.html (jump to address bar)
1. Modify Nginx service configuration:
[root@proxy nginx]# vim /usr/local/nginx/conf/nginx.conf
server {
        listen       80;
        server_name  localhost;
     rewrite /a.html  /b.html redirect;        //Add redirect to write multiple rewrite s
 location / {
            root   html;
            index  index.html index.htm;
        }
2. Lifting services
[root@proxy nginx]# /usr/local/nginx/sbin/nginx -s reload
3. Client access
[root@localhost ~]$ firefox 192.168.4.5/a.html
At this time, the page the client accesses is b.html. Observe the address bar change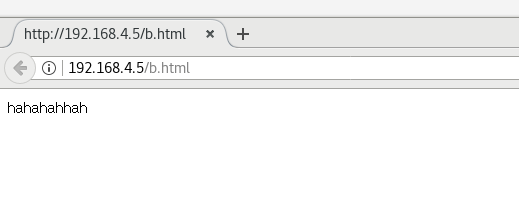
Step 3: modify the configuration file (request to visit 192.168.4.5 is redirected to www.cn)
1. Modify Nginx service configuration
[root@proxy nginx]# vim /usr/local/nginx/conf/nginx.conf
server {
        listen       80;
        server_name  localhost;
        rewrite  ^/   http://www.360.cn;
        location / {
            root   html;
            index  index.html index.htm;
        }
2. Lifting services
[root@proxy nginx]# /usr/local/nginx/sbin/nginx -s reload
3. Client access
[root@localhost ~]$ firefox  192.168.4.5
#At this time, if you visit 192.168.4.5, you will automatically jump to www.360.cn
The client accesses the following pages
Step 4: modify the configuration file (visit the following sub page of 192.168.4.5/ and redirect to the same page under www.360.cn /)
1. Modify Nginx service configuration
[root@proxy ~]# vim /usr/local/nginx/conf/nginx.conf
.. ..
server {
        listen       80;
        server_name  localhost;
rewrite ^/(.*)$  http://www.tmooc.cn/$1;      #In nginx, $1 has the same meaning as \ 1 in regular, indicating the preceding (. *)
location / {
    root   html;
index  index.html index.htm;
}
}
2. Lifting services
[root@proxy nginx]# vim /usr/local/nginx/conf/nginx.conf
3. Client access
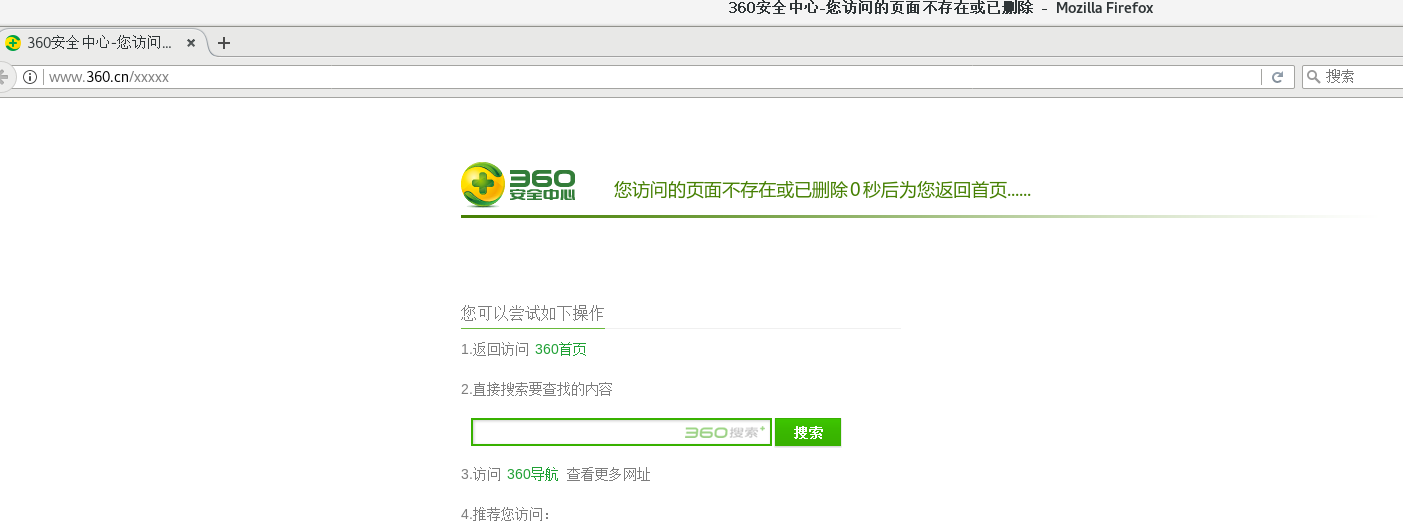
[root@localhost ~]$ firefox  192.168.4.5/download/
[root@localhost ~]$ firefox  192.168.4.5/xxxxx
At this time, the client accesses the following page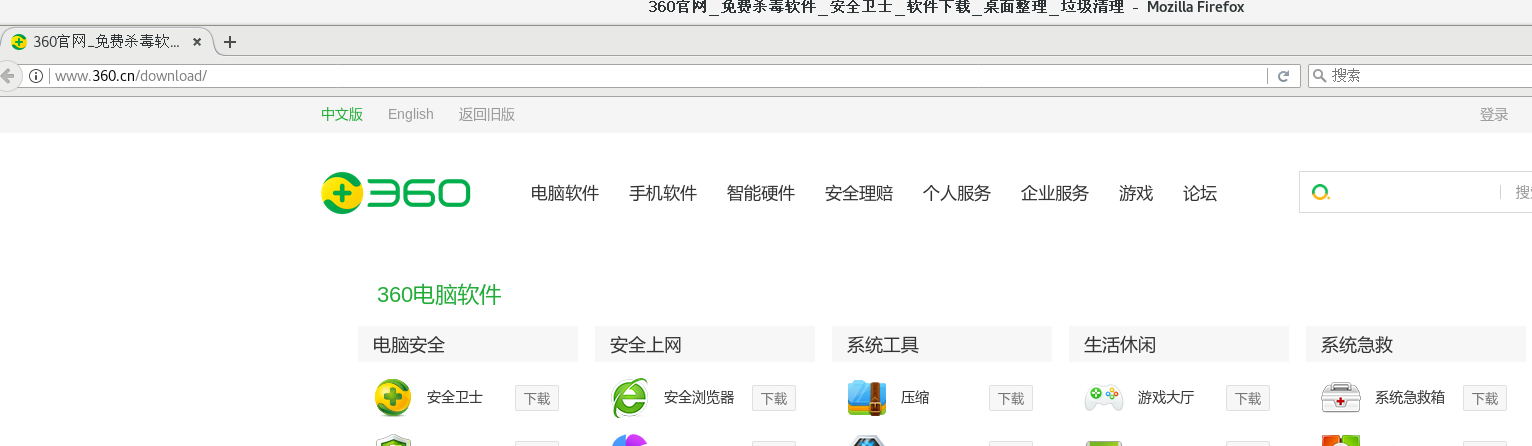
Step 5: modify the configuration file (to realize different pages returned by curl and Firefox visiting the same link)
Accessing the same page with different browsers results in different results
crul http://192.168.4.5/test.html
firewall http://192.168.4.5/test.html
1. Create a web page directory and corresponding page files:
[root@proxy ~]# echo ""wo shi Normal  wangye" > /usr/local/nginx/html/test.html
[root@proxy ~]# mkdir  -p  /usr/local/nginx/html/firefox/
[root@proxy ~]# echo "wo shi  firefox   wangye" > /usr/local/nginx/html/firefox/test.html
2. Modify nginx configuration file
server {
        listen       80;
        server_name  localhost;                       #Be sure to cancel the rewrite
        if  ($http_user_agent   ~*    firefox)  {
        rewrite   ^/(.*)  /firefox/$1;
}
#  $http ﹣ user ﹣ agent is a variable of nginx. The value of the variable represents the user's information, browser version number, etc. compare the customer information with Firefox. If the customer information contains Firefox, jump to the nginx page built by the corresponding Firefox file
        location / {
            root   html;
            index  index.html index.htm;
        }
3. Lifting services
[root@proxy nginx]# /usr/local/nginx/sbin/nginx -s reload
4. Client access page
[student@room9pc01 ~]$ curl  192.168.4.5/test.html
wo shi Normal  wangye
[student@room9pc01 ~]$ firefox  192.168.4.5/test.html
 At this point, the pages accessed with firefox are different from those accessed with curl
The page that firefox visits 192.168.4.5 is as follows: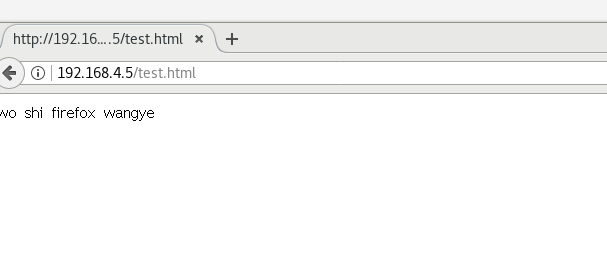
Address rewrite format [summary]
rewrite old address new address [option];
last no longer reads other rewrite s
break no longer reads other statements and ends the request
redirect temporary redirection
permanent redirection

