The final results are as follows:
It has the functions of command history prompt, command highlighting, file directory color discrimination and so on

Implementation steps:
1. Install homebrew, paste the following commands into the terminal, and then install step by step according to the prompts.
/bin/zsh -c "$(curl -fsSL https://gitee.com/cunkai/HomebrewCN/raw/master/Homebrew.sh)"
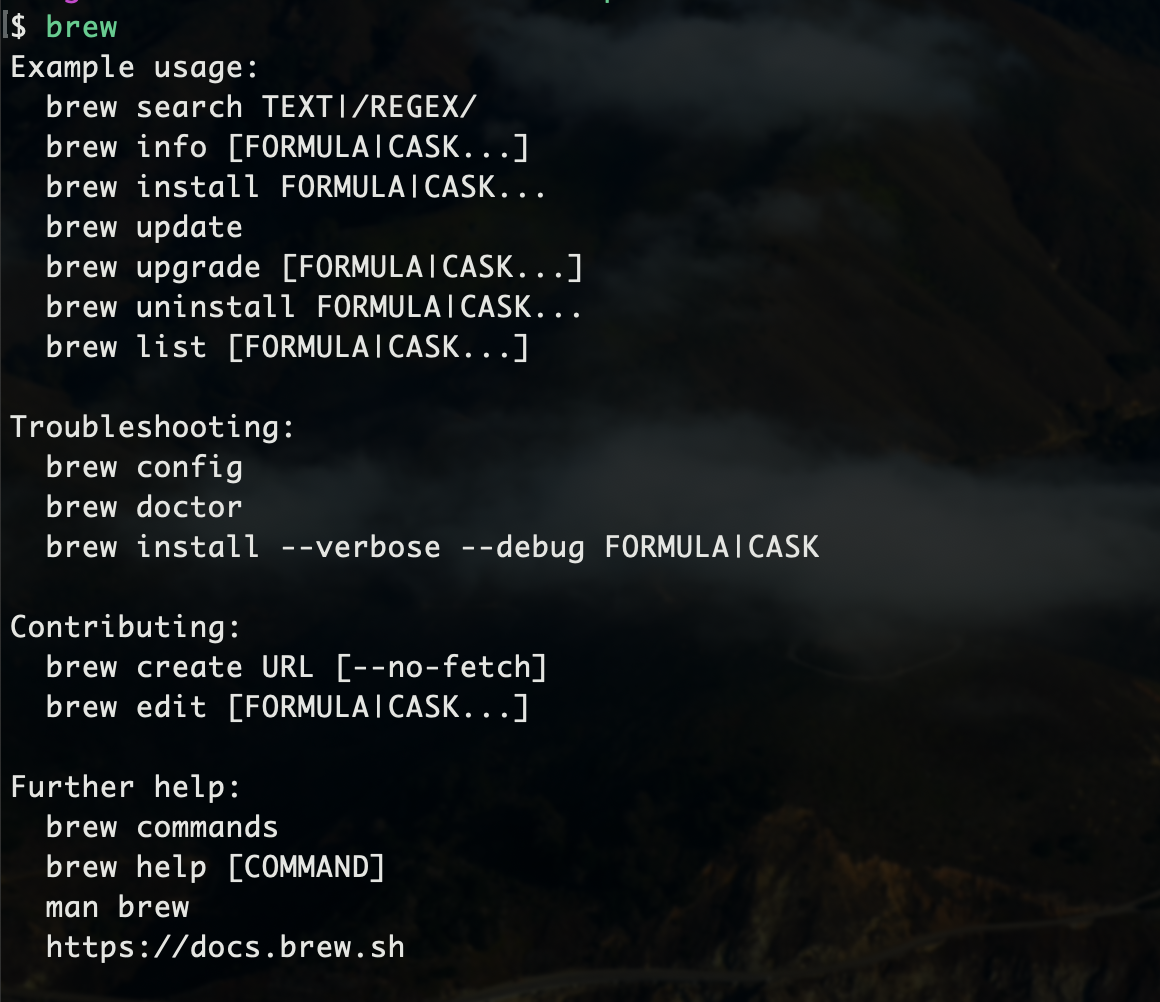
After the installation is completed, enter the brew command in the terminal. If the following prompt appears, the installation is successful
2. Install Oh My Zsh and save the following script as install SH file
#!/bin/sh
#
# This script should be run via curl:
# sh -c "$(curl -fsSL https://raw.githubusercontent.com/ohmyzsh/ohmyzsh/master/tools/install.sh)"
# or via wget:
# sh -c "$(wget -qO- https://raw.githubusercontent.com/ohmyzsh/ohmyzsh/master/tools/install.sh)"
# or via fetch:
# sh -c "$(fetch -o - https://raw.githubusercontent.com/ohmyzsh/ohmyzsh/master/tools/install.sh)"
#
# As an alternative, you can first download the install script and run it afterwards:
# wget https://raw.githubusercontent.com/ohmyzsh/ohmyzsh/master/tools/install.sh
# sh install.sh
#
# You can tweak the install behavior by setting variables when running the script. For
# example, to change the path to the Oh My Zsh repository:
# ZSH=~/.zsh sh install.sh
#
# Respects the following environment variables:
# ZSH - path to the Oh My Zsh repository folder (default: $HOME/.oh-my-zsh)
# REPO - name of the GitHub repo to install from (default: ohmyzsh/ohmyzsh)
# REMOTE - full remote URL of the git repo to install (default: GitHub via HTTPS)
# BRANCH - branch to check out immediately after install (default: master)
#
# Other options:
# CHSH - 'no' means the installer will not change the default shell (default: yes)
# RUNZSH - 'no' means the installer will not run zsh after the install (default: yes)
# KEEP_ZSHRC - 'yes' means the installer will not replace an existing .zshrc (default: no)
#
# You can also pass some arguments to the install script to set some these options:
# --skip-chsh: has the same behavior as setting CHSH to 'no'
# --unattended: sets both CHSH and RUNZSH to 'no'
# --keep-zshrc: sets KEEP_ZSHRC to 'yes'
# For example:
# sh install.sh --unattended
# or:
# sh -c "$(curl -fsSL https://raw.githubusercontent.com/ohmyzsh/ohmyzsh/master/tools/install.sh)" "" --unattended
#
set -e
# Track if $ZSH was provided
custom_zsh=${ZSH:+yes}
# Default settings
ZSH=${ZSH:-~/.oh-my-zsh}
REPO=${REPO:-ohmyzsh/ohmyzsh}
REMOTE=${REMOTE:-https://github.com/${REPO}.git}
BRANCH=${BRANCH:-master}
# Other options
CHSH=${CHSH:-yes}
RUNZSH=${RUNZSH:-yes}
KEEP_ZSHRC=${KEEP_ZSHRC:-no}
command_exists() {
command -v "$@" >/dev/null 2>&1
}
fmt_error() {
printf '%sError: %s%s\n' "$BOLD$RED" "$*" "$RESET" >&2
}
fmt_underline() {
printf '\033[4m%s\033[24m\n' "$*"
}
fmt_code() {
# shellcheck disable=SC2016 # backtic in single-quote
printf '`\033[38;5;247m%s%s`\n' "$*" "$RESET"
}
setup_color() {
# Only use colors if connected to a terminal
if [ -t 1 ]; then
RED=$(printf '\033[31m')
GREEN=$(printf '\033[32m')
YELLOW=$(printf '\033[33m')
BLUE=$(printf '\033[34m')
BOLD=$(printf '\033[1m')
RESET=$(printf '\033[m')
else
RED=""
GREEN=""
YELLOW=""
BLUE=""
BOLD=""
RESET=""
fi
}
setup_ohmyzsh() {
# Prevent the cloned repository from having insecure permissions. Failing to do
# so causes compinit() calls to fail with "command not found: compdef" errors
# for users with insecure umasks (e.g., "002", allowing group writability). Note
# that this will be ignored under Cygwin by default, as Windows ACLs take
# precedence over umasks except for filesystems mounted with option "noacl".
umask g-w,o-w
echo "${BLUE}Cloning Oh My Zsh...${RESET}"
command_exists git || {
fmt_error "git is not installed"
exit 1
}
ostype=$(uname)
if [ -z "${ostype%CYGWIN*}" ] && git --version | grep -q msysgit; then
fmt_error "Windows/MSYS Git is not supported on Cygwin"
fmt_error "Make sure the Cygwin git package is installed and is first on the \$PATH"
exit 1
fi
git clone -c core.eol=lf -c core.autocrlf=false \
-c fsck.zeroPaddedFilemode=ignore \
-c fetch.fsck.zeroPaddedFilemode=ignore \
-c receive.fsck.zeroPaddedFilemode=ignore \
--depth=1 --branch "$BRANCH" "$REMOTE" "$ZSH" || {
fmt_error "git clone of oh-my-zsh repo failed"
exit 1
}
echo
}
setup_zshrc() {
# Keep most recent old .zshrc at .zshrc.pre-oh-my-zsh, and older ones
# with datestamp of installation that moved them aside, so we never actually
# destroy a user's original zshrc
echo "${BLUE}Looking for an existing zsh config...${RESET}"
# Must use this exact name so uninstall.sh can find it
OLD_ZSHRC=~/.zshrc.pre-oh-my-zsh
if [ -f ~/.zshrc ] || [ -h ~/.zshrc ]; then
# Skip this if the user doesn't want to replace an existing .zshrc
if [ "$KEEP_ZSHRC" = yes ]; then
echo "${YELLOW}Found ~/.zshrc.${RESET} ${GREEN}Keeping...${RESET}"
return
fi
if [ -e "$OLD_ZSHRC" ]; then
OLD_OLD_ZSHRC="${OLD_ZSHRC}-$(date +%Y-%m-%d_%H-%M-%S)"
if [ -e "$OLD_OLD_ZSHRC" ]; then
fmt_error "$OLD_OLD_ZSHRC exists. Can't back up ${OLD_ZSHRC}"
fmt_error "re-run the installer again in a couple of seconds"
exit 1
fi
mv "$OLD_ZSHRC" "${OLD_OLD_ZSHRC}"
echo "${YELLOW}Found old ~/.zshrc.pre-oh-my-zsh." \
"${GREEN}Backing up to ${OLD_OLD_ZSHRC}${RESET}"
fi
echo "${YELLOW}Found ~/.zshrc.${RESET} ${GREEN}Backing up to ${OLD_ZSHRC}${RESET}"
mv ~/.zshrc "$OLD_ZSHRC"
fi
echo "${GREEN}Using the Oh My Zsh template file and adding it to ~/.zshrc.${RESET}"
sed "/^export ZSH=/ c\\
export ZSH=\"$ZSH\"
" "$ZSH/templates/zshrc.zsh-template" > ~/.zshrc-omztemp
mv -f ~/.zshrc-omztemp ~/.zshrc
echo
}
setup_shell() {
# Skip setup if the user wants or stdin is closed (not running interactively).
if [ "$CHSH" = no ]; then
return
fi
# If this user's login shell is already "zsh", do not attempt to switch.
if [ "$(basename -- "$SHELL")" = "zsh" ]; then
return
fi
# If this platform doesn't provide a "chsh" command, bail out.
if ! command_exists chsh; then
cat <<EOF
I can't change your shell automatically because this system does not have chsh.
${BLUE}Please manually change your default shell to zsh${RESET}
EOF
return
fi
echo "${BLUE}Time to change your default shell to zsh:${RESET}"
# Prompt for user choice on changing the default login shell
printf '%sDo you want to change your default shell to zsh? [Y/n]%s ' \
"$YELLOW" "$RESET"
read -r opt
case $opt in
y*|Y*|"") echo "Changing the shell..." ;;
n*|N*) echo "Shell change skipped."; return ;;
*) echo "Invalid choice. Shell change skipped."; return ;;
esac
# Check if we're running on Termux
case "$PREFIX" in
*com.termux*) termux=true; zsh=zsh ;;
*) termux=false ;;
esac
if [ "$termux" != true ]; then
# Test for the right location of the "shells" file
if [ -f /etc/shells ]; then
shells_file=/etc/shells
elif [ -f /usr/share/defaults/etc/shells ]; then # Solus OS
shells_file=/usr/share/defaults/etc/shells
else
fmt_error "could not find /etc/shells file. Change your default shell manually."
return
fi
# Get the path to the right zsh binary
# 1. Use the most preceding one based on $PATH, then check that it's in the shells file
# 2. If that fails, get a zsh path from the shells file, then check it actually exists
if ! zsh=$(command -v zsh) || ! grep -qx "$zsh" "$shells_file"; then
if ! zsh=$(grep '^/.*/zsh$' "$shells_file" | tail -1) || [ ! -f "$zsh" ]; then
fmt_error "no zsh binary found or not present in '$shells_file'"
fmt_error "change your default shell manually."
return
fi
fi
fi
# We're going to change the default shell, so back up the current one
if [ -n "$SHELL" ]; then
echo "$SHELL" > ~/.shell.pre-oh-my-zsh
else
grep "^$USERNAME:" /etc/passwd | awk -F: '{print $7}' > ~/.shell.pre-oh-my-zsh
fi
# Actually change the default shell to zsh
if ! chsh -s "$zsh"; then
fmt_error "chsh command unsuccessful. Change your default shell manually."
else
export SHELL="$zsh"
echo "${GREEN}Shell successfully changed to '$zsh'.${RESET}"
fi
echo
}
main() {
# Run as unattended if stdin is not a tty
if [ ! -t 0 ]; then
RUNZSH=no
CHSH=no
fi
# Parse arguments
while [ $# -gt 0 ]; do
case $1 in
--unattended) RUNZSH=no; CHSH=no ;;
--skip-chsh) CHSH=no ;;
--keep-zshrc) KEEP_ZSHRC=yes ;;
esac
shift
done
setup_color
if ! command_exists zsh; then
echo "${YELLOW}Zsh is not installed.${RESET} Please install zsh first."
exit 1
fi
if [ -d "$ZSH" ]; then
echo "${YELLOW}The \$ZSH folder already exists ($ZSH).${RESET}"
if [ "$custom_zsh" = yes ]; then
cat <<EOF
You ran the installer with the \$ZSH setting or the \$ZSH variable is
exported. You have 3 options:
1. Unset the ZSH variable when calling the installer:
$(fmt_code "ZSH= sh install.sh")
2. Install Oh My Zsh to a directory that doesn't exist yet:
$(fmt_code "ZSH=path/to/new/ohmyzsh/folder sh install.sh")
3. (Caution) If the folder doesn't contain important information,
you can just remove it with $(fmt_code "rm -r $ZSH")
EOF
else
echo "You'll need to remove it if you want to reinstall."
fi
exit 1
fi
setup_ohmyzsh
setup_zshrc
setup_shell
printf %s "$GREEN"
cat <<'EOF'
__ __
____ / /_ ____ ___ __ __ ____ _____/ /_
/ __ \/ __ \ / __ `__ \/ / / / /_ / / ___/ __ \
/ /_/ / / / / / / / / / / /_/ / / /_(__ ) / / /
\____/_/ /_/ /_/ /_/ /_/\__, / /___/____/_/ /_/
/____/ ....is now installed!
EOF
cat <<EOF
Before you scream Oh My Zsh! please look over the ~/.zshrc file to select plugins, themes, and options.
• Follow us on Twitter: $(fmt_underline https://twitter.com/ohmyzsh)
• Join our Discord server: $(fmt_underline https://discord.gg/ohmyzsh)
• Get stickers, shirts, coffee mugs and other swag: $(fmt_underline https://shop.planetargon.com/collections/oh-my-zsh)
EOF
printf %s "$RESET"
if [ $RUNZSH = no ]; then
echo "${YELLOW}Run zsh to try it out.${RESET}"
exit
fi
exec zsh -l
}
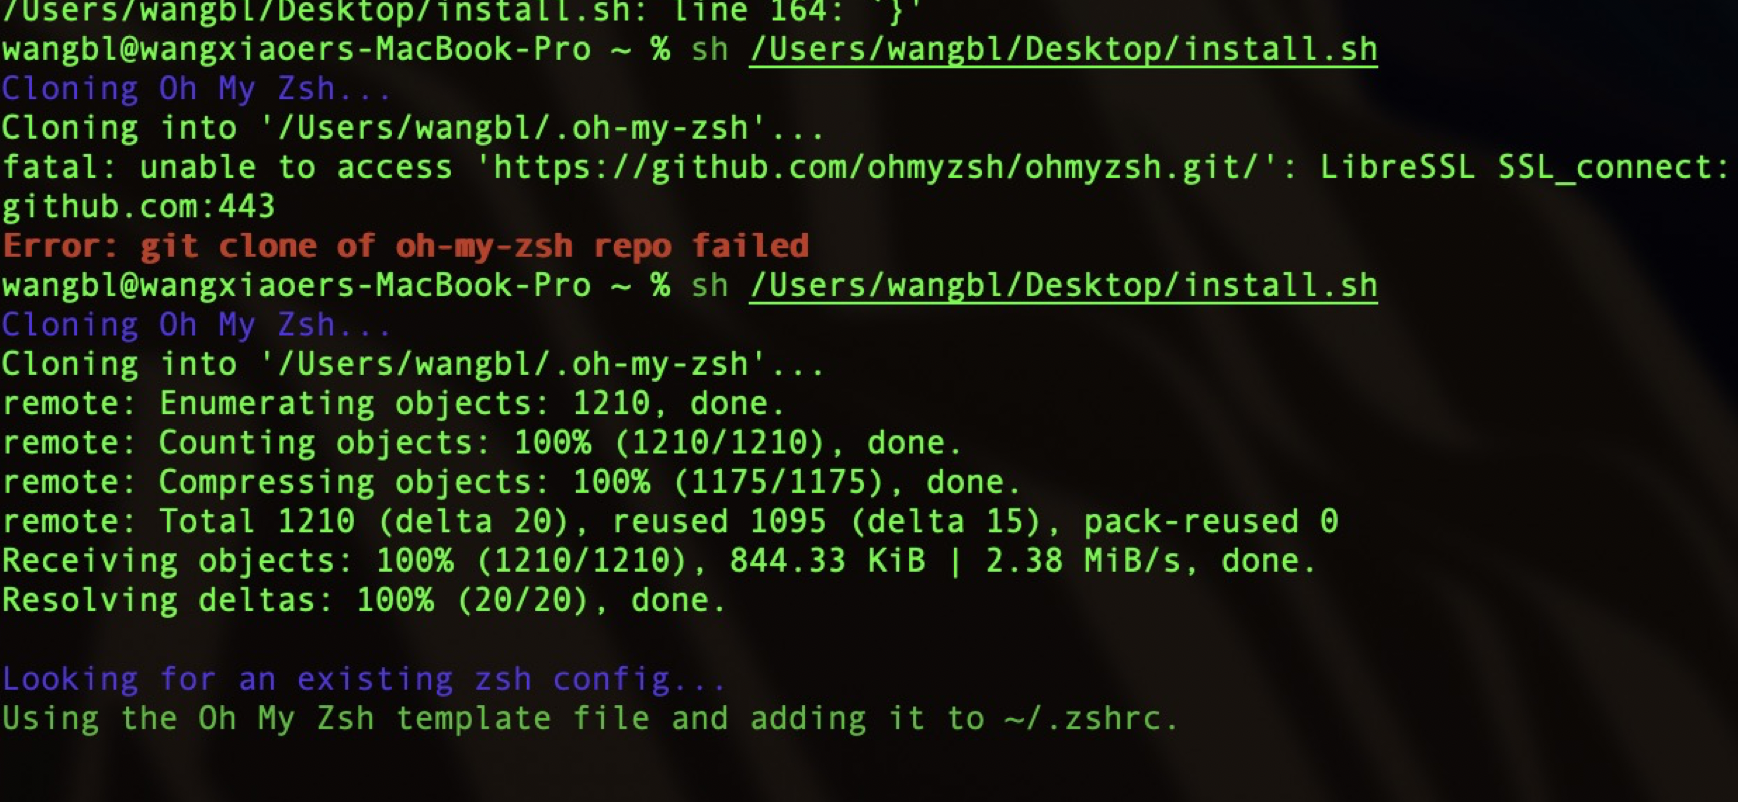
main "$@"3. Enter in the terminal, where the sh command is followed by install Path of sh
sh install.sh
If the following red prompt appears, you can try again, as shown in the figure below
4. After installation, open the terminal again. If the following prompt appears
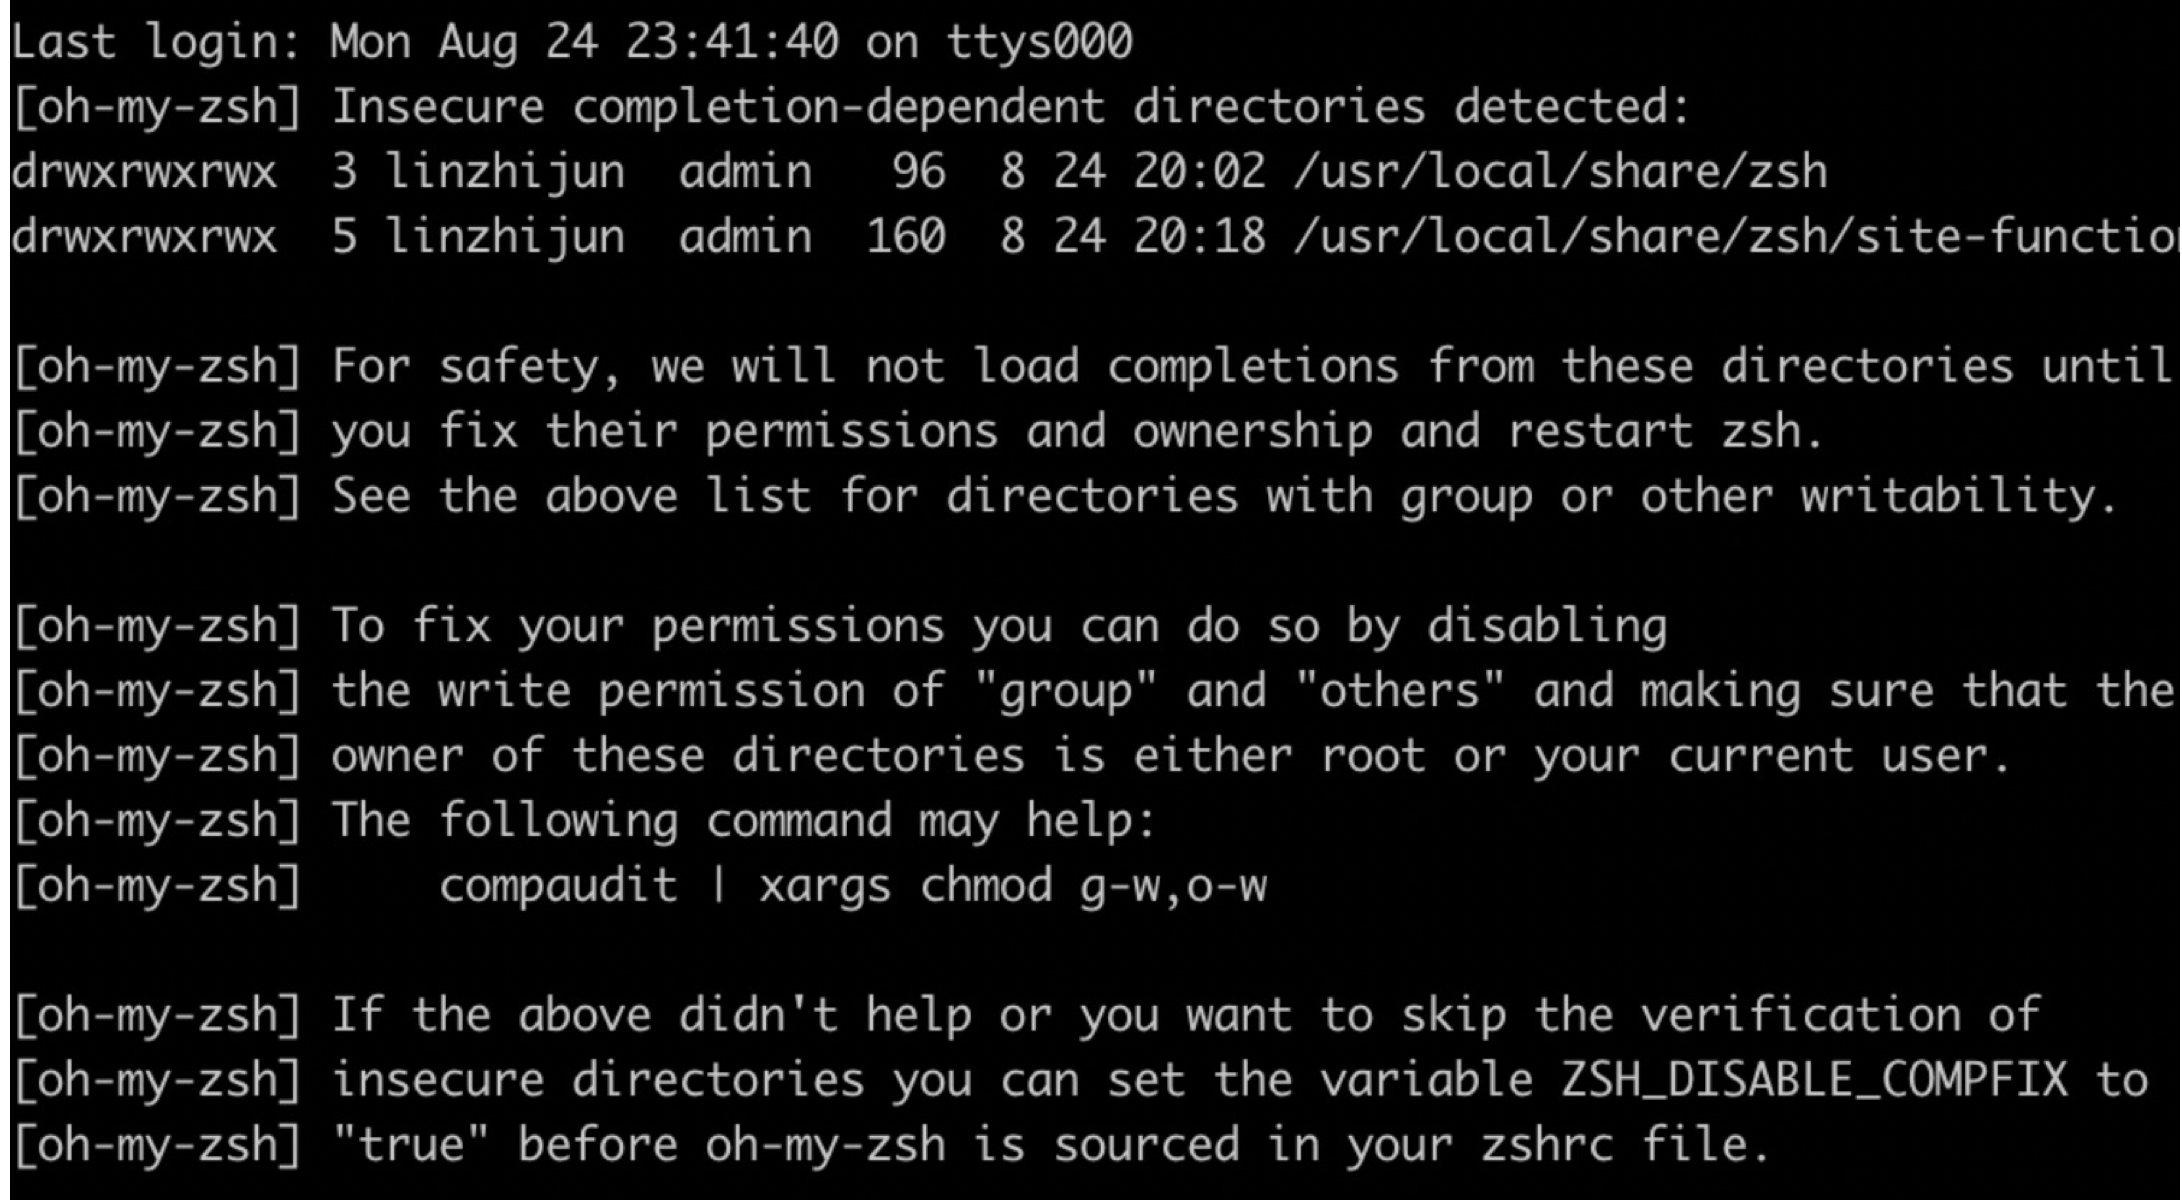
The solution is as follows:
chmod 755 /usr/local/share/zsh
chmod 755 /usr/local/share/zsh/site-functions
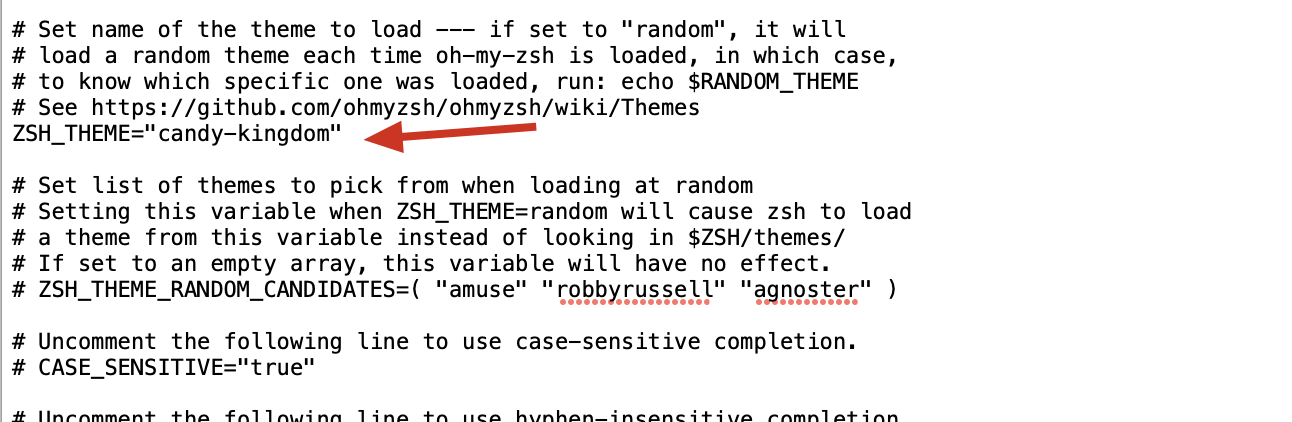
5. Set theme in ~ / There are many topics to choose from under the oh my Zsh / themes directory. Just fill the corresponding name in ~ / In the zshrc configuration file, as shown below, the topic used in this article is candy kingdom. Readers can set according to their favorite theme and see the effect. At the same time, it can also be through ZSH_THEME_RANDOM_CANDIDATES to set random topics, readers can try it by themselves
6. Install automatic completion plug-in
brew install zsh-autosuggestions
After installation, you need to set the environment variable in ~ / Add in zshrc
vim ~/.zshrc
//Add the following
source /usr/local/share/zsh-autosuggestions/zsh-autosuggestions.zsh
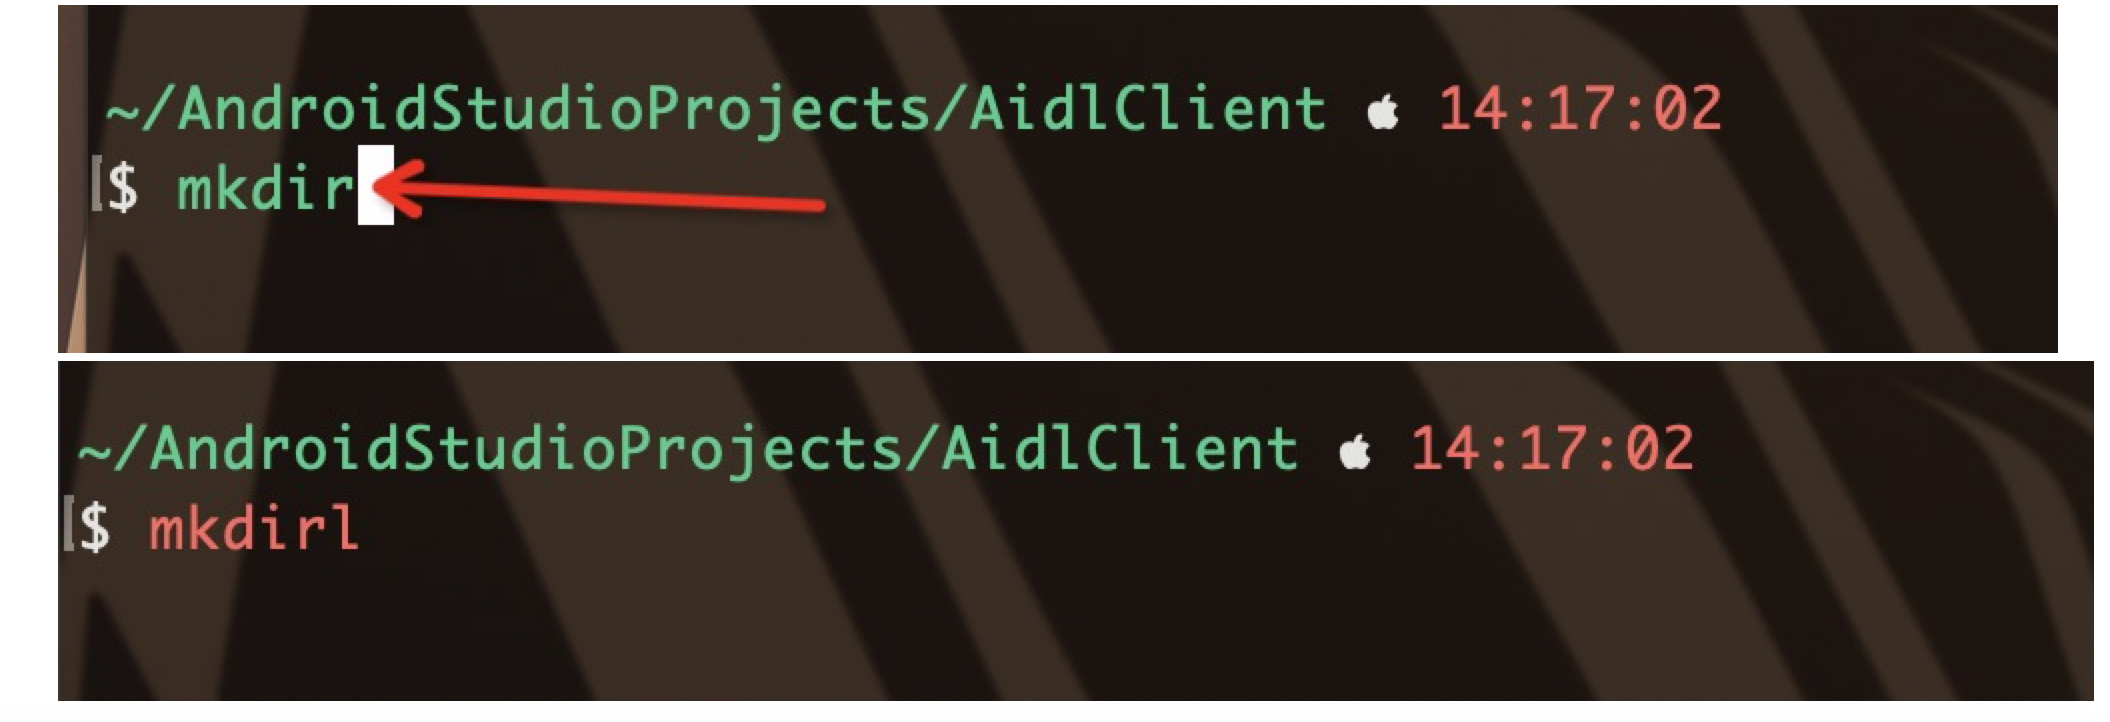
7. Install the syntax highlighting plug-in. After installation, if the command is wrong, it will appear red, and if it is correct, it will display green. Install the command
brew install zsh-syntax-highlighting
Configure environment variables
vim ~/.zshrc
//Add the following
source /usr/local/share/zsh-syntax-highlighting/zsh-syntax-highlighting.zsh
The effect is as follows:
So far, you have created your own terminal theme step by step.
Special reminder:
The background of the author's terminal is transparent. If you need a small partner, you can download it through the following link,
Download link:
https://download.csdn.net/download/Wbl752134268/19192044
After downloading, import this description file through the terminal - preferences. The steps are as follows: