Let's learn how to use the ChatterBot library to create a chat robot in Python. The library implements various machine learning algorithms to generate response conversations, which is quite good
1 what is a chat robot
Chat robot, also known as chat robot, robot and artificial agent, is basically a software program driven by artificial intelligence. Its purpose is to talk to users through text or voice. Famous examples of our daily contact include Siri, Alexa, etc
These chat robots tend to perform specific tasks for users. Chat robots often perform tasks such as making transactions, booking hotels, submitting forms and so on. With the technological progress in the field of artificial intelligence, the possibility of chat robot is endless
Of course, under the current technology, chat robot still has many limitations
- Domain knowledge - since real artificial intelligence is still out of reach, it is difficult for any chat robot to fully understand the meaning of dialogue when talking to humans
- Personality - inability to respond correctly and poor understanding are more important than the common mistakes of any chat robot. Adding personality to a chat robot is still a distant and difficult thing
We can define chat robots as two types
- Based on specific rules - in this method, the robot is trained according to the rules. Based on this, robots can answer simple queries, but sometimes they can't answer complex conversations
- Self study - these robots follow machine learning methods, are more efficient, and are further divided into two other categories
- Based on Retrieval Model - in this method, the robot retrieves the best response from the response list according to user input
- Generate models - these models usually give answers instead of searching from a set of answers, which also makes them intelligent robots
Well, let's introduce the knowledge of chat robot on tall. Let's build a simple online chat robot through chatterbot
2ChatterBot library introduction
ChatterBot is a library in Python that generates responses to user input and uses a variety of machine learning algorithms to generate various responses. Users can more easily use the ChatterBot library to make chat robots with more accurate response
ChatterBot's design allows the robot to receive training in multiple languages. Most importantly, the machine learning algorithm makes it easier for the robot to use the user's input to improve itself
ChatterBot can easily create software to participate in dialogue. Every time the chat robot obtains input from the user, it will save the input and response, which helps the chat robot without initial knowledge to use the collected response for self evolution
With the increase of response, the accuracy of chat robot will also improve. The program selects the closest matching response from the closest matching statements that match the input, and then selects the response from the known statement selection of the response
Installing ChatterBot is also very simple
pip install chatterbot
Now let's officially enter the world of Chatterbot
3. Build chat robot
Robot training
Chatterbot comes with a data utility module that can be used to train chat robots. At present, there are training data in more than ten languages in this module, which we can use directly
https://github.com/gunthercox/chatterbot-corpus
Here is a simple example of starting using ChatterBot in python
from chatterbot import chatbot
from chatterbot.trainers import ListTrainer

chatbot = Chatbot('Edureka')
trainer = ListTrainer(chatbot)
trainer.train([ 'hi, can I help you find a course', 'sure I'd love to find you a course', 'your course have been selected'])

response = chatbot.get_response("I want a course")
print(response)
In the example, we get the response from the chat robot according to the input provided
Build flash app
For the basic flash structure, we directly use a scaffold on GitHub, which is specially used to develop ChatterBot applications
https://github.com/chamkank/flask-chatterbot
Let's just clone the project directly
After downloading the project locally, we make some modifications
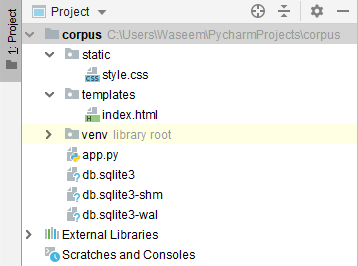
We need to add two additional directories static and templates for HTML and CSS files

Modify App.py file
from flask import Flask, render_template, request
from chatterbot import ChatBot
from chatterbot.trainers import ChatterBotCorpusTrainer

app = Flask(__name__)

english_bot = ChatBot("Chatterbot", storage_adapter="chatterbot.storage.SQLStorageAdapter")
trainer = ChatterBotCorpusTrainer(english_bot)
trainer.train("chatterbot.corpus.english")

@app.route("/")
def home():
    return render_template("index.html")

@app.route("/get")
def get_bot_response():
    userText = request.args.get('msg')
    return str(english_bot.get_response(userText))


if __name__ == "__main__":
    app.run()
index.html file
<!DOCTYPE html>
<html>
<head>
<link rel="stylesheet" type="text/css" href="/static/style.css">
<script src="https://ajax.googleapis.com/ajax/libs/jquery/3.2.1/jquery.min.js"></script>
</head>
<body>
<h1>Flask Chatterbot Example</h1>
<div>
<div id="chatbox">
<p class="botText"><span>Hi! I'm Chatterbot.</span></p>
</div>
<div id="userInput">
<input id="textInput" type="text" name="msg" placeholder="Message">
<input id="buttonInput" type="submit" value="Send">
</div>
<script>
function getBotResponse() {
var rawText = $("#textInput").val();
var userHtml = '<p class="userText"><span>' + rawText + '</span></p>';
$("#textInput").val("");
$("#chatbox").append(userHtml);
document.getElementById('userInput').scrollIntoView({block: 'start', behavior: 'smooth'});
$.get("/get", { msg: rawText }).done(function(data) {
var botHtml = '<p class="botText"><span>' + data + '</span></p>';
$("#chatbox").append(botHtml);
document.getElementById('userInput').scrollIntoView({block: 'start', behavior: 'smooth'});
});
}
$("#textInput").keypress(function(e) {
if(e.which == 13) {
getBotResponse();
}
});
$("#buttonInput").click(function() {
getBotResponse();
})
</script>
</div>
</body>
</html>
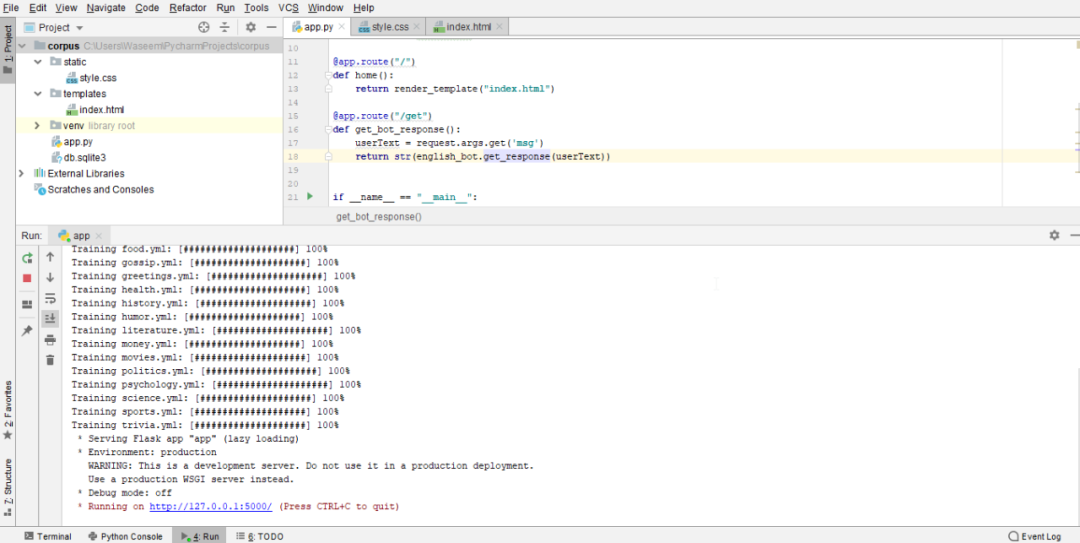
The index.html file will contain templates for the application, and style.css will contain style sheets with CSS code. After executing the above procedure, we will get the output shown in the figure below
Style.css file
body
{
font-family: Garamond;
background-color: black;
}
h1
{
color: black;
margin-bottom: 0;
margin-top: 0;
text-align: center;
font-size: 40px;
}
h3
{
color: black;
font-size: 20px;
margin-top: 3px;
text-align: center;
}
#chatbox
{
background-color: black;
margin-left: auto;
margin-right: auto;
width: 40%;
margin-top: 60px;
}
#userInput {
margin-left: auto;
margin-right: auto;
width: 40%;
margin-top: 60px;
}
#textInput {
width: 87%;
border: none;
border-bottom: 3px solid #009688;
font-family: monospace;
font-size: 17px;
}
#buttonInput {
padding: 3px;
font-family: monospace;
font-size: 17px;
}
.userText {
color: white;
font-family: monospace;
font-size: 17px;
text-align: right;
line-height: 30px;
}
.userText span {
background-color: #009688;
padding: 10px;
border-radius: 2px;
}
.botText {
color: white;
font-family: monospace;
font-size: 17px;
text-align: left;
line-height: 30px;
}
.botText span {
background-color: #EF5350;
padding: 10px;
border-radius: 2px;
}
#tidbit {
position:absolute;
bottom:0;
right:0;
width: 300px;
}

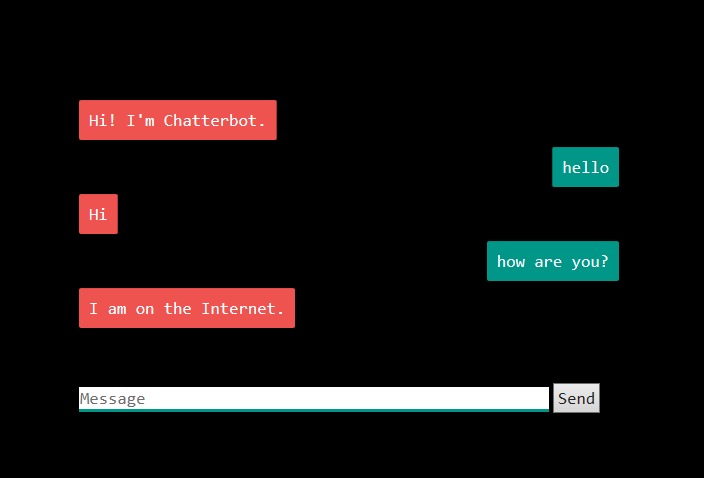
Next, we open the web page and you can see the chat page

There is a text box in which we can provide user input. The robot will generate corresponding response messages for the statement. The more messages we input, the more intelligent the robot will be!