Making image segmentation label data using labelme in Win10 system
preface
This paper mainly introduces how to use labelme to make semantic segmented label data, and convert the generated json files into usable image labels in batch through code.
1, Install labelme3 sixteen point two
1. Install Anaconda (ignore this step if you have a python environment)
There are many online tutorials on how to install Anaconda, which will not be repeated here.
2. Create a new Python virtual environment (if there is a python environment, this step can be ignored)
Create a new virtual environment using the following command:
conda create -n basic_env python=3.6
3. Activate the python virtual environment (if there is a python environment, this step can be ignored)
Activate the virtual environment you just created with the following command:
activate basic_env
3. Install labelme in the virtual environment
Use the following command to install labelme3 16.2:
pip install labelme==3.16.2
2, Making json data using labelme
After installation, enter the following command in the virtual environment to start labelme
labelme
The interface after successful startup is shown in the figure below

Click the "Open Dir" button on the left to open the folder containing the images to be marked, as shown in the lower right corner of the figure below

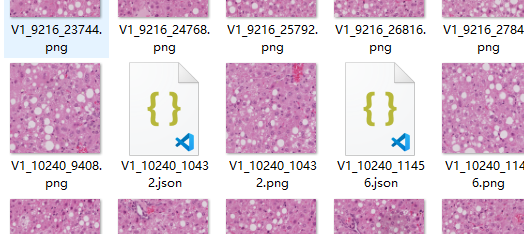
Readers can experience how to label in the software. It should be noted that after labeling a slice, readers are advised to save the generated json file in the same folder as the original image, as shown in the following figure.

3, Convert json data into image data
First, create two folders, one named "JSON", to store the JSON files generated in the previous step; A "label_json" is used to store the generated image data. Move all the JSON files in the original image folder to the JSON folder. (this step must be done, otherwise it may fail later.)

Open the ". \ lib \ site packages \ labelme \ cli" folder in the corresponding environment (my name is "D: \ anaconda3 \ envs \ basic_env \ lib \ site packages \ labelme \ cli"), and replace the original JSON_ to_ dataset. Replace the code in the PY file with the following (or recreate the file):
import argparse
import json
import os
import os.path as osp
import warnings
import PIL.Image
import yaml
from labelme import utils
import base64

def main():
    warnings.warn("This script is aimed to demonstrate how to convert the\n"
                  "JSON file to a single image dataset, and not to handle\n"
                  "multiple JSON files to generate a real-use dataset.")
    parser = argparse.ArgumentParser()
    parser.add_argument('json_file')
    parser.add_argument('-o', '--out', default=None)
    args = parser.parse_args()

    json_file = args.json_file
    if args.out is None:
        out_dir = osp.basename(json_file).replace('.', '_')
        out_dir = osp.join(osp.dirname(json_file), out_dir)
    else:
        out_dir = args.out
    if not osp.exists(out_dir):
        os.mkdir(out_dir)

    count = os.listdir(json_file)
    for i in range(0, len(count)):
        path = os.path.join(json_file, count[i])
        if os.path.isfile(path):
            data = json.load(open(path))

            if data['imageData']:
                imageData = data['imageData']
            else:
                imagePath = os.path.join(os.path.dirname(path), data['imagePath'])
                with open(imagePath, 'rb') as f:
                    imageData = f.read()
                    imageData = base64.b64encode(imageData).decode('utf-8')
            img = utils.img_b64_to_arr(imageData)
            label_name_to_value = {'_background_': 0}
            for shape in data['shapes']:
                label_name = shape['label']
                if label_name in label_name_to_value:
                    label_value = label_name_to_value[label_name]
                else:
                    label_value = len(label_name_to_value)
                    label_name_to_value[label_name] = label_value

            # label_values must be dense
            label_values, label_names = [], []
            for ln, lv in sorted(label_name_to_value.items(), key=lambda x: x[1]):
                label_values.append(lv)
                label_names.append(ln)
            assert label_values == list(range(len(label_values)))

            lbl = utils.shapes_to_label(img.shape, data['shapes'], label_name_to_value)

            captions = ['{}: {}'.format(lv, ln)
                for ln, lv in label_name_to_value.items()]
            lbl_viz = utils.draw_label(lbl, img, captions)

            out_dir = osp.basename(count[i]).replace('.', '_')
            out_dir = osp.join(osp.dirname(count[i]), out_dir)
            if not osp.exists(out_dir):
                os.mkdir(out_dir)

            PIL.Image.fromarray(img).save(osp.join(out_dir, 'img.png'))
            #PIL.Image.fromarray(lbl).save(osp.join(out_dir, 'label.png'))
            utils.lblsave(osp.join(out_dir, 'label.png'), lbl)
            PIL.Image.fromarray(lbl_viz).save(osp.join(out_dir, 'label_viz.png'))

            with open(osp.join(out_dir, 'label_names.txt'), 'w') as f:
                for lbl_name in label_names:
                    f.write(lbl_name + '\n')

            warnings.warn('info.yaml is being replaced by label_names.txt')
            info = dict(label_names=label_names)
            with open(osp.join(out_dir, 'info.yaml'), 'w') as f:
                yaml.safe_dump(info, f, default_flow_style=False)

            print('Saved to: %s' % out_dir)
if __name__ == '__main__':
    main()
Then go to "\ Scripts" (my name is "D:\Anaconda3\envs\basic_env\Scripts") in the corresponding environment and copy the executable labelme_json_to_dataset.exe to the newly created label_json folder.

The next command is in label_json folder, first switch to this directory on the command line, and then activate basic_enc is a virtual environment. Finally, execute the following command:
labelme_json_to_dataset.exe <json Folder name>
The command execution process is shown in the following figure:

After execution, click label_ The image data is generated under the JSON folder.

The file is shown in the figure below, label PNG is the label file we need.

4, Take out each image label data from the corresponding folder
Through the above process, although the json file is converted into image data, we want to put all tag files in the same folder, and sometimes want to get the binary tag data. Therefore, I wrote the following python code: (opencv is used in the binary process, which needs to be installed by the reader)
import os
import shutil
import cv2

label_from_PATH = "E:\csnZanCun\CLAM-SEG\data\label_json"
label_to_PATH = "E:\csnZanCun\CLAM-SEG\data\label"

filepath_list = os.listdir(label_from_PATH)
filepath_list.remove("labelme_json_to_dataset.exe")

# Check if the label folder exists
if not os.path.isdir(label_to_PATH):
    os.mkdir(label_to_PATH)

# Image binarization
bin_img = True

for i, file_path in enumerate(filepath_list):
    src_label = "{}/label.png".format(os.path.join(label_from_PATH, filepath_list[i]))
    label_name = "{}.png".format(file_path[:-5])

    if bin_img:
        dest_label = cv2.imread(src_label)
        dest_label = cv2.cvtColor(dest_label, cv2.COLOR_BGR2GRAY)
        ret, dest_label = cv2.threshold(dest_label, 0, 255, cv2.THRESH_BINARY)
        cv2.imwrite(os.path.join(label_to_PATH, label_name), dest_label)
    else:
        shutil.copy(src_label, os.path.join(label_to_PATH, label_name))

    print("{} has been copied to {}".format(label_name, label_to_PATH))

print("All done!!!")
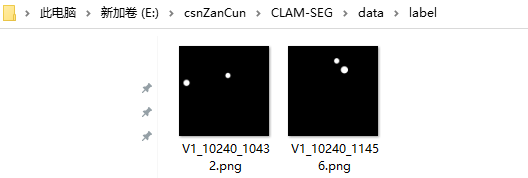
After executing the above code, the label folder is automatically created, and the label image is binarized. The file name of the label image is the same as the original image.

summary
The above is labelme3 16.2 if there is any error in the use process of, please correct it!