Maven
The notes are based on the video https://www.bilibili.com/video/BV1Fz4y167p5 You can refer to the video for unclear places in the learning records
1.1. Four features of maven
1.1.1. Dependency management system
Maven is not a dead reference. It can be modified according to its own needs
The example code is as follows:
<dependencies>
	<dependency>
	      <groupId>org.springframework</groupId>
	      <artifactId>spring-context</artifactId>
	      <version>4.3.7.RELEASE</version>
	 </dependency>
 </dependencies>
The groupId arifactId version above can be modified as needed
groupId: actual project and company name of Maven project
artifactId: Maven module - project name
Version: the corresponding version number
1.1.2. Multi module construction
Maven divides a project into modules
1.1.3. Consistent project structure
The directory structure is unified, and Maven projects created in IDEA and eclipse are common
1.1.4. Consistent build model and plug-in mechanism
2.Maven directory structure
Maven's basic directory structure is SRC - > main - > java and Src - > test
Generally, the code to be submitted is stored in main, while the code to be tested is stored in test
3. Modify local warehouse and change image
3.1. Modify local warehouse
All jar packages in the local repository can be shared by Maven files
Find the settings in conf in the extracted maven package XML file. After opening with Notepad, search localRepository. Will code
<!-- localRepository
   | The path to the local repository maven will use to store artifacts.
   |
   | Default: ${user.home}/.m2/repository
  <localRepository>D:\WorkingSpace\Maven\projects</localRepository>
  -->
Medium
<localRepository>D:\WorkingSpace\Maven\projects</localRepository>
It is suggested that the middle path should be changed to the warehouse Path (folder) established by yourself. It is recommended not to have Disk C, because the accumulated jar packages are large. After modification, copy this code outside the annotation and change it to
<!-- localRepository
   | The path to the local repository maven will use to store artifacts.
   |
   | Default: ${user.home}/.m2/repository
  <localRepository>D:\WorkingSpace\Maven\projects</localRepository>
  -->
<localRepository>D:\WorkingSpace\Maven\projects</localRepository>
3.2 changing the image
Maven will automatically help download resources, and the default resources are on foreign servers. Therefore, we can use the image in Alibaba cloud to speed up the download speed
Similarly, in settings Search for mirror in XML
  <!-- mirrors
   | This is a list of mirrors to be used in downloading artifacts from remote repositories.
   |
   | It works like this: a POM may declare a repository to use in resolving certain artifacts.
   | However, this repository may have problems with heavy traffic at times, so people have mirrored
   | it to several places.
   |
   | That repository definition will have a unique id, so we can create a mirror reference for that
   | repository, to be used as an alternate download site. The mirror site will be the preferred
   | server for that repository.
   |-->
  <mirrors>
    <!-- mirror
     | Specifies a repository mirror site to use instead of a given repository. The repository that
     | this mirror serves has an ID that matches the mirrorOf element of this mirror. IDs are used
     | for inheritance and direct lookup purposes, and must be unique across the set of mirrors.
     |
    <mirror>
      <id>mirrorId</id>
      <mirrorOf>repositoryId</mirrorOf>
      <name>Human Readable Name for this Mirror.</name>
      <url>http://my.repository.com/repo/path</url>
    </mirror>
     -->
    <mirror>
      <id>maven-default-http-blocker</id>
      <mirrorOf>external:http:*</mirrorOf>
      <name>Pseudo repository to mirror external repositories initially using HTTP.</name>
      <url>http://0.0.0.0/</url>
      <blocked>true</blocked>
    </mirror>
  </mirrors>
Add before bottom
<mirror>
            <id>alimaven</id>
            <mirrorOf>central</mirrorOf>
            <name>aliyun maven</name>
            <url>http://maven.aliyun.com/nexus/content/repositories/central/</url>
</mirror>
4. Manually compile Maven
Take the following maven01 as an example for configuration
First, create a Hello class in Maven. The path is D: \ workingspace \ maven \ projects \ maven01 \ SRC \ main \ Java \ com \ demo \ Hello java
After creation, under maven01 path, double-click the path, mark it blue and enter cmd to automatically execute the small black box
Enter the command mvn compile in the small black box to compile maven. If ERROR and BUILD FAILURE do not occur
Continue to enter the command MVN exec: Java - dexec Mainclass = "com.demo.Hello" yes The main method in Java is compiled without ERROR
If you fail, think from the following three aspects
1. Execute without administrator authority
2. There is a problem with the JDK environment configuration and it needs to be reinstalled
3. There is an error in the package name when entering the path. The path of the second command above is actually the package name (xom.demo) + class name (Hello)
5. Common commands under maven
5.1. Common command formats
| command | describe |
|---|---|
| mvn -version | display version information |
| mvn clean | Clean up temporary documents during project production |
| mvn compile | Compile source code |
| mvn package | The project packaging tool generates jar or war files in the target directory |
| mvn test | Test command |
| mvn install | Copy the packaged files to the local warehouse for use by other modules |
| mvn depioy | Publish the packaged files to remote reference for others to download |
| mvn site | A web site that generates project related information |
| mvn eclipse:eclipse | Convert project to eclipse project |
| mvn dependency:tree | Print out the entire dependency tree of the project |
| mvn archetype:generate | Create Maven's normal java project |
| mvn tomcat7:run | Running web application in tomcat container |
| mvn jetty:run | Call the Run target of the Jetty plug-in to start the web application in the Jetty Servlet container |
5.2. Command parameters
5.2.1.-D pass in attribute parameters
Such as MVN package - dmaven test. Skip = true means that Maven test. The attribute skip is assigned to true, that is, the test file is skipped during packaging
5.2.2.-P use the specified Profile configuration
During the project development process, there will be many different environments, including local, test, development, formal, etc. each environment will have different profile configurations. When using Maven, we need to specify different environments
<profiles>
        <profile>
            <id>dev</id>
            <properties>
                <env>dev</env>
            </properties>
            <activation>
                <activeByDefault>true</activeByDefault>
            </activation>
        </profile>
        <profile>
        <id>qa</id>
        <properties>
            <env>qa</env>
        </properties>
        <activation>
            <activeByDefault>true</activeByDefault>
        </activation>
    </profile>
        <profile>
            <id>pre</id>
            <properties>
                <env>pre</env>
            </properties>
            <activation>
                <activeByDefault>true</activeByDefault>
            </activation>
        </profile>
        <profile>
            <id>prod</id>
            <properties>
                <env>prod</env>
            </properties>
            <activation>
                <activeByDefault>true</activeByDefault>
            </activation>
        </profile>
    </profiles>
For example, MVN package - PDEV - dmaven test. Skip = true specifies the dev environment
6. Maven project integrated in IDEA
1. Search Maven in file - > setting
2. Select your own extracted maven path in Maven home path
For example, D:/WorkingSpace/Maven/apache-maven-3.8.1
3. Check Override in the User setting file and select settings in the conf folder under the maven path above xml
For example, D: \ workingspace \ maven \ apache-maven-3.8.1 \ conf \ settings xml

7. Creation of Java project
If you find no src directory when you create it, check out another blog: (5 messages) using idea to create maven project without src directory_ Days_of_April blog - CSDN blog_ idea creates maven project without src directory
Simply put, do not select quickstart to create, just create it directly, and then create quickstart after maven loads it for the first time
7.1. Create step
Don't wait for maven to download a lot of content. Remember to wait a few minutes for maven to download all the content
1. Create a new Project in the File, and select Maven object. First, make a normal creation without checking Create from archetype and let it load all the contents (directly click to the end, and the path can refer to the following methods)
2. Check Create from archetype, and then select the file with quickstart suffix below

3. Select your own GroupId and ArtifactId
Generally, GroupId is com Xxx xxx can be your own name or the name of your company
ArtifactId is the automatically generated project name

4. In the next step, IDEA will still let you choose the maven path. You can do it directly according to the above settings

5. Be patient when maven is loaded after creation
7.2. Create resource directory
1. First, create a directory named resources under the main directory and test directory respectively
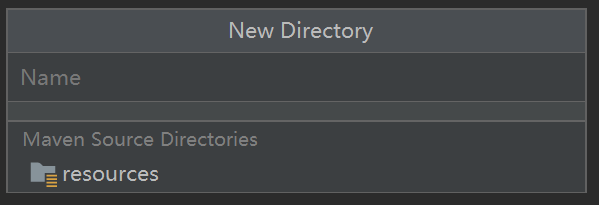
Here, you can directly click the following resources to ignore the subsequent steps
2. If it is not as shown in the above figure, right-click the created resources in the main directory and select the resources boot in the Mark Directory as
3. For the resources under the test directory, right-click the created resources and select Test resources boot in the Mark Directory as
7.3. Compile project
1. Click Add Configuration in the upper right corner
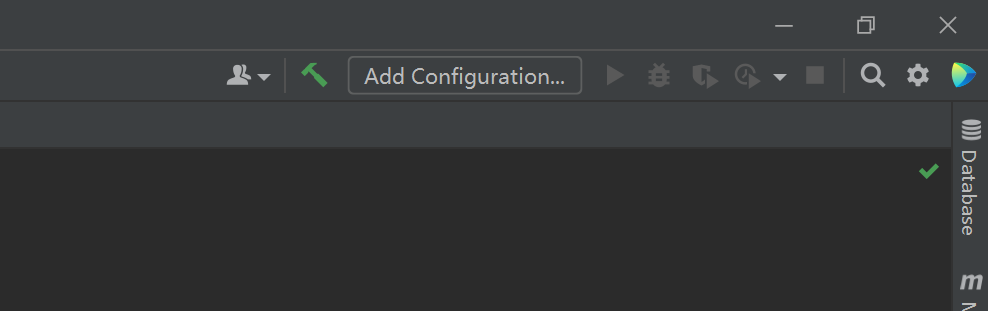
2. Click + and select Maven
3. Enter the command you want to execute in common line without adding mvn, because it is clearly Maven project here. Click Apply and then click OK

4. After setting, click the small triangle or bug on the right of Add Configuration to compile. This is the same as the meaning in eclipse. One represents normal compilation and the other represents debugging compilation. After the compile command is executed, it will be generated in the red target directory on the left class file
5. If the package command is used, the jar package will be generated in the target
6. You can also select common commands in Maven on the right

8. Creation of Web project
8.1. Create step
The template in Java is quickstart, the template in the Web is webapp, and the rest are consistent
After creation, there will be an index JSP file, which is different from Java projects
8.2. Modify some contents
8.2.1. Modify JDK version to 1.8
<properties>
    <project.build.sourceEncoding>UTF-8</project.build.sourceEncoding>
    <maven.compiler.source>1.8</maven.compiler.source>
    <maven.compiler.target>1.8</maven.compiler.target>
  </properties>
8.2.2. Set unit test version to 4.12
<dependencies>
    <dependency>
      <groupId>junit</groupId>
      <artifactId>junit</artifactId>
      <version>4.12</version>
      <scope>test</scope>
    </dependency>
  </dependencies>
8.2.2. Delete pluginManagement
<pluginManagement><!-- lock down plugins versions to avoid using Maven defaults (may be moved to parent pom) -->
      <plugins>
        <plugin>
          <artifactId>maven-clean-plugin</artifactId>
          <version>3.1.0</version>
        </plugin>
        <!-- see http://maven.apache.org/ref/current/maven-core/default-bindings.html#Plugin_bindings_for_war_packaging -->
        <plugin>
          <artifactId>maven-resources-plugin</artifactId>
          <version>3.0.2</version>
        </plugin>
        <plugin>
          <artifactId>maven-compiler-plugin</artifactId>
          <version>3.8.0</version>
        </plugin>
        <plugin>
          <artifactId>maven-surefire-plugin</artifactId>
          <version>2.22.1</version>
        </plugin>
        <plugin>
          <artifactId>maven-war-plugin</artifactId>
          <version>3.2.2</version>
        </plugin>
        <plugin>
          <artifactId>maven-install-plugin</artifactId>
          <version>2.5.2</version>
        </plugin>
        <plugin>
          <artifactId>maven-deploy-plugin</artifactId>
          <version>2.8.2</version>
        </plugin>
      </plugins>
    </pluginManagement>
8.2.3. Add plug-ins for Web deployment (two common servers)
Add the following two pieces of code to the plugins
1.Jetty plug-in
<!--Set in plugins In label-->
      <plugin>
        <!-- jetty plug-in unit, Set port and context path -->
          <groupId>org.mortbay.jetty</groupId>
          <artifactId>maven-jetty-plugin</artifactId>
          <version>6.1.25</version>
          <configuration>
            <!-- Hot deployment, scanning every 10 seconds -->
            <scanIntervalSeconds>10</scanIntervalSeconds>
            <!-- This is the external access path of the project -->
            <contextPath>/Web03</contextPath>
            <connectors>
              <connector implementation="org.mortbay.jetty.nio.SelectChannelConnector">
              <!--The access port number is configured here. The port number must not be written to 1-1024-->
              <port>9090</port>
            </connector>
          </connectors>
        </configuration>
      </plugin>
2.Tomcat plug-in
<plugin>
        <groupId>org.apache.tomcat.maven</groupId>
        <artifactId>tomcat7-maven-plugin</artifactId>
        <version>2.1</version>
        <configuration>
          <!-- This is the external access path of the project -->
          <path>/Web03</path>
          <!--The access port number is configured here -->
          <port>8081</port>
          <!--Character set encoding -->
          <uriEncoding>UTF-8</uriEncoding>
          <!--Server name -->
          <server>tomcat7</server>
      </configuration>
    </plugin>
After adding, it will be red, so you need to click the cycle button in Maven on the right to download
8.3. Start project
1. Loading
Consistent with the Java project, you need to click Add Configuration in the upper right corner and select Maven, but write the jetty:run command at the original Command line
If it is tomcat, write tomca7:run at Command line
2. Start
After the jetty:run command is executed, click the green triangle on the right, and the loaded port will be displayed below
[INFO] Started SelectChannelConnector@0.0.0.0:9090
After the tomcat7:run command is executed, it will tell which port it is executed on
[INFO] Running war on http://localhost:8081/Web03
Take jetty as an example, enter in the browser http://localhost:9090/Web03/index.jsp You can query index Output content in JSP

8.4. Freely determined port
1. Comment out the whole code of the specified port
<connector implementation="org.mortbay.jetty.nio.SelectChannelConnector">
              <!--The access port number is configured here -->
              <port>9090</port>
            </connector>
2. Rewrite a Maven in Add Configuration
Instead of just typing jetty:run Instead, enter jetty:run - djetty Port = 8899, where 8899 is the name of the port
9. Basic concept of Maven warehouse
9.1. Classification of Maven warehouse
For maven, there are only remote warehouses and local warehouses. The remote repository contains core plug-ins and jar packages that can be downloaded. The local warehouse contains all the plug-ins previously loaded on this computer, which can be used by all Maven files running on this computer. If the required file does not exist in the remote or local warehouse, an error will be reported.
The concept of remote warehouse: central warehouse, private server and other public warehouses
Central warehouse:
The central warehouse is where Maven downloads the jar package under the default configuration. Since the local computer warehouse was empty when Maven was first running, it needed to be downloaded from the central warehouse.
Private server:
Private server is a private warehouse server set up in the LAN to save bandwidth and time. It can act as an agent for external remote warehouses, and can also deploy internal projects to private servers for other projects. You can also upload some components that cannot be obtained from the outside from the local
Other public libraries:
For example, Alibaba cloud warehouse
9.2. How to find dependent files
1. Search mvn in the web page
2. Click Maven repository
3. Search the file you want and select the file version
4. Click to copy the internal code
5. Add to POM XML in the relevant location
10. Building multi module projects in Maven environment
Maven is divided into multiple modules, which is not only conducive to downloading, but also can select specific multiple modules for downloading according to their own needs. Take the following four modules as an example
| modular | significance |
|---|---|
| maven_parent | Base module, also known as parent (pom) |
| maven_dao | Access layer of database, such as jdbc operation (jar) |
| maven_service | Business logic layer (jar) of the project |
| maven_controller | Used to receive requests and respond to data (war) |
10.1. Create maven_parent module
Select File - > New - > project
Create a Maven project without template and change its name to parent
10.2. Create maven_dao module
Create a new Module project based on the parent and select the Module quickstart

10.3. Create maven_service module
With maven_dao is created in the same way
10.4. Create maven_controller module
Just select the webapp module, and the others are the same as above
10.5. Modify mode configuration
1. Modify JDK version
2. Unit test JUnit version
3. Delete redundant configuration
10.6. Set dependencies between modules
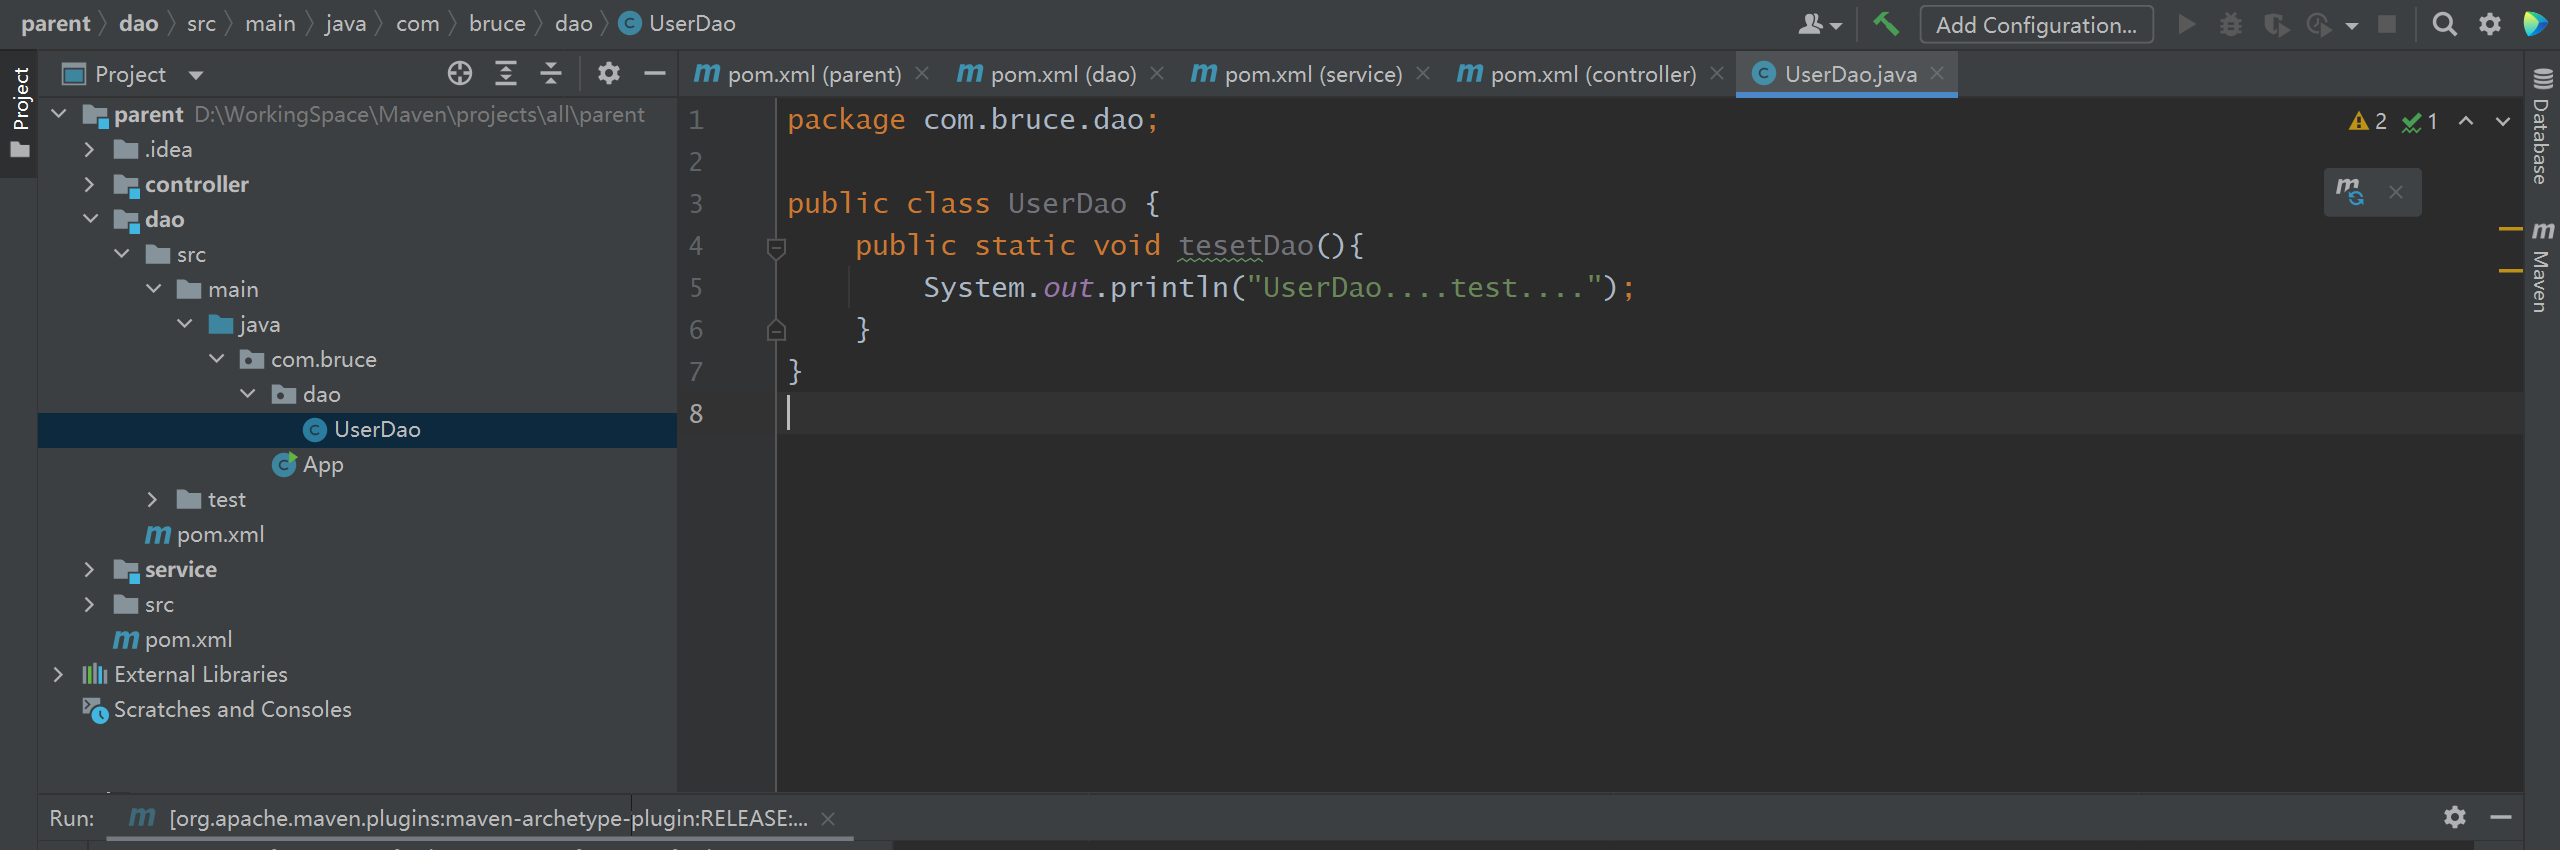
10.6.1.maven_dao
First on COM Create a package under XXXX
Create a UserDao class in the package
package com.bruce.dao;

public class UserDao {
    public static void tesetDao(){
        System.out.println("UserDao....test....");
    }
}
10.6.2.maven_service
Create dependency on dao
<!--add to dao Module dependency-->
    <dependency>
      <groupId>com.bruce</groupId>
      <artifactId>dao</artifactId>
      <version>1.0-SNAPSHOT</version>
    </dependency>
Create UserService class
package com.bruce;

import com.bruce.dao.UserDao;

public class UserService {

    public  static void testService(){
        System.out.println("UserService Tset....");
        //Method calling UserDao
        UserDao.tesetDao();
    }
}
10.6.3.maven_controller
Create dependency on service
<!--Create pair service Module dependency-->
    <dependency>
      <groupId>com.bruce</groupId>
      <artifactId>service</artifactId>
      <version>1.0-SNAPSHOT</version>
    </dependency>
<!--add to Servlet Dependence of-->
    <dependency>
      <groupId>javax.servlet</groupId>
      <artifactId>javax.servlet-api</artifactId>
      <version>3.0.1</version>
      <scope>provided</scope>
    </dependency>
Under controller, we need to create our own java folder and right-click in Mark Directory as to use it as a Resource Root
Create the UserServlet class under the java folder
package com.bruce;

import com.bruce.UserService;

import javax.servlet.ServletException;
import javax.servlet.annotation.WebServlet;
import javax.servlet.http.HttpServlet;
import javax.servlet.http.HttpServletRequest;
import javax.servlet.http.HttpServletResponse;
import java.io.IOException;

@WebServlet("/user")
public class UserServlet extends HttpServlet {

    @Override
    protected void service(HttpServletRequest req, HttpServletResponse resp) throws ServletException, IOException {
        System.out.println("UserServlet Test...");
        //Call the method of the service module
        UserService.testService();
    }
}
Add tomcat server in build
<plugins>
    <plugin>
      <groupId>org.apache.tomcat.maven</groupId>
      <artifactId>tomcat7-maven-plugin</artifactId>
      <version>2.1</version>
      <configuration>
        <!-- This is the external access path of the project -->
        <path>/Web03</path>
        <!--The access port number is configured here -->
        <port>8081</port>
        <!--Character set encoding -->
        <uriEncoding>UTF-8</uriEncoding>
        <!--Server name -->
        <server>tomcat7</server>
      </configuration>
    </plugin>
    </plugins>
10.6.4. Start project
Start according to the startup method of tomcat in the previous section
If the startup fails, you need to install the four items with the command (install under Maven in Add Configuration) for other items
Note that after install is set, all four installs should be executed once

In addition to Tomcat at the bottom, the other four are install. Start from the parent, execute install layer by layer, and finally execute tomcat07
11. Packaging operation of maven
First of all, it should be clear that the jar package is the compressed package of the Java project, and the war package is the compressed package of the Web project
11.1. Create a maven project
If there is no java directory inside, you need to add it manually. The adding process is the same as that of the controller above. Use the java folder as the Resources Root (source folder)
Similarly, if there is no resources directory, you should add it manually and use it as a Resources Root (source folder)

11.2. Create the required folder
As shown in the figure

Take dev as an example
bean.xml is
Indicates that it is a dev file
<bean>
    dev
</bean>
Under other folders are test and properties
db.properties
User and password respectively
uname=root
upwd=root
The content can be different in the other two places, because the account and password can be different
11.3. Add profile configuration
Just put it inside (e.g. after dependencies)
        <!--Packaging environment configuration development environment test environment formal environment-->
<profiles>
  <profile>
    <id>dev</id>
    <properties>
      <env>dev</env>
    </properties>
    <!--Default packaging when no environment is specified dev environment-->
    <activation>
      <activeByDefault>true</activeByDefault>
    </activation>
  </profile>
  <profile>
    <id>test</id>
    <properties>
      <env>test</env>
    </properties>
  </profile>
  <profile>
    <id>product</id>
    <properties>
      <env>product</env>
    </properties>
  </profile>
</profiles>
It should be noted that the value in env and the value in id should correspond to the file name as much as possible, so it is easy to find
11.4. Set resource file configuration
Put in build
<!--The configuration of the project resource file is placed in build in-->
    <resources>
      <resource>
        <directory>src/main/resources/${env}</directory>
      </resource>
      <resource>
        <directory>src/main/java</directory>
        <includes>
          <include>**/*.xml</include>
          <include>**/*.properties</include>
          <include>**/*.tld</include>
        </includes>
        <filtering>false</filtering>
      </resource>
    </resources>
The formats here are fixed. Just copy directly when using
filtering is related to the replacement of file names. You can close it directly here
11.5. Enter the maven command
1. Create a new maven item in Add Configuration, named package, and the command is package
2. Create a new maven item named package in Add Configuration_ The dev command is clean compile package - PDEV - dmaven test. skip=true
When Internet users access your project, they use it directly and do not need to use the test file. Therefore, skip the test related files when packaging

And so on_ test,package_ product
11.6. Under the target directory, you can access the war compressed package
For example, execute package_test, the corresponding bean in it XML and DB Properties is the corresponding value set by ourselves, and so on. It will be overwritten according to its own execution
12. Basic concept of Maven dependency
12.1. Dependent basic configuration
1. Basic coordinates: groupId, artifactId, version basic coordinates are the most important. Maven needs to find the required data according to the coordinates
2.Type: the type of dependency is jar by default
3. Dependency Scope
Compile: compile the dependency range. If it is not specified, it will be used by default
test: test dependency range, which is only valid for testing classpath
Provided: the dependency range has been provided, which is not required at runtime. It is valid for compiling and testing classpath
Runtime: runtime dependency range, which is valid for testing and running classpath
System: the system dependency range is consistent with the valid range of provided. However, due to the dependency path explicitly specified by the systemPath element, the build may not be portable, so it should be used with caution
12.2. Dependency range
Maven will use a set of Classpaths when compiling the main code, specifically the above five dependency ranges
12.3. Transitive dependency
For example, A - > b - > C, when we use A, we don't have to consider what to rely on and whether there are redundant dependencies. Maven will resolve the pom of each dependency and introduce the necessary indirect dependencies into the current project in the form of transitive dependencies.
But transitive dependencies can cause conflict problems.
That is, the versions of a - > b - > C 'and a - > e - > C' are different, which will cause conflicts. Therefore, you need to add the following code
    <dependencies>
        <dependency>
            <groupId>A</groupId>
            <artifactId>A</artifactId>
            <version>xxx</version>
            <exclusions>
                <exclusion>
                    <groupId>C</groupId>
                    <artifactId>C</artifactId>
                </exclusion>
            </exclusions>
        </dependency>

        <dependency>
            <groupId>B</groupId>
            <artifactId>B</artifactId>
        </dependency>
    </dependencies>