Let's review the directory structure of maven specification:

1. Build Maven project manually
Let's start by creating maven projects manually
(1) Create the directory mvnproject under disk D and enter it as our operation directory
(2) Create our maven project, create a directory project Java as our project folder, and enter it
(3) Create the directory where the java code (source code) is located, that is, create src/main/java
(4) Create the directory where the configuration file is located, that is, create src/main/resources
(5) Create the directory where the test source code is located, that is, create src/test/java
(6) Create a directory for storing test configuration files, namely src/test/resources
(7) Create a package in src/main/java (note that the directory is created in the windos folder) com/itheima, and create demo in this directory java file, as the java program required for demonstration, the content is as follows
package com.itheima;

public class Demo{
	public String say(String name){
		System.out.println("hello "+name);
		return "hello "+name;
	}
}
(8) Create a test package (directory) com/itheima in src/test/java, and create the test program demotest java
package com.itheima;

import org.junit.*;
public class DemoTest{

	@Test
	public void testSay(){
		Demo d = new Demo();
		String ret = d.say("maven");
		Assert.assertEquals("hello maven",ret);
	}

}
(9) Create pom.com under project Java / SRC XML file, edit as follows
<?xml version="1.0" encoding="UTF-8"?>
<project
    xmlns="http://maven.apache.org/POM/4.0.0"
    xmlns:xsi="http://www.w3.org/2001/XMLSchema-instance"
    xsi:schemaLocation="http://maven.apache.org/POM/4.0.0 http://maven.apache.org/maven-v4_0_0.xsd">

    <modelVersion>4.0.0</modelVersion>

    <groupId>com.itheima</groupId>
    <artifactId>project-java</artifactId>
    <version>1.0</version>
    <packaging>jar</packaging>

    <dependencies>
        <dependency>
            <groupId>junit</groupId>
            <artifactId>junit</artifactId>
            <version>4.12</version>
        </dependency>
    </dependencies>

</project>
Through the above operations, we have built the project structure of maven. Now we will build our project through maven
maven's build command starts with mvn, followed by function parameters. You can execute multiple commands at one time, separated by spaces
mvn compile: compile
mvn clean: clean
mvn test: Test
mvn package: package
mvn install: install to local warehouse
Let's do the following:
(1) Execute mvn compile in the DOS command window where project Java is located to compile the source code. Of course, you need to download the relevant plug-ins for the first execution

The editing results are as follows:
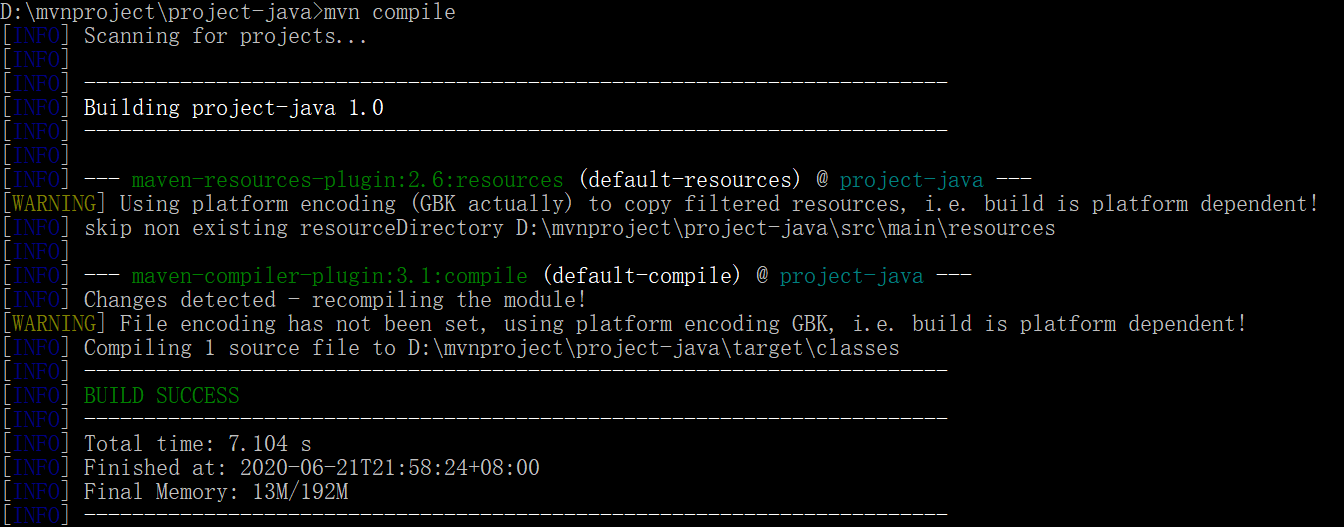
After compilation, a directory target is added under the project Java. In this directory, some things compiled by maven are stored
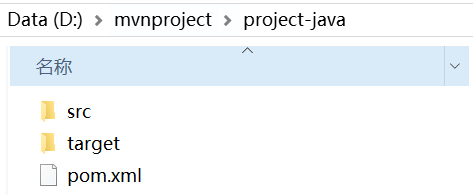
We can go to the target directory to check
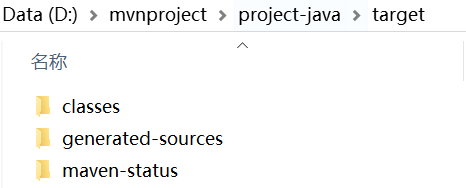
The generated classes directory is the compiled bytecode file
(2) Of course, if we want to clean up these things, we just need to execute the mvn clean command. After cleaning up, the target directory will disappear
(3) If we want to execute the test program in the test package, we just need to execute the mvn test command
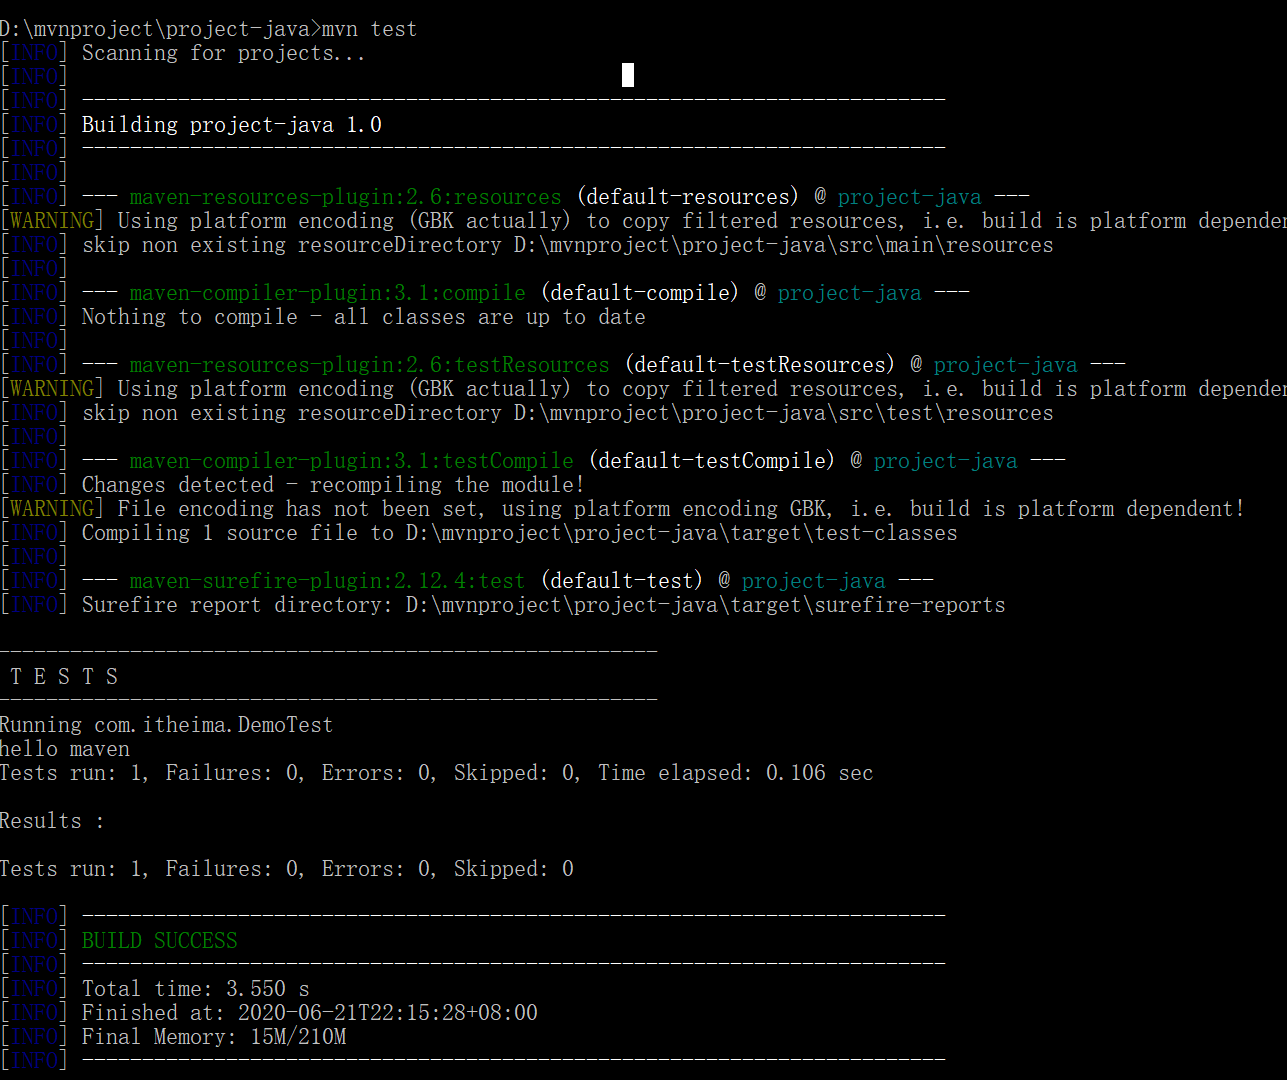
At this time, there will be more things in the target directory
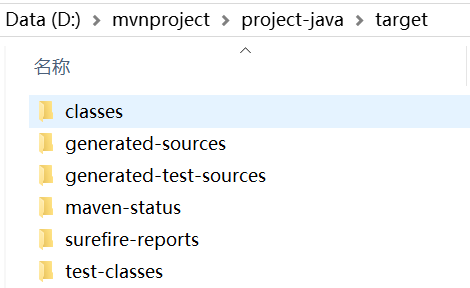
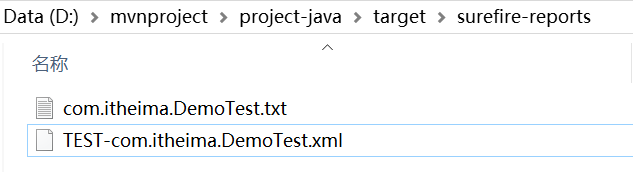
The generated test classes are the bytecode files of the test code, and the surefire reports are the test reports generated by it
(4) Use the mvn package command to package, as follows
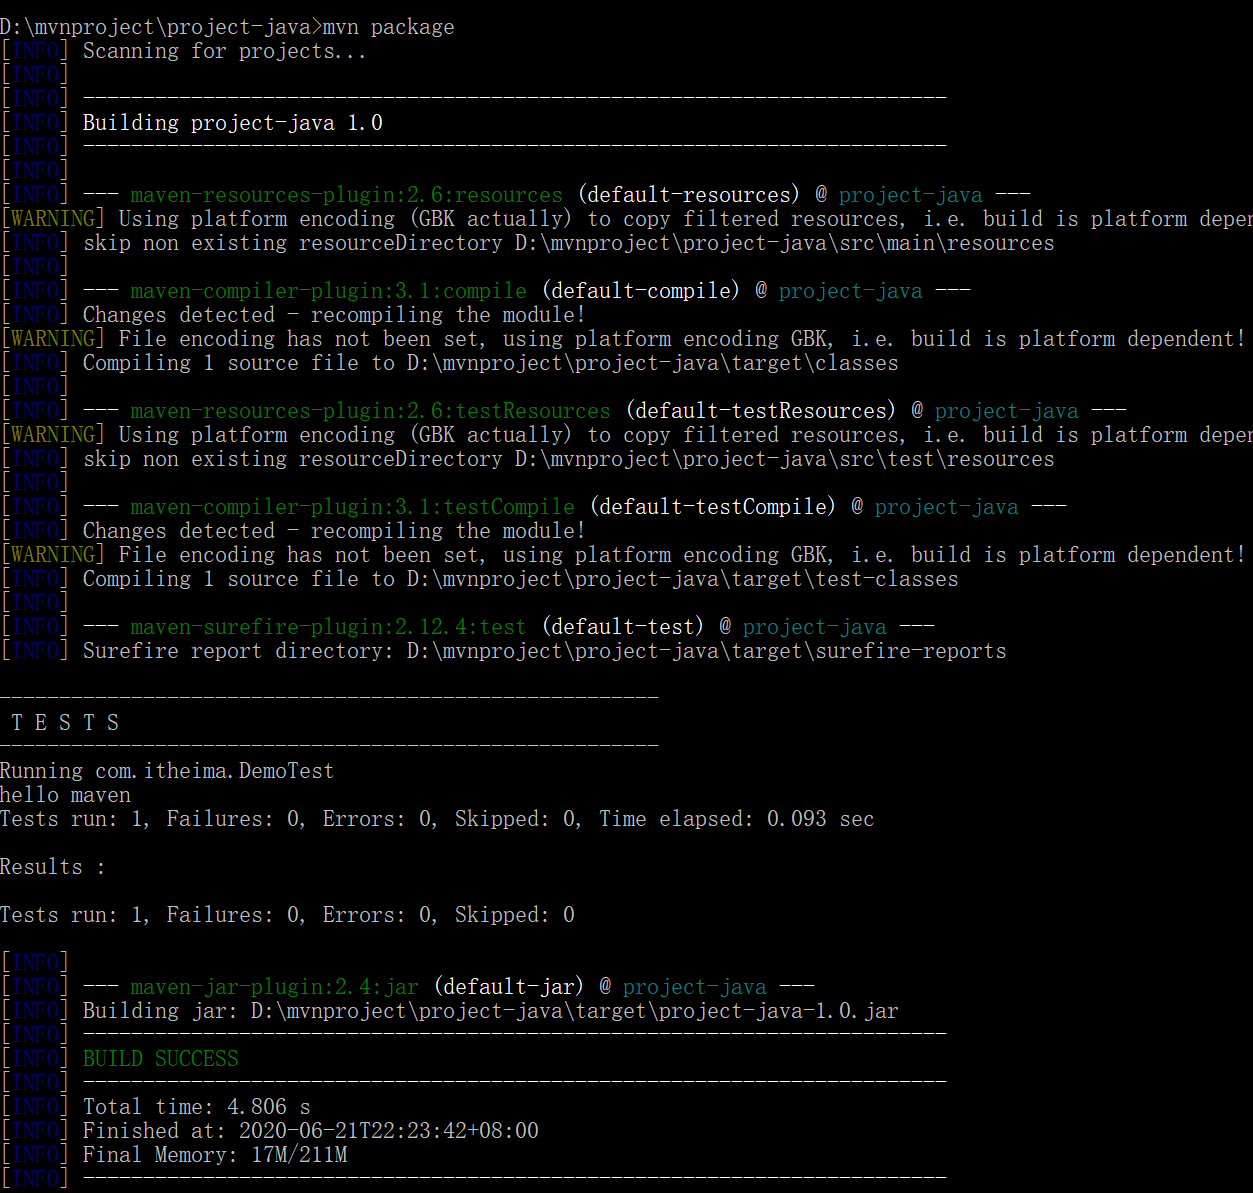
You can see the packaging results in the generated target directory
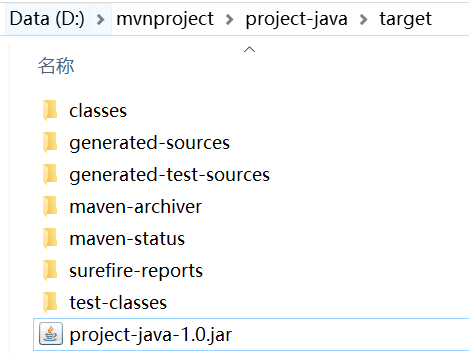
Of course, if you carefully look at the output of DOS window, you will find that maven will execute the first two commands MVN compile and MVN test when mvn package command
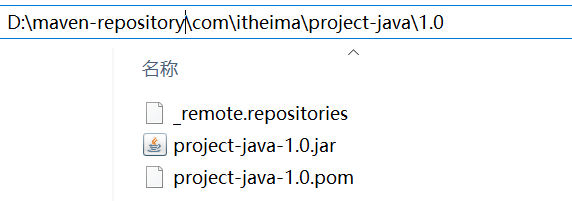
(5) Use the mvn install command to install and store the package of the project into the local warehouse

If you check the output carefully, you will find that the mvn install command will also execute the previous commands
At this time, we can go to the local warehouse to find it. How to find it? This is very important
maven is stored in the local warehouse according to the structure of groupId/artifactId/version
We created the maven project manually, which is relatively troublesome. maven also thinks so. Therefore, maven itself provides us with relevant plug-ins to help us build the project quickly. Of course, these are some commands:
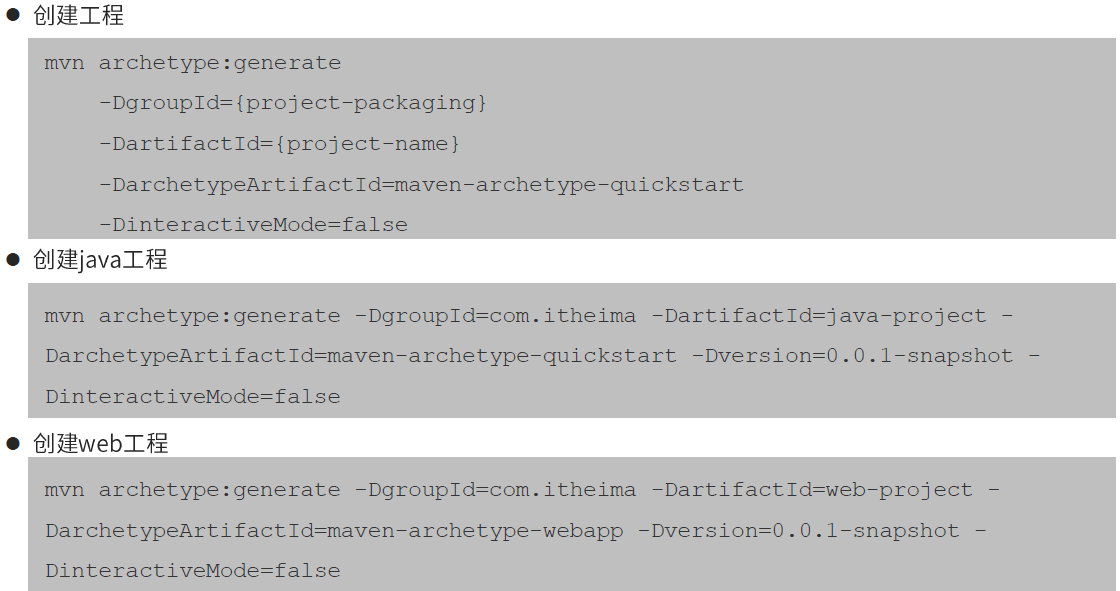
These commands don't need to be remembered, because we don't need them in actual operation, because we have basically used some IDE tools for project development in actual development. These IDE tools are basically integrated with Maven, and our operation is very simple.
2. Build maven project with IDEA tool
2.1. Create projects without prototypes
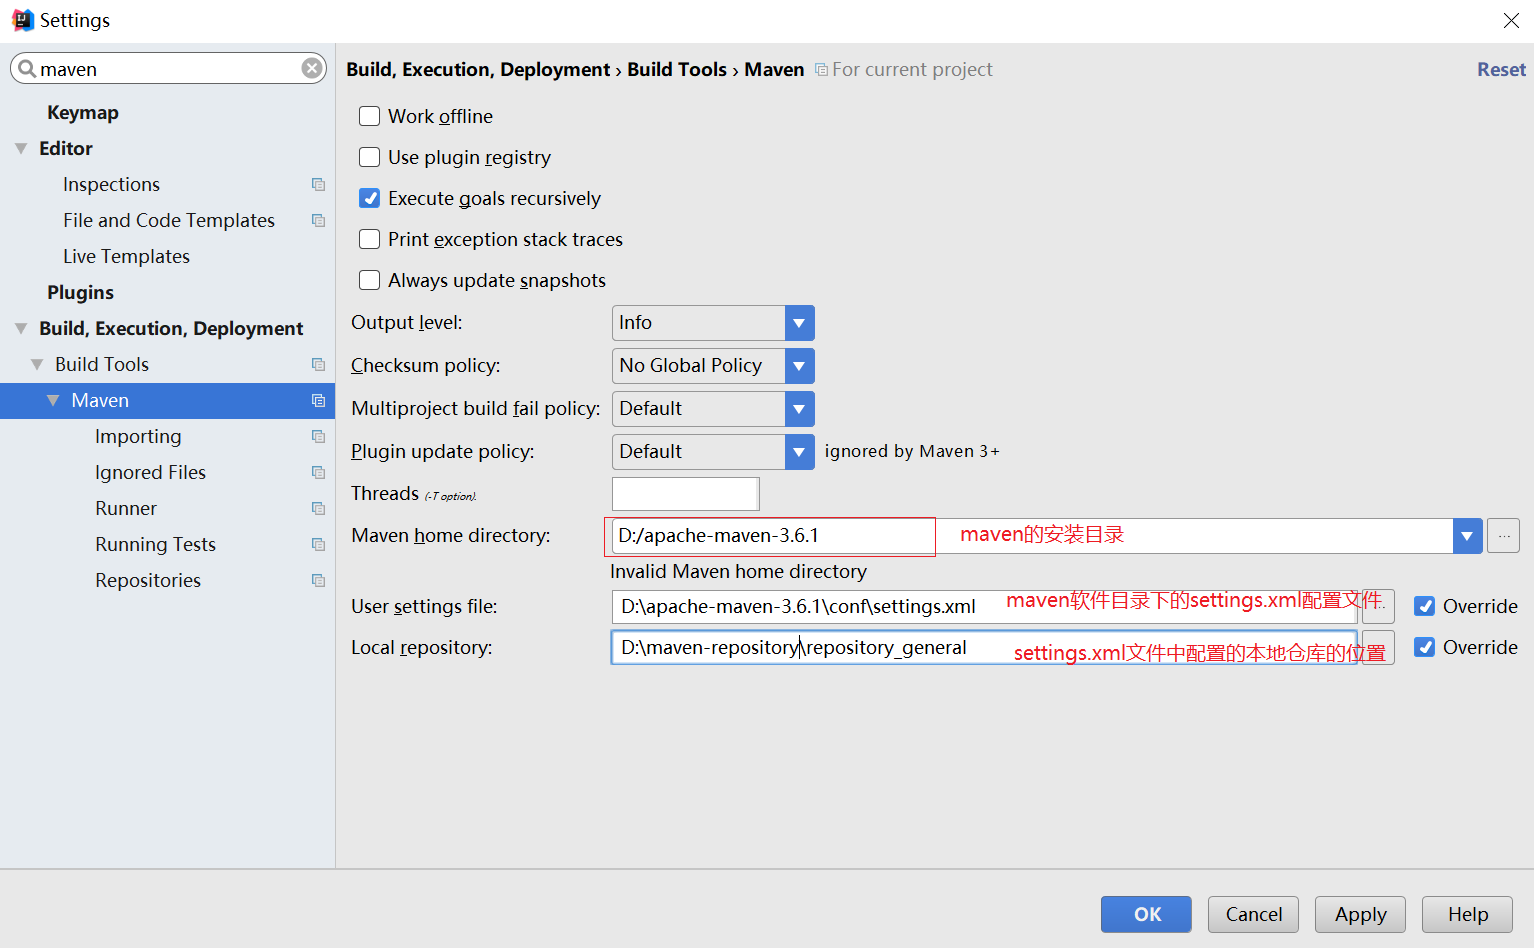
(1) Configure Maven in IDEA
(2) create maven project
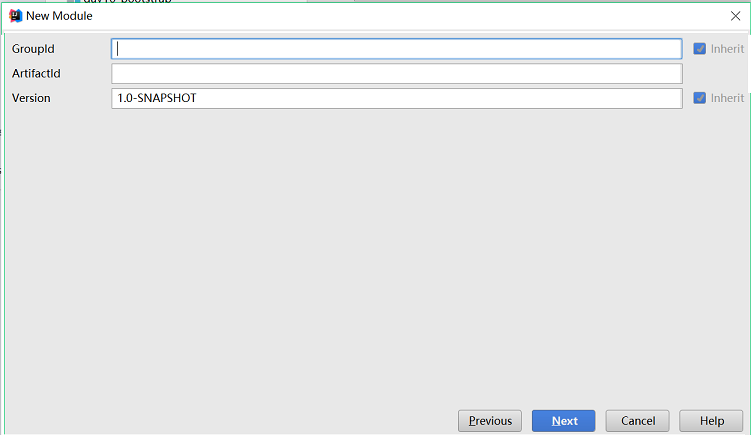
(3) Fill in the coordinates of the project
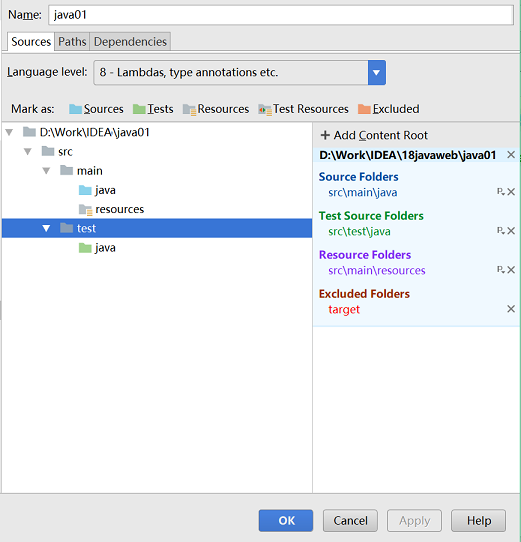
(4) Check whether the color mark of each catalog is correct
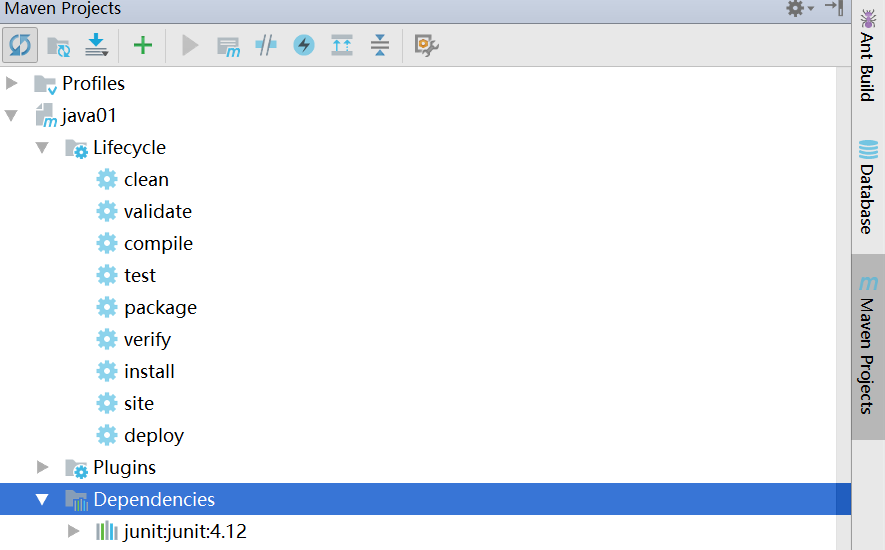
(5) there is a maven management interface on the right side of the IDEA, which can be clicked to view
(6) in the POM of the project Add project resource dependency to XML file
<dependencies>
    <dependency>
        <groupId>junit</groupId>
        <artifactId>junit</artifactId>
        <version>4.12</version>
    </dependency>
</dependencies>
(7) Create source code: com itheima. Demo
package com.itheima;
public class Demo{
    public String say(String name){
        System.out.println("hello "+name);
        return "hello "+name;
    }
}
(8) create test code: com itheima. DemoTest
package com.itheima;
import org.junit.Assert;
import org.junit.Test;
public class DemoTest{
@Test
public void testSay(){
Demo d = new Demo();
String ret = d.say("maven");
Assert.assertEquals("hello maven",ret);
}
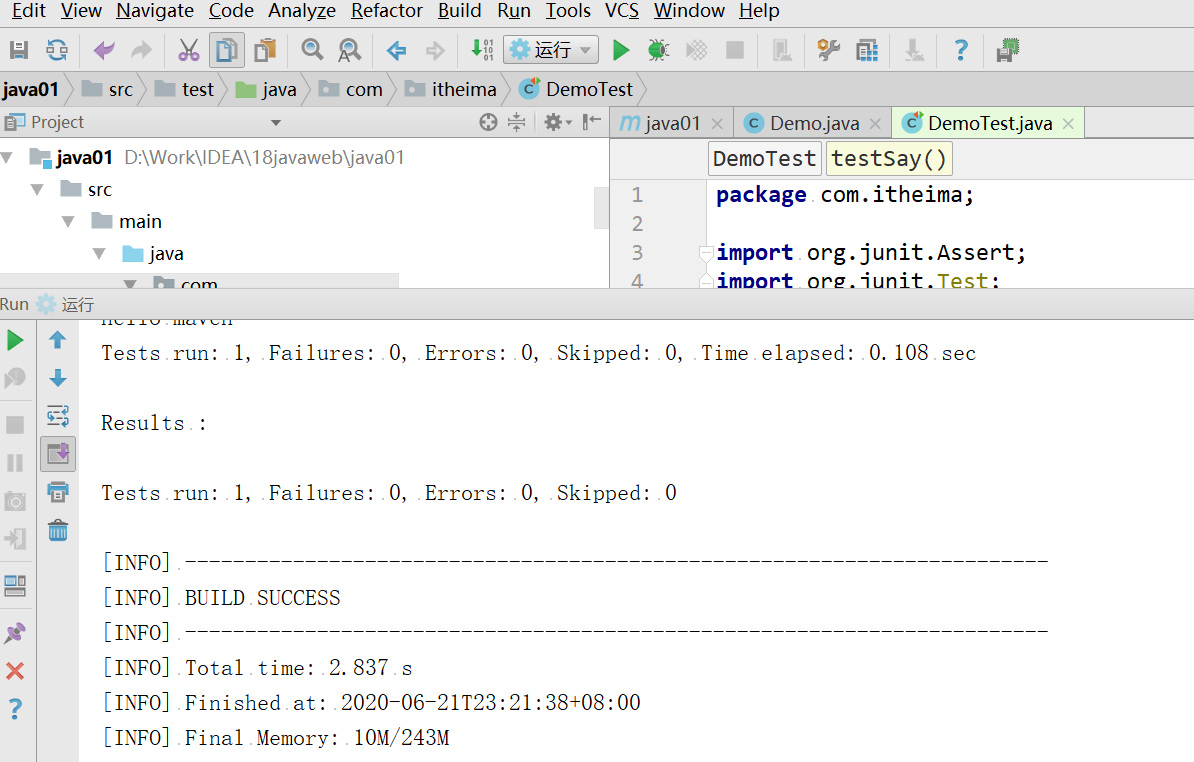
}You can then run the test
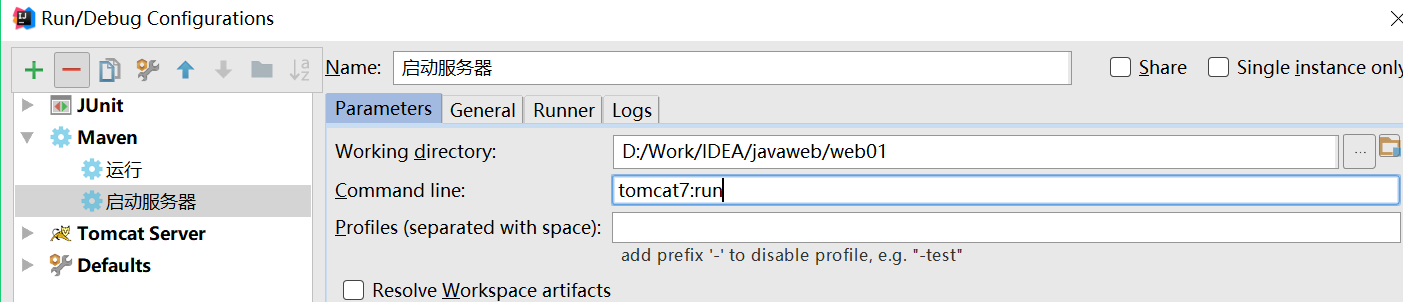
When running, you can edit the running template:
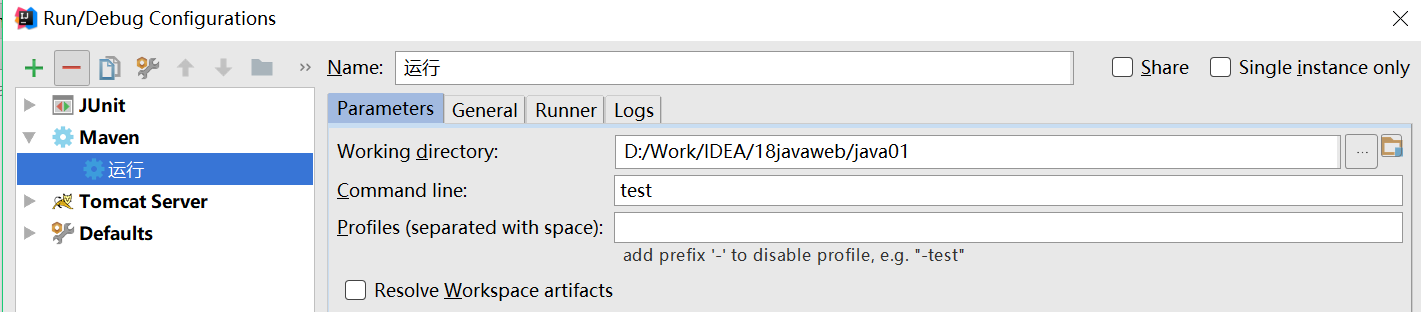
Then click Run:
2.2. Create projects using prototypes
-
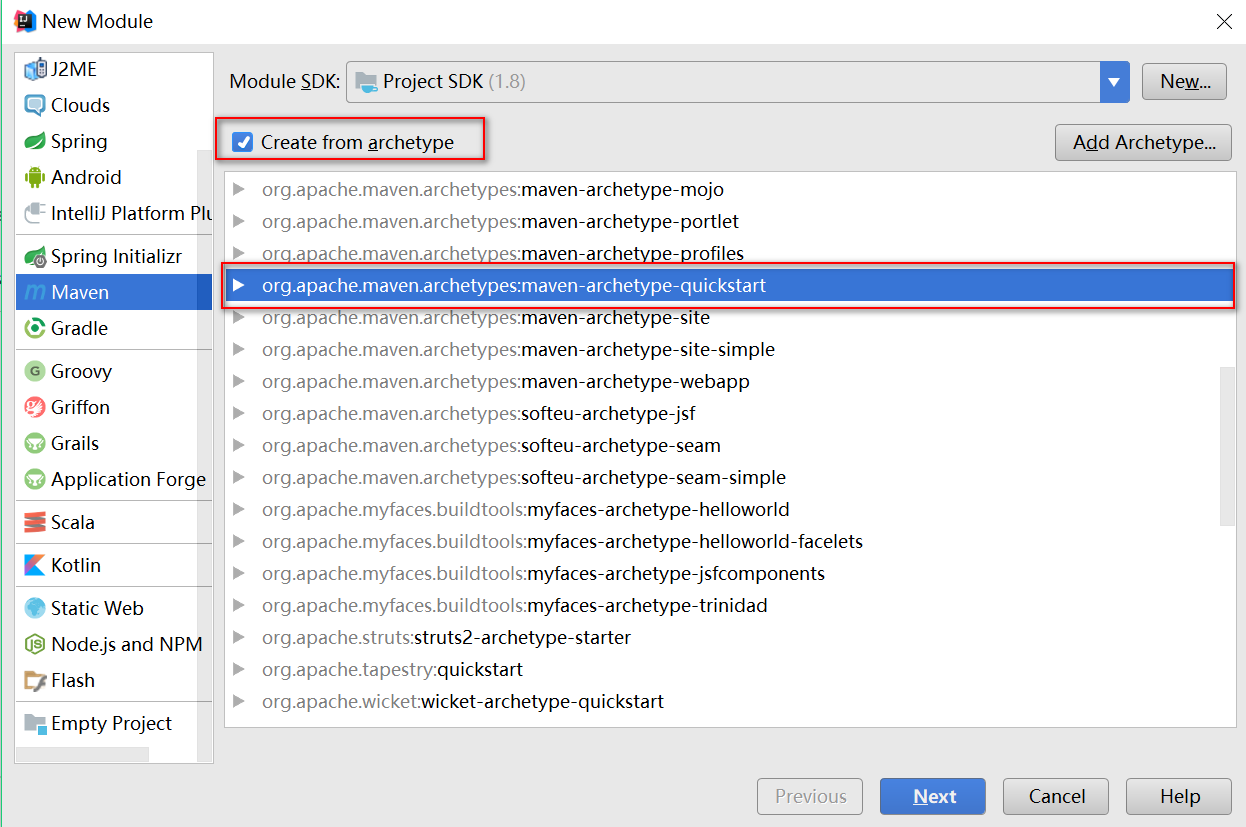
First, let's look at how to create an ordinary java project:
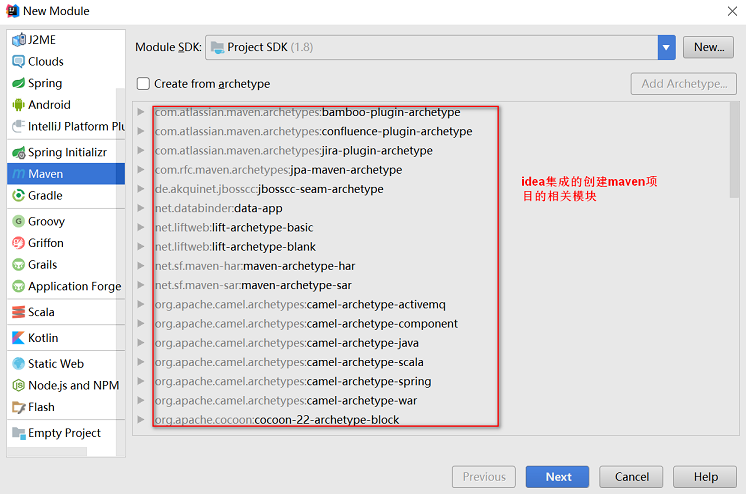
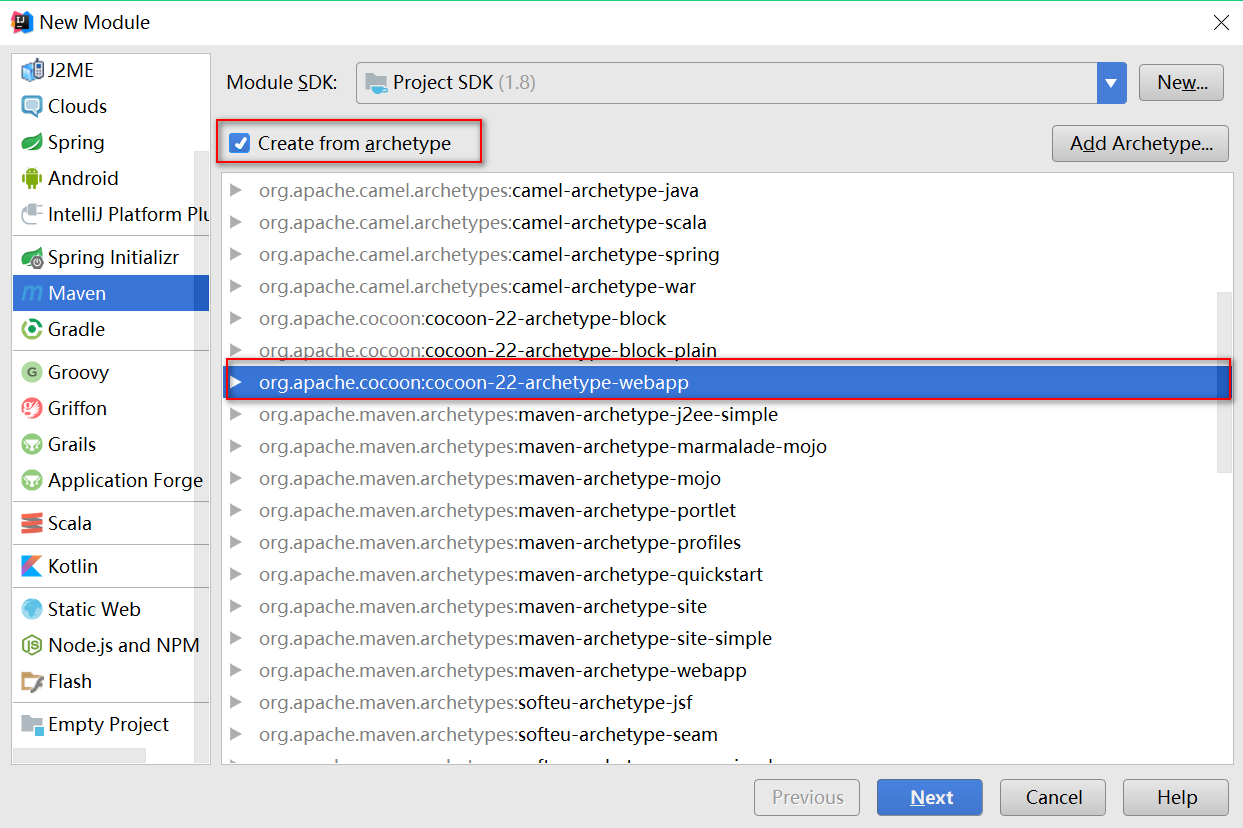
(1) Choose to use the prototype skeleton when creating maven projects
(2) After creation, it is found that some directories are missing in this way, as shown in the following figure
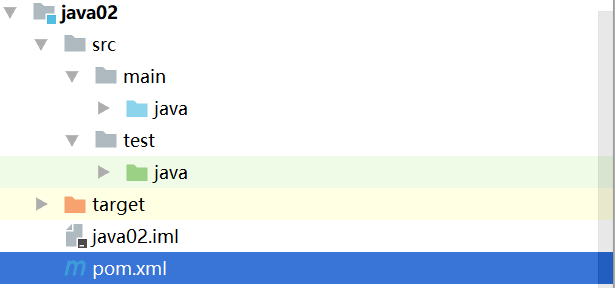
We need to complete the directory manually, and mark the completed directory. Remember
-
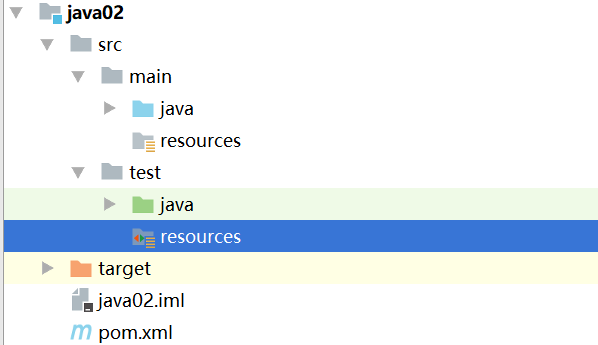
Then let's look at how to create a web project:
(1) Select the prototype skeleton corresponding to the web
There are many webapp prototype skeletons, and it's almost the same to choose which one. The same is true for ordinary projects created earlier. There are also many quickstart prototypes
(2) Just like the previous ordinary projects, the directory structure obtained by creating web projects through prototypes is incomplete, so we need to complete it by ourselves and mark it correctly. Finally, we need to get the following structure

(3) After the web project is created, we need to start running. We need to use a tomcat plug-in to run our project. In POM Add the coordinates of the plug-in in XML, and finally the modified POM The XML is as follows
<?xml version="1.0" encoding="UTF-8"?>
<project xmlns="http://maven.apache.org/POM/4.0.0" xmlns:xsi="http://www.w3.org/2001/XMLSchema-instance"
xsi:schemaLocation="http://maven.apache.org/POM/4.0.0 http://maven.apache.org/xsd/maven-4.0.0.xsd">
<modelVersion>4.0.0</modelVersion> <!--Specify model version-->
<groupId>com.itheima</groupId> <!--organization id-->
<artifactId>web01</artifactId> <!--project id-->
<version>1.0-SNAPSHOT</version> <!--Version number: release The finished version, snapshot Development version-->
<packaging>war</packaging> <!--Packaging method, web The project is packaged as war,Java The project is packaged as jar-->
<name>web01 Maven Webapp</name>
<url>http://www.example.com</url>
<properties>
<project.build.sourceEncoding>UTF-8</project.build.sourceEncoding>
<maven.compiler.source>1.8</maven.compiler.source>
<maven.compiler.target>1.8</maven.compiler.target>
</properties>
<dependencies><!--Set all dependencies of the current project-->
<dependency><!--Specific dependencies-->
<groupId>junit</groupId>
<artifactId>junit</artifactId>
<version>4.12</version>
<scope>test</scope>
</dependency>
</dependencies>
<!--structure-->
<build>
<finalName>web01</finalName>
<!--Setting plug-ins-->
<plugins>
<!--Specific plug-in configuration-->
<plugin>
<groupId>org.apache.tomcat.maven</groupId>
<artifactId>tomcat7-maven-plugin</artifactId>
<version>2.1</version>
</plugin>
</plugins>
</build>
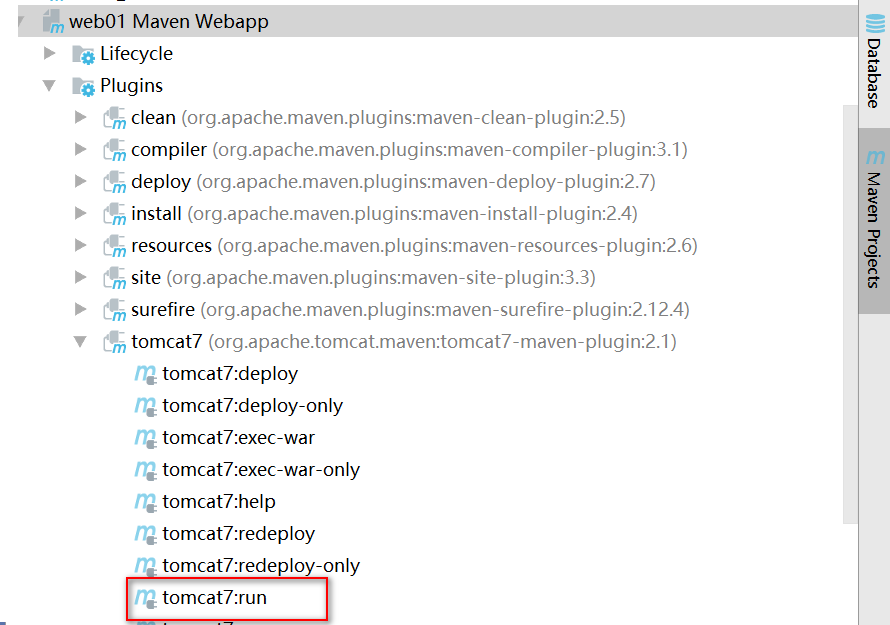
</project>(4) After the plug-in is configured, you can see the plug-in on the Maven project operation panel on the right side of the IDEA, and you can use the plug-in to start the project
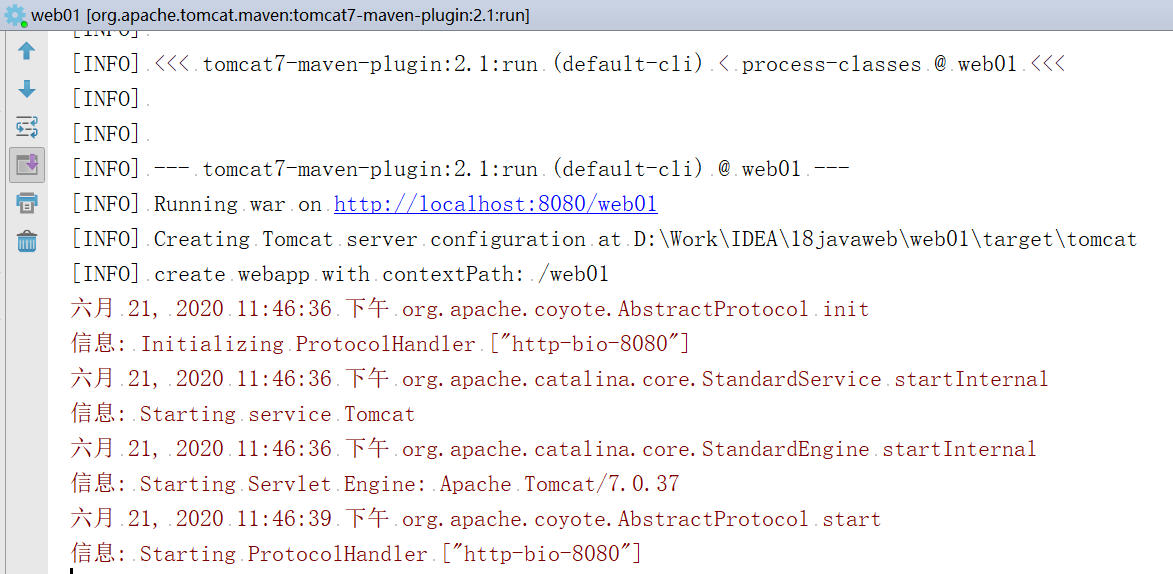
After running, the plug-in will give us a runnable address:
If we want to change the port, we only need to change it in POM Just configure the plug-in in XML
<plugins>
    <plugin>
        <groupId>org.apache.tomcat.maven</groupId>
        <artifactId>tomcat7-maven-plugin</artifactId>
        <version>2.1</version>
        <configuration>
            <port>80</port>
        </configuration>
    </plugin>
(5) at the same time, for the convenience of operation, we can also create an operation template: