In the previous section, we introduced the life cycle functions and customization methods in low code. In this section, we introduce the page Jump in low code.
Page Jump
It is relatively simple to realize page Jump in low code. Directly add behavior to the component and call the jump method of the platform. Open the application editor, select the button component we set, and modify the text content of the component.
After the button text content is modified, we can add behavior to the button and set it to jump to the page after clicking. In order to set the target page, we can first create two pages, the home page of the merchant side and the home page of the customer side. Click the + sign in the upper left corner to create a new page, and enter the page name and logo.
After the page is created, we can set the click event. Select the button component and find the behavior in the property panel on the right. When clicking, select page Jump in the pop-up interface and set the page to jump
Get user openid
The above jump logic only realizes the jump of the page. Before jumping, we need to obtain the openid of the user. Combined with the basic knowledge we introduced earlier, you need to call the custom connector to obtain openid when the applet starts.
Click the menu bar in the upper left corner and select low code editor
 Paste the following code into the global life cycle function
/**
 * You can obtain or modify the variable status and other information of the global application through the app
 * You can use Console Info view more information in the editor Console panel
 * If async await is required, please use async before the method
 **/
export default {
  async onAppLaunch(launchOpts) {
    //console.log('---------> LifeCycle onAppLaunch', launchOpts)
    const result = await app.cloud.callConnector({
        name: 'getopenid_dopqiuw',
        methodName: 'getopenid',
        params: {}, // Method input parameter
    });
    console.log(result)
  },
  onAppShow(appShowOpts) {
    //console.log('---------> LifeCycle onAppShow', appShowOpts)
  },
  onAppHide() {
    //console.log('---------> LifeCycle onAppHide')
  },
  onAppError(options) {
    //console.log('---------> LifeCycle onAppError', options)
  },
  onAppPageNotFound(options) {
    //console.log('---------> LifeCycle onAppPageNotFound', options)
  },
  onAppUnhandledRejection(options) {
    //console.log('---------> LifeCycle onAppUnhandledRejection', options)
  }
}
After saving, we can see that the console has output appid, and openid needs to take effect in the applet
Now, the question is where to save the obtained openid? We can define a global variable to store. Click the variable in the navigation bar to create a global variable openid
After the variable is defined, we can copy the path of the variable and assign values in the life cycle function
Final code:
/**
 * You can obtain or modify the variable status and other information of the global application through the app
 * You can use Console Info view more information in the editor Console panel
 * If async await is required, please use async before the method
 **/
export default {
  async onAppLaunch(launchOpts) {
    //console.log('---------> LifeCycle onAppLaunch', launchOpts)
    const result = await app.cloud.callConnector({
        name: 'getopenid_dopqiuw',
        methodName: 'getopenid',
        params: {}, // Method input parameter
    });
    console.log(result)
    app.dataset.state.openid = result.openid
    console.log(app.dataset.state.openid)
  },
  onAppShow(appShowOpts) {
    //console.log('---------> LifeCycle onAppShow', appShowOpts)
  },
  onAppHide() {
    //console.log('---------> LifeCycle onAppHide')
  },
  onAppError(options) {
    //console.log('---------> LifeCycle onAppError', options)
  },
  onAppPageNotFound(options) {
    //console.log('---------> LifeCycle onAppPageNotFound', options)
  },
  onAppUnhandledRejection(options) {
    //console.log('---------> LifeCycle onAppUnhandledRejection', options)
  }
}
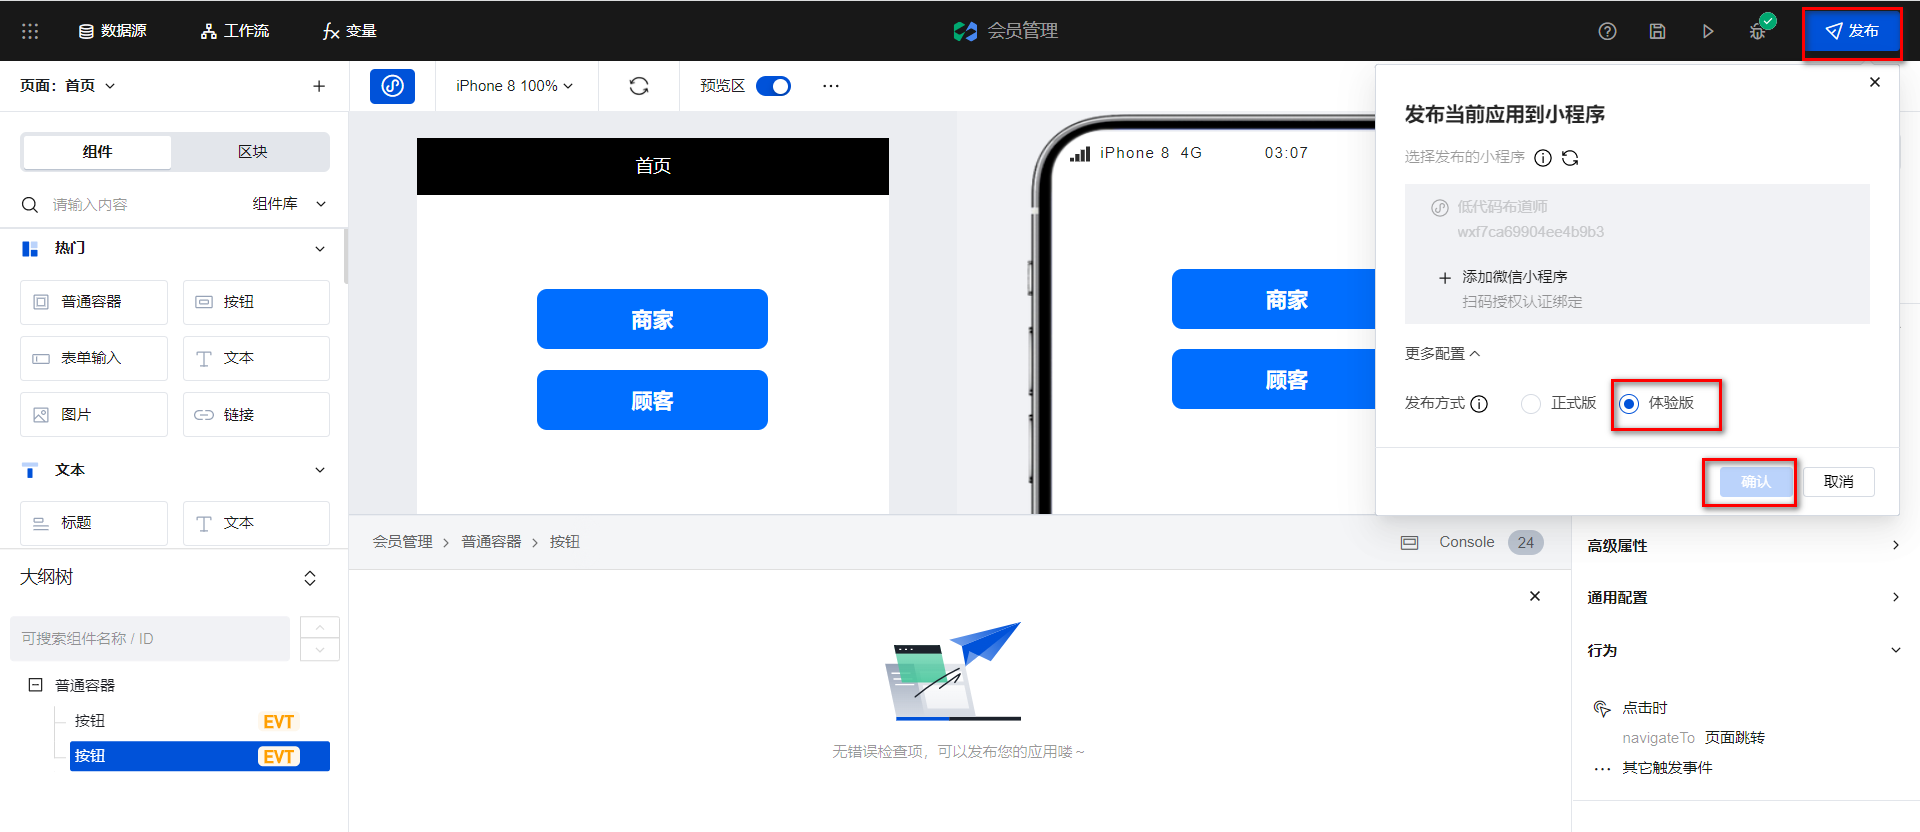
How to view the specific effect? Click the Publish button of the navigation bar and select the applet to be published as an experience version
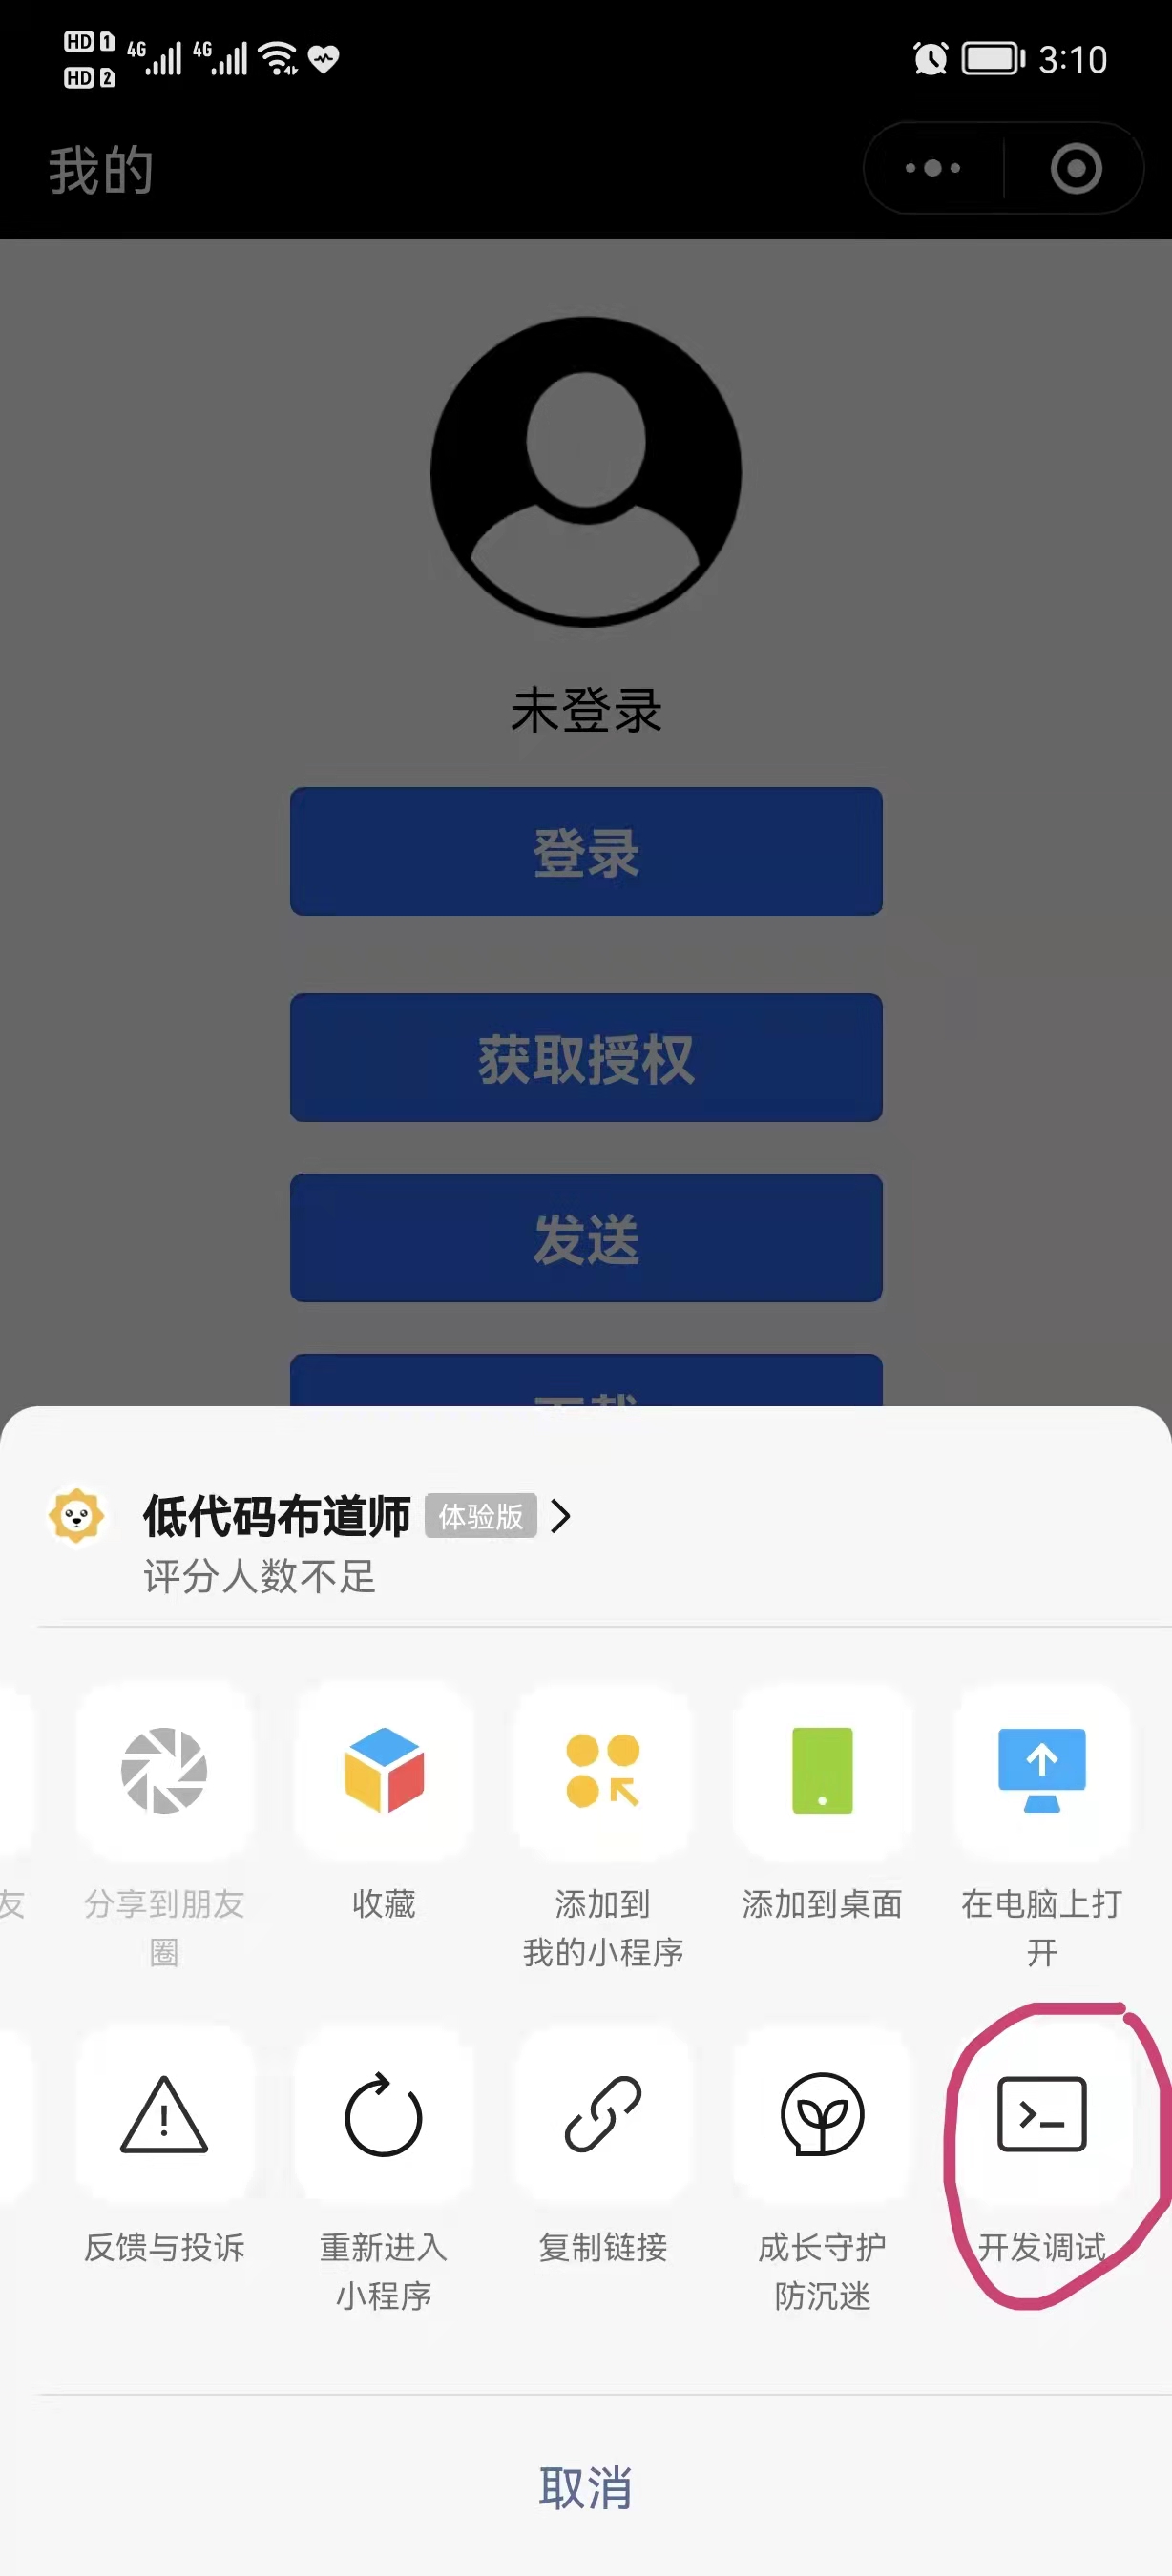
How to debug small programs? First open your applet and click the icon of three points in the upper right corner

Select the development and debugging menu in the pop-up window
After clicking, a vConsole icon will appear in the lower right corner of the applet

Click this icon to see the debugging window. Generally, we use console in our code The information printed by log will appear here. Proficient in using console Log printing variable information is also the basic skill of development. Basically, you can solve most problems through information printing.
Well, that's all for this section. Try it yourself according to the above steps. If you feel useful, remember to praise, pay attention and comment. I'll see you next time.