On the basis of the original, we added a new page, which is the user's personal information page person:
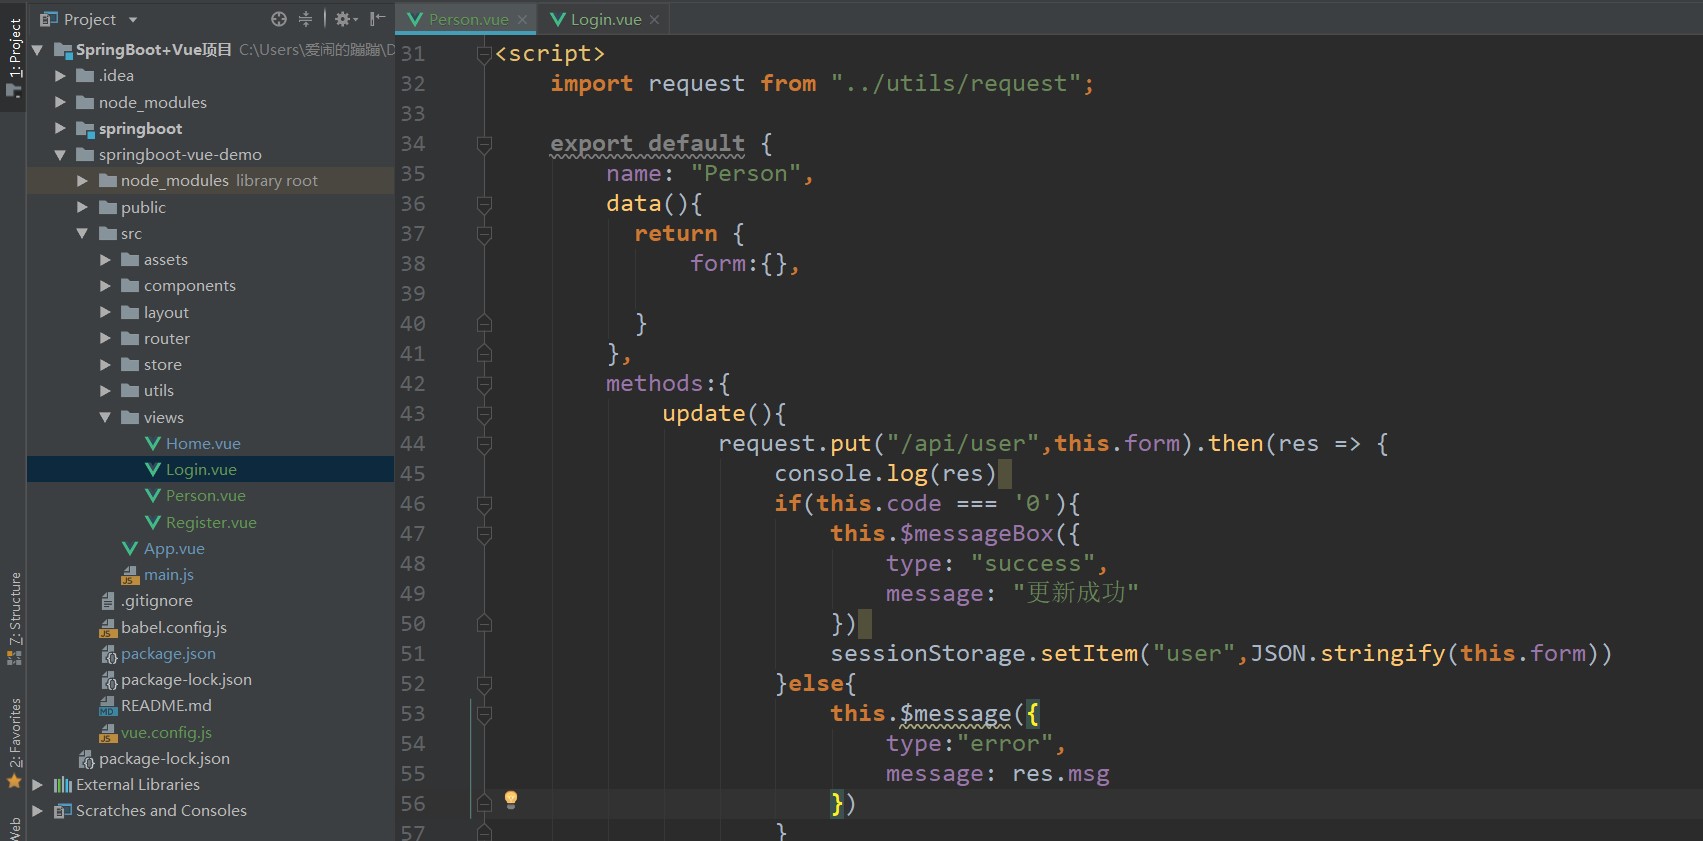
The source code is:
<template>
    <div>
        <el-card style="width: 40%; margin: 10px">
        <el-form ref="form" :model="form" label-width="80px">
            <el-form-item label="user name">
                <el-input v-model="form.username" disabled></el-input>
            </el-form-item>
            <el-form-item label="password">
                <el-input v-model="form.password" show-password></el-input>
            </el-form-item>
            <el-form-item label="nickname">
                <el-input v-model="form.nickName"></el-input>
            </el-form-item>
            <el-form-item label="Age">
                <el-input v-model="form.age"></el-input>
            </el-form-item>
            <el-form-item label="Gender">
                <el-input v-model="form.sex"></el-input>
            </el-form-item>
            <el-form-item label="address">
                <el-input v-model="form.address"></el-input>
            </el-form-item>
        </el-form>
            <div>
                <el-button type="primary" @click="update">preservation</el-button>
            </div>
        </el-card>
    </div>
</template>

<script>
    import request from "../utils/request";

    export default {
        name: "Person",
        data(){
          return {
              form:{},

          }
        },
        methods:{
            update(){
                request.put("/api/user",this.form).then(res => {
                    console.log(res)
                    if(this.code === '0'){
                        this.$messageBox({
                            type: "success",
                            message: "Update succeeded"
                        })
                        sessionStorage.setItem("user",JSON.stringify(this.form))
                    }else{
                        this.$message({
                            type:"error",
                            message: res.msg
                        })
                    }
                })
            }
        }
    }
</script>

<style scoped>

</style>
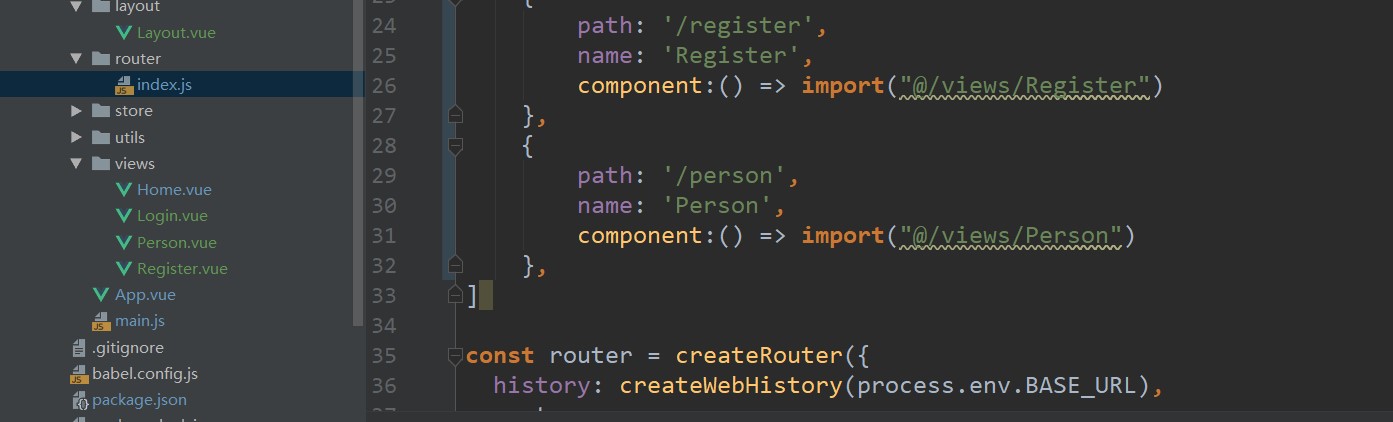
Then we're going to write our route:
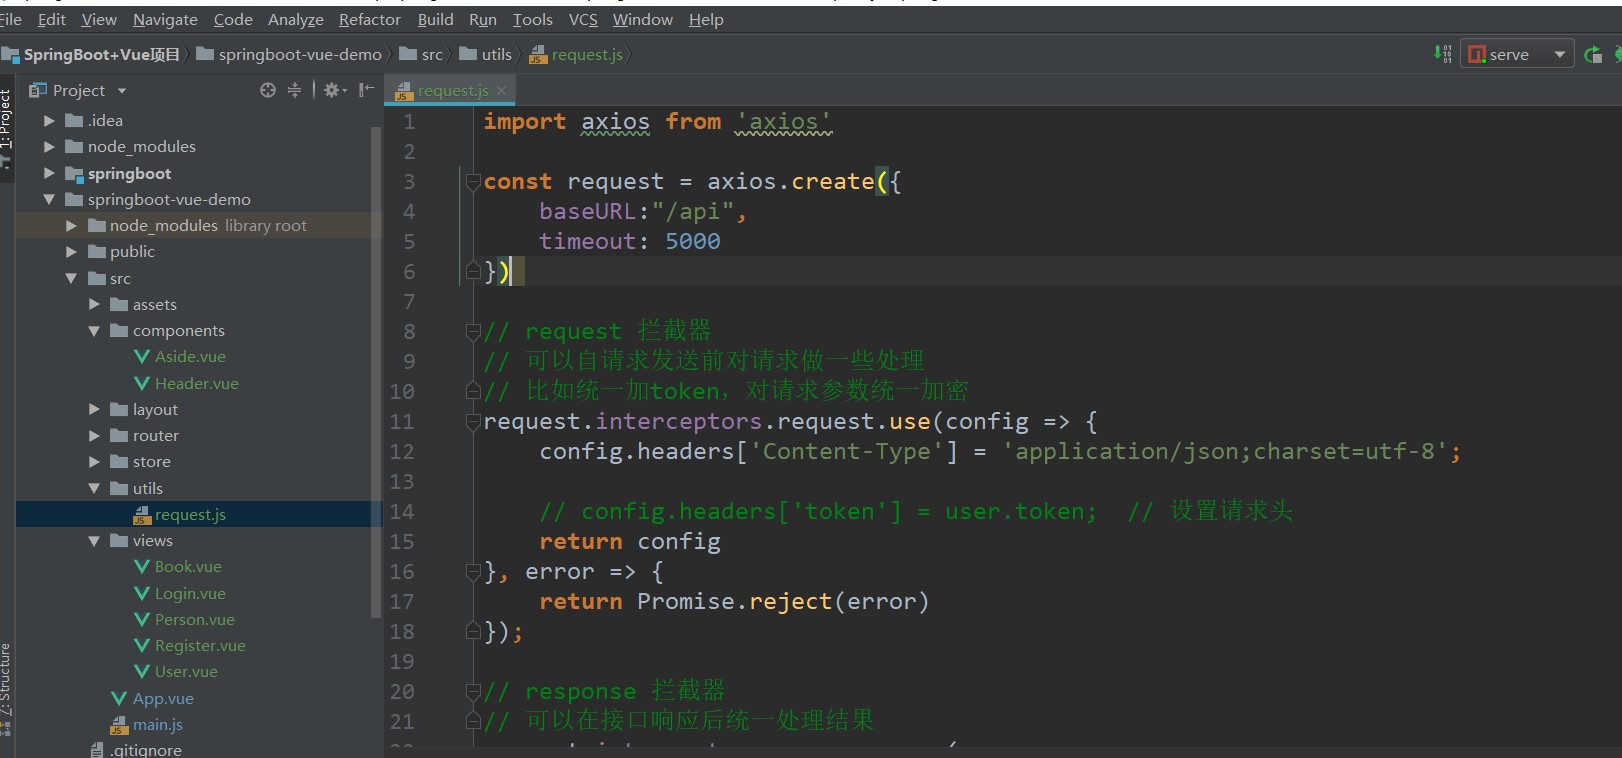
Now click personal information to pop up the information page. Now we find that the routing of our project needs to be preceded by / api every time. It feels very cumbersome. The solution is to add a sentence under the file request.js, as shown in the following figure:
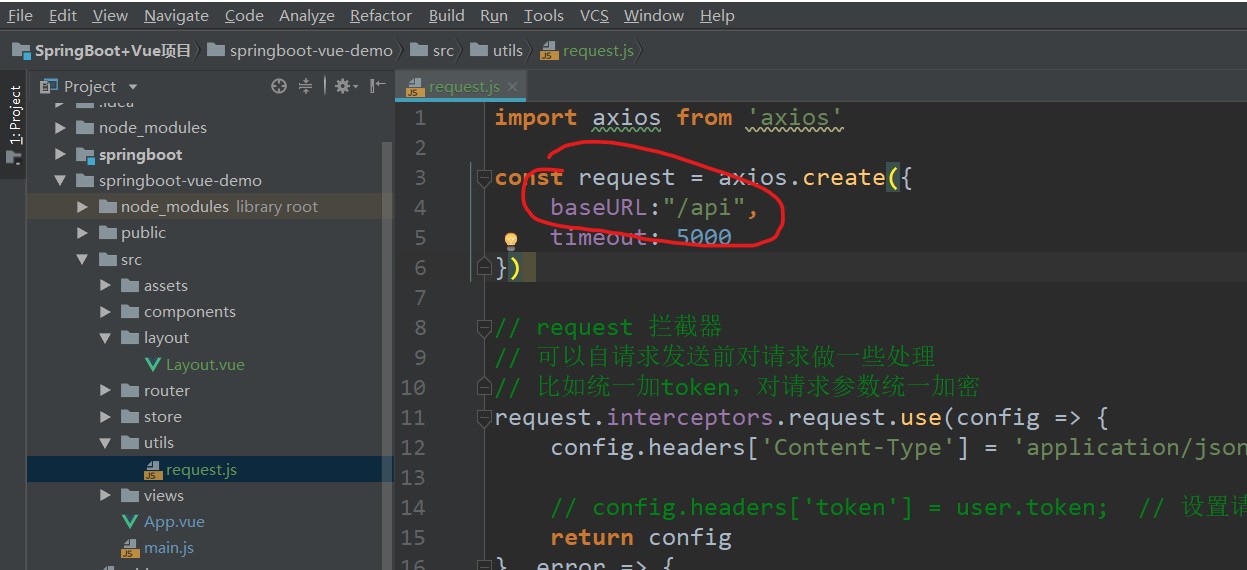
Now we don't need to add / api to the routes we write. The baseURL will help us splice them automatically, but we have added them before. It's troublesome to change them, but Idea provides a function of global modification, that is, we can select the place to modify and press control+shift+r to make global modification.

Next, let's implement the routing jump of the menu. How to implement this is actually very simple. For example, in our Aside sidebar component, we have such a setting:
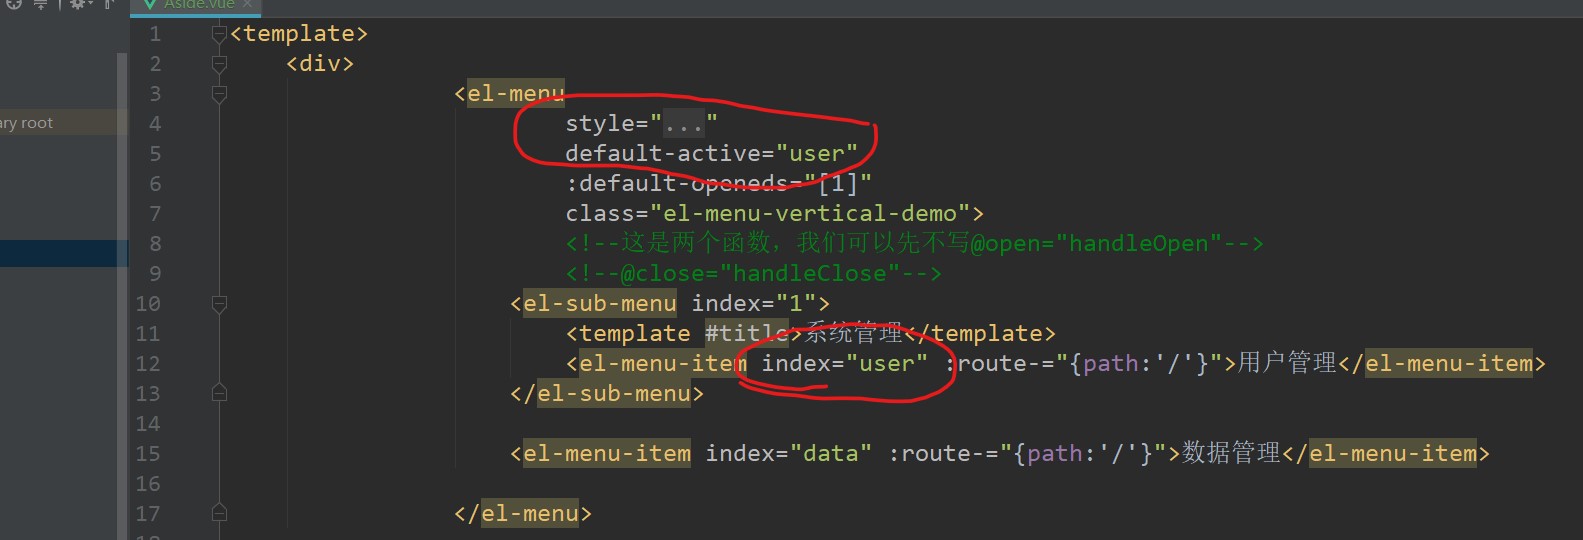
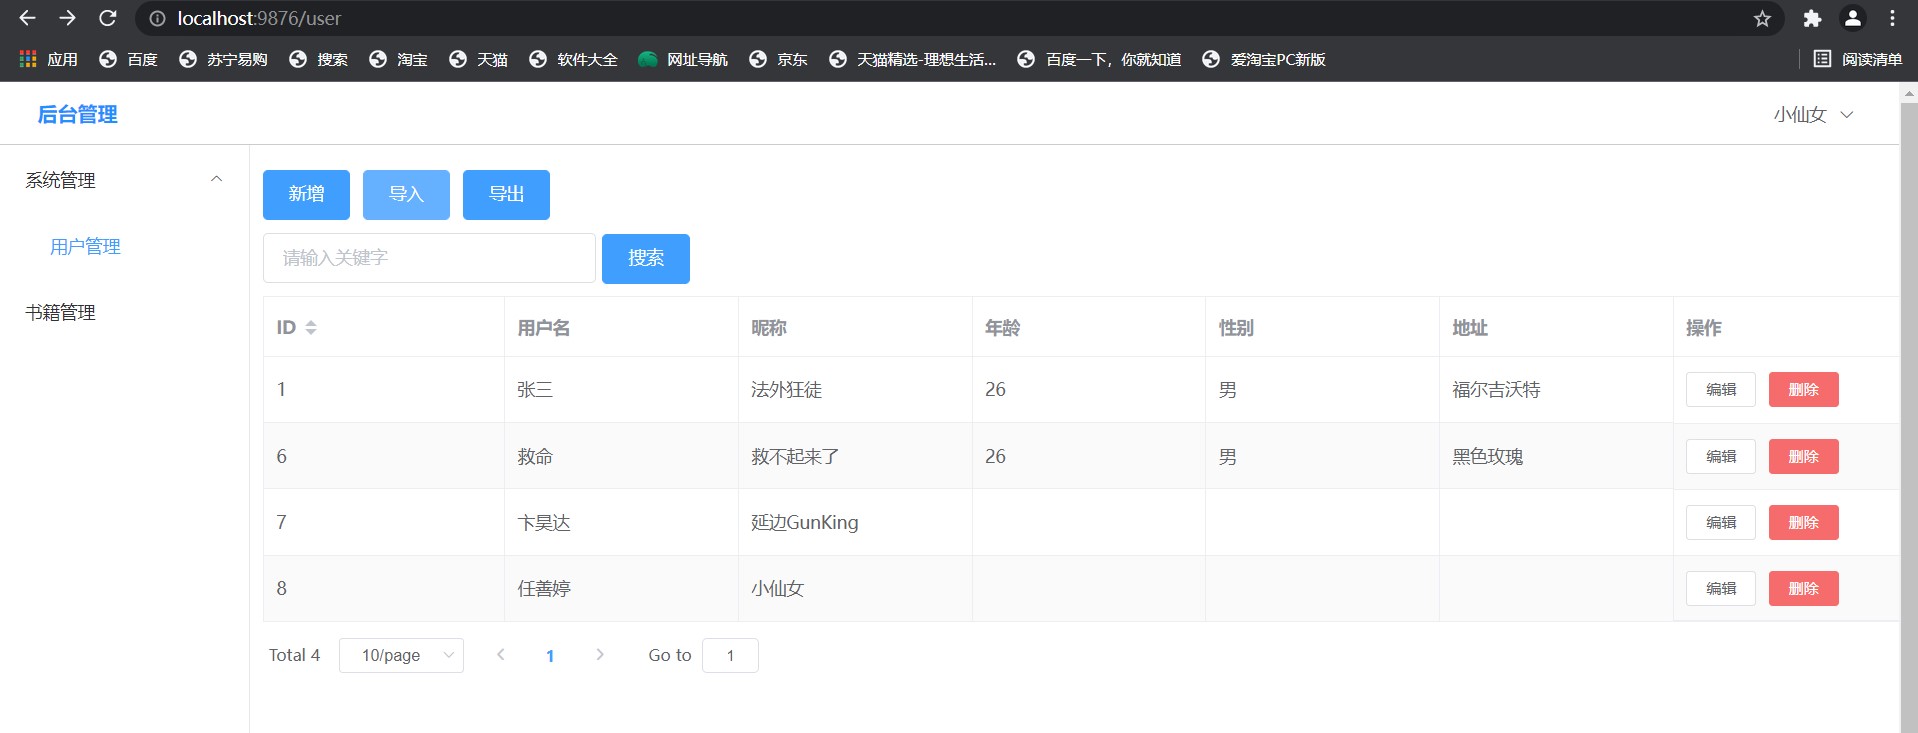
Default active and index correspond one-to-one, so "user management" will be highlighted when you enter Home:
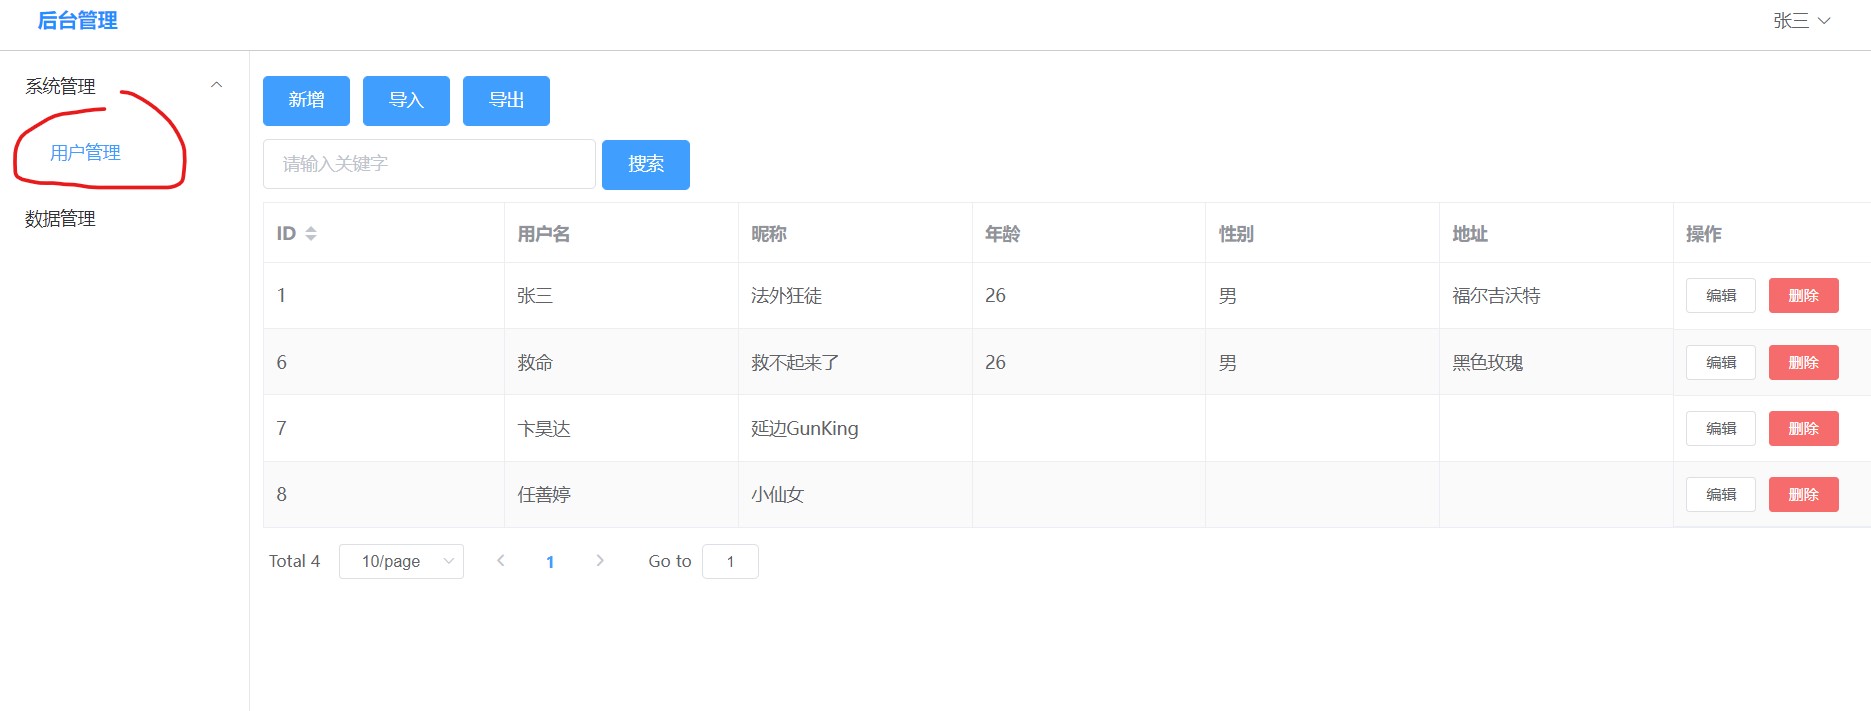
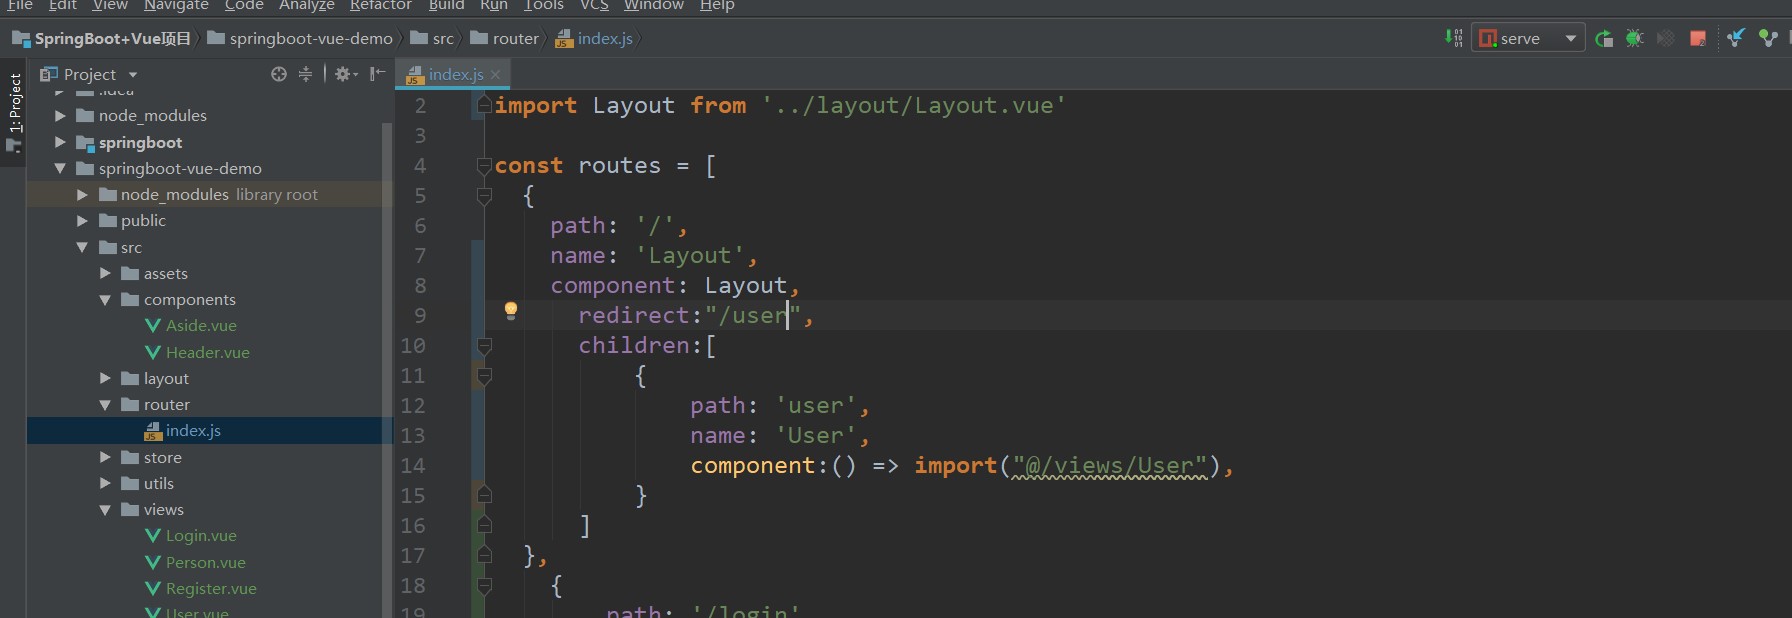
Therefore, the default user interface here is highlighted, but the setting of the Home.vue component here is actually unreasonable, because it is only a user management, not our project Home page, so we can change the name of the Home component, shift+f6 to User.vue:

Then remember to change the route:
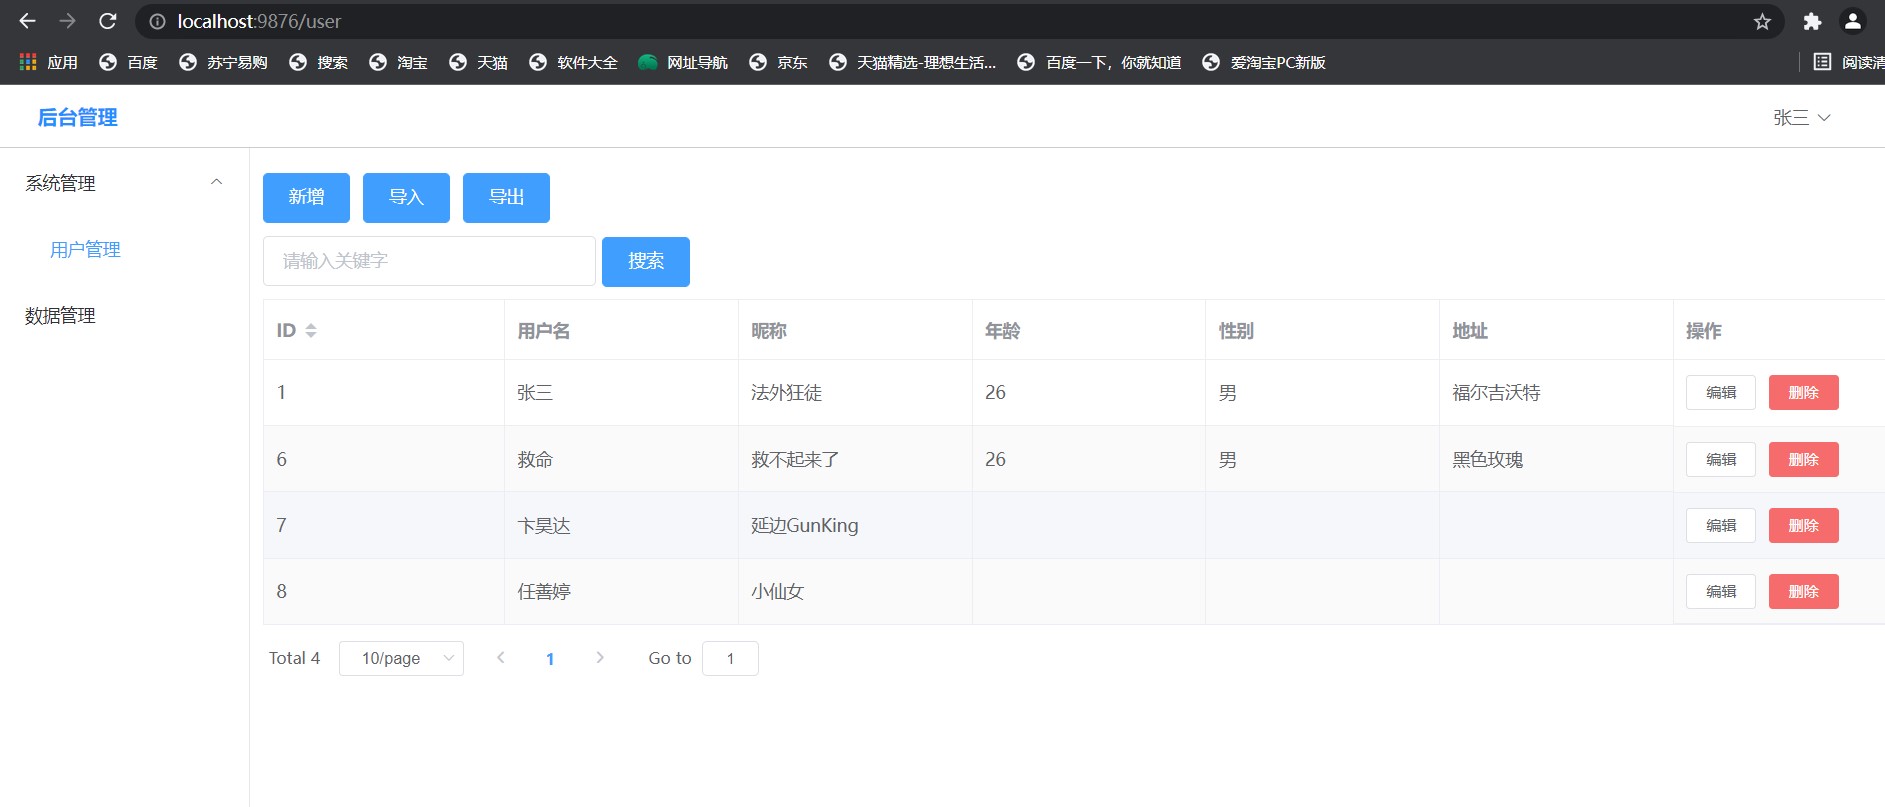
visit:
So how can we click the menu to realize route jump?
It's very simple. There is a value called router. We can use it, as shown in the following figure:

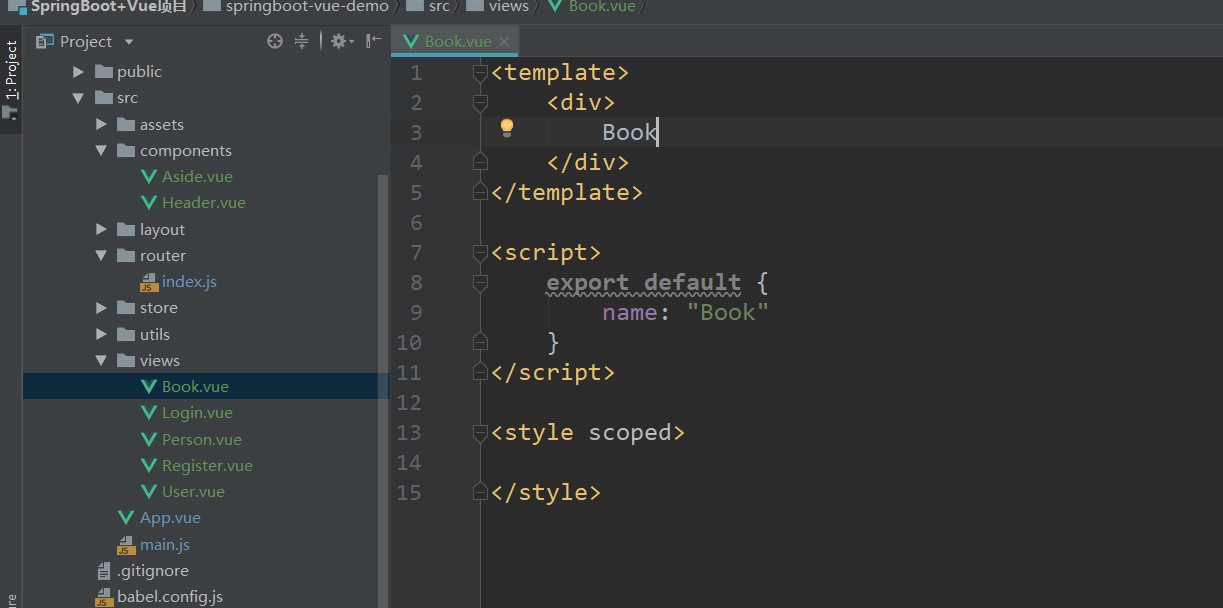
Of course, because we only have one page at present, we can't see any effect, so we'll write another page called Book.vue:
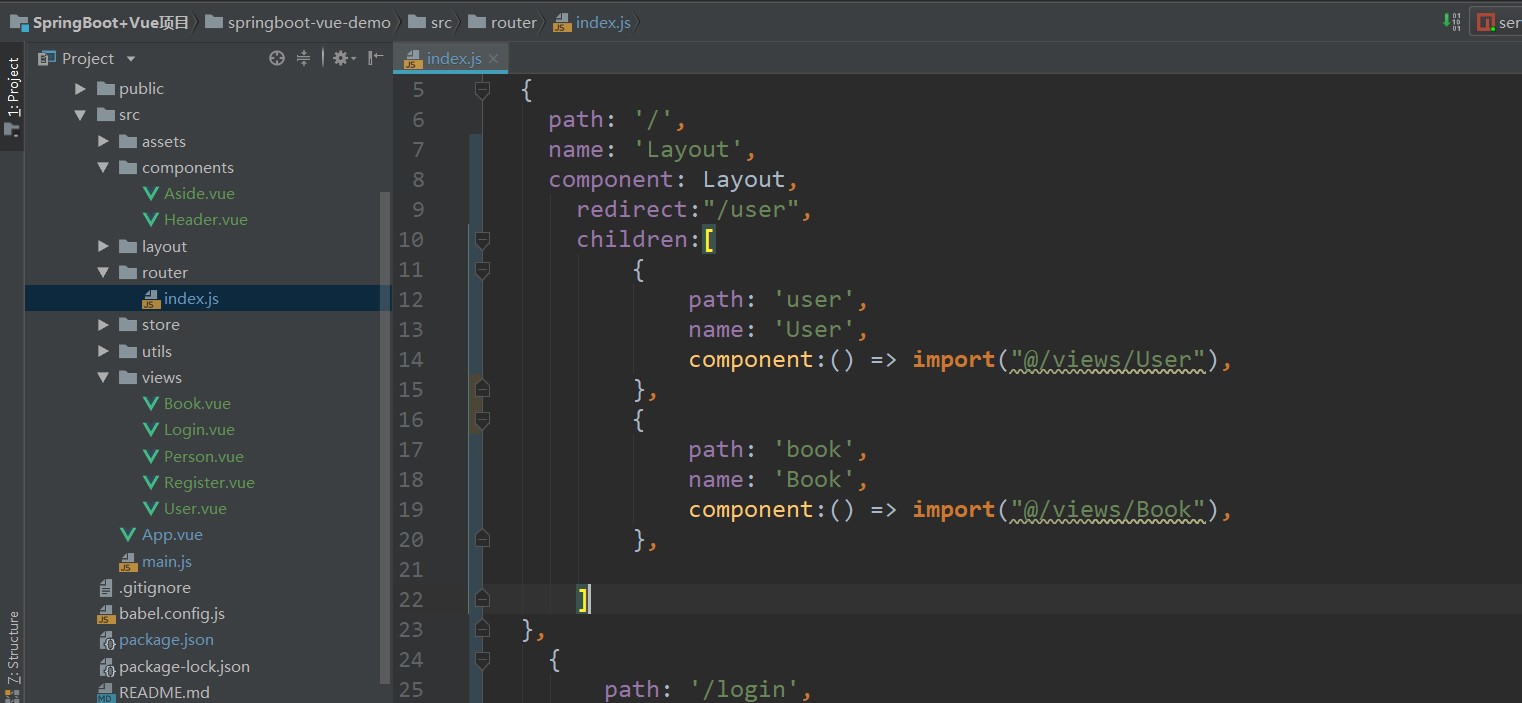
Then configure the route. Remember that the route switching in the page should be implemented in the sub route:
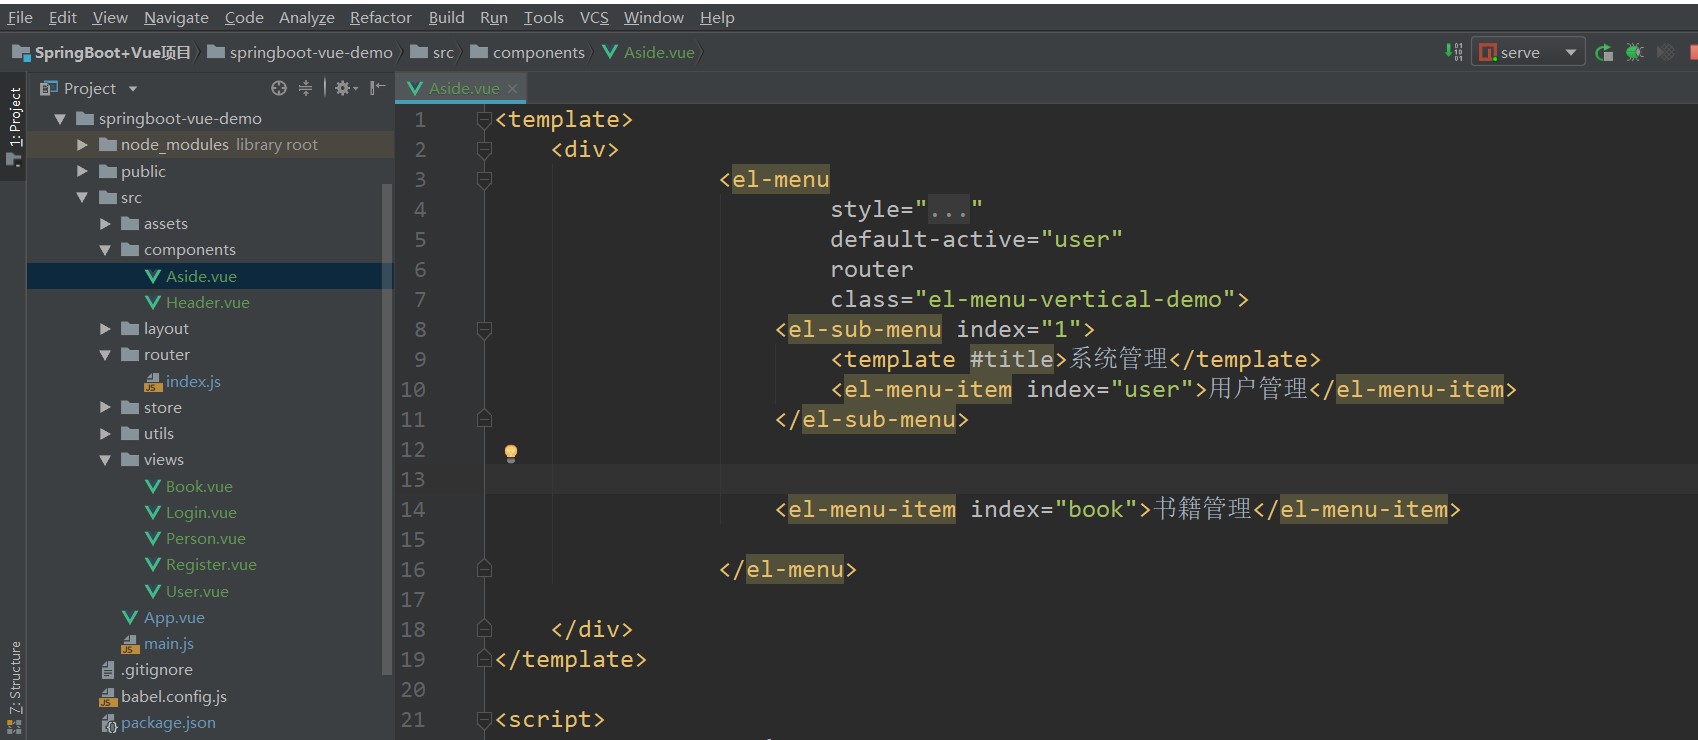
Then we remember to add a new menu in the sidebar. The position referred to by index is the route of the page:
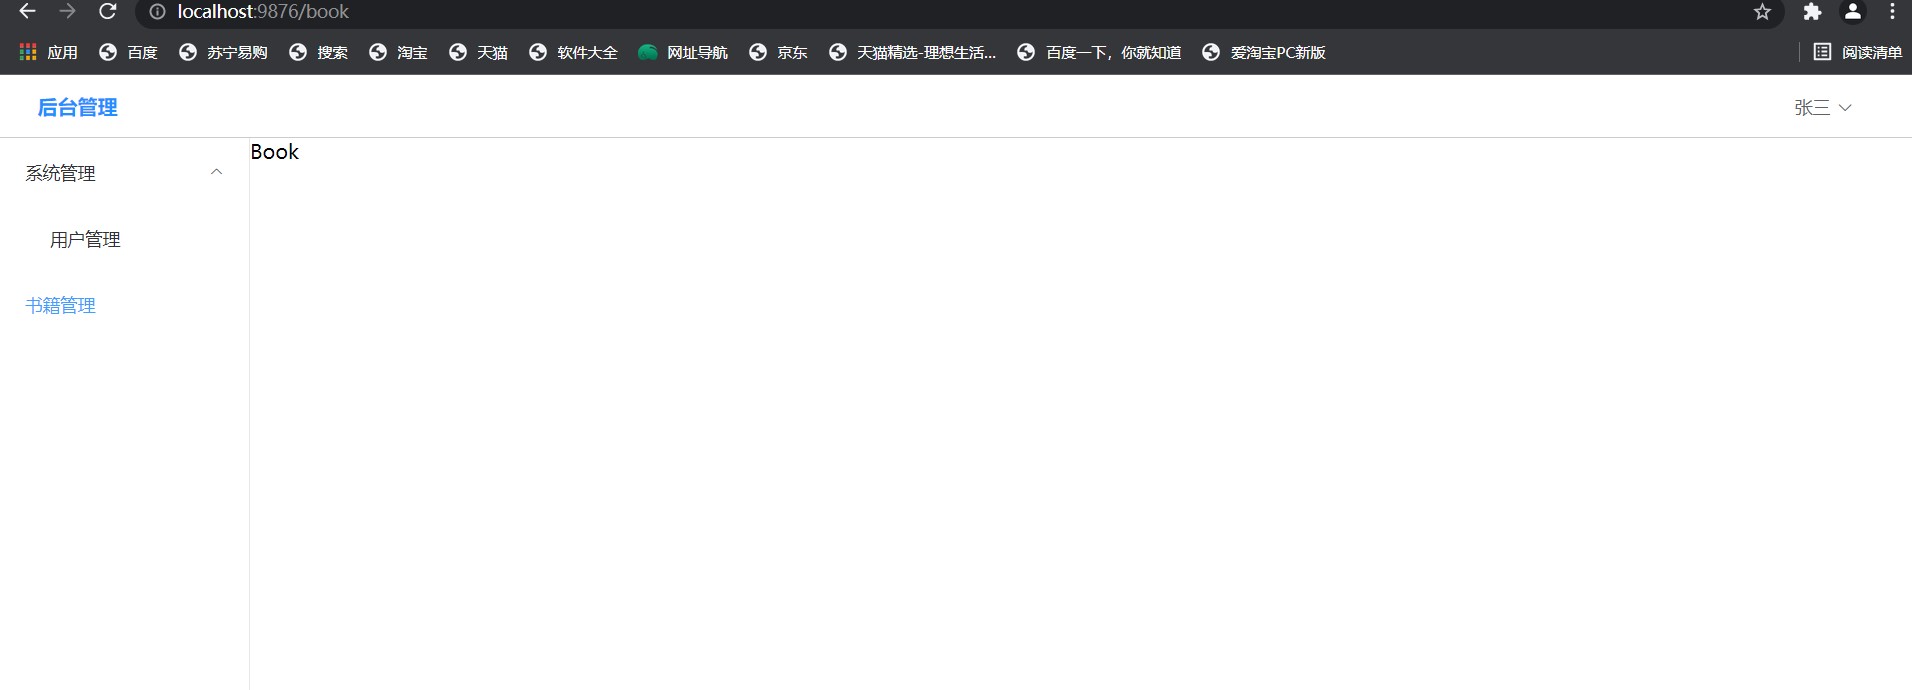
Now when we visit the page, we can find that the page will jump to where the menu is clicked:
The problem now is that every time we log in, we directly enter the user management interface. We don't even need to log in. Because we don't log in, there will be no user information in the upper right corner, even if our user information already exists in sessionStorage.
In addition to saving sessionStorage in Person.vue, corresponding changes are also required in Login.vue. The source code of the newly written Login page is as follows:
<template>
    <!--Place the entire browser page in a large div in
    width: 100%This means that div Full screen
    height: 100vh Ditto, one full height and one full width-->
    <div style="width: 100%; height: 100vh;background: darkslateblue; overflow: hidden">
        <!--margin: Parameter 1 Parameter 2; Parameter 1 represents the up-down distance, parameter 2 represents the left-right distance, auto Indicates automatic matching
        If the page produces white space, it is the largest in the outer layer div Add one overflow,Set to hidden that will do-->
        <div style="width: 400px; margin: 150px auto">
            <!--font-size Indicates the font size, text-align Indicates that the font is centered-->
            <div style="color: #cccccc; font-size: 30px; text-align: center; padding: 30px 0">
                Welcome to login
            </div>
            <!--Then go element upper copy A form-->
            <el-form ref="form" :model="form" size="normal" :rules="rules">
                <el-form-item prop="username">
                    <el-input prefix-icon="el-icon-user-solid" v-model="form.username"></el-input>
                </el-form-item>
                <el-form-item prop="password">
                    <el-input prefix-icon="el-icon-lock" v-model="form.password" show-password></el-input>
                </el-form-item>
            </el-form>
            <el-form ref="form" :model="form" size="normal">
                <el-button style="width: 100%" type="primary" @click="login">Sign in</el-button>
            </el-form>
        </div>
    </div>
</template>

<script>
    import request from "../utils/request";

    export default {
        name: "Login",
        data(){
            return{
                form:{},
                rules:{
                    username:[
                        {required: true,message:"enter one user name",trigger:'blur'},
                    ],
                    password:[
                        {required: true,message:"Please input a password",trigger:'blur'},
                    ]
                }
            }
        },
        created(){
            sessionStorage.removeItem("user")
        },
        methods: {
            login() {
                //Add this judgment before sending the request. The request is sent only when it is not empty and meets the rules
                this.$refs['form'].validate((valid) => {
                    if (valid) {
                        request.post("/user/login",this.form).then(res => {
                            if(res.code === "0"){
                                this.$messageBox({
                                    type: "success",
                                    message: "Login succeeded"
                                })
                                //Cache user information
                                sessionStorage.setItem("user",JSON.stringify(res.data))
                                //    After successful login, jump to the page and jump to the home page
                                this.$router.push("/")
                            }else{
                                this.$messageBox({
                                    type: "error",
                                    message: res.msg
                                })
                            }
                        })
                    }
                })
            }
        }
    }
</script>

<style scoped>

</style>
So how do we intercept it so that it can access our interface only after logging in? In fact, it is also very simple. The interceptor has been defined in our request.js. No matter what request we send, it will enter our Interceptor:
Because they will be intercepted, we now make a judgment here and take out the user data submitted in the login:

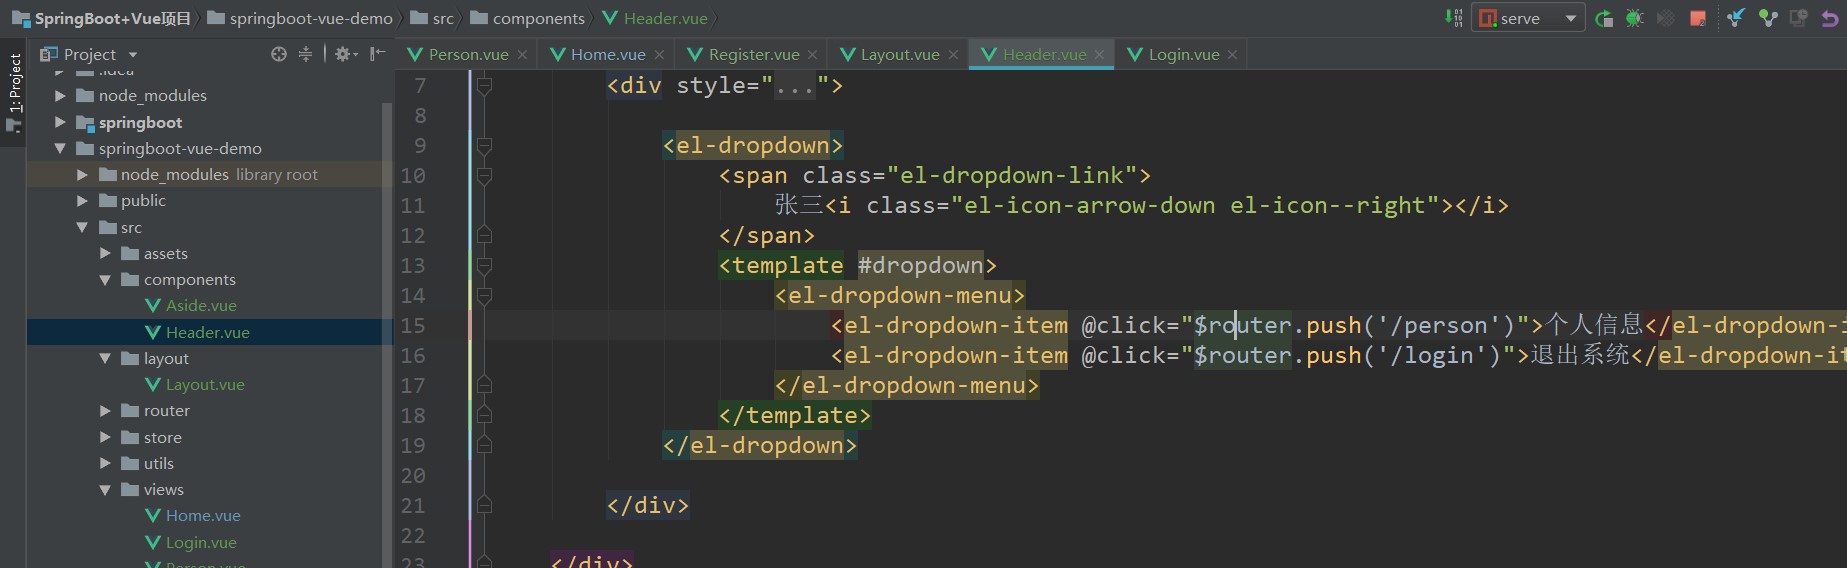
Now no matter which page you visit, you will pass through the login page, but the drop-down box in the upper right corner of our page has not been solved yet. We need to dynamically bind it to the logged in user. Here you can put the source code directly:
<template>
    <!--The first part of the management system, the head part, uses a large div As the navigation bar, the four words of background management are on the left and the drop-down box is on the right-->
    <div style="height: 50px; line-height: 50px; border-bottom: 1px solid #ccc; display: flex">

        <div style="width: 200px; padding-left: 30px; font-weight: bold; color: dodgerblue">back-stage management</div>
        <div style="flex: 1"></div>
        <div style="width: 100px">

            <el-dropdown>
                <span class="el-dropdown-link">
                    {{ user.nickName }}
                    <i class="el-icon-arrow-down el-icon--right"></i>
                </span>
                <template #dropdown>
                    <el-dropdown-menu>
                        <el-dropdown-item @click="$router.push('/person')">personal information</el-dropdown-item>
                        <el-dropdown-item @click="$router.push('/login')">Exit the system</el-dropdown-item>
                    </el-dropdown-menu>
                </template>
            </el-dropdown>

        </div>

    </div>
</template>

<script>
    export default {
        name: "Header",
        props:['user'],
        data(){
            return{
                user:{}
            }
        },
        created(){
            let userStr = sessionStorage.getItem("user") || "{}"
            this.user = JSON.parse(userStr)
        }
    }
</script>

<style scoped>

</style>
So it's connected:
Now let's enrich the contents of Book.vue. We can directly copy the things in User.vue. Remember to change the component name, routing location and some things in the form:
<template>
    <!--padding Set a little inside margin-->
    <div style="padding: 10px">
        <!--Functional area-->
        <div style="margin: 10px 0">
            <el-button type="primary" @click="add">newly added</el-button>
            <el-button type="primary">Import</el-button>
            <el-button type="primary">export</el-button>
        </div>

        <!--Search area-->
        <div style="margin: 10px 0">
            <el-input v-model="search" placeholder="Please enter keyword" style="width: 20%" clearable/>
            <el-button type="primary" style="margin-left: 5px" @click="load">search</el-button>
        </div>


        <!--hinder width Can not write, the browser will adapt
        stripe Zebra effect-->
        <el-table :data="tableData" border stripe style="width: 100%">
            <!--sortable Sort dates-->
            <el-table-column prop="id" label="ID" sortable/>
            <el-table-column prop="name" label="title"/>
            <el-table-column prop="price" label="Unit Price" />
            <el-table-column prop="author" label="author"/>
            <el-table-column prop="createTime" label="Publication date"/>

            <el-table-column fixed="right" label="operation">
                <template #default="scope">
                    <el-button size="mini" @click="handleEdit(scope.row)">edit</el-button>

                    <!--A message confirmation box pops up-->
                    <el-popconfirm
                            confirm-button-text="Yes, that's right"
                            cancel-button-text="Shit, I'll think about it again"
                            icon="el-icon-info"
                            icon-color="red"
                            title="Are you sure to delete?" @confirm="handleDelete(scope.row.id)">
                        <template #reference>
                            <el-button size="mini" type="danger">delete</el-button>
                        </template>
                    </el-popconfirm>
                </template>
            </el-table-column>
        </el-table>

        <!--Paging function area-->
        <div style="margin: 10px 0">
            <el-pagination
                    v-model:currentPage="currentPage4"
                    :page-sizes="[5,10,20]"
                    :page-size="pageSize"
                    layout="total, sizes, prev, pager, next, jumper"
                    :total="total"
                    @size-change="handleSizeChange"
                    @current-change="handleCurrentChange">
            </el-pagination>
        </div>

        <!--Pop up window to input user information-->
        <el-dialog v-model="dialogVisible" title="Tips" width="30%">
            <!--Define the form in this pop-up box to collect new user information-->
            <el-form :model="form" label="user name">
                <el-form-item label="title">
                    <el-input v-model="form.name" style="width: 80%"></el-input>
                </el-form-item>
                <el-form-item label="Price">
                    <el-input v-model="form.price" style="width: 80%"></el-input>
                </el-form-item>
                <el-form-item label="author">
                    <el-input v-model="form.author" style="width: 80%"></el-input>
                </el-form-item>
                <el-form-item label="Publication time">
                    <el-data-picker v-model="form.createTime" value-format="YYYY-MM-DD" time="date" style="width: 80%" clearable></el-data-picker>
                </el-form-item>

            </el-form>
            <template #footer>
      <span class="dialog-footer">
        <el-button @click="dialogVisible = false">Cancel</el-button>
        <el-button type="primary" @click="save">determine</el-button>
      </span>
            </template>
        </el-dialog>
    </div>
</template>

<script>


    import request from "../utils/request";

    export default {
        name: 'Book',
        components: {

        },
        data() {
            return {
                form: {},
                dialogVisible: false,
                search: '',
                //Current page
                currentPage4: 1,
                pageSize: 10,
                total: 0,
                tableData: [

                ],
            }
        },
        //It means that all the methods in this method will be called when the page is loaded
        created() {
            this.load()
        },
        methods: {
            //Query method
            load(){
                request.get("/book",{
                    params: {
                        pageNum: this.currentPage4,
                        pageSize: this.pageSize,
                        search: this.search
                    }
                }).then(res => {
                    console.log(res)
                    this.tableData = res.data.records
                    this.total = res.data.total
                })
            },
            add(){
                this.dialogVisible = true;
                //Empty form field
                this.form = {};
            },
            save(){
                if(this.form.id){  //update operation
                    request.put("/book",this.form).then(res => {
                        console.log(res)
                        if(res.code == '0'){
                            //element provides us with something to display the results, as follows
                            this.$messageBox({
                                type: "success",
                                message: "Update succeeded"
                            })
                        }else{
                            //element provides us with something to display the results, as follows
                            this.$messageBox({
                                type: "error",
                                message: res.msg
                            })
                        }
                    })
                    this.load() //The table is refreshed automatically after each update
                    this.dialogVisible = false //Close pop-up window
                }else{ //Add operation
                    request.post("/book",this.form).then(res => {
                            console.log(res)
                            if (res.code == '0') {
                                //element provides us with something to display the results, as follows
                                this.$messageBox({
                                    type: "success",
                                    message: "Successfully added"
                                })
                            } else {
                                //element provides us with something to display the results, as follows
                                this.$messageBox({
                                    type: "error",
                                    message: res.msg
                                })
                            }
                            this.load() //The table will be refreshed automatically after each addition
                            this.dialogVisible = false //Close pop-up window
                        }
                    )}
            },
            handleEdit(row){
                this.form = JSON.parse(JSON.stringify(row))
                this.dialogVisible = true
            },
            handleDelete(id){
                console.log(id)
                request.delete("/book/"+id).then(res =>{

                    if (res.code == '0') {
                        //element provides us with something to display the results, as follows
                        this.$messageBox({
                            type: "success",
                            message: "Delete succeeded"
                        })
                    } else {
                        //element provides us with something to display the results, as follows
                        this.$messageBox({
                            type: "error",
                            message: res.msg
                        })
                    }
                    this.load() //Reload table data after deletion
                })
            },
            handleSizeChange(pageSize){
                //    Triggered when the number of data pieces per page is changed
                this.pageSize = pageSize
                this.load()
            },
            handleCurrentChange(pageNum){
                //  Triggered when the current page number is changed
                this.currentPage4 = pageNum
                this.load()
            }
        }
    }
</script>
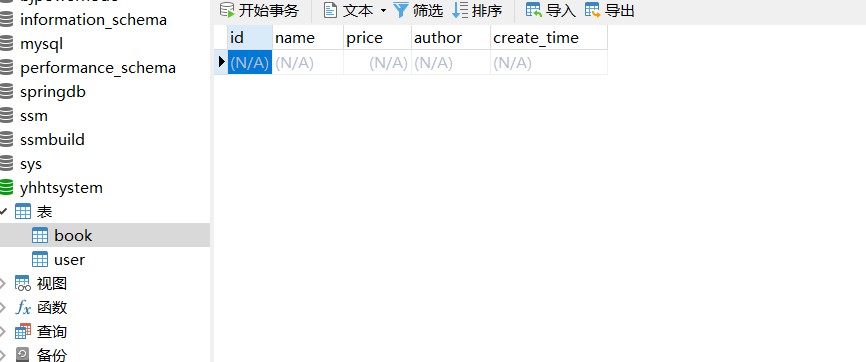
Then we go to the database to create the table of book:
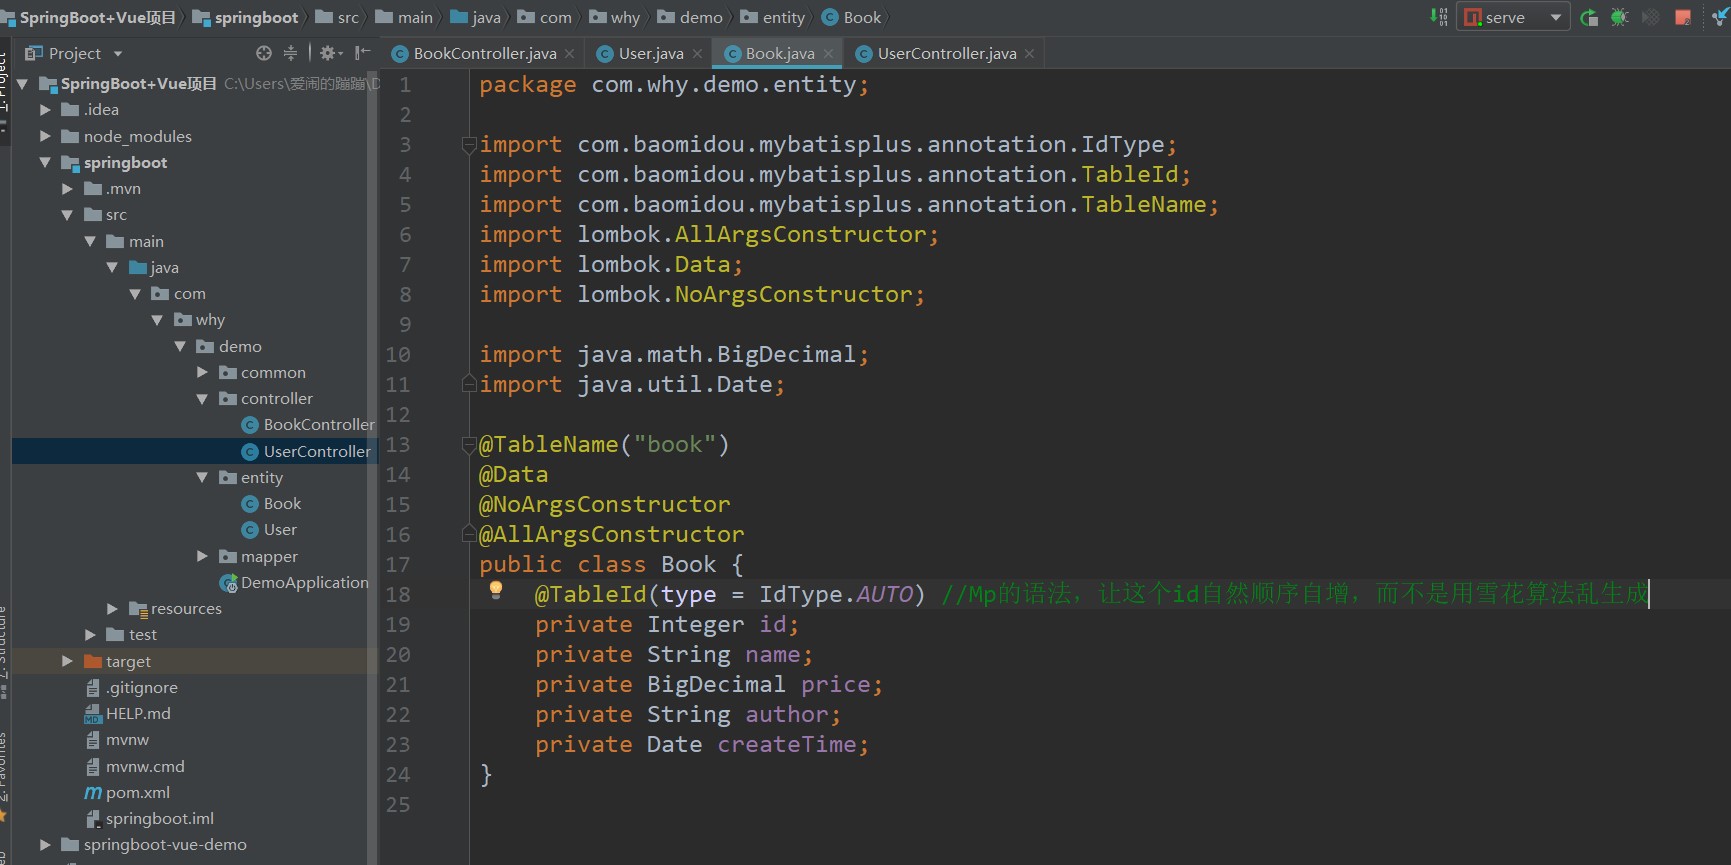
Then we write the entity class of our book:
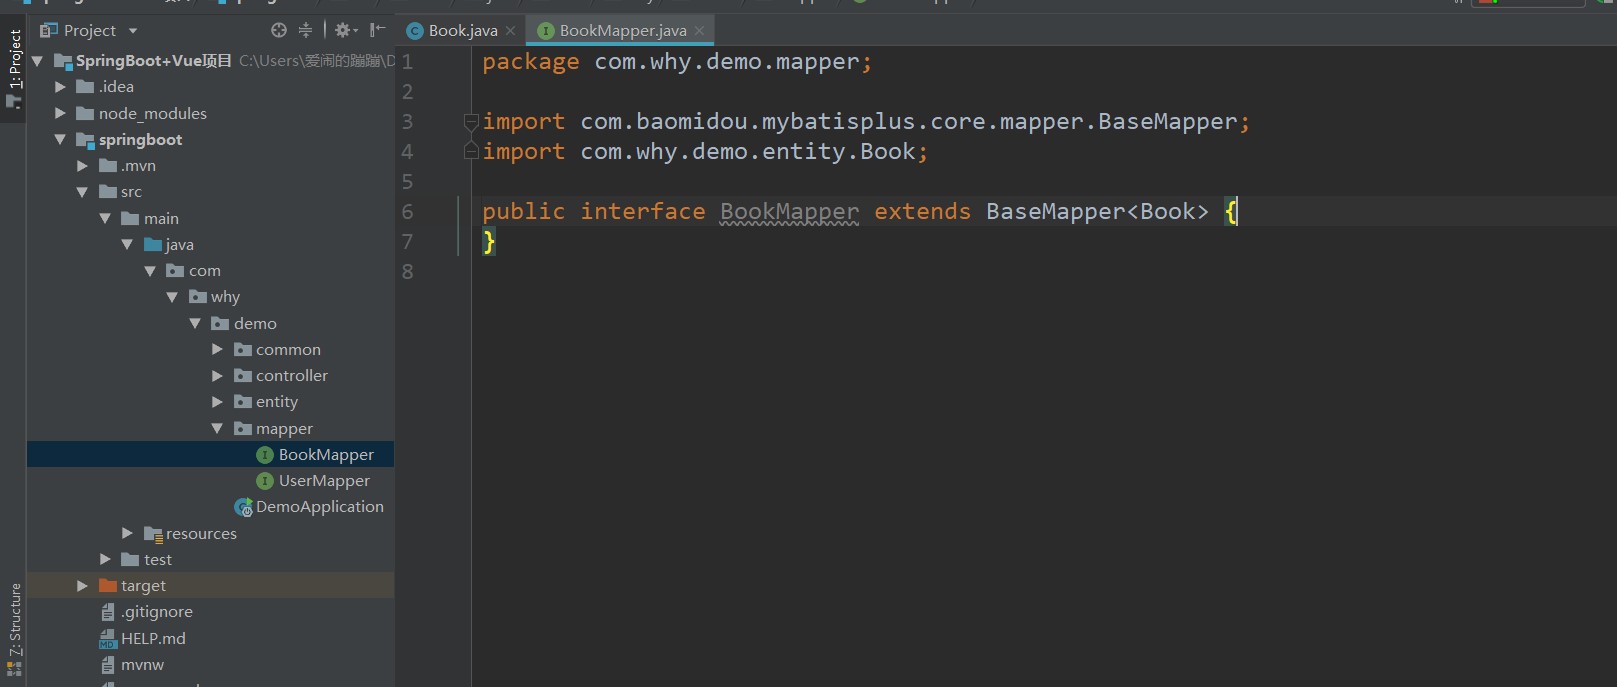
Then write our BookMapper:
Write controller layer again:
package com.why.demo.controller;

import com.baomidou.mybatisplus.core.toolkit.Wrappers;
import com.baomidou.mybatisplus.extension.plugins.pagination.Page;
import com.why.demo.common.Result;
import com.why.demo.entity.Book;
import com.why.demo.entity.User;
import com.why.demo.mapper.BookMapper;
import com.why.demo.mapper.UserMapper;
import org.springframework.web.bind.annotation.*;

import javax.annotation.Resource;

@RestController //Return annotation of json format string
@RequestMapping("/book")
public class BookController {

    //In theory, a three-tier architecture should be used. The controller calls the service and the service calls the dao. Here, the figure is convenient and can be directly called in the controller
    @Resource
    BookMapper bookMapper;


    //New user
    @PostMapping
    //@RequestBody is to convert the json data passed from the foreground into Java objects
    public Result save(@RequestBody Book book){
        bookMapper.insert(book);
        return Result.success();
    }

    //Delete user according to id
    @DeleteMapping("/{id}")
    //@PathVariable is to parse the data passed from the foreground through the {id} placeholder into a Long type id value
    public Result delete(@PathVariable Long id){
        bookMapper.deleteById(id);
        return Result.success();
    }

    //Update the user by accessing / user
    @PutMapping
    //@RequestBody is to convert the json data passed from the foreground into Java objects
    public Result update(@RequestBody Book book){
        bookMapper.updateById(book);
        return Result.success();
    }

    //To query the user, use the Get command, and it is a paging query
    /**
     * Paging query requires three parameters from the foreground. The @ RequestParm annotation is used to parse the parameters. If the following defaultValue setting is not added
     * By default, the request must carry three parameters, otherwise a 404 error will be reported
     * The first parameter pageNum is the page number of the current page
     * The second parameter pageSize is the number of pieces of data per page
     * The third parameter search is the keyword of the query
     * @param pageNum
     * @param pageSize
     * @param search
     * @return
     */
    @GetMapping
    public Result<?> findPage(@RequestParam(defaultValue = "1") Integer pageNum,
                              @RequestParam(defaultValue = "10") Integer pageSize,
                              @RequestParam(defaultValue = "") String search){
        //The following operations are provided by Mp. If you don't understand them, you need to understand and learn them yourself
        //Paging fuzzy query, the results are put in the Result and returned directly
        return Result.success(bookMapper.selectPage(new Page<>(pageNum, pageSize),Wrappers.<Book>lambdaQuery().like(Book::getName,search)));
    }

}
We have written the route before. You can directly access the test here. Log in to the home page, find the book management, and click Add:
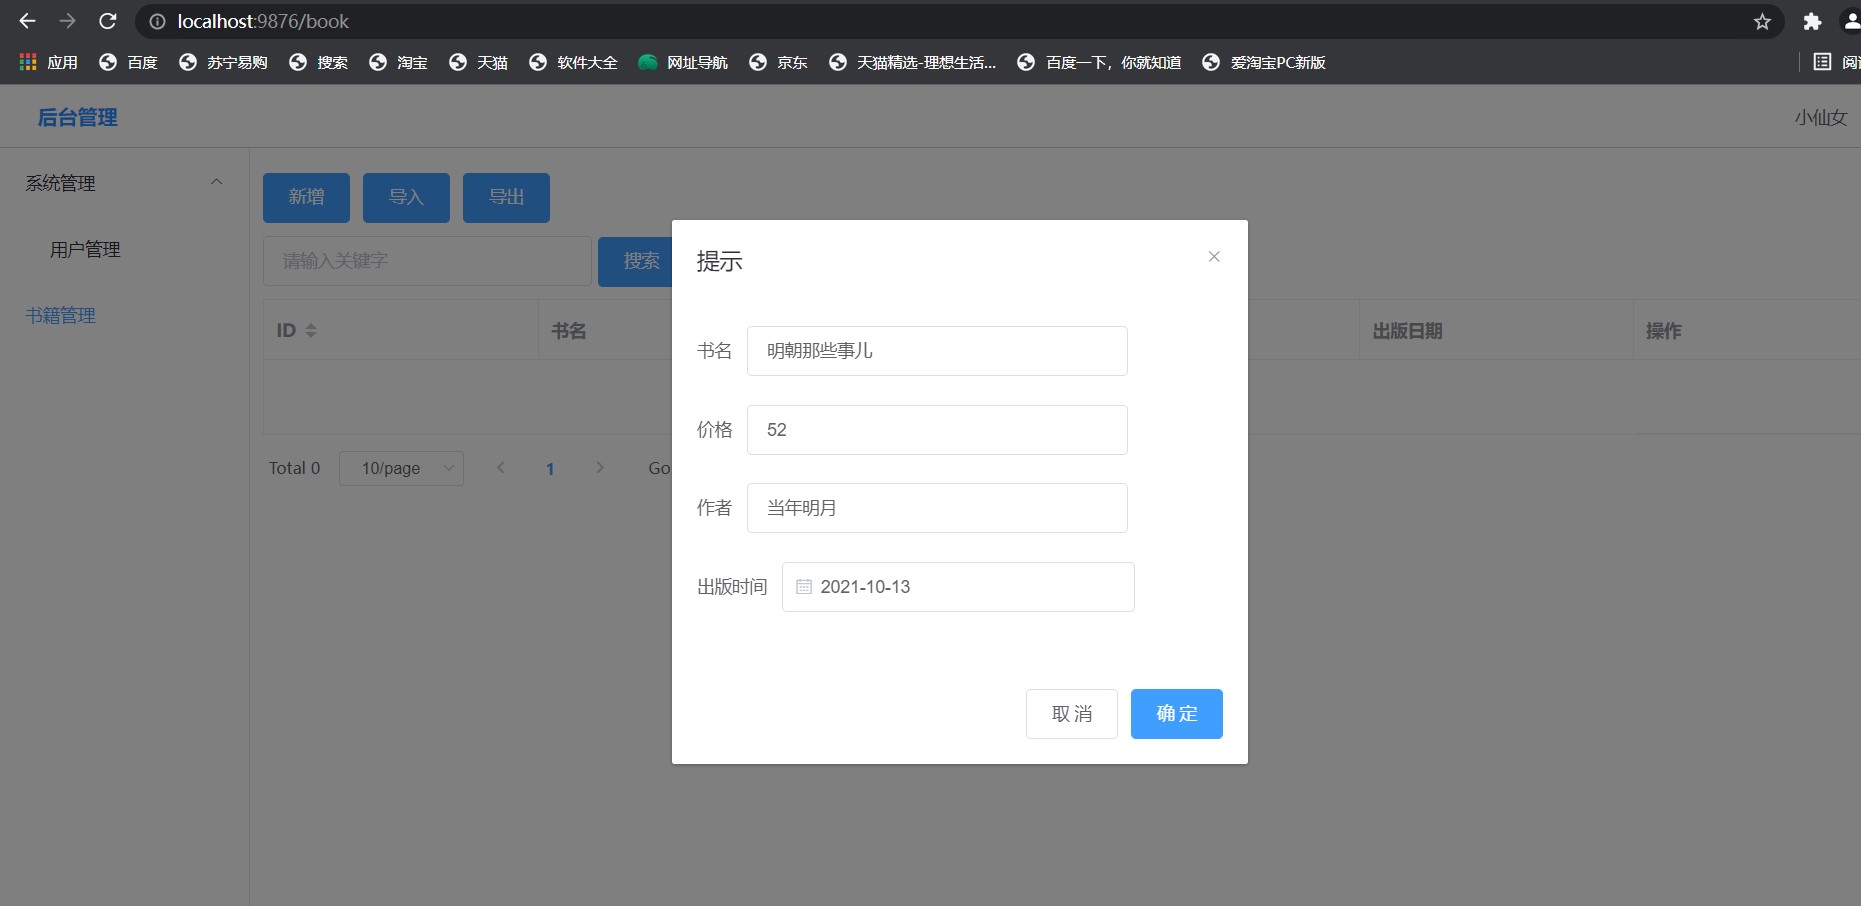
You can see that the addition is successful:
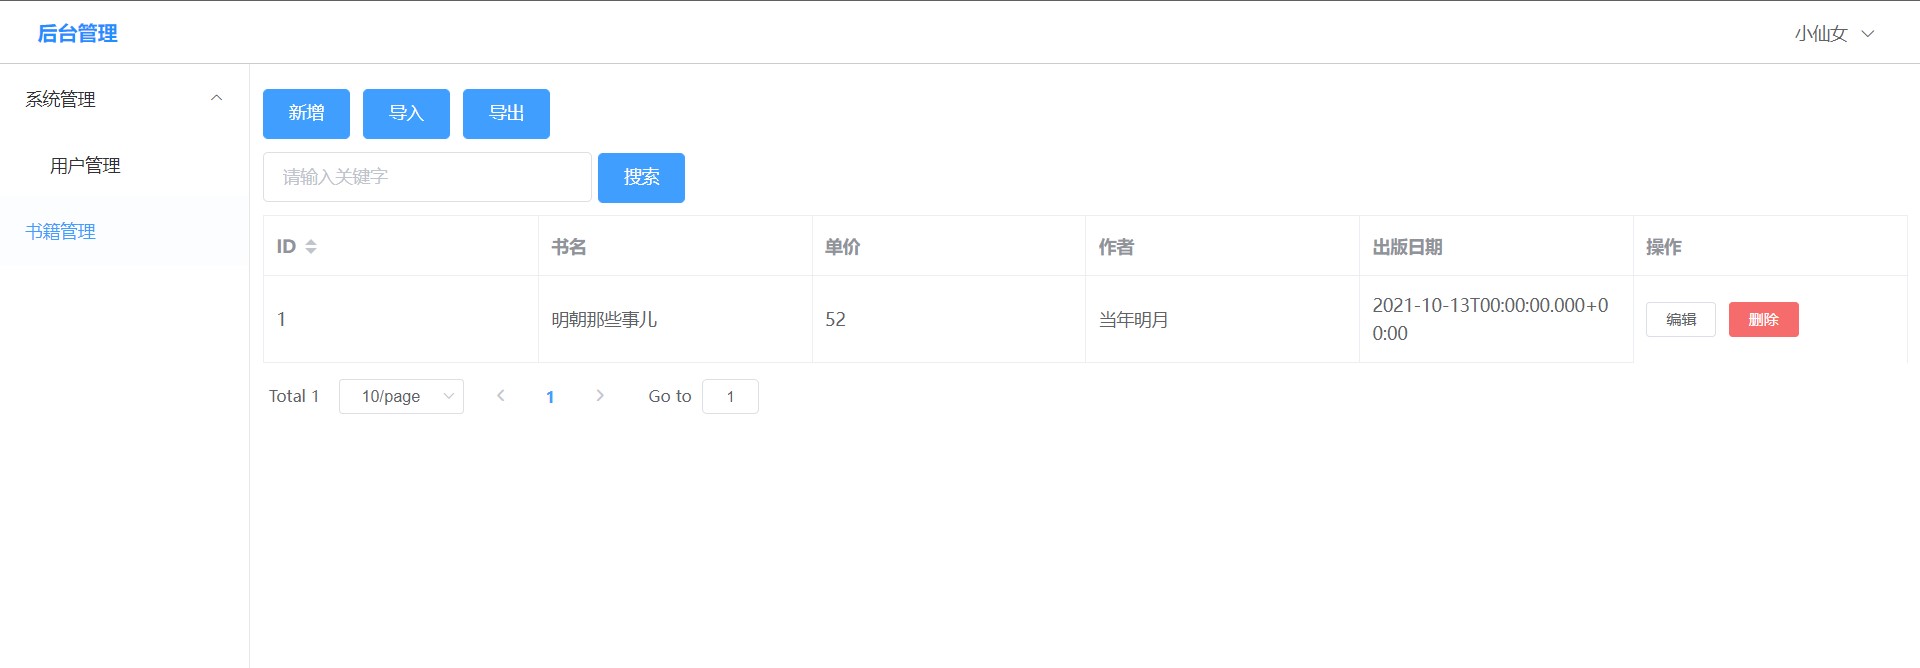
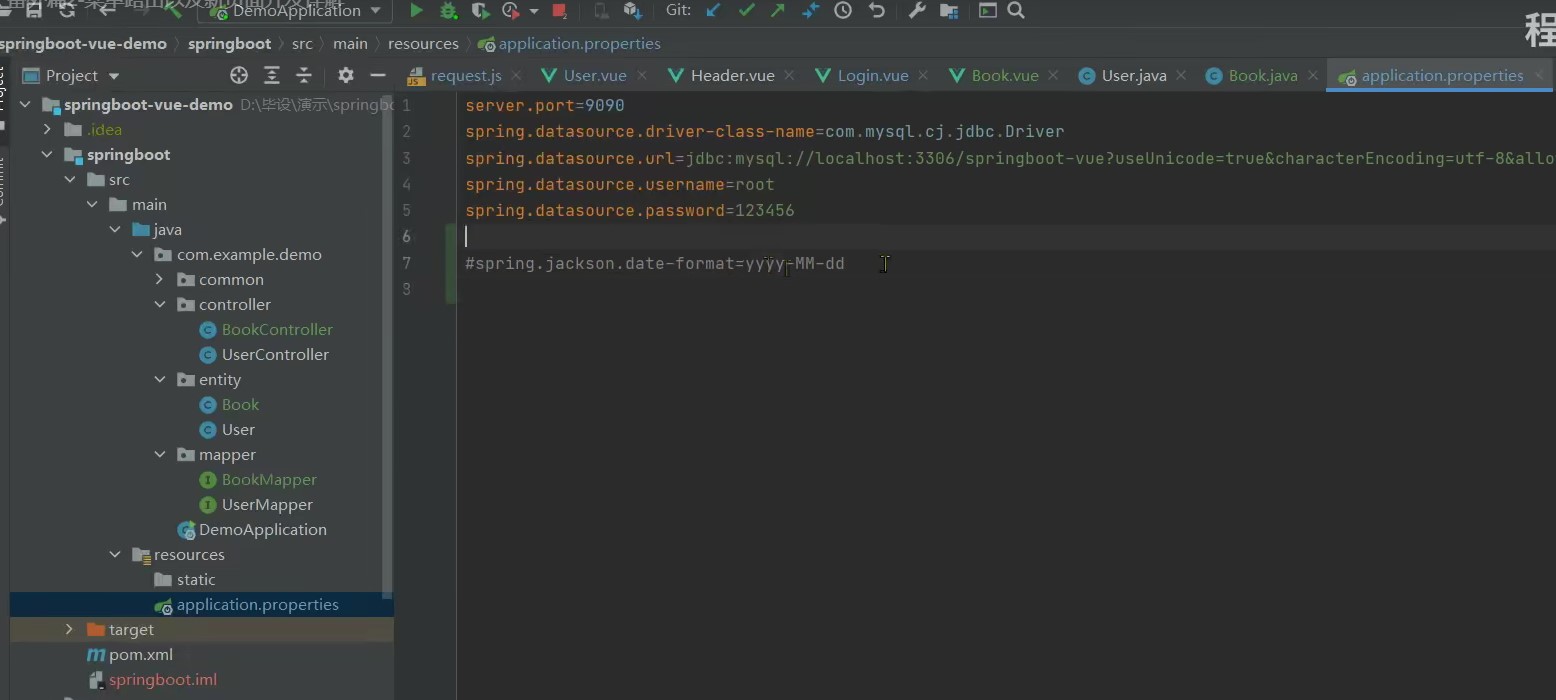
There seems to be a problem with the display of time above. We can solve the problem of date format as follows:
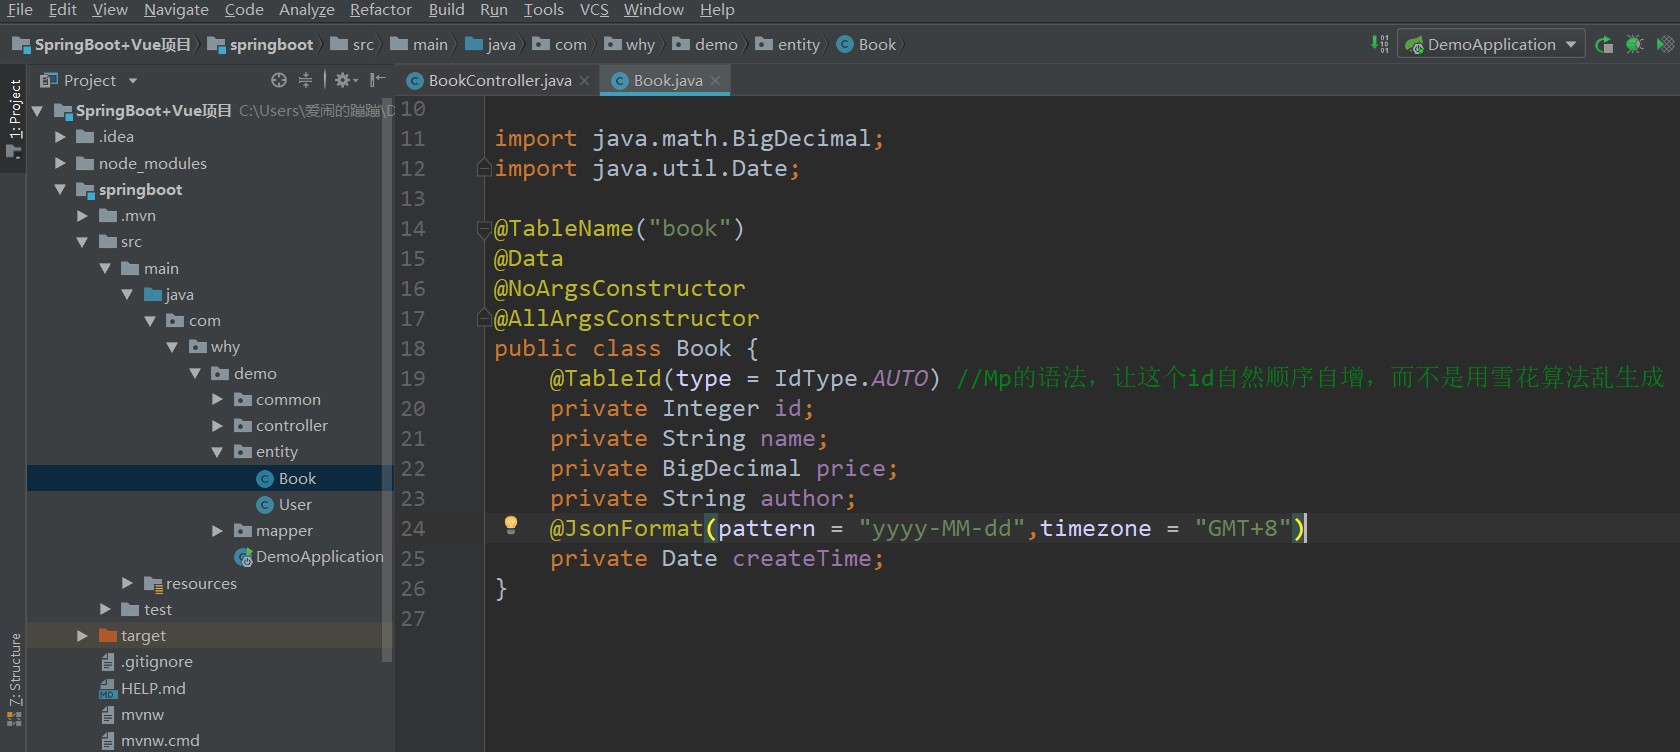
There will be no time format problem, or you can perform global configuration in yaml configuration file:
Then solve the default highlighting problem:
<template>
    <div>
                <el-menu
                        style="width: 200px; min-height: calc(100vh - 50px)"
                        :default-active="path"
                        router
                        class="el-menu-vertical-demo">
                    <el-sub-menu index="1">
                        <template #Title > system management < / template >
                        <el-menu-item index="/user">user management </el-menu-item>
                    </el-sub-menu>


                    <el-menu-item index="/book">Book management</el-menu-item>

                </el-menu>

    </div>
</template>

<script>
    export default {
        name: "Aside",
        data(){
            return {
                path: this.$router.path //Sets the default highlighted menu
            }
        },
        created(){

        }
    }
</script>

<style scoped>

</style>
Come here first and continue to write after subsequent study.