The most common way of communication between services is to call each other directly to communicate.
Instant messaging (synchronous communication) refers to that a message can reach the other end immediately after it is sent from one end.
After a message is sent from one end, it first enters a container for temporary storage. When certain conditions are met, it is sent by this container to the other end, which is called delayed message communication (asynchronous communication).
AMQP
An application layer standard advanced message queuing protocol providing unified messaging service is a general application layer protocol.
Both sending and receiving sides of the message can realize asynchronous communication by following this protocol, which stipulates the format and working mode of the message.
It is a Message Queuing service that implements AMQP(Advanced Message Queuing Protocol) advanced message queuing protocol. It uses Erlang language.
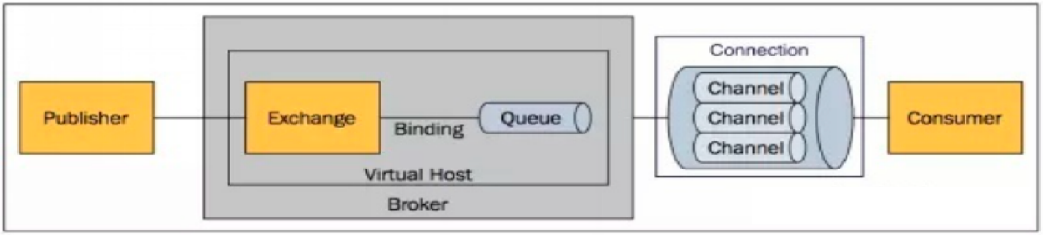
Server(Broker): a process that receives client connections and implements the message queuing and routing functions of AMQP protocol.
Virtual Host: the concept of Virtual Host, which is similar to permission control group. A Virtual Host can have multiple Exchange queues.
Exchange: a switch that receives messages sent by producers and routes messages to a Queue in the server according to the Routing Key.
Exchange type: the type of switch determines the behavior of routing messages. There are three types of exchange in RabbitMQ: fanout, direct and topic Message queue: message queue, used to store messages that have not been consumed by consumers.
Message: it is composed of header and body. Header is a collection of various attributes added by the producer, including whether the message is persisted, what is the priority, which Message Queue receives it, etc. Body is the data content that needs to be sent.
BindingKey: binding keyword, which binds a specific Exchange to a specific Queue.
docker deploying RabbitMQ
docker pull rabbitmq:management
Note: when obtaining images, you should obtain the management version instead of the last version. The management version only has the management interface.
docker run -d \
--name my-rabbitmq \
-p 5672:5672 -p 15672:15672 \
-v /home/rabbitmq:/var/lib/rabbitmq \
--hostname my-rabbitmq-host \
-e RABBITMQ_DEFAULT_VHOST=my_vhost \
-e RABBITMQ_DEFAULT_USER=admin \
-e RABBITMQ_DEFAULT_PASS=admin \
--restart=always \
rabbitmq:management
-- hostname: host name (an important note of RabbitMQ is that it stores data according to the so-called "node name", which is the host name by default)
- e: specify environment variables
RABBITMQ_DEFAULT_VHOST: default virtual machine name
RABBITMQ_DEFAULT_USER: default user name
RABBITMQ_DEFAULT_PASS: the password of the default user name
After the container is started, you can view the logs through the docker logs container
docker logs my-rabbitmq
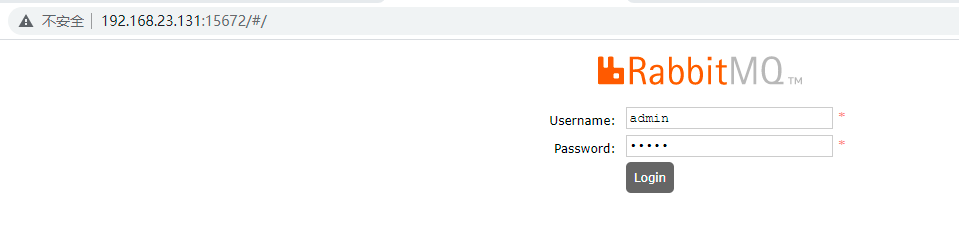
Enter the management background
http://ip:15672
Login user admin password admin
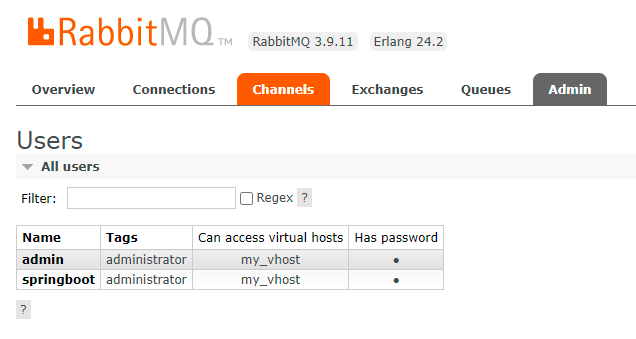
New user add a user
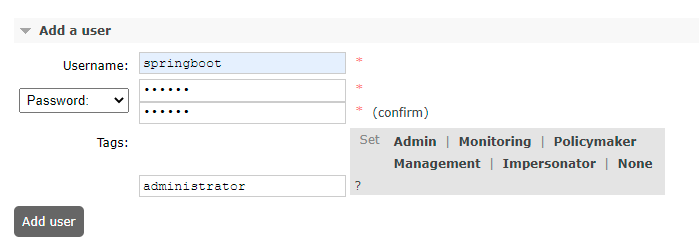
Remember to authorize!
After creating a new virtual machine, click spring boot to set the virtual machine
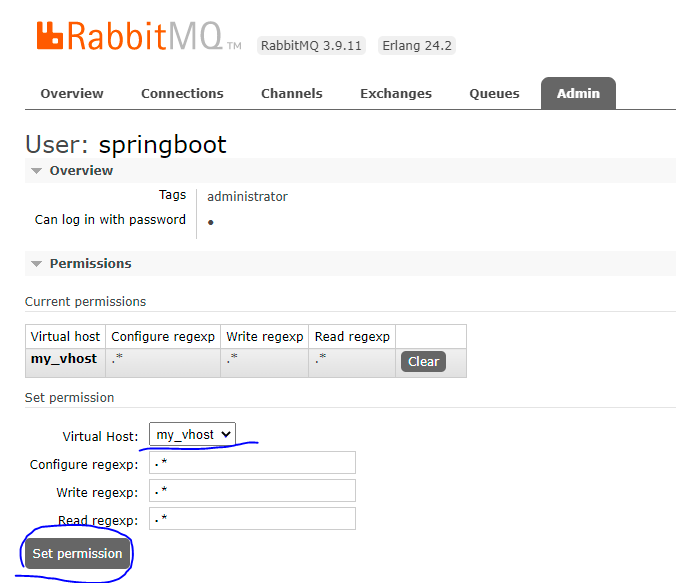
As shown in the figure, ok~ log in to springboot
Next, set up the springboot project

Required dependencies
<dependency>
    <groupId>org.springframework.boot</groupId>
    <artifactId>spring-boot-starter-amqp</artifactId>
</dependency>
yml file configuration
server:
    port: 8080
spring:
    application:
        name: provider
    rabbitmq:
        host: 192.168.23.131
        password: 123456
        port: 5672
        username: springboot
        virtual-host: my_vhost
Producer Provider
package com.example.pri;

import org.springframework.amqp.core.Queue;
import org.springframework.context.annotation.Bean;
import org.springframework.context.annotation.Configuration;

@Configuration
@SuppressWarnings("all")
public class RabbitConfig {

    @Bean
    public Queue firstQueue() {
        return new Queue("firstQueue");
    }

}
package com.example.pri;

import org.springframework.amqp.core.AmqpTemplate;
import org.springframework.beans.factory.annotation.Autowired;
import org.springframework.stereotype.Component;

@Component
@SuppressWarnings("all")
public class Sender {

    @Autowired
    private AmqpTemplate rabbitTemplate;

    public void sendFirst() {
        rabbitTemplate.convertAndSend("firstQueue", "Hello World");
    }

}
Run Test
package com.example.pri;

import org.junit.jupiter.api.Test;
import org.springframework.beans.factory.annotation.Autowired;
import org.springframework.boot.test.context.SpringBootTest;

@SpringBootTest
class ProviderApplicationTests {

    @Autowired
    private Sender sender;

    @Test
    void contextLoads() {
        sender.sendFirst();
    }

}
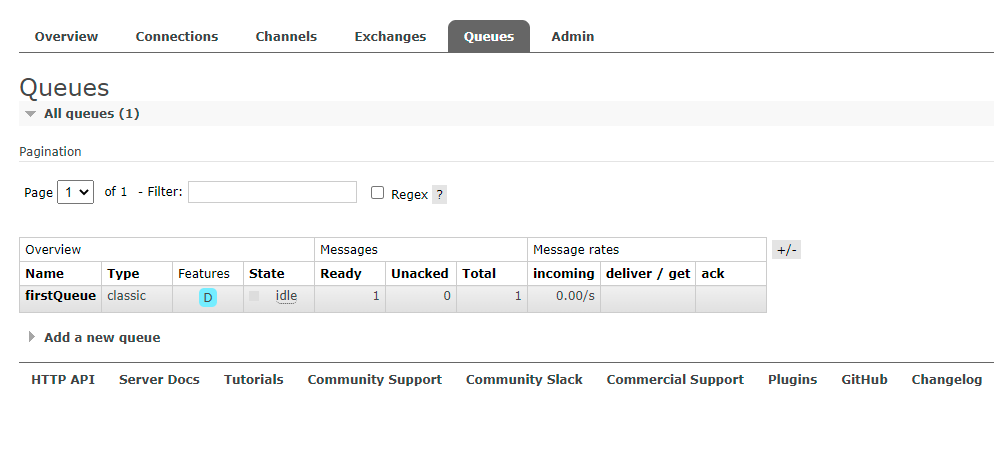
RabbitMQ will have a queue after running successfully
Consumer
server:
    port: 8081
spring:
    application:
        name: consumer
    rabbitmq:
        host: 192.168.23.131
        password: 123456
        port: 5672
        username: springboot
        virtual-host: my_vhost
package com.example.cum;

import lombok.extern.slf4j.Slf4j;
import org.springframework.amqp.rabbit.annotation.RabbitHandler;
import org.springframework.amqp.rabbit.annotation.RabbitListener;
import org.springframework.stereotype.Component;

@Component
@SuppressWarnings("all")
@Slf4j
@RabbitListener(queues = "firstQueue")
public class Receiver {

    @RabbitHandler
    public void process(String msg) {
        log.warn("Received:" + msg);
    }

}
Custom data sending
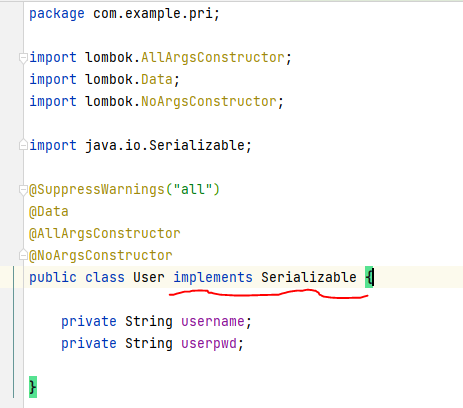
New user class
package com.example.pri;

import lombok.AllArgsConstructor;
import lombok.Data;
import lombok.NoArgsConstructor;

@SuppressWarnings("all")
@Data
@AllArgsConstructor
@NoArgsConstructor
public class User{

    private String username;
    private String userpwd;

}
Method
public void send(User user) {
    rabbitTemplate.convertAndSend("first", user);
}
The console reports an error after running
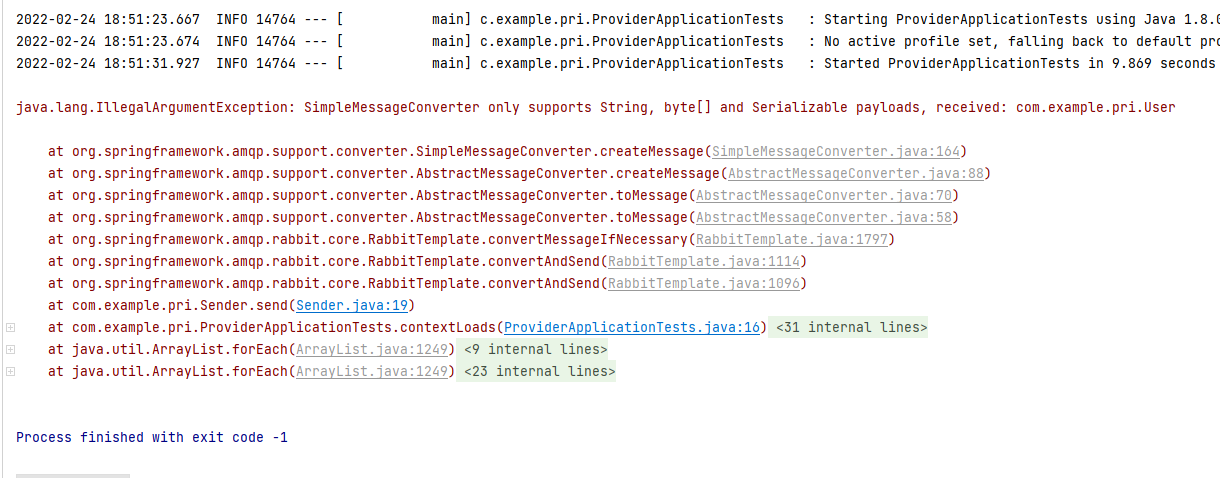
Solution: implement serialization interface