Docker is used in combination with Idea plug-in
1, Install docker plug-in
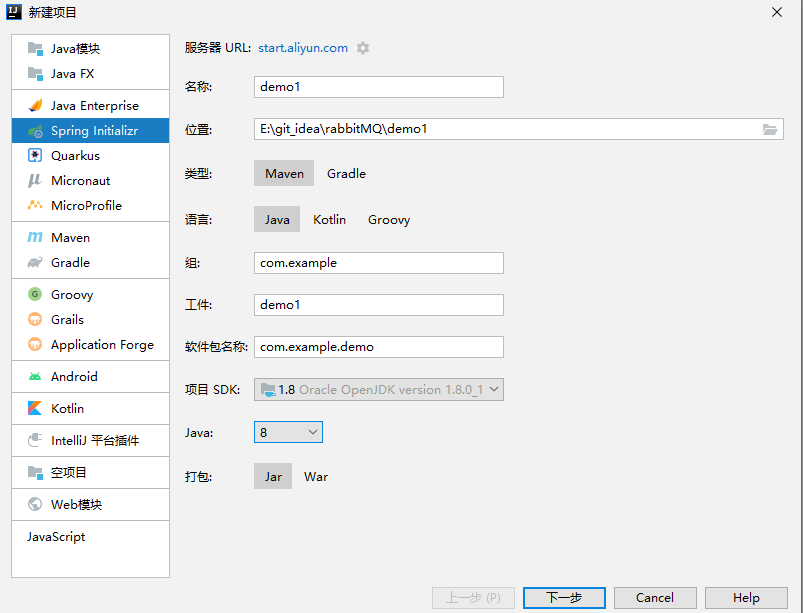
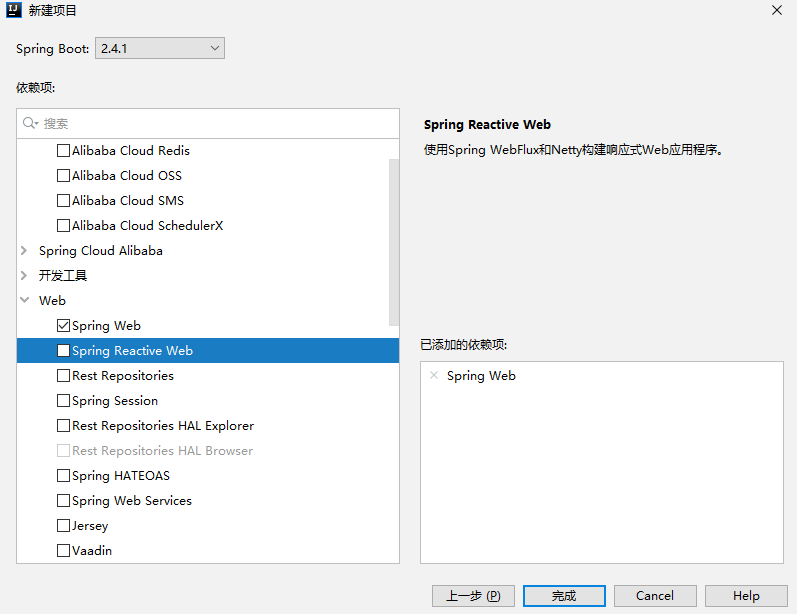
1. New idea project
2. Check whether there is a Docker in the plug-in

3. In docker The port number is indicated in the service file
ExecStart=/usr/bin/dockerd -H fd:// --containerd=/run/containerd/containerd.sock -H tcp://0.0.0.0:2375
systemctl daemon-reload
systemctl restart docker
4. Firewall operation
firewall-cmd --zone=public --add-port=2375/tcp --permanent && firewall-cmd --reload && firewall-cmd --list-ports

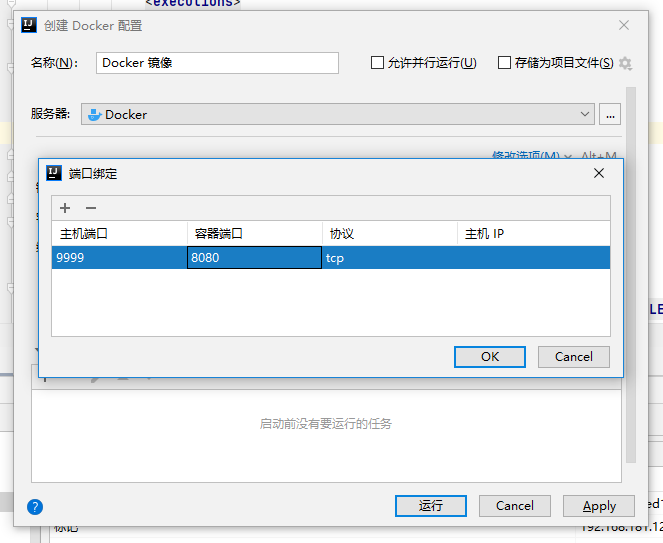
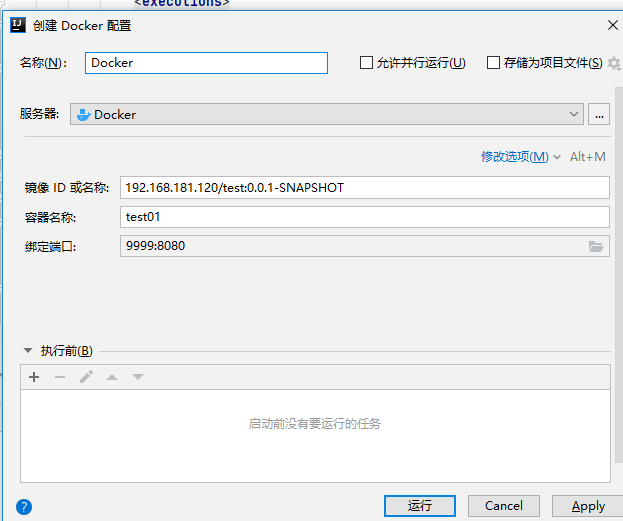
5. Configure Docker
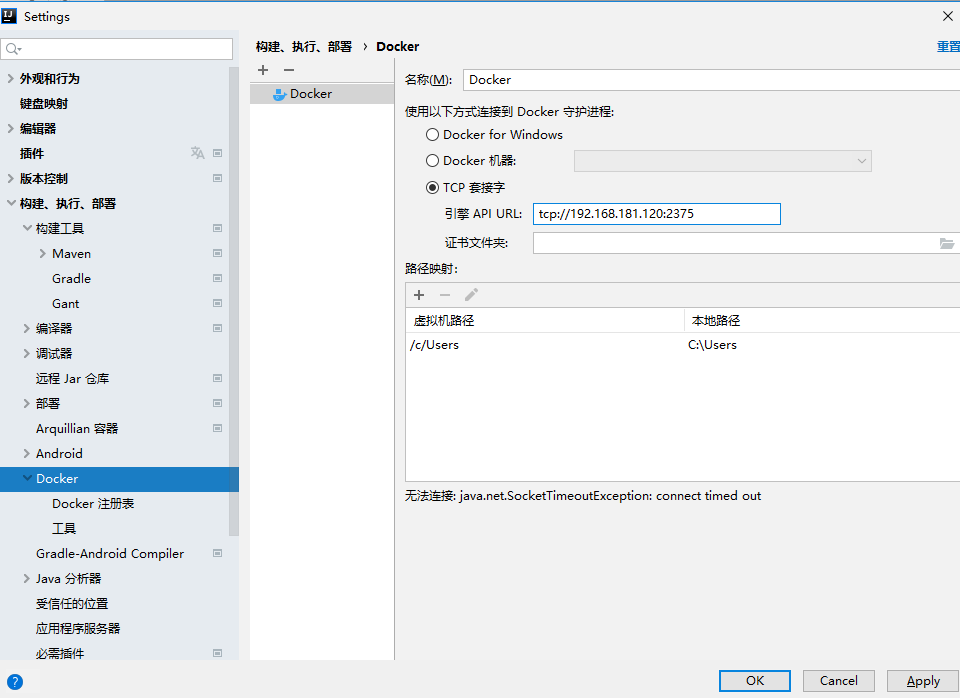
You can directly pull the image here, because I don't pull it when I have it
6. Build the Springboot project, generate the Dockerfile, and complete the image generation
Remove the jar package
Create a new file and put it in the jar package:
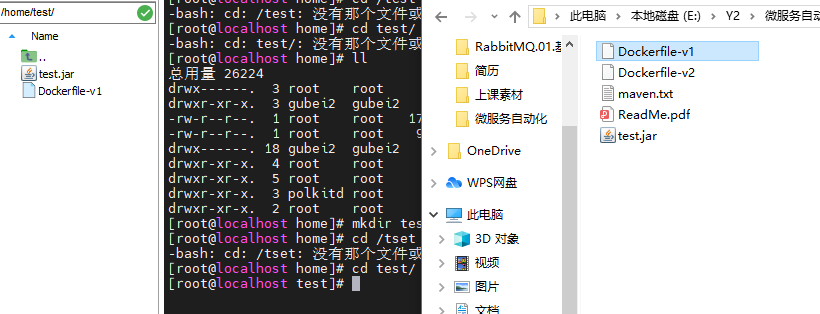
dockerfile-v1: change to dockerfile
#1. Specify the basic image
FROM openjdk:8-jdk-alpine
#2. Maintainer information
MAINTAINER xyz "xyz@qq.com"
#3. Create the / tmp directory and persist it to the Docker data folder, because the embedded Tomcat container used by Spring Boot uses / tmp as the working directory by default
VOLUME /tmp
#4. Copy test1 Jar into the container (this is different from the one click release of docker plug-in in the later idea)
ADD test.jar /test.jar
#5. Set time zone
ENV TZ=PRC
RUN ln -snf /usr/share/zoneinfo/$TZ /etc/localtime && echo $TZ > /etc/timezone
#6. Declare that the runtime container provides a service port. This is just a declaration. The application will not open the service of this port because of this declaration at runtime
EXPOSE 8080
#7. Specify the container startup program and parameters (equivalent to executing jar package with cmd command in the container)
ENTRYPOINT ["java","-jar","/test.jar"]
#The following script specifies the additional parameters specified when the springboot project starts
#ENTRYPOINT ["java","-jar","/test.jar","--spring.config.location=/usr/local/project/docker/xxl-job/config/application.yml"]
Compile image
docker build -t demo:1.0 .
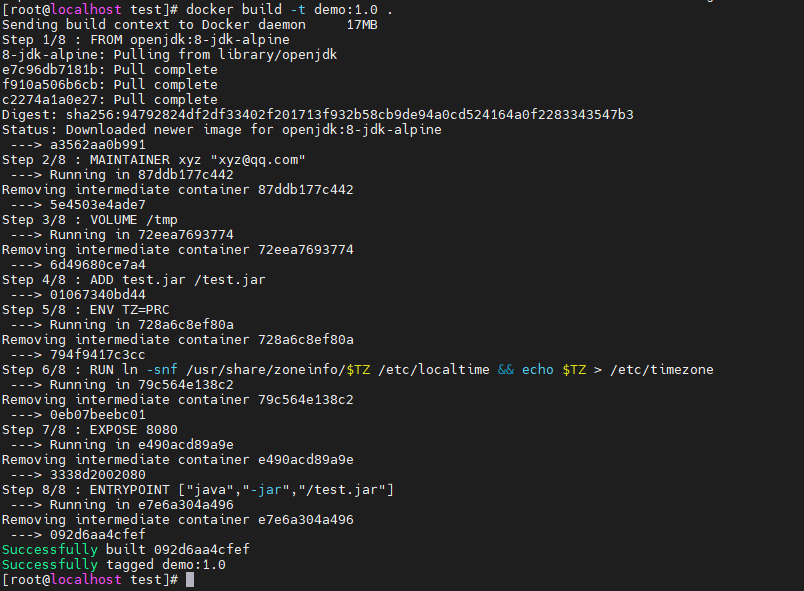
start-up
docker run -itd --name test01 -p 8848:8080 demo:1.0

Visit successful

II. Private server construction
1. Pull the registry image (choose to build the registry of version 2.7 here, do not use the latest version, and there is a BUG)
docker pull registry:2.7

2. Open the container
docker run -d \
--name myregistry \
-p 5000:5000 \
-v /usr/local/docker/registry:/var/lib/registry \
--restart=always \
registry:2.7

3. Verify whether the construction is successful
curl http://127.0.0.1:5000/v2/_catalog
curl http://192.168.27.120:5000/v2/_catalog

4. Let docker trust the private image warehouse address
vi /etc/docker/daemon.json
"registry-mirrors":["https://64qvhl20.mirror.aliyuncs.com"],
"insecure-registries":["192.168.181.120:5000"]
}
systemctl restart docker
3, Use of private warehouses
docker tag Custom image name[:edition] Private service IP:port/Warehouse name[:edition]
docker tag demo:1.0 192.168.181.120:5000/demo:v1.0
docker images
docker push 192.168.181.120:5000/demo:v1.0

View all images of the registered server
curl 127.0.0.1:5000/v2/_catalog
The demo has entered the warehouse

Download Image from registry
docker pull 192.168.181.120:5000/demo:v1.0
4, Idea one click deployment
Configure maven plug-in
① . create a new TestController class
package com.example.demo;

import org.springframework.web.bind.annotation.RequestMapping;
import org.springframework.web.bind.annotation.RestController;

@RestController
public class TestController {

    @RequestMapping("/test")
    public String test(){
        return "hello world";
    }

}
② Package the project
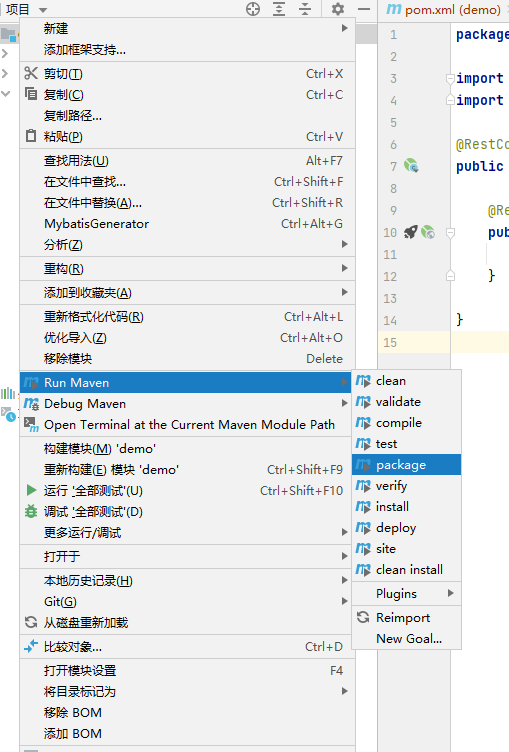
③ . pom file import plug-in
            <plugin>
                <groupId>com.spotify</groupId>
                <artifactId>dockerfile-maven-plugin</artifactId>
                <version>1.4.10</version>
                <executions>
                    <execution>
                        <id>default</id>
                        <goals>
                            <!--If package I don't want to use it docker pack,Just comment this out goal-->
                            <goal>build</goal>
                            <goal>push</goal>
                        </goals>
                    </execution>
                </executions>
                <configuration>
                    <repository>192.168.218.132/test</repository>
                    <tag>${project.version}</tag>
                    <buildArgs>
                        <JAR_FILE>target/${project.build.finalName}.jar</JAR_FILE>
                    </buildArgs>
                </configuration>
            </plugin>
Precautions for using plug-ins
① The plug-in relies on a Host with Docker to complete the construction of the image
② . since the plug-in needs to access the Docker Host, it requires the Docker Host to open the TCP management port and allow access (complete)
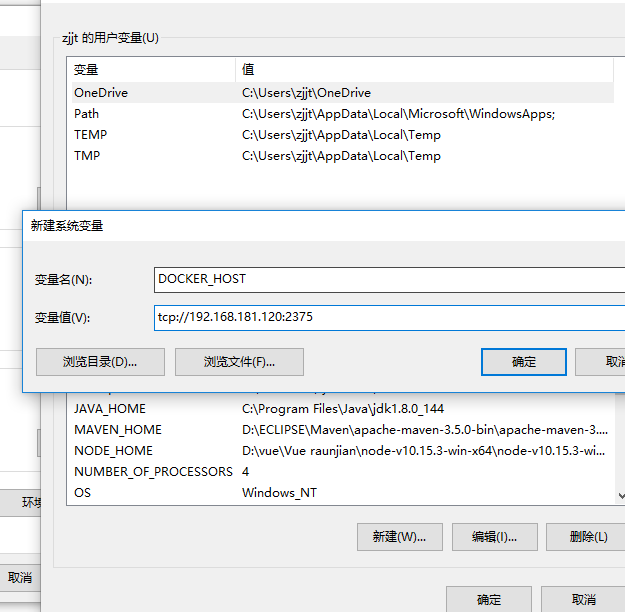
③ . the machine using this plug-in needs to be configured with DOCKER_HOST option, pointing to the corresponding port of Docker Host (incomplete)
That is, configure the relevant environment variable docker under windows_ HOST= tcp://192.168.181.120:2375
<pluginGroups>
<pluginGroup>com.spotify</pluginGroup>
</pluginGroups>

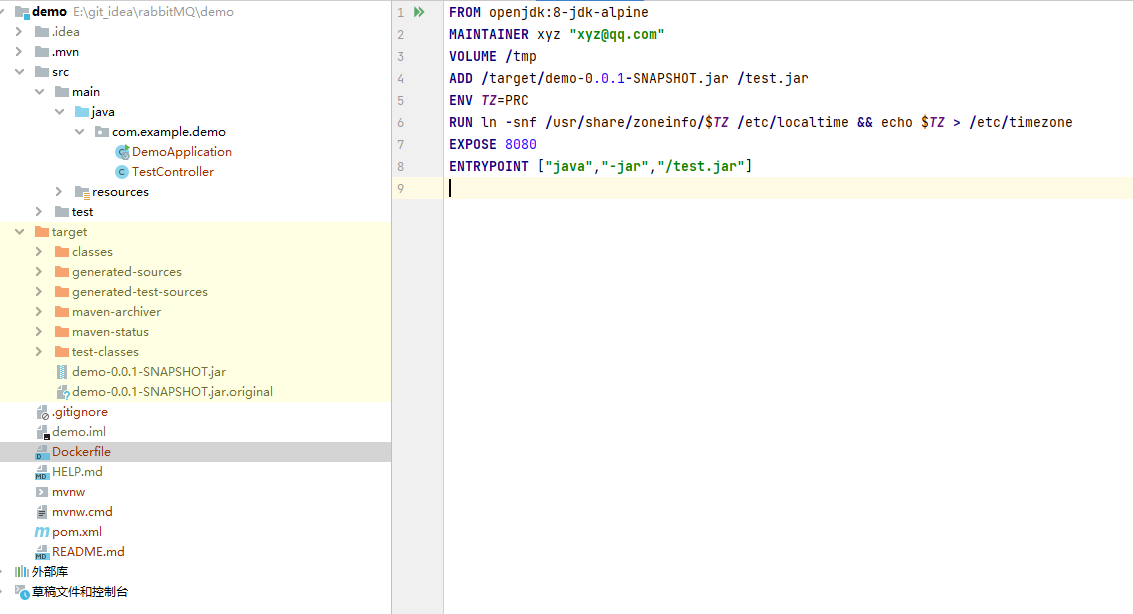
2. Dockerfile file of new project
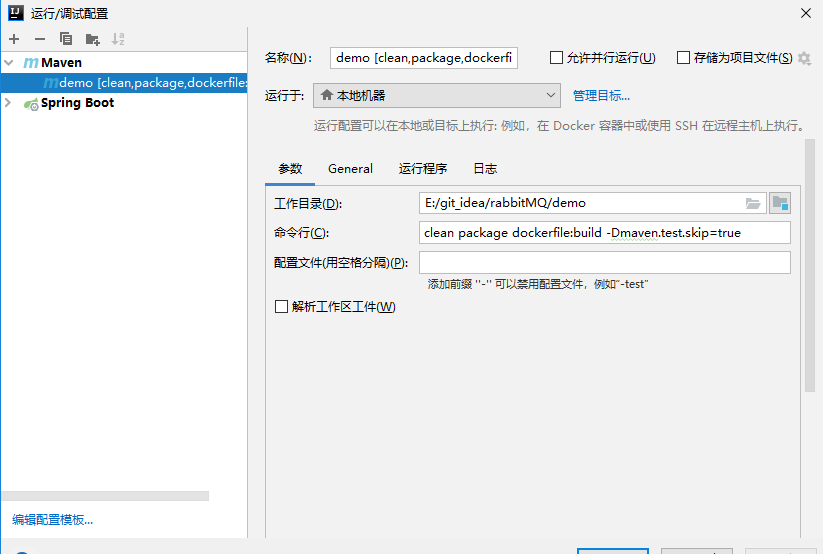
 3. Add maven command
clean package dockerfile:build -Dmaven.test.skip=true
Start:

