We will use a series to explain the complete practice of microservices from requirements to online, from code to k8s deployment, from logging to monitoring.
The whole project uses the micro services developed by go zero, which basically includes go zero and some middleware developed by relevant go zero authors. The technology stack used is basically the self-developed component of the go zero project team, which is basically the go zero software.
Actual project address: https://github.com/Mikaelemmmm/go-zero-looklook
1. Overview
In the previous section, we have built gitlab, jenkins, harbor and k8s. In this section, we will write the pipline of jenkins and publish our services to k8s through jenkins.
2. Deployment Middleware
Deploy mysql, redis, es, etc. outside k8s and simulate them as an online independent environment (as for online middleware, you want to deploy some middleware inside k8s. This time, the focus is on how to deploy micro services developed by go zero inside k8s cluster). Here I will directly use docker compose env under the project Yaml, and install all the dependent third-party middleware environments directly in SRV data Com (192.168.1.181), provided that docker and docker compose have been installed on this server.
Log in to 192.168.1.181
$ mkdir data && cd data && vim docker-compose.yml
$ docker-compose up -d
$ docker-compose ps #View confirmation
3. Independent configuration
The configuration of each service is independent and placed in a git warehouse. In this way, only one person is allowed to access the online warehouse. If the online configuration changes, directly modify the file of the warehouse. When jenkins makes cd, it will first pull the code and then pull the configuration of the corresponding service for automatic construction. For details, see the following pipline.
[q] why not use the configuration center?
1) The service needs to be restarted to modify db and redis, but there are some configurations that do not need to be restarted. The operation and maintenance needs to remember. If the records are mixed, it is easy to cause online accidents
2) Easy rollback. We sent a new version online and changed the configuration of the new version. At this time, online users report that there is a problem. If online users need to roll back quickly, if we use k8s one-line command to build the file into the image, we can roll back the code of the previous version plus the configuration directly. If the configuration center is used and the code is rolled back, it is troublesome to change the configuration of the previous version back to the configuration center.
The directory structure of independent online warehouse is as follows (this structure is related to the writing method in pipline)
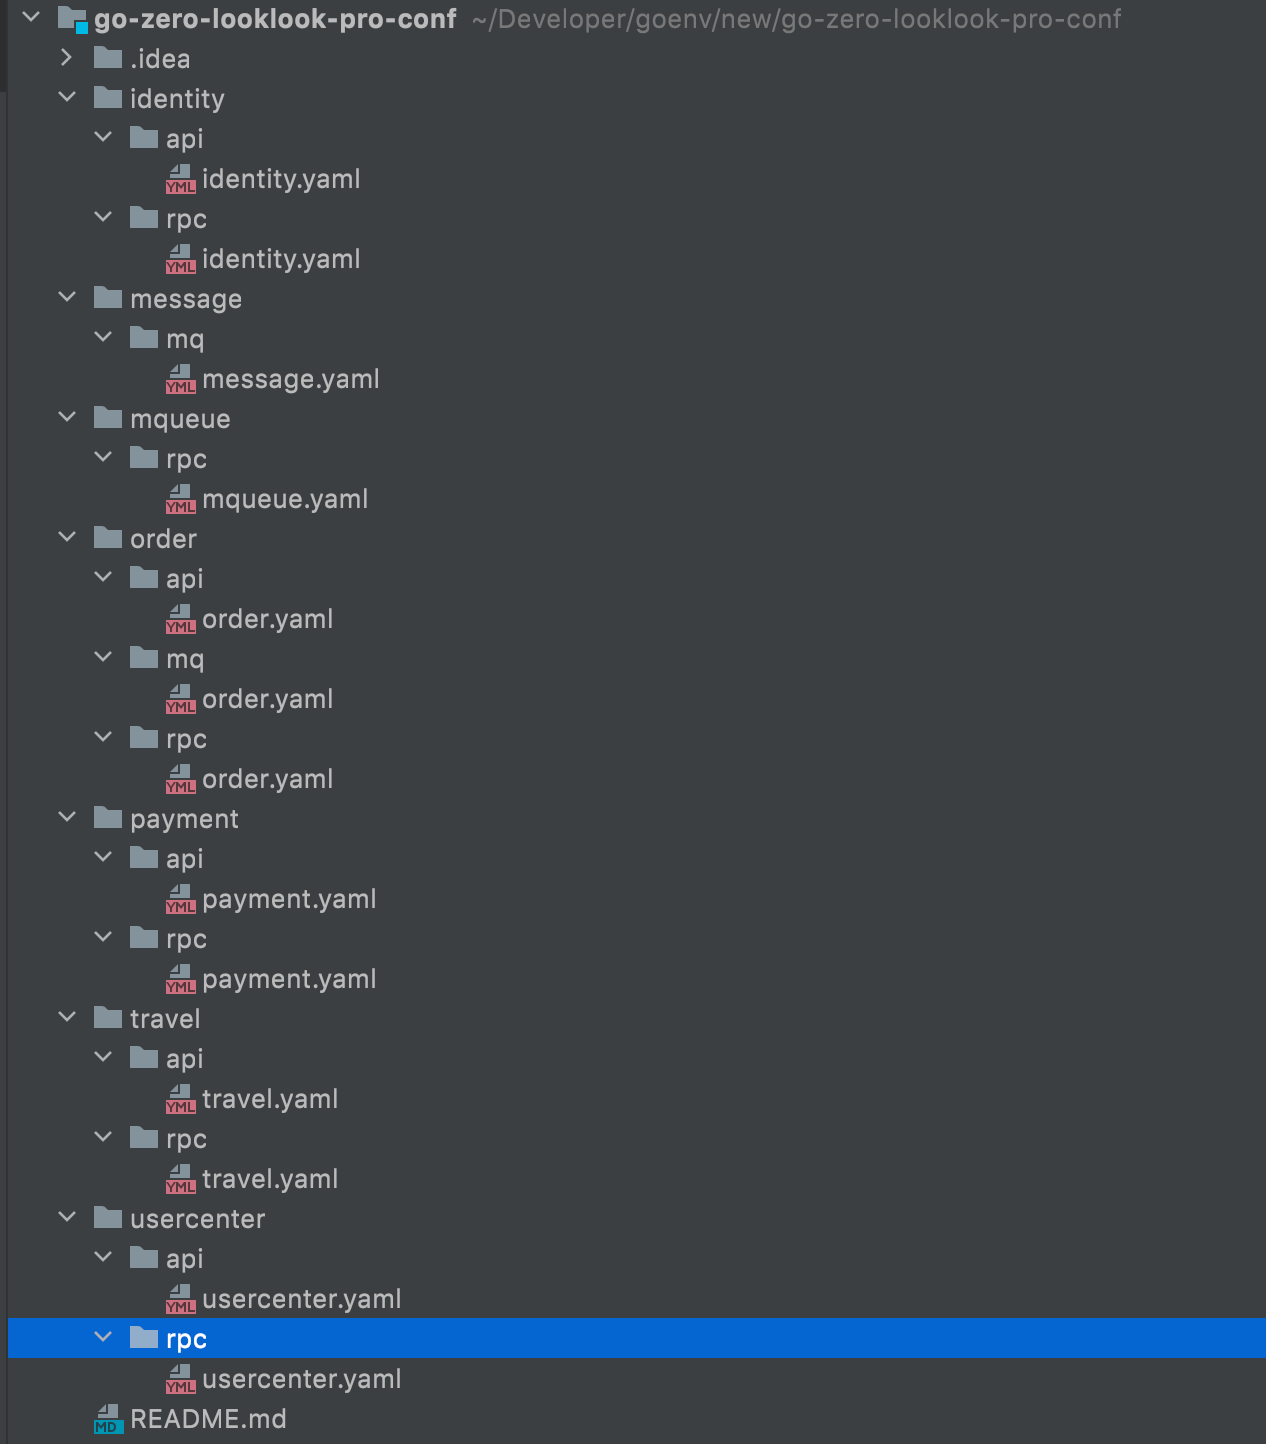
Warehouse address: https://github.com/Mikaelemmmm/go-zero-looklook-pro-conf , just download it directly
1. Modify the middleware in the configuration. The database and redis should be changed to 192.168.1.181. We regard this machine as the middleware of the online environment.
2. Another is our service discovery. We deploy online in k8s. Go zero directly supports k8s service discovery, so etcd is not required. When configuring zrpc client, we should change the configuration mode of target and k8s.
4. Write the pipline of jenkins
4.1 configuration parameters
visit http://192.168.1.180:8989/ Open jenkins, enter the homepage of jenkins, and click the menu on the left to create a new Item
Let's first create the pipeline of identity authorization service
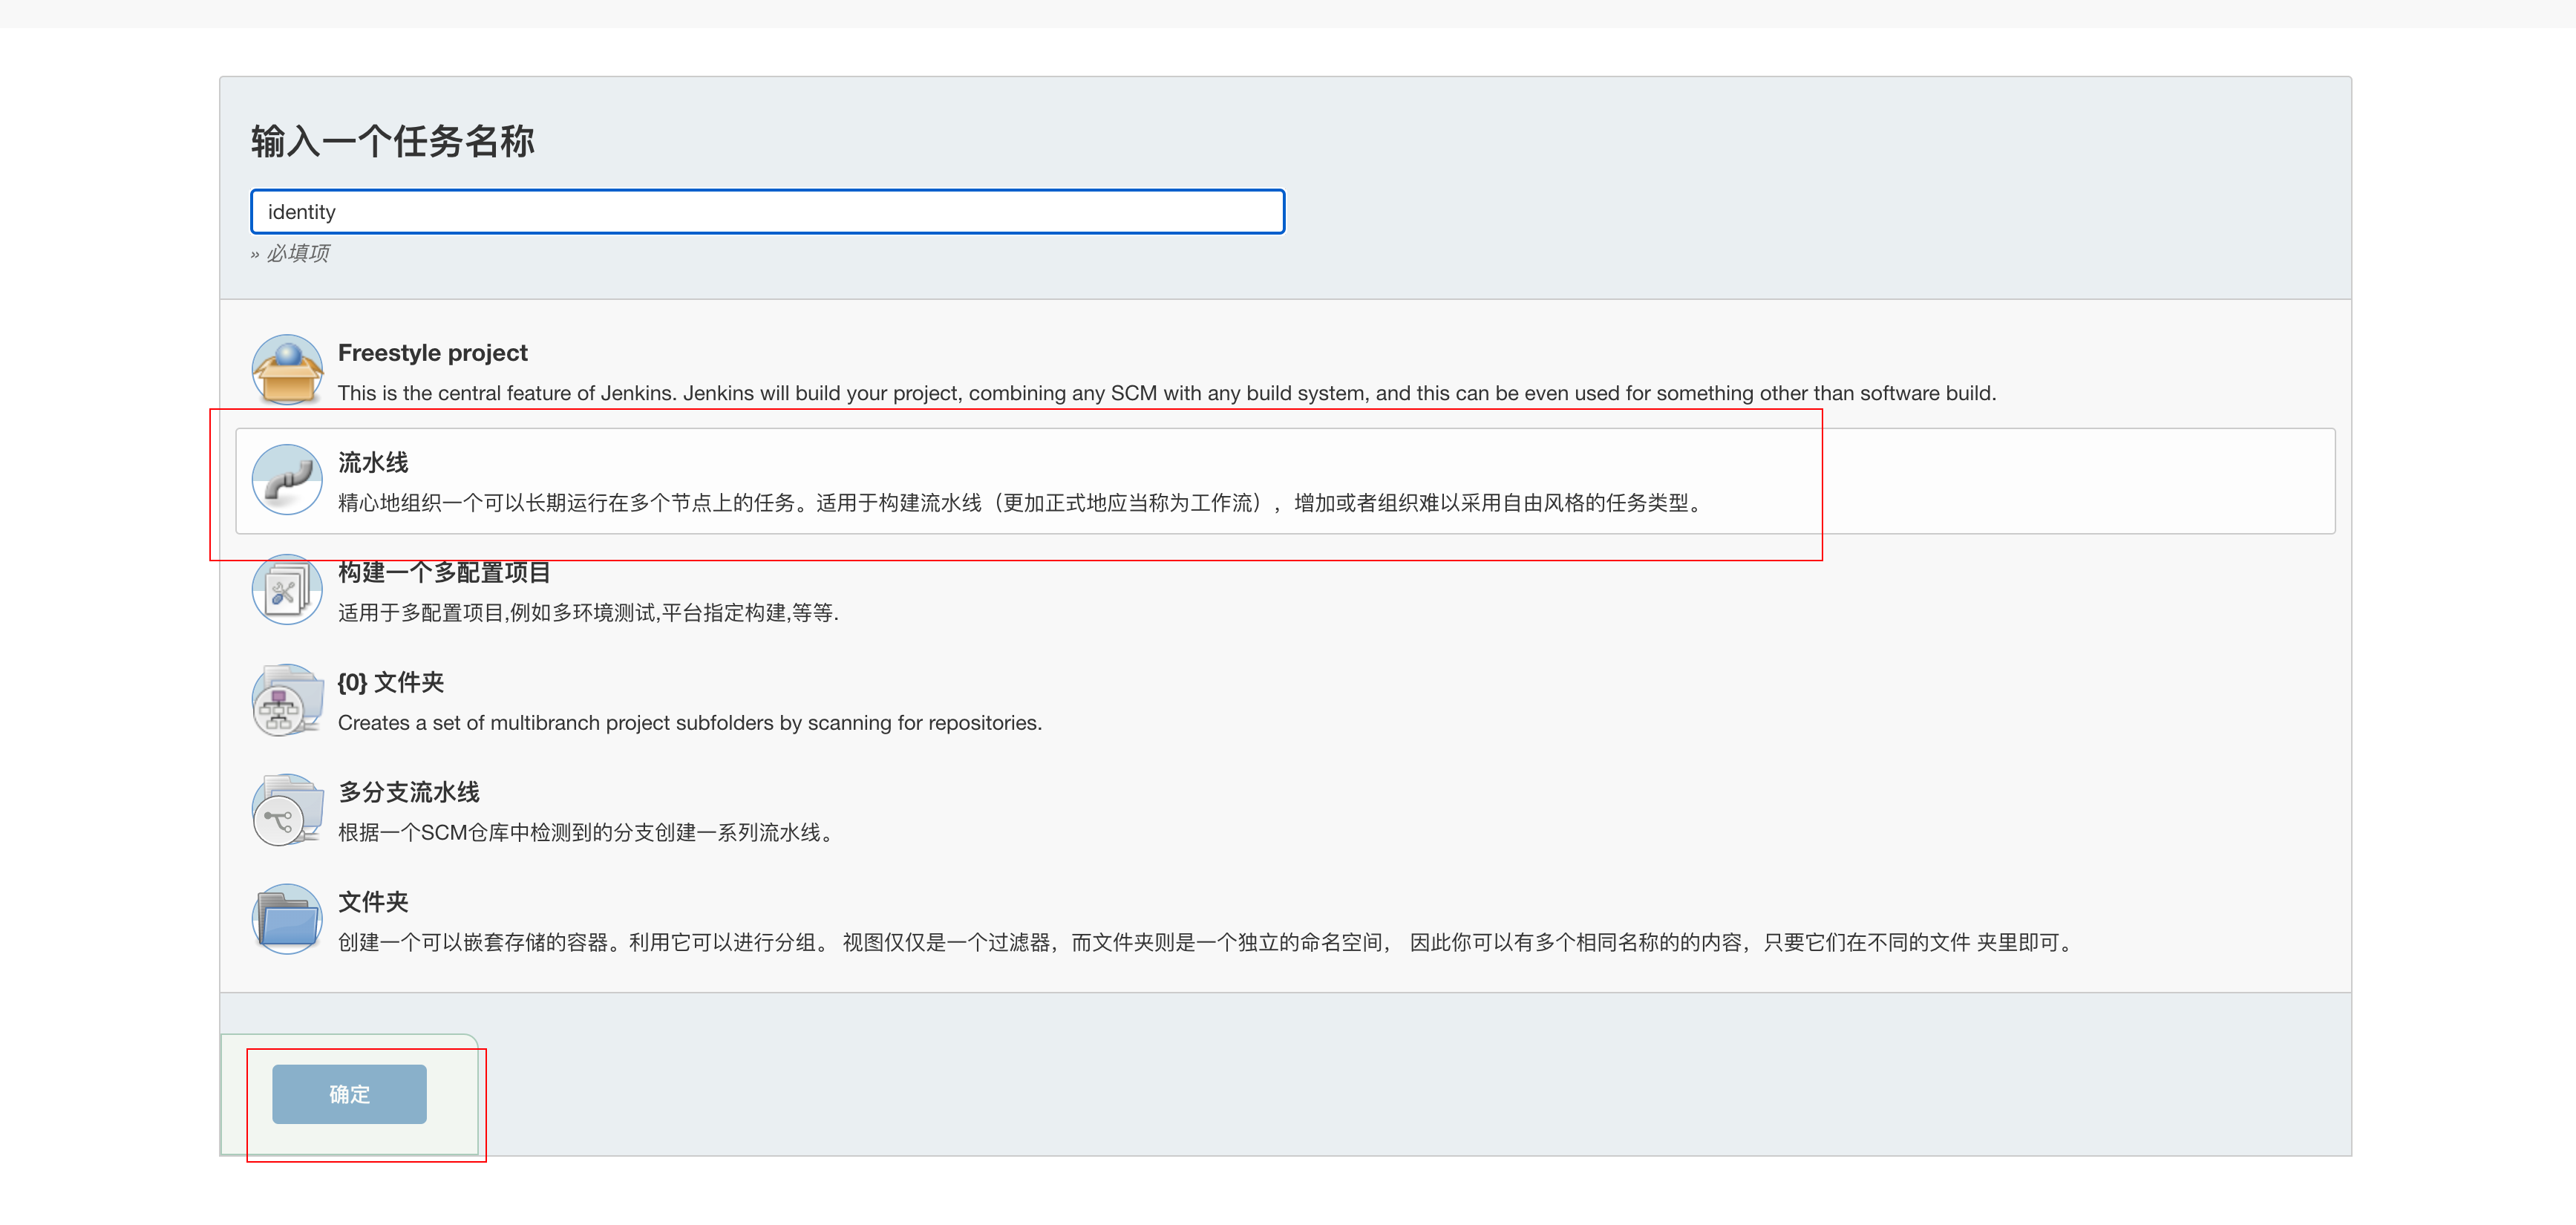
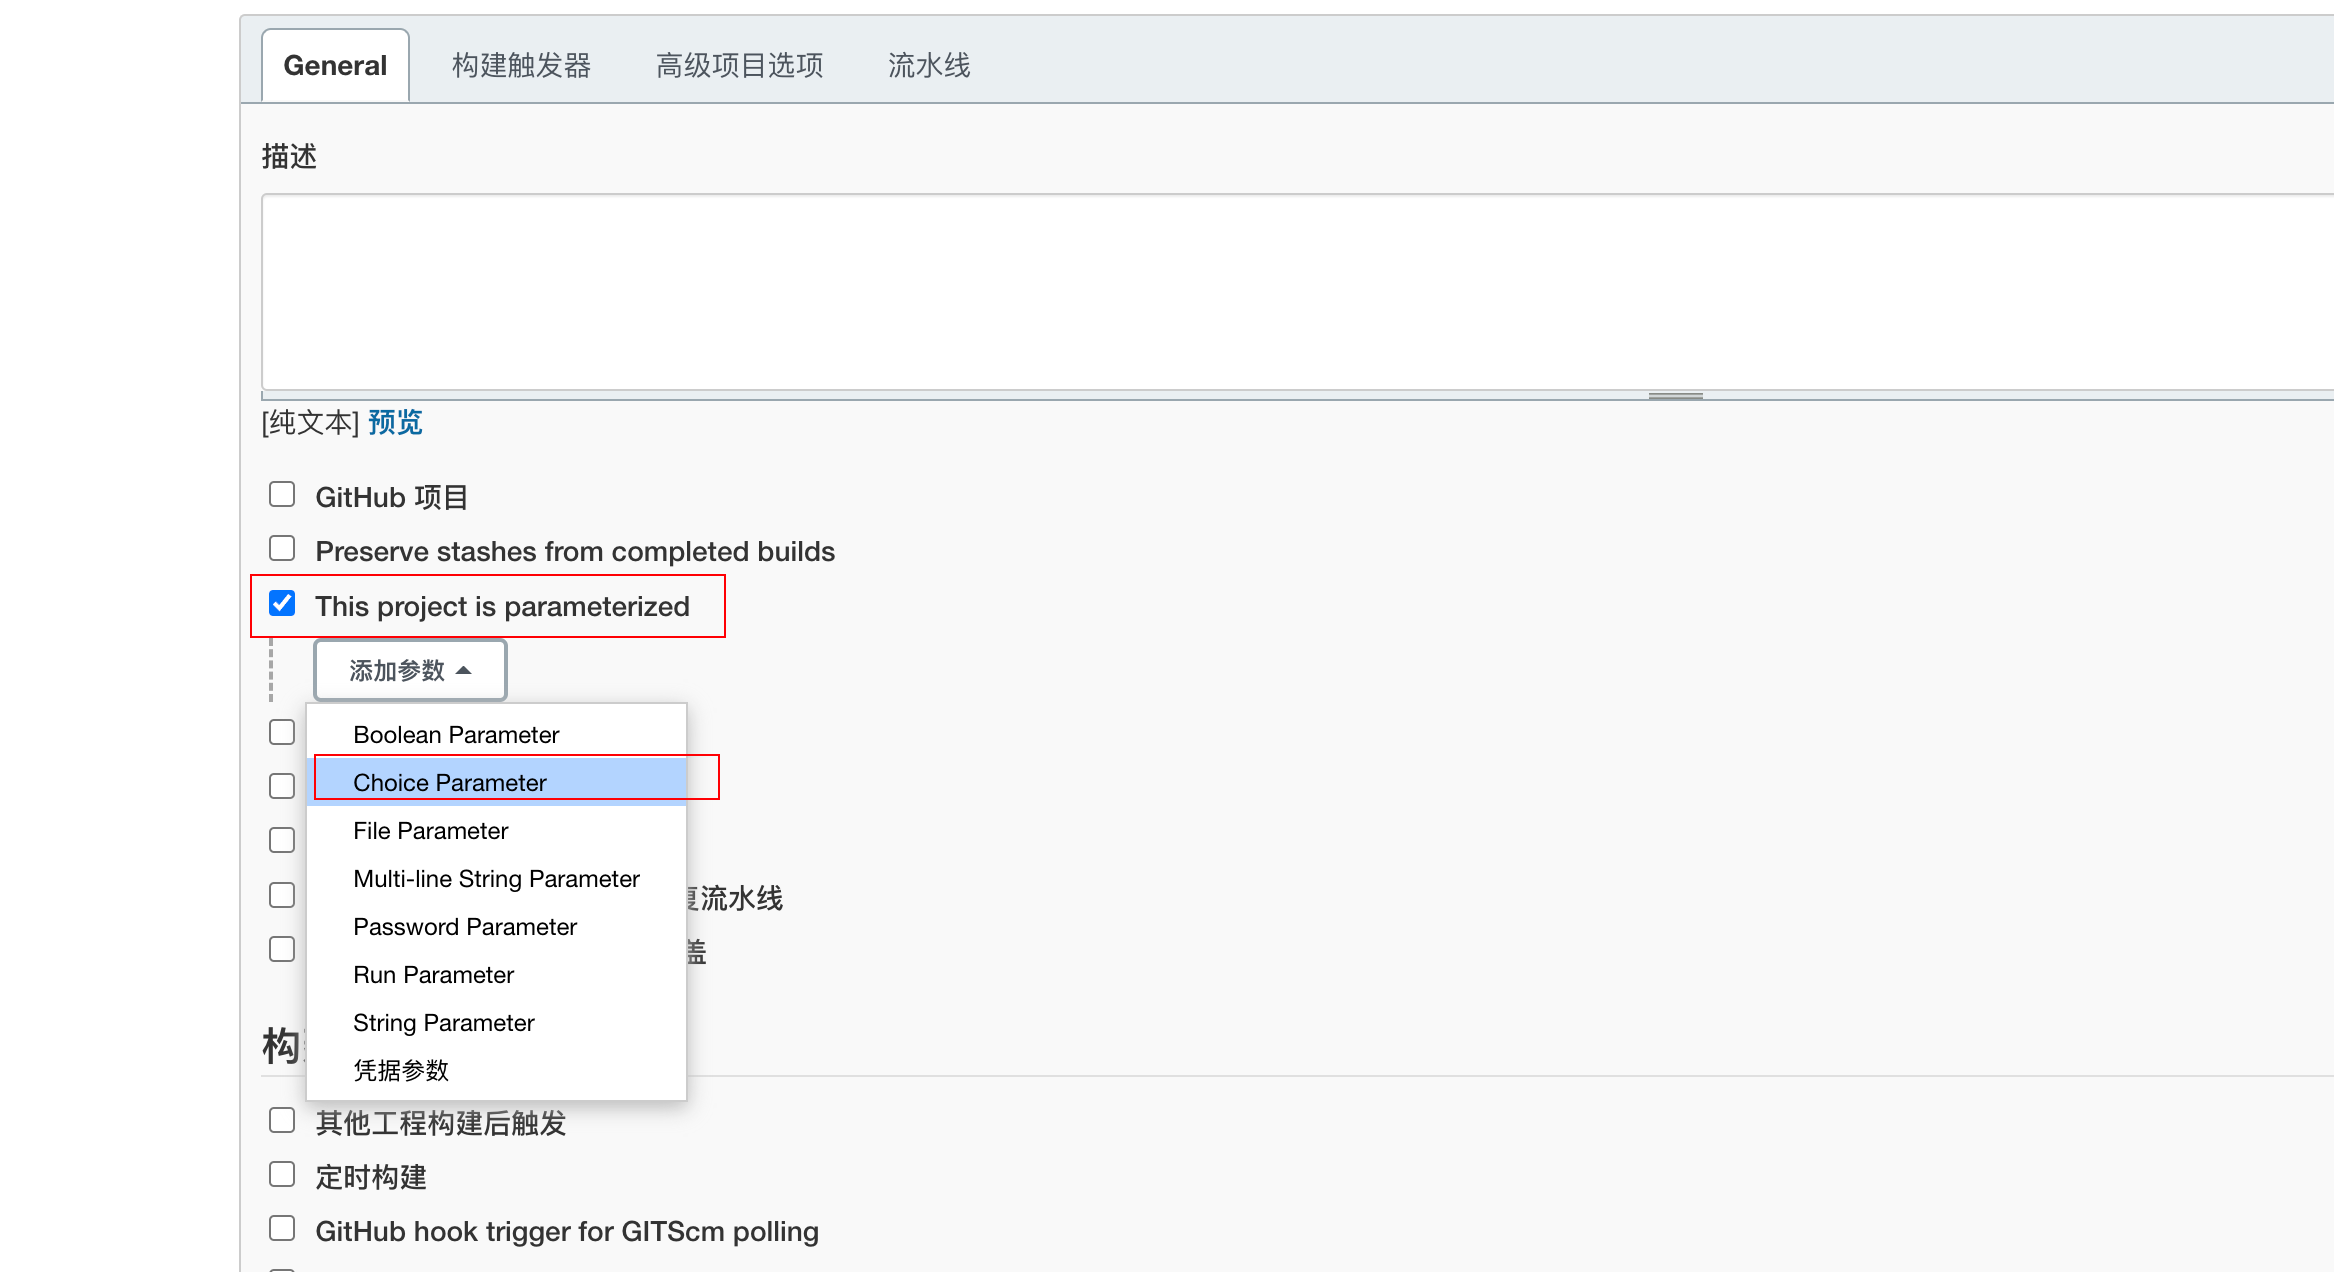
Then click "General", select "This project is parameterized", "add parameter", "Choice Parameter", as shown in the following figure
Then write the following content
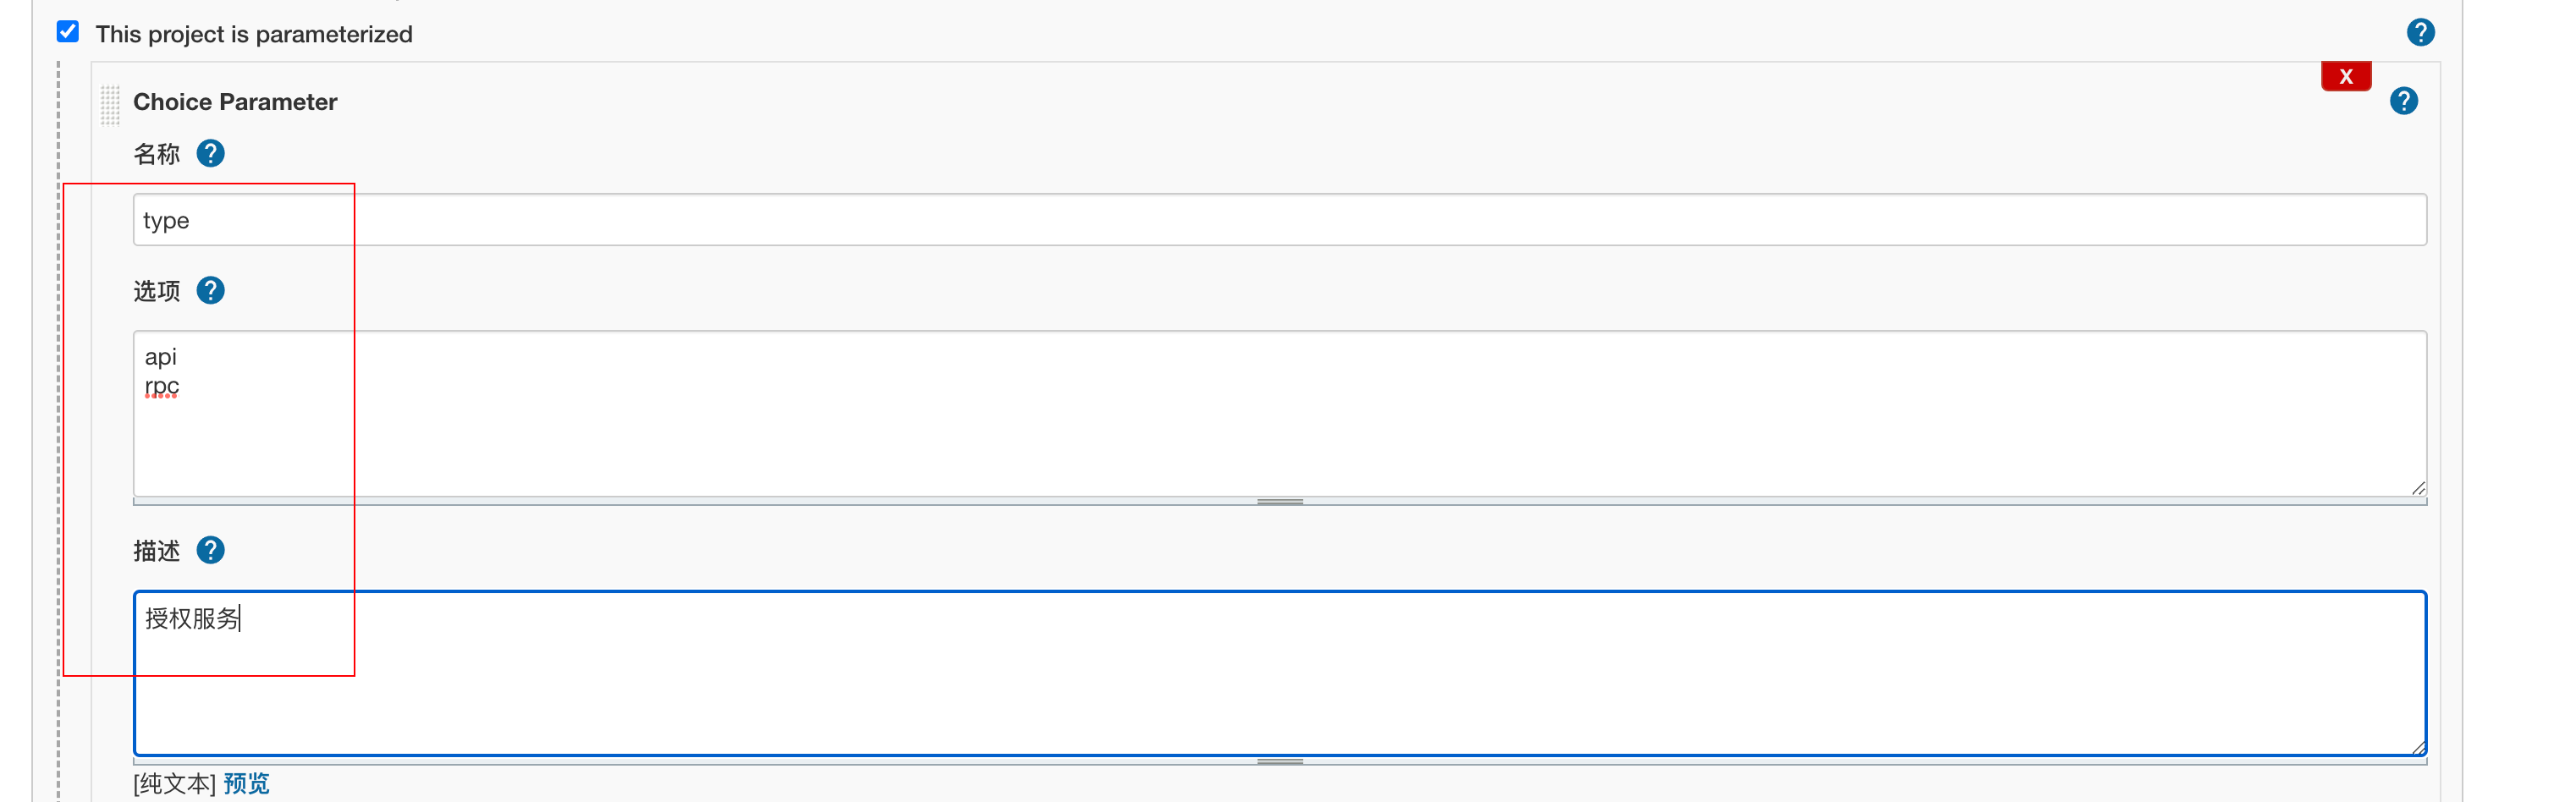
Save directly.
4.2 compiling pipline
Slide down the script and fill in the content
pipeline {
  agent any
  parameters {
      gitParameter name: 'branch',
      type: 'PT_BRANCH',
      branchFilter: 'origin/(.*)',
      defaultValue: 'master',
      selectedValue: 'DEFAULT',
      sortMode: 'ASCENDING_SMART',
      description: 'Select the branch to build'
  }

  stages {
      stage('Service information')    {
          steps {
              sh 'echo Branch: $branch'
              sh 'echo Build service type: ${JOB_NAME}-$type'
          }
      }

      stage('Pull code') {
          steps {
              checkout([$class: 'GitSCM',
              branches: [[name: '$branch']],
              doGenerateSubmoduleConfigurations: false,
              extensions: [],
              submoduleCfg: [],
              userRemoteConfigs: [[credentialsId: 'gitlab-cert', url: 'ssh://git@192.168.1.180:2222/root/go-zero-looklook.git']]])
          }
      }

      stage('obtain commit_id') {
          steps {
              echo 'obtain commit_id'
              git credentialsId: 'gitlab-cert', url: 'ssh://git@192.168.1.180:2222/root/go-zero-looklook.git'
              script {
                  env.commit_id = sh(returnStdout: true, script: 'git rev-parse --short HEAD').trim()
              }
          }
      }

      stage('Pull configuration file') {
              steps {
                  checkout([$class: 'GitSCM',
                  branches: [[name: '$branch']],
                  doGenerateSubmoduleConfigurations: false,
                  extensions: [[$class: 'RelativeTargetDirectory', relativeTargetDir: 'conf']],
                  submoduleCfg: [],
                  userRemoteConfigs: [[credentialsId: 'gitlab-cert', url: 'ssh://git@192.168.1.180:2222/root/go-zero-looklook-pro-conf.git']]])
              }
      }

      stage('goctl Version detection') {
          steps{
              sh '/usr/local/bin/goctl -v'
          }
      }

      stage('Dockerfile Build') {
          steps{
                 sh 'yes | cp  -rf conf/${JOB_NAME}/${type}/${JOB_NAME}.yaml  app/${JOB_NAME}/cmd/${type}/etc'   //Online profile
                 sh 'cd app/${JOB_NAME}/cmd/${type} && /usr/local/bin/goctl docker -go ${JOB_NAME}.go && ls -l'
                 script{
                     env.image = sh(returnStdout: true, script: 'echo ${JOB_NAME}-${type}:${commit_id}').trim()
                 }
                 sh 'echo Image name: ${image} && cp app/${JOB_NAME}/cmd/${type}/Dockerfile ./  && ls -l && docker build  -t ${image} .'
          }
      }

      stage('Upload to image warehouse') {
          steps{
          	  //Note that docker login will output the account and password to the jenkins page, which can be accessed through port SH is handled in a similar way. I won't write it in detail if there are documents on the official website
              sh 'docker login --username=${docker_username} --password=${docker_pwd} http://${docker_repo}'
              sh 'docker tag  ${image} ${docker_repo}/go-zero-looklook/${image}'
              sh 'docker push ${docker_repo}/go-zero-looklook/${image}'
          }
      }

      stage('Deploy to k8s') {
          steps{
              script{
                  env.deployYaml = sh(returnStdout: true, script: 'echo ${JOB_NAME}-${type}-deploy.yaml').trim()
                  env.port=sh(returnStdout: true, script: '/root/port.sh ${JOB_NAME}-${type}').trim()
              }

              sh 'echo ${port}'

              sh 'rm -f ${deployYaml}'
              sh '/usr/local/bin/goctl kube deploy -secret docker-login -replicas 2 -nodePort 3${port} -requestCpu 200 -requestMem 50 -limitCpu 300 -limitMem 100 -name ${JOB_NAME}-${type} -namespace go-zero-looklook -image ${docker_repo}/${image} -o ${deployYaml} -port ${port} --home /root/template'
              sh '/usr/local/bin/kubectl apply -f ${deployYaml}'
          }
      }

       stage('Clean') {
           steps{
               sh 'docker rmi -f ${image}'
               sh 'docker rmi -f ${docker_repo}/${image}'
               cleanWs notFailBuild: true
           }
       }
  }
}
Very important!!!
-
Build Optimization: when generating dockerfile s in pipline, we use k8s to deploy without etcd, but this deployment requires specifying the account (you have the permission to get from k8s endpoints, just use the default, and k8s will automatically create a default for us every time you create a new namespace), However, the k8s yml generated by goctl does not add the specified account option. This has been fed back and may be added in subsequent versions. Here we also use the template, which is also in the project directory https://github.com/Mikaelemmmm/go-zero-looklook/tree/main/deploy/goctl , you can build and specify this template in pipline
-
${credentialsId} needs to be replaced with your specific credential value, that is, a string in the [add credentials] module. We previously configured gitlab Cert, so fill in gitlab cert here. If you don't want to replace it yourself, ${gitUrl} needs to be replaced with the git repository address of your code. Other variables in the form of ${xxx} don't need to be modified, just keep them as they are.
-
This is a little different from the official documents. Because my project folder directory is different, I manually adjusted the dockerfile generated by goctl. In a dockerfile that I did not generate during construction, I put the dockerfile together in the directory when creating the project, so goctl is not required when building the image
5. Configure k8s pull private warehouse image
k8s by default, you can only pull the public image of the harbor image warehouse. If you pull the private warehouse image, you will report ErrImagePull and ImagePullBackOff errors
1. First release the machine in jenkins and log in to harbor
$ docker login 192.168.1.180:8077
$ Username: admin
$ Password:
Login Succeeded
2. Generate login harbor configuration file in k8s
#View the voucher generated by logging in harbor in the previous step
$ cat /root/.docker/config.json
{
	"auths": {
		"192.168.1.180:8077": {
			"auth": "YWRtaW46SGFyYm9yMTIzNDU="
		}
}
3. base64 encryption of secret key files
$ cat /root/.docker/config.json  | base64 -w 0

ewoJImF1dGhzIjogewoJCSIxOTIuMTY4LjEuMTgwOjgwNzciOiB7CgkJCSJhdXRoIjogIllXUnRhVzQ2U0dGeVltOXlNVEl6TkRVPSIKCQl9Cgl9Cn0=
4. Create docker secret yaml
apiVersion: v1
kind: Secret
metadata:
  name: docker-login
type: kubernetes.io/dockerconfigjson
data:
  .dockerconfigjson: ewoJImF1dGhzIjogewoJCSIxOTIuMTY4LjEuMTgwOjgwNzciOiB7CgkJCSJhdXRoIjogIllXUnRhVzQ2U0dGeVltOXlNVEl6TkRVPSIKCQl9Cgl9Cn0=
$ kubectl create -f docker-secret.yaml -n go-zero-looklook

secret "docker-login" created
6. Build
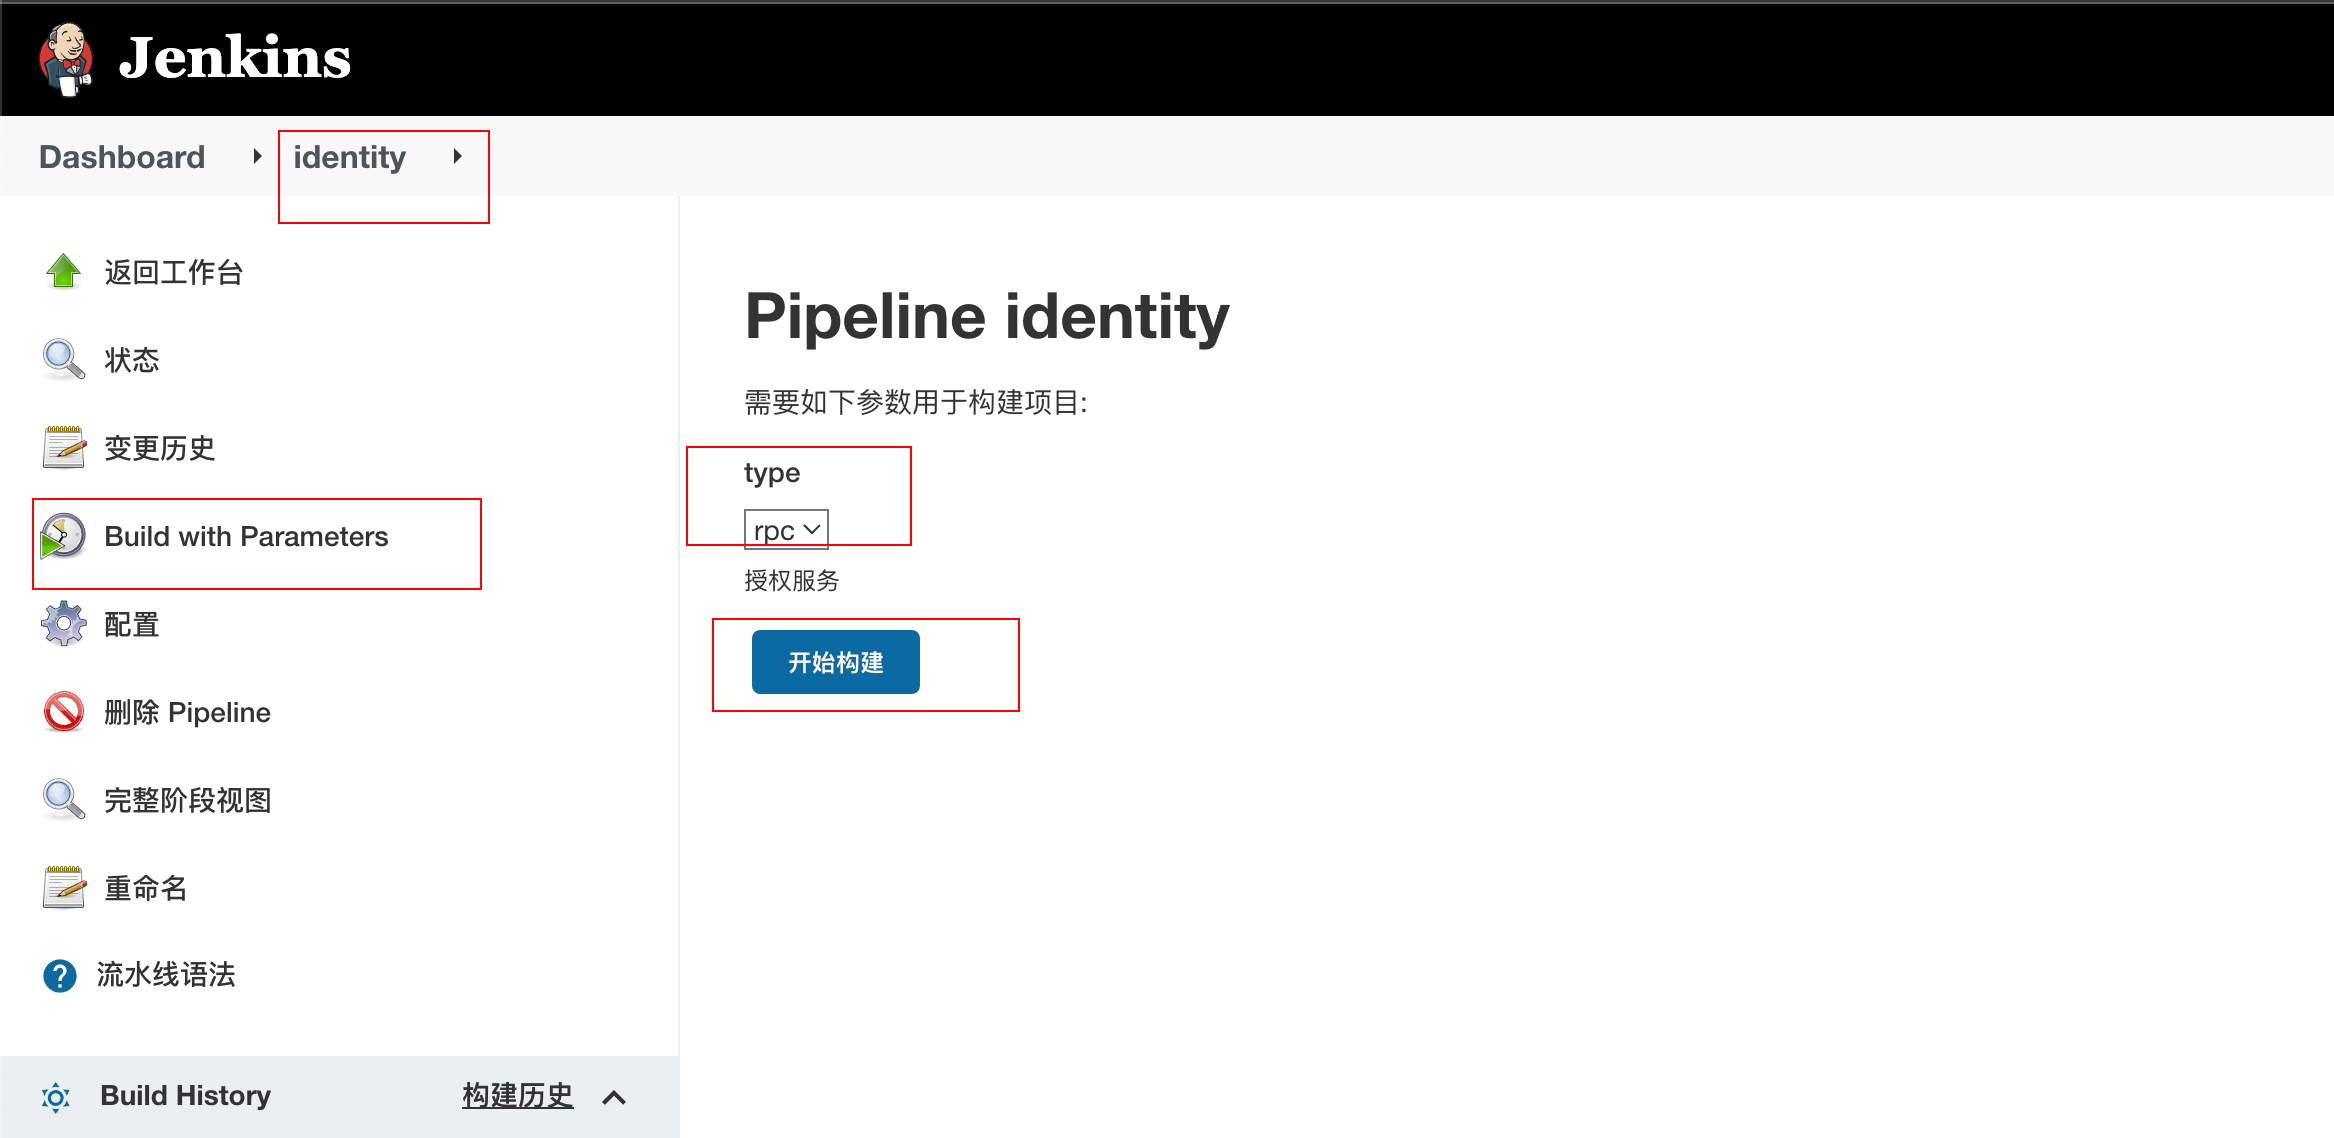
We enter the home page and click identity to enter the details page
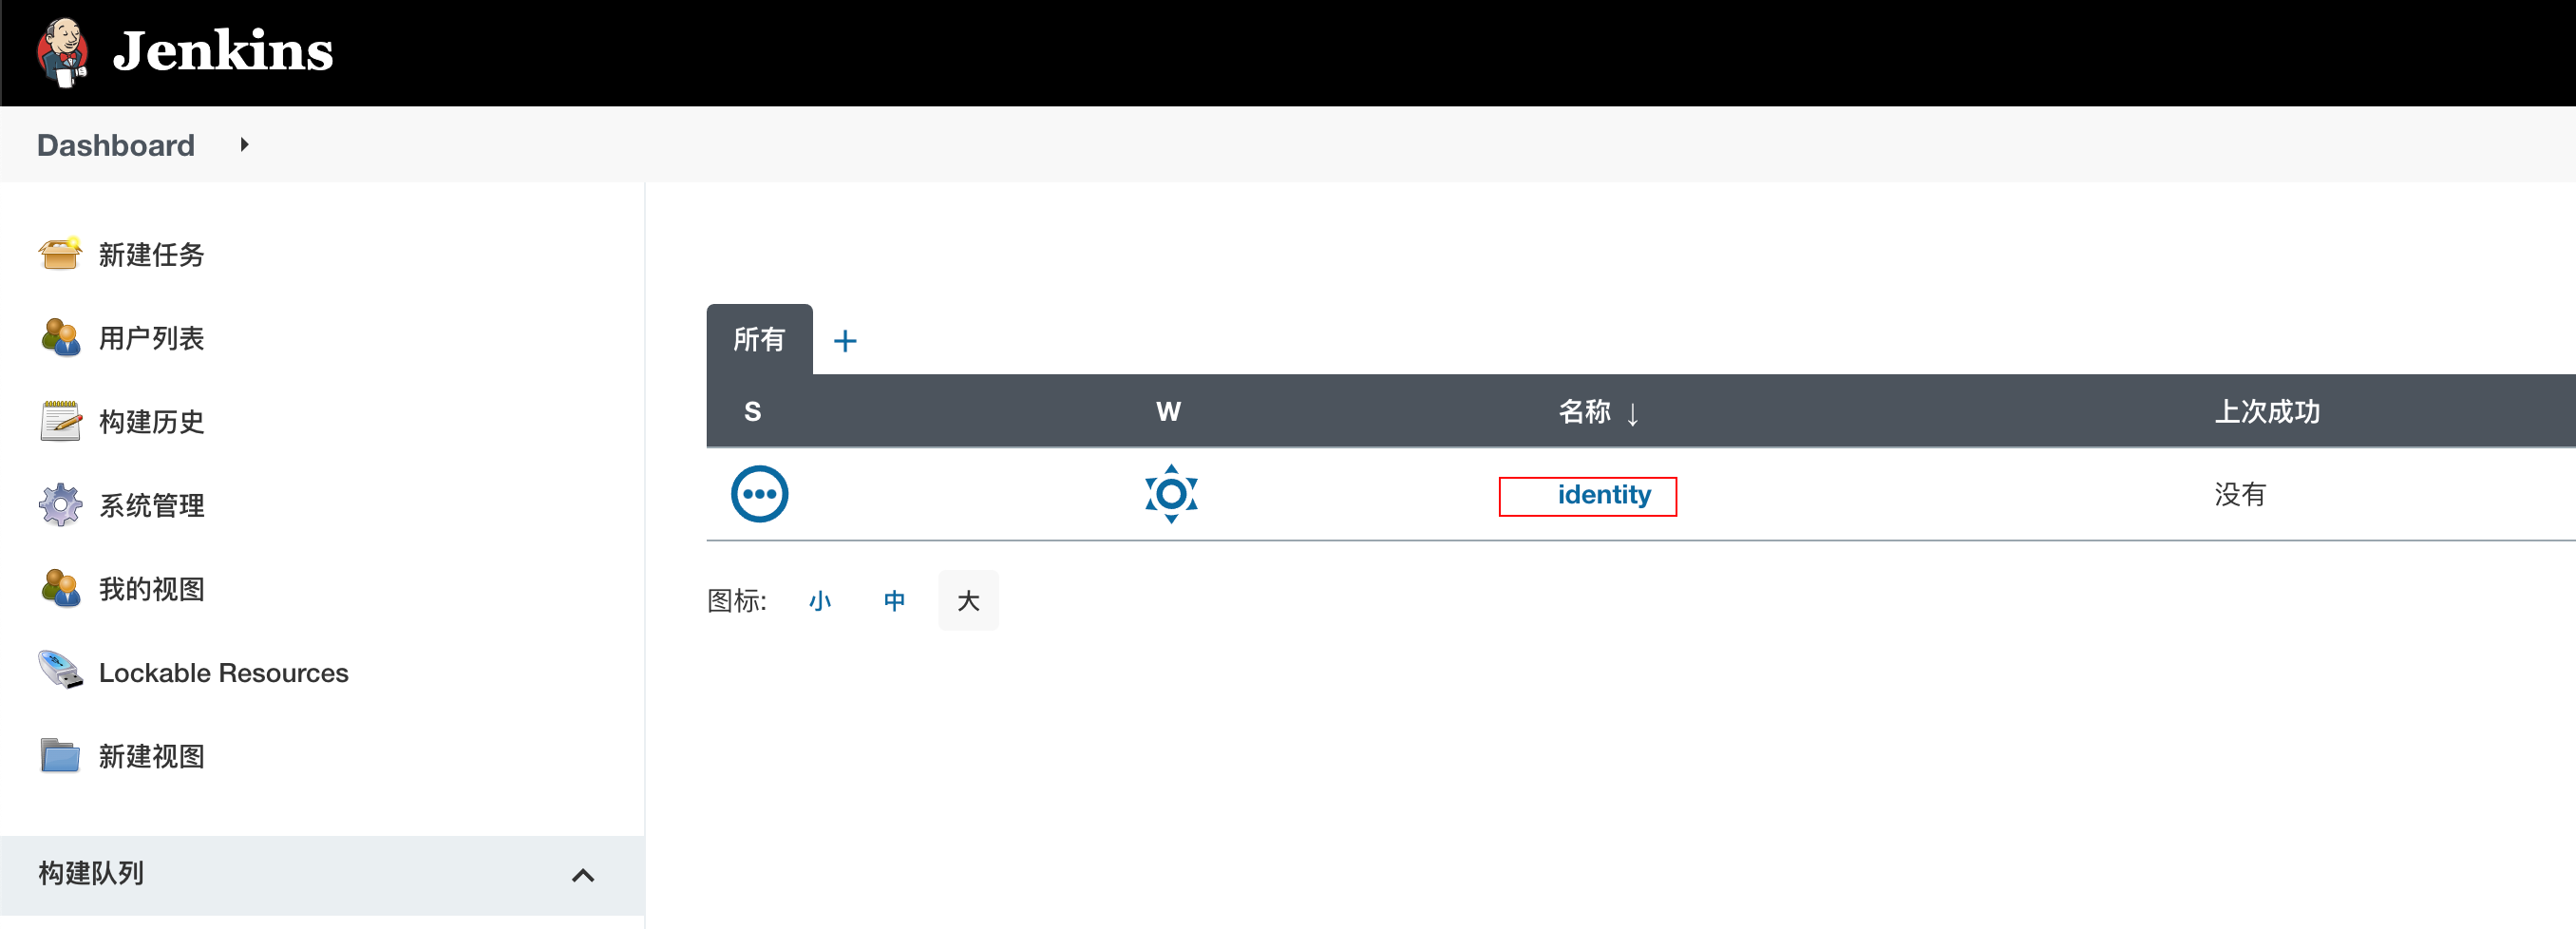
Then you can see the identity service configured above, as shown in the figure below, click "Build with Parameters", then select rpc and click "start building"
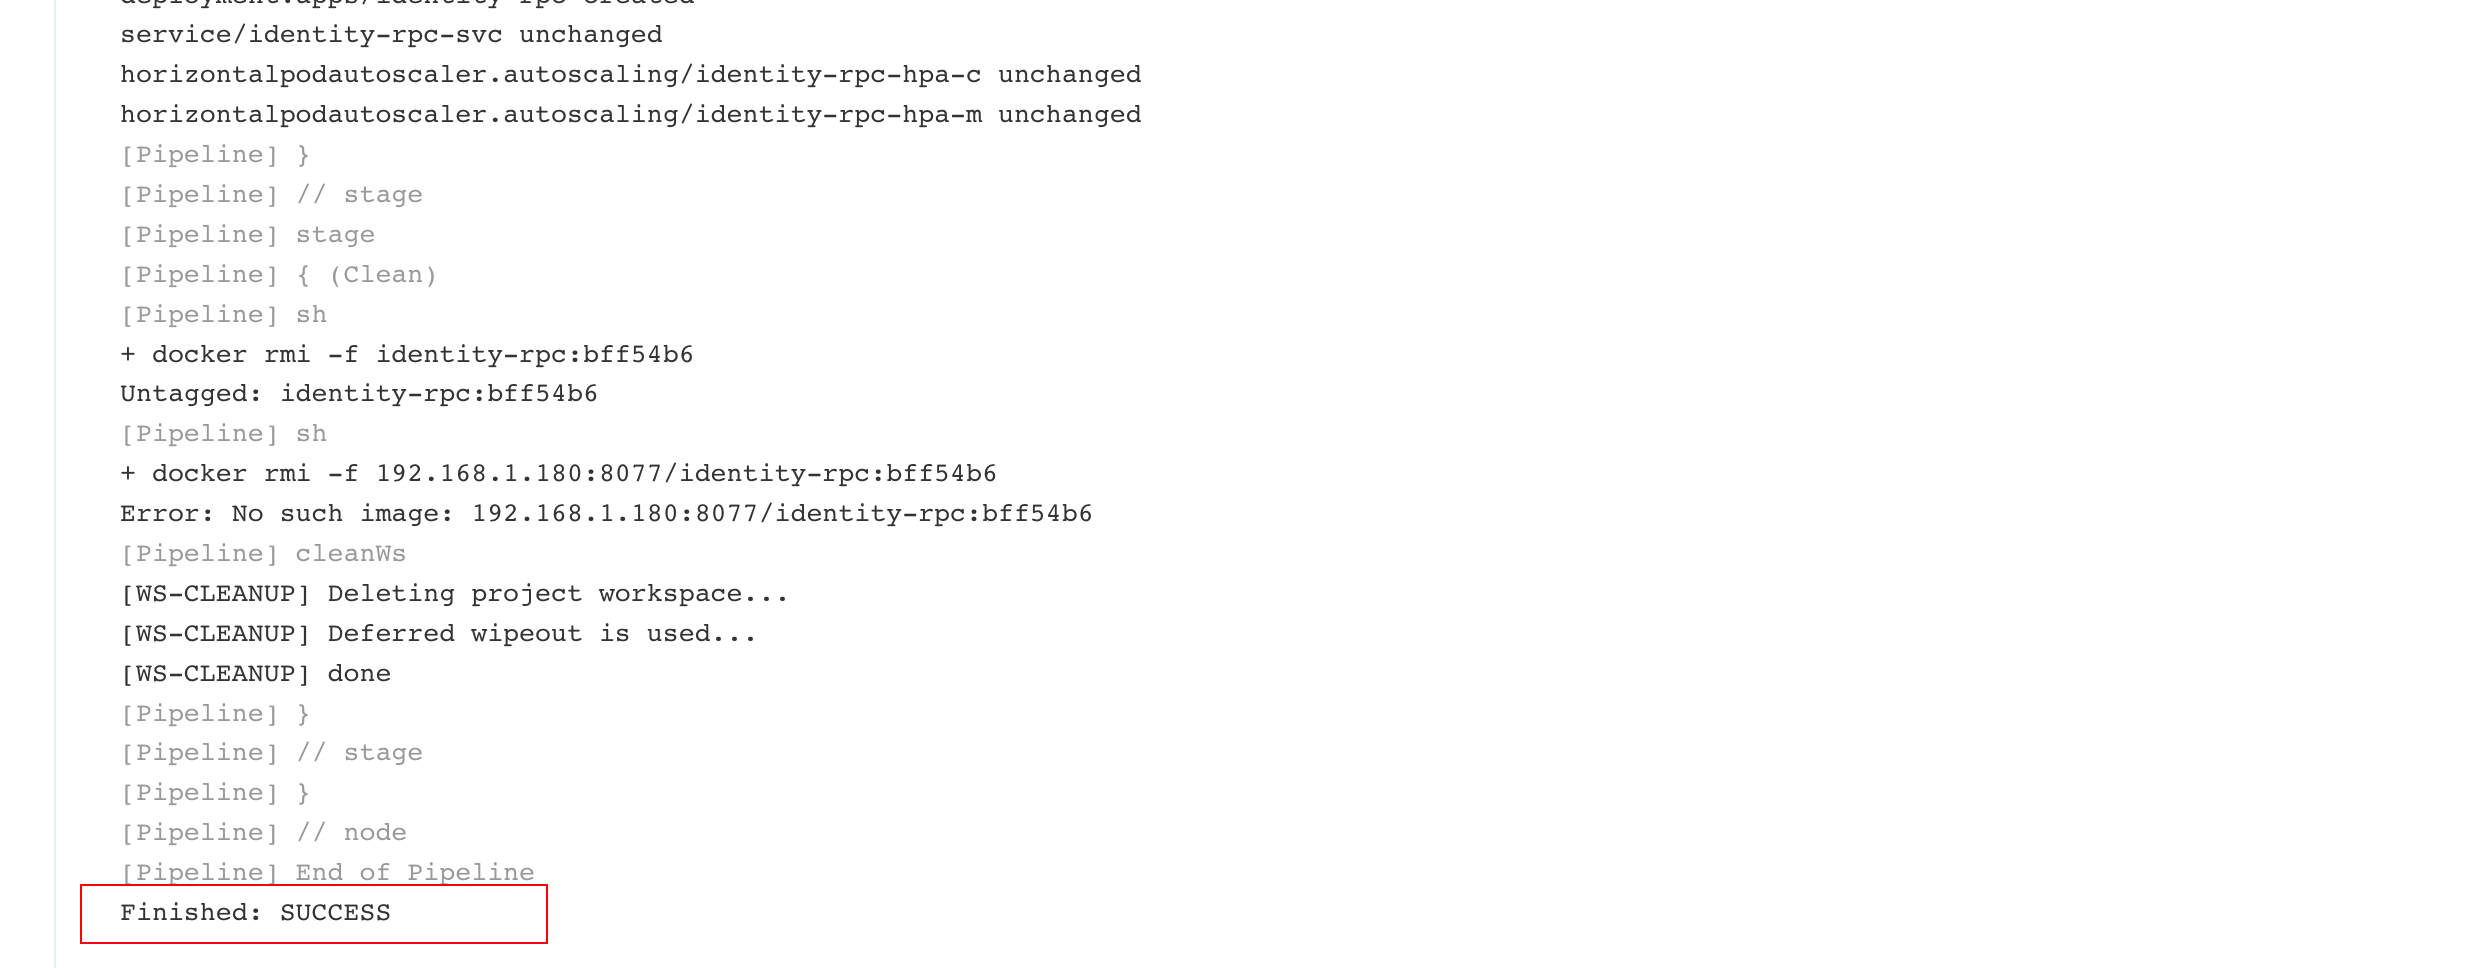
The first build will fail when pulling code. You should initialize something and click it again.
Deployment successful

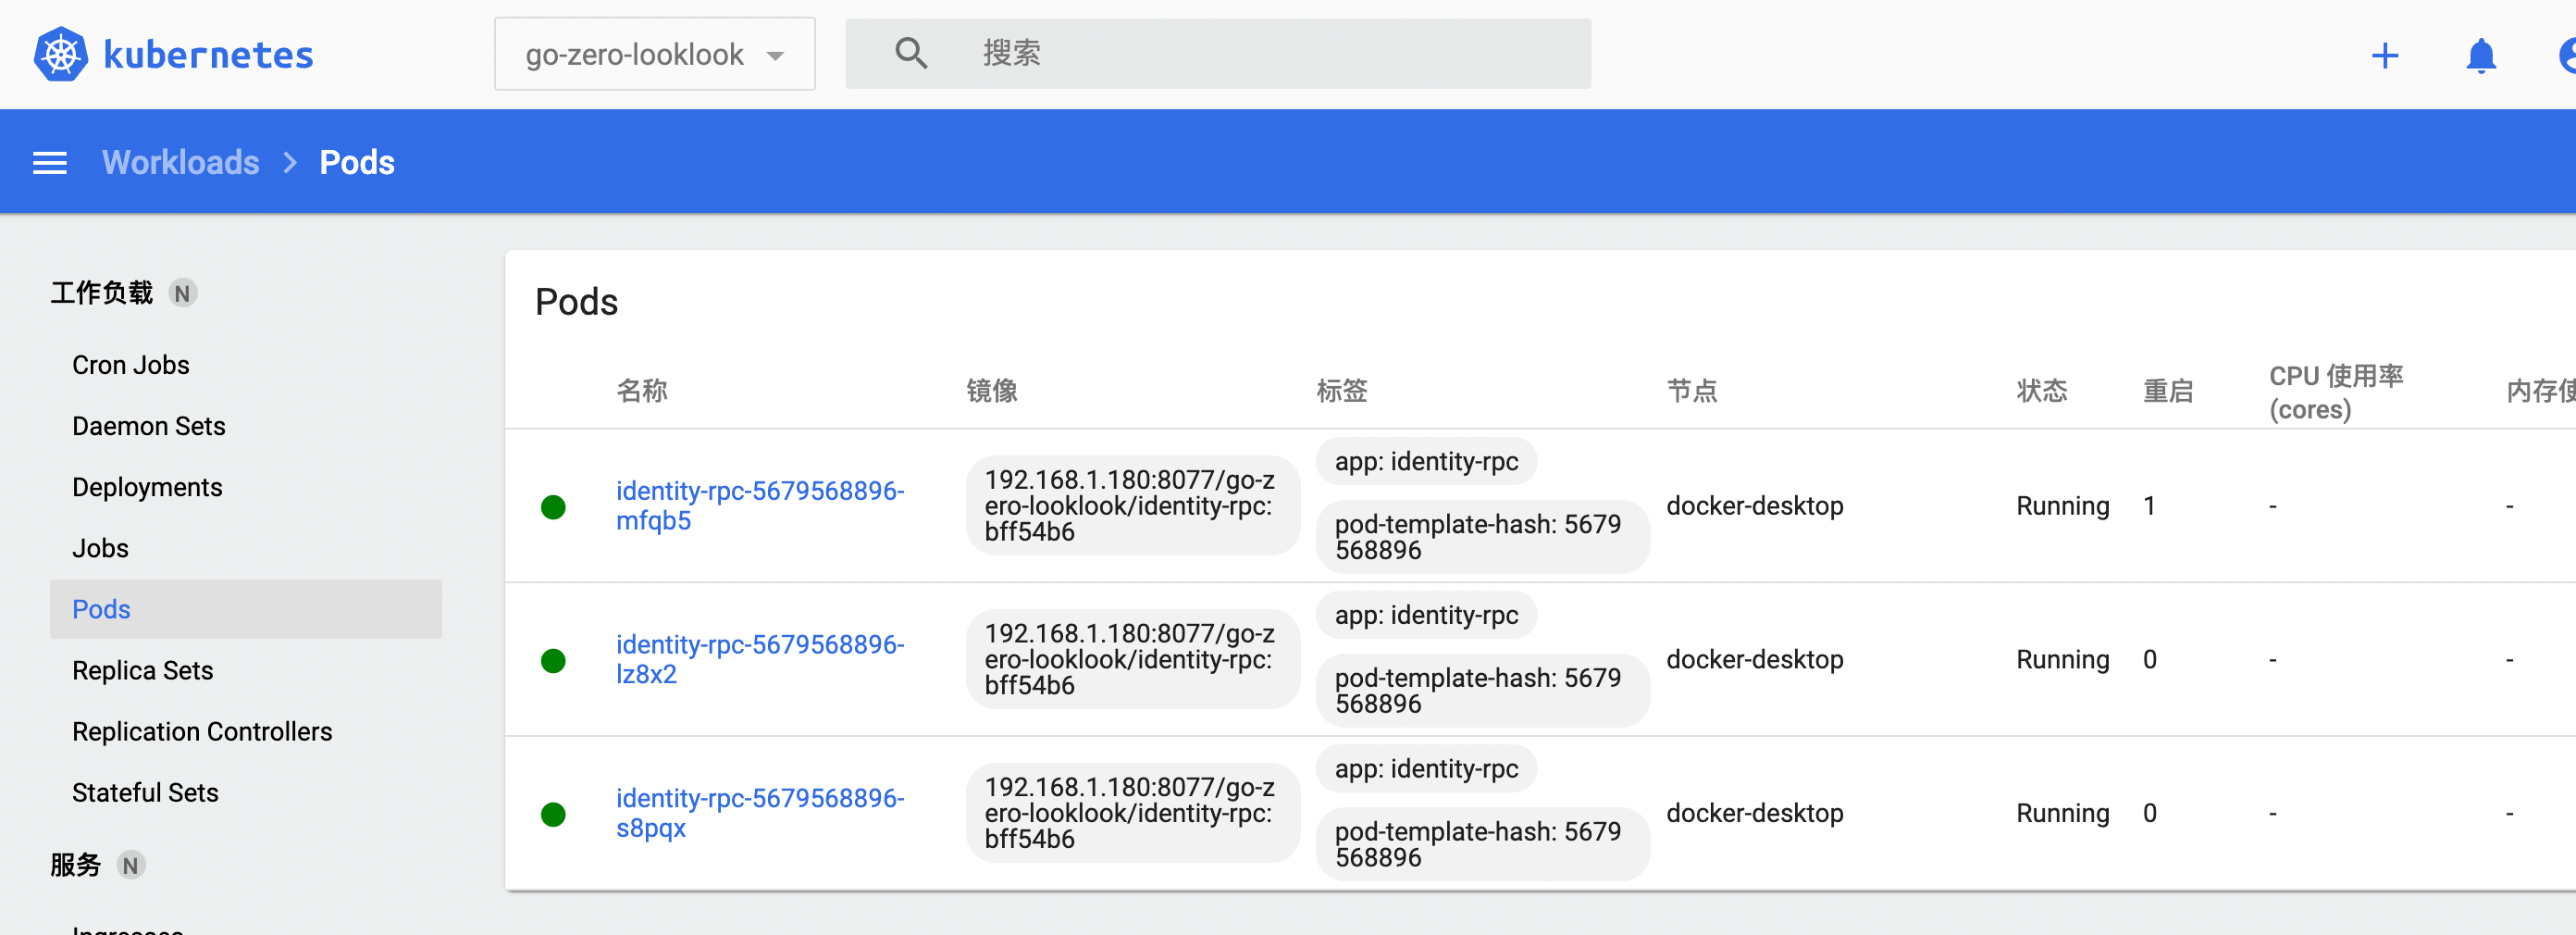
Similarly, build identity API, configure usercenter service, build usercenter RPC and usercenter API, and then configure other services and build. This time, we will only build identity API, identity RPC, usercenter RPC and usercenter API to show you.
6. Add gateway
Because our api services published in k8s through goctl will expose the nodeport port index, let's take a look at the nodeport port service of the service under the go zero look namespace in k8s, and then configure the nodeport in nignx.
This time, we will install nginx on a separate virtual machine outside k8s, expose the port of k8s back-end api service to nginx through nodeport, and then configure this api service in nginx configuration, so that nginx can be used as a gateway.
The installation of nginx will not be discussed here. Remember to have auth_request module. If not, install it yourself.
Configuration of nginx
server{
    listen 8081;
    access_log /var/log/nginx/looklook.com_access.log;
    error_log /var/log/nginx//looklook.com_error.log;

    location /auth {
	    internal;
      proxy_set_header X-Original-URI $request_uri;
	    proxy_pass_request_body off;
	    proxy_set_header Content-Length "";
	    proxy_pass http://192.168.1.182:31001/identity/v1/verify/token;
    }

    location ~ /usercenter/ {
       auth_request /auth;
       auth_request_set $user $upstream_http_x_user;
       proxy_set_header x-user $user;

       proxy_set_header Host $http_host;
       proxy_set_header X-Real-IP $remote_addr;
       proxy_set_header REMOTE-HOST $remote_addr;
       proxy_set_header X-Forwarded-For $proxy_add_x_forwarded_for;
       proxy_pass http://192.168.1.182:31002;
   }

   location ~ /travel/ {
       auth_request /auth;
       auth_request_set $user $upstream_http_x_user;
       proxy_set_header x-user $user;

       proxy_set_header Host $http_host;
       proxy_set_header X-Real-IP $remote_addr;
       proxy_set_header REMOTE-HOST $remote_addr;
       proxy_set_header X-Forwarded-For $proxy_add_x_forwarded_for;
       proxy_pass http://192.168.1.182:31003;
   }

   location ~ /order/ {
       auth_request /auth;
       auth_request_set $user $upstream_http_x_user;
       proxy_set_header x-user $user;

       proxy_set_header Host $http_host;
       proxy_set_header X-Real-IP $remote_addr;
       proxy_set_header REMOTE-HOST $remote_addr;
       proxy_set_header X-Forwarded-For $proxy_add_x_forwarded_for;
       proxy_pass http://192.168.1.182:31004;
   }

   location ~ /payment/ {
       auth_request /auth;
       auth_request_set $user $upstream_http_x_user;
       proxy_set_header x-user $user;

       proxy_set_header Host $http_host;
       proxy_set_header X-Real-IP $remote_addr;
       proxy_set_header REMOTE-HOST $remote_addr;
       proxy_set_header X-Forwarded-For $proxy_add_x_forwarded_for;
       proxy_pass http://192.168.1.182:31005;
   }
}
If you are online, you should configure multiple nignxs to maintain high availability. There will be an slb in front of nignx. Your domain name, including https configuration, should be resolved to slb. There is a firewall in front of slb.
8. Concluding remarks
So far, the whole series is over. The overall architecture diagram should be as shown in the first article. This series hopes to help you.
Project address
https://github.com/zeromicro/go-zero
https://gitee.com/kevwan/go-zero
Welcome to go zero and star support us!
Wechat communication group
Focus on the "micro service practice" official account and click on the exchange group to get the community community's two-dimensional code.