In autumn, I memorized a lot of octets of the operating system, but I still lack the experience of hands-on practice. There is no clear understanding of how the operating system works, how user programs run, and how to interact with CPU and other hardware.
Therefore, recently, I plan to learn the knowledge of the operating system, and choose the course based on hands-on practice to learn and expand the kernel source code directly, so as to uncover the mystery of OS step by step.
1. Introduction
MIT 6.S081 is a famous operating system course, a classic combination of theory and practice. Learn to design and implement the operating system by implementing some kernel functions.
6.S081 consists of courses and experiments. The first half of the course introduces various concepts and implementations of the system. The second part is about some papers, such as meldown, et3fs.
There are 11 experiments, which need to realize different functions, such as page, table and network driver.
The learning plan of the course is to follow the schedule on the official website directly. First, look at the handouts and manuals provided under structure, and then complete the corresponding labs. There are 11 labs in total. The main content is kernel development and expansion on the basis of xv6.
Each experiment has corresponding knowledge points for you to learn. After learning the theoretical knowledge, there will be corresponding exercises. Most of them need you to write code by hand. Learning while doing makes learning more efficient.
By the way, 6 One of the two teachers in s081 2020 is Robert Morris (RTM). Robert Morris wrote the first worm in history and is also the co founder of Y-Combinator.
Now that the concept of micro kernel is so popular, Hongmeng is publicized as the full scene OS of micro kernel. Don't you want to really understand the micro kernel OS in principle? And 6 S081 this course is to guide us to implement a microkernel operating system.
My implementation environment:
- qemu for riscv
- gdb for riscv
- gcc for riscv
- binutils for riscv
- Windows 10 + VMWare + Ubuntu 20.04
Learning resources:
-
Course website: https://pdos.csail.mit.edu/6.828/2020/overview.html
-
Course handouts: https://pdos.csail.mit.edu/6.828/2020/xv6/book-riscv-rev1.pdf
-
schedule: https://pdos.csail.mit.edu/6.828/2020/schedule.html
-
Video: https://www.bilibili.com/video/BV1Dy4y1m7ZE
2. Install Ubuntu 20 04
Ubuntu is basically updated every six months. As of July 30, 2021, version 20.0 has been launched.
When setting up the environment for the first time, the version of 18.0 is used. When installing the environment, the Riscv tool chain needs to be installed and compiled by itself, but this process is time-consuming and prone to errors. After being tortured by Prajna, I chose to be in Ubuntu 20 Build the environment on 04. It eliminates the cumbersome operation of installing the tool chain.
VMware download link: click here
Ubuntu download link: click here
3. Replace the source
3.1 replace / etc / apt / sources Source in list file
Install Ubuntu 20 After 04, the default software update source is foreign, which is slow to use in China. It needs to be replaced with a domestic source in order to install and update the software normally.
3.2 backup source list
The default source of Ubuntu configuration is not a domestic server, and it is slow to download updated software. First, back up the source list file sources list:
# First back up the source list
sudo cp /etc/apt/sources.list /etc/apt/sources.list_backup
3.3 open sources List file modification
Select the appropriate source, replace the contents of the original file, and save the edited file. We choose the source of China University of science and technology.
# Open sources List file
sudo gedit /etc/apt/sources.list
Edit / etc / apt / sources List file, add Alibaba cloud image source at the front of the file:
#China University of science and technology
deb https://mirrors.ustc.edu.cn/ubuntu/ focal main restricted universe multiverse
deb-src https://mirrors.ustc.edu.cn/ubuntu/ focal main restricted universe multiverse
deb https://mirrors.ustc.edu.cn/ubuntu/ focal-updates main restricted universe multiverse
deb-src https://mirrors.ustc.edu.cn/ubuntu/ focal-updates main restricted universe multiverse
deb https://mirrors.ustc.edu.cn/ubuntu/ focal-backports main restricted universe multiverse
deb-src https://mirrors.ustc.edu.cn/ubuntu/ focal-backports main restricted universe multiverse
deb https://mirrors.ustc.edu.cn/ubuntu/ focal-security main restricted universe multiverse
deb-src https://mirrors.ustc.edu.cn/ubuntu/ focal-security main restricted universe multiverse
deb https://mirrors.ustc.edu.cn/ubuntu/ focal-proposed main restricted universe multiverse
deb-src https://mirrors.ustc.edu.cn/ubuntu/ focal-proposed main restricted universe multiverse

#Add Ali source
deb http://mirrors.aliyun.com/ubuntu/ focal main restricted universe multiverse
deb-src http://mirrors.aliyun.com/ubuntu/ focal main restricted universe multiverse
deb http://mirrors.aliyun.com/ubuntu/ focal-security main restricted universe multiverse
deb-src http://mirrors.aliyun.com/ubuntu/ focal-security main restricted universe multiverse
deb http://mirrors.aliyun.com/ubuntu/ focal-updates main restricted universe multiverse
deb-src http://mirrors.aliyun.com/ubuntu/ focal-updates main restricted universe multiverse
deb http://mirrors.aliyun.com/ubuntu/ focal-proposed main restricted universe multiverse
deb-src http://mirrors.aliyun.com/ubuntu/ focal-proposed main restricted universe multiverse
deb http://mirrors.aliyun.com/ubuntu/ focal-backports main restricted universe multiverse
deb-src http://mirrors.aliyun.com/ubuntu/ focal-backports main restricted universe multiverse

#Add Tsinghua source
deb https://mirrors.tuna.tsinghua.edu.cn/ubuntu/ focal main restricted universe multiverse
# deb-src https://mirrors.tuna.tsinghua.edu.cn/ubuntu/ focal main restricted universe multiverse
deb https://mirrors.tuna.tsinghua.edu.cn/ubuntu/ focal-updates main restricted universe multiverse
# deb-src https://mirrors.tuna.tsinghua.edu.cn/ubuntu/ focal-updates main restricted universe multiverse
deb https://mirrors.tuna.tsinghua.edu.cn/ubuntu/ focal-backports main restricted universe multiverse
# deb-src https://mirrors.tuna.tsinghua.edu.cn/ubuntu/ focal-backports main restricted universe multiverse
deb https://mirrors.tuna.tsinghua.edu.cn/ubuntu/ focal-security main restricted universe multiverse
# deb-src https://mirrors.tuna.tsinghua.edu.cn/ubuntu/ focal-security main restricted universe multiverse multiverse
3.4 refresh list
sudo apt-get update
sudo apt-get upgrade
sudo apt-get install build-essential
The download speed took off in an instant.
4. Install SSH
By default, remote access via SSH is not allowed when Ubuntu is first installed.
Enabling SSH on Ubuntu is simple. Perform the following steps as root or as a user with sudo privileges:
Open the terminal with Ctrl+Alt+T and install the OpenSSH Server package:
sudo apt update
sudo apt install openssh-server
After installation, the SSH service will start automatically. You can verify that SSH is running by typing the following command:
sudo systemctl status ssh
The output shows that the service is running and enabled to start at system boot:
● ssh.service - OpenBSD Secure Shell server
     Loaded: loaded (/lib/systemd/system/ssh.service; enabled; vendor preset: enabled)
     Active: active (running) since Sun 2021-08-15 07:13:19 PDT; 23s ago
       Docs: man:sshd(8)
             man:sshd_config(5)
   Main PID: 46470 (sshd)
      Tasks: 1 (limit: 2275)
     Memory: 1.3M
     CGroup: /system.slice/ssh.service
             └─46470 sshd: /usr/sbin/sshd -D [listener] 0 of 10-100 startups
Press q to return to the command line prompt.
Ubuntu comes with a firewall configuration tool called UFW. If a firewall is enabled on the system, ensure that the SSH port is open:
sudo ufw allow ssh
Now you can connect to the Ubuntu system through SSH. It is recommended to use SecureCRT.
4.1 SecureCRT error
Ubuntu 20.0 is installed After 04, the old version of SecureCRT reported an error after connecting through ssh
Key exchange failed.
No compatible key exchange method. The server supports these methods: curve25519-sha256,curve25519-sha256@libssh.org,ecdh-sha2-nistp256,ecdh-sha2-nistp384,ecdh-sha2-nistp521,diffie-hellman-group-exchange-sha256,diffie-hellman-group16-sha512,diffie-hellman-group18-sha512,diffie-hellman-group14-sha256
4.2 solutions
Two areas need to be modified:
4.3 modify ssh_config
sudo vi /etc/ssh/ssh_config
Open comments for these two lines

4.4 modify sshd_config
sudo vi /etc/ssh/sshd_config
Add the following code
KexAlgorithms curve25519-sha256@libssh.org,ecdh-sha2-nistp256,ecdh-sha2-nistp384,ecdh-sha2-nistp521,diffie-hellman-group-exchange-sha256,diffie-hellman-group14-sha1,diffie-hellman-group-exchange-sha1,diffie-hellman-group1-sha1
4.5 restart the service and test
Restart sshd service
sudo service sshd restart
Just reconnect.
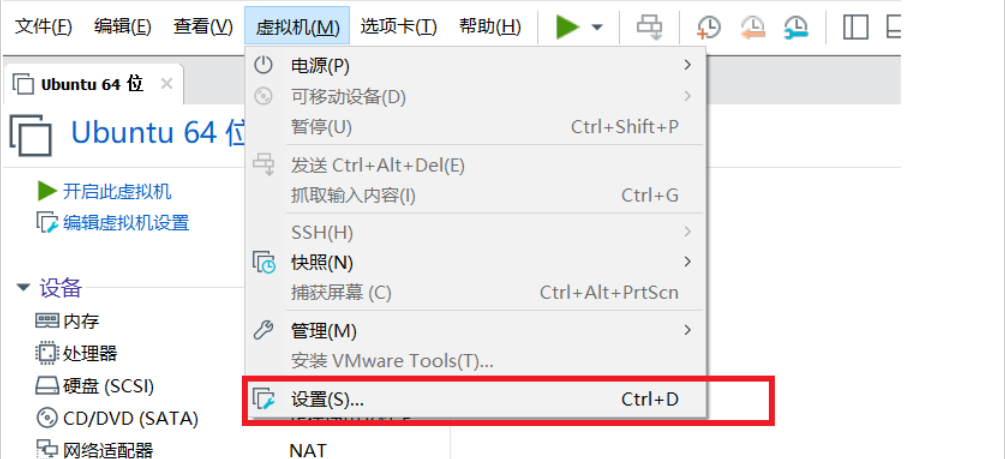
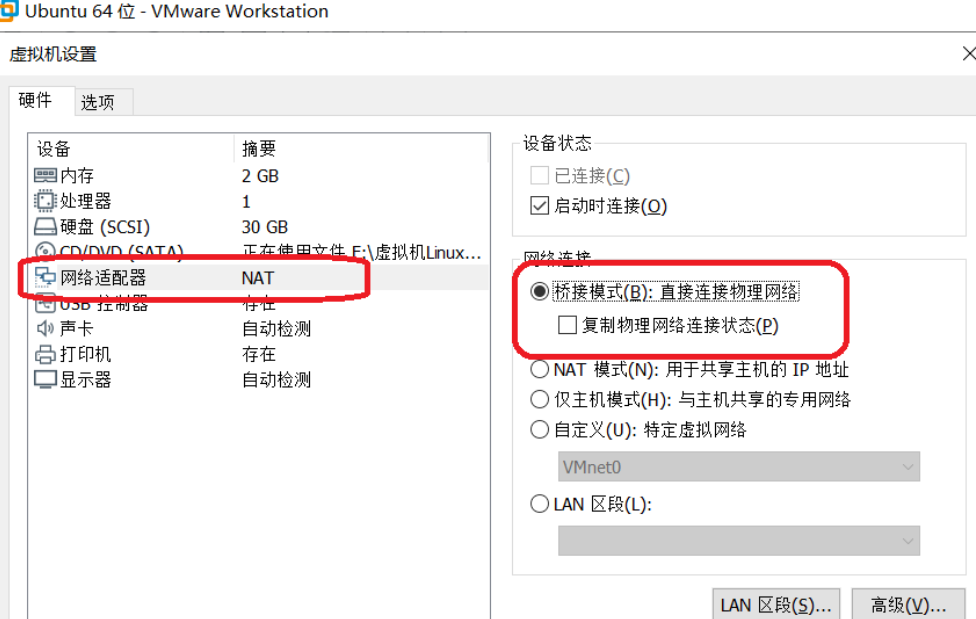
5. Configure static IP
Because the virtual machine is installed, it should be changed to bridge mode.
Next, edit the file:
sudo gedit /etc/netplan/01-network-manager-all.yaml
network configuration
# Let NetworkManager manage all devices on this system
network:
  version: 2
  renderer: NetworkManager
  ethernets:
    ens33: #The name of the configured network card can be found by using ifconfig -a
      dhcp4: no #dhcp4 off
      addresses: [192.168.1.8/24] #Set local IP and mask
      gateway4: 192.168.1.1 #Set gateway
      nameservers:
        addresses: [223.5.5.5,223.6.6.6,166.111.8.28,166.111.8.29,202.141.162.123] #Set up DNS for Alibaba cloud, China University of science and technology, etc
Then apply the changes:
sudo netplan apply
6. Install RISC-V cross compilation tool
risc-v tool chain installation is the most important step. If you use non-20.04, the installation will probably fail. Because only ubuntu 20.04 has the image source of the corresponding package!
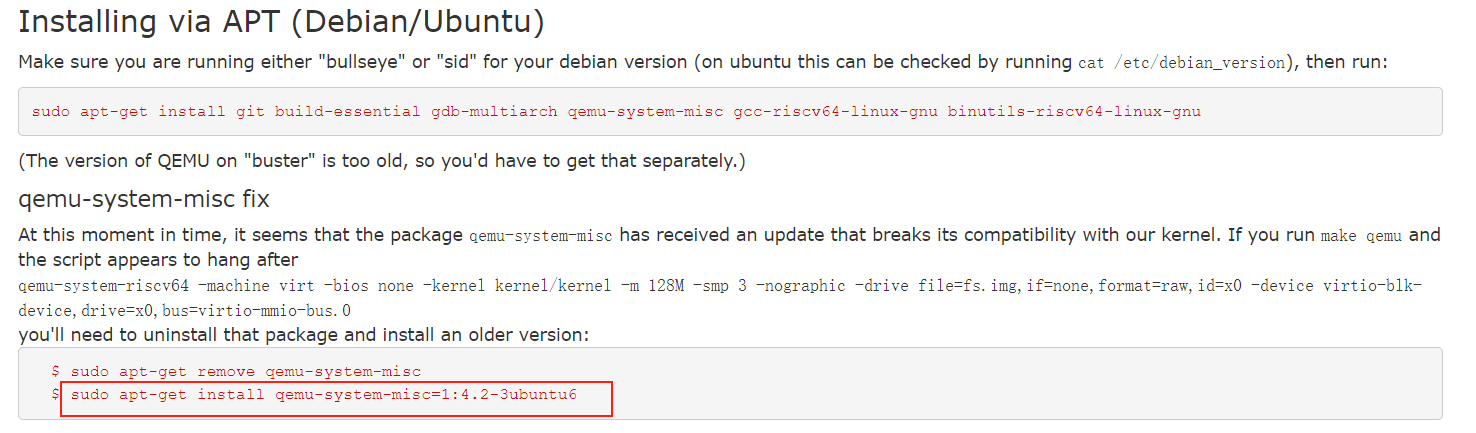
sudo apt install git build-essential gdb-multiarch qemu-system-misc gcc-riscv64-linux-gnu binutils-riscv64-linux-gnu libglib2.0-dev libpixman-1-dev gcc-riscv64-unknown-elf
7. Install QEMU
QEMU is used to simulate the risc-v CPU on our machine (X86) and compile the generated machine code of risc-v platform, which needs to be executed by the simulated CPU.
wget https://download.qemu.org/qemu-5.1.0.tar.xz  /home/zhongyi/6S081
cd qemu-5.1.0
./configure --disable-kvm --disable-werror --prefix=/usr/local --target-list=riscv64-softmmu
make
sudo make install
8 test
8.1 download xv6 source code
Download the xv6 source code from github, cut into the main directory of the source code, and switch the branch to util.
git clone git://g.csail.mit.edu/xv6-labs-2020
cd xv6-labs-2020
git checkout util
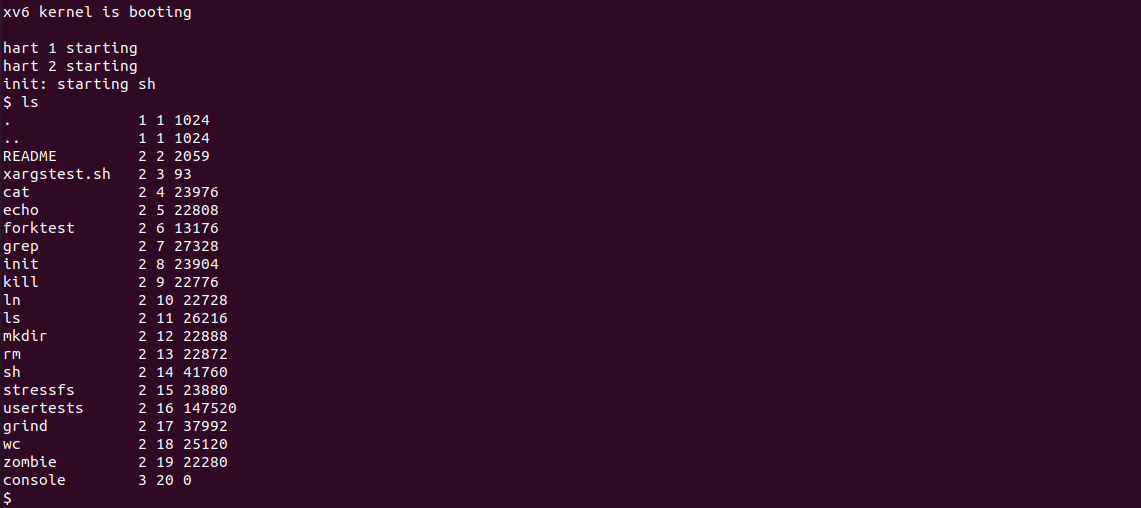
Compile in the project directory. If you can enter the xv6 shell and see xv6 kernel is booting, it means that the experimental environment has been built successfully.
make
make qemu
Press ctrl+a to release and then press x to exit qemu. This is very important.
8.2 inspection tool chain
riscv64-unknown-elf-gcc --version
expect
riscv64-unknown-elf-gcc (GCC) 10.1.0
qemu-system-riscv64 --version
expect:
QEMU emulator version 5.1.0
8.3 inspection and commissioning tools
Here, you need to open two windows, one to run qemu and the other to run the debugger gdb.
The window running qemu executes make qemu gdb and waits for gdb to connect
make qemu-gdb
sed "s/:1234/:26000/" < .gdbinit.tmpl-riscv > .gdbinit
*** Now run 'gdb' in another window.
qemu-system-riscv64 -machine virt -bios none -kernel kernel/kernel -m 128M -smp 3 -nographic -drive file=fs.img,if=none,format=raw,id=x0 -device virtio-blk-device,drive=x0,bus=virtio-mmio-bus.0 -S -gdb tcp::26000
Another window runs
gdb-multiarch -q kernel/kernel
If you see the following, there is basically no problem with the environment.
Reading symbols from kernel/kernel...
The target architecture is set to "riscv:rv64".
0x0000000000001000 in ?? ()
(gdb)
If it is the first time to run, please set it first according to the prompt gdbinit
echo set auto-load safe-path / >> ~/.gdbinit
After a few days, that's it, MIT 6 S081 environment construction is finally completed! Now you can do the experiment happily!
Article reference
https://pdos.csail.mit.edu/6.828/2020/tools.html
https://www.bilibili.com/video/BV11K4y127Qk
https://zhuanlan.zhihu.com/p/359384544
https://zhuanlan.zhihu.com/p/343655412