To familiarize yourself with the configuration, training, and testing of caffe's network structure, mnist is used for learning.
Mnist's training network is also an example that comes with caffe, but you just need to download mnist's data yourself.The steps are as follows:
(1) Install caffe, you can refer to other tutorials in the specific process.
(2) Preparing data
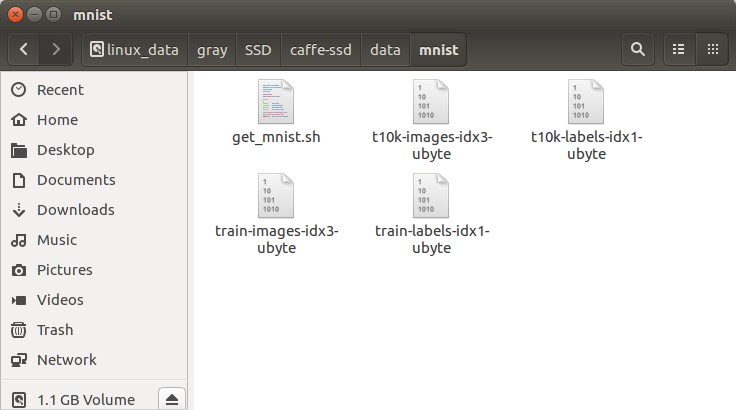
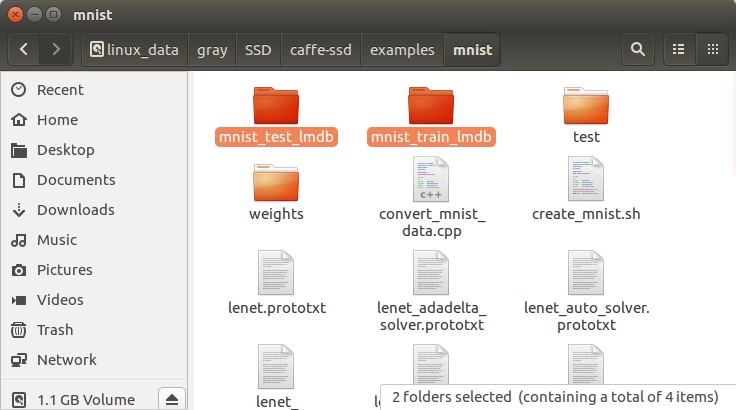
Enter the root directory of the caffe, most of the model network structure, configuration files, etc. are built into the caffe itself, under exmamples/mnist, some under data/mnist.
Function:
cd $CAFFE_ROOT#Switch to caffe's Root Directory
./data/mnist/get_mnist.sh#Download Data
./examples/mnist/create_mnist.sh#Convert to lmdb format
Then download the mnist data.Actually, I put the previously set data under the mnist folder to convert the lmdb format directly.
(3) Training
New or found lenet network structure file: $CAFFE_ROOT/examples/mnist/lenet_train_test.prototxt
Where the source: that is, the path to the lmdb format data, needs to be modified as it is
name: "LeNet"
layer {
  name: "mnist"
  type: "Data"
  top: "data"
  top: "label"
  include {
    phase: TRAIN
  }
  transform_param {
    scale: 0.00390625
  }
  data_param {
    source: "examples/mnist/mnist_train_lmdb"
    batch_size: 64
    backend: LMDB
  }
}
layer {
  name: "mnist"
  type: "Data"
  top: "data"
  top: "label"
  include {
    phase: TEST
  }
  transform_param {
    scale: 0.00390625
  }
  data_param {
    source: "examples/mnist/mnist_test_lmdb"
    batch_size: 100
    backend: LMDB
  }
}
layer {
  name: "conv1"
  type: "Convolution"
  bottom: "data"
  top: "conv1"
  param {
    lr_mult: 1
  }
  param {
    lr_mult: 2
  }
  convolution_param {
    num_output: 20
    kernel_size: 5
    stride: 1
    weight_filler {
      type: "xavier"
    }
    bias_filler {
      type: "constant"
    }
  }
}
layer {
  name: "pool1"
  type: "Pooling"
  bottom: "conv1"
  top: "pool1"
  pooling_param {
    pool: MAX
    kernel_size: 2
    stride: 2
  }
}
layer {
  name: "conv2"
  type: "Convolution"
  bottom: "pool1"
  top: "conv2"
  param {
    lr_mult: 1
  }
  param {
    lr_mult: 2
  }
  convolution_param {
    num_output: 50
    kernel_size: 5
    stride: 1
    weight_filler {
      type: "xavier"
    }
    bias_filler {
      type: "constant"
    }
  }
}
layer {
  name: "pool2"
  type: "Pooling"
  bottom: "conv2"
  top: "pool2"
  pooling_param {
    pool: MAX
    kernel_size: 2
    stride: 2
  }
}
layer {
  name: "ip1"
  type: "InnerProduct"
  bottom: "pool2"
  top: "ip1"
  param {
    lr_mult: 1
  }
  param {
    lr_mult: 2
  }
  inner_product_param {
    num_output: 500
    weight_filler {
      type: "xavier"
    }
    bias_filler {
      type: "constant"
    }
  }
}
layer {
  name: "relu1"
  type: "ReLU"
  bottom: "ip1"
  top: "ip1"
}
layer {
  name: "ip2"
  type: "InnerProduct"
  bottom: "ip1"
  top: "ip2"
  param {
    lr_mult: 1
  }
  param {
    lr_mult: 2
  }
  inner_product_param {
    num_output: 10 #Number of output types
    weight_filler {
      type: "xavier"
    }
    bias_filler {
      type: "constant"
    }
  }
}
layer {
  name: "accuracy"
  type: "Accuracy"
  bottom: "ip2"
  bottom: "label"
  top: "accuracy"
  include {
    phase: TEST  #Result accuracy at validation
  }
}
layer {
  name: "loss"
  type: "SoftmaxWithLoss" #Loss function during training
  bottom: "ip2"
  bottom: "label"
  top: "loss"
}
Create or find a new training profile for lenet: $CAFFE_ROOT/examples/mnist/lenet_solver.prototxt
The network model net: path, and network weight snapshot_prefix: need to be modified
# The train/test net protocol buffer definition
net: "examples/mnist/lenet_train_test.prototxt"
# test_iter specifies how many forward passes the test should carry out.
# In the case of MNIST, we have test batch size 100 and 100 test iterations,
# covering the full 10,000 testing images.
test_iter: 100
# Carry out testing every 500 training iterations.
test_interval: 500
# The base learning rate, momentum and the weight decay of the network.
base_lr: 0.01
momentum: 0.9
weight_decay: 0.0005
# The learning rate policy
lr_policy: "inv"
gamma: 0.0001
power: 0.75
# Display every 100 iterations
display: 100
# The maximum number of iterations
max_iter: 10000
# snapshot intermediate results
snapshot: 5000
snapshot_prefix: "examples/mnist/lenet"
# solver mode: CPU or GPU
solver_mode: GPU
Then create or find train_lenet.sh, which contains:
#!/usr/bin/env sh
set -e

./build/tools/caffe train --solver=examples/mnist/lenet_solver.prototxt $@
And do training:
cd $CAFFE_ROOT
./examples/mnist/train_lenet.sh
After training, create or find test_lenet.sh, which contains:
#!/usr/bin/env sh
set -e

./build/tools/caffe.bin test \
--model=examples/mnist/lenet_train_test.prototxt \
--weights=examples/mnist/weights/lenet_iter_5000.caffemodel \
--iterations=100
Testing:
./examples/mnist/test_lenet.sh
All of the above are training and testing data in mnist dataset. You can only see some results, but you don't see the process in them. Therefore, the following is a picture to test.
(4) Test digital pictures
Prepare the configuration file deploy.prototxt:
Modify the header and tail of lenet_train_test.prototxt to get the configuration file deploy.prototxt:
Lenet_train_test header:
name: "LeNet"
layer {
  name: "mnist"
  type: "Data"
  top: "data"
  top: "label"
  include {
    phase: TRAIN
  }
  transform_param {
    scale: 0.00390625
  }
  data_param {
    source: "examples/mnist/mnist_train_lmdb"
    batch_size: 64
    backend: LMDB
  }
}
layer {
  name: "mnist"
  type: "Data"
  top: "data"
  top: "label"
  include {
    phase: TEST
  }
  transform_param {
    scale: 0.00390625
  }
  data_param {
    source: "examples/mnist/mnist_test_lmdb"
    batch_size: 100
    backend: LMDB
  }
}
Change to Deploy header:
name:"Lenet"
layer {
  name: "data"
  type: "Input"
  top: "data"
  input_param {
    shape: {
      dim:1 #batch_size
      dim:1 # rgb 3,gray 1
      dim:28
      dim:28
    }
  }
}
Tail of Lenet_train_test
layer {
  name: "accuracy"
  type: "Accuracy"
  bottom: "ip2"
  bottom: "label"
  top: "accuracy"
  include {
    phase: TEST  #Result accuracy at validation
  }
}
layer {
  name: "loss"
  type: "SoftmaxWithLoss" #Loss function during training
  bottom: "ip2"
  bottom: "label"
  top: "loss"
}
Change to Deploy Tail
layer {
  name: "prob"
  type: "Softmax"
  bottom: "ip2"
  top: "prob"
}
The label layer was removed because the actual category was not required for testing.
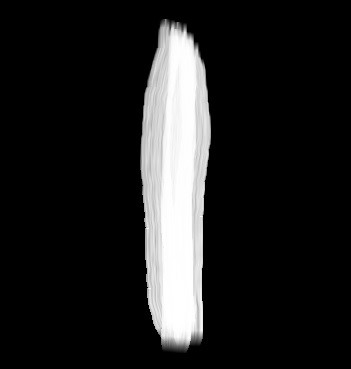
The test picture is as follows, with a black background.

New test function mnist_detect.py:
#encoding=utf8
import sys
import numpy as np
import cv2
sys.path.insert(0,'/$caffe-root/python')
import caffe

MEAN = 128
SCALE = 0.00390624 # 1/256
#imgPath = sys.argv[1]
imgPath = '/$caffe-root/examples/mnist_2/test/bmp/6.jpg' #Test Picture Path
caffe.set_mode_gpu()
caffe.set_device(0)
net = caffe.Net('/$caffe-root/examples/mnist_2/deploy.prototxt','/$caffe-root/examples/mnist_2/weights/lenet_iter_5000.caffemodel',caffe.TEST)  #Profile and Weight File Path
net.blobs['data'].reshape(1,1,28,28)

img0 = cv2.imread(imgPath,cv2.IMREAD_GRAYSCALE)
img1 = cv2.resize(img0,(28,28))   #Picture zoom to 28 x 28
image = img1.astype(np.float) - MEAN
print(image.shape)
image *= SCALE
#cv2.imwrite('rewrite.jpg',image)#image/SCALE+MEAN)
net.blobs['data'].data[...]=image
output = net.forward()
#print(output)
pred_label = np.argmax(output['prob'][0])   #Forecast results
print('\nPredicted digit for {} is {}'.format(imgPath,pred_label))
Reference resources
Recognize mnist pictures using caffe under windows,csdn: wuzebiao2016
Caffe-mnist Don't Handwrite Numbers , cnblog: Pirates of the North
The lenet.prototxt(deploy) file needed to test your own single picture,csdn:kele_imon
Differences between lenet_train_test.prototxt and lenet.prototxt (deploy file) in mnist in caffe,csdn,redfivehit
Wait
Next, I will do some more work on mnist data parsing, compare the pictures and recognition results one by one, look at the recognition results intuitively, and try how to improve the recognition rate of other handwritten digital pictures.

