Article link
| number | classification | Articles and links | introduce | author | Source classification | Date of writing | Collection date |
|---|---|---|---|---|---|---|---|
| R1 | reference resources | HPool | Largest Chia ore pool | 2021-06-04 | |||
| R2 | reference resources | Chia official website | 2021-06-04 | ||||
| R3 | reference resources | Chia official browser | 2021-06-04 | ||||
| R4 | reference resources | CHIA CLI Commands Reference | 2021-06-06 | ||||
| R5 | reference resources | How to setup a Chia Harvester on Ubuntu | 2021-05-04 | 2021-07-01 | |||
| R6 | reference resources | Farming on many machines | chia GitHub official website | 2021-06-04 | 2021-07-02 | ||
| T1 | skill | Zero to one Chia harvesting practice: P diagram and harvesting tutorial of Chia Expressway under Ubuntu | chia_plot multithreaded P-graph | This blog | 2021-06-12 | 2021-06-12 |
Installation of Chia coin harvester in cluster mode
The advantage of cluster harvesting is that each node does not need to run a complete chiya node, which requires relatively high network and CPU, increases the consumption of CPU and network resources, and of course, consumes more power.
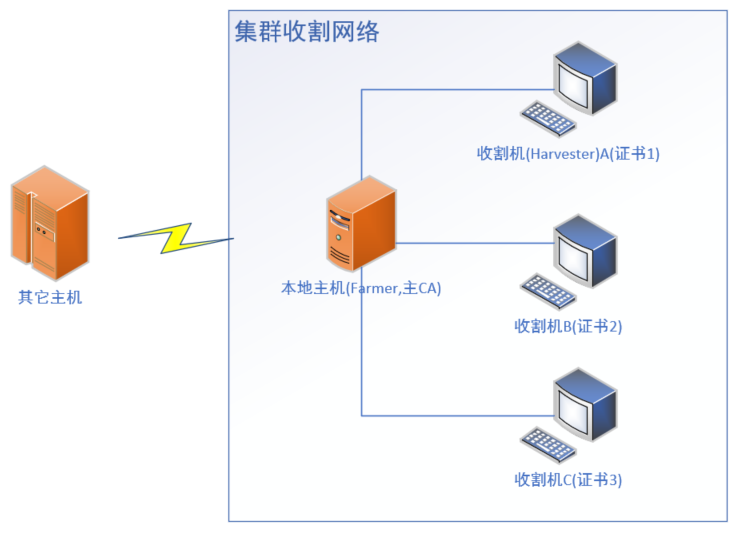
This paper introduces the cluster method of Ubuntu as a harvesting node. The following is the network topology.
The local host can be windows or Linux. The host sends the Ca (Certificate Authorization) file to the mining node, and then generates the certificate of the harvesting node to harvest the cluster.
1. Download and install chia program
Download address of official website: https://www.chia.net/download/
At present, the latest version is 1.2.11. Download the widnows version of the program.

2. Obtain the host CA file
Through the CA (certificate authentication) file, you can and authorize other machines to join the cluster with this machine as the host.
The CA file for Linux is located in
~/.chia/mainnet/config/ssl/ca
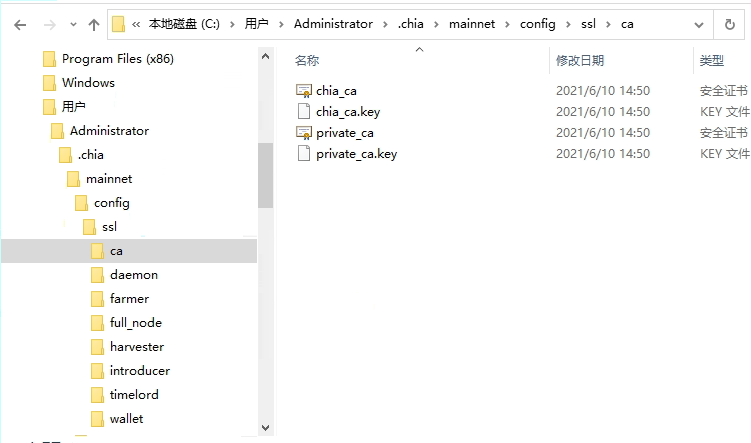
The CA file for Windows is located in
C:\User\yourusername\.chia\mainnet\config\ssl\ca
The following figure illustrates the location under windows.
3. Copy the ca folder found in the previous step to the Windows harvester
4. CA Certificate Authorization
On the Windows harvester, use the CA file of the host to generate the cluster certificate.
Enter the command line mode and enter the following operation commands
#Note that the following daemon folder directory is the default directory for installing version 1.2.11 under windows. It will change due to the installation path and version number.
cd C:\Users\chia\AppData\Local\chia-blockchain\app-1.2.11\resources\app.asar.unpacked\daemon>
#Generate the certificate used by the cluster Note: if the ca folder is not under d:\ca, please modify it accordingly.
chia init -c d:\ca

After the certificate is generated, the ca folder copied from the host can be deleted for security.
5. Configure Linux harvester and start cluster harvesting
Pay attention to turn off UPNP, otherwise there will be problems if there are multiple wallets locally.
5.1 configure harvester
#Stop all chia services running in the background
chia stop all -d
#Configure host IP
chia configure --set-farmer-peer 192.168.2.127:8447
#Turn off UPNP
chia configure --enable-upnp false
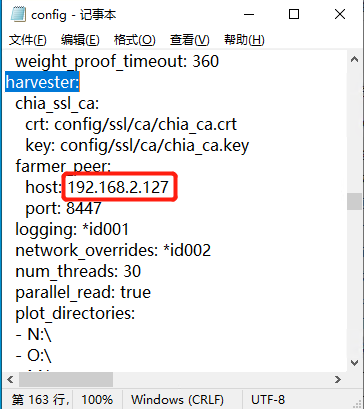
After the configuration is completed, you can check the following files
C:\Users\chia.chia\mainnet\config\config.yaml
harvester:farmer_ Peer: does the host configuration point to the IP address of the host? If not, it needs to be modified manually.
tips: how to add a plot file Subordinate commands can import the plot folder
chia plots add -d /yourplotfolder/
5.2 start harvesting service
# Start mining service
chia start harvester -r
# Stop mining services
chia stop harvester
6. Verify whether the mining is normal
6.1 GUI (graphical user interface) verification
Check whether the harvester is connected normally through farmland - > advanced options. Refer to the figure below
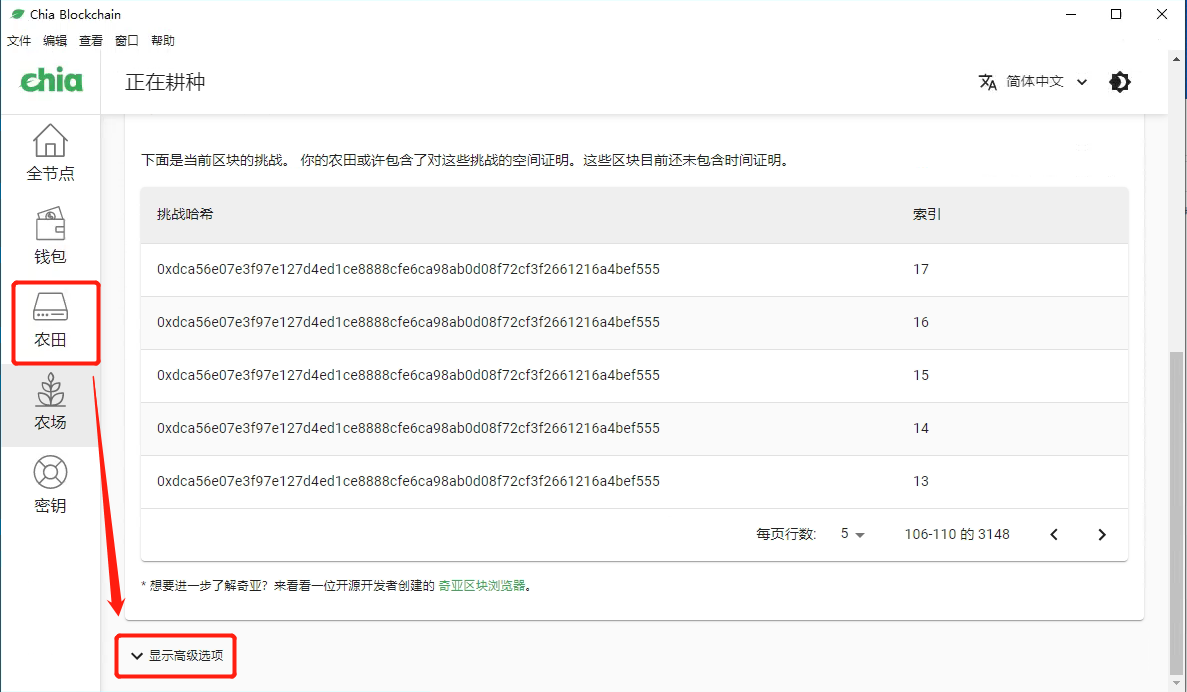
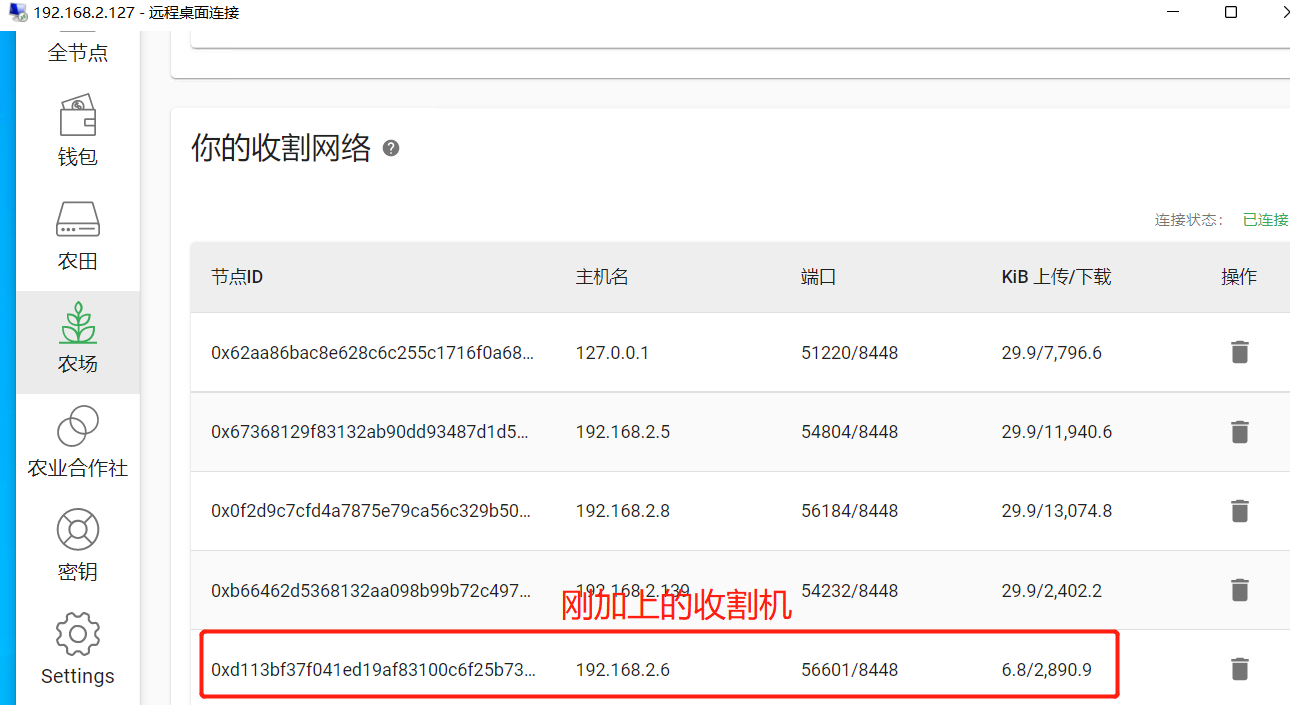
Tips: after adding the harvester, you need to restart the chia program of the master node to see the entry of the new harvester on the UI.
6.2 log verification (optional verification)
Modify the log level of the host (default WARNING) to DEBUG, restart the host node (wallet program), and then check the log ~ / chia/mainnet/log/DEBUG. Log, if the following information appears, it indicates that the harvester is harvesting normally.
[time stamp] farmer farmer_server   : DEBUG   -> new_signage_point_harvester to peer [harvester IP address] [peer id - 64 char hexadecimal]
[time stamp] farmer farmer_server   : DEBUG   <- farming_info from peer [peer id - 64 char hexadecimal] [harvester IP address]
[time stamp] farmer farmer_server   : DEBUG   <- new_proof_of_space from peer [peer id - 64 char hexadecimal] [harvester IP address]
You can search the harvester IP to find the above information.