9. Mysql database backup and restore
1. Backup application scenario
Data failure may occur when data transmission, data storage and data exchange are carried out in the server. Such as unexpected downtime or storage media damage. At this time, if data backup and data recovery methods and measures are not taken, it will lead to data loss, and the loss can not be compensated and estimated.
2. The mysqldump command backs up data
We have different scenario requirements when exporting data. There are several situations:
Export the table structure and table data of all databases in mysql
mysqldump --all-databases --master-data -u user name -p'password' > dbdump.db
Export the table structure and table data of an individual database in mysql
mysqldump -u user name -p password -h127.0.0.1 -P3306 Database instance name > Backup file.sql
Export the database table structure in mysql without table data
mysqldump -u user name -p password -h127.0.0.1 -P3306 --add-locks -q -d Database instance name > Backup file.sql

-- Parameter Description:
-h: Specify access host
-P: Specify the port number
-q: Export directly to standard output without buffering queries
--add-locks : The table is locked during export and unlocked after completion.
-d : Only the table structure is exported without data
2.1 premise of using mysqldump: binlog log function needs to be enabled
# 1. Modify the mysql configuration file
vim /etc/my.cnf

[mysqld]
# binlog
# After configuring log bin, you must configure server ID to start MySQL;
# The server ID must be unique among all master-slave services;
log-bin=mysql-bin
server-id=1

# 2. After configuration, restart the mysql service
service mysqld restart
2.2 export the table structure and table data of all databases in mysql
[root@server01 opt]# mysqldump --all-databases --master-data -uroot -p > dbdump.db
Enter password:
2.3 export the table structure and table data of a separate database in mysql
[root@server01 opt]# mysqldump -uroot -p -h127.0.0.1 -P3306  test > test.sql
Enter password:
2.4 export the database table structure in mysql, excluding table data
[root@server01 opt]# mysqldump -uroot -p -h127.0.0.1 -P3306 --add-locks -q -d test > test.sql
Enter password:
3. source command backup and restore
#Restore format:
SOURCE Path to import file;

2. reduction
 To log in first
 create database db1;
 use db1;
 source route/backups.sql;
  Execute this sql Script file
"Note: when restoring, you need to log in to MySQL and select the corresponding database "
4. Backup and restore data in db1 database
4.1 backup db1 database
[root@server01 opt]# mysqldump -uroot -p -h127.0.0.1 -P3306 db1 > db1.sql
Enter password:
[root@server01 opt]#
[root@server01 opt]# ls -ll -h db1.sql
-rw-r--r-- 1 root root 3.3K Feb  8 15:12 db1.sql
[root@server01 opt]#
4.2 delete all contents in db1 database
mysql> drop database db1;
Query OK, 2 rows affected (0.02 sec)
4.3 create a new db1 database
Before importing data, you need to create a database.
mysql> create database db1 charset utf8;
Query OK, 1 row affected (0.01 sec)
4.4 selected database
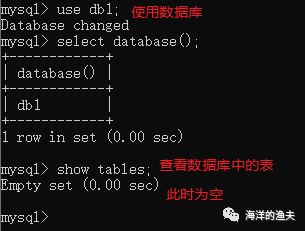
mysql> use db1; -- use db1 database
Database changed
mysql>
mysql> select database(); -- View the database currently in use
+------------+
| database() |
+------------+
| db1        |
+------------+
1 row in set (0.00 sec)

mysql>
mysql> show tables; -- View the tables in the database. There are currently no tables
Empty set (0.00 sec)

mysql>
1590461051865
4.5 restore data using the SOURCE command
-- use source Command import data
mysql> source /opt/db1.sql;
Query OK, 0 rows affected (0.00 sec)

Query OK, 0 rows affected (0.00 sec)

Query OK, 0 rows affected (0.00 sec)

Query OK, 0 rows affected (0.00 sec)

Query OK, 0 rows affected (0.00 sec)

...
-- View the currently used database as db1
mysql> select database();
+------------+
| database() |
+------------+
| db1        |
+------------+
1 row in set (0.00 sec)

mysql>
-- View current db1 From the database table in, you can see that it has been successfully imported
mysql> show tables;
+---------------+
| Tables_in_db1 |
+---------------+
| product       |
| stu3          |
+---------------+
2 rows in set (0.00 sec)

mysql>
5. Import data with MySQL command
In the above, we use the source command to restore the data, but the defect is that we need to log in to mysql first. This command is not so convenient if it is written in a shell script.
Then we can use the mysql command to import data directly.
The format is as follows:
mysql -u user name -p Password database name < Backup file
Examples of execution are as follows:
[root@server01 opt]# mysql -uroot -p db1 < db1.sql
Enter password:
[root@server01 opt]#