Nacos high availability environment construction
Nacos highly available environment = Nacos cluster + Nacos persistence

Reference: < ( ̄)  ̄) ↗ Nacos official website - cluster deployment instructions
@
1. Create Docker LAN
-
Create Docker LAN
PS C:\Users\xiao> docker network create MyNetwork
56b64b706d69bf2d3b30eb6d63c94bb110c74e16febf96c1b1b0aa687cc3d493
-
List all LANs
PS C:\Users\xiao> docker network ls
NETWORK ID     NAME        DRIVER    SCOPE
56b64b706d69   MyNetwork   bridge    local
e19f31ab243a   bridge      bridge    local
09b9f7e52530   host        host      local
3bb55566e6c5   none        null      local
-
View LAN details
PS C:\Users\xiao> docker network inspect MyNetwork
[
    {
        "Name": "MyNetwork",
        "Id": "56b64b706d69bf2d3b30eb6d63c94bb110c74e16febf96c1b1b0aa687cc3d493",
        "Created": "2022-01-27T11:58:16.195894307Z",
        "Scope": "local",
        "Driver": "bridge",
        "EnableIPv6": false,
        "IPAM": {
            "Driver": "default",
            "Options": {},
            "Config": [
                {
                    "Subnet": "172.18.0.0/16",
                    "Gateway": "172.18.0.1"
                }
            ]
        },
        "Internal": false,
        "Attachable": false,
        "Ingress": false,
        "ConfigFrom": {
            "Network": ""
        },
        "ConfigOnly": false,
        "Containers": {},
        "Options": {},
        "Labels": {}
    }
]
2. Create and start an Nginx container and join the container to the LAN
-
Create and start the Nginx container
-
Join Nginx container to LAN
PS C:\Users\xiao> docker network connect MyNetwork MyNginx
-
Check whether the Nginx container has successfully joined the LAN
PS C:\Users\xiao> docker network inspect MyNetwork
[
    {
        "Name": "MyNetwork",
        "Id": "56b64b706d69bf2d3b30eb6d63c94bb110c74e16febf96c1b1b0aa687cc3d493",
        "Created": "2022-01-27T11:58:16.195894307Z",
        "Scope": "local",
        "Driver": "bridge",
        "EnableIPv6": false,
        "IPAM": {
            "Driver": "default",
            "Options": {},
            "Config": [
                {
                    "Subnet": "172.18.0.0/16",
                    "Gateway": "172.18.0.1"
                }
            ]
        },
        "Internal": false,
        "Attachable": false,
        "Ingress": false,
        "ConfigFrom": {
            "Network": ""
        },
        "ConfigOnly": false,
        "Containers": {
            "9ba1cfa5e902ba3f4cfebb6404d03f8c4cbe1aa418fc4ae682722c5882c88811": {
                "Name": "MyNginx",
                "EndpointID": "22e350022928c6e597a0bc217b84270525ab8400bb84d04387d63632f0b028eb",
                "MacAddress": "02:42:ac:12:00:02",
                "IPv4Address": "172.18.0.2/16",
                "IPv6Address": ""
            }
        },
        "Options": {},
        "Labels": {}
    }
]
3. Create and start a MySQL container and add the container to the LAN
-
Create and start MySQL container
-
Join MySQL container to LAN
PS C:\Users\xiao> docker network connect MyNetwork MyMySQL
-
Check whether the MySQL container has successfully joined the LAN
PS C:\Users\xiao> docker network inspect MyNetwork
[
    {
        "Name": "MyNetwork",
        "Id": "56b64b706d69bf2d3b30eb6d63c94bb110c74e16febf96c1b1b0aa687cc3d493",
        "Created": "2022-01-27T11:58:16.195894307Z",
        "Scope": "local",
        "Driver": "bridge",
        "EnableIPv6": false,
        "IPAM": {
            "Driver": "default",
            "Options": {},
            "Config": [
                {
                    "Subnet": "172.18.0.0/16",
                    "Gateway": "172.18.0.1"
                }
            ]
        },
        "Internal": false,
        "Attachable": false,
        "Ingress": false,
        "ConfigFrom": {
            "Network": ""
        },
        "ConfigOnly": false,
        "Containers": {
            "9ba1cfa5e902ba3f4cfebb6404d03f8c4cbe1aa418fc4ae682722c5882c88811": {
                "Name": "MyNginx",
                "EndpointID": "22e350022928c6e597a0bc217b84270525ab8400bb84d04387d63632f0b028eb",
                "MacAddress": "02:42:ac:12:00:02",
                "IPv4Address": "172.18.0.2/16",
                "IPv6Address": ""
            },
            "45a4bca256c29842067cb324c67f3288c24b545a61cb796f4df1bfc5b1fcaae6": {
                "Name": "MyMySQL",
                "EndpointID": "f80a9fbd1f849a58f18b45d4d7684295e6d8e593c0b308af7215846692e2e57d",
                "MacAddress": "02:42:ac:12:00:03",
                "IPv4Address": "172.18.0.3/16",
                "IPv6Address": ""
            }
        },
        "Options": {},
        "Labels": {}
    }
]
4. Create and start three Nacos containers and join them to the LAN
-
Create and start the Nacos container (cluster mode)
<( ̄︶ ̄)↗Nacos actual combat - installation and use md
docker run -itd -p 8848:8848 --env MODE=cluster --name MyNacos1 nacos/nacos-server
docker run -itd -p 8849:8848 --env MODE=cluster --name MyNacos2 nacos/nacos-server
docker run -itd -p 8850:8848 --env MODE=cluster --name MyNacos3 nacos/nacos-server
-
Join the Nacos container to the LAN
docker network connect MyNetwork MyNacos1
docker network connect MyNetwork MyNacos2
docker network connect MyNetwork MyNacos3
-
Check whether the Nacos container has successfully joined the LAN
PS C:\Users\xiao> docker network inspect MyNetwork
[
    {
        "Name": "MyNetwork",
        "Id": "56b64b706d69bf2d3b30eb6d63c94bb110c74e16febf96c1b1b0aa687cc3d493",
        "Created": "2022-01-27T11:58:16.195894307Z",
        "Scope": "local",
        "Driver": "bridge",
        "EnableIPv6": false,
        "IPAM": {
            "Driver": "default",
            "Options": {},
            "Config": [
                {
                    "Subnet": "172.18.0.0/16",
                    "Gateway": "172.18.0.1"
                }
            ]
        },
        "Internal": false,
        "Attachable": false,
        "Ingress": false,
        "ConfigFrom": {
            "Network": ""
        },
        "ConfigOnly": false,
        "Containers": {
            "9ba1cfa5e902ba3f4cfebb6404d03f8c4cbe1aa418fc4ae682722c5882c88811": {
                "Name": "MyNginx",
                "EndpointID": "22e350022928c6e597a0bc217b84270525ab8400bb84d04387d63632f0b028eb",
                "MacAddress": "02:42:ac:12:00:02",
                "IPv4Address": "172.18.0.2/16",
                "IPv6Address": ""
            },
            "45a4bca256c29842067cb324c67f3288c24b545a61cb796f4df1bfc5b1fcaae6": {
                "Name": "MyMySQL",
                "EndpointID": "f80a9fbd1f849a58f18b45d4d7684295e6d8e593c0b308af7215846692e2e57d",
                "MacAddress": "02:42:ac:12:00:03",
                "IPv4Address": "172.18.0.3/16",
                "IPv6Address": ""
            },
            "b2268309c7e072f7212fc10efc773636676243d40067e8f4511324786701aed7": {
                "Name": "MyNacos1",
                "EndpointID": "2d0c0db59c5918bac6955bdc24682576d0b8301ea67097110d5a4f6a8557966e",
                "MacAddress": "02:42:ac:12:00:04",
                "IPv4Address": "172.18.0.4/16",
                "IPv6Address": ""
            },
            "a07e465b71cd19c54caa26aeb58aad9714d03945d029648ec65e61affc3b1796": {
                "Name": "MyNacos2",
                "EndpointID": "0a5a371b04e2eb4087836a817785edaf86a356b1ad100f164328d6481a17b190",
                "MacAddress": "02:42:ac:12:00:05",
                "IPv4Address": "172.18.0.5/16",
                "IPv6Address": ""
            },
            "d29eceb1c4b5d6071a8e11d75dce038f27eae5e8800cafc7cbeb97429c3d5d95": {
                "Name": "MyNacos3",
                "EndpointID": "79cb067cd0d3c267fc51614fc794c31d8922e334132a3ae3efaabf4dd3bb7e60",
                "MacAddress": "02:42:ac:12:00:06",
                "IPv4Address": "172.18.0.6/16",
                "IPv6Address": ""
            }
        },
        "Options": {},
        "Labels": {}
    }
]
5. Verify whether the above containers can ping each other
Note: ping: command not found
Solution: apt get update + apt get iputils Ping
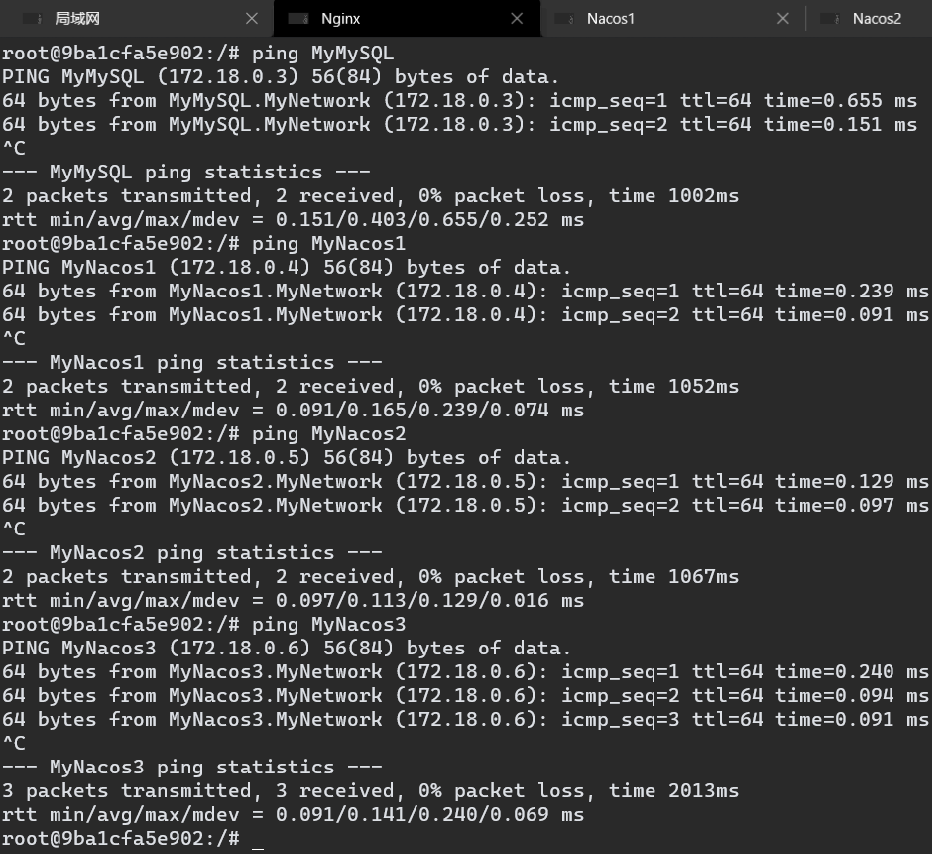
6. Configure Nacos persistence and cluster
<( ̄︶ ̄)↗Nacos actual combat - persistence md
-
Obtained from the official website of Nacos Nacos database build script , MySQL executes the script to build the Nacos database
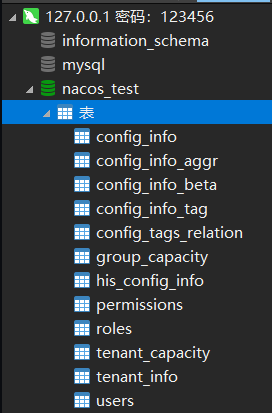
-
Enter the Nacos instance and modify / conf / application Properties file to configure Nacos persistence

-
Modify / conf / cluster Conf configuration file to configure the Nacos cluster

7. Verify that Nacos persistence is in effect
-
Restart all Nacos instances
-
Open the control panel of any Nacos instance and create several configuration information
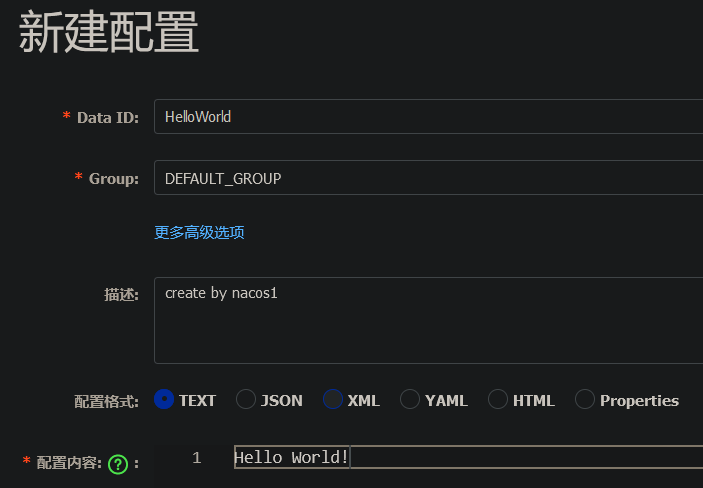
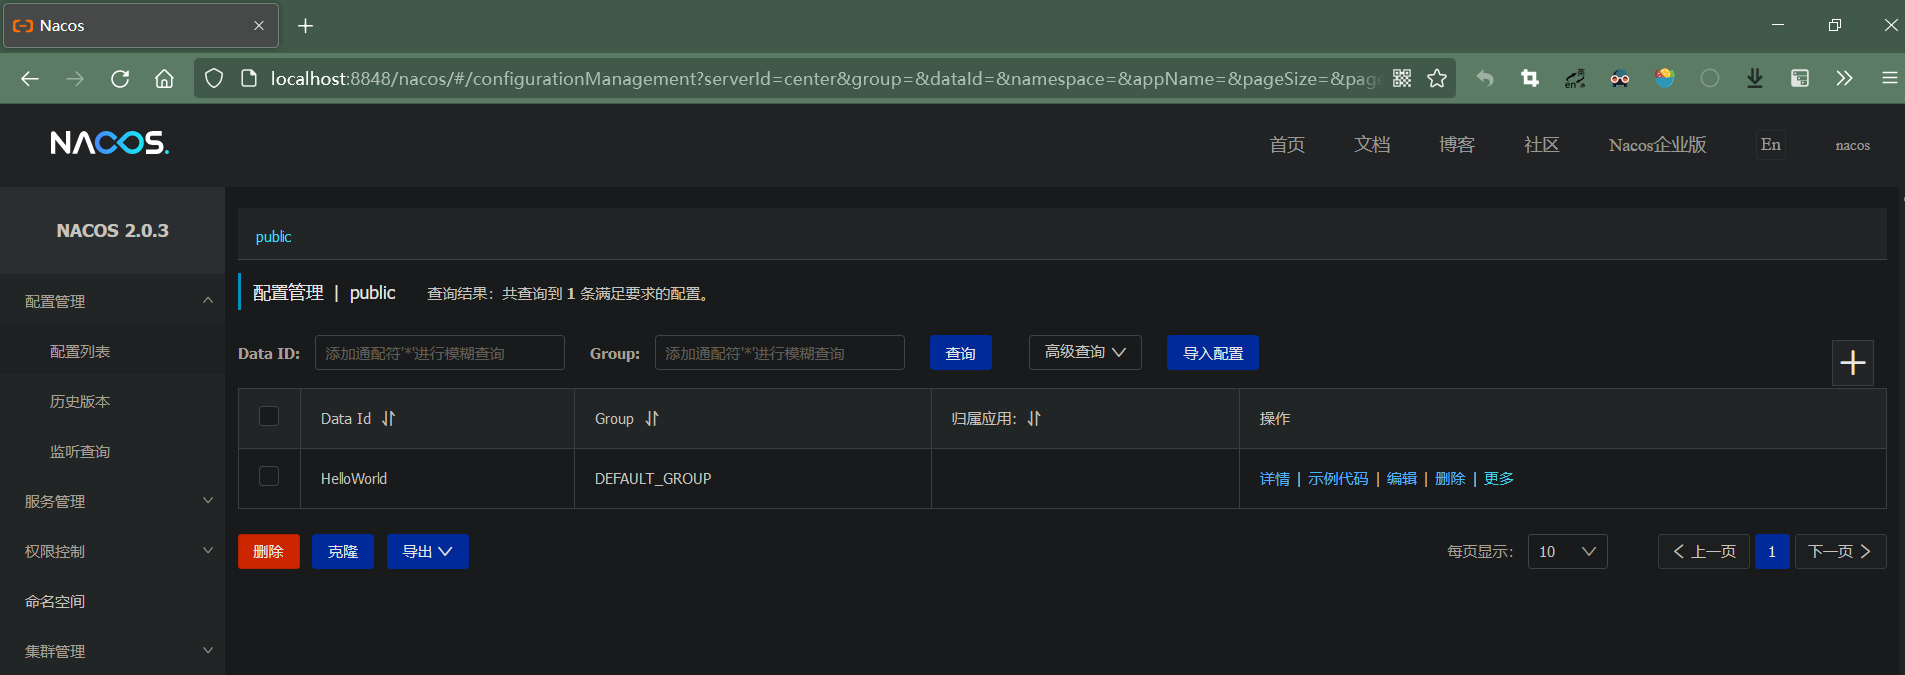
-
Check whether the configuration information is stored in the database


-
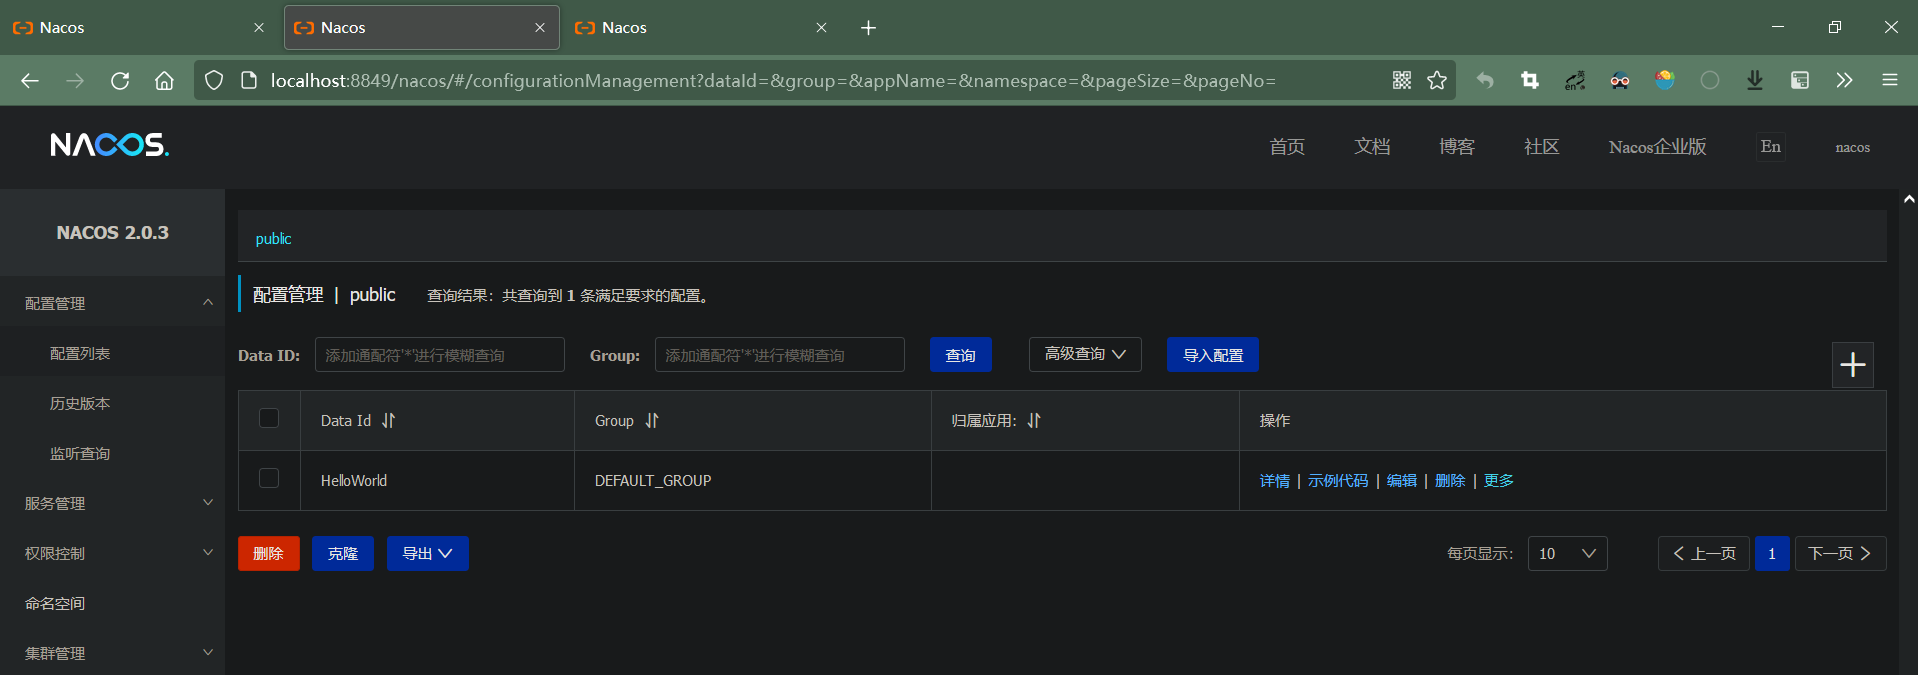
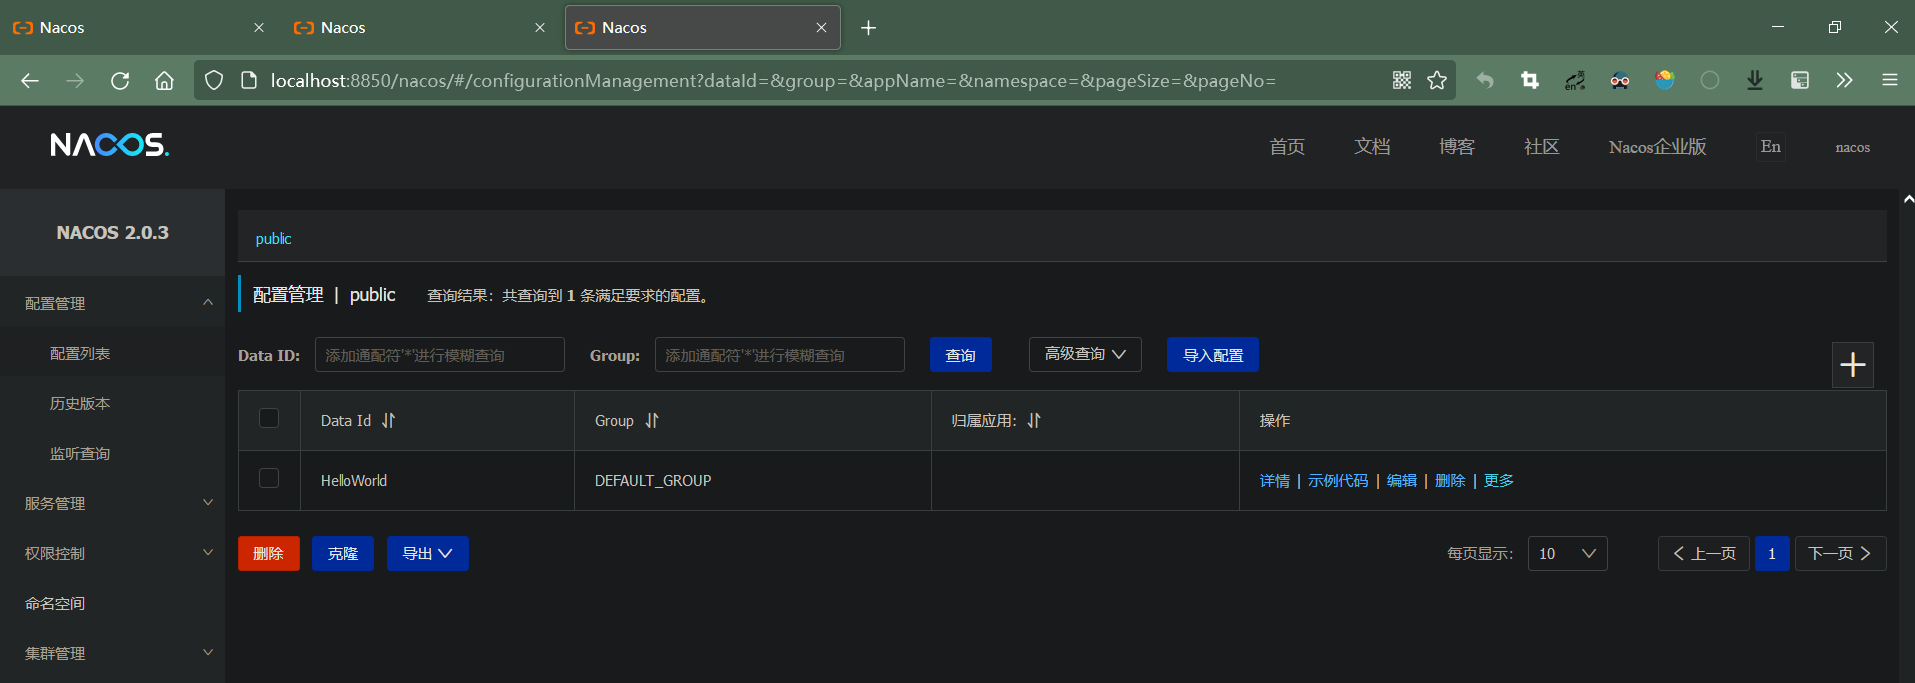
Open the control panel of other Nacos instances and check whether the same configuration information is obtained
8. Configure Nginx load balancing for Nacos
<( ̄︶ ̄)↗
Enter the Nginx container and configure the custom configuration file / etc / Nginx / conf.d/nacosloadbalance conf
upstream serverInstance {
    # ip_hash;
    server 172.18.0.4:8848  weight=1;
    server 172.18.0.5:8848  weight=1;
    server 172.18.0.6:8848  weight=1;
}

server {
    listen       80;
    server_name  127.0.0.1;

    location ~ /nacos/ {
        proxy_pass http://serverInstance;
        proxy_connect_timeout 10;
    }
}
9. Verify that Nginx load balancing is in effect
-
Modify the Nginx configuration file and change the log format
log_format main '$remote_addr --"$request"--> $http_host--> $upstream_addr [$status $request_time]';
-
Restart Nginx
-
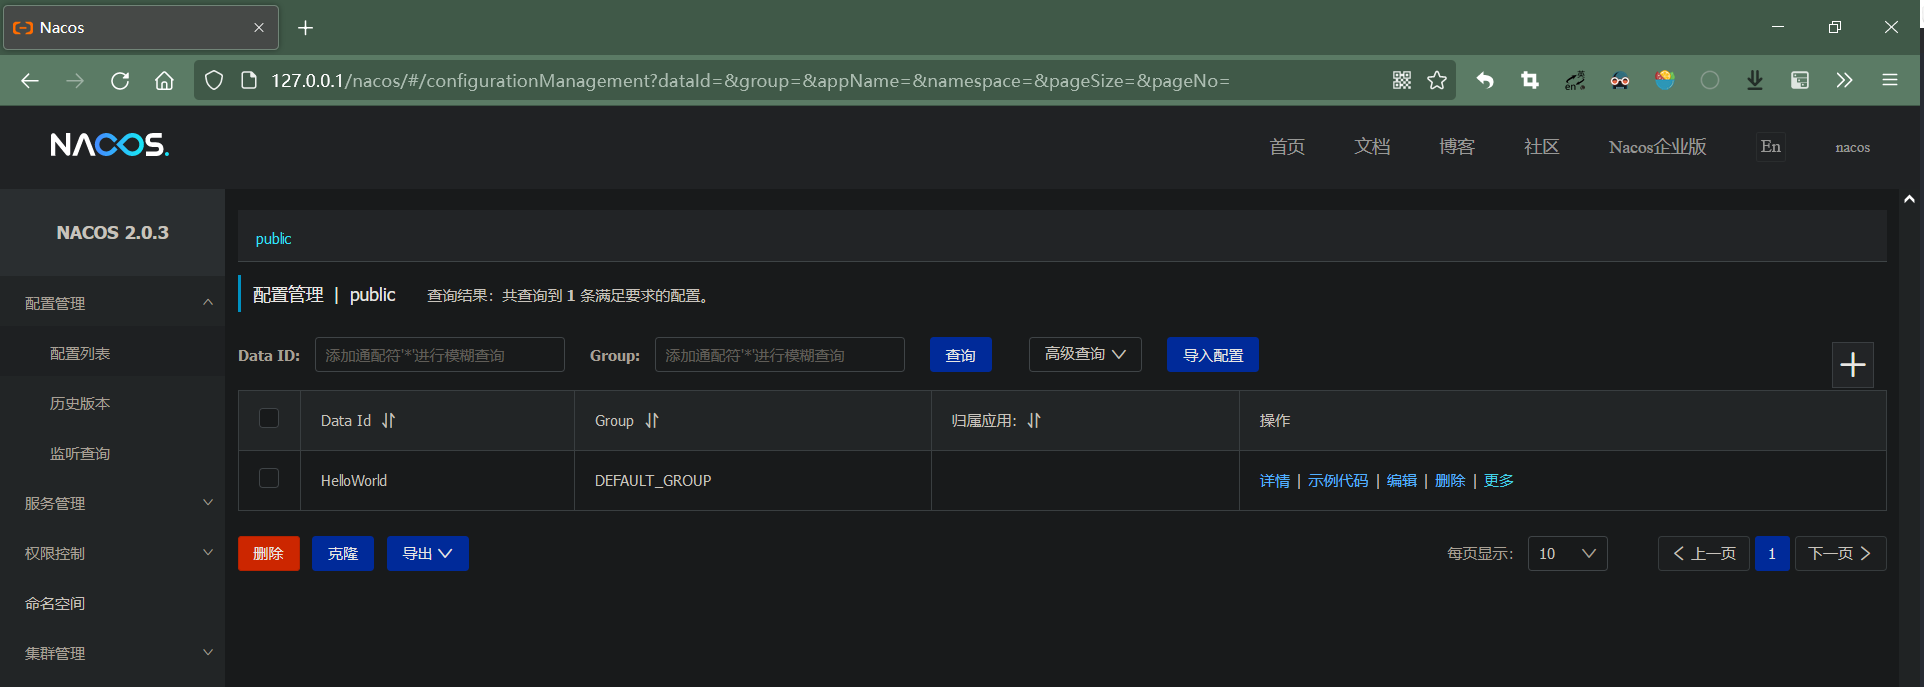
Access the Nacos control panel via Nginx
-
View the log file after several refreshes
172.18.0.1 --"GET /nacos/ HTTP/1.1"--> 127.0.0.1--> 172.18.0.4:8848 [200  0.012]

172.18.0.1 --"GET /nacos/ HTTP/1.1"--> 127.0.0.1--> 172.18.0.5:8848 [304  0.010]

172.18.0.1 --"GET /nacos/ HTTP/1.1"--> 127.0.0.1--> 172.18.0.6:8848 [304  0.009]

172.18.0.1 --"GET /nacos/ HTTP/1.1"--> 127.0.0.1--> 172.18.0.4:8848 [200  0.010]

172.18.0.1 --"GET /nacos/ HTTP/1.1"--> 127.0.0.1--> 172.18.0.5:8848 [200  0.010]

172.18.0.1 --"GET /nacos/ HTTP/1.1"--> 127.0.0.1--> 172.18.0.6:8848 [304  0.010]