nacos instructions
1. Installation / deployment
Download the corresponding installation package from the official website: https://nacos.io/zh-cn/index.html For example, nacos-server-2.0.2.tar.gz
Upload server, unzip:
eyecool@eyecool-OptiPlex-7060:~/nacos/nacos$ ls -l
 Total consumption 44
drwxrwxr-x 4 eyecool eyecool  4096 7 June 14:29 bin
drwxr-xr-x 2 eyecool eyecool  4096 7 June 14:20 conf
drwxrwxr-x 7 eyecool eyecool  4096 7 June 14:29 data
-rw-r--r-- 1 eyecool eyecool 16583 3 November 18:36 LICENSE
drwxrwxr-x 2 eyecool eyecool  4096 7 October 15:47 logs
-rw-r--r-- 1 eyecool eyecool  1305 5 June 14, 2020 NOTICE
drwxrwxr-x 2 eyecool eyecool  4096 7 June 14:19 target
Nacos supports MySQL databases. There is a nacos-mysql.sql database script in the conf folder. Create the corresponding database and execute the script.
Start:
Enter the conf folder and modify the configuration file application.properties, such as port, database configuration, etc
#*************** Spring Boot Related Configurations ***************#
### Default web context path:
server.servlet.contextPath=/nacos
### Default web server port:
server.port=8848

#*************** Network Related Configurations ***************#
### If prefer hostname over ip for Nacos server addresses in cluster.conf:
# nacos.inetutils.prefer-hostname-over-ip=false

### Specify local server's IP:
# nacos.inetutils.ip-address=


#*************** Config Module Related Configurations ***************#
### If use MySQL as datasource:
# spring.datasource.platform=mysql

### Count of DB:
# db.num=1

### Connect URL of DB:
db.url.0=jdbc:mysql://127.0.0.1:3306/nacos?characterEncoding=utf8&connectTimeout=1000&socketTimeout=3000&autoReconnect=true&useUnicode=true&useSSL=false&serverTimezone=UTC
db.user.0=root
db.password.0=eyecool
For database configuration, you can configure multiple. If you configure multiple things, you need to open the db.num attribute, for example:
#*************** Spring Boot Related Configurations ***************#
### Default web context path:
server.servlet.contextPath=/nacos
### Default web server port:
server.port=8848

#*************** Network Related Configurations ***************#
### If prefer hostname over ip for Nacos server addresses in cluster.conf:
# nacos.inetutils.prefer-hostname-over-ip=false

### Specify local server's IP:
# nacos.inetutils.ip-address=


#*************** Config Module Related Configurations ***************#
### If use MySQL as datasource:
# spring.datasource.platform=mysql

### Count of DB:
db.num=2

### Connect URL of DB:
db.url.0=jdbc:mysql://127.0.0.1:3306/nacos?characterEncoding=utf8&connectTimeout=1000&socketTimeout=3000&autoReconnect=true&useUnicode=true&useSSL=false&serverTimezone=UTC
db.user.0=root
db.password.0=eyecool

db.url.1=jdbc:mysql://127.0.0.1:3307/nacos?characterEncoding=utf8&connectTimeout=1000&socketTimeout=3000&autoReconnect=true&useUnicode=true&useSSL=false&serverTimezone=UTC
db.user.1=root
db.password.1=eyecool
start-up
There are two types of nacos startup: single machine startup and cluster startup. Cluster will be introduced later.
When the stand-alone starts, enter the bin directory and execute the command. Under ubuntu, the command is:
bash startup.sh -m standalone
For other linux systems, execute the following commands:
sh startup.sh -m standalone
Under windows system, execute the following command:
startup.cmd -m standalone
visit
Access in browser: http://192.168.61.95:8848/nacos , and log in to the system using nacos/nacos to perform relevant configuration operations.
2. Cluster deployment
Machine 1: 192.168.61.95
Machine 2: 192.168.63.59
On the two machines, modify cluster.conf and add the corresponding ip and port
192.168.61.95:8848
192.168.63.59:8848
Start separately, execute the command in the bin directory, and start in cluster mode by default
bash ./startup.sh
Startup log of a machine:
2021-07-15 17:18:20,739 INFO Started Nacos in 19.706 seconds (JVM running for 20.965)

2021-07-15 17:18:20,739 INFO Nacos started successfully in cluster mode. use external storage

2021-07-15 17:18:20,949 INFO Initializing Spring DispatcherServlet 'dispatcherServlet'

2021-07-15 17:18:20,949 INFO Initializing Servlet 'dispatcherServlet'

2021-07-15 17:18:20,975 INFO Completed initialization in 26 ms

2021-07-15 17:18:21,163 INFO [Cluster-192.168.63.59:8848]RpcClient init label, labels={source=cluster}

2021-07-15 17:18:21,165 INFO [Cluster-192.168.63.59:8848]RpcClient init, ServerListFactory =com.alibaba.nacos.core.cluster.remote.ClusterRpcClientProxy$1

2021-07-15 17:18:21,171 INFO [Cluster-192.168.63.59:8848] Try to connect to server on start up, server: {serverIp='192.168.63.59', server main port=8848}

2021-07-15 17:18:21,491 INFO [Cluster-192.168.63.59:8848] Success to connect to server [192.168.63.59:8848] on start up,connectionId=1626340701266_192.168.61.95_49626

2021-07-15 17:18:21,495 INFO [Cluster-192.168.63.59:8848]Register server push request handler:com.alibaba.nacos.common.remote.client.RpcClient$ConnectResetRequestHandler

2021-07-15 17:18:21,496 INFO [Cluster-192.168.63.59:8848]Register server push request handler:com.alibaba.nacos.common.remote.client.RpcClient$4
For the springboot project, multiple nacos services can be configured during service registration, separated by commas, such as:
spring: application: name: nacos-user cloud: nacos: discovery: server-addr: 192.168.63.59:8848,192.168.61.95:8848
be careful
When deploying a nacos cluster in a LAN, sometimes a timeout error will be reported when the service is registered.
***************************APPLICATION FAILED TO START***************************Description:server error: such as timeout. failed to req API:/nacos/v1/ns/instance after all servers([192.168.63.59:8848, 192.168.61.95:8848]) tried: ErrCode:400, ErrMsg:<html><body><h1>Whitelabel Error Page</h1><p>This application has no explicit mapping for /error, so you are seeing this as a fallback.</p><div id='created'>Fri Jul 16 09:11:50 CST 2021</div><div>There was an unexpected error (type=Bad Request, status=400).</div><div>receive invalid redirect request from peer 192.168.61.95</div></body></html>Action:please check server status
During startup, the Nacos Registry will obtain the local IP address through InetAddress.getLocalHost() in the NetUtils class, but sometimes it does not obtain the local address, resulting in failure to load the registry. In most linux systems, the host name is found according to hosts. You can modify the hosts file to add the mapping of native IP and name. You can also release the nacos.inetutils.ip-address property in the application.properties file of Nacos and set the local IP.
### Specify local server's IP:nacos.inetutils.ip-address=192.168.61.95
3. Service registration
Take the springboot project as an example. What should I do if I want to register the service with nacos?
1. Introduce the jar package. Note that version 0.2.7 corresponds to version 2.x of the nacos service
<dependency> <groupId>com.alibaba.boot</groupId> <artifactId>nacos-config-spring-boot-starter</artifactId> <version>0.2.7</version></dependency><dependency> <groupId>com.alibaba.cloud</groupId> <artifactId>spring-cloud-starter-alibaba-nacos-discovery</artifactId> <version>2.2.6.RELEASE</version></dependency>
2. In the application class, add the annotation @ EnableDiscoveryClient
@SpringBootApplication@EnableDiscoveryClient@NacosPropertySource(dataId = "database-test")@EnableFeignClientspublic class SpringBootApplicationOrder { public static void main(String[] agrs) { SpringApplication.run(SpringBootApplicationOrder.class, agrs); }}
3. In the yml file of the springboot project, specify the nacos service and the name of the service: spring.application.name
spring: application: name: order-service cloud: nacos: discovery: server-addr: 192.168.63.59:8848,192.168.61.95:8848
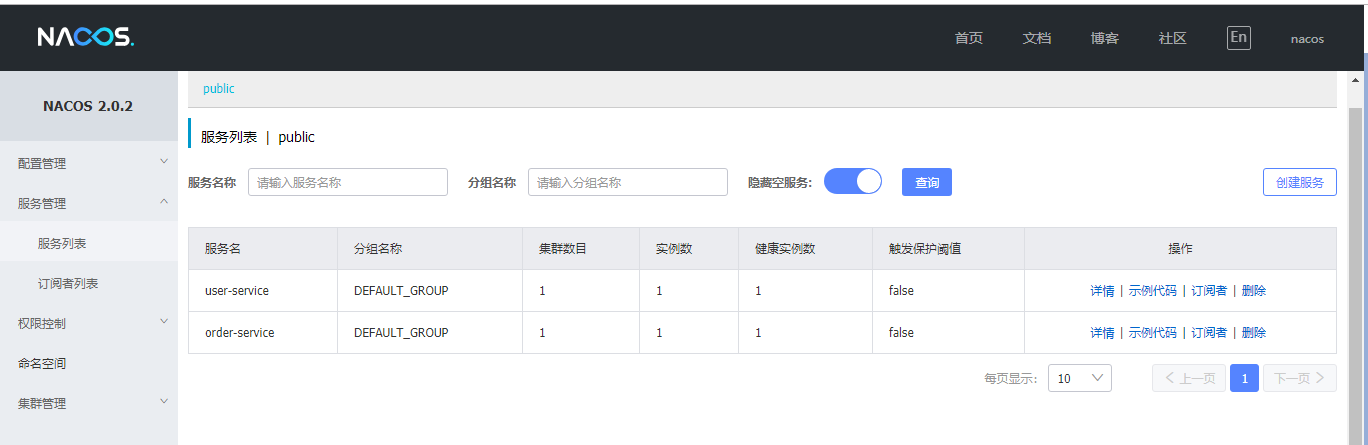
After the springboot project is started successfully, you can find the corresponding service in the nacos management page:
4. Service call
nacos supports a variety of service calls, such as TestTemplate, WebClient, feign, etc. Here, feign is used as an example.
1. Add dependency
<dependency> <groupId>org.springframework.cloud</groupId> <artifactId>spring-cloud-starter-openfeign</artifactId> <version>2.2.5.RELEASE</version></dependency>
be careful:
Pay attention to the version selection. If the version is too high, a lack of loadbalance error will be reported. Because the higher version removes the loadbalance from the jar package.
2. Add annotation @ EnableFeignClients in application class
@SpringBootApplication@EnableDiscoveryClient@NacosPropertySource(dataId = "database-test")@EnableFeignClientspublic class SpringBootApplicationOrder { public static void main(String[] agrs) { SpringApplication.run(SpringBootApplicationOrder.class, agrs); }}
3. Service call
package nacos.demo.mynacos.service;import org.springframework.cloud.openfeign.FeignClient;import org.springframework.web.bind.annotation.GetMapping;@FeignClient(name = "user-service")public interface OrderService { @GetMapping("/userservice/user/get") String getUser(Integer id);}
Among them, use FeignClient annotation to specify the service name to be called. In my case, if value = doesn't work, you need to use name = to access it. The content in the GetMapping annotation corresponds to the address of the service to be accessed/ userservice/user/get, where userservice is the root path of the user service application.
The following is the interface code of user service:
package nacos.demo.mynacos.controller;import org.springframework.beans.factory.annotation.Autowired;import org.springframework.stereotype.Controller;import org.springframework.web.bind.annotation.GetMapping;import org.springframework.web.bind.annotation.PostMapping;import org.springframework.web.bind.annotation.RequestBody;import org.springframework.web.bind.annotation.RequestMapping;import org.springframework.web.bind.annotation.RequestMethod;import org.springframework.web.bind.annotation.RequestParam;import org.springframework.web.bind.annotation.ResponseBody;import org.springframework.web.bind.annotation.RestController;import nacos.demo.mynacos.model.User;import nacos.demo.mynacos.service.UserService;@Controller@RequestMapping("user")public class UserController { private final UserService userService; @Autowired public UserController(UserService userService) { this.userService = userService; } @RequestMapping(value = "/get", method = RequestMethod.POST) @ResponseBody public String get(@RequestBody Integer id) { User user = userService.findById(id); if(user!=null) { return user.toString(); } return "null"; }}
In the method of the called service, @ RequestBody is required, otherwise an error will be reported, which cannot be @ RequestParam.
4. Call the result and access the get method of order of order service to return the result.

5. Service load balancing
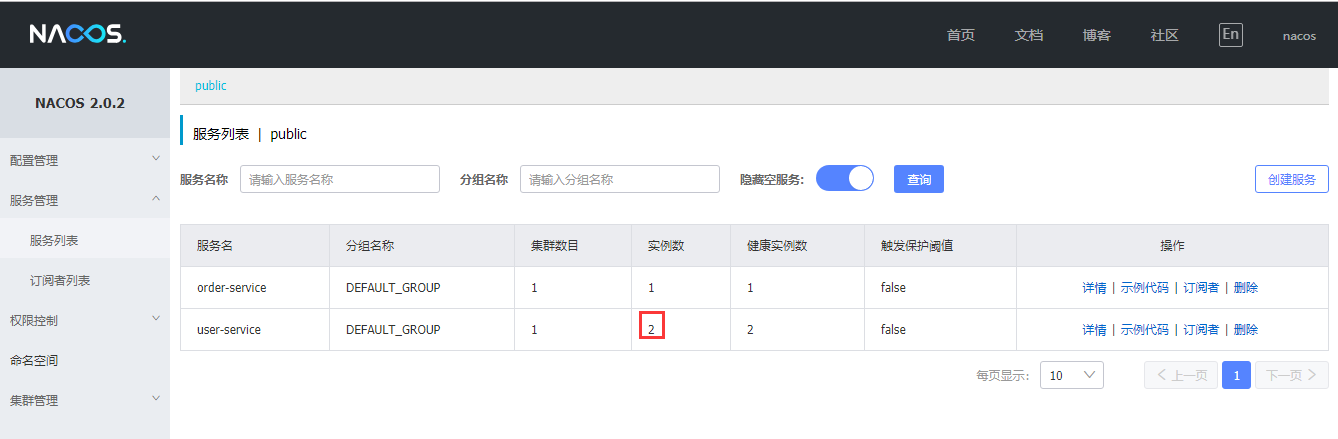
If feign is used, in the lower version, it has its own load. Copy the user service project and start it. At this time, there should be two user service services on nacos, as shown in the following figure
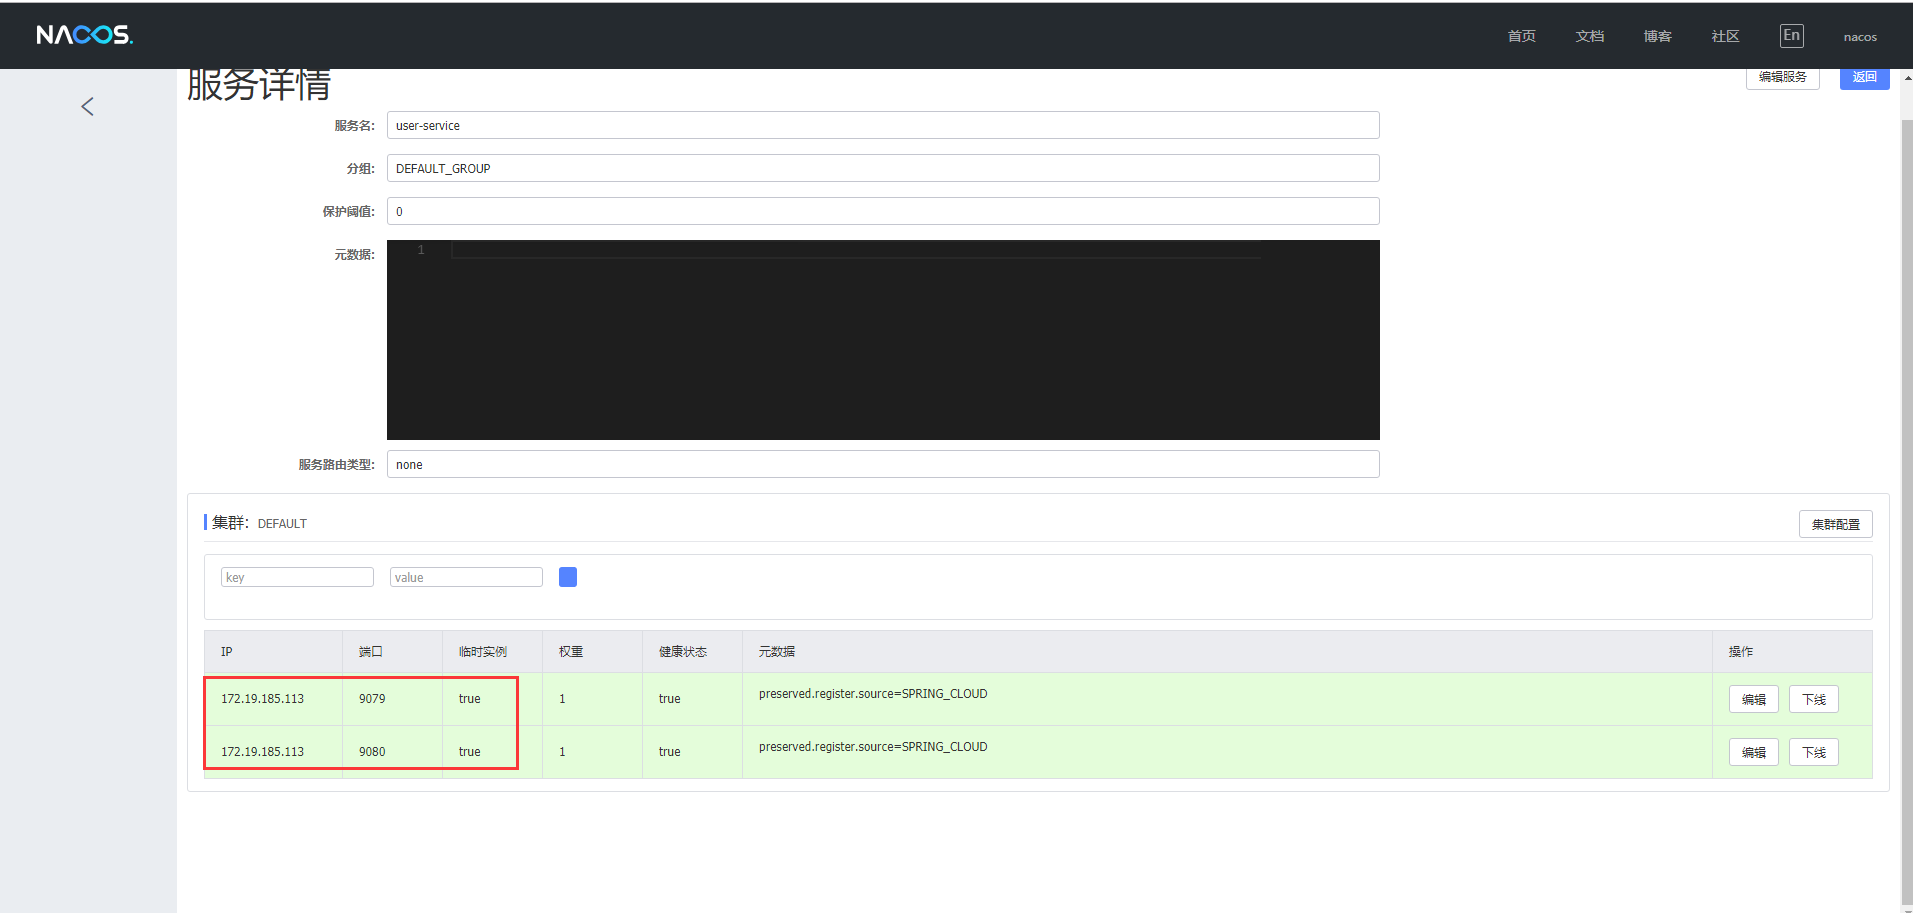
See the details below:
At this point, access the get method of order service again and return the result:
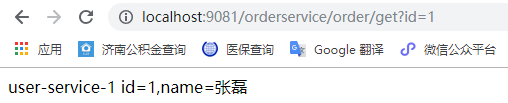
Visit again:

The returned result changes, indicating that feign has its own load.
If you want to modify the load algorithm, please add the following in application.yml of order service:
#to configure ribbon,The service name of the callee user-service: ribbon: # NFLoadBalancerRuleClassName: com.netflix.loadbalancer.RandomRule #Configuration rule random# NFLoadBalancerRuleClassName: com.netflix.loadbalancer.RoundRobinRule #Configure rule polling# NFLoadBalancerRuleClassName: com.netflix.loadbalancer.RetryRule #Configure rule retry# NFLoadBalancerRuleClassName: com.netflix.loadbalancer.WeightedResponseTimeRule #Configure rule response time weight NFLoadBalancerRuleClassName: com.netflix.loadbalancer.BestAvailableRule #Configure rule idle connection policy ConnectTimeout: 500 #Request connection timeout ReadTimeout: 1000 #Timeout for request processing OkToRetryOnAllOperations: true #Retry all requests MaxAutoRetriesNextServer: 2 #Number of retries to switch instances MaxAutoRetries: 1 #Number of retries on the current instance